Transcripts
1. Introduction: In this class, you
will learn how to create amazing product
animations in Blender. These high-quality renders and animations can be used
in multiple ways. You can create an entire
product advertising video ends. You can even upload the
animations separately to create some amazing portfolio
pieces which are also perfect for any kind
of social media feeds. Multiple 3D modelling
techniques will be used to create the wine bottle,
label and capsule. We are using the free version of Canva to create the label. The simulation
materials, animations, and lighting will all
be done inside Blender. The rendering workflow and post-production will
be discussed in depth. So you can create these amazing animations
all on your own. Thanks for taking a
look at this glass, and I will see you
in the next video.
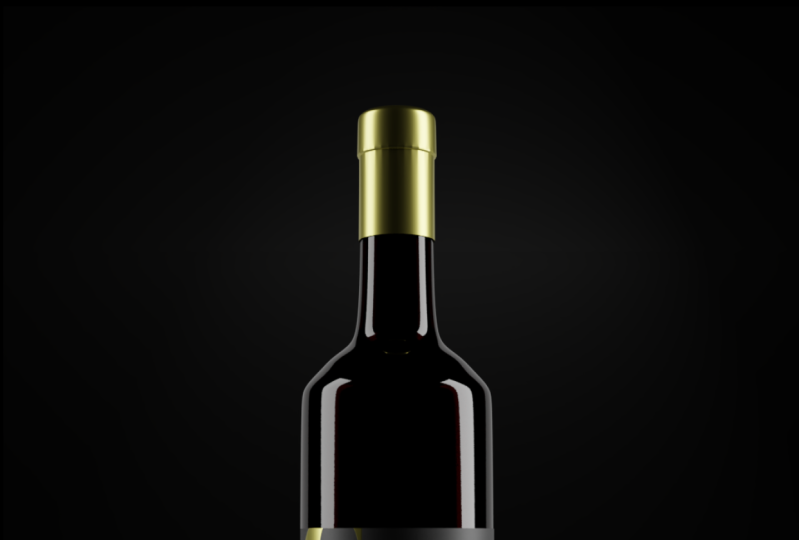
2. 3D Model the Wine Bottle: In this video, we're
going to create the 3D model of
this wine bottle. Before you're going to create
any products or model, it is often good to look at reference images and maybe look even into the anatomy or how
a certain product is made. This will help you be better
than your competitors and actual people that wants to
have their products rendered. They can see you
understand their product. A wants to hire you to
create these renders. So let's go over the anatomy. At the bottom we have the heel, which is the corner or
base of the bottom. We have also a punt. This bond is an indentation on the underside of the bottle, and we can also see
it in this image. This bond was more prominent
in older wine bottles, but nowadays they recreate it just to get
some authenticity. We also have this body. And the body is the wider
cylindrical part of the bottle. And on top of this body
we have the label. And here of course
we put the brand and the wine information
above the body. We have the shoulder. This is the sloping part
between the neck and the body. And of course, after
that we have the neck. This is the slender
part below the capsule. The capsule is a wrapping
around the closure. It could be from metal, but you also have
certain plastics. And we also have a closure. So the closure could be
a cork or a screw cap, and it is not always
on top of the capsule, often a dislike
already underneath. So let's jump into Blender. I have my screencast keys on. So if you ever are kinda confused on which key
strokes I'm using, you can see them
down here, right? So wherever I'm pushing, even right-click, left-click,
they all show it down here. Now are of course, also explain what
I'm doing just to make it a bit easier
for everyone. The first thing that we
need is a image, right? And we're gonna work
from an image like this. I don't want you
to feel forced to create this exact bottle. This class, this
course will work with any kind of bottle that
you want to recreate. But this is the
one that I chose. So what we're gonna do an image, we're just going to
drag it into Blender. And I highly suggest you
first insert blender, click on one to go
to your front view, and then you can
drag your image in. This image is important as
an MTS we can see here. And we can move
this empty around. So I could go to
Item and puts the x, y, and z at 0. This doesn't mean
that this bottle is perfectly aligned in the middle
because it is of course, an image that we have taken from Google or whatever, right? So it could still be that it's a bit to the right or a
little bit to the left. That is totally fine. And we can check this
quite easily if you just de-select or cube
or create a new cube. So here I'm just going
to create a new cube, scaled a bit down. You can see at 1, it starts
to hit one of these sides. And at the other side is like not really touching it, right? So what you could do is
just move this empty now around the x-axis just to make sure it's perfectly
in the middle. Then when I scale
this cube a bit down, you can see that both sides hit perfectly, right? Awesome. So we can delete
the cube right now. And we know that this bottle
is nice in the middle. When we want to recreate
a bottle like this, we need to keep a
few things in mind. Of course, the anatomy
of the bottle. But we can see that all here. But also the geometry that
we want to work with. Because often we want to recreate just the big
details in the beginning. But you could already think
a little bit forward and see where we might want to
use some extra edge loops, where we might want to add some extra sharp edges with bevels or even buffer modifiers. In this case, there'll be here. So that's handy to know. But the first thing I
would like to start with is just adding a circle. We can scale the
circle a bit down. So right now it is the same size as the
body of this bottle. If you go to Edit
Mode, which is stop, click on a to select everything
and extra this downwards. You can see that we already have the beginning of this bottle. Another thing to
keep in mind when creating a model from
an image is that most images that are created are created with
a certain focal length. So a camera has a lens on top and that distorts the
image a little bit, right? It's not an orthographic
view as we might say. And I can also showcase
it inside Blender. So this is kind of a
non orthographic views. So you can see that the
bottom, even though it's flat, it doesn't look flat because this part is
a bit more in front. But if I click on one, you can see that now
it's perfectly flat. So this also happens
of course with images. And with this one, it is not that noticeable. But here in the
bottom, for instance, we know that the bottom
of this bottle is flat, but we can still
see a curvature. So I want you guys to graph just 1 perfectly here in the
middle in this case. And from there on
we start building. So I'm just going to put this here perfectly in the middle. And from here on we
start extruding. And also the next point, next point is going
to be around here. We can see a curvature
starting from here on, we are starting to go to
the shoulder of the bottle, then reacts through this
and somewhere around here will be the
start of the neck. You can see this nice curvature. We can recreate with
extra edge loops. So Control R to create an
edge loop and scale this up with S. And you can
create as many as she wants. I wouldn't advise
creating too many, but a decent amount
will always get you quite nice, smooth results. Around here it goes
inwards of bits. And then here we have
to start the neck. So here to start the neck. And here I want also
some extra edge loops just to showcase how
nice and smooth this is. From the neck. We just go up here again. We get this distortion. So I want you again to
focus on the middle, right? So it will stop around. Harish, I guess you could see that the sides don't
match up at all, right. If you would look at the sides, who would stop the kind of the bottle or the
neck and around here, but it doesn't match up. But because we chose the middle, we should follow this middle. I hope that makes sense. It is not that important, but I hope it makes sense. Now we can extrude this. Then I'm going to right-click. So it snaps back into
the first place. Then scale it up
until we reach this and then extrude it on the top. And we can see that here
it's a bit more smooth, so extrudes GI,
smooth a bit outs. Or you can even
move to bid on top. And then create some extra
edge loops and scale this up so we have a nice
and smooth fall off. So very handy, very cool. Does it need to be perfect? But in this case, we kinda get the feeling of this bottle. Just the bottom though. We have this ponds where
we talked about before. So let me showcase it again. Scan of this shape, right? And not all bottles have this, but in this case we do have it, so let's recreate it. We can also see all
these dense in here. We're going to
recreate this as well, but that will be for later on. Okay, so let's just first
focus on the big shapes. For this shape, it's going
to look a little bit messy, but eventually it
will work quite well. Okay? So we're going to
extrude this skill, the bid down, then actually
it again and move it inwards. So skill z, right? I'm going to inverse here. And you can kinda see
from these reflections or you can kinda see inside of this bottle where we need to go. So you can follow this. It doesn't have to
be perfect, okay? And then extrude wants
more extra again. And then with this extrusion, I'm actually going to, let me showcase
this a bit better. I will select this extrude right-click so they
snap back into place. But there are still selected. Then I click on em to merge
my selection at center. So now all of these
which I had selected, they will just merge
at the center, which creates a nice
merchant, the middle. This looks quite messy. And the way that we have
to fix this is with a subdivision
surface because then everything becomes
nice and smooth. So here, select this add modifier and add a
subdivision surface. We can add more subdivisions and even right-click to shade smooth bots because we are
using so many subdivisions, you can see that all of
our shapes are smoothed out and we lose a lot of the
details that we created. So let's get some of
these details back again. Because the sub deficient
surface smooths everything out. That is essentially why
we lose our details. And if we just add
more geometry again, so if I grab here
an extra edge loop, you can see we get
some shapes back. So you can do that
here and here. Of course, this
heel here should, anyways, be a little bit more skilled down
here in the bottom. Right, a little bit here. So we have a nice and
smooth shape here. But now this already
looks way better. Here. We're losing
a lot of detail. That is because these
edges of course, also gets smoothed out. And you can also select
the whole edge loop here. Click on Control B to
manually create bevels. Or you can do this
with a modifier. So here we can grab a modifier. Let's put this modifier above
the subdivision surface. And let's change the limit
method angle to wait. With this weight, we can
select certain edge loops. So I'm going to select this
edge loop and this one. Then go to Item and
inactions data. You can put the mean
birth weight to one. And you can see that now
these edge loops became blue. And now only in those
blue edge loops, we get bevels, right? So we can put the segments
Smith up if you would like to, and also play with
the amount if needed. Very, very cool. So here in the bottom is also a little thing
that I want you to notice. This kind of weird geometry
is created because we, let me show you
go from geometry. Two triangles, right? And if you stop the fight
at these triangles will become quads and then you
get those weird shapes. So how do we change this? There's not a lot
that you can do, but you can select
this edge loop. I'm going to move the inverse. We have double-click on g, So g, G and move
it inwards a bit. And now I'm going to create
an extra edge loop here, just so it's nice and smooth. And now we have to put the bevel and the subdivision on again. You can see that there is still a little bit of this happening, but it is way smaller, right? So if I'm a little
bit further away, already, cannot see it anymore. So that is one of the ways
that you can fix this. You can also move them a bit of rounds that sometimes helps, but it's not that big of a deal as long as we cannot see it. So the next thing that I
want you to notice is that this bottle right now has
no thickness to it, right? We need to make it more solid. So this also can be
done in multiple ways. You could opt for a
solidify modifier. The problem with this is that this insight also gets
solidified, right? You can see that the
outer details that we had also goes inside here
with a normal bottle. We don't get this weird
little bump, right? So what I would like to do, instead of the
solidify modifier, I like to select
everything in edit mode. Click on Shift D
to duplicate this. I also like to go
to the front view just so I can see
it a bit better. Go into wireframe mode
and then click on Alt S. So S kinda inflates it. If you just do S, you
can see the scale, but Alt S works a bit
differently, right? So Alt S and move it here. Choose a right thickness
for your glass. So in this case, I
think this might work. And now I'm going
to click on Shift H to hide everything else
except what we just created. You can see that we still
duplicate this parts, but we can just delete this. And the next end of the month
to do is click on Alt H to unhide everything and
move this part up. So just go to the front view
wireframe mode and just move this upwards somewhere
around here. Now we want to bridge
these edge loops. You can just select this
edge loop with Alt select, then Shift Alt, select
the next edge loop. And I like to go to F3 and then just search bridge edge loops. You can also go to Control E and look for
bridge edge loops again. So here, bridge edge loops. One thing that I want
to explain though, because we extra this inwards, probably the normals
are a little bit weird. So if you go to your overlays, you can check the geometry. Face orientation can see that the inner edge loops here
are red and that is wrong. That is also why sometimes the bridge edge
loops don't really work the way that
you might think. So if you have a problem
with the bridge edge loops, I would highly suggest you select all of these
inner phases. So all the way here, then go to Mesh normals
and then flip normals. So now there are flipped and
we can see the blue side. Blue is faced towards us, and red is like faced
the arrow side, right? So we want this to be
facing towards us. And then you can
reach them again. Just select these F3 and then
bridge edge loops. Perfect. So that is essentially that. And then you can turn off
face orientation again. And that is essentially it. So these are the
basics of this model. In the next part, we're
going to build a bit extra upon this and make it more realistic than it is now. And I'll see you guys there.
3. Finalize the Wine Bottle: In this video, we're going
to finish this bottle. So in my case, I think I need to fix two
things with this bottle, right? The first thing
is this top part. And if we get this
reference image back, I can see that it just
looks way too sharp. This looks nice and smooth, and really looks like
glass, of course. And my sharp edges look
way more like a metal. So I want to change
this for sure. Also here on the
bottom with the pons, I think I over-exaggerate
at this shape a little bit. It's to guess the
inside is too big. And we need these little
shapes on top of here, right? So we can easily change this. Let's go to the top. And I just want to select this whole face
tube scale shift. And then what does does
is it just scales it around every access
except the z-axis. Here. And now my bevels have a
bit more of a lead way. Otherwise they are
way too sharp. Then I can also select all of these edge loops and just
scale them a bit upwards. So it's just a skill. Or again, skills shifts
set could also work. I will also create two
more edge loops here, just so this is
nice and straight and then it goes inwards. I might also create an
extra edge loop down here. Alright, so this already
looks way better. I do think though, that
this is still way too sharp and this is
not narrow enough. So I'm going to select
this whole phase loop skill shift sets to
make this a bit smaller. And you could opt
for deleting this. Let's look here, mean
baffled weights. And then just creating
your own geometry. Or you could just
keep the bevel style, but that's a bit up to you. This in my opinion, already
loose way, way better. And you don't have to
spend too much time into this because we're essentially going to put a caption
on top of here. But I still want
you to know that your final model needs to look quite close to
the reference images. Because the more realistic
you get with your model, your textures, your materials, the more realistic your rent. This will be an artist for this bottom part is going
to be quite simple. I'm just going to
select this edge loop, scaled a bit down. And I'm going to show
you right now how we are going to create
those little bumps. It's gonna be very simple. Don't follow me yet
because we do need to do a little step in between. But we're essentially going to select this whole edge loop. Click on I2 inset, you have to do it twice. And then we can
essentially just extrude this downwards and we get these
little protruding shapes. But we don't have enough
geometry first of all. And these shapes are just
random way too big, right? So if we add more geometry, we can make it look more
like what we have here. So to add more geometry, we can add a
subdivision surface, keep it That's levels
view port one, and then apply it. But if we apply this right now, what you will see is that all
of this gets smoothed out. And that is because we first
need to apply our bevel. So make sure your bevels or the way that you
want them to be, apply it and then apply a new subdivision surface
with left viewport, add one. So now that we
have applied this, you can see that we
have more geometry. And we can of course play
around with this geometry. So first of all, I'm
going to click on skill Xero with these two
edges selected. So now I'm going to select
this whole edge loop, click on X and delete
this edge loop. Then with my face
selection selected, click on i2 times again and
get these shapes out of here. Then you can actually
go down and you can see that we get
these nice shapes. The thing however,
as you can see, is that these shapes also the forearm, the
rest of the model, a bit more geometry will for sure help
getting rid of that. But you could also do it
even in the beginning. So if you already
have this here, create more geometry now. Then select this edge loop or
face loop and do two times i extra this down. Now you can see because of
those extra loops in here, this is always smooth ER, but if you put them too
close to each other, you can also see that it makes these edges quite sharp, right? So, yeah, you can move this a
bit more up to make it less sharp and then you get the result that
we are looking for. I hope you guys
learned from this. We have these shapes now. I also fixed the top. And of course you can
always go in here and I think that now it's
a bit too big. Do I need to maybe scale down? It's all up to you. It is what you see
in your models. And yeah, that's it. So the only thing we
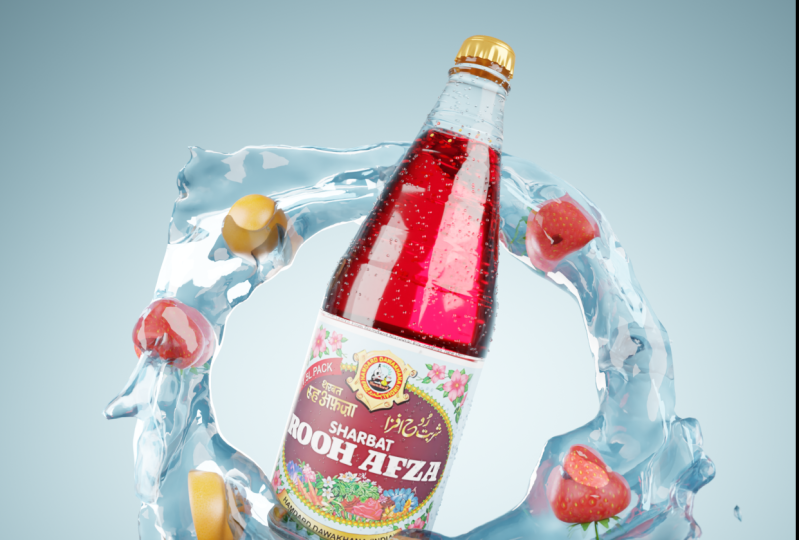
need to create now is some extra fluids
for this bottle. Because of course we have, in this case wind inside. But it could also be
maybe you're creating olive oil or whatever. What you want to do is you
want to go to the top view. So we're looking
into the bottle. Then go into edit mode and make sure you have the
vertex selection. Select it, and make sure
you select this vertex. Then when you click
on Control Plus, you expand your selection. And if we go to the side
view into wireframe mode, you can see where we have our selection and where you
want your wines to end up. So in this case, if our liquid is going
to end up around here, they click on Shift
D to duplicate this. Then P two separate what
we just duplicate it. Then hide your bottle. Select this extruded
a bit, inverts, extrude again and
then again at center. So the liquid can be
quite sharp at the ends. That doesn't really
matter too much. Just make sure it's
nice and filled. And this is the liquid. This top circle is of course, our glass bottle. Bottle. Now that we have these two
very important models done, we can go onto the other models, which are the label and as last, we of course have the capsule. So I'll see you guys there. And I hope you guys
learned from this. If there are any questions, just ask down below.
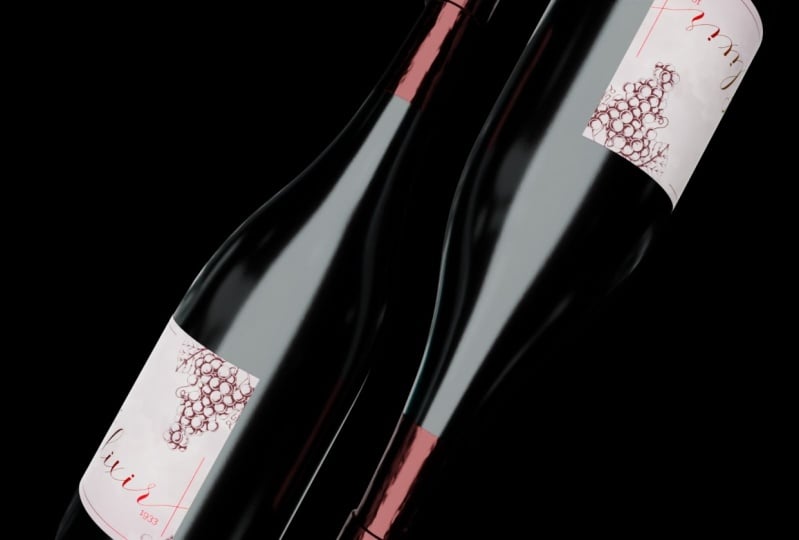
4. Create the Label: In this video, I'm going to show you guys how we can create
some simple labels. Normally, you of course, get the labor from your client. If you get paid to do this job, they'll send you
the labels because they want to showcase
those labels. But in a lot of
cases when we don't have any freelance work yet, then we need to create
our own labels. And it's very time-consuming. And we as 3D artists,
don't really know how to create compelling labels, right? So there are lots of
websites which have like free labor makers
have some templates and they are quite
easy in handy to use. So in this case, I chose
the website called Canva. You can use any website, any program you can
create your own. But I just wanted
to be a bit simple and easy for this tutorial. In this case, when
you are in Canva, you can search for a template. So if you go to templates
and then we can look for a wine label,
something like that. So Canva is not
necessarily free, but it has some free templates and that is what
we're looking for. So yeah, you can choose here, I think I chose this one. And then you can customize
this template if you want to. So the cool thing about this is that you can literally just
customize anything here. But keep in mind pictures like these labels have watermarks. And if you want to download
it without watermarks, then you have to pay for Canva. You can download them
with watermarks. In this case, you
cannot even see the watermark, so
it's not that bad. But you can also just
import your own, Let's look elements or your own images that
you have found, right? So you can do a lot here. Just make sure that
you're not using the pro version if
you don't want to pay, which is totally fine. We don't have to
pay for anything in this class or course. If you don't even want to
create a label yourself, you can also just download
the files I provided. So let's say I'm
going to dial this, then you click on Share. When you download your file, the PDF print is probably
the highest quality. So if you want to edit
some stuff there and then go inside Photoshop or any
other editing program, I would highly suggest
download the PDF print, but if we want to insert
electrode inside Blender, you can do PNG. I think that's the best in
this case. Let's do PNG. And then you can of
course do download a free watermark
draft in sub blender. I want you to delete
the default cube. Then go to the front
view, which is one. Now let's go to
edit preferences, look for a add-on. And this add-on is called
Import Images as Planes. Now, when you take that on
and save your preferences, you can click on Shift a
image, Images as Planes. And here you can import your
newly downloaded label. So let's rotate this label for 90 degrees around the z axis and look at the label itself. So it goes with the Viewport
Shading material preview. You can see that minus flipped
so I need to rotate it again around the set
access for a 180 degrees. And let's go to Shading. In such shading, I again will
just go to the front view, zoom a little bit in, and I go to their rendered
viewport shading. Now, let's go to the random
properties and go to cycles. Cycles is way more
realistic than EV, and that is why we use it. I'll also put my device at GPU. Now you can see that
for this plane, which automatically has this
material applied to it, we have one image, texture or principled shader and debt creates what
we can see here. I do, however, want to put
my light a bit closer, so I'm going to move
it in front and a bit closer here and see
what is happening. Here we have a decent
looking label. Now, I don't want this alpha to be disconnected because I
don't need any translucency. In all honesty, you could just use this label
and that's it. But we can always
go a step further and create really something
more interesting. What if you want this label, but with golden letters, Devin needs to create a mask. And most masks look like this. So it's a black and white map, which is a gray scale map. Most of the time with masks, you use total black
and total whites to separate these colors. But if you have a
gray in-between, it takes the average of both. So how do we create
a mask like this? Let's go back to Canva. As you can see here. I can duplicate this page. Now in this page, we can change the
colors and make everything black and white. So what do we need to delete? I only want the text and
this little line around here to be black or white and everything
else should be opposite. So I'm going to delete
all of these shapes. Change the color of the text
to black instead of blue. Also, this little
cube around here. Then we select the background and make that totally white. This label here
also has a color, so make sure that it is white and the transparency
should be a hundreds. So now we have a mask for this. Again, just got to
share downloads. Make sure it's P and G.
Then instead of all pages, we can just tick off page one and only
downloads page two. And here you can
just download it. When you have download this, you can go back into Blender. And here we can add this mask. The first thing is
I want to do is create a new principled shader. So just shift a and look
for a principled be SDF. This principled shader
is going to be God. So I'm going to put this
into the surface of the material outputs and make
this a nice golden color. And of course, the metallic
should be all the way to one. Now you can of course,
play around with the roughness however
much you want. Now, this is the goal
of color that we have, but we only want this
text to be gold. So let's grab an image texture. And here we're gonna put
our newly created mask. And we need a mix shader. Because we're going to mix
this principled shader, which is gold, and this
principled shader, which is this label. So let's mix them together. And a normal mix shader without mask just mixes the two
shaders together, right? So if the fact is at 0, we have this shader, the goals. And if the effect is at one, we get this shader and
anything in-between, It's kind of an average. But if we put the color
of this mask in here, you can see that now the black and the white gets
separated from each other. So we have the golden text and everything else is just
whatever we see here, right? Because if I turn or take this base color out of here
and just make this black, for instance, get
this very, very cool. What we can also do with this, because it's a black
and white texture map. We can put this
into a bump node. So the color goes into the
height of the bump note. And I will just put the
bump nodes from the normal into the normal of
the principled shader. Here you can see some
height difference. So I actually want to put
a strength way lower. Plus I want to have this text on top instead of carved in. So I'll make sure
that I will grab a color ramp and pour it in-between the texture
map and the bump node. With the color ramp,
you can switch these colors and
you can see that now we of course
get the opposite. So the text lays on top. And the cool thing about
the color ramp is that we can put it to ease as well. And now we can play around
with these two sliders because you can see that
the text is very blocky. So if we just move
this a bit around, you can see that now we
get less blocky texts. And of course the strength is
just a bit too high still. But playing with those
things will create some very cool effects and some extra depth to
your texts and label. Overall. This is your label. Awesome. So in my final results, you also saw that I
had these cool shapes. So these plants, they were
a bit more reflective. To make them more reflective, we need to create another mask. So just go back to Canva, are actually duplicate,
just this top one again. Here we don't want the text
so we can delete the text. We can delete this extra
little cube around here. And from this wide thing here, we should make the transparency all the way at the hundreds. And now we can start
thinking about the mask. We noted we don't need the tax. That's why we deleted it. But we do want these parts here. You could do this in two ways. We can make
everything else White and make these flowers black, or make everything else black
and make the flowers white. So it doesn't really matter
how you choose to do it, but in both ways it would work. So let's make
everything else black. And to select this background, you need to go in-between
these symbols. So here, make this also black. And all of these flowers are
going to be burly white. Also for this one,
just download this. Now inside Blender. We can again just use
whatever we have here. I'm actually going to
keep the base color and black and change this image texture to
our newly created mask. And I'm going to put this
mask into the roughness. And now you can see that we
have a roughness difference. We still want to play
around with this roughness because the roughness itself is not really what I want yet. I want them to be
flipped first of all. And maybe not as strong
to edit this roughness, we can grab a color ramp. I'm actually going to
switch these again. To edit the color ramp, we actually need to know
what these colors are doing. So if you have your thing
all the way at white, you can see that the
roughness is just set at one. If we have both colors
at all the way, black, it is the same as the
roughness set to 0. Now we can play around with
the roughness so I can put the white a little
bit darker, right? So we have a bit more
roughness in the label area. But if you think
these blends shapes are a bit to reflect. If you can just put the black
a little bit higher, right? So the higher it is, the
less reflective it will be. So, yeah, that's a bit
up to you what you want to create here
and how you want it, this difference to
see you can also put them closer together so you have more of
a sharper fall off, let's say in-between
these two shapes. But it's a bit up to you what you really wanted
to create here. So in this case, I think
this looks quite cool. Now you can also create
a thickness here. So you can literally
just duplicate this. Put it down here. Then color goes into the FAQ and this bump
goes into this bump. If this is too much
like bumpiness for you, you can of course,
change this as well. And in this case, we need to switch
these colors again. So yeah, that is how we create
this cool little label. And you're not forced to create the exact same
label that I have. If you liked the color
that we had before, like the white, please use that. But in general, this
is what we need. Now I want you to save this
and just save it as a label. Then later on we can go inside Blender and
import this label and make sure it
also fits nicely upon our bottle. I
see you guys there.
5. 3D Model the Label and Capsule: In this video, we're
going to import the label that we created
in the previous video, and we're going to create
the capsule on top. So let's start with importing
our label file append. And then here we can
see our labor file. If you double-click on here, we can choose our mesh, which in this case
is this label. So that is literally everything
that you need to do. And if we go to the
rendered few boards here, we can see that of course our material is also automatically
working in an instant. Awesome. So let's go back to the solid viewport shading and we need to fit this label
on top of the bottle. This actually quite easy. If you go into edit
mode on the bottle and just select one of these edge
loops all the way around. Click on Shift D
to duplicate this, and I click on P to
separate the selection. Now we have separated this little circle and we need
to convert it to a curve. So select the circle, then go to objects. And underneath convert
we have curve. So now it's converts
this mesh to a curve. A curve looks like this. So right now we have a
lot of geometry here and that is why we
can barely see it. But if you zoom in,
you'll be able to see very small little arrows. Okay? And why do we need to do this? Well, let's put our
label in position. I'm going to select a label, put it around the y and
x-axis all the way to 0. Then rotate it around
the x-axis for 90 degrees and move
a bit forward. I just want to see
if my Texas goods he had a seem all
to fit quite well. So what I want to do now is
I want to add a modifier. I want to add the
curve modifier. We can select our
previously created curve because we don't really
have any extra geometry. You can see that
kinda works weird. But if you just
click on Control R, crit, extra geometry here, then we can see that it
follows this nice curve. Okay? So that is essentially
what we want to do. And you can create as much
geometry as you want. But because we are only
curving around this bottle, right around this way, we don't really need any of these edge loops that
we can see here, right? So it's better to
just create this. And then you can always add
some extra subdivisions, put it before the
curve modifier. And that is essentially it, of course is subdivisions, as you can see, it will
make this more smooth. And if that is not
what you want, which in this case
we don't want this. Just select all of
these outer edges. With edge select, select
all of these outer edges. Click on Shift E, and then
just drag this all the way up. You can also click on down here and make sure the factor
is all the way at one. This way, these corners are, these edges here are
creased and they will not be a smoothed out by this
subdivision surface. However, we do see that some stuff seems
to be wrong, right? First of all, we
cannot really read this because it's flipped. So yeah, we could just
select this model then rotated around the Z
axis for a 180 degrees, which flips it around. But it's still is not in place. And that is because I moved it a bit around the y-axis, right? So if I hide this,
I can show you, I just moved it a bit around here just so we could
see what was happening. But yeah, this kinda messes up how it works with
this curve modifier. So the X, Y, and Z should all be at 0. And then you can activate
this curve modifier. If it intersects like this, you do not scale up
the model itself. You just go to the curve
skill that a tiny bit up. That's all that it takes. Okay? And now we have a
little bottle here. So if you go to the front view, you can see that this is not
perfectly in the middle. So you could just rotate both of these models
at the same time. So the curve and the label, so rotate around the z axis. And here you can put
it nice in the middle. Now makes sure this also has a smooth Modifier applied to it. And that is essentially
everything that we need to create this label or to input the label and put it on
top of our bottle, right? Awesome. So what is our next little part? We need to create the capsule. And what is a capsule? If we look at the capsule, you can see here that captures
are just crazy like this. And there are many
different types of capsules that are also different
materials of capsules. So you could keep that in mind if you want to have
a different kind of reflection and wants to be true to whatever
material is used. Here you can see that they do, however, all have the
same kind of shape. And this shape just goes
on top of the bottle. Then it gets heated up or down, or maybe also different ways, but then it just shrinks down. This makes sure that our
Cork stays in place. And of course there will be no air added to
this wine bottle. So if we go to Blender, what we can easily
do is just select. Of these edges here. And then we can just
go to the front view, select the edges that we want. So maybe I want it
all the way up here. Then I'm going to de-select
these ones on the insights. So this should be fine. Shift D to duplicate
this p and n selection. So now this bottle
tool is now names, but we can rename
this to capture, should be a bit bigger. So go into edit mode a and then Alt S to just
inflated a little bit. And then we can merge
this in the middle. So just this E m at center. And here we have this model. So here again, you can just move some stuff
around if you want to make it more smooth
than underneath. But that's up to you. But let's say this
is the capsule. Then also for the capsule, we need a decent looking
material, right? So you can select the capsule. And first we need
to UV unwrap it. So if we go to our UV Editing and then
click on a new and unwrap. You can see that this doesn't really match up what
we can see here. And if I just put a
random texture on here, so I will go to Shading new
and then image texture. I can create a new texture, and this is going
to be my UV grid. And then click on, okay, we can go back to our UV Editing and we can see what the UV
texture should look like. We should have these kind
of nice square shapes. But if we go to our
material preview, you can see as they get
very weird shapes here. And this shows us that the
texture is being a warped, and that is not what we want. So we're going to select
certain edges and vertices, and then we can
create a UV seam. So I'm going to select
this edge loop here. Then go to the back
view which is going through one right front view is one Control, one is backfill. Select this vertex here, and then holding control
and make it go all the way. On the bottom. Click on Control E to
create these seems. So mark seam. Now you can see that
these vertices are red. And if you pick a u
and unwrap again, you can see that this whole
model here is changed, or I mean, these
UVs are changed. The model is the same,
the UVs are changed. And now, because we've
cannot cut into here, you can kinda see it like paper. If you made this
out of paper and you cut this piece
and this piece, that you can glue it
back together to make it a 3D model or make it flat, like it will be seen here. So now we also can
see that all of these textures are
actually shown correctly. Of course, we do have
a cut in-between here, but that doesn't matter
in this case, right? Then the squares are
nice and square, and that means that we don't
have any warping going on. So we're not all the way
done with the UV maps yet. That is because later on I want a nice straight line of gold. And if we look at our uv maps, it is quite hard to get a
straight line with this. Yet if these UVs, there are other ways
to create these lines, you can do it in
a number of ways. But I do think a nice UV map is just the
easiest for us to understand. So what we're gonna do here
to make this more straight, we're going to select
this outer edge loops. So just Alt and left-click, right-click on scale x 0. Now you can see that this
gets nice and flattened. Now, if you select
the next edge loop, you can just click Shift R and this repeats
your last action. So we just have to select it. Shifts are, selected,
shifts are. Now we're going to do the
same for the top edge loop, but now it's gonna be scale. Y is 0. And then again Shift
R on all of these. Now that we have done this, our next little task is
going to be way easier. So it takes a little bit, but we'll have a better
result at the end. So let's go to shading. What we want to do
is we want to select our label material and then
we want to duplicate this. You can just rename
this to capture. Now. Now you want to start to thinking about what you want
in this capsule material, but you don't want, you, of course do want
this nice gold ends. We wanted the other
color as well, which is black in this case. But I don't really need any
of these little plant shapes. So I'm going to
delete the roughness, the mask, and of course, the bump node of these
small little plant shapes, we still have this black color. The next thing is going to be this gold material
in the God material, unlike the bump, but I
don't really need the text. However, this material also
has the mask applied to this. The only thing we
actually need to do here is just change the mask. If we change the mask, we also have no texts anymore and the bump
will still be there. So that is what we're gonna do. We're just going to create
a new image texture. You can rename this
to whatever you want. Width and height of
2048 should be fine. And I'll put the
generator to type two. Blank, click on. Okay. You can see that
now it became gold. So if you go to texture paint, you can see the whole
texture map is black. And if we paint
any white on here, you can see that now we
are painting the black. I want to switch this right? So you can do this
also in two ways. We can just switch these
two little shaders. Or you can use an inverted nodes inverts in-between the
mask and the mix shader. But this adds an extra node. And I think it's
quite unnecessary if we literally just can
switch these two shaders. So that is why I chose
those Shader option. So let's go back to
the texture paint. Whatever you paint on here
you can see now becomes cold. Awesome. So what do we want to happen? Well, the first
thing that I said, I want a nice little
line here in the bottom. And we can do this with just
the brush that we have now. So I'll put the
strength or the radius, at least the way down
strengths you stay at one. That's Luca, maybe
a radius of five. We might change this later. And let's go to the fall off. I want it to be just very sharp, so almost no fall off. And what I want to do
next is go to stroke and stroke method is
going to be a line. So what happens with line? If I click and drag, you can see a line appears, and then that line, we will have a
nice panes, right? So this makes it
easier because if you go with dots you encounter
needs to drag it, right? And that is not what we want. So that is why I use line. We're flying, we can put, now we can fix the radius. Let's just put a line here.
That looks quite nice. So I'm going to click
this, then hold Alt, and with all that kind of snaps to a certain amount
of degrees, right? So here you can
see that now I can make a very straight line. And that is all
that. We want it. Perfect. So that is our
little golden line. Now, for on top, I actually want a blended logo or any other logo that
you might want to use. We can also easily do this. Just make sure you put the
stroke method back at dots. And we're going
to add a texture. So click on New, go to the Texture tab. And here we can
open our texture. In this case, it's going
to be this brush texture. So when you create
a brush texture, just make sure it's
black and white again, it should be a grayscale map. So just select this one. And what happens now? If you go back to your brush? Here we can see the texture and our mapping is set at tiled. If I click and drag, you can see that we have
a tiled kind of effect. I personally don't want that and output the
mapping at stencil. And stencil is
quite handy as you can see, if you click on seven, we are in the top
view and we need to put the stencil in place.
You can do this in two ways. You can move your whole screen
like this you normally do. Or you can right-click and
move the stencil itself. We can hold Control and right-click to
rotate this tensile. And we can hold Shift
and right-click and then drag around to scale
the stance or up or down. So that is how you move it. So just right-click and
now you can move it, shift to scale and
control to rotate. If you're happy, you just click. And now you can paint
wherever you want and it makes this
nice and goals. It is also possible
to just click and the host tensor will
be applied at once. But like this, I'd
also works right? It's just a bit longer,
but that's fine. So now we want to go
back to our materials. So let's go to Shading and go into the render
view port shading. Here I want to see if our gold actually looks like it has a
little bit of a bump or not. And in this case I think
it actually goes wrong. It goes inside. And I wanted to protrude. So let me just put a strength with higher
see what's happening. Yeah, it goes to the
wrong side. Right. So I'm just going to switch
these color ramps around. But you could also again
use a invert notes. I still need to change
something here because this just doesn't
look like I want to, but this is how we do this. So now we have
created the label, which looks amazing, and we
have created our capsule. Keep in mind, when you
have created your capsule, you have to save this image. So go to texture paint and just go to image and save S, right? So you can save it
as maybe a new mask. So this is going to
be the capsule mask. But this is very important
because if you don't do this, you will essentially just lose your whole
texture map, right? And we don't want
that, but that is it for this label and
of course capsule. In the next part, we're
also going to create some cool materials for this glass bottle,
the wine inside. I see you guys there.
6. Create the Glass Material: In this video, we're going to
create the glass material. Before we can create
a glass material, we need to create
a little studio. Because if we don't even
have decent lighting, how are we going to create a normal looking
materials, right? So you cannot really work
in a dark, Let's say. Now, let's add a cube, go into wireframe mode
and scale this up until we cannot reach this point here in the bottom
of the bottle. We can always make the
scoop bigger later on. But first of all, I
want you to delete these two vertices or this edge. This creates a nice and evenly
distributed two planes. Of course we can scale this up. And if you want to
scale it up so it stays underneath the bottle, the only thing you have
to do is select this face and then click on Shift S to
do the curse to select it. And make sure our
transform pivot point is that 3D cursor. This seems like a lot of steps. But if you now scale
it, it will be skilled around this 3D cursor. I'm just very used to
these steps because I use it a lot of times in
different kinds of cases. But we can just go back here
and put it to medium points. And now everything will
be skilled as normally. And there were probably also weighed different
ways to do this, but this is one of them. Now, when I create a studio, I still want to be able to edit it at any point that I want. And we know that modifiers
are the best way to do this. So in this case, if we go to the rendered
viewport shading, then we can see a clear
defined line back here that is often not
really what we want. We want a nice and smooth line. We can create this with baffles as you
might already know. So let's select this edge
loop and go into item, then put the edge data baffled
weight all the way up. We can create a bevel modifier and then put the limit
method at weight, because that is the weight that we literally just put there. This weight is one. You can put the
amount and segments, of course higher to
create a more of a smooth looking Studio. Right-click, Shade Smooth to
make it even more smooth. So now we don't have this yet. That's ugly little edge
that we had before. The next thing that I want to do is add some extra subdivisions. This is not always necessary, but sometimes you can
see that we still have some of these lines. However, this extra subdivision does give us extra geometry, but it makes also this
here smooth, right? So these corners, if you select this whole
outer edge loop, then click on Shift E
to crease these edges, then there will not be impacted by the subdivision surface. So that is how I create
that little studio or I will rename this as floor. You can see that all of
these names and everything in a collection is altogether, it is very, very
disorienting and I'm not sure what I'm
clicking each time. So I would like to
create a new collection, which is just our
studio collection. I like to put my floor, all my lights and of course my camera in this little studio. Now we can delete
this reference image. It's not that important anymore. And we should rename
everything else. So this is going to
be our wine bottle. Then this is our glass bottle. This is our curve. We can keep it for right
now and we will later on, we can just accept it
if you would like to. This is going to be our label. And what more do we have? We have our liquid
inside and our capsule. So everything seems to
be named quite decently. So we can actually work if this and click on whatever we need. This is very important and
sometimes I totally forget. But the bigger
your students get, the more important this gets. Okay, So because if I don't
want to see the studio, I can just turn this off
at one-click instead of turning multiple
pieces of very handy. Now, I want to explain one
more thing to you guys. We have a decent studio. So let's put now our
camera into position. I actually would like
my camera to just be in the front view.
So we look from here. If you click on one and go into your front view,
select the camera, go to few, Align View and
alive and active camera view. Then it kinda jumps
where you're at. It doesn't do it perfectly. But we can easily change these locations and rotations
if you would like to. So the z and the
x should be at 0. And this one is the
y's just how close we are at this bottle in this case. And if you have this red little
dotted line around here, make sure you go to
View and turn this off. Otherwise we might
move it by accident. And that's not
really what we want. This is where we start off
with a good camera position. If we go to shading, we can essentially start
to create our materials. So you can select your Bottle here, create
a new material, and here we can start
adding our material. The problem here is I still wanted to move
around my lights. I want to look for my camera here in their rendered viewport. And I want to play around
with the materials. How do I do all of this at once? Well, it is not as hard
as you might think. We can change these editor
types and we can add new ones and delete even once if we don't
want them, right? So this is very much user-friendly and we can
change it to our needs. So in the case of
a model like this, I would like to have one
rendered viewport shading open. I would like to have a
3D view port where we can just move our camera
around or AR lights around. We can just change
whatever we want here. Then I'm going to move
this a bit to the right. I could even zoom in right, because we just need
to see our model. And here we can move
like zoom in as well, so we can still move
our finger around. Then here I'm going
to combine these two together and change this
to a shader editor. Select whatever model you want to change the material off. And here we can see
all of these nodes. So here in this viewport here we can see
the materials and see what is happening
with our, um, yeah, are seeing that
we're creating here, we can move our cameras, lights and everything
around or even add extra models if you would like to, without impacting this. So I don't have to get out of
here and click on 0 again. This is always hair and it
will always be updated. And here we can
change the materials. So that is really how
I like to work with these kinds of scenes with
almost every model actually. So what do we need to do to
create a glass material? Well, it is quite, quite simple. We need to just put the
transmission to one. That already makes a
nice and glass material. It however, does create
a frosted glass. There's one problem though. We are still inside EV and
we need to go to cycles. And cycles are two
different beasts. Ev is quite quick. But as you can see with
transparency translucency, it is not really realistic. Cycles, however,
is very realistic, but it is not the quickest
engine to work with, but it gives us the best
results and we want that. Let's put the device at the GPU, because now it uses our GPU and my GPUs is way
better than my CPU. So here we can see our glass. And our glass is a
frosted glass right now. And that is because our glass
has a roughness of 0.5. So if we put this to 0, we can instantly see that it is a nice and reflective
glass, right? However, we also have a
fluid or a liquid in here. And I actually made a little
mistake in the last video. We don't want this liquid to
be smaller than the object. We actually wants to
make it a bit bigger. So let me show you
how we do that. Go into edit mode, select everything out S and
scale it up a little bit. And you just want to scale
it up until you go a little bit further
than the inside right here you can see instantly what for
impact that has, that is what you want to
have and that's also what we can see when we look
at reference images. So if we look at the wine
bottle which is full, you will never really
see a separation from the glass and
the liquid inside. That almost seems
like it is for, and that is how you create that. So just make it a little
bit bigger than the inside. So that is essentially it. However, this liquid should
also be a wine color, right? So click on New. Again here, transmissions
should be up, roughness should be 0, and then we can play
around with these colors. So maybe a red, dark red wine should be fine. A dark red wine is probably
not perfectly like a glass or Clearwater
material with a color. But because we already have a glass over here which
also has a color, we will not refund
really see this, right? There's more of a,
a little object which creates a shadow for us. So let's select the
glass bottle again. We have a nice wine
inside this glass bottle. And I want you to look at some reference images
from wine glasses, because wine or wine glasses
are not always white, they might be yellow, there might be green, and it might be brown, right? And some are even that dark, that they are black. This is probably
more of a lighting. But yes, there could be
quite, quite, quite dark. Most of the time they create
these darker colors to protect the wine against
the UV rays of the sun. That is the main reason
why it's often so dark. For lighter winds,
I think you have to drink them even earlier anyways, and that is why they don't
really have to protect them. I don't really know
that a 100 per cent, but that is just a
little guesswork. We, however, are going
for a car like this, so it's quite dark. I wouldn't say it is black, but it's probably very
dark brown or dark green. So if you go to your base color, you can literally
just change this. So let's say you go to the
more of a brown sides. You can do that quite
easily here, right? And the light position
here matters as well. Our lights, of course, is from the front at most
of the times right now, it doesn't even create
really nice highlights. That is because of the
shape of this slide. I will go into that
in a later part. However, I want you to see that if I put my
light in the back, we could make this
light a bit bigger, so the radius a bit bigger, that we get some reflections or that we can see
through this model. If you want to have this
later on in your animations, makes sure this color also fits what you want to showcase. Mine essentially looks a little bit reddish right
now. That is weird. I wanted to be more of a darker brown or
green color, right? So makes sure that
actually matches up. So keep that in mind. So for Brown, you
probably go around here and keep it quiet, dark. Let's put our light
in the front again, just so we can
kind of see what's happening with
these reflections. We are not all the way done
yet with this glass material. That is because if we look at some of the images of glass, so even here, we can
see that glass is not always just very
clean and smooth. Glass actually has
small imperfections, even if it is produced in mass. As you can see here, these are
little hide imperfections. So some Hide Details
could give us a more realistic look
through our material. We can create these
details quite easily. Just create a bump map. This is going to make
sure that we get some bumps into the normal
of this principled shader. And we need a noise texture. If you click on Control Shift and select this noise texture, you can see what's this noise texture does
and how it is displayed. This, however, only
works if you use the add-on named Node Wrangler. So make sure the Node
Wrangler is ticked on. It is quite important
and I use it a lot. But Control Shift, you can just see every node group
is doing, right? So in this case, this
is our noise texture. And I do see that it is
a little bit stretch. So if we click on Control T while selecting
the noise texture, you can see that
instantly a texture coordinate and a mapping
note will be added. I like to use the
object as factor, and here we can see that it
gets displayed a bit better. At least that is what I want. Now, we can scale this up. And I like to put the scale
of the z also a bit higher, so everything's
stretched a bit out. I feel like I look at some of these reference images
of these wine bottles. It seems like these
bumps are kinda stretched towards
this way, right? I hope that makes sense. So I like to fake that a little bit here and just
stretch them like this. Now, perfect, So skills
should be little bit higher. It should be quite
small details. And that should be fine. So we can always
check this value. We can always change
this as well. Nothing is set in stone. So if we connect this fact to
the height of the bump map, we get this kind of bump
map as you can see, and it will look like this. So this is a very, very bumpy, kind of nasty
looking wine bottle. But we can put the
strength way down, right? And here we get these
kinds of reflections. So 0.003 might
already be enough. And right now this
looks kind of weird because our light
gives us a very, very sharp kind of highlights
and we can change that. But our show you guys that in our next video where we
talk a bit more about lighting and then we
can still jump into this bump node and put it
a bit higher or lower, depending on what our
lighting actually shows. Because often we
want, of course, to create a very
good-looking material. But sometimes immaterial
might look different in a particular kind
of studio setting or seen then another studio
setting or seen. Personally. I make sometimes still some
edits to my materials. And even in post-production, I might do certain stuff
to make it look more realistic or more like
the client might want. So I hope you guys are excited to jump
into the next video because the lining
is really going to change a lot about this model. It sounds weird,
but even changing the shape of the
slide will already make this modal pop way more than you might've thought.
I see you guys there.
7. Lighting the Scene: In this video, we will go more into depth, into the lighting. The lighting is very, very important if we
do not have any light. So if we go to World, put this background to 0, click on our lights, go to object and
put this note to 0. Then of course our
whole scene is black, which means without lighting, we get this result, right, and that is
not what we want. But if you put the emission
a little bit higher, we can instantly see
something happening. Our whole scene comes to life. Our light has multiple
purposes and you can also manipulate these purposes
with changing the light. So of course, the light
lights up a scene, but it also creates
certain reflections. These are called highlights, and it will also create shadows. And shadows are also
very, very important. So the main light in your scene, we often call this a key light. The key light. And this key light is also often the most bright
light in your scene. We can change the power here, or if you click on Use nodes, you can also change it here. Now, the key light
has a certain radius. In this case, if we
use a point light and this radius changes
the highlights and of course the shadows. If we look at these shadows, we can see a clear difference between a hard light
or a soft light. If the radius of
our light is small, we can see a very, very hard light here. So the shadows and the light, It's a very much of a
contrast between them. If however we scale
this radius up, we can see that we create
a nice and soft lighting. This is of course changed
with the skill of this light. But if I move the
slide very far away, then still put the
strength bit higher. But you can see if I
put it very far away, even though it's a bit bigger, you can see that it's
still gets sharp, indicates that it's
very far away. You need to scale it even
more if you wanted to create a softer
lighting position. And the scale matters a lot when creating hard
or soft lighting. You can also compare
this to the sun. The sun is huge, right? But it is very far
away from Earth. So if we don't have any clouds and our sun shines nice through, we can see some very
hard lighting, right? So all the shadows
are very sharp. But if there is a
lot of overcast, so a lot of clouds, the light from the sun, we'll go through the clouds
and scatters around, which essentially
creates a soft box. The light gets scattered around, which makes the light
source way bigger. So this creates soft lighting. Now, this is of course
quite important. And the size of our lives is also important
for the highlights. So for a bigger radius, we of course get
bigger highlights, which incidentally makes our wine bottle pop
out even better. Now, the shape of the light
can also matter, right? So if we change this
light from a point light, area, lights, we can
see here the shape. The shape is a
rectangle in this case, but the shape will also be showcased as the
highlights, right? So if I go here and just
change this a little bit, moved a bit around. We can see that the shape
also matters a lot. And this actually looks
very good in my opinion. Nice and square highlights really makes this model
pop in my opinion. So of course, you still have
to play around a mission, and this is actually
quite important. But when do we know when we are overexposing,
underexposing our Render. Well, what is exposure? And why do we even
care if we are under or overexposing
our render, we are losing color data. And this is not what we want. We want to keep as
much color data and they are as possible. Otherwise you get kind
of a flat render. Plus the post-production
will be way harder if you have
less color data. Now, let's click on
the random properties. If you scroll all the way down, we have color management. And in color management, we can check our exposure. So in fuel transform changed
from filmic to false color. And here we have a
very trippy seen. What does this do? This essentially
shows you if you're under or overexposing
your model. And it does it with a heat map. So everything which is blue. And if I put this
strength way down, you can see that we even go
into the purple or black. This is being underexposed and there we will
lose color data. If you're overexposing, you
can see that we go to what's the dark red or even
white in those cases, we will also lose color data. So we want to be
somewhere in-between. And what is a good rule
of measure is when we get a nice and a gray color. And as you can see here, this is the kind of color
that we're looking for. And this of course,
will not work on the whole entire model. But if you get
some of this gray, that is often a good sign. Now, if you have a more reflective model or if your model is a brighter color. So let's say white, it will act differently than, let's say, darker colors. Or if you are, have a
non-reflective kind of object. Alright, so you can see
that the bottle here in this case is way darker about the highlights
are super bright. Or if you look at these
reflective letters, you can also see that they will often be even
some rat in there, and it is not super bad to have some almost orangey
red in there, but you don't want
to go too dark, okay, so keep that in mind. So your job here is to try
to find a middle ground. How do we don't want to
overexpose anything? We don't want to
underexpose anything. But in some areas where
it's very reflective, you could end up with
some rats, right? So that's almost not
possible to avoid. But just keep in mind
what is happening. A normal key lights
is often not enough. Let's put the fuel
transform back to filmic. Select the key lights and duplicate it and move it
on the opposite side. Often what we do if
the second lights, we rename this to
our fill lights, is as the name already suggests, it fills up the shadows that we create with
the key light. And filling up does not mean we get totally rid of the shadows, but we wanted to make the
shadows a bit more bright. So if we duplicate
that this key light, we already know that the strength of the
second light should be a little bit less strong because we still
want some of the shadows, but just not as much. This also creates
nice highlights. So the position also for
this model will matter. It depends on what you want
to create in this scene. But you could
duplicate this light. Again. I personally
would like to change it to the
point light and width we're going to do if
this slide is create a rim light or a backlight. So also rename this
to rim or backlight. And the goal of this
backlight is essentially to separate this model from the background
with the lighting. And I often like to hide certain lights just to check what a particular
light is doing. So this backlight, for instance, could be maybe a bit stronger here and maybe
even a bit bigger. Just so we get some nice
reflections from the back. It is a bit hard to see because the floor here is
just a white color. If we create a new material
and make this a bit darker, you can see a bit better what
this backlight is doing. It really creates this
very cool little rim here. And it just looks very
beautiful in my opinion. So also the strength
here matters. The radius matters,
as you can see, and the way that it interacts with the model and
the background also. So very, very cool of
what is happening here. And all of these lights should complement each other to
create a beautiful scene. Right now, you still
have the ability to change the reflections
or the roughness, I should say, of this
capsule and the label. They should reflect on what your client wants or in
this case, what you want. So I might want to make
even a bit darker here, which means more
reflective, right? So a bit more reflective
could be there. You can change the color still. Maybe you want it
even more dark. It's totally up to you what
you want to create here. But once you have your
final kind of render setup, which is all of these
slides in here. And your materials. Now we're starting to look
more towards the final render. And when everything starts
to compliment each other, then we can start to look
into our next video. So please play with
around with the lighting, maybe even go in some
of the materials. And then in the next part, I will show you guys a bit more about creating
an animation. One more thing that I would
highly suggest you do right now is to save this file. Save it. So later on we can just start a whole new
blend file and just import our finished
wine bottle, right? So just save it. It's gonna be really handy
with all the upcoming videos. Then we can always imports are finished wine bottle
whenever we want. I see you guys in
the next video.
8. The Rendering Workflow: So how do we render
a simple animation? For this simple animation, we're going to stay in EV, but we will go to the
output properties because here we can always
set a resolution. The resolution is
could be different depending on what
your client wants. If you want a Instagram video, you need a different resolution than for instance,
a YouTube video. We also have a frame rate. 24 is kind of a
weird frame rate. Often 30 or 60 is used. We also have a
frame range, right? We have a frame start
and a frame end, which is showcased here, but also here in our timeline. Then we have an output. The output essentially means
if you create a folder, Let's say I created this
tryout kube folder. You can click it, accepted. And now every file that will be rendered will go directly
into this folder. This is very handy. We of course, also have a file
format that we can choose. Normally, you want something
better than a JPEG or a PNG. A lot of people are
rendering with PNGs, but there are way
better file formats. I personally like to use
Open XR multi-layer, especially for videos that
might be a bit longer. So if you use open
XR multilayer, we essentially can add
all our layer passes, and I will explain
later what those mean. Now. We have a black and
white RGB or RGB and Alpha. So RGB is normally set if you have any transparency
in the background, you want to put RGBA. We have float half and float for which food is 32 bits
of color channels, and the float half is 16 bits. And right now we're saving
them as zip lossless. These files, however,
are quite big. If you want smaller files
with almost the same quality, you want to choose DW a lossy. And that is essentially
it for the output. I however, would like
to explain why I choose an image file format instead of a movie when we
are rendering animations. When we render with an
image file formats, what happens every
image that gets rendered will be
saved in this folder. So let's say we have
rendered 90 files, but a frame 91 blender crushes. The nice thing about having
this image saved is that you already have saved
all of these 90 images. So the next time you can
just start from frame 91. So we did not lose
any time here. Well, what happens with
a movie file formats? If we choose a movie file and
it's crashes at frame 91, then it will not have saved
all this file before here. It will actually
lose all this data. Thus, you have just
lost a lot of time. That is the reason why we
choose an image file format. Now, Why Open edX
are multi-layer? Again, this is because I want to save time if
anything goes wrong, I can always go
back in my passes. So let me explain these
passes for a little bit. If we have our model here, um, I will very quickly
go to cycles GPU and change some of
these shader settings. So maybe I want it to be
a bit more reflective. Let's put the
roughness a bit up. We can change the color
to maybe some blue. Here. The layer passes,
we can select here, so few Layer Properties, and here we have passes data, but we're going to focus
on the light section. We want to take on everything that we are
using in our scene. So if you think back
about the bottle, we have a diffuse, we have glossy, we
have transmission, but we do not really
have any volume. Now, emission environment, shadow and ambient occlusion
and shadow catcher. Those could be chosen as well. I often like to use or
safe ambient occlusion as well because it is very
handy for post-production. And the crypto math is also
very useful for if you want to mask off certain pieces
of objects or materials, Let's just select object
and see what happens later. So I'm actually going to
duplicate this and change the material of the
second one that just so I can show you what a
crypto math does. But right now the only
thing you have to essentially do is just
render, which is F2. When this is rendered, we can look here
at the top right, you can see few layer combined. It, that means all
of these passes are combined and that
creates our final image. So that is what
blender always does. It always renders
these separately, these layers here, and then
combines them together. But now we have the opportunity to go
into them separately. And we can also look at them. If you'd just click on
combined, you can choose. A0. So this is what
the EO looks like. We can look at the
diffuse color, right? Makes sense. We can look at the glossy
color or the glossy direct. So if you are, maybe at the end of your
animation, you see like, oh, it might be a bit
too glossary this part. They can always jump into these
files and just change it. So you can all do this
in post-production without having to render
this whole timeline. Again, the whole
animation that is very, very powerful and that is
why we often use this. There are multiple
programs and waste too, combine all of these separate
frames into an animation. But right now we're just
going to stay inside Blender. So if we create an animation, I'm just going to make
a very short animation. We'll do like a 100 frames. And then I'll put a time limit per frame at like two seconds. I'm going to render
this animation and every single render is going
to end up in this folder. So Render Animation and I'll see you guys
when we are back. Of course this you can set
two combined because that is how our renders are going
to look like anyways, right? Like this. So now we have rendered
our animation ends. If we go to our files, we can see that if I click
on the trialled cube, all of these files are here, all of these EXIF files. So how do we combine this and
make this a animation file? Very simple. I often like to open
a new blender file. I can essentially delete
everything from here because I just need to go
to compositing. In a compositor,
we can use notes, and instead of using
the random layers, we're actually going
to use an image node. Here. We can combine
this with the composite and open the
images that we just created. One all the way. Until hundreds open image. This will create frames, so a 100 frames and the
starting frame will be one. Which you also can see is
that all of these passes are also instantly
shown in this node. So this is a lot. And how do we combine these? Well, first of all, we have
a combined one, right? And if we want to see
the combined one, you click on Control Shift
and then select this E XR. But again, for this one, we need the Node
Wrangler add-on, as I said in previous parts. So here we can see
what is happening. Now. If I just have the
diffuse direct, we can see this. If I have this one,
we can see this. So we need to combine
all of these ones together to end up
with our end result. And this seems hard, but it is actually
quiet, quiet, easy. If we go to the blender manual, we can actually see
how we can or how we have to combine these to
get the combined results. This is essentially how blend the deposits in the first place. So diffuse direct plus the
Diffuse indirect times the diffuse color will then be combined with all
this other stuff and then we get our final image. So we just did a mixed node. This mixed node will
combine both the diffuse, direct and diffuse
interact with ads, right? Plus is adding them together. And then we just duplicate this. So Control C, Control V. And this one is going
to be multiplying. So the diffuse
direct and diffuse indirect will be combined
by the diffuse color. And this is our color. Very, very handy. We need to do this. For all of these. You can just
duplicate this here. Glossy direct. The
glossary indirect will be added together
and this will be multiplied by the glossy color. And then we get this effect. Now, we do this again. So just duplicate this direct, indirect multiplied
by the color. And all these other
ones like the A0 and a crypto markets are not
necessary at this point. But we need to combine
these as well. And S, we can see all of these
then get added together. So we just duplicate this note, C control V, and
then put it here. So these two multiplies are gonna be together and then
they would once more. And then we're going to add
this last one with this one, perfect effect is
added together. Before we are going to
continue with this lesson, I quickly want to explain
two things to you guys. One is not so important, but the second one is a bit more important and I will
let you know why. So the first one is, if we look at the
combined render, you can see that the environment or the background is great. If you look at all of
these added together, we get a black environment. This is because we
actually did not include the environment here
from all these passes. So if you ever have an environment which you
also want to showcase, Then I would highly suggest
you turn on the environment. In a lot of cases, I use my own studio, so I have a model as a studio, which then will still show up without taking on
this environment. This is also the reason
why I forgot this, because often I use
or a studio or I want my background to
be transparent so I can put my own
environment in later. This is not a big deal. I will explain this in
upcoming videos as well, but I still want you guys to
know why this is different. The next thing, however, I actually forgot also
in my upcoming videos, which is kind of stupid, but yeah, I'm sorry for that. The only thing that is, is, is we need to use one extra
node after this whole group. This extra note is
that the noise note. When we render inside Blender, you can see underneath this random option
we have the noise. And the noise is very handy, especially if you
have bigger scenes. Or your materials might
be a little bit more complex with more reflections
or even transparency, we might get some
noise in there. This noise is what
we do not want. And the denoise button is something that gets
rid of a lot of noise, like really a lot. This is also why we use it. However, that the noise, I think happens after all of these pieces
have been rendered. So if we have rendered
all of these, and it happens after it is not included in this
whole set, right? So we need to put just a denoise after this Add
button right here. And we can also combine
it with the view. However, that the noise clutters your computer
down by quite a lot, especially if I wanted to
do something before this. So maybe I have a UN
saturation nodes. I want to have before
the denoise button. You might get troubles with just your computer
being really slow. If you hover over any node, click on em this way, you can mute it. So M for muting. Then if you essentially
want to render, you just hover over the denoise button
again, click on em. It might take a little
bit for it to calculate, but then you can
start rendering. So sorry, I did
not include this. I do hope you now understand why do we need to add
even one more nodes? Because it makes everything
look even better and it just makes the noise less
noisy. So that's it. So let's continue
with the lesson. So why do we need
all of these nodes? Well, there are very handy
for post-production. If you want to change
the color, for instance, I can just do a hue and saturation node is
throw it somewhere in here with the diffuse and
change this view, right? So it is very powerful
in this way that we have all separate nodes for each
and every single option. Now, it is a little
bit messy though. We can clean this up with
joining certain parts together. So in this case, we know that the diffuse has three
of these values, glossy and transparency also n, These three diffuse
or combined here, so 12 and then multiply
the third one. So these two, if you
select them both, you can just click
on Control J to create a little kind
of group around it. In this note section, you can change the
label to diffuse. And now we have this separated. We can do the same for this
part which is glosses or Control J, label, gloss. And here we have the glossy. And of course here we
have the transparency. So join them together and
change this to trans. So now it's already
a bit more clean. You can essentially throw a
lot of these nodes in here. So if I want another
image texture in here, bam, I throw them in here. And these groups can get very
big if you would like to. You can see that
there were still, it will still look quite clean. But how do we start
to render this? Because right now we still
just have an image here. Well, what you do
is you make sure your timeline is set at the frames that your
animation also take. So our animation
as a 100 frames. So I put the end
at a 100 and make sure that your last node
goes into the composite. Then let's go to the
Output Settings. And here we just want
to change the folder. Maybe you want to have it
in a different folder. And the file format should
now be a movie file. If we now click on
Render and animation, we are starting to
render our animation. This however, is not
the same as rendering. You can see that it
goes way, way quicker. It just shoots by these frames. And that is because
it's not re-rendering. It is essentially
just putting all of these images together
to create a movie file. So this just doesn't
take long at all. This is our movie file. Of course nothing
is moving around because we just kept
them stationary. That is essentially
how this works. And we're going to use
this technique over and over in our next renders. Okay, So if you're Ff questions, you can always ask,
which can also jump back to any of these videos. So let's go on and create
our first animation.
9. Animation: The Grand Reveal: In this video, we're going to
create our first animation. Let's look right now what this animation is
going to look like. So you could make this
animation in two ways. You could animate a light or you can just take two images, a hotel totally black image, and then one image
of the final result. Then we start with
black and then slowly showcase the other image, as you can see right here. So this is very handy
for anyone that doesn't really have time or a good proceed to render a lot. That is also why I included
this, ran their hair. It first of all, looks
very, very cool. The rest sort of a shortcut. We just need one or two images
for the other animations, however, we have some
camera movements. We might have a
fluid simulation. And for those you cannot
use these techniques. The first thing that we're
going to do is we will delete this default cube and just import our final bottle, right? So appends go to your bottle file here and
then look for a collection. Because in this case, we need this collection. And the collection is going
to be the wine bottle. Very cool. So here we
have all the materials. Everything is working except
we still need to go to cycles and then cycles we
use the GPU Of course. So in this video we
have a nice front view. So click on one, select
the camera view, aligned view, align
active camera view, and then select this camera, go to x 00 and the y is how
far we are away from it. This camera also has a
certain focal length. 50 were for products. It's not even that bad. So let's just keep it
at this right now. I want to look at my render preview and see
what is happening here. I don't really like
the backgrounds. I want some kind of studio
and the lighting just sucks. So I personally, again, like to go to Shading and just change these
to my needs, right? So we'll move this here. This is going to
be my camera view, and it's gonna be the
rendered view ports. Here we're going to
grab another treaty, few parts here and
here we can change or add certain things
have to be ones. And these, I'm going to
combine together and just make this our shader editor. Now, let's first of all
create a little studio. So I'm going to grab a cube. We can scale this a bit up here. Then delete these two vertices. Select this edge, go to item. Therefore weight
all the way to one. Click on n to just get rid
of this little section here. And here we go and
add some modifiers. So we want a bevel modifier. Let's grab some bevels and here some segments,
right-click, Shade Smooth. And then we could add
a subdivision surface, but I don't think
it's necessary. Now, I want to move this or scale this up so you
can scale it like this. Or we can of course, make sure our 2D curses
here than skill around to the 3D cursor and then
just scale it up. Already. It looks way better
as we can see. The, we're going to
create a material as well for this little
cube in this case. So click on New. And then there's going
to be way darker, right? So dark and I don t want
that money reflection. So the roughness is
gonna be quiet low, maybe from point a or high, this case 0.8 is going
to be quite rough. And when I add all
of these things, we already talked about
multiple collections, right? So I would maybe like to create a studio collection to
put all of this inside. So studio, yes, the light or background or R Studio in this case and
our camera, right? So these are the most
important things right now. And we want to start with
a totally black scenes. So if I select this light
and put it all the way to 0, you can see that it's still
not all the way black. That is because our world also has a certain
amount of strength. So let's put this to 0 as well. Now there are both at 0, which gives us a
very dark scene. Perfect. I'm going to move
my light behind my bottle and I want to do
that like very perfectly. So if I click on Shift C, my 3D cursor snaps
to the middle. I can select my light, click on Shift S and do
the selection to cursor. So now our light snap to the cursor and we can move
it around the y-axis. So if I put the slide higher, so make sure you
go to object here and put the strength
of bit higher. You can see what is happening already starting to
look quite cool. But I think we need to put the radius a bit up
of the slides so we get more of that
rim around here. And let's see what the
strength should be. This looks better,
might put it higher. And then maybe we do need
to put the roughness a bit lower. Let's look. But I want the base
color to be darker, either needs to be very nice and some real decent
contrast between here. So you're just searching for a cool little value
between the roughness, the color, and of
course, the light. The light, while
the size matters as you guys already know
where you place it. So if I put it closer
or further away, that also changes a lot. And that is mainly it. To render this, we
just have to go to the output
properties and choose, of course, our file format. If you want to do a lot
of post-production, which in this case, I don't think it's
that necessary. You could choose, of course, the Open XR multiplayer. And of course, choose all of these options which we also did in the previous
video, right? So it's the direct
glossy and transmission. Those are important
and you could choose environments
and inclusion as well. But because we're actually
just making two images. And then we're going to
animate these images. That is why I want to
skip this middle step, because otherwise it gets
a bit tricky to follow. So I am just going to do
the file format at tiff, okay, RGBA color depth
16 is probably fine. Now, we are going to run there are like this frame
where the light is, where you want it to be at. So if you are happy
with your final image, I'd say you can just click
on F2 and then save this. Once it's done. Here, just go to Image, Save As, and then you can rename this
to last image, seen one. Then what we're gonna do
is we're going to put this light at 0 and
then render again. So render image. And this is going to be
our first image, right? Not our last model first. So it is just a black image, totally fine image
save as, and here. We can just do first image
seen one, save as image. Very, very easy. The only thing
that we have to do now is open a new blender file. And we can even go to File New and choose the
video editing tab. Now we have our sequencer here. And here we can put in
all the images that we have so you can find
your folder here, or you can just drag
your images in. So we have our first
image and our last image. Now, you can see them here. This is essentially
the timeline, and it is showcased in seconds for you to submit up to how long
you want us to take. So maybe we do like six seconds, which is going to be, I guess a 145 frames. And then this one
can be the same. What you want to do
here is we want to animate this last image, right? And we want to
animate the opacity. So let's say at two seconds
we want it to be 0. And then you click
on this little dot, which is animate property. Then we can go to four seconds and we can put it
all the way to one. And then again, an
image property. So now if we play this at first, you will only see this first
image, which is black. And then we'll slowly
start to transition into R, last image. And at this, this nice
image, of course, if you ever want to
change anything here, you could do that with, of course, changing
this animates property. But you can also go into, let's click here
the graph editor. And in the graph editor
you can move this around. If I move this around,
you can see that it also will change here, right? So I can play around
with these curves. I can even add some modifiers
if I would want to. But in this case
we're just going to keep it as what we have. So let's go back into
our video sequencer. And here the only thing
we have to do now is take care of our output. We want a frame rate of, let's do 30 frames per seconds. This frame range is
also quite important. If we select one
of these strips, we can see that this one
is a 145 frames, right? So 145 frames should be the
whole animation in this case. So we can put it
at the end at 145. If you have a higher than
I will just start to render like a transparent
image after this, which is not really
what we need. Then as output, it's
automatically set as mpeg video, which is fine. Then make sure you have
your folder ready here. Seen one, accept
Render Animation. And now it will render
this whole animation which takes almost
at a 145 frames. And again, it doesn't have
to re-render it all the way. Again, it's just compiling these images together
and making a video file. Now, if we look in our folder, we can see our animation here. And if we play this, we get this result. Very, very cool. So this is all done
with just two images. This is going to be
our first animation. You are able to of course, change whatever you want. Maybe you want the
resolution to be different. That's all up to you. I hope you guys
learned from this. And in the next
part, we're going to create another animation. I see you guys there.
10. Animation: Closeup Barrel Roll: In this video, we're going
to create this animation. To start this animation, we can jump into Blender. I'm going to delete the
light and the cube. So just delete them. Go to File, append and select the file where you have your wine bottle
collection, right? You're finished wine bottle. And this one is mine. So here we have this whole
collection imported at once. Now, what do we want
to create here? We want to animate the camera and we want
to animate the bottle. So often refers to animate. Then we start to
play around with the lights and the
renders, right? So how do we start here? First of all, we want to
put our camera in position. And a karma is
essentially going to be quite close to our model. So I'm gonna grab two of these 3D few ports here and on one of the screens
I'm going to click zeros. So I'm actually in
the camera view. Here. I want to show you that we
are essentially going to put a camera quite
close to our model. And then we're just
going to move it up. So that is the camera animation. But it needs to be a little
bit more interesting, right? So I'm going to rotate
my camera actually, maybe around the
set access here. You can even go into this view, make sure you turn
on camera to view. And then we can move it just to wherever we
are looking, right? So that is also very handy. Sometimes it's a little bit hard to move the camera because it's kinda rotates from a different position
that you might expect. But you will get
there, no worry. So something like this
will be interesting. And then what we're gonna do is selected here and then
we're going to move it up. Alright, so that is going
to be our animation. So it's a bit up to you how close by you want to
do B to this model. We can also make an
backgrounds so we can actually go a bit further
away if you would like to. But if you have very
small intricate details, often close ups are
very cool, right? But we're gonna do something
like this for right now. So interesting position
of the camera, I like it. And then we can go to animation. So an animation you can
see we already have a few. If our camera position, we have a 3D view port
plus the timeline. So this is perfect
for animation. So what we're gonna do is, right now we're going
to think about how long we want this
animation to take. So I'm thinking
240 or 120 frames. I'm just going to do
shorter right now. But if you want this animation
to take a bit longer, of course you'd just
take more frames, right? But we're gonna do
a 120 in this case. Now, at frame one, we want this to be our
beginning position. So i location. Then at frame a 120, we wanted to move up, so G. And I'm going to
move up until here. So we have this end
of the bottle inside this little capsule I location. So now we have animated
the camera from 0 to a 120 and then
we have this result. Perfect. The next step, however, is animating the bottle. So click on Shift C, and this makes sure that the 3D cursor is
perfectly in the middle. Then Shift a to add an empty. Let's do the plane access. We want to select this whole wine
bottle collection and as less the empty, right? So select a whole
collection, then the empty, and go into the 3D
view port here, control V and set
parents to objects. So now all of these models are parented to this or
empty in this case. So if I move the empty, you can see that
I can rotate it, I can move it, I can
animate it later on. And all of these
models will follow. Perfect for
animations like this. Now, click on AI and start
your rotation keyframe at one. Then go to frame a 120. We're going to rotate
this a little bit. Then click on AI and
do rotation again. So now we can see if we
just look at the bottle, that it rotates nice and slowly. But we should have more
control about this rotation. Because let's say we
have this rotation here. The first thing
that we can see is that I need to put this to the
rendered viewport shading. Is that our label, which we've worked hard on an
often the company which are the client that gives
you this project wants to showcase this label. We cannot even read it when
we are passing through here. So we want to manipulate
the rotation. It is quite easy to just
go to the Graph Editor. So change editor type from
dope sheet to graph editor. And what we can see here is a whole new kind of fuel, right? And what we can do here, if you hold the
middle mouse button, which is the scroll wheel, if you click it, then
you can move around. If you zoom in or zoom
out, It's just crawling. But you can see that
we have to scroll off quite far out to actually
see all of this. And it's just not really
handy to work with. So we can also scale this down. If you hold Control
middle mouse button, you can kinda move it
down and it was still. I work the same, but we can essentially see it a
bit better, right? So control middle mouse button
and then you can just move up or down to compress
this together. Perfect. So these two little
black handles from this blue line
are the rotations. So it is the eula rotation, rotating this around the z-axis. And you can see that these keyframes that we have put actually have a nice BJ line. And these BJ curves make these animations nice
and smooth, right? They start off a
little bit slower, then it speeds up. So in this case of the empty, it speeds up with the rotation. But with the camera, it actually speeds up
inside the location, right? It's slower hair, and then it moves a little bit quicker
and slows down again. Because both of these
have the shakers. And you can change this
interpolation mode while selecting these handles. Then click on T and you can change it from wget to linear. Now it rotates at a
linear speed, right? So all of that is possible. We can also speed up or
slow down our rotation. So if our line, if we essentially
move this one up, we can see that our rotation gets sped up quite a bit, right? And it's the same for if I've
moved these two together. So if I move this one down, you can see that now it
rotates a bit slower. So it's a bit up to you what
you want to achieve here. The one thing that
I do want, however, is that if my camera is
somewhere around this label, which is around frame 50, then I want this label
to be nice and readable. So I can move this up and down. But the ones that make
sure around frame 50, this label of readable. So now we have this rotation. It rotates, we can still
read it and it goes up. So of course our
animation is quite quick. So you can see that it
might not even be readable because our animation
is only a 120 frames. If this bothers you, you could put it
two more frames, so 240 and just move
this then towards there. Right. Now you can see that it
rotates even slower. Why do you need to do that
for a camera and this empty? Now, this is everything
that you need to know for this animation. Let's go to the lighting. Let's go to Shading. And of course here I'm going to edit this whole
screen a little bit. So here we are. Ran that few ports
with 0, right? This is our camera. Here. I like to add some extra
lights or the 3D viewports. And these for right now, we can combine and I can
change this to shading. Now. Often, I also like to grab an extra little
timeline out of here, just so we can move our
animation around timeline. And now you can move
it around here, right? So quite simple, quite easy, and it doesn't take
too much space away. So let's talk about
the lighting. We first need to make
sure we are using cycles and we are
using the GPU, right? And here we can see that, well, our scene, it doesn't
really have any light. We of course, also deleted
the light in the beginning. But I also want to show you
that the background is, of course, now still
casting light, right? Because if I put it to
0, it becomes black. The background gives
us some light, but this is a very
flat lighting. We could add an extra
environment texture. And in this environment texture, you can import an HDRI. And there are loads
of different ages. Uris, you have
studios, for instance, they are very nice, but you could also do, let's
say this Kiara interior. The thing is this gifts you really, really
realistic lighting. But a lot of times
these reflections, as you can see, have
some color data in them. That is not always a problem, but because I don't
really want the focus to be on any of these reflections, like this intricate reflection,
as you can see here. I really want them to be
more on the model itself. So that is why I choose
to also put a color ramp in-between the environment
texture and the background. This makes the environment
texture black and white. And we also, yeah, the lighting is a bit
more soft, right. So we can even put it to ease to make it even more softer. And it's up to you what
you want to achieve here. But you can also
drag these in and out and even change
these values. So if you look around
here, you can see that this is right now what
our HDRI looks like. So very, very cool. I'm going to stay, keep that linear for right now. So let's now add some lights. I put this back to object
because we're going to use our notes with the lights
that we're going to add, Shift a and just
add a area lamp. And, um, yeah, we probably
better move it down here. Move it around, and try to start or create some nice
reflections, right? So the highlights are
always important. Scale it up. And of course, the strength
is very important as well. So make sure you use the notes
and put the strength up. So this is kind of
our main light. This is our key lights. And you want to make
sure that the key lights makes the most sense. And gifts are some
amazing reflections. So also you want to make sure that you're only looking
in this camera for you. You can do this by
just zoom in a bit more in and just imagining it. Or you can click on Control
B and then just drag here. And now we can literally only see what's in
this camera view. If you want to ever delete this, you do Control Alt B. So then it kinda expense again, you could even just use a singular little piece here if you really
want to focus on this, this is very handy
and it also cuts down your viewport render times a lot right there,
real life rendering. So I'll advise you to do this. Now. As we can see here, animation is starting
to look good. We have some light on our label. But the thing is, I do
think our environment map, so the world here is
overtaking a little bit. I'll put the strength to
maybe point to or even lower, just so I can really play around with the lights that
I want to add here. You can always go up and down in the timeline to really
see what is happening. And yet this light here, actually, I actually
really enjoy it. So I would love to make
this our key lights. Then we can always
check the slide, right? So we can check
for overexposure. So go into your random
properties all the way down column management and
change this to false color. So here again, it works just the same as
in our last video. Play around with
these values and you will get a nice
and decent results. So I might put a
little bit higher, so I get towards the orange
and that should be it. Now go back to filmic and
we can start to duplicate this to make our
fill lights, right? So here, the second light is
going to be the fill light. And as many of you already know, the fill light is going to
be way less of a strength. We want to fill up these shadows that we
create with the key lights. But we don't want it to be too extreme because then we don't really know
what to focus upon. So I'm going to make
them round here. This should be fine. It's still readable,
especially if we go a few frames forwards. But it's not too extreme. And let's go to frame one. What we can see
here is not a lot, and this is where our
animation starts. We can see some reflections, but it isn't really noticeable. What we're actually seeing, that is because we don't
have any light in here. It's all just too dark. So I would like to
grab another lights. I'm just going to
duplicate our fill lights and put it here in the bottom. Here we can kind of shoes
of what we want to achieve. I really want to see these
little shapes out of here. And it's just not possible
with what we have right now. Let me scale this a bit down. Move it up and it's starting
to make a bit more sense. And also the position and the rotation of course
always matter, right? So really play around
with this until you are, you actually are showing the shapes that you
want to show off. And that just looks
pleasing to the eyes. Well, I can play around with
this for hours, I shouldn't. So let's go to the next section. Let's make sure we can
actually read this text. If your text is a bit too dark, you could even add
an extra light, just a normal point lights, and then move it just
in front of your label. And what you should do here, because I don't really enjoy like a reflection
like this, right? This real brown reflection
from this slide. So you could put a light
quite close up to your label. And then if it's still, still shows, you can even
put the radius lower. Alright, so the
rate is even lower. Put it even closer here. So you avoid those reflections
which we might not want. So in this case, I think
this looks quite cool. The strength of the slide, of course, is not
really there yet. So use nodes and then put the strength just so we can read this a
bit better, right? Yeah. You can see
that you can add so many lights and they
do so much to your scene. And especially with an animation like this that we are
moving our camera. The light needs to work in multiple occasions,
not just one. And we can just turn on
and turn off lights. Well, we could, but it makes
it look very disruptive. So that is what
we want to avoid. And the only thing that I
think we should do now is maybe try to get a bit more of a separation from
the background. So the background is
still looks off and the separation can be
done in multiple ways. We can create a rim
light in the back, which is one perfect way to create more reflections
on the outside, which then will separate
this objective bit more. And we can also change
the background. That is also done
in multiple ways. We can create a
studio in the back, or you can just go here. Your random
properties go to film and then puts the
background at transparent. And then later on
we could always add our own color that we would
like in the background here. Alright, so let's do
that for right now. So I can also show
you guys how to do that in post-production. But maybe a nice rim light
in the back would be nice. So just duplicate this slide. We're going to make it
a way bigger, right? And we can play around
with the strength as well. Just so we have some more
reflections from the back. Here. It's a bit hard to see
what is happening. I might uncontrolled be just
so I can see everything. Play around with the
radius or maybe even change it to an area
light so it's more flat. I think it's a bit too strong. So for sure make this
way less strong here. Just a little bit of an extra
flexion is totally fine. And that is how we
can separate it even more from whatever background we are going to use later on. If you don't like
it, don't use it. It's also a little bit to
your own interpretation. Not everything that I'm doing is necessarily the only thing to do it or the
right thing to do. Sometimes it's just like, oh, does that look cool? If so, please do it. If it doesn't look, go
don't do it, right? And a lot of times you'll
also see that some of your clients might not like
certain things that you do. So then you have to change
certain stuff, right? So that is kind of your job as an artist and someone
has to deliver. You want to make an beautiful
little ran their hair. But we also wanted to deliver whatever our client
is asking from us. And we can always give them certain feedbacks
because we know that certain staff will just not
look good in 3D or whatever. If you're happy with this, I would highly advise you
to first just save this, save S. And as you can see
already made multiple videos are multiple C
files from my bed. And then we can start
to render this. So let's run this animation. First of all, we go to our few Layer Properties and then we choose
whatever we want here. So we want direct
Glossy transmission. Here. We could choose for environment, ambient occlusion and that I think should be at crypto mats object and materials
could always be handy if you want to
mask off certain pieces. Okay, so keep this in mind. Now, let's go to the
output properties. Frame rates 24. I think the last video we
did 30 frames per seconds, so we could do the same here. And because we are rendering
30 frames per seconds, we know that a 120 divided
by four will be 30, right? So we know that the
whole animation will take four seconds. Put a new folder here. I always recommend just
grabbing new folders in here. And this is seen to render. Go in here and accept it. I highly recommend that we go again to the open
EX air multi-layer, makes sure that RGB is active because we have an
Alpha in the backgrounds. Now, we already know the D WA a lossy files
are a bit smaller, so I would also recommend those. And here float fool
should be fine. Float half should also
be okay by the way, if you want to save
some more space for half, should also be okay. You can always do a
little pre-render. So if you're not sure
about a certain part, so maybe I'm not sure about what the
label will look like. Well, click on F2. And of course here we
are starting to run their indicates
of these letters. You can see that actually
they look quite messy. So you could always jump back
into the material and play a bit around with these values because these
are making the letters, actually they are
the gold ones here. And it has to do with
this mask, right? So I personally would probably
put a color ramp in here. Let me zoom in on these letters. Here we can put these
a bit close together. You can see that it
makes, well, if it's, if it's outside of here, It's kinda bleeds
into the background. But if you put this closer, it gets a bit sharper. So then these letters
also get sharper. As you can see. I hope that makes sense, but it has to do with this mask. And it also has a lot to
do with the quality of your masks and the amount
of pixels that we have. So I think the quality
that we use are downloaded from Canva was a bit too low. And if you want higher, you often need to pay. So that is why we didn't
do it in this case. But if you have this problem and you don't really know
where it comes from, you need to download or create higher-quality images
where the text is actually nice
and sharp, right? If this would be
four K textures, you would not have this problem. But this is just for
a little tutorial, alright, so we don't
really have to worry about it too much. And if you do vary a
bit too much about it, you can go a bit further
away with this camera. You can zoom just
a little bit more out and it will be
less noticeable. But it is good that
we caught up on this. Because now we know how to make it a bit sharper with
the materials that we have. Or if we ever have to create better looking labels that we need a higher-quality label. So this is good. Once you're happy
with your decisions, we can start rendering, right? So just save it again
before you start to render and then
Render Animation. That's it. After you have random images, we can go to the compositing
in a new blank file. Make sure you use notes. And we're going to
delete the random layers and add an image nodes. We can combine this to
the composite and open, of course, a new or
newly rendered images. In my case, it's just one, but you should select
your whole sequence, then open your image. Now, if I click on
control shifts, instantly get this viewer
attached to this image nodes. And as is always, the first
dot will be viewed first. If I hold Control Shift
and keep clicking, you can see that it
goes to the dots below. But we can also change
this backdrop, okay? And if you don't
see the backdrop, make sure you click on
this backdrop option. If you go to View, you can see that all of
these options here are for the backdrop and there
are also some short keys. So if I click on V, You can
see that I zoom a bit out, which could be handy
in a lot of cases. Now, I'm going to keep this
viewer up here for right now. And I want to combine
the diffused, glossy and a transparent to create this combined
image as well. But then we have more
control over it. Now, it is just as
the last videos, you're using a mixed nodes. The diffuse, direct, Diffuse, indirect will be added together. So ads then we can
duplicate this. And the diffuse direct, indirect edits will
be multiplied. So multiply with
the diffuse color. And if you now click
on Control Shift and unselect this nodes, you can see that we
get this as our color. Perfect. We could already
joined us as a group. So Control J, select the group, go to notes, and then
label this as our diffuse. Now, we can duplicate all
of these, drag it down. And this duplication is going
to be our gloss, right? Are glossy, so gloss. Here. It's exactly the same
direct, indirect color. And that will result in this. We should of course
combine these two, but I like to do at the end because we have to do
this one more time. So Control C and Control V to duplicate changes to the
transparent so trance. And then here again, exactly the same direct, indirect, and then multiply
it with the color. Perfect. So we need to combine
all of these as well. So we're going to
just duplicate this, add nodes and this multiply from the diffuse is going to be added with the multiply
of the glossy. And then we get this result. And it needs to be
done one more time. But then with the transparency, it could be in either way. It doesn't really
matter because it's just added together, right? It's just whatever
looks good to you. Make sure this end results if you're eventually
going to render this, is also combined
with the composite because that is essentially what you're going to run there. Very cool. And what I personally
would say you should do is just save this as a file, a separate blend file. So you can reuse
this every time. Because otherwise you have to
do this every single time. It's just annoying. So if I just grab
another image here, which has a multi-layer
XR and has the same yeah, passes rendered out, which most of the time
you do essentially. But if it has that and you just opened another image here, you can see that it
automatically will work, right? I opened the, our
previous image, but everything is still
connected as it normally would. And I can go back
to my other one. I can do this in sequences or even totally different models as long as it's rendered
these passes. Now, what do we need
to change here? First of all, I want to
change the background. I just do not really
enjoyed this. And yeah, we can do this because we also ran
it out our Alpha. So the Alpha looks like this. It's a black and white map, which is kind of a mask. So we could choose, hey, this part I wants
to be shown and this part I wanted to have
a totally different color. So it's quite easy. We can literally just create
an RGB notation here. With this RGB
nodes, you can just change the colors to
whatever you would like. But now we need to mix it together with Oliver
other results. So just add another makes note. And we're going
to mix these two. So the RGB and this add nodes. And then we get dish or salts. So now it's kinda mixed and effect a set that
all the way at one, which means only this image
here is essentially working. If I put this to 0, we can
see that only this node here is working anywhere between
gets kinda mixed together. But if we use this Alpha map, so for just drag this
over into the FAQ, and it will use the white
for one of the node 3s and the black
for the other one. In this case, we actually
want to swap these. You can do it like that or
you can use an invert node. But swapping it is quite simple. And here we can just change any color
that we want, right? So in this case I think a wide, actually quite loose good. So maybe we should
keep it at death. Now. It's totally up to you
what you want here. But here you can see that
it's quite easy to change. I personally do like
my reflections, so I don't really need to go
and change anything here. But you always have
that possibility. However, I might want to have a little bit
more of contrast so we could add a brightness
and contrast nodes. Just pop it in after
the mixed layer here. Make sure this is also viewed. And here we can play around
with the contrast, right? So a little bit contrast
goes a long way. Don't overdo it, but it
already looks way better. We can go to the hue and
saturation notes just so you guys can see
what is possible, but hue, saturation
and value here. And then you can
even change the u. So if you're happy
with your results, make sure you put
the image back into the composite because that's essentially what we're
going to render. And then go to the
output properties. Make sure you have your
nice output frame rates. Probably will put it at
30 frames per seconds. Then here file format is going
to be a movie file, right? So I probably will use mpeg. And that's essentially it. Now, if you click on
Render and run animation, then your render is
finalized and you have a cool little video file
which you can send to me and I can give some
feedback to it as well. Awesome. So I hope you
guys learned from this. And in the next part, we
are of course kinda create another little scene where
if the exact same bottle. So I see you guys there.
11. Fluid Simulation Workflow: In this video, I'll explain
to you guys how we can work with the fluid
simulations in Blender. In the upcoming video, we're actually going to
use this knowledge and then create this very cool
animation where we can see the wine bottle and then
some wine just splashes against it and creates this
beautiful piece of art. So let's select this cube and go to the physics properties. Here we can add a fluid. In fluid, we have
three different types, domain, flow and effector. We're going to use the domain. In the domain, we essentially
have our fluid simulation. So inside of this cube, all of the fluids
are going to happen. You can change the scale, of course, of this cube, but often you will
use a cube for this, not really a sphere. For instance, the
domain type however, is set at gas, and we don't want that gas
is for smoke and fire. We actually want to use liquids. So make sure you
change this to liquid. Let's also add a new model. This is going to be a UV sphere and we can move a bit up here. And this sphere also
will be a fluids. But here the type is
going to be the flow because we want a
certain flow of water. Now, the flow type is
going to be liquids. Right now the flow behavior
is set at geometry. And if we go into the
cube, scrub it down, and click on mesh, then we can start playing
our simulation, right? So if I play, you see
that nothing happens. Sometimes that
happens in Blender. And I'm not sure
why this happens, and I hope this will
be updated very soon. But for me it seems
like if I just click this on or off or when it's on, off and on that debt, Our seems to work. I do want you guys to
understand that this is not because this button especial, every single option here. If you just turn it up and down or down and up, just change it. That will kinda reset
this fluids domain. And that is kinda
what is happening. I often just click on assumable, but that is not necessary. You can click on anything which updates this fluid domain. Now, if we play this, you can see that a little
sphere falls out here, a sphere of liquid. And that of course false. Then the floor of this domain, it is a sphere because we
use a spherical objects. And in this spherical object, we chose flow behavior geometry. If you choose flow
behavior inflow, this will essentially
keep flowing water or liquids
to the simulation, add fluid to the simulation. And you can kinda see
this as a faucet. Water just keeps flowing in unless you animate
it differently. We also have outflow. Outflow will delete fluid
from the simulation, which can also be seen
as a drain, right? If you turn the water on, then at the phosphate
comes to water and the drain essentially
makes the water disappear. So that is what those are. So let's choose inflow. Now, if I play this, you would think like,
oh, it would change. No. Again, I get this
problem with Blender. That's no big deal. Just select this again
and then turn on or off. It's resumable. And now it seems to work. Weird, right? But it works. You don't really get any
other problems with this. So only, this is
the annoying part. Now, very cool. We have a
constant flow of fluids. Now we want this also in our
animation in the next video. But I also want to show you even another object
that we can add. If I add, maybe we just
do an add a UV sphere. Scale the mud down here and
I'm going to move with here. What we can do is we can
again click on fluids. But the type is going
to be the effector. The effector type we
will keep at collision. There is also an
option to do guides, but Coalition is what we want. A normal correlation will
not really work here, right? So that is why there is a special collection
for the fluids. If I play this again, we get to the same problem. So let's go here and
turn on is for summable. Now, if we play, you can see that it actually starts to interact
with each other. Very, very cold. And that is essentially what
we want later on, right? Then we get such a cool splash. We can also, if we
select this sphere, even choose an initial velocity. This applies if velocity, so a force to our liquid. So you can kinda see it as a garden hose if I want to
spray around the x-axis, Let's say for five
meters per second, this initial velocity will
make sure that it does. So now, if we play this
again, nothing will happen. So let's go here. It's assumable and then play. You can see that now it
starts to spray against here. Very, very cool. Alright, so we could use that
to our advantage later on. There's also options to make
this water look even better. Of course, we have the
resolution deficiencies, right? So if I do this times two, we can see that now we
get a better quality. Yeah, liquid. Very, very cool. We also can play around
with the time-scale. Because if we render
30 frames per seconds, then off this water
is already like here, within a second, so the animation just
goes way too quick. I kinda wanted to have a
slow motion feeling to it. So this time scale
can be 0.3 or 0.2. If we now play, you can see
that it takes way longer for this water to explode
on impact here. Right? So playing around with
these options will really make your
animation look better. I hope you guys can understand
what is happening here. And if you do, then I would
highly recommend you go to the next video
because then we can really make a cool animation. I see you guys there.
12. Animation: Wine Splash: In the last video, you have learned how to
create a fluid simulation. So in this video, we're going to
apply all of that. I first want you to rename
this collection to studio. And we can delete the
default cube for right now. Let's select Scene Collection. And I want you to go to File and append your finished
wine bottle collection. And here we have the
wine bottle collection. I don't really need the
empty for right now, so I'm going to delete it. Now we already have
two collections, which is very handy
because you can just hi them whenever you want. Let's add another collection. This is going to be
our fluids simulation. In this fluid simulation, we of course need a cube. This is going to be our domain. So go to the physics properties
and click on fluids. This is going to be our domain. Click on one to go to your
front view and scale this up. We want to have this bottom parts on the
bottom of this bottle. That is because if
this fluid false down, it's okay for me to
just let it fall here. The next thing that we can do is we can put our
camera in position. So our camera right now is here. But we want to see our bottle
from the front, right. So the one on my
numpad is essentially the front view because
here is also our label. Select your camera, go to View, Align View, and then
align active camera view. Now, this nephron
works perfectly. So drag this out and put
the x and the z axis at 0. The y-axis is
essentially how close by your camera is
to your bottle. We can yeah, just
fix it like this. Now, the next thing that is important is our fluids, right? So what we want to do is we
want to add a UV sphere, move it to the back of the
bottle, then click on 0. So we are in a camera view and just scale this sphere down. So it is essentially
not feasible anymore. Then it's still needs to
be inside of this domain. This is also going
to be our fluids, but this will be the flow, the flow type at liquids, and the flow behavior at inflow, because we want a constant flow. Now, we of course
want this liquid to also interact with our bottle. But I want to
duplicate this bottle. So just duplicate
the glass bottle, move the duplicate in the
fluid simulation collection, and just hide these
other two for right now. This glass bottle can be edited a little bit because right
now it has a lot of geometry. And we can even like
look inside of here. And that is not necessary
because the fluid is just going to touch
this outside, right? So let's click on
seven, go into top, so your edit modes and select
this little first x here. Click on Control Plus to
expand your selection. Here, we want to
delete these vertices, then select this outer
edge loop, extrude it, scaled a bit down
extra again at center. Perfect. So we have way less
geometry right now. And normally when you
are working inside any simulation kind
of environment, you want to make everything as easy as
possible for Blender. I would highly suggest you save it right now before we are starting to play around
with this simulation. So just File Save As I like
to create a new scene. So it's gonna be
seen number three. And then fluids sim. Now, of course
this needs to have a fluids effector as a
factor type collision. And we can start playing around. So go at frame 250 and play, and nothing will happen. Fair enough? Let's select our cube and
make sure we using liquids. Then if you play again, nothing will happen because
we need to make sure we are using our mesh. And I want it to be resumable. Now we can see that this keeps falling down as
it is, a nice inflow. Perfect. However, I wanted to shoot
at the bottle itself. So we need an
initial flow, right? So just select the sphere and then select initial velocity. Where does our philosophy
needs to go, however? Well, if you look here, we can see our
y-axis is this way. And the negative, the minus, why is that way? So we are going to go
around to the y-axis, but then minus, so minus
five meters per second. Then we can play this
and you can see, of course it doesn't work. So select your cube and then you can even just go resolution one up and one lower. That also works by the way, just changing any setting
here, essentially resets this. Then we can play it. And you can see that now we get a more of a decent result. I don't think this
is strong enough, so I will actually do
minus ten or minus seven. It depends on your situation. Then again, just change this a second and then play again. Perfect. So here we are getting
a cool result. Now. The time the however
is also important. Right now, we are using
a normal timescale. Fine, but this whole liquid
happens within a second, especially if we're using 30
frames per second, right? So in a second, we already have this result. And in my opinion,
that is way too quick. It doesn't really make sense and it will not look beautiful. So I like to put
this timescale way lower to maybe point to. Now if you play this again, it will, of course
take way longer, but it kinda makes it in slow
motion, which is very cool. And this all happened now. Two seconds, right? So we have more
time to play with, and it will look, I guess
a bit more classic. Now, it of course
looks a bit weird. And that is mostly because
of the resolution. The higher report this
resolution, the better. Essentially the fluid
is going to look. Of course, if you put
a resolution higher, it takes way longer
for it to render. Also, higher resolutions often also creates more of these
splashes, as you can see. So I think we're kinda
getting somewhere. And you could still play around with the
initial velocity. Maybe you want it to be
a bit less strong so it can dust less of this
what we have in here. The size of the sphere
also matters, right? If it's smaller, it impacts different on the bottle itself. That could also matter. And of course, the
resolution and timescale, those are the things that I
play around with the most. In this case, I probably
want to do this times two. So we have a 128 resolution
depending on your PC, this could take quite a while. So make sure you
again save your file. You can just save it to
a part one or whatever. And I also want you to look at the bake because
we need to bake this. And right now the type
is set at replay. And I wanted to put it
at all so we can bake. All. Our bake will be
saved in this folder. You can change it
if you want to. Right now, I'm not going to, but it could always be handy. Also, the nth frame
is quite important. I right now don't really want it to just end on frame 250. Maybe I'll do it at
frame 90, right? And if you turn on is resumable, then once you have
read that 90 frames, you think like, Oh, I
want ten more frames. You can put a 200 and then
you can resume your bake. It doesn't need to
rebase everything. That is why I would probably
turn this is resumable on. Now, let's bake this. Now we have baked all
of these 90 frames. If you want to bake further, you can, because we
clicked on is assumable. If you change this
to a hundreds, you can see, you can
click on resume. But in our case, we actually, I think I only
wanted to go into a frame 60. So the end of your timeline
should be to frame 60. Now, we know that now we only have two seconds of
an animation going on. If you want this liquid
to be even slower, you can of course, go up here in your domain and change the timescale to
even a lower amount. But in my case, I thought it will
be cool if we just take one render here, so one animation here. And then we can move the
camera around and just change the camera position
to something like here. So that is how you can just
create multiple scenes and make your whole animation longer with different
camera angles. Plus, it just looks cool, different camera angles, right? We already made this
amazing simulation. Why not show multiple views? Now? Select this one, right-click, Shade Smooth, and also
change the name to wine. And we want to start to
create some materials. But as you probably
already know, we first need some
decent lighting. So let's go to Shading. Change this top one to the
rendered viewport shading. And here we can see that even if I put my studio
and my wine bottle on, we cannot really see a lot. Also in the fluid simulation, the glass bottle
should be hidden. So go to the object properties, visibility, and turn the renders off because we just
want to run there. The one wine bottle
right now, two of them. Now, it still looks fake. That is because
we are inside EV, but we should go
through cycles, right? And I'm going to use the GPU. So once we have this, we can change this around
so I can move this one. I'll go to the camera view in the top view port
here, the top right. And I'm going to click
on Control be to just render only inside
this camera view. Now, here in the bottom, I would like to go and create
another treaty few ports, because here we can add
certain stuff to our scene. Then let's connect
these and change this to shader editor. I always like to grab another
little section out here, which is just gonna be the timeline because
we might still want to move around in this
animation, right? So if you want a lot of
wine, you go towards the 60. If you don't want to see
any wine, we go to frame 0. So the lighting kinda sucks. Let's go to World and
add an environment. Texture has joined us together
and open a new a CRI. In this case, the lining
is way better and we can actually play around fifth
materials if you want to. However, I also want to create a little studio
because I don't really want to see this
HDRI as a background. So just shifts. See credit cube, scale this up and delete these
two vertices here. Then select this edge loop. So just this edge here. Then go into Item and put the baffled weight underneath the edge data all
the way to one. Now, we can add a modifier, which is going to be
the bevel modifier. And here we can put the amount and segments as high as we want. Make sure you right-click
Shade Smooth. And then we can go
to the front view, which is one, and put
this in position. So somewhere around here. Make sure however, that
the studio is just as big as your camera view because we don't want
these empty spots in here, so just make it a bit bigger
if you don't have that yet. And of course put
it again in place. Alright, so somewhere
around here. Awesome. Now we want to change the
material of the wind. So I would suggest that you grab a frame where we have
a lot of wine here. Select the vine,
go back to object, and then click on New and
rename this material to wine. Then transmission goes all the way to one and
roughness at 0. Now we can play around
with the color. I want a nice and dark red wine. The IOR of water is 1.333. And probably wine is
very close to this. So let's just put it at 1.333. Now, the color is quite dependent on what
for why you want to use or showcase what
else a bit up to you. And you can always
change this later on. What does our light look like? First of all, we have our HDRI. And I first wanted to
go to frame one just to see what is happening
with just the bottle. And right now it looks okay, but it still looks a bit boring. So let's go to the world and
put this strength way down. Because I would love some
of these reflections, but too much is just
not really what I like. Now, this slide can
be changed, right? So we can move them around and change it to
the area lights. Here we can create some
decent looking reflections as long as we make
it big enough here. And it's actually flipped
around and put it back. With the slides. Again, you have to check that the background, so the studio also
still looks good. And of course, reflections
of the, of the bottle. So if you're happy, if you're seeing,
we can of course, also play around
with the strength. So go back to
objects, use notes. And here we can play around with the strength to know
those specific number. We again want to go into the render properties and
go to color management. Here we can put it to false
color and we have Few. Again, you want to go
towards the orangey color, but you don't want to go
towards the deep rats, rats. So for these should be careful, but I think it's still
fine for right now. If you're happy with this, go to filmic and we can start to duplicate this key lights. So we still need to rename them. So this is the key light
or the main light. This is the fill lights. Fill. And later on we will
see if we add another light. But the fill light is
going to be less strong, but maybe a bit bigger, right? Something like that. So just
play a bit around here. We still want them to be
able to see the label. But I think that it's
totally doable right now. And let's actually
look what it looks like when we have some white
in here around frame 60, it looks like this
and it is a bit dark. It looks cool, but a bit dark. So I might duplicate
my key light here, change the slide to
our point lights, and just play around with
the strength emission here. And of course the radius. You can see that
this slides really makes the wine pop because the light comes from the back and shows this cool color
in the wine, right? So don't be afraid to
play around with that. Awesome. Now, the only thing
I think that is a bit overkill is this
background color. From the studio. We can create a new material and just
put the scholar bid down. It's okay if it's white, but I don't want
it to be overdone, especially because now we
have this backlog here. So a back or rim lights. And that also makes the
background even more bright. So it's okay if you put the
base color of the backlight a bit lower because it
will still look decent. If you're happy
with your results, we can start rendering. So first, make sure
you save this again. So here, I think fluid
animation should be a filename. Then we can go into
the output properties. Frame rate should be at 30 and frame whatever
N frame you want. In my case, 60. Of course, create
a new folder here, animation front few accepts. And here we wants
to put the open edX are multi-layer SR file formats. The codec is going
to be the D wj. We have RGBA and
the float for as these settings now go to
the Few layer properties. And here I wanted to put a diffuse on Glossy
transmission. That's also the
ambient occlusion. And maybe object
immaterial as crypto math. If we ever wants to change something inside of this render, then we can go to the output properties,
recheck everything. If you're happy with it, you can save it again
if you would like to, and click on Render Animation. Before we are going into
the post-production, I want to show you scenes. So this whole blend file is essentially one
blender scene, right? We can however, have multiple
scenes per blend file. It is very handy, especially if you just want
to change one or two things, but don't want to ruin
your first scene. This scene is our
front view, right? So we can rename it
to the front view or from fuel liquid animation,
something like that. Then we can duplicate it here. And we can duplicate it as a full copy because we still
want to everything in here, but we want to move it
in another position. This full copy, we
could rename to camera position change or whatever you think
is appropriate. Now, if I go into
the camera view, moving around, of course
we have to go here, click on View and
then gamma to view. Now we can move it
around and look for a very cool setup here. So this actually
looks quite cool. Then we did not move or remove anything from
our previous scene. So if I render in this scene, it is going to look
totally different than from this scene, right? So we have two different scenes here and it's super powerful, especially if you want to have multiple camera views with maybe different
lighting settings. Because in this case,
lighting looks amazing. It we'd worked on this
and it looks cool. But if we go to the camera position change and look at our rendered
viewport shading. Then we can see that
these camera settings or this lighting settings
might not work as well as we thought, right? So I will leave it up to you
how you want to change this. But again here you only
have to run there. I would highly suggest you do a different
output folder here, but that is essentially it. And that is how you can
make your animation so much more interesting
with multiple views. And as you can see here, we don't have to save a
100 files for this, right? Everything is still in
one file and we can change different
scenes if necessary. I do not think going over the post-production again
will help you in any way, because it's literally
just the same. So I'm going to end
this video right now, and I'll see you guys
in the next video where we're going to
create another animation.
13. Animation: Double Up: Welcome to the last
animation of this course. I will not go over the
basics which we have been through many of times
in these videos. So I'm not going to
recreate it a studio. I will of course
show how I do it, but I will not explain
every single part. I will just speed it up. And then once we
get to a new topic, I will actually explain
what will happen. But in general, we're just
going to import a wine bottle. Then I'm going to
create a little studio, create some cool lighting, and then I will explain how
to make this animation. So in this animation, we're going to make another
bottle appear from the back. It is super simple, but lots of products have
multiple versions of them. And lots of customers actually
want to showcase that. This is a cool way
to showcase it and you will actually
see it a lot once you start looking at maybe
be hands or even in just ads on YouTube
or on the TV. Without further ado. I think we should just
start, as you can see, our first import, my
wine bottle collection. Then I will also rename a
new collection two Studio. Now our Creator Studio. And I will also put a
camera in position. Let's make sure that the
studio also looks good. So a nice smooth
transition will do. Let's make sure we
are working inside cycles and also are
in the shader tap. Now, we can change
the UI to our needs. And I already explained in multiple videos what kind
of UI I like to work with. Let's get our HDRI in
here for better lighting. And let's also
change the lights. So what are we going to do now? First of all, we need
to wine bottles, right? So what we're gonna do is
we're going to duplicate this. But we also want to
animate the wine bottles. So we need to create an empty to just animate it
with more ease. So click on Shift C here.
Some of them it out. We can zoom in back and
add an empty plain x's. Now we can just select
all of these objects inside this wine
bottle collection, then as less the empty p and
then set parents to object. Now we can duplicate
this whole collection. And this means that
now we have two empty, but also to wine models. Awesome. This second one, we can just move a bit
backwards around the y axis depending on where you have
a camera setup. Of course. Now, we cannot see this wine bottle because
it's behind the first one. We do however, see a
little bit of a shadow. To be honest, this is fine. You can set up your lights
a bit different to hide it, or you can even do it
in post-production. But I think it's totally fine and we will
not really see it. Now. The next step, however, if this wine bullet is
going to be showcased, we can see that it looks exactly the same as our
first wine bottle. Normally, that's not a big deal. But often when a client wants
to showcase a second model, a second products, they want to showcase
something else, right? They don't want to showcase
the same model twice. So we should just quickly
change our labor, maybe. Select our second wine bottle. Click on the label, and then I would
highly suggest you just duplicate this materials. So just click on this
little tool here. Now this material is duplicated and we can change
whatever we want. We can change, we can
put this silver, maybe. We can put this
to another color. All of that is possible, but I think a very easy way
to change this dramatically. It's just got an image texture, put the color into
the base color, and then just grab your
original label color, right? So my case, it looks
like this. Very cool. I wanted the same
color to also be in the color of this base material. And output the metallic
all the way to 0 because it doesn't
need to be metallic. We could offer make this text more reflective so
the roughness can go a little bit lower, right? So this is a very
easy and quick way to change this label. For instance, the way
that you work with this is totally
different bird label. But again, often the client will provide you with these labels. Now, for this capsule here, we do need to change something. So again, select the capsule of this second
wine bottle again. I just hit the first one so I can even click
on it by accident. And then duplicate it again. Capsule material 0.001. And here we want to
copy these colors, so I like to do it inside
the material preview. Then this black hair
needs to be white. So I'm just going to, I drop it just for
extra simplicity. And this little line on here, I'm going to make the
same color as this blue. So here instead of the gold, it's gonna be the blue. And of course it's not
gonna be metallic. And the roughness can also
go a little bit lower. So here we have a totally
different looking wine bottle. Now we can start animating. The animation itself
is quite simple, but it does require a few steps. And I will explain why I do
this steps because otherwise, why would I be a teacher? So the first thing
that we need to know, we have a wine bottle, and we have a wine
bottle zeros 01, which is the one with
the white label. This wine bottle 001 is
hidden in the beginning. Then later on in the animation, it there'll be refueled and
comes here to the right. We need to talk a little
bit about the composition. When you select a camera, go to Viewport Display, scroll down and click
on composition guides. You can see that there
are a few guards that can actually help us with
our compositing. Now, the center is quite simple. If you have a model in the
center of your camera, that essentially
already looks good. The thing here though,
in the beginning, our wine bottle zeros, 01 second wine bottle
is behind here. So that means that we have
all the folks in the middle. And well, the center
competition essentially works. But as soon as we
add this model, we of course have another
point of interests. Also. We have a
very big empty area and that is not really
what we want, right? That looks ugly and
it's unnecessary. So what do we want to do here? We want to switch
essentially from center. Two thirds and thirds
is quite simple. You can see all these
dotted lines here. And at every
intersection points, there could be a point
of focus, right? So this is where our
eyes like to look at. You can see it almost every
movie that they put the actor or whatever they're filming at one of these
intersection points. As you can see here. Now, we could move our camera to get both of these at one
intersection points. And that will essentially make our composition look better. So those are the two things
that we're going to do. We will review the wine bottle and we will move the camera. We can also do something
extra with the camera, which is the depth of field. But I would like to
explain it later on. I would suggest you keep the third zone as
composition guides. Then we can start to animate
our wine bottle, 001. To animate this, we just
need to select the empty and choose a beginning frame from where we want our
ball to move from. So maybe our bottle stays stationary for the
first five frames. So at frame five, we could select the empty, click on AI and then insert
keyframe at location. Then at frame 50, we could move our bottle
around the x-axis. I insert location. So now this is our animation. The next thing we need
to select the camera. And also, I think
around frame five, we will put the first
rotation, right? Because right now this is still, our focal point is
still in the center. So we don't really need to
move our camera around yet. But around frame 50 is the end frame of this
animation of this bottle. And here we need to
rotate around the z axis. You can see that with me. It doesn't work
perfectly, right? So this one is nice
in the center here. But this one needs to be moved a little bit.
That's totally fine. Just make sure that
this first bottle here, which will stay stationary
and does not move, has this line there. These focal points. Then make sure you
select the camera I rotation at frame 50. Now we can literally just change this wine bottle 001 location. We can move a little
bit to the left, so it's nicely in
the middle here. And then I location to just replace the
keyframes from before. So now we get this animation. Awesome. This looks
way better right? Then, this empty space
that we had before. However, my studio is too small. You can see that because
we're moving our camera. Well, we actually have
an empty spot here. So I'm just going to scale my my studio up
around the x-axis, and that is literally
everything that we need to do. The lighting, however,
also needs to change. But I want to talk about that later because I
put a light here. We get some huge shadows in the back and it just
doesn't really work out. So after this, we still needs to change some
of the lighting. But I first want to show
you something else. We've talked about. The depth of field in the camera options. At depth of field is
actually quite interesting. We can focus on a certain model. And then as we can do here, I'm just gonna focus
on here on the label. And then if I put
the f-stop lower, you can see that everything
which we're not focusing upon is being blurred out. It works like, just
like a camera. Now, we want to change this
because at the beginning, we want this first wine
bottle to be very feasible. But at the second part
of the animation, we want the focus to be
on this model, right? So that is also a very cool
way to animate this as well. But how do we animate this? We're going to create
another empty. So Shift a and just
create another empty. I will move this empty
somewhere around here. So we are essentially
in front of the label. Then select the camera
and select this empty, this newly created empty, in this case it's empty 001, but you could rename
it to depth of field, something like that,
or focus object. Now we just have to
animate this empty here. So we just need to
click on AI location. I actually want to do
with one frame before, so I can just select
these keyframes here. Click on G to move
from one frame before. And then around frame 60. I'm going to move it in
front of this model. So just go to the top view. Move it around.
Somewhere around here. I location. So now you can see
that this is nice and sharp and this
one is blurry. So what will happen in
these ten frames is that the focus goes on the other model and
we can prolong this. It doesn't have
to be that quick. We can maybe do like ten frames longer if
you would like to. But this is a very cool way
to also animate this, right? So the only thing
we might want to do is just change some
of the lighting, moved a bit backwards
and still check if everything is lit well, but this is essentially
everything that you need to know to
create this animation. Now I think you guys
can just render this and maybe do some
post-production if needed. And otherwise, if you're
all the way done, please send me your renders. I would love to see
what you guys created. Maybe I have some feedback, maybe I don't have any feedback. And as lest, I will gladly thank you for participating
in this course. Thanks.
 David Jaasma, 3D enthousiast and ofcourse teacher.