Transcripts
1. Create Jawdropping Animations and Renders in Blender.: Welcome to this class. My name is staffer Jasmine, and I'll be your
instructor in this class. You're going to learn how
to create a jaw dropping animations and renders
inside Blender. The first few videos
are called workflow, in which you will learn the multiple ways I use
blender to my advantage, after years of learning
and teaching blender. After you have completed
the work for lessons, you will have the
ability to pick and choose whatever
you want to learn. So if animation number tree looks the most
fascinating to you, that you're just jump right into that lesson and start
to learn from there. There is no specific order in which you have to
follow these lessons. In the first video of all
these separate parts, you will see the skill, effort that is required and also what you will learn
in upcoming videos. If you enjoyed this concept, then please follow me on
Skillshare sent in your renders so I can give some
valuable feedback and give this class a refuel. This way, I know that
you enjoy the lessons and can update this class
in the near future. Plus, I will add
all my followers know whenever I've
updated a class. So this way you
also instantly know whenever there are
new lessons online. If you have any questions, then please ask me in
the discussion tab. And otherwise, I hope to see
you in the upcoming video.
2. Workflow blender versions and addons: Welcome to the workflow
video number one. In this video, we
will go over blend this versions and
add-ons I often use. If there are any other specific blender
add-ons that I use, I will of course explain
them in later videos. But let's first go
over the version. So the blended version
that are used the most in this class is Blender 3.2.2. As you can see down here, this might change in the future because I'm going to
update this course, right? So if I update the scores, I might have a newer version, but in general, it doesn't really matter which
version you are using. Probably you can do
exactly the same, but sometimes things
might differ. So if you are in Blender
version and row five or 4.3, maybe one little key
is somewhere else, but in general it will
be exactly the same. So let's now talk about add-ons. Add-ons can be very
important as they can make your workflow
quicker and more streamlined. Plus some add-ons make you do certain stuff which you
cannot do without it. But let's just stay at one particular add-on that I
really want to explain. This add-on is called the
Node Wrangler add-on. So let's look at our anodes. Go to Edit Preferences, and click on Add-ons. Here you can see all the
add-ons that you can use. You can even download specific
ones and install them. But right now, we're
just going to go to this little search
bar and look for the Node Wrangler add-on. This Node Wrangler add-on
is very, very handy. Let me explain how we use this. So make sure you take this
on and safe preferences. Then click it away. And let's go to the
shading of workspace. So in the shading workspace, we can play around
with these nodes, which of course
creates a material, as you might already know. When you want to add a note, you can click on Shift a and then search
for a certain node. But with the Node
Wrangler add-on, you can also just have a
short key at certain nodes. So if I select this
principled shader, click or Control 0, you can see that a
mix shader is now in-between the principled shader and the material outputs. This of course, is only for
people that use this a lot. They create a lot of materials and they just want
some short keys. Now that is not us. So let's just look at
what is handy for us. There are some very
cool websites which also gives you some
free materials. In this case, poly Haven has very nice CCC arrow
free materials. And in a later video, I will just talk about
some websites that you can use and mostly of them
you can use commercially. So let's say, I want a material. When you click on
a material here, you can see that this is
going to be the material that you are gonna
get inside Blender. But each material is made out of a lot of different textures, as you can see down here. So here we have this one, we have diffused, we
have a normal map. And you might already know how to import these in
Blender, right? So if we have blender, you first of all are going
to get a image texture. Need to combine this
to the base color. Click on open, search
for your materials. So let's look here. I have a material here, and now I want this
diffuse in here. Now, this is okay, but we need to do this for every single part
of this material. So I also should do this
for the specular, right? So it's open this, use the specular and
then put it in here. And then of course the
color space is not as RGB, so I need to change
that to non-color. What if the size is not good? Then I need to add a
texture coordinates. Mapping nodes. Combined that somehow and then
combine it to this. And then I can change the scale. Alright, so I hope you guys understand that this is often the way that
you have to do it. And now I change the scale
and you can see that the skill chains
as well on here, so I can put it to
five or even ten. So as you can see,
this is a lot of work and I'm not even at
half of the nodes that are actually need to create a decent looking material with
the Node Wrangler add-on. However, we do not have
to do all this by hand. So we can just select
the principled shader, click on Control Shift N T, and then we can look
for our material. Now you just pick and choose which dexterous you want
to use in your material. So let's do the diffuse specular roughness
and the normal map. Then click on principle
texture setup automatically, all of these textures
are being added. Plus, we already have
this normal map, which is also set the
color space at non-color. It goes into a separate
normal map nodes, which would need,
otherwise it doesn't work. And of course it then goes into the right spot of this
principled shader. Also, automatically we have
section here which has the texture coordinate
and a mapping nodes in which we can easily
change the scale. If we need to. We can also connect and
disconnect nodes way easier. So let's say this one is disconnected here, this
principled shader, we can easily just hold Alt, right-click on the node
that we want to connect. So the principled and then just drag to the next node, right? So you can see that
it's easily connected. Instead of trying to find
these little sockets. Both of them work. Now, disconnecting
is also quite easy. Just hold Control and then right-click to
just cut in-between. And there are of course
way more uses for this, but these are the basics. And the cool thing is that
we can also use it in the compositor
because the composter also is all nodes based. But I will later on explain
that in a separate video. So I hope you guys
learned from this and I'll see you in the next video.
3. Workflow Studio and Transparent background: In this video, I'm
just quickly going to explain how I often
create my studios. So a studio, it's not
necessarily that important, but I'm going to show you
how to create a very simple one and also how to just create
a transparent background. So if we have, let's say
we have an object here, we have our nice monkey. We were to render this monkey, but we don't have any
background and we don't really want to have all this
empty space there, right? So what you easily can
do is just grab a cube. You're going to
scale this a bit up. And then we can delete
these vertices here. Just delete them. Now, if
we go to the Modifiers, add modifier and add a bevel, then we can see that
we can start to bevel this very sharp
edge here because this is way too
sharp and you can certainly see it
in your renders. If I go to my render preview, you can easily see a
very sharp line there. Now, if we use this
bevel, however, we can put the amount higher, but also the segments. And now you can see that it
becomes nice and smooth. Right-click Shade Smooth. And here we already have
a very decent studios. So if you just want
something in the background, then this is often a very easy and simple
way to create that. So this is our little studio. So putting something
in the background, of course, creates
a nice background. So a studio can do it. You can put some mountains
in the background, but you can also
do this later on. If you want to put Southlake
later on in the background, then rendering of a
transparent layer might be quite smart. So if you want to render
a transparent background, the only thing you have to do is go to your read the engine, this bulk flux inside
EV but also cycles. Scroll down to film and
click on transparent. Now you can see that we have
this Alpha behind here, and if we render this
essentially is transparents. This also works for
cycles, cycles. Film, transparent, F 12, and there you have your
transparent background. So these both are quite
handy and easy to use. I will see you guys
in the next video.
4. Workflow Lighting: In this video, I would
love to explain to you a little bit about my
lighting workflow. So how do we light up a scene? How do we make our models look better if certain lighting? Well, let's just get started. When we have or when
we start up Blender, we instantly get a model, a light, and of
course, a camera off. This is needed to
create a render. So if you click on F 12th, you instantly render a image. Now, this is our render. And this render is created
with all of this in mind. Plus render, if you go to
the render properties, has been rendered in
the render engine EV. For more realistic results, I would highly suggest
you use cycles, but both of these random engines have their own place and time. Now, if you use cycles and you also have a better GPU than CPU, then please use this. If we now click on F 12 or
lighting changed a little bit, it looks more realistic, but it is a bit hard
to see, of course, because it's just
a singular cube. So let's go to the
shading workspace. I go to the shading
workspace because often the lighting and kind of material creation
go hand in hand because you cannot really see your materials have
good lighting. But if you don't have
your good materials down, then you also don't really
know how to place a light. So often it's a little
bit switching in-between them to actually see what
your light is doing, I would highly suggest you go to the render preview shading. And now if we move
this slider around, you can see that it actually
impacts our scene as well. So often I like to go
in one screen here, click on zeros so we are in our camera view and
then zoom a little bit, inserts a bit bigger. By do I do this? Well, I want to see what
is happening to my scene, but from the cameras viewpoint, because it doesn't
necessarily needs to look good in every single field that you're looking
at it, right? We need to make this image. So this needs to look good. But if I want to
change the light now, I need to go out of it again, move it around and
then click on 0 again. That is just quite tedious. So I always drag one
here to the side and then just change one tip
that you might not use often to another 2D viewports. In this view port, I can
always see what is happening. And in this viewport, I can move my light around. So that is kind of how I
like to still edit my lights in a 3D view port without having to go out of
the camera view. So let's talk about the different kinds of
lights that we have. This is, for instance, a lighter you can
just add, right? So if you click on X, delete
this one with Shift a, you can essentially
just add a light. And here we can see
some different types. But if you just
select this point for right now and move it up here. Also, this slide has a specific object data
properties for lights itself. So here you can see
that you can still change the type if you want to. All of these types, as you can see, have different options. But the main options
are kinda the same. So let's start with
the point light. We can change the color. We can change the power, of course, the radius
of the light as well. Then with the sun,
it's a bit different. We can change the
color strength, but here we have a
different angle spot. We have also all the same. But in a spot, you can change
the beam shape right here. And the area lights, which I personally use a lot, has also color power, but has different shapes. If you want to
change the shapes. Right now it's a
bit hard to see. We need to zoom in. But you can see that we can also change this scale if
we want to write. So I just need to scale this up. You can do this in
the 3D view port. You can also do this
here in these options. There's also an option to
use notes with your lights. And in this emission shader, you can change the color and the strength of
your life as well. Now, as you can
see, quite handy. But there is also one more
light that I want to show, and that is the light that
the world gifts to our scene. So let's say this point
right here is off. We don't have any
other lights on, but still, this scene is
not all the way black. We still have some
lighting in here. This is because if you go
here from object to world, you can see that we have a
background note in here. And this background
note essentially gives light to the whole scene. So even this strength
we can put up, down or change the color. But another cool thing is we
can put other nodes in here. So if we add an environment texture and then drag it into
the background, you can see that now it
becomes purple and that's kinda just showcases
There's no texture here, so please add something. So let's open a texture. And we're going to
open an HDRI texture. And in later videos, I will show you where
you can download these. But let's say I'm just going
to open the Kiara interior. What this does, it
gives us a 360 degrees. Whole texture around here, which adds light to our scene. And the cool thing,
if we change maybe the material of this
cube a little bit, I'm going to make
it a bit darker. And I'm going to
change the roughness. You can see that
not only does it give really realistic lighting, it also gives us very, very
realistic reflections. If I make a dark, you
can even see it better. So as you can see, this really creates
very realistic results. Let's talk a little bit about the three-point lighting setup. I often use this kind of
light set up because it's very versatile and it's
also quite easy to use. You can also combine this
with the HDRI lighting, so it's not necessarily
separated from it. So what do we do here? Well, we have our light here. And the first slide that we're
going to create is called the main or the key light. The key light. And this light should be, of course, in a
decent position so we can actually see our subject. And it should just be a
flattering lighting, right? So moving it around and playing with the strength
can achieve that. Then once you're happy
with the placement, you're going to duplicate this and move it over
to the other side. I'll put the strength
right now at 0 and rename this to fill light. So what this slide
is supposed to do, it should fill up some
of the shadows that we have created with
the key lights. So if we put the
strength a bit higher, you can see that that
starts to fill up some of these very dark shadows. Often this light has
a lower intensity, but also this is very dependent on where
you place the slides. If it's very far away, then sometimes of course
you need more strength. So that is one thing
to keep in mind. Then as last, we
have another light. This slide is often
referred to as rim light. Rim or back lights. And the rim light is
supposed to create a nice rim around the subject. It doesn't have to
be a rim around it. But let me show you a
little bit of what we mean. Here. I want to put the
strength of it up and maybe also the radius. But here you can see that we create some kind of rim
around our character. And as I said, it
doesn't have to be around the whole character. A little bit of hair
would also be fine. And it's often used to create a separation between the
subject and the background. So now it's really pops out
of the image that's safe. And we even could give
a different color, do this light, right? So often the rim light
is also handy for debt, but you can do that
with any light that you want. That
doesn't really matter. So one more thing that I
want to show you is that sometimes we might overexposed
or underexposed our image. So let's say right now we know that this is overexposed
if I put this so high, but sometimes it's
hard to see if you're actually
overexposing something, especially if you're
working with really a lot of reflections or
a reflective material. This also we can
check him lender. So if you go to your random
properties, scroll down. Here we have a
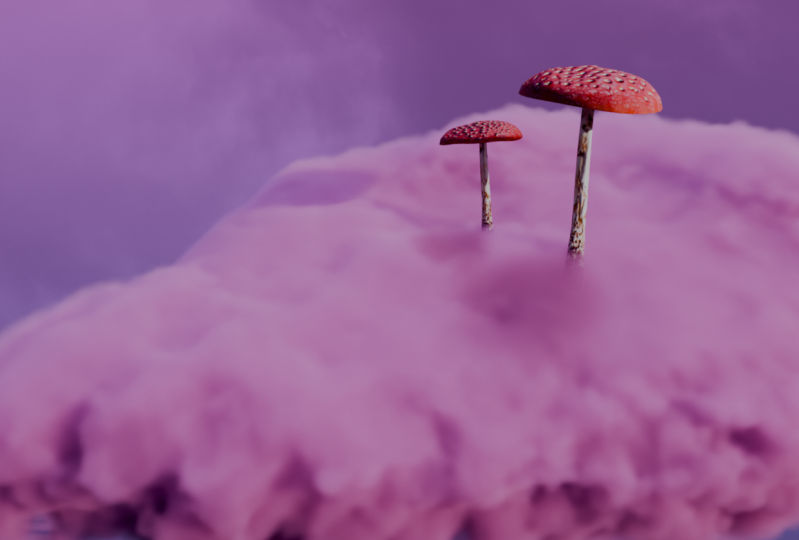
little section which is called color management. And in a column management, we want to chase
filmic to false color. And here we can see
a lot happening. So everything is now
in weird colors and it looks like we're having a
bad trip on some mushrooms. But the thing is
with these colors, we can check if you're
under or overexposing. So let me grab my key lights and I'm going to put the
strength all the way up. What you can see is that we
reach rat or even white. And once you reach
that threshold, you will lose color data, so you do not want to
reach that threshold. Also on the opposite would be
if we go all the way to 0, I sadly have to do this with
every single light here, light and even the
backgrounds to 0, then you can see that
we are reaching black. So black is bad. But even if you have a
little bit of light in here, so let's say dark purple
or even dark blue. In those cases, you are
underexposing your image, thus also losing color data. So both these cases are bad, but what do you want n? Well, we actually want to
reach this grayish color. And I often like to go
a little bit higher, so a little bit higher, so we are getting towards
the yellowish orange. And to be honest, if you have
your key light in check, alright, then we can know
what we're looking for. So if you go now
to filmic again, you can see that now we are
not over or underexposing, but we still could
pump it up a little bit without hurting
our color data, right? So if you pump it
up, you can just go to back to false color. Who did a bit higher. As long as you don't reach
this red, then you're fine. So here yellowish
should still be fine. Go back to filmic. And here you can
see that we still have some decent lighting. Now for the fill light
and the rim light, you could check it, but we know that
the key light is the harshest light
in our scene, right? So the other ones
probably will not overpower our key lights. So often I just check the key
light with the false color. And then these other lines I can do just with my eyesight. Alright, so here we
have our fill here, just fill up some
of the shadows. And then of course
we have our RIM, which doesn't do a
lot in this scene. But if we change a
bit the color here, let's do some nice blue. And here we have
some fun lighting. So these are the lights
that I use and this kind of setup I often use as
well in all of my videos. Go to the next video where you will learn
a little bit more about a studio or backgrounds
that you can use. I see you guys. There.
5. Workflow Rendering: Let's talk a little
bit about rendering. So if rendering, you
need to keep in mind a few settings that
you might want to set up before you
start to render. So as you already know, if you go to Render and click on Render image or
render animation. Blender essentially
starts to calculate how the light objects in your scene and then we get our image. Higher qualities often take more time to render
and lower quantities, less time and you need to find a middle ground
in-between them. Because you can make your
random like ten hours, but it's ten hours necessarily
better than ten minutes? In some cases, yes, In some cases, no. So having a little bit
of knowledge about rendering itself will
really, really help you. So let's first look at to
render engines that we have. We have EV and we have cycles. Both of these have
their own use. And of course, you also have
to keep in mind that some of you might have a shared VPC. And if you have a very shady PC, then sometimes you need to opt for a little bit
of a less quality. Even though it's not
super realistic, you can make really
nice renders with it. Then we also have cycles. This is my main render engine, which I use a lot. With cycles, you can
even choose your device. So we have the CPU, but also a GPU. Only use this if you
have a better GPU. But in general,
nowadays people do. Also, maybe you
cannot even click GPU or do not see this option. But you then have to do is go
to Edit Preferences system. And here you can
choose your GPU, make sure you take it on. And then of course, you can Save Preferences and go here to
click on your GPU. Now, there are a lot
of options here. And before we gonna
look at dose, by the way, we're not going
to look at all of them. I'm just going to
show you a little bit of a general view. But before we're going
to look at those, I would like to look at
my output properties. We are going to look at
the output properties because we want to
check your resolution. In my videos. I often do 1920 by 1080, but that doesn't
necessarily have to be the resolution that
you ran their ads. If you're working inside
Instagram or maybe TikTok that you might want to use, weigh different
resolutions. So please look up on Google
which resolution you want to use for your social
media or your website, and then start with
those resolutions. So if I put this one down or up, you can see that my camera
instantly changes as well. We also have a frame rate
which 24 frames per second is scanner general what they use in games and some animations. But you could put it up to 34 more of a film like appearance, or even 60, if you want a more, have more like a game experience
of frames per seconds. So in movies they often still
use 30 frames per seconds. And in games they often wants to have as many frames as possible. But yeah, that will take
a long time to render. Of course, 24 or 30 is often
the ones that I choose. Now, we also have a frame range, but this has to do more
with the animation. So if you want a
longer animation, you can put the end up or down, but you can also do it
in the timeline itself. Now, the output folder, however, and file format can
be quite useful. So whenever we render, it goes into a folder, and right now it
goes into the TMP. It's kind of annoying
to find this folder. If you want to do
some pre renders, I highly suggest you
just go here and create a new little folder somewhere
where you can find it. Then let's say this
is going to be, this is going to be somewhere. Put it in there, excepts. And now whenever I render
or an image or a movie, it will end up in this folder. Now, file format is
also quite important. Right now we have p and g, that is scan of a general
setting, a default setting. But if you want to
have higher-quality, you might want to think
about a tiff file. Often, I do, however, recommend you stay in
this image section of the rendering only
when you want to do a little pre-render
or after compositing, you might start to think
about movie files. But why do we do this? Well, let me explain. If you render an image
and you have two random, let's say an animation
of 250 frames. If this render
crashes at image 240. Well, you already have saved
all these images before. So you can just go to 240 and
start rendering from there. And then you have
all your frames. However, if I start to
render a movie file, so let's say a unpack. What happens if it crashes
at frame 240? Guess what? The whole file just
gets destroyed. So all of this time
that you have run, That's all it's 239 frames
will just be wasted. So that is why I
highly recommend you render an image file
and then later on, just throw it together and I'll show you how to do
that in the next video. Just to like a tiff, which has quite a
lot of color depth. As well. Awesome. So that is what we need to know about these output properties. So let's take a quick look at some of the render
settings that we can use. So if we just have our sampling, which is already important, we have a nice thresholds, max samples, minimum
samples, and time limits. I highly suggest you just look at the Render settings
for right now, because the viewport is
essentially what we see when we click on this Viewport
Shading rendered. But once we start to render, it uses these options. Right now normally
this is set at 4090, but let's say we
put it very low. I untick this d noise so it will not denoise
after Iran there. What will happen,
as you can see, is that we get a lot of noise. And this noise is kind
of what you do not want. To get rid of this noise. You can do multiple things. The most basic thing is just
putting the samples higher. So if I put this to a 100, you will already see
a small difference. It will, of course, also
take a little bit longer. Butter is noticeable change. So as you can see, you can play around with these samples. The higher you put them, the longer it takes, but you get better quality. Also at 1, it will kinda give
you diminishing returns. So let's say maybe
adds a thousand. It might not be true, but
maybe at a thousand it looks a very nice clean and we
do not have any noise. If I then put it to
10 thousand village really helped me know. If you're going to render
an entire animation, I would highly suggest
you do a few pre renders this way
you save some time. But keep in mind, blender also does have
the denoise option. So let's say we go back
to frame 210 samples. Our first, turn this off and show you how
much noise we have. So this is the amount of noise. Now I turn it on, and this is now our end result. So you can see that
the denoise button is actually very, very good. We do not have any noise. However, it looks kinda
blurry in some cases. And that is because
there was so much noise. But if you just put
this to like a 100 and then keep the noise
button on the denoise button. Then you can see
it we get really, really, really nice results. So now it's your question. Do we really need to go to 4,090 samples to render this for like five minutes or
are a 100 samples, we have to denoise
button on enough. That is for you to figure out. Now, there are also a lot of other things
that you can do here. So you can play around
with the light paths and these amount of bounces are key in creating
realistic and nice imagery. Normally, I keep
this at the default. But if you really
wanted to have maybe very nice glass or you have very intricate
details or lighting, then I would highly suggest you put some of the bounces up. And these are the
basics of rendering. I do not think we need to
go way further into this. But if you understand
a little bit on how to make your
renders look goods, how to change the resolution
so you can actually target the social media
that you want to target. Um, we also talked
about noise reduction, which is the most important and in some ways in
which you can make your imagery even better with some of the
light paths bounces. So in the next video, I will just explain a little bit about the composter and then you can choose your own animation
and just start off. So I see you guys there.
6. Workflow Compositing: In this video, I'm
going to explain to you guys how we can use the
compositor inside Blender. I do think the composter
is highly underutilized. And if you guys are
going to use it more, it will highly and
greatly impact your work. Now, why do I think
it's underutilized? I think a lot of
pros are actually using a different
program as a compositor, which it's not bad necessarily. But if you are a
new blender user, you don't really want to
learn even another program. Plus a lot of capacitors actually costs quite a
lot of money to use. Plus, I also do not
think there are enough tutorials
about the compositor. Now, let's just jump
straight into it. What can we do with this? There is a multitude of
things that we can do. But one of the ways that I
like to use it is to compile my recently rendered images
together into a movie file. Now, let's first take a
look at the compositor. So compositing, use notes. And right now we have two nodes, the random layers
and the composite. If we click on F 12, we essentially create
a render layer. But if I click this away
and go through compositor, you can see that it doesn't
really end up anywhere. This is because we need
to add another note. And because we have the
Node Wrangler add-on, We can just click on
Control and Shift, then select on the random layers and a new node will pop up, which is the viewer node. Now we can also see which
render we just created. How do we navigate
through this compositor? Actually is quite simple. The only thing you have
to do is go to View. And here are all the tools
which you need to move around. So zooming in or zooming out, clicking the middle mouse
button to pan around. But all of these short keys only changed the way that you
look at your notes tree. The backdrop, however,
has different keystrokes. As you can see, out middle mouse button or click on v to zoom out or
Alt V to zoom in. So that is the way that we can navigate through
this composite there. As you can see, the
compositor is node-based, so we can literally
just pop in notes, just like creating materials, and we get a different result depending on the
notes that we use. So let's import some of the vendors that we
have created before. So we are not going to
use to render layers, but let's add an image nodes. Click on Open. And here we're going to just
open all of these frames. So I just select the
first one, hold Shift, select the last one,
and then open image. Because I selected
all my frames, I instantly creates
an image sequence. Then the image goes into the viewer and
the composite node. Now, I don't see
anything happening here. That is because I'm at frame
number one, frame like 60. Actually my cube
is feasible. Also. If you look at frames, this entire render only
takes a 120 frames. So the timeline should
also end at 120. What can we do here? Well, there are lots of
things you can do here. But the first thing that
I want to show you is that we can actually
add a background. If you want to. Just grab an RGB nodes and choose a color which you might want your
background to be. So maybe nice and pink. So to combine the
background of this image, we just need one extra nodes. So I'm going to move
this a bit further back and maybe even
disconnect them. And then click on Shift
a to add an alpha over. This alpha over
nodes works a little bit like the layers
inside Photoshop. It lays a layer on
top of another one. So if we have the RGB here, we can drag that into
the first image. And this one is going to
be in the second image. Now, to connect
the viewer again, just click OK Control
Shift and just select on this
node to this node. The only problem
that we have here is this little weird
line around here. And that can easily be
fixed by clicking comfort, pre-multiply it, or dragging
this alpha into the FAQ. So now we have easily add a new backgrounds and we can still change the
color if needed. You can already imagine that
you can do way more of this. We can even put an animation
in a background or just an image in the background instead of just a
singular color. Awesome, So that is one of the ways that you can
use your compositor. But as you can see, there are lots of nodes
which can be used. So let's say I want to change the brightness and
contrast a little bit. Just drag it in and
play around the fits. And as easy as that,
everything gets changed. Once you're finally
happier if your image, make sure the last node that you actually have
in your node three is connected to the composite because this is going
to be rendered out. And then we want to render this out as a movie file, right? Because right now we
have an image sequence, but we want a movie file. So go to the output properties, make sure your
frame rate is set. And now we want to change the file format to maybe a mpeg. Then if you go to Render and
click on Render Animation, you might think like, how do I now need to re-render
everything? But no, it's not like
re-rendering it. We're actually just
putting all of this very quickly into a movie
file, Render Animation. And here you can see how fast these frames are being rendered. Right now it's already
done and we can easily find our movie
file in our folder. And here we have our
finished results. So I hope you guys learned how you can work
with the compositor. And of course in future videos we will go a bit deeper into it. I see you guys in
the next video.
7. Workflow Free 3D Assets: In this video, I would love to show you
some of the websites that I often use to
get my free 3D assets. Also some free stock images and even a free
palette generator. So let's look at the first one. Probably haven, body Haven
has free ace your eyes, textures and 3D models. And the cool thing
is that they are licensed as a CC 0 license, which means they are
first of all free. But you can also use them in
your commercial projects. Now, the next one is Paxos. Paxos has free stock
images and videos. However, with Paxos, you have
to be a bit wary because some images require
you to do nothing. But some images
also require you to credit the creator or
the owner of this image. Then we have Sketchfab. Sketchfab is mostly
for 3D models. So here you can look for a license if you want to
use them commercially. You can use the CC 0, but you also have
something like CC BY. And that means that you
can credit the author, but it can still be
commercially used. So here you have some
very cool models as well, as long as you credit the owner. Then we have a
website like coolers, in which you can create
your own color palettes. So you can just explore trending
ones or create your own. There are many
websites like this, but this is just an
easy one to use. So I hope you guys can see that from these
websites you can get some very cool free assets to actually help you
in your 3D journey. This is the last video
of the workflow. So I see you guys
in the next video where you can choose
your own tutorial. I see you guys there.
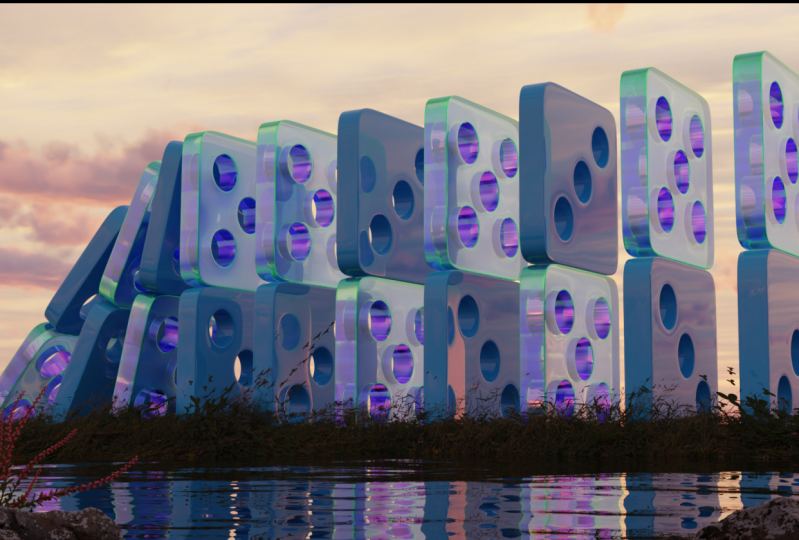
8. Glassy Gradient: Introduction: In these videos, you're going to learn how to create
this animation. So in the first video, we're going to take a quick
look at the final scene. So if we look here,
you can see that, yeah, this is what
this scene looks like. We have a very simple model. It's just a cube, which is kind of twisted
with some modifiers. And the only animation at this
Q pass is just a rotation. Now, we also have a camera. This camera also rotates. And of course, the materials
that you can see here, this is actually a
glass material and then the world that looks a
little bit more intricate, but I will explain that as well. So that is everything
that you need to know to create this animation. So in the next part, we're
just going to start and create this whole
animation from scratch. So I see you guys there.
9. Glassy Gradient: 3D Modeling: Let's start with the creation
of the spiral object. So just select this cube
and click on Scale. And then the seven, okay, so we're only scaling
this around the z axis. Then we need some
extra geometry. So going to tap to
click on Control R, this essentially creates
extra edge loops. If you scroll up, you can see that we create more edge loops. The number doesn't
really matter too much. Just make sure you have
enough for it to rotate. In my case, I did 34. Okay. Just so you know,
now we are going to the modifiers and the
first modified as we're going to add is
the simple deform. We wanted to twist
around the z axis. And we can of course
choose our own angle here, which could be maybe a 180. This already looks
way more interesting. However, we do have a
bit of a flat shading. If you click on right-click
and do Shade Smooth, you can see that everything
becomes nice and smooth. But we do get some
shading artifacts. As you can see here,
it looks a bit weird. This we can resolve easily with just adding extra geometry, add modifier, and let's
add a bevel modifier. The bevel modifier might work a little bit weird
as we can see here. This is because we scaled
up our cube, right? So if I now select the cube, click on Control a
and apply the skill. Now we can see that, okay, this baffle makes
a bit more sense. Okay, So a applies scale so that our modifier
works good again. Now I want to put a few
more segments in here, so maybe three or four. And you can always
play around with the amount that already
looks way better. But I'm going to add
even more geometry with a subdivision surface. The levels viewport can be
like maybe two or three. Vendors should go higher
to maybe five or six. This will make the render time, of course, also longer. But otherwise, we might
get a little bit of a blocky result in our
render because this is a glass material that is
essentially the whole 3D model. A little spiral. Spiral is done. The next step is going to be putting the
camera in position. So click on one and
then select the camera. Go to View and align the active camera to feel
alive and active camera view. Then we can see that our
camera can move position, but it is not perfectly
in the right spot. So click on this arrow
and makes sure that x and the z axis are set at 0. And now we're literally just
straight on this model. And with the y, we
can come in closer or go further away from
this model every 12. Now, how do we need to animate? First of all, I want
you to think about how long this
animation should take. In my case, I did a 120 frames. Okay, so put the end at whatever frame you
think is appropriate. Then we can start to
animate this spiral. And we all need to
animate the rotation. So at frame one, you can click on AI and then
insert keyframe rotation. Then at frame a 120, we can rotate this
whole spiral around. So we could do rotate
360 and then I rotation. So now a whole rotation will
be made in these 220 frames. If this is a bit
too quick for you, you could just go here and
then divide this 260 by two. Right-click replace keyframe. So now I just did a 180
degrees because this is a very symmetrical object
and has four sides here. It essentially will
still loop perfectly if you want to make this
a looping animation, as you can see. Now, the next step is going
to be animating the camera. Also, this is quite simple. Select the camera and here we want to animate the location, but also the rotation. So it's kind of
one step further. We need to animate two things. This, however, is
also quite simple. The first thing that I
want to do is go to frame one and put this
rotation here at maybe, let's do a hundreds
around the y-axis. And I want to zoom
in a bit more. So I think this is
a cool position for our animation to start. So click on AI and then location rotation while
having your cameras selected, you saw I got a little error. That is because I have
nothing selected. But while you select your camera eye location and rotation, then at frame a 120, I want it to be at the Y and 90, so it's nice and straight, but I want to be zoomed in. So something like
this should be fine. I location rotation. So our whole animation
right now looks like this. My opinion, that looks
very cool and I would highly suggest you
now save your file. Then in the next part, we can create our materials and of course, start rendering. I see you guys there.
10. Glassy Gradient: Materials + Rendering: In this video, we're going
to finalize this animation. So we already made a model. We already finished
the animation. But right now we need to create some decent luca materials. So let's go to shading. The material for the
spiral object is actually quite simple to create, so we can just select it. And here we want a kind
of a glassy material. We can only see this glassy
material inside cycle South highly suggest you go to cycles and put the device so GPU. If you have a better GPU, then let's put the transmission
all the way to one. And I will also put my
viewport shading at renders just so you can
see what's happening. We have a decent
transmissive material now, but the roughness should be low. So I'm just going
to put it to 0. And here we have a
nice glass material. The lighting is
not that important because most of the light
actually comes from the world. But you could play around
with an area light, right? So if you want an
area light in here, you can just make one played
around with the reflections. But all of this is quite arbitrary and it's
not that necessary. So let's just go to
the World settings. I'm going to click on 0. So I'm actually in my camera view. And I will drag a new little
timeline out of here. Just go here timeline
and put it to frame one. The only thing we
have to do is go to World instead of objects
and scroll a bit out. Here we have a background
and a world output. We're going to use a gradient. Texture is great in texture, creates a very cool
gradient on here. As you can see. However, the gradient
is not really whatever color we want in
our reflections, right? So what we're gonna
do is we will add a color ramp and a color ramp goes in-between the gradient
texture and the background. Here we can put any color
that we would like to. I personally like to use callers.co and we can choose
any kind of pellet here. So if you go into colors here, then accept our cookies. You can explore trending pellets
or even create your own. And here you can just choose
one and copy these colors. So if I, for instance, like this palette, I know
that I need 12345 colors. So I will go back to Blender and click three times on
this little plus. So we have five of these stops. Then click on this arrow to
distribute the stops evenly. And now you can see they're
evenly distributed. The only thing that
you have to do now is just click on here to
duplicate the color. Go back to Blender, Select one of the stops, and then select this
color down here. Then you go to the
Effects tab and just paste whatever you just
copied and click on Enter. And now we have
this color in here. And we're gonna do that
for every single stop. Copy. Select. And then based on if the hex. So now I've duplicated
all of these colors. If we look at the background, you can also see them. But we're not
finished yet because two reflections just
still look quite dull. Even though it's beautiful. It's still, it's not really
what I want to achieve. And what essentially
is happening in this whole world here. This is kinda shown right? It goes from the white blue to the darker yellow
or orange down here. I want this gradient to keep
duplicating over and over. To do this, I need to add
a texture coordinate. A mapping note. Here we'll just put the
generated into the factor, move them a bit back. And as last, we
need a math nodes. This factor goes into the
first value of the math, and this value goes into the factor of the
gradient texture. Right now we have this
math Note Set ad, ad, but we want to put it to
modulo. Click on that. Put the value back to one. And what we now can do, it still doesn't
really look different, but we can start
to scale this up. So I'm going to
scale it by 101010. Here we can see that it gets duplicated over and over again. Very, very handy. Now, going through a curfew and here you can kind of
see what is happening. I would also like to put my
gradient texture at easing. And also the color ramp
could be at ease as well. To make them a bit more smooth. You can see that one parts, or at least half of
this world is not really getting duplicated
over and over. You can see that this
is just all the way little bit of a bluish light. I just like to put
the location also at 101010 or whatever
you have here, just duplicate it over or play around with any
of these settings. And now we have it all the
way through, duplicate it. And here we get this
very, very cool effect. And I hope you can see that you can change this to
what ever you want. We can do different colors
so we can play around with the amount of times
that gets duplicated. All these rural
settings change a lot, and even the model
that you create also changes the way that this
animation will look. So it has a very,
very much potential. And I would really hope to
see just different kinds of models and a different kind
of colors in your renders. Now, to render this, I personally liked that the
background was not feasible. If you want to do that, just go to the
random properties, go into film and then makes sure transparent is ticked on. Now, I would also
like to go into the output properties and put the frames at 30
frames per seconds. And now you can just follow the rendering pipeline which
you have learned before. So if you start rendering, we can see this amazing color
scheme and this animation. And I hope you guys can show
me what you have created. I see you guys in
the next animation.
11. Cell fracture: Introduction: Welcome to the introduction
of this animation. So you're going to learn how to create an animation like this. And it's actually quite
simple and easy to do. But you will learn a lot. You will learn new
lighting techniques, you will learn new animation
techniques, and of course, how to make such a model or any model explodes with
the self fracture add-on. So this is our main
scene that we have here. And as you can see, we have just a very simple
studio, some lighting. And of course,
once I click Play, we have our animation starting, which means that now we have this cool explosion of all of these pieces just breaking apart and then flying
in random ways. This is all done with
some force fields and of course,
some rigid bodies. So this is essentially also
some kind of simulation. You do need a model
for this animation. Of course, the model that I'm using is already
up for download. But if you want another model or want to download it
from another source, you can go to Poly haven. Probably Haven has some
very cool models here. And there's actually also
where I got this bus from. But you can also try
out another model. I would highly suggest however, that you don't make
the polygons too high. So these plants, for instance, they might not work as good as, yeah, a bust or a couch, right? But in this case we
choose the marble bust. Now, this is a CC 0 license, which is everything
from this website, which essentially means you
can use it for any purpose. I think you can even
download it and try to resell it, which is weird. But yeah, you can use it
in any kind of project, even if you want to
sell them commercially. Now, there are also
some options here. We can download a different
texture resolution, but for k in this
case should be fine. We can also download
different kinds of files. We can do it in a blender file, but also FBX if you
like that better. I will show in the
next video how we can import these
into Blender. And then of course you
can just download it. If you're happy
with your choice, go to the next
video and we can go on and start to create
this animation. I'll see you guys there.
12. Cell fracture: Animation: In this video, we're
going to import the model and then start to explore it with a self fracture add-on. So
let's get started. The first thing that
we need to do is delete this default cube. Then it, depending on how
you download your file, we need to import it somehow. So go to file. If it's an OBJ, FBX or any other file
that's shown here, then you can just click
on it and import it. But if it's in a brand file, you need to append it. And here you can just
click on the Blend file. So in this case, it
was the marble bust. You can select the
object and then we inserted this
object inside Blender. I don't want to scale
it up a little bit. So Skill five, enter
should be fine. Now, what we want to
do if this model is we want to make it explode with
the self fracture add-on. But before we want to do that, I actually like when
the self fractures have a different insights
material than outside. And if you want to
have that as well, go to your material
properties of this marble bust and click on Plus to create a new material. This can be our gold material. Now, let's go to Edit
Preferences and look underneath add-ons for
the cell fracture add-on. Take this on. And of course you can save preferences as well. If you click on F3, you can search for your
cell fracture add-on. You can also find
it inside objects. Quick effects, self fracture. So there are a lot
of options here, but we don't need
to know them all, especially not for
this tutorial. The source limit is how
many sales will be created. Hundreds, in my case, I thought would look cool. But if you want less or more, you can always play
around with this. Then materials should
be set at one. This makes sure
that it's chooses the second material in
your material stack. Now, we only need to create
an extra collection, otherwise, all of these
cells will just be thrown in a collection
that is already here. So if we just rename
this to sell, fracture, click on, Okay. And now it will create
all of these cells. Plus all of these cells are directly in this new collection. Perfect. So we have our cells here. We have our camera,
light and marble bust. We still need this one later on, so we don't need
to delete it yet. But let's just focus on the
self fractious for right now. Let's select the
first model here. And what we want to do is
we want to make sure that this model starts to
fall down, right? So if we go to our
physics properties, we can actually make all
of these rigid bodies. And in a rigid body, there are also
some options here, so you can change
it to your needs. But we want them to be active, so they actually will be
controlled by the simulation. The mass could be
changed as well. So maybe you can put
it at like 0.75. We have dynamic which is
fine and shape convex hall works for this
method as well. There are some other things
that you can change, but this in general is good. However, we do not
really want to click on every single piece here and then start to
add a rigid body. And if you have made changes, then we need to put
this also 2.75. It's just a bit annoying. So what I like to do
is make sure I select one with this rigid body
selected or applied to it. Then right-click
to our collection and make sure we click
on Select Objects. Now select all the objects
in this collection. And my active element
is essentially the last selected yeah, object, which has in our case, this rigid body
already applied to it. Why do we do this?
Well, if we now go to Objects, rigid body, and then copy from active, then all of these models here, all of these cells will have this rigid body applied to it. So it's all the same, right? All of them have
also a mass of 0.75. And if you have
changed anything else, everything would be copied. So that's perfect. So
if we now play this, you can see that everything
falls down at the same time. Perfect. That just means that
all of them have the rigid body applied to them and they're working
with the simulation. So why does it fall down? That is because if we go
into our scene properties, we have a gravity and the
gravity is minus 9.8, which is the gravity on Earth. Now, what we want
to do here is we actually want to turn
off the gravity. And if you ever want to
make something realistic, then I would not
suggest it, right, because there's always
some gravity around. But in this case it's
a bit easier for us to grasp what our next steps in this animation
I'm going to do. So let's start with
adding some force fields. If you click on Shift C, we can see that our 3D cursor jumps nicely into the middle. Then Shift a to
add a force field. Let's just add the
force field, force. I'm going to move
this a bit up so it's around the face area. What I want to do now is go
into the physics properties. And now you can
see that these are the physics properties
of this force. We have some settings here, but the main ones
we're going to focus on is this strength. So if we now play this, you can see that very slowly it starts to kind of
exploded, looks like, right? This force kinda pushes
everything away. You can make this quicker or slower with changing
the strength. So let's put the strength
at a 100 for right now. Here you can see that
it goes a bit quicker. It really kind of explodes. However, if it just
explodes like this, it's still kinda looks
boring because it's just a singular movement and there's no
randomness in here. How do we change this? I would suggest to just
add another force fields, Shift D to duplicate this force field and change
the second type two, you can choose, you can just
play around with these, Let's do for tax in this case. But you can literally just
play around with all of them. And here you can see
what the 4D text does. So as you can see, there are so many things that you can do. Plus you can even keyframe every single part of
these forces, right? So if you want this for texts to become
stronger later on, or maybe a bit less strong, then you can always
also animate debts. Now, I thought it would be
cool if we start to animate the first 30 frames as
just a nice steel frame. And then after it
starts to explode. So what we have to do, we have to go to frame 29. Make sure strength is at 0. Right-click, insert keyframe. Then the frame 30, put it back to a hundreds
right-click insert keyframe. So now this vertex type, in the first 30 frames, it will not have any
effect on our scene. But at frame 30, it will start to have a
strength of a hundreds. Right? So that is essentially
what it does. I will do the same
for my other force. So the force is this one. And again, frame 30
seems to be okay. So at frame 30, strength
of a hundreds go on back and add a frame
29 strength of 0. So now the first set of bars, we can see that we have just,
yeah, nothing happening. So we can admire the bust. But if we render this right
now, It's a bit hard to see. Let's go to cycles. Gpu Zuma within. We can see these cracks already. And I actually don't want
to see the cracks yet. I want that to be
later on in animation. So how do we change this? This is essentially quite easy. What you just need to do is at the first part
of the animation, we just want to see
only the marble bust. Then around frame 29, we want to see all
these cells, right? So we can also animate this. First, let's do 29 frames. Actually. We're going
to see the marble bus. So right-click Insert
Keyframe while having this little camera on, which means it's
gonna be rendered. And then at frame 30, this is gonna be turned
off because we want to see the self fractures and not
this marble bust anymore. We're going to do exactly the same for the self fractures, but then we're going to
switch it around, right? So at frame 30, which they
should be all feasible, and at frame 29, they
should be all invisible. Sadly, in my version of Blender, we cannot put a keyframe
on a entire collection. I need to do this separately. I think however, this will
be changed in the future. Okay, So don't worry too much and maybe you can
already tried to do it. But I'm not sure why just
doesn't work with me. What we need to do at friend 30, all of these are
gonna be visible. So I'm just going to click on AI and then just hover over it. So i, and that is
essentially it. It's annoying because you
need to do a hundreds. But we've just one
singular button. It's not that hard. Then at 29, we need to do the opposite. So just click and drag
all of these off. I can actually make
this even bigger. Then we're going to
do exactly the same. Just keep clicking I,
so they all become nice and yellow at frame 29. While having this little
camera turned off. That means that it's
not gonna be rendered. If you want to do a
little pre-render, we can grab the camera. Let's move a bit around. Here, a few cameras view. Is there any light
in our scene here? So here we can see some cracks. At frame 29, we should not be able to see cracks
so you can render. Here, we can see
there are no cracks. Then at frame 30, render, which have
the cracks, right. So that makes it a bit
nicer and smoother. Instead of seeing the
cracks at all times. There's just one thing
more that I would like to change in this particular case, which has to do
with the animation. If we go, Let's go back
here to our scene. We have also a rigid body world. And in the rigid body world, we have a speeds. So if you put this,
let say at five, we can see that everything
here sped up by a lot. Let's go back to solid view. Right? It will be
sped up by a lot. And I actually liked to
play around with this. So maybe at first
like 80 frames, I want the speed to be like
1.1 or 0.1, I should say. Then insert keyframe, maybe
like 20 frames later. I want the speed to
be 1.5. Key frame. If we make this whole animation
take around 160 frames, let's look what that does. So here we don't have anything. And now the slowly
start to explode and then it goes quicker, right? So that actually
looks quite cool. I do think the 0.1 might
be a bit too extreme. So maybe 0.3, and that's
put it a bit further back. So maybe if frames
60. And here we can see that it actually
looks quite cool. So the animation probably
will only take a 120 frames. In the next video,
we're going to add a nice studio, so materials. And I'll see you guys there.
13. Cell fracture: Materials + Render: In this video, we're
going to create some nice materials,
some decent lighting, a studio, and maybe even
some camera movements to make this animation
even more interesting. Let's get started. The one thing that we need is, of course, a studio and
some decent lighting. So we can easily do that
with creating a cube, scaling this up, and
also around the x-axis. So we can just delete
one of these edges. And here let's add
a bevel modifier. Put a mountain bit up, and of course the
segments as well. Right-click Shade
Smooth, and that is just a very basic studio. Awesome. The next thing, we need some lighting, but we also need materials. And actually a lot of times in the beginning they're
gonna go hand in hand. You cannot see the
materials without lighting, but you can also not see yeah, what the lighting is doing
without any materials. So we're just going to
change one light here. Let's grab this slide, changes to an area lamp, scale it up here, and then let's move it around. Harish. Go to Shading, go
to the camera view, and click on the
render a few parts. Make sure that you are in
such cycles and use the GPU. So here we have our materials. We actually just want to see
the marble bust so we can hide the cell fractions
for right now because they're creating these
weird artifacts here. So if you just hide all
of them for right now, you can see that we actually
look at the normal material. So let's select this bust. And what we have now
is the gold material, which is gonna be the material inside the cell
fractures, right? So let's go back to the
material properties and just select the
marble bust material, which is the material on
the outside of this bus. So what we can see here, this material has already
been set as you can see. And I don't really
want the base color, subsurface or subsurface color. You have to be careful because if you take the subsurface out, it could be still
that this one is on. So also this one should be 0. And now we can play
around with the color. I actually really liked black. So black should be fine
and nice and dark color. Just so the highlights
that we're going to show later on also pop a lot. So this is actually quite cool. I actually liked the
reflects on this as well. The next part is going to
be the studio in the back. Just click on New. This material can be
renamed to studio. And here we can also change the base color to
a nice dark color. However, the roughness, I want
to put all the way at one because I just want reflections
in my character here. And that is one of the ways in which we can
create some contrast between the background and
of course, our main subject. So this slide actually
looks decent. And if you want to change
some extra lights, we could always grab a
new 3D view port in here. Just duplicate the slides, move it over here. I'm going to use notes
with the slides as well, just so I can pull this
strength of it down. This one goes a bit higher, maybe make this filled
out a bit bigger. So we know this is
the key lights. It's going to be our
main light in our scene, which is all the time or most of the time it's going to
be the strongest slides. So in this case the
strength is 1.15. Then this slide here
is our fill light, which fills up some of the shadows that the
key light created. So to fill lights, a lot of times to
feel like it's a bit less strong as you can see, but they could also be a
bit bigger to even create more, I'm softer shadows. And then in the back
we could even create a nice backlight or rim lights. So REM or back both work because it creates this very
cool rim around here. This rim light is
also very important in separating the background
from the subject. As you can see, this one, I might even put E for lower
than the previous one here. So maybe 0.01. And
you could also, if you want to play around
with some colors, right? So the emissions do not
always have to be just white. You can play around
with some blues. So if I want the blue here and maybe if the fill light and make a nice maybe rat, right? So you could also create some very cool effects
with these colors. Don't be afraid to play
around with some of these. So now, if you're
happy with this, we can start to look
at our next material. That next material
will only be seen, however, inside the
cell fractures. So the marble bus can be hidden. We can go to the self fractures. And what we want to do here
is we want to go through the timeline and just
play a bit forward. What happens is once these
cells starts to separate, we can see that we have an
inside of these cells, right? It's gonna be a different color. So if you select
one of these cells, you can go to the
second material. And this is the gold material. So in my case, I
really enjoyed if we do maybe some kind
of a gold color, so a yellowish color,
yellow, orange. And then just put the
metal all the way to one to create a
nice metallic look. I enjoyed that, but you can
put whatever you want to. Also, another thing, our self fracture like the
explosion that we create has not been
saved anywhere. So every time I want to
just check somewhere, I need to replay this. That is not what I wanna do. So you can always go to your scene properties inside
the rigid body world. And here you can save your cache or bake your
cache, I should say. So if you bake your cash essentially saves
the position of these cell fractures per frame. And now you can just pick, click and drag from wherever
you want to see them. You don't need to
remake it every time over and over.
So very cool. If you want to change something, however inside the simulation, you need to make sure to
delete the big first. Otherwise you don't
see the changes. So that is this material which also looks
very, very cool. Then as last, I just want to create a nice camera movement. So if we look at a camera, I actually want to just move
to the left and the right, but I still want to keep
looking at this bus. So let's create a new
empty right in the middle. So click on Shift C, just saw a 3D cursor jumps back
here in the middle, create a new empty scale
this bit up so it's a bit more visible and I might
put it around here. Now, if you select the camera, we can go into the object
constraint properties at an object constraints. And here we're going to
choose tampered track. Now as target,
we're going to just choose the newly created empty. You do have to however, change the axis to
the right axis. So in this case it's minus sets. But you can just click a little
bit through to see which one or where it starts
to point at this empty. So now if we move the camera, you can see that it doesn't
matter wherever I move it. The camera will always
follow this face. So I can go here and a camera
view that move the rounds. You can see that it
starts to follow it, which can create some very
cool effects. As you can see. You can however,
also move the empty because the camera is
damped to this empty. So for the animation, I'm gonna move my empty a
bit lower with down here. And then select the camera around frame one
about my camera to be maybe here I location. And then the last
frame, which is a 120, I want it to be all
the way over here. I location. So now if we move, you can see that we also get
this cool camera movement. So that is essentially
everything that you need to know to create this animation or
just one render if you don't want to
run there for hours. So that's totally up to you. Just to make sure you just
go through the normal steps, create an output file format, and then Render
Animation. That's it. I hope you guys liked it. Please send me your
renders and I'll see you guys in the next video.
14. Dispersion Metaballs: Introduction: In this video, you're
going to learn how to create this animation. You will learn how to
work with metal balls, which is very interesting. And I will also show you
a very cool technique to create more randomness
in your animations. So, let's first look
at the final scene. This is the final scene. And as you can see, my render actually
started from frame one. And we'll just keep rotating and cool ways and
it's kinda unpredictable. This technique that
we're going to use is very, very simple. We're just going to add
some noise to our rotation. In the materials section, we will create a
material like this. It goes quite well
with a very cool HDRI. And that creates the
refractive kind of material that we can
see in our render. If you want, you
can jump right to the next video and start
creating the animation. If you want to know a little bit more about the metal balls, then I advise you stay here
so I can explain it to you. When adding objects
inside Blender. So shift a. We can also add a metal ball. And a metal ball is not
necessarily just a ball, as you can see, there are
other kinds of shapes as well. So it's up to you what
for shape you're looking for That's choose to
bow for right now. When we look at this ball, it looks like just
a normal sphere, but that's not totally true. If I duplicate this sphere. You can see that as soon
as I move the way they kind of start to blend
together like clay. But you also can see this
a bit like is water or fluid in a 0 G
environment, so in space. So this also could
be quite handy for some kind of
fluid simulations. If you click on top, which is edit, we
can see two circles. The inside is the
influence circle, and the outside is
the selection ring. We can change all of
these settings inside the object data properties
of the metabolic itself. Here we have a resolution, a render, an influence. Let me make this bigger
influence thresholds. And we can update on Edit, we can put it to always, or we can change it
to whatever we want. Now, right now, the resolution
is what we can see here. So the resolution
field board is 0.4. And we can obviously see
that it's not that smooth. If you put this lower, it gets more and more smooth. If you put it higher, it
gets more blocky and rough. This is the resolution viewport. So only this will be
shown in the viewport. If you've rendered, actually
does the resolution render. So often we put this, yeah, we can put it
quiet low, maybe 0.1. But in the render, you might want to have
even more detail. So 0.05 depending on
your computer, right? We can also change
this to whatever. But in general, we don't really want to see any block Enos. The influence
threshold inferences, all metal balls as we can see, if I put this lower or higher, then we have texture space, which is not that
necessarily right now, but an active element. We could still change
the type, right? We can go to capsule or a cube. And you can change this
for metabolic, right? So there's still combined
with each other, but every metabolic could be
a different kind of type. We also have a stiffness. You can see that the
inner share go here, which is the influence circle, gets bigger or smaller. And we also have a radius. But you can also just
scale a metal ball up with our normal S short key. If you want, you can
even make it negative. All right, so now
it cuts away from this metabolic or we can just hide it if you don't
want to see it at all. Very, very handy. And those are all the options
for the metal balls.
15. Dispersion Metaballs: 3D Modeling + Animation: In this video, we're
going to create the metabolic model
and animation. Let's get started.
We're going to delete this default cube
and click on Shift a to add a metal ball. I'm going to choose
the metabolic, but you can choose
any shape that you like when having this
method ball here, we can literally
just duplicate it. If Shift D to add
another metal ball, it instantly starts
to react with each other as some kind of clay. As you can see. We can scale it up or
down and we can start to create the model
that we have in mind. However, the resolution
is still quite low. So I would like to go to the object data properties of this metabolic or of
these metal balls. Because if you change
something here, off the metal balls that
are connected with each other will be affected. So let's change the
resolution few ports to 0.1. And now you can see that
we have way more detail. The Render should also be 0.1
or maybe even lower, right? So 0.05 might give us an
even more crisp results. Let's now scatter multiple
of these metal balls on top of this big one to create
a cool looking 3D model. I always like to create
some decent randomness. So scaling up or scaling
it down and also moving your models around in multiple
kind of yeah, fuse, right? Because if everything
is just done around a particular axis, you can see that it's
just all straight here. So that is not about ions. But of course this
is all up to you. It is art. So just create whatever
you think looks cool. When you're happy
with your result, we can start to think about
the little bubbles inside. So Shift a and let's
add a UV sphere. I'm going to click on Z
and then do wireframe. Now I can scale
this little sphere down and I'm going to
do exactly the same. Just scattered more of
these fears around, move them around and scale
them up and down to create a randomness in also
these little air bubbles. Now I actually want to join all of these
spheres together. So not a metal balls
but just the spheres. So select them here. Then click on Control J to join them together
because this is later on going to be easier
when applying materials. Before we're going to animate
this are highly suggest. You also save this because
if anything goes wrong, we can always jump back. So File, Save As, and save this file. Let's start animating. Before we're going to
animate this metal balls, I first want to show you how a normal animation would work
and what kind of technique that we're going to use
to make it actually more random and
also a bit easier. I'm going to turn off all of these metabolic for right now, just to show you how I
would animate just a cube. So when you start animates, you of course have
your timeline. And we can see here that
we start at frame one. Then we can insert a keyframe. So if you click on AI, you can choose if
you want to keyframe around the location,
rotation or scale. Or of course, you can
do some stuff together. So logos, your rotation, logo should rotation
scale or whatever. Let's do location. Then often you
choose an end frame, so maybe around for 80. I want this animation
to be done. Then I want my cube here
to move around the x-axis. Then click on here,
i, and then location. So from frame one to frame AT, we get this locational
shifts, right? It goes from here to
here. Very simple. Now, you can actually
see in the graph editor. So if we go to graph editor, you can kinda see how this animation works
with these curves. So normally, to already make your animation a
bit more smooth, blend automatically creates
a bell-shaped curve in between these key frames. So you can see here
that the x location, which is this whole
animation here, has a certain curve to it. We can change this
curve as well, so I can move it over here. And now you can
see that animation looks totally different, right? So you can actually do
quite cool stuff with this. You can even change the
interpolation mode when going to key and going to interpolation
or just click on T, you can even change the easing
or the dynamic or future. So if you choose
bounds, for instance, you have to select the
first one here, t bounds. They can see that we get a
bouncing effect in this curve. So now the animation
will look like this. Alright, Very, very cool. So that is how we normally would animate and that is
how these curves work. But in this case, we are going to
actually use modifiers. So I'm not going to have
this second keyframe here. I will just delete it. But we're gonna go
here to the side. You saw this arrow,
arrow here, right? So if n, You can always kind of collapse
them or open them. But here we have a modifier
section and we are going to add the noise
modifier in this noise. As you can see, we'll
create noise around, in this case the X
location, right? Because that is what we chose. So that is how we're
going to animate this. Now let's just quickly
start with animation. I like to go to the
animation tab as well. Here we're going to add a empty. So click on Shift C to make sure our 3D cursor is
perfectly in the middle. Then click on Shift a to
add an empty plain access. We need to scale this bit up. And then I'm going to select all of my spheres
and metal balls. And as last is empty, you can see that the last
selected object is a bit orange and the other
ones are more red. Now click on Control P
to set parent object. So now all of these models here, the metal balls and
the spheres are parented to this empty. And if I move the MTR rounds, rotate it, move it, or even scale it. You can see that all of
these models will follow. This means that we
just need to animate empty and everything
will follow. Very, very simple. Go to frame one and
insert keyframe rotation. We only need to animate
the rotation in this case. As you can see here, we're using this dope sheet, but we also want the graph
editor, in this case. Now, for the graph editor, we don't have anything. They're just straight. That is because we just insert a normal key-frame without adding an extra
keyframe or whatever. But we can start
to add modifiers to each one of these
eula rotations. You can also see
these rotations here. So here you can see that if I manipulate the extra rotation, this rotation or this
will happen for the y. It's this one and this one. So let's click on X, click
on this little arrow, and go to modifiers. Let's add a noise modifier. And I'm gonna make
this a bit bigger just so you guys can see
all of these options here. So here is our noise. And you can scroll
in or out with your scroll button or even hold control and the
middle mouse button. So click it in and then drag your mouse up and down to
compress this a little bit, because sometimes it's a bit hard to see what is happening. So you can also do that. Now, we want to play
around with the scale, which kinda elongates this. Because if you have
a very small scale, you can see as we get a very
general kind of animation. But if you make it nice and big, it becomes nice and smooth,
as you can see here. Now, for the strength, if we look at one of these
high points in this curve. So you can see that
this high points will actually reach 21.9. So 22 degrees around the x-axis. If you want it to
rotate further, you just have to put
the strength up. As you can see, that now
this curve will become longer and we get 70
degrees instead of 22. Also here, if this is too long and you cannot
really see it anymore, hold Control middle mouse button and then just move your mouse a bit down and you can see
that now our fingers a bit cramped down so we
can see it a bit better. This might be more of the
results that you might like. This is totally up to you, but playing around
with the skill, strength and maybe even
the offset might be in your best priority to
change this noise modifier. And this is how we
can get a lot of cool randomness with
just a modifier. We don't have to keyframe
anything of this. So I would like to do this for every singer eula
rotation that we have. So x, y, and z, Let's
just add a modifier. Noise. Play if the strength and the
skill and maybe even offset. Then look at the results
that you've created. So I might want to put a
bit more skill in here. Yeah, this already looks
better in my case. Then also the z unit rotation at modifier, noise, strength. And skill should again go up. Here we get this cool effect. Also here you might
think like, hey, these curves are a bit too much the same like
each other rights. You could just put the
offset on here and just make sure that the curves don't line up
perfectly with each other. So here, this actually
looks quite cool. So if you're happy with your
model and your animation, then I highly suggest you
go to the next video. I'll see you guys there.
16. Dispersion Metaballs: Rendering: In this video, we're going to create the material
for this animation. I will be showcasing
three different kinds of materials which all look
relatively the same. One will be the simple
class material. The second material is the
simple dispersion material. And the third material is to
advance dispersion material. Why do I do this? Well, class materials in general take long
time to render. And this is why
the first material will take the least
time to render. The second one will take
a little bit longer, but gives a visually
more pleasing material. And a third one will take
the longest of them all. But it also has the
best visual results. You can choose yourself
which one is the best for your PC and maybe the time
that you want to run there. I also want you to know that any other material will still look great on this animation. If you'd rather have like
a golden material or a rusty iron or a
food, whatever. Then please skip this
video and just run there with whatever material
you would like to create. Before we are going to
create any materials, we should create a
little studio and get some decent lighting
in the scene. So let's go to Shading. Here. I would like to go to my
front view, which is one. Then we're going
to create a plane. So Shift a and then
create a plane. Scale this up, can be quite big. And then, um, we'll move
a bit to the bottom. Now, I'm going to go into top, which is edit mode,
and then select this edge loop here at the end. Extrude this upwards. Because we've scaled this up, we should go back to object
mode and click on Control a while having this plane
selected and apply the scale, because sometimes it works a bit weird with certain modifiers. Then I'll make sure I
select this edge loop here and then go to the item. Therefore weights all
the way up and make sure I add a bevel modifier. Let's put the amount of a tire
plus the segments as well. But we need to put the
limit method at weight. So here we can just put this up. And then right-click
Shade Smooth. I would like to
create more segments just so it's nice and smooth. You can also add a subdivision
surface if you would like. But keep in mind that the
corners will get smooth. So select all of the
outer edges here. They click on Shift E
and drag all the way to the right to make sure
it's nice and sharp. This is a little studio. We should also make sure that our camera is in
the right position. So we've clicking one, we are in a front view, then select the camera, go to few, Align View and
align active camera to view. Our active camera jumps
kind of in the fume, but it's not perfect yet. So the x and the z
axis should be at 0. And then with the y, we can zoom in and zoom out if
you would like to. So around here should be fine. The next thing is to make sure that our lighting
also looks good. So if we go to our
Viewport Shading rendered, we can see that
it is quite dark. Now, this is because there's
just one light in here, which you might not
even use this one. So we could delete it at this point and just
see what we have. It is just a total gray mess. So let's go to the shader editor and change the
object two worlds. Here we can add an
environment texture. We can drag this environment
texture into the background. Now, we can open on a juror I also here you can
choose your own HDRI, but I'm going to use
the Kiara interior. Now. This Kiara interior has
a lot of colors to them, and I personally made
them black and white. You can easily do this with just adding an extra color ramp. I'm putting it in between the KR interior and the background, which makes it black and white. Plus, it also makes
everything a bit more soft. Now, if you go to
the front view, we can also create
our first material, which is the simple
glass material. We can select our metal balls, go back to Object, and just click on New to create
a new principled shader. This is going to be our
simple glass material. We can change this ECT. We just need a transmission
all the way to one and the roughness
to 0 or maybe 0.01. Awesome. So this is a very,
very simple material. And when we start to render, you can see that we
have a decent results, but the studio should
still be changed. This studio is actually going to be a nice and black material, so just make it quite dark. You don't have to go
all the way to black, but dark is fine and put a
roughness also quite high. We're still inside E V, So I would like to change
the render engine to cycles and make sure
we use the GPU. But you can see that our materials still
looks quite dark, isn't as bright as I showed
in this preview images. So let's select the studio. What we want to do here
is we want to go to the object properties
of the studio. Go to visibility. And I will turn everything off except the camera visibility. So now we get the
results that we like. And we can always add one extra light if you would
like some extra reflections. So just click on shift a
to create an extra light, which is going to be a point
light moved here to the top. And here we can use notes to make sure that
you've can play around with the strength. But I would also like to go to the object data
properties of the slides. And then we can also play
around with the radius, right? So a bigger radius gives us a bigger kind of
reflection on here, which I personally like
as you can see here. Alright, so those are
very cool reflections that you can add
to your animation. This already looks way better. The only thing
that we have to do here is also make sure that our little bubbles here have
the same glass material. So simple glass, and now we have small little
bubbles in here as well. So this is our first material. It looks quite decent. But if you want more
dispersion in here, then I would highly recommend you create the next material. For the next material,
I, first of all, I want to create a little
bit more space just so we can see all the
notes necessary. Now, I would like
to explain that the basic less material that we just created has no dispersion. This helps if the render times, but with the next two materials, we do need dispersion. So what is dispersion? When a light and a new medium, like water, it's path for band. And the larger the index of
refraction of the new medium, the more the light will bend. But when we send a white light is composed
of all visible wavelengths. Colors will disperse separately. This is called dispersion. This happens because
the wavelength of each color is different. Thus, they will disperse
at a different angle. Now you have the
option to create the simple dispersion
material or skip forward in the video and create the
advanced dispersion material. When we think about
the basic colors, we have, red, green, and blue. So let's create tree
glass materials with red, green, and blue. So Shift C, Shift V, shift, Shift V to
duplicate them. This one is going to
be all the way rat. This one is going to
be all the way green. And this one is going
to be all the way blue. We do not need the principled
shader in this case. Then we are of course
going to add these shapes together so the red and the green is going
to be added together, and this creates this. Then we're going to
create just another add shader and then join
these together as well, which gives us a nice
and white material. But what we're gonna do here is we will change the index of
refraction for each color. Because as I said before, the index of refraction per
wavelength is different. The index of refraction for
this class material at red, we will keep at 1.45. But the green one, we can change to 1.5. And this blue one we
can change to 1.55. So for each one of
these materials, we have a IOR
difference of 0.05. And here we can see
that the dispersion is happening already. Very, very cool. The thing is, we might need some extra light in
this background so the world to make
this pop even a bit more so maybe the strength of this background
should be 1.5, or even to make these colors
pop out a little bit better. Well, here we can
see that we get this very poor
dispersion technique. To showcase this material
a little bit better. I would like to hide
my metal balls. You do not have to do this, but I just want to showcase it. And I will add a sphere here with this material
applied to it. What we can see here is a simple dispersion
which we just created. So this creates a school
dispersion effect. This already looks better than just our normal simple
glass material, as you can see here, which has just no
dispersion, right? So this looks way cooler. But there is also an
advanced material. This at fence material, we'll take a long
time to render. So keep that in mind. If you do not want
a very long time to render than just stay with the simple dispersion
or even glass, right? So keep that in mind. Now. There's less material is
created by CG vertex. The total breakdown
and download of this material is also available
on his YouTube channel. It is a very, very well done video and YouTube
channel in general, South highly suggest
you also look at that. To create this new material, we need to create
a glass material, but we need to separate the
refraction and reflection. So just duplicate this or
create a new material. And what we want to do
here is we want to create a refraction and a glossy, which is our reflection
node, right? So glossy and refraction. Then let's add a mix shader
and join these two together. We can also join this to the surface of the
material outputs. As less we will
add a final note. This fact goes into
effect of the mix shader. So now we essentially
just have a glass shader. I forgot to explain that. You can also play around
with the glossy roughness. If you want a very shiny
and non rough objects you put it, of course is 0. Or if you want the opposite,
you put it to one. But you can even add an image texture with
a crunch node, right? So maybe some scratches in here, some flag that goes
into the roughness, and then we have some
scratches on here. So all of that is also possible with playing
around with this roughness. To modify the refraction, we will use a white
noise texture. So white noise, we can
set this to two D. And I would like a texture coordinate nodes in
here to make sure that the generated is plugged into the factor of
the white noise. Now, we will use a color ramp so we can create the
colors that are needed. Value goes into effect
of the color ramp, and the color goes into the
color of the refraction out. Now, the beginning and the end
stop should both be black. So just turn this to black. We will add three more stops, and now we will evenly distributes these
three stops to red, green, and blue with
the value of four. So select the second stop here. This is going to be
red and value of four. This one is going to be
green at a value of four. This one is going to
be blue at a value of four to evenly
distribute this, just click on this arrow
down here and click on distribute stops evenly. Now let's add a map Range Node. Let's connect the value of the white noise texture to the value of the
map range knelt. And the minimum can be set at
1.4 and the maximum at 1.5. This result will go into
the IOR of the refraction. And here we already get
this very cool effect. You can see that
these colors are starting to blend better. Possibly can get this
fishbowl effect. To make this a bit
more user-friendly, I would like to add
to value nodes. One to the top value node
will be the IOR of the glass, which can be set at 1.4. If you're using a
different kind of medium, then you can just
set that IOR for it. The bottom one will be
the amount of refraction. So we can start at 0.2 and
then change it to our needs. We should add these nodes
together if a math nodes, and you can see that
the math note is automatically set at
ad, so that is good. Both of these will
be added here. This value goes in the two max. The IOR of the class, which is the top value, will go into the two minimum. And we also need to connect
this one to the front. Now note, here we get
this awesome effect. So you can literally just play
around with the amount of dispersion that you would
like to have, right? There is one more
thing that we can add to make this
even more realistic. When we look at this
sphere here and get these dispersion
of these colors, we can see that every color is right now evenly distributed. That is not necessarily
the case in real life, because every single color
has a different wavelength. And the distribution of these wavelengths is not
in a straight linear line, it is more a curve. So if we just move
this a bit up here and recreate an RGB
curves, we've trow, It's in-between the
white noise texture and the map range right
underneath the color ramp, we can both make
them a bit bigger, just so we can showcase
it a bit better. Here with these curves, we can essentially say like, hey, I want more of this blue. So I'm going to create a curve that essentially shows
more of the blue, a little bit less of the red. So the red can
still go up a bit. We don't want like naan bread, but a bit more blue than
red is more realistic. And of course, you can
still make this value more. But here we can see
that it is a little bit more blue than red. And you can still play
around with these curves, but that is essentially
more realistic. So just look what you
think is interesting. But this is essentially
the entire material. So now you can start rendering and hope to
see your renders a very soon and make sure to also
check out the next animations. Bye-bye.
17. Pink Clouds: Introduction: Welcome to this video. In this video series, I'm going to teach you how to
create this amazing render. So what are you going to learn? You will learn how to create
this amazing looking clouds. Not only are you able to create any kind of shape of clouds
with this technique, but of course also
color and density. So you could even create
a little bit of a missed. Now, if we want to
make this scene, we also want to create
or put in some models. These three models
that you can see here are from the
botanic add-on. You can use this botanic add-on because there is a
free trial version. And this free version still has lots of free
models for you to use. If you want to use any
other kind of model. That of course,
is also possible. After we have created the clouds and imported the three models, then we can start to render
and composite this image. So how do we do this? Well also that will
be quite simple. As you can see, I have
two little sections here, the background and
the Render Clouds, and those will be combined. And that is everything
that you need to create this awesome render. So let's first start to talk
about the botanic add-on. If you do not want
to use this add-on, that I would highly
suggest you just go to the next video and start
creating this render. The botanic add-on needs to
be downloaded and installed. If we look here
in Google and you just type botanic blender, then you can see a link
to the blender markets. When you click on the link, you can see that there
are multiple options here to download. Now, we're going to use the
free version of botanic. If you purchase this, then you can essentially
download the zip file. You do, however, need
to create an account. Alright, so here, Edit, then you got to go
to Filter cards. And here you can
continue to check out, which then leads your
account, email and password. After you have done this, you will download the add-on, which is a zip file. Then you can go into Blender, click on Edit Preferences. And here we can go to add-ons
to install our new add-on. The add-on in my case is called botanic underscore free, 6.60. This could be different for you depending on what
your downloads. But right now we select it
and click on install add-on. We have installed this add-on, as you can see down here, but we still need
to activate it. So if you go to this
little search bar in the add-on section, we can search for
both there, Nick. Here, you can just take
this on and wants a strict on safe preferences
and click away. Right now, we can just
go here, polygon IQ. And here we can
spawn our assets. Right now we have the
category coniferous. This is a type of tree. You can see that there are
different kinds of threes, because this is
the free version. We do not have all of
them available for us. So the grayed out versions, you essentially need
to pay for them. These, however, are free. There are also
different categories. So here, in this case
we chose Tropical and then click on Okay to
insert this in your scene. So now you know a little
bit of help authentic verbs that are way more options
that you have here. You can also import grass and
already randomly generated. But right now we'll
just start with a simple tree and we will
see what the future brings. So if you want to continue, please jump onto the next video so you can start to
create some clouds. I see you guys there.
18. Pink Clouds: 3D Modeling: So here we are with a
brand new blend file. And the first is I want to do is put the camera in position. So let's delete this cube. Select a camera, go to the
front view, which is one. Then click on View and align
active camera to view. To check up if it's really
good, like in position, you can always go to your
item here while having this camera selected and
check the x and the z axis, there should be at 0 plus only the x-axis should
be at 90 degrees. From here, we can start
building our clouds. Now, before we're gonna do that, I would love to show you how
these clouds work and how we can create any kind of
shaped cloud that we want. So what we can do Shift a, and we can just choose
a fun yeah, object. So let's do this monkey, which is the Suzanne hats. Then we're going to
click on Shift a again. And here we will
add a volume empty. Let's go into the modifiers
of this volume empty. And here you can
see that there are only three kinds of modifiers. We're going to use
the mesh volume. And here we can select
any object that we have. In this case, Susanna,
the monkey hat. Then we can hide our object. And here we have
our cloud. Susanna. Awesome. Right? Now, if you go to
random properties, you need to make
sure that you are in the right render engine. In this case, I would highly
suggest you go to cycles and use a GPU because that
is just way better, especially when working
with volume metrics. Then you can go to the
random viewport shading. Here we can see that it's
kinda looks like a cloud, but not really, right, so we need some better
lighting in here. We can easily add
some extra lighting. When we go to shading. When you are in shading, make sure you go
to World and add an environment texture here and environment texture and just
drag it into the background. Now, we can open this, and here we can open
any kind of HGRI. Why huffing is selected. Make sure you go back to the
rendered viewport shading and maybe go into
the camera view. Right here we have
our little clouds. I might want to make this
background transparent. And if you also want to do that, you can go to the
random properties, film and then transparent. Now we can focus on this cloud. So let's go back to the
modifier properties. And here we have
these options here. You can play around with
the density already here, but I personally like to do
that inside the materials. If you create a new
material for this volume, you automatically get a
principled volume nodes. And here we can change
the density also, right? So that's actually quite cool. We can change the color, we can change density, or you could even
do temperature, blackbody intensity,
and a mission as well. But I will leave those
for something else. Those are more for if
you have like flames, then we have a certain emission. But now we just have
a normal density and we can choose our color. So what do we have here
is the monkey head, but you can see that it's
quite square and blocky. That is because our mesh here should have
a higher amount. So if I do this times four, you can automatically
see that we get way more detail in
our volumes, right? So that is actually
very important. So I could do this
times two again, and it will get a higher
and higher detail. So this is quite important
later on as well. You should keep it quiet high, but keep in mind, putting gets higher and
higher will of course, require more off your
computing power. So it might make your PC slower and of course
make renders longer. So now that we know how
to create some clouds, we can actually create
the cloud shape that we want because we can use any
shape that we would like to. And the cool thing about this
is that we can still use the same volume section that
we have created before. So this Suzanne hat, if we create now a UV sphere, for instance, I can
go to the volume. And then instead of
the Susanne had, I can select the sphere. And the sphere becomes,
as you can see, the volumetric kind of material. So let's delete the
sphere and Susanna. And now we can start
to create the clouds. So let's just change this
one-on-one to 3D viewports. So in the top one I
have my camera view, and here on the bottom, I can just play around
with my shapes. So what is a good
shape for a Cloud? Well, because I want
a big cloud seen, I actually want to use what
is called metal balls. And if a metal ball, you just have a sphere, as you can see here, and it has a little circle around it. If we add another
metabolic with Shift D, you can see that they can
interact with each other. So this is a very handy way to actually create some
cool looking clouds. Here. I'm just going to my
front view for right now. And just select these clouds, can scale them, upskill them
down, move them around. You can see that you can make it quite interesting
looking shapes. So this just playing around with these
metal balls for right now until you get a decent
looking cloud shape. So if you're happy
with your shape, we can start to look at
the metabolic themselves. So here we have a metal ball. If you go into your object data properties of
the metal ball, we also have a
certain resolution. If you put this
resolution lower, then you can see that it
becomes more detailed. It does, however, create
some more geometry. You can see the phase
is down here, right? So we were at point for this, we're like 3 thousand phases. If I put it lower, you
can see that it goes even 200 thousands or
even in the millions. So it depends a bit
on you're seeing. In my case, it doesn't
change that much, but it's some cases
it could actually be quite an extreme
difference, right? So play with around
with the resolution. Then you can convert it
to a mesh if you like, the resolution that you have. So 0.4 seems to
work okay with me. And then I can select
one of the metabolic, go to Object, comfort
and uncover to mesh. So now this is a mesh
instead of metal balls. However, as you can see, this geometry is kinda weird
and it's not really perfect for some displacements which
we might want to add, right? So how do we do this? Let's go to the modifiers, click on Add Modifier,
and choose decimate. In the decimate modifier, we can essentially choose
to triangulate everything. And if you go on top, you don't really
see a difference. But if you go to Z and
into wireframe mode, they can kinda see
what will happen. So we need to put
the racial lower. And if I put a ratio at
around points, move 0.6. You can see that first of all, the main reason why you use
the estimate is sorted. We can put the face count lower. The lower I put this ratio, the less geometry
essentially will have. But you also risk of
losing certain shapes. So you don't want
to put it too low, but we want to put it a bit lower just so we can actually, yeah, I have some decent
geometry for some displacement. I'm going to put it at maybe
0.5 and then apply this. And if I now go into top, you can see that all of this
geometry has been changed. Awesome. If we now subdivide this, you can see that we have a
decent, like it's not perfect, but a decent geometry
for the displacement. So let's add a displacement
modifier as well. Here. Once you use a
displacement modifier, we essentially need to
apply a texture to it. So if you click on New and you can find this
texture in here. Or if you just click on here, it also jumps to the texture. Then we can essentially play
around with the texture. Right now the type
is imaged or movie, but we want to change
this to clouds. And here we can see
that this black and white or gray scale map is now influencing
the displacement. And to make this more
cloud-like outbreak, to put this size way up. And here you can see
that we get more of a randomness in our clouds, which is what I actually want. If you're happy with
your displacement here, you can go back to
your modifiers and you can also play around with the strength if
you would like to. But as you can
see, this texture, because rename as this place. This texture can be found here and we can always,
still edit this. That is the kind of strength
of modifiers, of course. So this is now our base model. And this base model
is not a volume yet. So let's go to the
Volume object and select this new clouds or MBO
as our new volume. We can hide this metal ball from the viewport and the
render because we're just going to focus on the volume anyways here and we go back to the rendered
viewport shading. You can see that we have a way cooler kind of cloud shape. This cloud shape
is however decent, but I would like it to look more like a cloud
that it needs to look more fluffy, less full. And of course, the voxel amount needs to be changed as well, but that can all be
done quite easily. So the cool thing about this
volume empty is that it has modifiers and we have a
volume displaced modifier. It works the same as a normal
displacement ball of fire. But in this case, it works
with the volume metrics. So if you click on view, we can again go to this texture. And this is going to be again, a nice cloud texture. Also here, I would first
like to put the size way up so we get some more
random displacement in here. Go back to the modifiers. And here you could also play
around with the strength. In my opinion, one
displacement or about we actually have two
displacements is not enough. So I would like to
add in another one. And with this displacement, we're just gonna go a little bit lower in the size, right? So maybe this week
is going to be 0.5. And you can always put the strength and
maybe a bit lower. But here we have more
and more randomness. So as you can see, this cloud is coming together piece by piece. There are some things that
needs to be changed still, but it is already
coming together. The next thing that I would
like to do is go back to shading and make sure that the density is
way lower, right? This is just way
too dense. Maybe. Start with five. Actually looks quite cool. Color also want that to change a bit more of a light pink. Here we already are starting
to get a decent seen. Also as you guys already
know this background. So the environment
method we choose has a huge impact on how the
scene actually looks. So I would highly suggest
you go to Poly haven.com. And here there are loads
of free edge your eyes. You can just download them
and put them in your scene. For a kind of a Clouds, I would highly suggest you go at least to outdoors, right? That makes sense. And I feel like scenes where
there is a big sun here, like a big focal point of
light, works the best. Otherwise, you don't really get any nice shadows in
the clouds themselves. And also once you have
an ace your eyes. So let's say I have
this Roy Park, HGRI, the position of this
agent or I also matters. So right now I made
everything transparent. But if we look here, we can always add a texture coordinate from
generated to the mapping nodes. And here we can rotate this
HDRI and this rotation, as you can see, thus a
lot through your scene. So you can see that
in the back it starts to rotate around where the light or the sun is positioned is quite important. You should also not be afraid to maybe add even an extra light. This light that we have here is just a normal point
light, which is fine. But if we change this
to a nice sunlight, we of course do need to
put the strength down, so let's put it to maybe five. I'm going to use notes. And also the position of this lamp or light
is quite important. If you put it in a bag, we get a very nice little glow or rim lights in the back
as you can see, right? So with this on or off, you can see that also
with extra lights, you can make your, your
clouds pop even more out. Lighting is very important. Of course, your
materials are important, so your density, the colors that you want
your clouds to be at. And of course, the shape
of the clouds themselves, which we did with the
metabolic themselves. Then we displaced
the metal balls. Then we made this a volume
inside the volume empty. Here we added two
more displacements. So that is why we get all
of these cool shapes here. So now that you know how to create a decent looking clouds, we can go to the next video. In the next video, I'm going to teach you guys
how we can add some models to the scene using the
botanic add-on. And then we can
start to render and composite this image.
I see you guys there.
19. Pink Clouds: Compositing: So now that we have
the clouds ready, we can also insert
the three models. If you click on n,
You can see that this little section comes up and we want to go to polygon. You spawn assets. You can see that we have
multiple categories and I want to choose
the tropical kinds. And then just the first one. Click on Okay, and here
we just added a tree. It is that simple. If we go here into
the 3D view port, we just have a little
bit more control. I will scale this down. Here. I will go in my camera view so I can see how high up we can go. This actually seems decent. I want to rotate
it a bit as well. And then duplicate your tree. Move it over, make sure you, by the way, rotate this around. Otherwise you just have an immediate duplicate next to it. It just looks very weird, so make sure you
rotate it around so it looks like an
actual other tree. Here. I'm also going to
play around with the scale a little bit. Here we have our two threes. If you're now not happy
with your clouds, you can, by the way,
still change them. So let's say I want to
see more of this tree, but putting it higher,
it's not really a solution because then
I can't see it anymore. The thing is, you can
just start to edit your M ball here and that will automatically change
when your volumes. So you can just go to the N bar. You can go into sculpting. And now we can
literally just sculpt the way some pieces
that we might not want. So let's say, I don't
really like this part here. Alright? Or maybe I want
some extra here, right? So all of this is possible
if you go back to your, let's call it the shading, put your volume on hydro m bar. You can see that automatically
it has been changed. Cool, right? As we
have some cool shadows here and we can see
more of the tree. It is very editable
even later on. So even just before rendering, you can still
change your clouds. To render this, we need
to go to our volume. And here we want to play around
with the foxhole amount. So low Fox or amounts,
as you can see, creates a very blocky
and weird results. So we want to of course,
make this higher. Maybe like 600 voxels will do. But it totally
depends on how good your policy is and how long you want to
run there as well. Now, if you go to the
random properties, we have multiple things that
we need to take care of. If you did not make the
background transparent yet, then now it's the time to do, because we do need a
transparent background to help us with the compositor. So let's go to film and
click on transparent. Then if you go here
to the volumes, we also have a
certain step rate. Lower step rates are
higher-quality volumes. So you might want
to put this at 0.8. But keep in mind also, this does have a huge
impact on your render time. So lower is better, but it will make your
random times way longer. And as last, we have light
paths and enlight paths. You can see that volume is
automatically set at 0. Let's put this at four, so it's the same as the
diffuse and glossy. Now when light passes
through volumes, it will actually
also start bouncing. The only thing you
have to do is to click on F 12 to start to render. So this is the final render. I'm going to save
this and then we can open a new blank file and start to composite in
there, image safe S. So here we are in
a new blend File. Let's go to the
compositor and use notes to start composite image. We first need to delete a random layers and
add an image nodes. We can connect this
to the composite and open our previously
rendered image. Now, if you hold Control and Shift and
select this lesson, you can see that we end up
with our render, right? So it's essentially just
shows us in the backdrop. V. We can zoom out. With Alt V. We can zoom in. Then what does the first
thing that we see? We have cool clouds and
we have a decent seen, but we don't have
any background. So it just looks weird. We can add a very simple
and easy background with just adding an RGB node, putting this to maybe to blue, and then using an Alpha over nodes and combining these
two images together. Now you can see that
we have a backgrounds, but these corners
here are quiet, weirdly and ragged, right? These edges, if you
click on comfort, pre-multiplied, this goes away and we have a decent
looking scene. However, if you want
your background to be even more interesting, I would suggest maybe
adding some extra clouds. So in my case, I actually
did not use an RGBA node. I actually used another image. Note, here, I opened
a cloud texture. I got this texture from
a website called Pexels. You can download
them here for free. And you want to look for a grey, black and white image of clouds. Alright, so what you
can do is you can just open it here and then we can
use this as the background. However, there are some
problems that we have here. First of all, we might
want to change the size. It doesn't really matter
per se with the render. Because if I would render this, you would still see that it only ran this the part
that we want anyways. But because this
is so zoomed out, we might lose some detail
in the background. But if a transform nodes, we can just put the
scale a bit lower. And now we have some more
detail in our image, right? So if Alt V, We can zoom in, and here we have some
better looking clouds. But it looks quite
dark and dull, right? All these nice pink little
crowds that we have here. This doesn't matter
if the background. So how can we change this? It is actually quite simple. We just need to move this
a bit backwards and use a mixed node in-between the
transform and the Alpha over. We can put this to multiply, and here we can
change the color to just a nice and blue color. So this is one of the
ways that we can do this. But the dark blues or
just a bit too dark. So adding an extra color ramp in-between the transform and
the newly added mixed nodes. Here we can essentially change the darkness
of these parts. So if you select
this dark handle here and just make it
a bit more bright, you can see that now everything what does
dark is brighter. So this automatically
will also impact the colors as you
can see here, right? So we can put this a bit brighter and at essentially
will look like this. This already looks better. I personally thought that
even this was a bit too doll. Maybe I want a nice gradient
from another color. So if you use a color ramp, you might think like, hey, I'm just going to
add a color ramp. Change this to nice and blue, and this one here
to maybe a purple. The problem here is that
these just get mixed, right? There is no gradients
and we also do not have a gradient nodes. But if we just add a texture nodes and use
the color into the back, then add actually a texture. So we need to go down here, create a new texture. We can use blends, and this blend texture is
essentially a nice gradients. So now that you have
created this texture, you can click on
here in this node and just select this
texture to be used. Now, we can change
this texture as well. You can do it down here
in the colors with the brightness,
contrast, saturation. But you can even change the orientation because
right now it's horizontal. You can change to vertical. You can even change
it from regression, from linear to maybe spherical. Write a lot of things
can be done here. Let's actually keep it
at linear for right now. And I'm going to put
it at vertical ends. But you also can do, you can still move
these handles around. If I want a little
bit more blue, I just moved this blew up. And here we get this very
cool kind of change in color. So that is one way to make the
background more appealing. Now, we also do not want this
background to be too bright because then there's
no focus anymore on our nicely created clouds. So just keep that
in mind as well. There are lots of things
that you can do extra here, but if you're happy with it, I would highly suggest you just select all of these nodes. Click on Control J to
join them together. And now when you
click on nodes, here, we can change this label so we could rename
it to background. And here we have it nicely
into its own little section. Here for this
particular section, which is our nice clouds. Here we might want to
add some ways too, edit the clouds themselves. So personally I might
like to use a D noise. I love to the noise
my images because, you know, we all hate noise. The thing is that this node
is actually quite slow. So if I change anything here, it still needs to redo
the denoise every time. I personally like to add it, then select it and
click on em to mute it. It will still be in the scene, so you can just
unmute it at anytime, but it doesn't need to
calculate it everytime. You will maybe change a color. Just make sure
before you start to render that you
unmute this again. Now, I want to add
a filter nodes. And in this filter note, I just want to soften my image. So if we look at
these three is here, you can see that without this filter that they have
this kind of sharpness. And with it on, it
looks like this. So you kinda want to
find a middle ground. You don't need to soften it
all the way to one, right? So maybe 0.4 could be fine. Then I want to
duplicate this node, which is a filter notes and
just use a box sharpen. Now it's sharpens
everything again and makes it nice and sharp
around the edges, but we don't want to
overdo this as well. So maybe 0.15. This already looks quite decent. If you want to change
any of the colors, that is also totally possible. You can use hue and saturation. You can use the color
balanced node as well to change the colors here a little bit or
balanced the mouth. All of that is possible with
those kindness with notes. And maybe at the end, you want to use an RGB curves. Here. We can just make
a nice little curve here to make everything pop
a bit more awesome, right? Also this can be joined
together Control J, and this will be our clouds. Unmute the denoise nodes. And here you want to make
sure that your last node is connected to the
compositor as well. And then you can start
to render with F2, which will not take that long. And here is our final
rendered image, Derek. Alright. So I hope
you guys learned a lot from this and
see that actually, once you start to get
used to the compositor, it actually makes your
image is way better, but also it's not as hard as it might look
in the beginning. I hope you guys learned
from this and I see you guys in the next video.
20. Planet: Introduction: In this video, you
guys will learn how to create this
awesome animation. However, you can also
just rather a still image because this animation does take a long time to render. And to be honest, it is just a, you know, 360 degrees rotation. So the animation is
not debt heart, right? So just a still image render. We'll also do. If we look at our blend scene, you can see that it is
actually quite simple. Now, if we click on 0, which is the camera view, and I'm just going to
only focus on the Earth, the atmosphere, clouds, and also the sphere in
the back can go away. Then we can see that we just have a simple texture, right? Then we will have
some clouds on top, which looks like this. And of course we have
a nice atmosphere with a volumetric material. Now, as last, we have a
light here in the back. And if you look at this, you can see that
it doesn't look at all like the random
that I just showed you. But when we go to
the compositor, you can see a whole
different kind of render. And the composite
that looks like this. It is quite messy. We should clean it up a bit, but I just want to show you
that all of this awesomeness is just possible in a composter
inside Blender itself, we do not need any other program in this particular video. So if you guys want
to learn this, then I highly suggest you
go to the next video to create this awesome
looking around there.
21. Planet: 3D Modeling + Materials: In this video, we're
going to create the Earth, clouds,
and atmosphere. You will create the
models which are very, very simple, but we will also
dive into the materials. Let's get started. The first thing that we
want to do is delete this default cube and we're
going to add a UV sphere. This UV sphere is already the
Earth model. Very simple. So just rename this
model to Earth. Then. Let's add a subdivision
surface modifier. We can put the levels
viewport to react to. But in the render, I
would like to go a bit higher to maybe
even four or five. Right-click Shade Smooth to make everything nice and smooth. Let's go to Shading. Click on New. And this is going to be our earth materials, so we can just rename it to
earth or earth material. And then next thing that
we wanna do is we want to start and add our
first image texture. So just drag this
in, click on Open. And here we can go
to Planet to add the Earth Day map texture. You can get this texture in
the files that I provided, or you can go online and go
to solar system scope.com. And here you find all the
textures that we need. We by the way, do
need all of them. Just download all of
these five textures. I personally use the eight K, but of course you can also
download the two gate if you want to know. If you select this note, you can click on Control T. So the texture coordinates and the mapping node
will also be added. To actually showcase this
material a bit better, we first need to go into
the render engine cycles because that is what we're
going to run the width at the end, the device. I would like to
set it to the GPU. If we go to the camera view, which is 0, go into the
rendered viewport shading. Here you can see that, yeah, the lighting looks a bit
different, which is good. But the light that
we have doesn't really look like
I want it to be. So I would first like to
move my camera a bit closer. So go to View, camera to view. Now we can just zoom in to
move our camera a bit closer. So somewhere like this, I think will look cool. Yeah. Then make sure you
take it off again because otherwise you
might move it by accident. And now what I want to do, I'm just going to change
this bottom editor very quickly to
the 3D few parts. Just so we can move
some stuff around, then select the lights. We want to change the slides. So let's go to the object
data properties of the slides and change
this from points to sun. Right here we can
see what it does. It changes to sun, which creates quite a different
kind of lighting, right? But it's way too strong. You can see that the
direction that we created almost
loose white, right? So let's put the strength
at ten for right now. Now, we want to put this
light in a better position. So in this top one,
I'm going to like to go to the camera view. Here in the bottom. I can just move the
slide around, right? So I would like to have
a nice shadow here, something like this, and
a nice highlight here. So this already
looks kind of like, I want it to look awesome. Now, we can change this
back to the shader editor. So here shader editor. And I like to do this because if we play around with
all of these notes, it's a bit easier to see
it on such a huge space. Also for the slide, I would like to use notes. And here we can of
course play around the emission and
strength as well. However, I want you to keep
in mind that this light, which is the sun, has
just a white color. For a more realistic color, I would like to
add a black body, drag this color
into the emission, then change this temperature. Because right now
the temperature essentially creates the color. We want to put this at 5800, which is more
realistic to our Sun. Last thing that I wanted
to do is go here into the world and put this
color all the way at black. So now we have just this
little earth in space. Very, very cool. Let's go back to
Object and select this earth to finish
our earth material. We can just duplicate it, this node, and then we can
open the specular map. Let's drag this factor
of the mapping node into this image texture and put
the color into the specular. Make sure your color space
is set at non-color, right? Because this is a
gray scale map. Because this is a
gray scale map, we can essentially see it
as kind of a mask, right? And what we can do if this
mask or what this mask does is the black
parts of this map, which is the land,
have no roughness, but we can still change the
roughness of the sea, right? So that is very handy. I might put this at
0.6 for right now, we might change in the future. Then the last map that
we need to create for this particular part of the
material is a normal map. Normal map. We can drag this
into here as well, is also a non-color
data for color space. And this will essentially
show some high detail. To combine this normal map, we first need a
normal map, nodes. Right? Now we can put the
color into here and a normal into the normal of
the principled shader. Awesome. So what does this do? Well, essentially
creates hide details, as you can see here. And we can play around with the strength to make
this more noticeable. I might put it at 1.5. And this is essentially
what we end up with. It still looks quite messy, but it will start to
look better and better. And of course, most
of the color of this render will be done
inside the composite there. We just need to add one
more image texture map. So I'll just open this
Earth Night map texture. And we're going to use
the emission of this. So we can just combine
a mapping nodes into here and then add
a mission shader. This color can go into the
color of the emission shader. And we just need to
mix these two shapes together with a mix shader node. So just this
emission goes to the top one and a principled
shader goes in the bottom one. And then we can just
combine them both. And here you can see that
in these lighter areas, the emission is not
that noticeable because the light is essentially
already shining on there. And in the dark areas
it is very noticeable. So I personally
really like that. Let's now add some clouds. The only thing we have to
do is select this Earth. Click on Shift D
to duplicate it, and scaled a little bit
up with your S key. Now, we can rename
this to clouds. And if this material I want to delete a material
and click on New, then also this material
can be renamed to Clouds. So keep in mind, the
Earth is not gone. It's just that the
clouds are now over it. How do we create
these cool clouds? We literally only needs
one image texture. So open this Earth
clouds texture. Click or Control T to make
sure that the texture coordinate and the mapping
nodes are also applied. And here we just inserted
a nice cloud texture. As you can see, this
is a gray scale map, so a black and white map. And you guys already
know that this can also be used as a mask. So why do we need to notice? Well, some parts here, I want to have transparent
and the outer parts, I want to be nice and
wide, just like clouds. So if shift a we can add
a transparent shader. Then use a mix shader to mix the principled shader and a
transparent shader together. Then we just have to use this
texture as the mask, right? So put it into the fact
of the mix shader. Make sure the color space
is set to non-color. And what you could do is
you could keep it at this. Or if you've got more control
over the transparency, you can put a color
ramp in-between here. Play around with that, right? So it's quite simple
and quite intuitive. And that's how you can play around with the size
of these clouds. The next thing that I
would like to add is also some height detail. So with this texture here, we can also create
high detail because it's a gray scale map, right? So if we just use a bump nodes, put the color of
the gray scale map into the height
of the bump node. And then put the normal
of the bump node into the normal of the principled shader. What this bomb load
does, as you can see, it creates a bumpy
area depending on the whites and
blacks of this image. So if we look at our
clouds right now, you can see that
they are very bumpy. In this case it's
a bit too much. So you can just go
down and strength here to make sure it's
not overwhelming. But this already
looks quite cool. So maybe 0.07 sovereign
debt gives a decent result. That is essentially
how we create these cool clouds
around our earth. The next model is going to
be our atmosphere. Also. This is just again,
a sphere, right? So you can just
duplicate the clouds. In this case, I want to hide the clouds and hide
the Earth right now. And maybe scaled
a little bit up. So this is going to
be our atmosphere. So let's just rename this. Also delete the material
and create a new material. It can rename this as well. So what do we do
if the atmosphere, the atmosphere is going to be
a follower metric material. So we do not need this
principled shader at all. We actually will use a
volume scatter node. And we can put this volume
into the volume here. So this does take
some render time. If you want to put
your render time lower a don t want to
render like volumes, then I would highly suggest you just don't do this, right? It doesn't make that
much of a difference. If you want to have like a
little eye for small details, then I would of course at this. But yeah, that's just
all you need to know. It does add some
extra render time. Now, for us volume, we do want a nice
kind of a blue color, but we don't want this very
sharp fall off here, right? So we need to create
some notes to make sure that the follow-up
is not that sharp. It is actually quite simple. We just need a gradient texture and we can put this grain
texture into the density. Then with Control T, we instantly add a
texture coordinate and a mapping nodes. However, the gradient texture
should not be linear. We actually wanted at spherical, but it's not right
in the middle. So let's make sure that in
the texture coordinate, we're actually using objects. And now it's nicely
into the middle. So we can change the size of
this with the scale here. But the thing is, I
don't really want to, you know, put this attitude and aptitude and this is too
hard, it doesn't fit. So maybe 111, I don't want to keep doing
this over and over. So what I'm gonna do
is I'm going to grab a vector math change
to add to scale here. And now I'm going to
put the factor in here. If you put this vector
just all at one, you can literally play
around with this skill and all of them will be scaled
up at the same time, right? So it's a bit easier
to work with. And that is essentially
your material. If you want a little bit more. Control over the sides, you could also add a
color ramp in here. With this color ramp, you
can also play around with these corners if you want
it to be. More often. Even the software fall off. You can use ease. You can pull these together, all of that as possible. But as you can see,
it is sometimes a bit hard to see
what's happening. So make sure you put your
clouds and earth back. And now you can play around with the atmosphere and see how far you want the atmosphere
to actually reach. So again, this is the
scale of this atmosphere, so the scale of that sphere, but also how you
play around with this color ramp and also
the skill in here, right? So it is not that hard. I think I have one here. Put this one a bit
closer and you can always do a little
pre-render, okay? So that is always that
there's no shame in doing a small little pre-render to
see what is happening here. That is the atmosphere. So very, very simple. As last, we only want a nice bright star
or sun in the back. Also, this is just going
to be a UV sphere. Now, UV sphere can
be quite small. Right-click Shade Smooth. Then we just put it
somewhere back here, maybe a bit further back here, new material, there's
gonna be a star, so we can rename this to star. Material can also be star. And this is literally
just going to be an emission shader. Let's put it right
now, or maybe 20. But later on we can see, yeah, if we need to
change this strength, because sometimes in the
composter you can see like, hey, I actually want more light in here because this has gone to create a whole cool
bloom that we could see. And if you've got more or less, we can always go back
here into the material. So this is how we create all
the materials and of course, all the 3D models. In the next part,
I'm going to show you how we can
render this and play around with the compositor to create a more pleasing effect. I see you guys there.
22. Planet: Compositing: In this video, we're going
to finalize the render. This means we need to render
it and then jump into the compositor to make
a more pleasing image. So let's first do a
little pre-render. If I click on F2, you can see
my pre-render jumping up. So if we look right
now at this render, I gotta be honest, it
looks quite ugly, right? We have a weird background
which is just black. This star here doesn't
make any sense. It's just a white sphere. The Texas look decent, but yeah, it doesn't
look that good, right? And even the atmosphere
looks kinda map. How do we change all of these? Well, first of all, we want to make sure that the background is going
to be transparent. So let's go to the
random properties, scroll down to film and make sure you click
on transparent. So now if I would render this, now you can see that this
is still transparent. So what next for
the compositor is actually quite handy if you
separate certain models. So in this instance, if we have this star, we want to put some
effects on it. And we only want those effects to happen to the star itself. So we need to separate them. And there are multiple
ways to do this. But in this case, we go to
our few Layer Properties. Here we have passes data. Here we can actually
click on object index. And if we now go to
a specific object, so let's go to the star. We can go into the object
properties of the star itself. Go to relations. And here we have a bass index. And with this pass index, you have the ability to kinda separate certain models as
a mask in the capacitor. Let's say the star is going
to be the best index one, the earth is going
to be number two. Clouds is three. And I don't think the
atmosphere would work, but we could make it for just to see what is
going to happen. So now if you render, nothing will necessarily change, but we will later on see the best index in
our composite there. So what else do we
need to change? Well, you could take a
quick look at your clouds. Are they too far away
from this earth, right? So then you need to scale the
clouds a little bit down. You can also take a look
at your atmosphere. The atmosphere in our case, is a volumetric material. So here, of course you can
play around in a material, but if you go to your
random properties, you will also see a little
section which has volumes. And in the volume you have a viewport and step
rate in the Render. Both of these are step rates
and the lower you put this, the higher-quality
your volumes will be. It doesn't have to be
high in this case at all because it's quite
a simple volume. It is not like clouds or smoke. But putting this lower will
get you a higher result. Be careful though
it of course will take longer to render. And then as less what I
want you to look at is, of course, your lighting. Your lighting is very
important and the lighting, you can never change later on. So we can of course change
our brightness contrast, but we cannot move our light around once it's
already rendered. So if you like the position and the strength of your light, then I would suggest you go and start and render out
your first image. Also with rendering
out your first image, you need to keep a
few things into mind. Of course, we need
to be in cycles. I personally use the GPU because my GPU is just
way better than CPU. The output, I also put my resolution at what
I want it to be. So 1920 by 1080. And here the frame rate, we can always change
it if necessary. So I personally like 30
in most cases because it's just kind of what we
see on TV or movies TV, a lot of them are 30
frames per seconds. File format is also
quite important. So it keeps a lot
of colors intact. So I would like to
choose the tiff and you can even go to the
color depth 16. But yeah, in this case,
I'm not gonna do that and we'll just start out
with our first render. So click on F2 and just
let it render out. This is our finished render. We can minimize this and
go to the compositing tab. Here we want to use notes. You probably already know, but this is the
random layers and this is the currently
rendered image. If we hold Control and
Shift and select this node, we have this viewer, so we can actually see it in
the background. Now, this random layers has
an extra little section here, which is the index obey. These are the indexes
that we have created from every single
model that we have. We can mask this out. Now. We want to create a sun flare. And we can create this with multiple blur and glare nodes. It is actually quite cool. But we first need to
mask out this sun. Because if just
use a blur nodes, you can see that if we
just blur this out, then everything will
be brought out and not only the Sun, right? So that is not what
we want to do. We need an ID mask and this will be connected
to the index obey. Then what we can see is
this ID mask has indexes. And if you remember correctly, index number one was the sun, index to Earth, clouds,
and the atmosphere. But as I already thought, the volumetric materials
don't really work yet. So the index for
is really nothing. So let's keep it at
sandwiches index of one. And here we can start to play around to actually
create that cool effect. The effect is quite simple. We just need a nice blur node. This helps us blur out this very sharp sun or
startup they have right now. You can just put
these pixels higher. You can do this
in multiple ways. You can just do
it with Gaussian. You can even do fast Gaussian or put this at relative
and half a percentage. But I think right
now the x and the y, just putting the pixels
higher, actually works decent. But if you put these pictures
higher and blow this out, you can see that this whole
image gets darker, right? We do not really have a
very bright star anymore. If however, we create a color
ramp and put this after, what you can see is if you
put this handle to the left, we get a brighter and
brighter blur, right? So this is kinda what
I want to achieve. Now we can finally
start to think about the streaks of this flare. So let's add a layer nodes. And we can put this
after the color ramp. And we have this glare node. We have a certain
amount of streaks. So there are a lot
of options here, but the streaks are essentially
not showing up yet. That is because we
first need to play around with these options. First of all, the threshold
is very important. The glare field will
only be applied to pixels brighter
than this value. So if all the pixels are darker
than this one threshold, you will have no streaks, right? So let's put this to 0. Right now we can see
some streaks coming up and the iterations are actually
quite important as well. So let's put this at five. Then. The fade is how much
they will fade out. So if I put this maybe
2.95 instead of 0.9, you can see that we get some
very cool fading effect. And the higher you put this, the longer these streaks go, then the amount of streaks are also quite
important, right? So if I put this 216, we get a quiet of a
different effect. And the last two things that
we have to play around with, or the mix and the
color modulation. The mix mixes the
original image, which is just this mask with, in this case nothing. So what that does is it kind of fades
everything a bit out. So there's mixed could
be set at one which now shows this processed
image totally, right? Which is, of course these
streaks mix at one. You can also play around
with the color modulation. This creates a very cool effect. So if you put it to move 0.6, you can see that we get
some colors in here. You don't want to overdo this, but 0.6 or 0.7 might add a little bit of extra
touch to this image. So this is one way to get
a beginning kind of flare. Another way would be
adding sun beams. If you select sunbeams, we can see here, we can put it also
in the ID mask. We can see that nothing
really happens. And that is because the array
length is still set at 0, you need to put
this ray length up. So let's put this to point to. Now we can see that's the, yeah, in the back that we
get a ray length. And this length is being created from this cross points, right? So if we put this cross
here where the sun is, then we get a very
different effect. So you can just
move this around. Let's put this here. And here we can see this
very cool Sunbeam effect. Now, we can easily join
these two together. So just as a mixed
node set to Add, then puts the glare
in here and the sunbeams in the bottom
one will give us. This effect is
already starting to look better than
another cool effect. Could be if we grab
this glare here. Let me put some beams down, connect the blur to this glare. And this glare will just
have to streaks here too. Then let's put the
fader bit higher. Let's add another blur note
and put it F that is glare. So there's a little bit messy, we'll assume clean it up. But what we can do with
this blur node is just puts the X a little bit higher to just smooth
it out a bit more. Now if we join all
of these together, so just add another add nodes. And I will just
join this one here. And then the sunbeams goes
after with this add nodes. Now, if we combine
them all together, we get this cool effect. The only thing that we
have to do now is combine this together with
our original image. So how do we do this? Well, it is actually
quite simple. We just need another
add node here and just add this image
with our other image. And here we have
everything together. Another thing that
I want to talk about is changing colors of a particular part of this image. So let's say the sun is
normally not really just white. We could add a
color balance node. Let's put it here. And here we can play
around with the colors. So the color balanced
node does it per section. So what it essentially does
is lift is for the shadows, gamma is for the mid tones. And here we have gain, which is for the highlights. So here we can just
literally just pick a color. So if I put this right here, we can see that this color
is going to start to change. Very cool. Now, I see that my blender is
a little bit slow, so I might put this
too fast caution. This one as well. The streets too low. This will change the
way that this looks. But later on, I'll go
back into it again. But it's just a bit slow, so that's why I just put
everything a bit lower. Now, you can see that you can change the
colors here, right? So I could also put this one
to maybe a red or orange. And that is one way to start and play around
with these colors. So our image is
starting to take form, but we are missing
still a huge part of this image and that
is the background. We don't have any stars or
space in the background. So let's add that
with an image nodes, we can add an image
to the background. And I downloaded my
image from Pexels. So I just looked for stars and
searched for a cool image. I think I chose this one. Then inside Blender,
you can just open your newly
downloaded image. And here we have it. So how do we connect these
two together though? We have this image and of
course we have the background. We just need an alpha over alpha alpha and it
goes in between here. Let me actually get rid of
this composite for night now. And the image goes
for right now. Let's do it in a bottom. And this background
goes into the top. So now we can see
that this image is laying on top of it and we
have some very cool stars, however, are background,
or I should say, My background is
way too big, right? And that is not
necessarily a problem, but we do lose a lot of
detail if I keep it this big. So with a transform nodes, we can change the
scale and even angle. So if I rotate this to 90 degrees and then put
the scale to maybe 0.5. You can see that right now
we have way more detail. I could even make it smaller. So maybe 0.3. 0.3 is a bit too small. 0.4 is fine and we
will keep it at that. So as you can see, quite easy. Now, as last, I would
like to add a bluish hue. So in-between the
Alpha over and add, we can add another
color balance, right? And this one just needs
to be a bit more blue. So here I will go in the Gamma and Gain a bit more
towards the blue. And here we are
starting to get a more or a cooler effect. In my opinion. I'm also going to use
a hue and saturation. And maybe put the saturation
a little bit lower. Here we're getting quite a
cool effect in my opinion. So if you're happy
with your result, you can put the last
node into the composite. Then you can start rendering
your entire animation. Or if you just want one
image than just one image, that is also totally fine. I hope you guys learned
from this and I see you guys in the next video.
23. Retro Run: Introduction: In the upcoming few videos, you're going to learn how
to create this animation. And as you can see, we're going to work with an
infinite looping animation. There are multiple ways to
create looping animations, and for every single one, you need a different technique. So I'm happy to show you
the technique that I used for this looping animation. We're also going to
use multiple scenes. So if we look here
at our final render, you can see that it's
quite empty still. Where is the sun? Well, in our second scene here, we actually have the
sun and the animation. Both of these animations or scenes are rendered inside E Fi. This makes sure that animation does not take a long
time to render at all. Also, we're going to use a
very nice program or website, I should say, which
is called Mixamo. Mixamo is from Adobe. You can just log in here and grab multiple of these
characters for free. You can even change
the animation and download them as an FBX file, then we can import that and of course render it
as an animation. So if you look here,
you can see that this is essentially
our animation. So let's jump right
into the next video so you guys can learn how
to make this animation.
24. Retro Run: Animation: To start this animation, I would highly suggest you
first look into Mixamo. Here you can just
create your accounts. I just log in with
Facebook, I think. And then we can start
to browse characters. Here. You can choose any
character that you want. But I chose the racer. It looks a little bit
like an astronauts, especially if we just look
at the back of this model. So if you look for eraser, you can also find it here. But you can choose what kind
of character you would like. You can even upload
your own characters. Then if you're happy
with your character, you can go to animations
and we can change to any animation that we think might fit quite well
in this animation. I personally chose fast run. Fast run. We want it
to stay in place. So it's just runs
at the same place. Then I think it runs
a bit too quick. So I'll put the
overdrive a bit lower. And I want to make sure
that at the overdrive, we can see here that
there's 26 frames. In my mind, we need to
make this loop a ball, and it might be a bit easier
if we just find 30 frames. So I put the overdrive at three. Then we can start
to download this. So if you click on download, you can download it
as an FBX with skin. And here you can choose between 3060 or 24
frames per second. So I'll just do
30 for this case. And we don't need any
key-frame reduction. So you can click on Download. Then once you have
downloaded the file, you can see that it will
just end up as an FBX file. Let's open a new blank file. And here what we want
to do is we want to first start with
for animation. Normally we don't
really do this, but I want to show you how
we make this loop bowl. So let's delete
this default cube and we're going to imports. So click on File Imports, FBX, because we downloaded our little character as an FBX. Go to your FBX file, and then just double-click
on your FBX file. And here we have our character. And you can see that
it automatically has 30 frames applied to it. Awesome, right? Now. I also want a plane in here. This plane is going to be the
size of our floor, right? Or for our grounds. So I actually want to
scale down my character. So you can just select the
armature and scale it down. So skill, and I'll
do it 0 points, one. So it will be 1 tenth of
whatever scale we just had. This will make the
character nice and small and makes essentially this area or this floor bigger. Then I want to go
to the front view, which is one, and make sure
my camera ends up here. So few align, few align. Active camera view, select the camera and just to make sure it's in the right position. So I think it's good actually. But we can barely see it, so we need to move it closer
around the y-axis here. So here we can see
that the character is actually running thoughts us. So we don't want
that. And I'm going to select the armature here, rotated around the Z axis
for our 180 degrees, and then move it if
g around the y-axis, a little bit closer
to the camera. Perfect. So if we look from
a camera view, we can see this right now. And we can move our camera in position so we can actually see this floor or less grounds
and also the character. So you can move around the y-axis and of course
the Z a little bit. And you could even
have a little bit of a different rotation in
here if you would like that. So software like this
would work great. But how do we animate this? It is actually quite simple. Later on, we're just going
to erase this floor, right? So this is going to be
our wireframe floor. We're going to do, we're
going to create an empty. Empty is going to be
exactly in this spot. So I would like to
select this edge, click on Shift S to put
the cursor to select it. Now, if we go back
to object mode, we can click on Shift
a to also add a empty. We can do the plane
access for right now. Now, we're going to
select the camera, the armature of this little guy. And then as last empty, click on Control P to set
parents to the empty. So two objects. Now, if we move this empty, we can see that the armature, and of course the camera
will move with it. So we only need to
animate the empty. We're going to animate it from the beginning of this
wireframe floor to the end. So let's go to frame one. Click on AI and
then do location. Then let's go to frame 60. Go into top. While having this
wireframe floor selected, then select this edge and click on Shift S to put the
cursor to that selection. Then go back again
to the object mode. We have top and
select this empty. Then click on Shift
S once more to put the selection which is
this empty to the cursor. So now the empty
ended up in this bot. Click on AI to also insert
keyframe at dislocation. So from frame one to frame 60, you can see our animation goes from the beginning of this wireframe floor to the end. I actually would like to put this frame here,
this keyframe one. Let's put it to 0 so you can literally just
select it here, so it's yellow and then click
on G to move the rounds. This will help later on
with making this loophole. So from frame 0 to 60
is the whole animation, which means we have 60 frames. Now, this animation
looks decent, right? But the thing is, when we look
at our graph editor here, you can see that our
animation right now, as it normally is, has a big J curve to it. What that does is it speeds up our animation
in the beginning, then it is quite linear, so you have the same speed here, and then it slows down. And this is because it makes these animations
way more smooth. You can edit these. So if you select all your frames here with a, then click on t. We can make this
interpolation linear snow. You can see it's just a
straight linear line. Also, our nth frame should
just be at frame 60, right? But now you can see
that the animation is the whole time,
the same speeds. Alright? So let's go back to the timeline and make sure that
the end is set at 60. If you go to your camera view, which is 0, you can
start playing this. And what we can see here is our little guy
does the animation, but it stops at frame 30. That is because we
only have 30 frames. And we can change
this in two ways. You can first start
to think about the fact how fast he's running. Do you like the speed
that it is running? If you want him to
run a bit slower, you could scale this up. So you can scale
it up to frame 60. So now it's way slower. Or you can just
duplicate these frames. So select them all
with a Shift D and then move this
duplication over. And now you can see
that because this is also a looping animation, it will just keep running, but then at the same speed. And one thing that you
need to make sure that in both cases we want the
animation to continue, right? We don't want, Let's say if
these two friends were gone, we don't want laggy
steel framing There. It is still a bit hard to see if this is actually a
loophole or if this actually loops because our
background here or our floor, I should say, it
kinda skips, right? But if we hide this floor, you just look at this. You don't really see a disconnect in the
animation itself. So this is already
nice and looped, but the floor is not looped yet. We're gonna do that now. So the only thing we need
to do to make this floor seem Looper bull is to
just create more arrays. So go to the modifier
properties and make sure you create
an array modifier. We want to array it
around the y-axis, not the x, so that x can
go to 0 and the y to one. And then you can just
do a count of maybe 15. Now if you look at this, you can see that it's
just a perfect loop. And we don't really
have any point in which it seems to stop, struggle or skip, right? So this is perfect. And that is how we
make this a nice loop. In the next video, I'm gonna show you
how to actually make a more interesting
looking floor. And then we can also
talk a little bit about the other animation which we're going
to add as well, which is of course
the sun, right? So let's go into that and
I see you guys there.
25. Retro Run: Floor + Glare: In this video, we will upgrade the wireframe floor
and also creates a decent materials so we can
start and random this scene. The first thing that we notice
is the wireframe floor. Right now, it is
just a normal plane. So let's add the
wireframe modifier. And what you can see is this wireframe
modifier essentially creates a wireframe
on every edge. So if we create an extra
subdivision rev right-click, you can see that these
newly created edges will also have this
wireframe applied to it. Now, we want to create
a decent amount just so it will
look good later on. However, we still need to go to the wireframe
modifier to make sure the thickness is a
bit smaller, right? So maybe 0.001, it's quite thin, but later on this
will make more sense, especially if the materials, let's actually create them. Now. Let's go to the
shading and click on New while having the
wireframe select it. Then the leader
principled shader. And this is going to be
our emission material. So just as an emission node jointed vessel
material output and we can even rename this
material to a mission. Now, we can change the color, as you can see here,
and the strength. If you go to the random
viewport shading, we can see that right now
I have a stroke of one, it is pink, that all make sense. But it doesn't really have
that nice glow that you could see in the preview
before, right? So how do we create
that cool glow? Well, you go to the
random properties, stay inside the EV and then
just click or take on Blum. Blum. We have a lot
of options here, but we still don't really see anything change in
our scene itself. That is because together
with these options, we also need to play
around with the color and the strength of our why
this case wireframe floor, but it's just the
emission, right? So if I put a strike
through five, you can see a huge
difference already. I can even put it
higher to ten, right? So you can see that it
increases strength wise a lot. But you can also play
around in these options. So there is a certain
threshold and the knee also has to do
with this thresholds. We can change the radius, Michigan see here, which is the radius of the bloom itself. So you can make it
smaller or bigger. And even play around with
the intensity of it, right? Even the color you
can change as well. But then Mike is, I think the
white actually looks cool. So these are the options that you should play around with it. You can always change
them in the future. But how do we make this
floor look more interesting? Well, one thing is, of course, the material which
we just created, but it's still a
very, very flat. So if we change
this flat look to a more maybe bumpy area with
some hills on the sides, then it will already
look way better. To create this, I would
highly suggest, however, you turn off your
wireframe modifier just by clicking
on the real-time display modifier in
viewport, right? So if you take this on, the wireframe will
essentially not show. Then go to sculpting. And here we have adjusted
normal material. What we can do a sculpting, as you can see here, we
have loads of brushes. And in this two area, the active tool, we can also change the
brushes if we need to. And we can kinda see
what our brush does. So if I click and drag, we get this line. Now it is quite low poly, but that is also what we want. We want this flat low poly
shading because that will essentially complement
our wireframe, right? So we just want to play around with maybe
a different brush. So I would personally liked
the sharp brush in this case. And then just click and drag. However, the sharp brush
works in a subtract mode. You can click on Add
just so it always adds. But you can also hold control, so it switches directions, okay? So either of these will work. You can click on ads or just hold Control to switch
your direction. I really like this brush because
it creates higher peaks. And there is one more
thing that you have to take or keep in mind is that this is essentially one plane and this plane will get
arrayed over and over. This is handy because it
saves us a lot of time. But if you go to this corner, you can see that it
kind of gets cut off and that is what
you want to avoid. So maybe avoid the
coordinates a little bit and just work
on all the other. If you still want to have a little bit of height
in the corners, I would highly suggest you
enable the y-axis symmetry. So now if I drag here, it will also happen
on the other sides. Which makes it look
less disruptive. However, you can also
see that once I do this, we might get a gap
in-between here. This is also easily
fixable if you just go to your Modifier Tab and go
into the area modifier, you can click on
or tick on Merge. Then you have to play
around with this distance. Okay, so just put it,
this is a bit higher, So there will actually connect, and that is how we can do that. So that is one more way to
make this look a bit more interesting without
any disruptions and that you actually
can see it too much. Just create some hills in here. So now it's time to check up
if we actually like this, go back to shading. Go to the front view or a
camera view which is 0, and then just stick on
the wireframe again. And this is the area
that will be created. Very cool. However, this is
not just the end because I don't want to be
able to look through here. So what I did is just duplicate
this wireframe floor, rename this one to just maybe floor or
black floor or whatever, and then delete the wireframe. Now, I'm going to
also just duplicate this emission nodes and then just create a principled
shader instead. So principled BST F, drag it in here. This, I think I'll just make a nice dark or even
black material and put the roughness quite
high or even the specular low if you don't
want any reflections. And here we get this
very cool effect, right? So if we now animate it, you can see that
we've run around in such a very cool
area with hills. And later on we of course, will also create
a huge son here, which is also animated. This last, I personally also made sure that
the background, so the world is also
totally black, right? It makes it look
more like space. And this guy here, I actually also
changed his material. I took out the
roughness, specular, and then even the
base color and just made him black so it
looks more like a shadow. I even made sure that the specularity is
all the way to 0. I think this will only makes sense if you have
the sun behind here. And before you start rendering, you need to make sure
that the world does not get rendered with
this character. We actually want this to
be transparent, right? So go here into your
random properties, go to the film and make sure
that transparent is on. So once we start to render, this is nice and transparent and we can put the sun behind here. So those are a few things that
you want to keep in mind. But that is essentially
everything that we need to know to create this scene. So we can rename the scene
to whatever guy running. Or maybe you know, a
bit of a better name. And then just make sure you
of course, also save this. So maybe less than
three in this case. And then in the next video, we can start to create the sun. And then we can run, They're
both of these animations, which because it's EV, it goes quiet quick, as you can see here, this was one frame and it
took me not even 1 second. I have a good PC,
but in general, this will work for you as well.
26. Retro Run: Sun Animation: In this video, we're going to create the background
of this animation. And then we can
both rendered them and compile them
together in a composite. So let's create the sun. We are actually going to
create a whole new scene. So if you look at
our scenes here, we already rename
this to guy running. And we can click here
to create a new scene. As you can see, you can
create a whole new scene. You can copy certain settings or even fully copy everything
that is shown here. But we're just going
to create a new scene. Once you create a new scene, we might want to go back to
the layout section ends, maybe add even a camera. So shift a camera. You can see that the camera gets added from whichever
position you are at. So if you are in the
front view already, which is one, then
click on Add camera. Now this actually
rightly precision. So let's move this around the y-axis just so
it's a bit backwards. Then go into 0, which
is the camera few. And let's add a circle. This circle can be scaled
a bit down and rotate it 90 degrees around the x-axis. Now, this circle, first of all, needs to be filled
because we want to have a nice field moon with a
decent looking material. Just go to Edit mode, extrude, scaled
down around here. Actually it again, right-click so it snaps back
into the middle, then click on M two,
merge at center. Click on Control R to just
create more edge loops, as we can see here,
which will later on work better when we add
a Boolean modifier. And then we just want to add
some extra subdivisions. So maybe we'll put the levels, few ports and the render at two. Now, what do we need to do? Well, we want to create
this school sun effect. But how do we do this? Well, it is actually a
little bit easier to see once we have a
decent material in here. So let's go to Shading, click on New and just delete this to create an
emission shader. We can connect this to
the material outputs. And what we want to
do here is I want to Greg get a sort of a gradient. So we need a gradient texture. We can connect this
to the emission. And then let's go
back to this view. What we can see once we enter the rendered viewport shading is that we get a nice
gradients in here. This gradient,
however, goes from side-to-side and I
want it to rotate. So if Controlled T, we get a texture coordinate
and a mapping note in here. Let's rotate this around
the z axis for 90 degrees. You can see however, that it is rotated correctly as we can
see how it rotates. But we cannot see it anymore. If we however, put the
x location a bit up, you can see that that now
starts to appear, right? But now we have our gradient. Now we have a gradient, but it doesn't have the
correct colors that I like. So let's add a color ramp and just drag it in-between the gradient texture
and a mission nodes. Now, we can just change these
to change the gradient. So we're going to
even put this to ease if I want it to be
a bit more smooth. B-spline, I can do as well. There are lots of options
that you can do here. Now, we can also change the stops and the
colors of the stops. So I could, for instance, make this one nice
and red, right? I can make this one nice
and yellow or orange. Maybe I want to
switch them around. It's all up to you. What you want to create, as long as you are
happy with, I just see. And of course, if the gradient doesn't really match
up with what you want, you might need to
play around with the location still a little
bit, as you can see here. So this is kind of what
we have right now. And again, the colors
you can choose. And of course, if we go
to our render properties, we can again turn on the bloom and play around with
the strength of the emission to
create more bloom, the radius, of course as well, and maybe even some
of the intensity. So all of these
options are the same essentially as what we
did in our last video. But how do we create that cool effect that
you saw in the preview? Well, we need to use cubes to essentially cut
pieces out of this sun. So let's just go back
for a second into layout and create a cube. Let's scale this cube down, just make sure the
whole Sun fits in there and maybe
even a bit more. So, be generous with your skill. Then scale this down. And we want this
to be super thin. So you could do it with skill set and just try
to drag it down. Or you can go here and just put the scale of this
z axis even lower. So I can put this to 0.001. So it's super, super thin. This is very handy later on. Now, this is also going to
be a part of our animation. So at frame 0, I want this to be the
location and the scale. So I locations scale. Then we can start to think about how many frames we want
this animation to take. I was thinking about 60 frames. This is because 60 frames. Yeah, it's just a nice number. But our beginning seen our guy
running is also 60 frames. So there were both loop
at the same time, right? But you could also do 30 frames. Then the sun loops two times and the guy running loops
onetime in that time, right? So that is also possible, but let's just keep
it at 64 right now. So the end frame
is going to be 60. Then we want to look for a
position of frame 60, right? So the animation is
essentially going to be, I'm going to move it down. But I'm also going to scale it up right somewhere around here. Maybe. Then click i and do
location scale again. From frame 0 to 60, we get this animation. Very cool. Now, what does this look
like with our materials? We first need to add a modifier. So select your son. We can actually
rename this to sun. Then add a Boolean modifier. And as object, we're going
to select this cube. We can hide the
cube for right now. What you can see is that this cube gets cut
out of the sun. So that is the Boolean modifier, that is what that does. So if we now go to the rendered viewport shading and play this, you can see that we get
this cool animation. Awesome, right? We want this to happen over
and over and over again. So we only have to
select the cube, duplicate it, go
into the timeline, and make sure you select both keyframes and
just click on G to shift these animations
around maybe 20 frames depending on
what you want to achieve. So now we have two of these. Cool, right? We can do
this over and over again. So I can duplicate this again, move 20 frames, duplicate
again, move 20 frames. So now we've reached
from frame 0 to frame 60, these animations. But the one thing that
you might be able to see is that it doesn't
move at all, right? This is because our
first cube here, the animation of that
ends at frame 60. So this should actually
be our beginning frame. Right? So what we actually
want to do here, we want to go 60 frames further. Then we can essentially
select all of these cubes, duplicate all of them, then go into the timeline. Make sure all of
these animations are, these keyframes are selected. Click on G and move
it all the way until this first keyframe
ends up at frame 60. So now if we change
this to 60 or 61, you can see that this
will be a perfect loop. Awesome, right? Now that it loops perfectly, we need to make sure that all of these are actually Booleans, because as we see in the sun, we have only selected
one of these cubes. I don't want to add like
ten of these Booleans. We can actually operands,
as it says here, operand type two
collection, right? So if you just create
a new collection, we will rename this new
collection two boolean. And then put all of
these cubes from, in my case, cube 02 cube seven, drag them into the
Boolean collection, select the sun and
make sure we have selected underneath
the collection, of course the
Boolean collection. Now, all of these cubes
essentially will be Booleans in the sun because they are all inside
that collection. We, however, do also
want to hide them from the fuel board and
the render because we just want to see the cutout. We do not necessarily need
to see the cubes themselves. Now if you play
this, it might be a bit slow because of course, it needs to calculate
all of these Booleans. But if you run this, you can see that it just works
how it's intended to be. The only thing I would
highly suggest though, is that you go to the
render properties and make sure also here we can
put film to transparent. So now if you render, everything else is transparent and we can literally just drop this in the background of
the scene guy running. So now we need to animate
or render both of these. And we can do this quite simply, as I explained in one of the first videos on how
to actually do this. But because this
is a little bit of a more advanced
animation and we're actually throwing multiple
animations together. I would love to show you
guys how I did this. So in the next video, we will start to render and
then compile them together, and then throw them all in the compositor to finish
our nice animation. I see you guys there.
27. Retro Run: Rendering + Compositing: So before we can
composite everything, we need to Random them. So of course, before you're
going to render something, make sure you just
click on F2 to actually check if your
render looks cool, right? So in this case, my frame, a 109
that I have here. Yeah, looks decent. It's a bit hard to see
because we of course have this transparency
back here. Um, but in general, it doesn't look that bad. So I'm just going
to be okay with it. Then once you are okay
with your render, you can go to your
output properties. Choose a frame rates. Maybe we'll do 30
frames per seconds. Makes sure however, if
you have this frame rate that you also do the same
frame rate in your outer seen, a resolution should be fine. And then we need to
choose a file formats. This case P&G might be good, maybe deficit bit better. And then of course,
you can also choose a color depth if you want to have some more color
depth in here. And that is essentially it. Choose a nice folder or create a new folder,
I should say. So I'm just going to create
a new render folder. And in this render folder, I will put the sun render, which is this accepted, and then start to
render the animation. Because this is e v, it will actually go quite quick. So now you can see that
for every 1 second, I already have a render and I'll see you guys
when this is done. So my render is done, but we of course need to
render the scene as well. So go into the guy
running scene, make sure the frame
rate is good. And also makes sure you again, like what you see. So little pre-render
always works. Wonders. I like what I see, so I can start to run
it all animation. We only need to put the
file format again, a diff. I'll keep the color depth
of eight for right now. But of course, I will create a new folder which is
going to be running guy. And then accepts
Render Animation. This animation also
almost no time. So I'll see you guys
when it's done. Now that this is done, I would like to just quit this, maybe even save it, right? And then create or
open a new blank file. In this new blend file, we do not have to worry about the camera cube or light at all. We can just skip all of
this and go to compositing. And when using notes,
we get two nodes. We can the composite node
and the random layers. We can delete the random
layers and add an image nodes. This image note is quite
handy because we can import the images that we
already have rendered. So let's go get the sun render. I'll select the first image, scroll down, hold shift
and select the last image. This way we have selected
the whole image sequence. So open image and
automatically you will see we have an image
sequence here. We have 60 frames and we
start from frame one. If we connect this image to
the image of the composite, you don't really see
anything, right? That is because this is
essentially for rendering. If we're going to
run the right now, we will see what the end
result of the composite is. We can essentially save that, but we still cannot
see whatever we have. If you click on Control Shift
and unselect this node, you can now see the
backdrop, right? And this is because
Control Shift and selecting this node
added a new node, which is called
the viewer nodes. So now we essentially
view the backdrop. This backdrop works differently
than the notes work. If a zoom in or out, the backlog doesn't
zoom in or out. We actually zoom in and
out from the notes. If you want to zoom
out of the backdrop, I would highly
suggest you look at the view options down here. Backdrop, move, backdrop,
zoom in, backdrop, zoom out. And of course, fit backdrop
to available space. So with v, we can essentially zoom a little
bit out if needed. Very handy. And now we can start to add multiple nodes to composite
these images together. So let's start to think
about the background. This son is our backgrounds, but we still have a
transparent layer here in the back, right? We might want to also
have some color in there. So I'm just going to
grab an RGB nodes, which just has a singular color. If I hold Control and Shift
and then click this note. You can see that now this node is connected
to the viewer. So you can easily
switch in-between nodes or even in-between sockets
of a certain node. If you keep holding Control, Shift and clicking on
a certain node, right? So it's very handy to
just showcase your notes. This color. Maybe we want to have
a bit of a dark blue. But how do we combine
these two together? Because now they're
still separated. Well, we have a very nice
note which is an Alpha over, let's put an alpha over here. In the top image. We'll put our background, which is this blue, and then we put the sun
in the bottom one. Now, if we click on
Control Shift on this one, you can see that there
are both combined. Awesome, right? And
you can still change any color that you
want if needed. Now, very handy, but this is
not everything in our scene. We of course have
another animation. So let's duplicate
this image sequence and just open it and go
to their running guy. And of course, select all
these frames as well. Open image. Now, we can just
duplicate this alpha over and put this image
than in the bottom. And here we can see
what's happening. Awesome, right? However, the sun might be a
bit too low in this case. So do we have a note
to change this? Yes, we do. We can add a transform nodes. This transform node
goes in-between this image sequence and the Alpha over what
you can do here, you can change the pixels are balanced the
x or the y-axis. So we can essentially
move our image right? So now the y-axis can
go a little bit higher. And we can even play
around with the scale. So maybe 0.8, right? So it's literally just
up to you what you want. But yeah, as you can see, we
can play around with this. And this is what a so-called about having separate scenes. You can literally just play
around with the background. You can even add
certain nodes to just one particular part
of your render, right? So if I want also
a glare in here, I can do that literally
just for only the sun. So just put it also
in-between there. Let's make sure we get
some space in here, just so everything is a
bit more organized. Here. Let's do ghosts and just play
around with this threshold. Alright, so I put it to maybe 0.2 and we have
some glare on here. Now it's a ghosts, but maybe for glows
a bit better. And that makes it
pop a bit more, but it's up to you what
you want to create here. I'm just showing you
that you can just throw extra notes in here
if you would like to. So this is all
combined. A very cool. The only thing that
I might want is even some more focus
on this middle. I don't really need
to see anything here. This is just empty
space anyways, and maybe a nice
vignette would work. What is a vignette though? If vignette is a
gradual darkening of an image around the
edges of the frame. So normally when you go into
Photoshop or Premier Pro, you often have a
vignette option. We do not have that in Blender. But if we just start to think very simply about
what a vignette is, we can easily create one. So if shift a, we
can create a mask. Let's use an ellipse mask. And if you click or Control
Shift on there you can see we get a nice circular
little pattern. We need to make it a bit bigger. So the width and the height
I do will do add 0.8 or 0.6. And here we have a
nice big circle. We can use this
as a mask, right? But this circle is quite
sharp and abrupt, right? So let's add a blur
node in-between here. And we can put it to just
first Gaussian and put this X and a Y way up to
maybe 200 or even 300s. Just so we get a nice
smooth blurring here. Then justice a nice mixed node. We can mix this ellipse mask with the blur and this alpha
over of all these images. So just join them together. Here. We don't really
see anything yet. If however, we put
this to Multiply, you can see that the dark
areas of this blur nodes, we will essentially get darker. So it still has the
same kind of course. It doesn't just throw a
black on top of there, but a darkens the areas, which gives a very cool
effect and even draws us more into this running guy instead
of the outside, right? So if vignette is
often quite cool to drag even more attention
to the middle. So those are very cool ways to make this a much
more interesting. And I would also highly
suggest you always look into some brightness contrast and maybe even some
RGB curves, right? So brightness and contrast, if we want some more
contrast in here that always make stuff
pop a bit more. You can even blur it. It's totally
dependent of course, of what you want to create, a virtual want to showcase. But I hope you can see how
powerful the composite can be. Now, if you're happy
with your results out, highly suggest you
start rendering this and of course send
it to me, right? So just go to the
output properties. Make sure the frame
rate again is just set at the same as which
we rendered with before. Also. Now we need to put the nth frame again at
wherever we want to end it. So frames 60, right? They're both 60 frames. The whole loop takes 60 frames, so 60 should be
the end. Awesome. So now we just want to
search for a decent folder. So maybe I'll just
put it in this folder except and then change
the file format. So here again, you can
choose any file format. Let's just do an
impact for right now. And one thing before you start
to render makes sure you put your last nodes
inside the compositor, okay, the composite nodes, because the viewer and the
composite are different. This is just to
look at your image, but this is essentially
what will be rendered out. So now you can start rendering, render animation, and now everything will not
even be rendered again. It will just be
compiled together. So this is even quicker
than just normal rendering, even when you, when you
ran it like HD images. Okay, so don't worry about
the compositor taking too long or having to re-render everything. It is
totally different. I hope you guys
learned from this. If there are any questions, please ask them below, and otherwise, I'll see you
guys in the next video.
28. Falling Dominoes: Introduction: In these upcoming videos, you're going to learn how
to create this animation. Or if you want, you can
make it just a still frame. Both are fine. So what are the separate
parts that you need to learn in order to
create this animation? Well, it is quite simple. First of course,
you are going to learn how to create
these dominoes. And the domino animation is
created with rigid bodies. So you will also learn
a little bit about the rigid body simulation and how to finish
this animation. Then we're also going to
create an animate this water. You will also learn how to
use the free version of the botanic add-on to create
some extra plants and grass. And of course, a nice camera position where we can actually make sure that the dominoes
in this case look huge. So it's actually quite
cool that placing your camera in a certain
position will really change the way that
the viewer looks at an image and cannot
perceive what it is. Because if I just put
my camera up here, say I'm going to grab my camera here and then just
look from top, the instantly start
to look smaller. So those are a few things
that you're going to learn. And right now, if
you do not have the botanic Add-on
installed yet, then keep watching, otherwise
jumped to the next video. So how do we install
the botanic add-on? First of all, we need
to go to this website. This website is called
blender market. And in the blender market, you can look for both Titanic. And we need this tree and grass library
botanic free add-on. Now, you can see that the
full add-on cost 130 bucks, but you can use a
little trial version. So does this cost
$0 to purchase? But you have to keep
in mind that you need to make an account here. Then once you have
downloaded the file, you need to go to Blender
because the botanic add-on is not an add-on that just comes regularly
with Blender. We need to install it. This is very simple. Just go to Edit
Preferences, Add-ons. And here we have
an install button. Click on this and
search for your add-on. The add-on should
be in a zip file. So here you can see that I have the botanic free zip file. So just double-click on it or click on it and install add-on. And then we will have
to search for it in this little search
bar here botanic. Just make sure you take it on
and then safe preferences. The way that we use the botanic add-on can be in a
multitude of ways. And I will also show you how
we have to create the grass. But it essentially is here. So if you drag out this
little arrow or click on n, then we get these options. And here we have
probably gone IQ. And here we have
the botanic add-on. You can spawn assets. And here we have, for instance, the category Carboniferous. And we have this tree. You can change through
different categories. So here we can go to maybe
flowers and have some flowers. Blast, you can click
on this image and we have a multitude
of other flowers. However, because this is
the free trial version, only the ones that
are actually colored in are available to you. So these all are not. If you actually
like this add-on, then of course you can buy it. But right now we don't need it for this particular tutorial. And then if you have
made your choice, you just click on Okay, and instantly we have a
nice little tree here. That's it. So in the next video, we're going to start
with this class. I see you guys there.
29. Falling Dominoes: 3D Modeling the domino stones: In this video, we're going
to create a domino stones. It is actually quite
simple and very editable. If we make number five, then we can easily
create all the way. 0-56 is a little bit different. That's why we're just
going to focus on five and all of the
numbers underneath. And then of course, you can place them to
whatever your liking is. So we're gonna go
to the top view, which is number seven. Then we can delete this
default cube and add a plane. We're going to create
some cuts and display in some loop cuts to just focus on one little part which
we can mirror over. So go to top, click on Control R to
create a loop cut here. And here. Then we can essentially already delete all of these vertices, x, and then delete vertices, and we just have this
little parts left. Now, I want to do
exactly the same. So contra arm and Control R to create a vertex
here in the middle. So now I want to
create a circle here. So just click on Shift
a and add a circle. This circle has
too many vertices. So go to add circle
this little section here and change the
vertices to eight. Scale this down to your liking. So maybe around here, and then this is fine. Then with Control R, I'm going to create two
more edge loops here. We kinda have a vertex here
plus some extra geometry. Then we're going to
duplicate this one over and move it
exactly in the middle. So you can kinda match these vertices up with these
lines, with the edges. So just met them a bit up. And this should be fine. I do think the circles
are a bit too big. So if you want to
scale them down, you have to select them both. Make sure your pivot point is changed to individual origins. Otherwise you get this effect. But if you change it
to individual origins, then you can see that
the skill around there, of course, individual origin. So something out
this should be fine. Make sure however that you gonna go back to
the medium point, otherwise you might be
confused in the future. We can delete some
more vertices now, so it's gonna look a
little bit bare-bone. But if we're going to
delete all of these here, X vertices, then delete this
one here in the middle. And this is essentially
what we end up with. Now, we're going to select
these four vertices, click on F to fill them up. And then also these form, then these are gonna
be just three. If you now just select
these two vertices. So this edge here is selected. And then click of
f, it will start to fill all of these
vertices automatically. Then as last one, we do
need to fill this one up. Right? Awesome. So this might look weird, but if we're going to
go to the modifiers and add a mirror modifier. You can see that we can mirror
it around the x and the y. And now we instantly
have a nice part of a dominant stone which has
five of these circles. But this is very flat. So let's add a solidify
modifier to make it more solid. In some cases, the
solidify modifier might not work as intended. That might be because
your normals, the face orientation is flipped or you have
maybe have like a set, say this one is flipped. Let me show goes this. Then we get a very weird
results with our modifier. So if you want to fix this, we need to make sure
that all the normals are set in the right position. So if you now go to
top, click on a, and then do Mesh normals and
then recalculate outside. So that is essentially
how that works. Let's put this thickness 2.3. So we have a nice thick
kind of dominoes stone, and it still looks quite rough. If we add a
self-sufficient, however, you see that everything's
becomes too smooth. So before we add a
subdivision surface, we need to add a bevel modifier. And this bevel
modifier here we can change the amount
that it baffles. So you can see here
that every edge got beveled in a certain
way because we can put the amount lower or we can
put more segments in there. However, these edges here in these circles are also beveled. We don't want them
to have any bevel because it will never
get nice and smooth. So let's make sure
that the angle in the bevel modifier is set to an angle of 50 or
maybe even higher. And now you can see that
those bevels are gone. Now we can add a subdivision
surface and right-click to shade smooth out probably puts another extra
subdivision in here. And we can see that
everything looks decent. Bots, these sides here
are still very sharp. Also that we can easily change. I would highly suggest however, we apply our mirror modifier. Now, if we go to
these corners here, we can bevel them. So conferral, be, drag it out
and nothing really happens. That is okay. Just click and we get another section
that comes up here. If you don't see
this, just make sure you click on this
little bevel option. We want to make sure that we are actually affecting our vertices. And now we can see
a huge change. Make sure that the width
is not too big, right? So we want the width a
bit smaller around here. Maybe. This should be fine. Now, this already looks decent. If you want your edges here to be a little
bit more sharp, what you have to do is create an extra edge loop in
all of these edges. So just right-click
and sub-divide them. Then select those vertices and scale them a little bit up. Awesome. So this is our
domino number, five. Let's move this up
by g and then Y one, and duplicate it and then do g minus two around the y-axis. What this does, it gives us
an entire piece of domino. Right? Now it's a
55 domino stone. But what we can do is
we can easily fill up these holes here to create
these other numbers. So if I fill up this hole here, we can see that we have a four. If I fill up, let's say this hole and this, this whole, then
we have it three. So it's as easy
as that to create extra numbers and all the way from zero to essentially five. How you fill them
up is also easy. You just select the
whole edge loop here, which is with holding
Alt and then selecting, then actually with E and
then click on M two, merge at center here, same E, M at center. Here we have a number three. So I'm going to leave it at
number 5.3 for right now, the thickness look decent. We have some nice
bevels and yeah, it looks nice and smooth. I'm happy with our results. So now you have to
create the materials. And I'm not really going to explain how I created
the materials. That is not because I
have some grand secrets. I just wanted to see what
you guys come up with. Now, if you truly do
not know what to do, grab maybe immaterial
from Pali haven or just called the shading and create a very simple material. So just click on the modal, click on New here. You can rename it as
well as you want. So maybe we do a nice
corporate color. It's metallic, goes
all the way up and we can play around
with the roughness. This is copper. And we can select this one here. We can create maybe
a glass material. Here. We can do transmission
all the way up and then play around with
the roughness as well. So it can be as easy as that. But please spend some time
in this because I would actually really liked to see
what you guys come up with. I'll see you guys
in the next video. We're going to build up our
scene a little bit more. So I see you guys there.
30. Falling Dominoes: Ocean Generator: In the last video, we created, of course,
the dominant stone. So right now, I think it's
time to create a nice ocean. And we can put our camera
and domino imposition. So we actually start to
get the feel of the scene. So let's get started. Let's go to Layout. And here we can zoom a
little bit out and click on shift a to create a plane. Now, this plane is
going to be our water. So we can rename this to water or ocean or
whatever you want. Then go to add modifiers
and add an ocean modifier. So this modifiers kind
of an ocean generator. And there are a lot of
options that we can utilize to actually
change this option. We can also animate this. So if you play around
with the time, you can see that it looks
like a nicely animated ocean. Perfect. Now, what do
we want to change here? We could repeat it for
a multitude of times, but I think 1.1 should be fine. So just one little plane. Then we have resolution. In the resolution we for sure. And it's play around
with because we want very tiny, small
little wrinkles. We do not really want
this huge waves. So putting your resolution
higher will definitely help. You have two ways of putting
your resolution higher. And as you can see, you
have a resolution viewport, which is this top one, but we also have a
resolution render. So if we put this one
like the render to 32 brand and does not really
slows down from this. But if you put this
resolution field or to high blender might slow
down a little bit. So be careful with that. I'm going to put it to 32 just so you guys see what's
going to happen. But you can see that we get
a very small little detail. I want to get rid of
these huge waves. This can be done also
in multiple ways. First of all, the depth. This is the depth
of the floor or the ground underneath the water. So if we put this
to, let's say two, you can see that some of these very high peaks are
actually being lowered down. Then of course we
should go to waves because that is essentially
what we need to edit. The skill is very important because that
needs to go down. So maybe 0.03 or even
lower could do wonders. If we zoom in, you can
barely see anything. And we don't really know
if this is the kind of waves or if these are the
kind of waves that we want. How do we check this? I highly suggest you go into the lighting and actually see how the reflections
are going to look. So let's go to the random properties changed or run the engine from ev2 cycles, then go to Shading and go here into the world
instead of objects. Here we're going to
add an age, your eye, or an environment texture. And this can be connected into the background, so just open. And in my case I used
the Kiara one done, then you can open image. And here, if we go to the
render view port shading, we can see this HDRI
in the background. So this ocean also
needs a material. Let's go back from
world to objects and click on New while having
this option selected. Also this material can be
renamed to ocean ends. I'm going to put this
base color just to black and put the roughness
all the way to zero. So we have a very
reflective material. Now we're going to look
for these nice waves. And if you essentially look
from a little bit more down, so we can see these mountains
in the reflections. You can see your waves. And as you can see, these
waves are not very extreme, they are very subtle. There are not huge waves
and this is what we want. Awesome. So our water is done. The only thing that
we need to do is put our domino stones in place. Now, we can grab
our domino stones. Let's grab both of them and join them together
with Control J. Then rotate around the
x-axis for 90 degrees. Go to the front
view, which is one. And I'll just go to
the layout right now so we can kind of see
what is happening. Then click on G to move that around the z axis and just move it a little bit above the ocean. But you don't have to do it
very accurately because later on we're going to also create a little bit
of a land rights, but this is for the next video. So let's now click on zero
to go to our camera view. And go here into view, camera to view so we
can move our camera. Now, I'm going to move my
camera somewhere around here. Actually, I'll go
to the other sides. Here. I want to look kinda up to the dominant stones because that makes them look huge, right? If I just look from
down here that just look very small,
that's not what we want. We want them to look
very impressive and big. I think something
like this might work. We always can change
it in the future. But what we have to do is select one of these
domino stones, add a modifier, and
this modifier is going to be the array modifier. So we of course want to
take a look at this. So let's turn off the
camera view so I can move around and actually see what this array
modifier is doing. Let's scroll down
to the modifier. And right now we are
carrying around the x-axis, but we wanted to array
around the y-axis. So x to zero, y to one. Well, now a problem arises. The domino stone actually does not array around the y-axis. It erase around its own y-axis, which for us is now the z axis. So what we could do is just
select the dominoes stone, click on Control a, and apply the rotation. So now it actually goes
around the y-axis. Let's do a width of 3.5
or maybe even four, and then just do a higher count. So this looks decent. I wanted to go around
the other way. So what you could do is just
two minus four in this case, the last thing that
we need to do is to animate this water. So let's look at the water. It is quite hard to see
if it actually animating it because the scale of
our water is so small. So keep in mind how much you
have it right now, -0.03. And we're just kinda
put it up to maybe one so we can actually
see what is happening. Now. I'm going to put my
resolution field boards also a bit smaller, so maybe 12th, just so Blender doesn't really
slow down too much. Now, how do we animate this? Let's grab our timeline. Put the end at quite a
generous and frame because we do not really know yet how long our animation
is going to take. Then at frame one, we're going to right-click on this time and insert keyframe. Then let's go to the
last frame here. Let's put the time. Let's try five. Right-click, insert
keyframe, and just play this to see how slow or how
fast our waves are going. This is actually
quite nice and slow. The problem is, once you add keyframes are animations
inside Blender. It automatically creates
curves out of these. So if we change this timeline
to the graph editor, you can see a curve here. This curve resembles
what I'm talking about. It goes slow here. The water speeds up here. Right now it's a constant speed and then it slows down again. We want it to be more linear. So select this first
keyframe here, click on T and then do linear. And now we have a nice
linear speed at all times. So if we play this, we can see the movement. And I actually like how
nice and slow that's going. Of course we do not know
how it's gonna look like if it got smaller. So 0.03 because there's
literally nothing to see. But if you do 0.3, we might be able to
see a little bit, yes. And it still looks quite
nice and slow and decent. So I'm actually happy with
what we can see and this is y. I'm just going to accept
the fact that probably at 0.03 is also going
to look great. Awesome. So that is the animation for
this water or this ocean.
31. Falling Dominoes: Vegetation: In this video, we're
going to create a land where these domino stones
will actually stand upon. And we will also create some grass and maybe
some plants in front. So how do we do this? Well, it's very simple. Let's click on seven
to go to the top view. And let's add a plane
wave shift, a mesh plane. We're going to scale this up
and move it to the middle. Then scale this
around the y-axis. Just so all of these
domino stones are covered. Then we're going to scale
this a little bit further up, somewhere around here
and go into edit mode. Now, we're going to
create a loop cuts. So if countries are, you can see that this little
edge loop here appears. If you scroll up, then you can create
more or less, right? So we want to hear, then just right-click
so it snaps into the middle and we
can scale this up. So scale around the x-axis. So there are maybe a bit bigger
than these domino stones. Then we're going to select these two edges here and
move them a bit down here. Now also this water can go a little bit down because I want this length little piece to be a bit higher than
the water, of course. Now, this is a little
bit to flat, right? So if it creates two
extra edge loops and just move a bit
around the z axis, we have more of a
smooth fall off. If you right-click and
click on Shade Smooth. Now it's also nice and smooth. So this is quite decent. The cool thing about this, if you click on zero, we noticed we can only see
this part of the grass. So later on we
might not even need this outer part so we could literally already
deleted, right? So I just selected this x
vertices and that's it. Now, we need some
graphs upon here. And we're gonna do that with the polychronic
botanic free add-on. In the first video,
like the introduction, I already explained
how to install this. So if you have not done that
yet, please go back there. Then what we can do
is we can scroll down and use this
scatter option. If you click on Plus or
having the object that you want the grass to be
scattered upon selected, then you can select
a certain category. We're going to choose grass. Grass is fine and we
can click on Okay. Now, incidentally, this
object has a new modifier, which is a particle system. We can also go to the
particle system and change all these
settings ourselves. So the first thing that I
want you to change is go to the viewport display and just put this
amount a bit lower. We do not need to see every
single grass trained on here. So if we put this to like ten, we only see ten per cent. But if you start to render, then you will see all
the hundred per cent. Of course, this is just to make sure that your blended
doesn't slow down too much. I do not necessarily need anything to spawn
here on top because I want this donor stones to just be on some dirt
instead of grass. How do we do this? Well,
we can select this face. Go to the Object
Data Properties, create a new vertex group. And this is going to
be density grass. We can assign this phase
to this vertex group. So now if we go back to
the particle properties, we can scroll down to the vertex groups and puts this density grass
into the density. Right now you can see
that only grass will be spawned up on this density. So we need to flip this around and this will
now be avoided. Awesome. So we only have grass
very wanted to see grass. If you click on zero. Of course we've changed
some stuff around so we might need to move our
camera a little bit. But essentially
what we have here, a very decent looking scene. So let's go back to View, camera to view and put a
camera into a better position. I'm going to move my water
a little bit higher. Something around this
actually looks quite cool. Now, what I personally like is to create more
layers in your renders. So some plants in
the foreground will actually help a lot
with your image. So we have plants
in the foreground. We have our main animation, which are the domino stones,
and then the background. We will have, of
course, our HDRI, which are some very cool
mountains and of course sky. So now you have created three
layers which already makes your image look way,
way, way better. To create these plants, we again need to
go to the polygon IC add-on spawn assets. And here we just want to
look for maybe a shrub. Then we can choose for
the symbols nigra. And if you just click on Okay, we have this added to our scene. I personally like to grab
another scene out of here. Zoom a bit. In this scene here, I can just move my plants
around wherever I want to. So I'm going to
select this plant, click on G shifts to just
move it a bit around. Maybe here. One can go here. Cool, right, so we create some extra layers to this scene. At the next video, we are going to animate
this domino stones. So I see you guys there.
32. Falling Dominoes: Rigid Body Simulation: In this video, we're going to
animate the domino stones. And the domino stones are
actually a simulation, a rigid body simulation, which of course you
can do inside Blender. And a rigid body
simulation is used to simulate the motion
of solid objects. So I'll very quickly just explained to you how this works. If we select our cube, you can see that we can go to our physics properties and
make this cube a rigid body. If we start to play this, we have space or
just in a timeline, you can see that our rigid
body interacts with the world. There is a certain gravity
and it will fall down. This rigid body also
has a mass which makes it heavier or less heavy. And of course it has
a certain coalition. We can make certain models
collide with each other. And that is what we're gonna
do with domino stones, bars before you can
make objects like active type rigid bodies
collide with each other. We also need a floor for
these to stand up on. So if shift a, we can create a plane. I'm going to move this
plane down and scale it up. This plane also needs
to be a rigid body, but this is going to
be a passive type. This means that it will
still be in your simulation, but this will not fall
down or be pushed away with any other collision. So if we play this, you can see that the cube
will just stay up on here. However, if I move my
cube, Let's save it up. I'm going to rotate it. Now you can see that it still does collide with each other. So if the domino stones, we literally are going to
just create a stone here. We're going to create
multiple of these. One of them is gonna be
turned a little bit. And then we play. And as you can see, we have a perfect animation
arrived here. So let's do that in our scene. So right now we're going to
finalize this domino stones. Because after we have done
the whole simulation, it's just annoying to
change stuff, right? So first of all, I think I'm going to move
them a bit backwards. I might add a count of two more. And this should be fine. So I'm going to hide
everything else. So if you select the donor
stone and click on Shift H, you essentially hide
everything else in your scene and we can
focus upon these. Now, let's create
a new collection. So right-click here, new
collection, domino simulation. Then we're going to drag
our domino stones into there and rename this to domino. Before we're going to create a rigid body simulation
on this domino stones, we need to separate them, right? Because otherwise it doesn't
really give a rigid body to each separate
individual donor stone. So let's apply all
these modifiers. Then what you want to do is you want to separate
this piece by piece. So if you go to top, click on a and then P, you can separate by loose parts. Now however, all of
these are loose parts. So you want to join these
two pieces together, right? So if I select these two here, Control J, these two
pieces Control J. Now however, all of
these donor stones still have their origin all the way here
in the beginning, which is what we do
not really want. So we want to select all
of the domino stones, go to Object, set origin and origin the center
of mass surface. So now all of these
domino stones have their origin
perfectly in the middle, which now also makes you
able to rotate them easily. So if you don't want
them all to stand with a five on top and a
three and a bottom, you can literally just
grab a few, rotate them. Maybe these as well, hundred and 80 degrees
and maybe around the z axis to get some of
these rotations going. Now, if you want
to animate this, you just need to create a rigid body on one
of these models. So go to the first domino stone. Go to physics properties
and click on rigid body. I want this stone
to be huge, right? So the mass is probably
also quite big, so maybe 1,000 kilos. Then we want to start
animating this. But if we play this, you can see that it
of course falls down. I personally like to
create a new plane for this display that we just created is going
to be the floor. But I do not want to
see it in my renders. So just take this
little camera off. Now. This is a rigid body. It is a passive rigid body. And now it will interact
with my active rigid bodies. So if I play this, you can see that nothing happens because our rigid body here are dominant stone is just
on top of it right now. You can kinda see it moving. It just falls down on
top and that's it. That is exactly what we want. So we're going to
select all of these. And then as last, the
one dominant stone with the rigid body applied
to it go to Object. Rigid body and a
copy from active. So now all of these have the exact same rigid body
settings as this first one. And the only thing
we have to do is we have to rotate this
first one a little bit, so it actually starts falling. And then we have our
rigid body animation. Now, if this animation goes
a bit too quick for you, we can slow this animation down. So go to the scene properties
to the rigid body world. And here we want to play
around with the speed. If it put it to 0.5, it will go slower, right? So maybe this is too slow, but you can kinda see
what the difference is. I actually think it
looks quite decent. And we also know that our
animation is now going to take maybe like 190 frames. This everything that
we need to know to animate these domino stones. In the next video, we're going to go over finishing the scene and
starting to render. I see you guys there.
33. Falling Dominoes: Lighting + Rendering: In this video, we're going
to finalize this animation. So first of all, my screen
might look a little bit different now because I guess or I didn't save it
or blend the crushed. But yeah, I had to redo the domino stones and
these plants here again. So yeah, some stuff
might look different, but everything else
is exactly the same. So the first thing that we
need to do is make sure that this entire rigid body world
is actually saved, right? So if you go to the
Rigid Body Worlds, scroll down, you have a cache. And here we can simulate a
certain amount of frames. So mine is 200, then they are all down
and I can bake this. This bacon does
not take too long, but now we don't have to recalculate the
simulation every time. So I can click like here, here, here, it doesn't
really slow down anything. So often I take a
little bit of time in the end to finalize
the lighting, maybe some of the models that
might not be on par yet. And of course, the animations
and the Render Settings. So how do we do this? Well, we can see a lot when we click on this
rendered preview, but sometimes that does
not give us enough detail. So what you could do is just
go to your render settings. Mine is set at cycles GPU and then I'll put
the render samples, maybe the firewall for 1,024. Now I'm just going to
render this so f 12th, and we will wait
until it's done. So now let's render is done. We can take a better look at it. A few things to
jump into my mind. And I understand also totally that some things
that I might not enjoy or that I want to change might look totally
different on your image. So I'm just going
to go a little bit through my thinking pattern. And if you want to
join, you can join. Otherwise you can just
render out your animation. You don't have to wait for me. So what do I see? First of all, I see
the water here. I'm not that happy
with the water. I would like there to be a
little bit more wrinkles, so I want to change that. The second thing,
which to be honest is the biggest thing
is the lighting. There's a lot of shadow
here where the grass is. I would like it to be
more light and there's too much light where
the domino stones are because in my opinion, shadows are just as important
as like bright areas. So I also want to incorporate
those into my renders. And in general, that
is actually it. So let's change
these two things. I'm going to click this away
and start with my water. As we can see, this water
has quite a big area, right? And we know that if you want
a higher quality water, we probably need to put
our resolution higher. But why should we put
our resolution so much higher if you're not even
seeing half of this like water. So what we could do
is scale it down by quite a lot and move
the bit into place. The only thing you want
to make sure of is that this butter is always in view when we are
in a camera for you. Alright, so that is
the only thing you have to keep into account. We can always put
the resolution in the viewport a little bit lower and the render a
little bit higher, if you would like to write, that is no problem. Also, if you want the
skills or the scale of the waves to be a bit larger, you can put this
number a bit up. And it is dead simple. For the lighting. I would like to go to Shading. Click on this arrow to go to
the camera view and change this section here to
treaty few boards. I'm going to drag this out. And here in this viewport, I'm going to play around
with the lights in this viewport or just want
to see our beautiful image. So just click on
rendered viewport. And here we have
whatever we want to see. I'm going to hide
every single light except the main
light that we have. And in this case
that is our HDRI. So this slide here can
go off for right now. Then we can go here from
objects, two worlds. And in this world scene, we can play around with this light so we can put
the strength up or down. And if you click on Control T while having
this image selected, you can see that we get a texture coordinate
and mapping nodes. This only works if you have the Node Wrangler
add-on activated. We can play around
with the rotation. So the rotation of this can be easily
changed as you can see. Does it also changes
our lighting? This slide on itself
already looks decent, but I think an extra light
would actually do wonders. So this lie that we've hidden, we can unhide it selected. And we're going to change
this to maybe a sunlight. Sunlight in general
are very strong. This strong light, however, we can use to see where
our light is ending up. So if I move it here, we can kind of see what
the light is doing. And I want some cool
shadows just to rotate it. Maybe to something like this. So we have a nice light
area or bright area, and we even have
some shadows from domino stones being cast
onto other domino stones. Also quite cool. Now the
strength is way too high. And you guys probably already remember how we can
check the strength. But in general, we put this
a bit lower to maybe ten. Go to Object, use notes. And here we can always play
around with the strength. But what I'd like to do is go
into the random properties, scroll down to color
management and check my film few transform from
filmic to false color. Now, we want to reach grayish, maybe even orangey color. But we don't really want to
go too much into the rats. Let's go back to filmic. And of course now you can
still kinda judge to, I want to go a bit higher,
that's totally fine. But keep in mind if
you go too high, as I explained in one of the
earliest workflow videos, that you might lose
some color data. So once you're happy
with your decision, you can start to render. Please share your renders. I would love to see them. And if you want any feedback
or have any questions, just ask down below. See you guys in the next video.
 David Jaasma, 3D enthousiast and ofcourse teacher.