Transcripts
1. Create Foiled Handmade Cards without a Foiling Machine: Hi there. I'm sure
I'll welcome to creating foil cards
without a foiling machine. Now, foiling has been
around for a few years now. But to be honest, when
it first came out, I thought it was a fad and I thought it wasn't here to stay. Clearly, I was wrong on that. Now, even though foiling
has been around for awhile, I'm still hesitant to invest
in a special foiling machine and different boiling plates while I liked the look of it, It's kind of an investment. So I was excited to discover
a different way that you can create foiled cards without needing a
special foiling machine. Let's go take a look at what we're gonna cover in this class. Now the method we're going
to use with foiling in this class requires
either heat or pressure. Now, for this class I'm
gonna be using pressure with my big shot die cutting machine because that is a tool
that I already have. And you could use a
dye cutting machine and doesn't really matter
which one you have. As long as it applies pressure in order to do die cutting, you can use that with this. The other method using
heat can be done with an inexpensive
laminated machine. If you don't have a
die cutting machine, but have a laminated machine that will work as
well for these ones, obviously, you're
going to need to have a decoding machine to do the foiling method
with the dicot. But like I said, it's a tool that I already have and that's what we're gonna
be using in this class. These are the four card designs that we're going to be
doing in this class. A couple of them I've done in different colors just so that you can see the
first one here we're going to be using a stencil and create a
foil design with that. The next one we're
going to be using two different stamps and create a foiled card with
a stamped image. For the third one,
we're gonna take that stamped image
and then we're going to add a second foiling color and I'll show
you how to do that. For the last one, we're going to use double-sided tape and a die in order to create
a foiled card that way. Now all the supplies that we're using throughout this class are listed on the supply sheet that is included in this class. And those supplies
were also linked to where you can purchase them if you choose as the designs that we're doing in this class. But you could easily swap out the stencil, the foil color, the stamped image, or the dye, and create ones to
your own taste, to your own color palette,
that sort of thing. Now let's cause
create some cards.
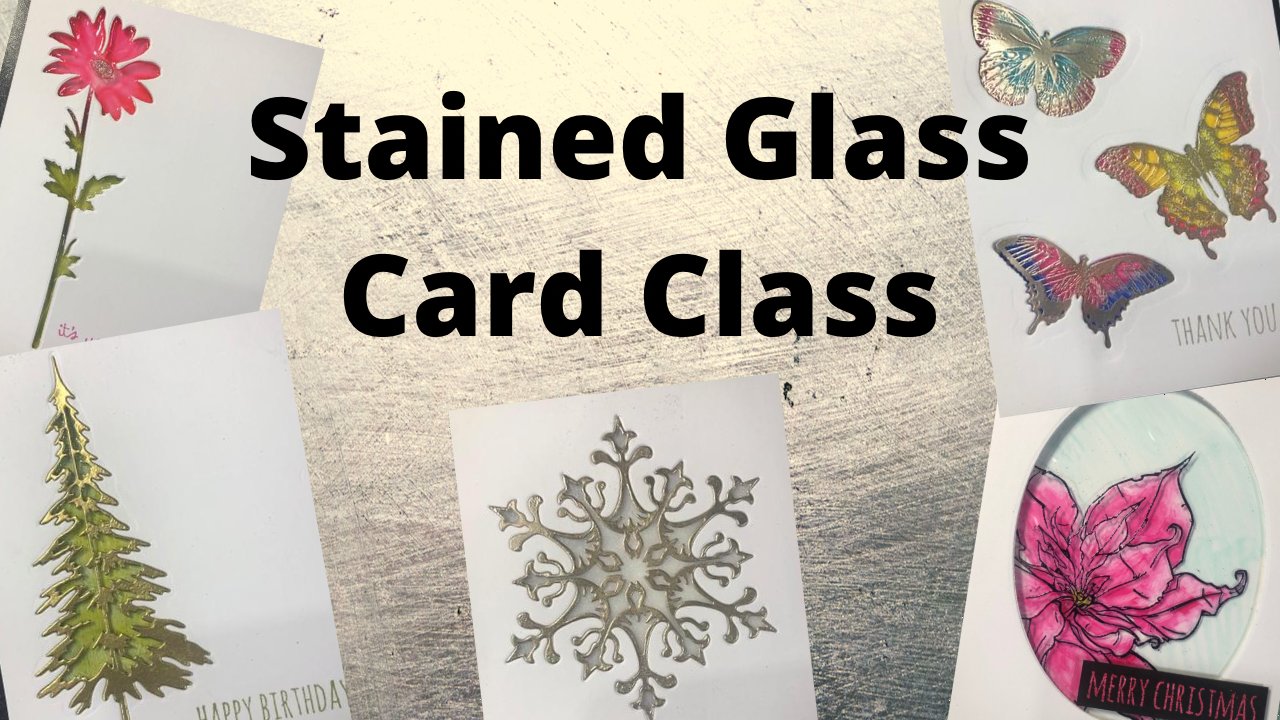
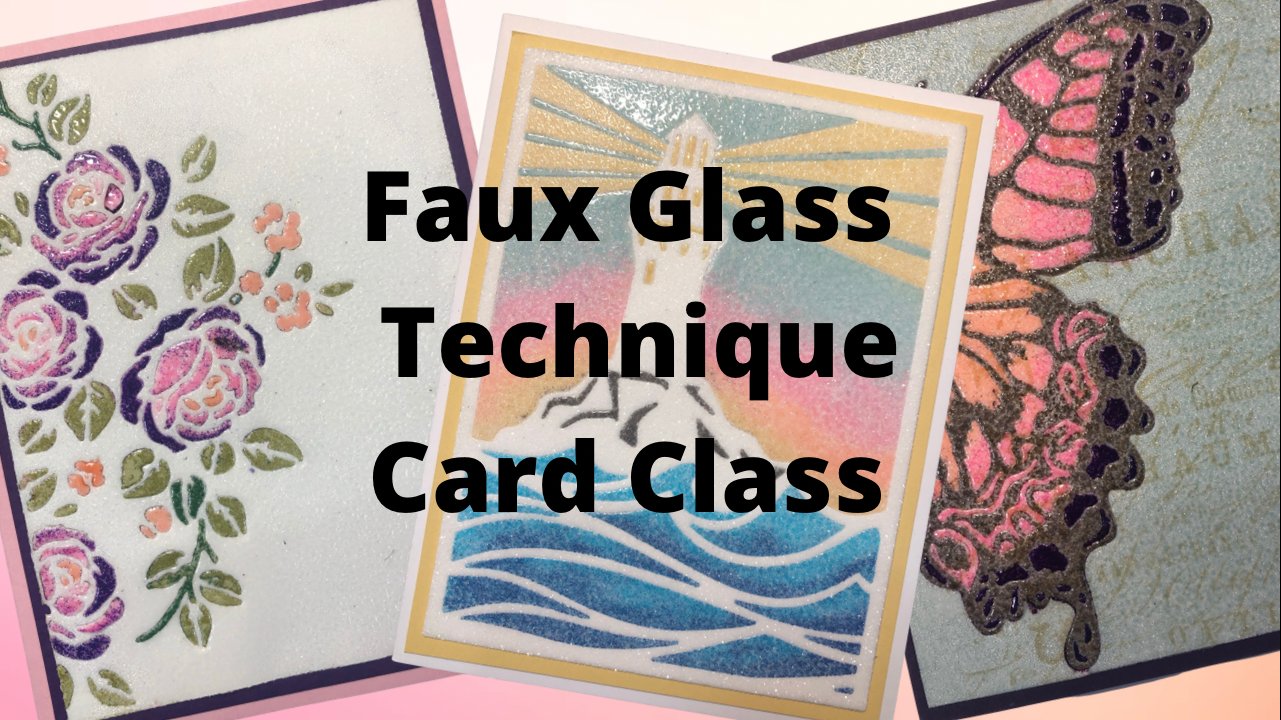
2. Foiling with Paste and a Stencil: Alright, so the first card that we're gonna
do in this class is this roses card. We're using an opal foil and the foil comes in a
package like this. And there's five sheets in there that are six inches
by 12 inches. So typically, you can do about three cards
with the front of this, but I'll also show you how
to stuck on my panel here. I'll also show you how
to use the back of It's all right, I'm
gonna have to rip this. There we go. Alright, so I'm going
to cut my foil just to cover the front of my card. All right, so I'm going
to have that to the side. I'm going to demonstrate on black card stock because
you're gonna be able to see on camera what I am describing a little bit easier than you'll
see it on white card stock. I've got my black piece
of card stock right here. I'm going to put it
down on my surface. I'm going to tape it in place. And then I'm going
to place my stencil where I want it to go. And I'm going to tape that in
place with a little hinge. And the reason I do that is so then when I
lift the stencil, if I accidentally get, lose hold of it and it drops, it drops exactly the same spot. So I'm not going to
mess anything up. There are parts of
the central that I don't want on this with
the front of this card. So the easiest way
to avoid that is just to use pieces of tape
and close and cover them up. That way you don't accidentally get to paste in those areas. You don't necessarily
have to do it, but this way, I don't have to worry
about it quite as much. So the paste I'm going to use
is deco foil transfer gel. So this works in
two different ways. You can use it with heat or
you can use it with pressure. We're going to use it with
pressure in this class. So I've got a
palette knife here. I'm going to take
some of the gel. I'm going to push it
into the stencil here. I'm not worried about it
going off of the car because it will clean up off my desk super quickly and easily
with just a baby weight. But I do want to
make sure that I get a nice smooth layer because I've got areas
tape that I don't want the piece to go. I don't have to worry
about being super, super careful on this side of my part because I know
it's not going to go into areas I
don't want alright, once that is all filled, I'm going to put the
excess in the container, lift my stencil up. And like I said, I
can just lift it up if I lose hold of it, it'll just fall
in the same spot. And then I pull my stencil up. This needs to be cleaned
fairly quickly because that is basically glue that you're
putting on your card based. Now you see how
it's really white. We need to wait for it to dry until it's completely
clear like this. And this is what I meant
by being able to see the difference on black card
stock better than white. On white, it's
harder to see when it's completely clear on camera. So you can see it very easily on between the black
and the white there. So I'm going to put
that aside there. And I'm going to clean
this up quickly with a baby wipe because we want
to get all the glue off. Now the only other
thing that I did on my card base that we're going to use is I put a little bit of this onto my desk
here, just like this. And then I check the edge
of my card stock piece. And you can do this in
two steps if you want. And I just rubbed
it through because I want to have a little bit of that foil showing on
the side of my car, just a foramen and it's
not gonna be super even. But I just want to add just a touch to frame
it a little bit. If you want to do that at
the same time, you can, if you would prefer, you can foil your piece first, then do that and do it
in two different steps. But you want to make sure
that that dries completely before you move on
to the next step. And once again, let's
clean this off here. Let's move the
sample card aside. In order to use pressure, what I'm going to use as
my die cutting machine. I'm going to take that foil. I'm going to lay
it on the front of the card around my
die cutting machine. Now when I do this, I
do make sure that I use to very flat plates. I don't want to use my plate that's like
this because that's going to add some texture
to the front of your card. So I'm going to use
two very flat plates. Put it on there, put the other plate
on top of it, and then run it
through the machine. One time is probably enough that I typically do it back and forth just to get the pressure
for going from both sides. Some of the glue must have
gotten to the back of my car because it's sticking
to my plate there. Let's move the machine
out of the way. We can lift up our foil. Because of that pressure, it is stuck to anywhere that
I have had any of that glue. So now we can simply glue that
to the front of our card. And I'm just going to use some distress collage
medium to do that. I'm going to center it. I didn't didn't cut this
down, so I have a frame. So this one here, we just don't have a matter
around it. That's okay. Typically, what I would do
ahead of time is cut it down so that there is a bit
of the card-based behind it. Like I said before,
I didn't really like this oval as much on the black. I found it showed up
nicer on the white. But this way you can see
what it looks like on black. Right here. I had not waited long
enough for my gel to dry, so some of it ripped
when it came up, but I was able to put gel again and then redo
it where you see it darker here is where
there's two layers of foil on the gel just to be
aware that you can fix it. But that's the effect
that you're going to get. Then if you wanted to do
a different color that is just gold on the black. Then finally, you can have fun with a bunch of
different colors. So this is just a bunch
of different home. He's got a gold red, purple on the back as well. So you can use a few
different colors and foils come in so many
different colors, the sky is the limit really. But that is how you're going to use the gel through a stencil. In the next section,
we're going to be using it with a stamp. And I'll show you how
to do that there. And we'll see you then.
3. Foiling with Paste and a Stamp: All right, So for our next card, we're going to use some
foiling with a stamp. Now there was a slightly
different process to this, as with using it with a stencil. We're gonna use the same
transfer gel paste. But what we're gonna
do is I have a piece of fun foam here is on a piece of foam core just
to give it a little bit of stability when
I'm holding it, I'm going to put a
nice thin layer as if creating my own stamp pad. And then I'm going
to stamp the image and then stamp it
to my card stock. Now I do keep my
piece of foam in a plastic bags to give
it a little bit of life so that it doesn't
dry out on there. I'm going to show you
stamping on a black card. We already see how it's going
to look on the sample here. And then we're gonna
do it on a piece of white just to show you what
the difference looks like. A very first step is taking
some of the transfer gel. And we're gonna put a nice thin, thin layer on our
piece of fun foam, trying to get it as
thin as possible. And as even as possible. The palette knife makes it
nice and easy because there's a nice straight edge there. So it's almost
like putting icing onto the piece of foam there. I'm gonna take my stamp. I am tapping it a
couple of times just to make sure that I get it
too all over the place. Then I take a look at the gel is white so I can see
exactly where it is. I'm going to stamp it on
my card is not card stock. You want to make sure
when you're stamping it, that you are very careful not
to let it slip because it is a little bit slick
and it would be very easy to slide
on your card stock. So that needs to let it needs to dry so
it's completely clear, just like the the
paste and the stencil. Once again, it's much easier to see the black then on the white. Now I'm going to
stamp a sentiment. And once again, I'm
being very careful to try not to have it
slide on my card stock. Then I need to let that dry.
I'm gonna pause a minute. I'm going to clean all
my supplies and put this away, and then
I will be back. I have my white wine here that's completely dried
for the stamping. You don't need to wait
quite as long as the paste. The paste I want to say you probably have to wait
a couple of hours so it's completely dry
because it's quite a bit thicker with a stamping, it's not nearly as
thick, so you don't have to wait quite as long, but you still want to make
sure that it's completely dry. You'll be able to
see exactly where the stamped image is
because there'll be glossy. It'll be completely clear. I'll see you in just a moment. All right. So my area in my pace
is all cleaned up. We're ready to foil, so I've got my piece here that has the dried foiling gel on here. Now, my piece of foil here I'm using a piece of
holographic foil is not quite big enough to cover the butterfly plus
the sentiment. So what I'm gonna do is
I'm going to cut it. I'm going to put my
sentiment piece down. Then I'm going to put my
piece over my butterfly. Now as I said before, this gel can be used with
either pressure or with heat. So as I've said, I'm using a cutting machine, I'm using a big shot
to apply pressure. If you didn't have one. You could also use an inexpensive laminator that would work with
this gel as well. We can lift this up. I see there's a few
spots that are missing, so I'm just going to turn
this over a little bit. Then I'm going to add an extra piece of car stuff
underneath just to tighten the pressure a little bit
and see if that helps. Put it through rate
again, 1 second. This is a great way to foil
without a foiling machine, but your results are gonna
be slightly different. It's going to have a slightly
different look to it. That's to be expected. But it's still helped a lot. It's still nice,
inexpensive to be, inexpensive way to be able
to get foiling on there. Now, let's move this stuff
out of the way here. I've got a tiny little
bit of foil on here. The way to fix that is to
use an adhesive eraser. You can just erase and
it'll remove those areas. Now we can do this to the
back of our card here. Now for this one, I didn't use anything to frame it as
I did the first one. In the next card, I'm going to show you
a way to frame it. That is actually a
little bit easier, plus a little bit more precise. It just frames it
a little bit nicer than the method that I showed
you in the first video. Now this matte doesn't
really show up on the back of the
cart or from the card. So probably what I
should've done was picked a different color
for the card-based just to kind of bring out the colors in the
holographic foil there. Because this didn't
really do it as much as I would have liked. But still, actually I think
I'm going to do that. I'm going to grab another
piece of card stock. I'll be back in a moment
and we'll fix it, right. So I've got grabbed a
pale pink card stock and it's just going to let the color of the
holographic foil showing through a
little bit better. It's going to frame this
a little bit better. Yeah. Definitely a nicer
look than just putting it on plain white. There you go. So very simple to use stamps. Now here's the one thing
that I wanted to say. I chose a stamp that has some
detail but wasn't super, super detailed in that set. There's another butterfly
here that's really, really detailed and has
a lot of lines in it. That particular
stamp didn't foil nearly as well as this one did. So you're going to
have to pick and choose which stamps you use. Here's another one that is just the gut finer lines to it. And once again, that one
didn't foil quite as nicely as I would've liked. You will have to
play around with stamps that work
better than others. So be aware of that. But it's a great way
to get some extra use at your stamps in
a different way. As well as the fact
that you don't have to buy a foiling machine
in order to do this. I see it a little bit of a
line here from some foil, so I'm just getting
rid of that there. But there we go.
The same color foil to different
backgrounds and just shows you the difference
between the two. Another one is right or wrong, both their personal preference, but they still look
absolutely beautiful. And obviously the
sentiment could be swapped for any
one that you have, same as the image I'm sharing with you
on our supply list, all these ones that I'm
using for this class, but you could easily
change stencils. You can use images. You could change foil colors and customize it to
your own preference. Will see you in the next video. We're going to take stamping and oily and we're just going to tweak it just
a little bit adult, few more extra elements to it.
4. Foiling with Paste, a Stamp & 2 Sided Tape: All right, So this here is the third card that
we're going to do. The start of it is very
similar to the second one. We're going to stamp the IV and then we're
going to foil it. And then we're going to
add a few extra accents to do the read, as well as my favorite
way of outlining that in a way that you
get a nice clean border. Very first steps,
same as the first. We're going to put a
little bit of the gel down on this block now
I probably don't actually need to
do this because I just did the other card. But just so that you see
and putting a fresh amount each time is a good thing. Once again, nice thin layer. I'll take a look at your stamp before you stamp and
make sure that you've got the gel on all the surfaces. We don't want to miss areas. Police your stamp where
you want it to go. Press nice and firm.
And I do jiggle it kind of a little bit just to make sure that I've gotten all
the edges of the stamp, this needs to completely
dry till it's clear. I have one here already to go. So let's move this
out of the way. Put my phone back
in the bag here. Like I said, this bag does
get a little bit of messy, but it's nice to be able to use that fun foam over and over again and have a sealed
area for it to live. Grab my machine. Now all these pieces of foil
that we're foiling with, don't throw them away. The last card I'm going to
show you a different way, a different way
that you can reuse all of those bits
and get them used up because foil in itself
is not the cheapest thing. It's always nice to be able
to use all of our supplies. Once again, I'm going to put
the plate down and I like to try to make sure
that my plate that the foil is as flat as possible. Run it through. Then remove that
foil now once again, same as last time, it didn't feel quite as much
as I would like. So I'm going to add a piece of card stock balloon just to
thicken up that sandwich. Actually I'm going to add just to tighten it up a little bit. And it's best to use card stock because card Scott
card stock has some give to it so you don't want
to use anything that's very rigid and ruin your machine. There we go. That's better. All right, let's put
this to the side. Now the first thing
I'm going to do is use the state to go
around the edges. So I have a tape that is
an eighth of an inch here. This is the thinnest
this tape comes. I'm just going to
place it around all four edges and cutting the ends so that they
get nice square edges here. I'm trying to bump this
up as close to that other tape edges possible
because if there's a gap, you're gonna see
it with the foil. There we go and one more side. And then here I'm cutting
that to the edge of the tape, not the outer edge
of the inner edge. So put the tape to the side. Now the last thing
before there it is, before I well, I'm not
going to foil quite yet. I'm taking some Tombow
Malte glue and I'm putting it over every place
that I think there's a berry. Now Tombow multi glue
is a glue that is really lovely when you're
using it for crafting. When you put it with two
pieces of paper together, it sticks and you can't
rip anything apart. If you just let it
dry on its own, it dries to attack you finish. So it's perfect for foiling. But once again,
you're limited to what shapes and stuff like
that you can make with this. So I tend to use it for berries and just dots
and stuff like that. So I need to let this sit
until it's completely transluscent is going to have a little bit of a
yellow tone to it, but you're gonna be able to
see through it and it'll be back once that is ready
and we'll continue. All. So our glue is pretty much dry. There's a few areas that are onDestroy is I would like them, but I think it's going to work. And if not, it's going
to show you what happens if you don't
wait quite long enough. I'm taking the backing
of that tape off. I'm just using a pair
of tweezers and tucking the tip underneath the backing and then grabbing it
to pull it right off. I've got a piece of
scrap foil here. This tape sticks
really, really well. It's a great way to
use up that bits because any part here
that's got foil on it, you can absolutely use. When you put your foil down, I tend to try to put a
pick an area that's pretty much are pretty well covered with foil so that it
goes onto my tape. If there's a part that
doesn't have foil on it, it's going to remain sticky. But then I can take
a different part of the foil and put
that on the tape. So it's a great way
to use this up. So any foil that's on
there gets used up. It does get to the point
where even though you've got a tiny little bit of
oil left on your sheet, you might as well just toss it because It's really
hard to get it off. But this technique is a really great way to
get some of this used. Because why waste it? Now that the edges are done. Now I can do the berries, and that just requires pressing
down on those blue dots. Now I do want to
make sure for that, that I am also using a red part of the foil and not the clear because
if it's clear, there's no foil left on it. There we go. We've
got our piece here, foiled around the edges and
foiled in this denture. I'm gonna glue it
onto my card base. Just using some distress
collage medium. It dries clear and
it dries matte. So if anything
happens to seep out, it is going to be invisible. No one's going to
be able to see it. Hold that down for
a few seconds. Like blue starts to hold. And then for me this looks
slightly a little bit plane, even though it's nice and foil, there's just not as much
dimension as I would like. So I typically like to
just add a little bow. Just give it a little
bit dimension. I've just got some thin gold. Ruben here. I like to cut the edges of the tails with a ribbon
at a little bit of a slant. Then I use the distress
collage medium to hold it in place now because
it's a liquid glue, it does need to sit and dry. If I move this around, it's likely going to the Bose, likely going to fall off. I do just let that
completely sit and not be disturbed for awhile so that
that glucan dry completely. And now that I said that
I'm going to lift it up so that you can see it.
But there we go. Another foil card with
stamping as well as the tape in two different colors, will
see you in the next video.
5. Foiling with a Die & 2 Sided Tape: For our last card, we're going to use a dicot and we're
actually going to use the same tape as
our narrow tape, but we're going to use
it in a thicker form. This even comes all the
way up to 12 inches wide. This one here is
a five-inch rule. Perfect for card
making because it's perfect size to go on the
whole front of the card. I have some thin card stock
here that I've already put the tape on and I'm
going to die cut it. I've tried to do this technique
with just die cutting the tape that comes
in individual sheets. And it's really finicky to
try to pull that backing off without ruining the tape
because this is a little bit a little bit stretchy. It's really doesn't
work quite so well. It's a little bit
finicky. So I'm gonna put my die against my tape, put it in my machine, and we're going to die cut it. So in order to not get
a ton of dimension, I've used thinner card stock. It's still going to
add a little bit the stability to that tape and it's not going to get ruined as I'm taking
it out of the die. But it's just going
to be a lot easier to work with than just
the tape on its own. I've done the tape on its own for simple shapes like
stars or whatever. And it's worked that way. Something like this
is a little bit too intricate for that. So take that out of there. Now because we're
using this tape, it sticks really, really,
really, really well. For this card, we can use
some of our Foil scraps. So this is where I was saying, don't just have to make sure
that that was cut down. Don't throw away your scraps because we can use
them for this one, my sample card, I did goal so that you could see
it really, really well. For this one, we're gonna
use the extra pieces of our OPO foil just so you can see the difference
between the two colors. So to start, I'm going to do the same outline with my tape
as I did on the last card. It just gives it a
really nice frame. And when you do it with the
exact same foil as your card, you don't have to match
it with something. Coordinating. Works perfectly just like this. Then the last side, it's very stoked mid-sentence. There. There we go. So our outline is done. We can put our
taped to the side. I'm going to tape that,
take this dicot and I'm going to glue it
to our card front. I'm just using some distress
collage medium for that. I like this glue
because if anything happens to seep out
from under the dicot, it is Matt and it dries
completely clear. So you don't actually
see any glue. You don't have to worry
about it quite as much as you would say if it's
a glue that dries glossy. I'm not putting a
sentiment on this card. Typically I leave my cards
without sentiments and I wait until I plan on using them and then I will add
a sentiment to it. Just going to hold it down for a second to let that
glue really stick. Then the other thing I want
to do is I'm going to cut this dicot rate at the edge of the inner edge of that tape. There. There we go. I have a white card base here. I'm actually going to
use that other piece of the pink because I know that coordinates really well
with that oval foil. So while I'm waiting
for this glue to dry, and especially in that bottom
part of that stem there, I'm going to score my
card and get that ready. There we go. There we go. All right. So I can take
my tape off of here. If you have a hard
time taking it off, tweezers often help. Really fine tip tweezers. And I find that if you just try to slide it underneath
the backing, you can often quite
easily pick it off of your card front. Now for this one, we are going to be
using pressure, but because this
tape is so sticky, the pressure just from
pushing it with your hands is enough so we don't need to run it through the
die cutting machine. My stem there's not stuck
down as well as I would like. So I'm going to try
foil it carefully and then I will stick it
down again afterwards. I'm going to use, if you use Foil scraps and I'm gonna
do the outside first, just line it up and
then pull it off. Here we go. Because we've already used it. There's some places
that are opened that don't have any of the foil. So all you do is you just move it onto a
different part of the sheet and fill
in those areas. Not quite as easy as just having the foil do it all in one shot, but it's a great way to reuse. Use up this foil
and not waste it. Because like I said before, boiling isn't super
cheap or foil isn't. Supplies are not super cheap. It's nice to be
able to use them. For those long edges I
tend to like to use, here's a good full piece. I tend to like to use strips that I don't have to
necessarily fill them in. Some foils you'll find, you'll have an easier time sticking them down than others. There's anything that's not,
doesn't have foil on it. You can just take a piece of your backing there
and put it on. I think we've got it
mostly covered with a few areas on the edge here. And you definitely want to make sure that you have
everything covered with oil. Otherwise, you have exposed tape that is going to stick
to it pretty much anything. So we don't want to
have exposed paper. All right, so let's move
our foils to the side. Then we can glue this
down to the card. Once again, I'm going to use that same distress
collage medium. There we go. And this has actually
gotten glue down with the pressure of doing our foils. It's gotten glued down enough, so we're good with that. If you find you
have an area that's not stuck down as much as
you are not stuck down, not foiled as much as you like, you can use an
embossing buddy to just add a little
bit of thought. I had mine sitting here
but I don't see it. Just add a little bit of powder that will take the
stickiness off of the tape, but I'm not feeling
anything here. The other option is if
you do feel an area, you can just take your foil and try to foil it
a little bit more. There we go. We've got our flower embossed or
foiled with OPA foil. And then we've also got it
foiled with goats, gold foil. And once again, you can use whatever colors you
want with this. Any color will work, but a great way to
use your Foil scraps.
6. Create Foiled Handmade Cards without a Foiling Machine Thank You: Thank you so much for joining
me for this boiling class. I hope you enjoyed learning some different ways that
you can add foil to your cards without needing
a special machine to do it. Now, don't forget there all the supplies we used in this class are on
the supply list, but you can easily swap out the foil color, the stamp image, the stencil, or the dye, and create cards
to your own taste, hope to see you soon
in another class.
 Artsy. Island Girl, Teacher