Transcripts
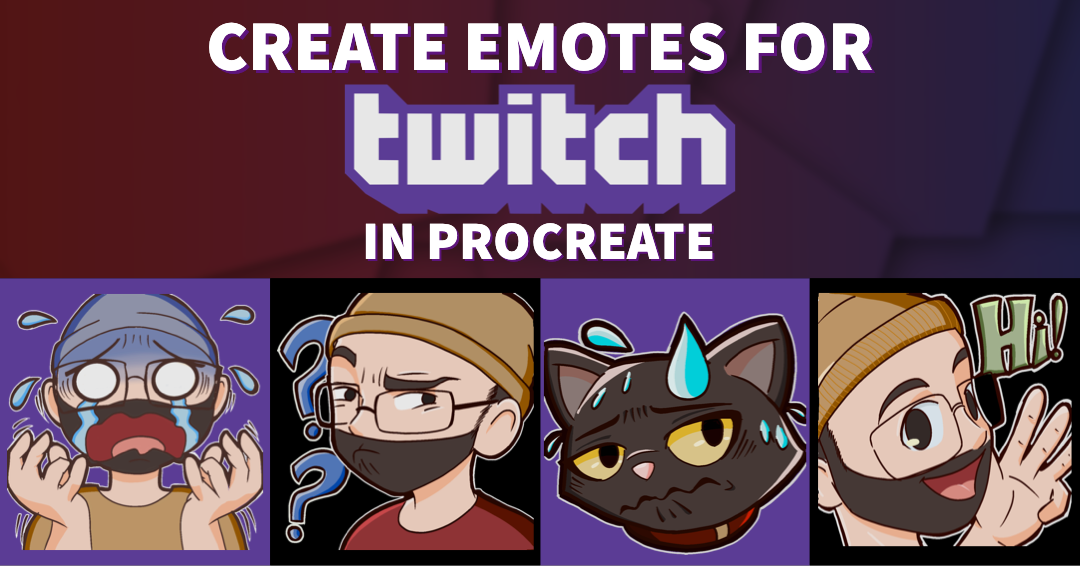
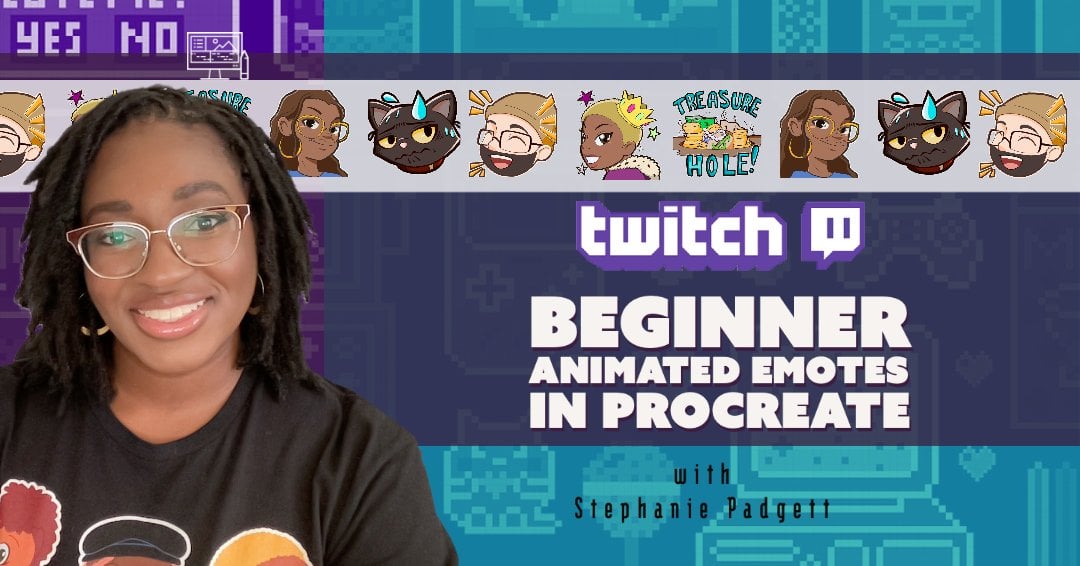
1. Course Introduction: Hello and welcome to my course. My name is Stephanie and I'll be teaching you how to make emotes for Twitch. As a children's book illustrator, I need to be able to illustrate expressions to tell a story or to set a mood. Throughout this course, I will teach you how you can use various references to create expressions, export, and format your art in Procreate, and if you are streamers, I will teach you how you can upload your emotes for Twitch. This class is for any skill level with a familiarity in Procreate. This class is also great for side hustlers who want to reach out to more clientele in Twitch streaming. You can also use these skills to further develop your facial expressions and comics storytelling and even use this artwork for emotes and YouTube streaming or even in Discord. By the end of this class, you'll be able to create emotes of your very own for yourself or use them for marketing to gain new clientele. Let's get started.
2. Project introduction: In this course, I will share with you the steps I take to create emails in Twitch using Procreate. I've provided a template you can download to sketch out and turn your expressions. I will also share design tips, references and how expression can be exaggerating for using the squash and stretch method. Then comes the fun part of drawing. We'll work on creating confident line art color palettes in organizing the emails to fit onto one file. Finally, I will show you how to resize and exploit your art and how you can upload your emails to Twitch, and if you're not uploading emails to Twitch, and also I'll show you how you can export your arts, so you can send it to your clients. This course primarily focused in using Procreate. However, as an alternative, you can use Adobe Photoshop, or Clip Studio Paint. Let's begin the first lesson in designing your characters.
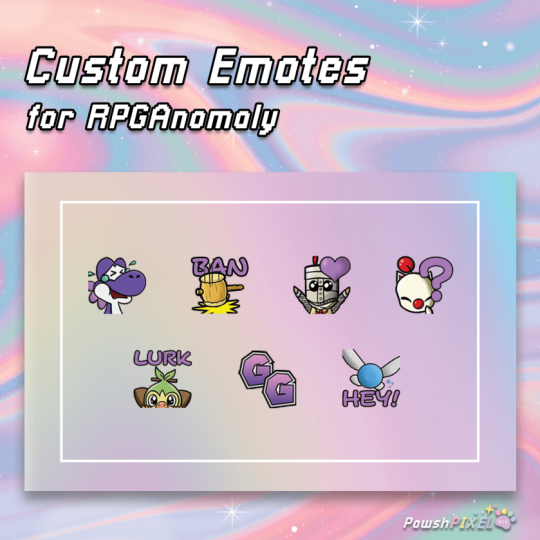
3. Design Your Charater: When designing your character, you want to keep in mind to designer your character with key memorable components, whether it's the hair or their facial hair, or even a prop that they constantly hold. A good example of this is looking at Mickey Mouse. Despite Mickey Mouse's character design changed throughout the years, he still has the iconic three circles, two first ears in the main circle for his head. Another good person to look at is Batman. Through the years have changed, but Batman still remains the same. Sometimes your characters will have a thing. What will be your character's thing? In Mario's case, his thing is essentially what we all know that he jumps, but he also is very recognizable from his overalls, the red hat, the mustache. His outfit is as simple as it is, it's very easily recognizable. Sometimes not all characters will have a thing. Take a good look at the Power Rangers. Even though the Power Rangers are right now in their current street clothes before they put on their costumes, but they're always wearing that same color palette. The Red Ranger is always wearing red, Yellow Ranger is always wearing yellow, and etc. Keep in mind that when designing your character, having too many accessories will not translate well when it's downsize to icons. Looking at this example, this character that I've quickly designed, she has lots of hair clips, hair accessories, hats, bows, ribbons, and belts, these won't translate very well when it's downsize to a 20 by 28 pixels square. Keep in mind that the main focus of these emotes is the face, the shoulders, and occasionally adding the arms. So if your character has a really large, big, fluffy dress, probably most likely you are not going to be able to see it. When starting with here emotes and their expressions, let's use the mostly used emoticons, such as laughing out loud, crying, anger, etc. These are the most commonly used ones and the easiest to be recognized. At this time, feel free to download my template for planning your expressions in your emotions. In the next lesson, we're going to look at some references and begin planning our expressions. I'll see you in the next video.
4. Planning Expressions: In the previous lesson, we discussed about how to plan for our expressions and designing our characters. Now we're going to discuss on how to plan our characters and what expressions they're going to make. If you haven't done so already, feel free to go ahead and download my template for planning expressions. There's one that's pre-loaded and one that's empties upon any expression that you want. You don't have to use paper. If you feel more comfortable drawing straight onto Procreate, that works perfectly fine as well. Now I know you're really ready to get started into drawing, but let's check out a couple of references so we can really express our facial expressions. The best reference is yourself. Take a look at yourself in the mirror when making various faces. As silly as it may this feel and as silly as it may look, you can really get a feel of how your eyebrows, your mouth scrunch is, or how your nose nostrils flares up. You can also use stock photos as a point of reference. Take a good look at some stock photos with dramatic lining, that can also help as well. You can also look for inspiration from cartoons, anime, and various manga, but do not copy. That's someone else's work, you want to make your work your own. Taking inspiration is fine, but copying directly is a no-go. For the images that I'm making, I'm going to make eight different expressions for our client in this case. The expressions I want to use are hello, seriously, he also has a pet cat, so we're going to include his cat in there as well. There are some times when he plays games and it gets confused, that's another one that he wanted. In addition to that, there is also sadness, cry/defeat. Maybe between you and your streamers, you may have a little bit of a inside joke. In this case it's finding treasure because that's his thing. Finally, we're going to go with annoy. He really doesn't get angry like that from what he's expressed to me, so we're going to stick with annoy. Now, his key elements for his character design is, glasses with a square frame and a beanie hat. In addition to that, he also has a beard. His main things is his hat, his glasses, and his beard. That's what's going to make him easily recognizable and it looks like himself in real life. I'm going to go ahead and get started on drawing the facial expressions in each square. Take care to fill up 90 percent of the square. That's right, you heard me, 90 percent of the square. The focus is on the face, not so much on the outfit. We also want to make sure that the key elements are easily visible and recognizable. Which recommends to consider that a simple image can often be the most pleasing to the eye. Since you only have a small space to work with when it's resized into the stream, too much detail or too many words can clutter the image, making it look messy and hard to understand. In other words, keep it simple. In the next lesson, let's dive deeper by exaggerating your expressions. I'll see you in the next video.
5. Color Your Art: Now that you have designed your character, and/or avatar and drafted some expressions, let's digitize and color your art. I like to draw my artwork on a large canvas with the 1080 by 1080 for the pixel height and width, with a DPI of 400. Typically is very large, but don't worry, it's going to be downsized. The brush today I'm going to be using is the syrup inking brush. Whenever I'm inking, I like to use strong, clean, confident strokes. The more confident my strokes are, the cleaner the lines end up looking. On a separate layer that I'll put on top of my original line art layer, I will increase the stroke width of my syrup brush, and then I'll go over the lines one more time. Just so there's a heavy contrasts so they can show up clearly on the screen. Because remember, these are going to be downsized. Next on a layer below all of my line arts using the syrup pen I'm going to fill in underneath the line art a light color. In this case, I used a very pale light yellow. When I need to fill in a large area, I like to drag a swatch color over the area I want to fill. When dragging the color onto my canvas, I keep holding down until a blue line appears on the top of my screen, and I can swipe left or right to adjust the fill of the threshold. When I feel that my line art is complete, I like to do a test on a twitch emote testing website. On this side, I can upload my emotes regardless of the size, and it will automatically resize itself, so you can see what it looks like on the screen. You can also toggle between dark and light to see how it's going to show up on different contrasts. The great thing about this, is that you can see how icons will look like in a chat situation. You can resize it to be larger or smaller. I'll also be providing a link to this site on the class notes. Now I'm going to change the color of this pale yellow to a darker color so I can see the contrast when coloring. You're going to select your layer, and click "Select", and then select the layer again change the color and then select "Fill". Now I can see where I left out some empty spaces to make sure that I have every spot filled in when coloring it. When I'm coloring, I like to use clipping masks. I'll may put a layer above the original layer, and from the right flyout menu, I'll select it to be clipping. The great thing about clipping mask, anything that you color stays within that layer so it doesn't go outside the lines. Clipping mask works pretty much the same like how it does in Photoshop. For flat colors, I'm going to use pastel light colors and shade with more saturation. It'll take a bit of adjusting, but once you find the color, save the swatch. Less is more. We want your prime focus to be on the facial expression. Too many additional elements like super tiny details will not be easy to pick up once the size of the emote will be exported to a smaller size. As you can see, I like to separate my shadows and highlights on different layers within the clipping mask. When I add my shadow, I'll add more saturation to the color. That would be the middle part that's on the color slider. When I feel that my color is satisfactory, I'll go back to the website and I'll test my color design on both light and dark backgrounds. When I switch to a dark background, is very challenging to see what's going on in the image. I need to provide some contrast so you can see the difference between the light and the dark backgrounds. I'm going to go back into Procreate and on a separate layer I'm going to create a white outline with the thick plate, so there can be a nice clear contrast when the background is dark. In the next lesson, we're going to resize and export your emote.
6. Resize and Export: At this point now you're ready to resize your images so it can be uploaded to Twitch. What I like to do is to duplicate my artwork just in case if I make any mistakes. I'll rename my artwork, Resized Emotes. I'll open the resized file and I will toggle and make sure that my background is turned off. On the top left-hand side of the screen, I will click on the wrench and on the drop-down menu, I will go to Crop and Resize. Under the settings, you want to toggle, Resample on. The aspect locked is automatically engaged. It will preserve the aspect ratio relative width and height as you resize your Canvas. With Resample turned on, adjusting the size of the crop overlay doesn't change the dimension. Instead, the numerical dimensions you enter will set the Canvas area. This will enlarge or shrink your Canvas to fit your chosen numerical dimensions. If you need to change your image dimensions, tap the number to bring up the iOS keyboard, type in your new size. The area inside the overlay will automatically grow or shrink to fit your size. To go back to your action menu and you want to share your image as a PNG. In this case, I'm going to send my image to my iCloud account. I suggest renaming your images so it's easy for you to find when you're going back into your computer or in your Google Drive. Just for good luck, I'm just going to show you how I did this one more time. In the next lesson, we're going to upload all the emotes to Twitch.
7. Upload to Twitch: Now let's go ahead and send your emotes and get them uploaded to Twitch. Emotes can only be uploaded by Twitch Affiliates and Partners. Click the profile icon on the upper right-hand corner of the program window and a menu will drop down. Click "Dashboard" or "Creator Dashboard", you'll be taken to a new page. Click the drop-down menu for "Viewer Rewards" and select "Emotes". You'll see another window open with three different tiers. These tiers are based on your user subscription. We're going to upload to the first tier. You're going to want to toggle "Auto-resize" on and click the box with the arrow to upload. Twitch will automatically resize your emote and then you will give your emote a unique name. Twitch will also give you a preview of how your emote will look against light and dark backgrounds. Finally, you can click "Upload" and you'll see a notification on the top of your screen that says "Emote uploaded". That's it. Now you'll have to give Twitch some time to go through an approval process but once it's approved, your users and viewers can start using your emotes. If you're sharing your emotes to a streamer I suggest sending it through Dropbox or Google Drive. Emotes are a great way of having your viewers express their emotions while you or your client is streaming. Now let's wrap up this class with a few closing remarks.
8. Closing Remarks: Congratulations, you've finished the course. You're now on your way to making emotes of your very own or for other people, great job. Emotes are a great way of having viewers express their emotions while you or your client is streaming or just simply chatting. If you enjoyed this course, please leave me a rating and share this course with your friends. If you have any additional questions or you just want to chat, send me a message, I would love to hear from you. While you're at it, feel free to check out my other course on card making for beginners. You will be surprised about some of the other things that you can learn with simple materials. Follow me on social media @Amusedsteph and I'll see you in the next course. Bye.
 Stephanie Padgett, Growing Artist