Transcripts
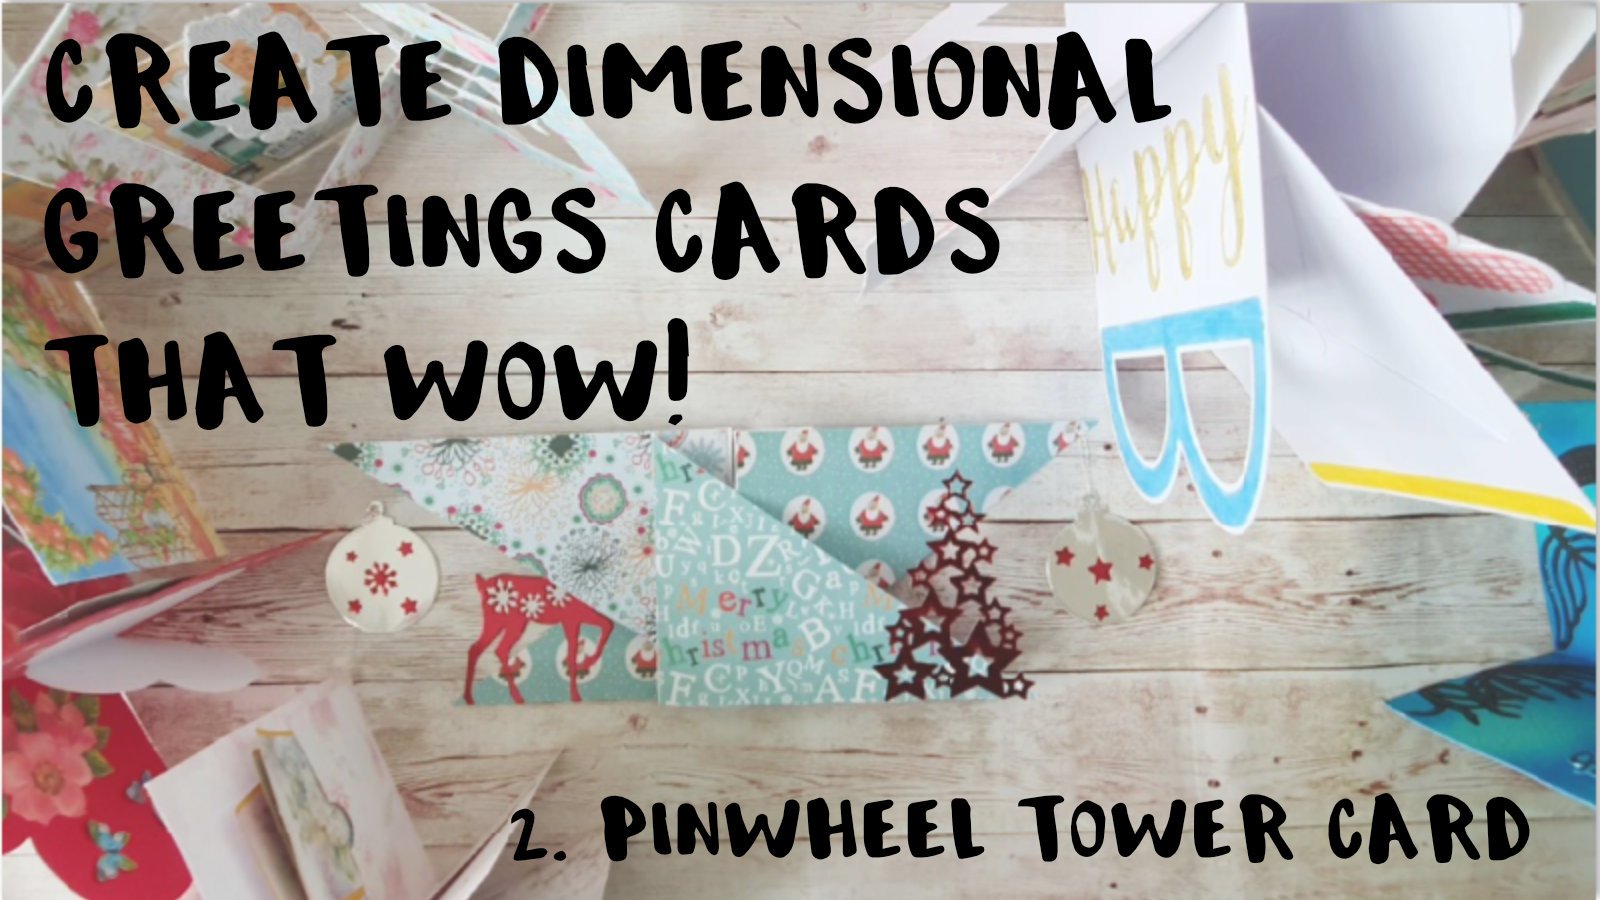
1. Introduction: Before I started card making, I thought that Greetings, Carter and he came one way, a single piece of card with a folding middle and something on the front. But now that I've been card making for a few years, I realized that that couldn't be further from the truth. I'm Lillian Andi. I'm a bit of a paper addict, and I loved making cards in this class. I want to take you beyond the conventional Flat Greetings card and show you how to create the dimensional easel card that will allow its recipient. Over the course of the lessons, I'll show you how to you create the basic card shape. I'll discuss my ideas about how to design and decorate for maximum well factor. Andi. I will walk you through an easel card project, which you can reproduce or use of inspiration to create your own wow inducing easel card. If you've never made a card before, you'll still be able to produce something really wonderful. If you do have previous card making skills or you are an illustrator or artist, I think you'll be able to take the concepts that I present and use them to create something really spectacular, So I hope you'll join me on this class, and I look forward to sharing some of my card making skills with you.
2. Tools: In order to make your card, you're going to need a few things. First of all, you're gonna need card stock. So this is just plain white card stock. I recommend a weight off between 2 53 100 years, um, which is about 9200 and £10. I also recommend using a school board. This is an example of a score port. It has regular measurements across the top at regular intervals and channels and edged into the face off it. And it will also come with a scoring tool. And the way that you use it is to place your card into the recess and then defines the place the appropriate measurement, and then simply locate your scoring tool into one of the channels and score at the down the length of the card. The good thing about using a school board is that creates, um, neater, crisper folds. If you just try to fold card without one, it will probably crack with the school board. You can create more professional Look, don't worry. If you don't have a scoreboard, you can get around it. So here I've got an old math mat. You can use an old math mat or are folded tea towel, just something that's got a bit of giving it. You don't want to be scoring against a hard surface and then also ruler Andi, I've got here a knife kitchen knife, but you wanted to be fairly narrow. You don't want it to be too thick and chunky. Andi. In order to school your card, you would just take the appropriate measurements. So measure across the top and the bottom line up to your ruler at the right place and then firmly press. You're a tool in this case, the knife into the card and school down the length of it. And the reason that you want something that has a little bit spongy is because, um you want you want the paper to be ableto bend into what it's sitting on. You'll also need some glue. I'm using just playing pvh glue. Here. You can use any glue you like a zoo long as it dries clear. Also, you'll need double sided foam tape. This is it comes on a roll or it comes in parts that you can cut down two different sizes, and this is great for adding dimension, not essential. But if you can get it, it's useful. Toe have is double sided tape. Um, this is useful because we'll be using acetate. Andi Sticking Using wet glue with a state can be quite tricky. Scissors. Just a ordinary pencil for sketching. Um, well, design ideas, some sort of coloring. So I've got alcohol Marcus here. But you can use pencils, paints, inks, whatever. You have a hand, we'll be fine and finally your needs so you can buy this from craft stores. I've put a link where you can get it in. The resource is, but you can also create your own. If you have a laminating machine, this is just a laminating pouch that I've passed through with nothing in between. As you can see, it's it's quite flexible, but it is very bubbly. Unclear eso it works really well. If you wanted something a little bit more sturdy, you could get that by just passing to laminating pouches through sandwich together, and you end up with a much sturdier, um, piece of appetite. It's a little bit more opaque than just the one laminating pouch, but it does work quite well and also If you have any old packaging appetite from packaging , don't throw that away. Hang onto it because it does come in useful.
3. The Basic Easel Shape: you can use any size card. I'm using half a sheet of a four because it fits nicely into the school board. So the first thing to do is to find the midpoint and score down the card. So for this, the midpoint is at four and 1/8 of an inch. So I'm just gonna run scoring toe down, and then we've got our first school, so that will fold you fold. That will give you a centerfold. Feel card. So at the moment, it just looks like a basic greeting card. The next folder you need is at halfway between the edge of the card and your centerfold, or alternatively, 1/4. Now I did formulate, So that's around two inches. It doesn't have to be exact, but that's basically what you want. So we're gonna put our line at two inches. Okay, Now what you have if you fold along the centre line and then you fold along the quarter line and you end up with this kind of shape, a wedge, and that will basically give you your easel. Very simple card shape to make. It's not complicated at all, but what's important is what how you what you do with it now, As you can see, if you are left it like this and you put a lot of stuff in it, I would have a tendency to four forward. So then next important component is to have a stopper of some description. So it could be anything, really. I'm going to use this scalloped circle, and this is where your phone tape comes in. So take some foam tape. I think it on the back and then put it roughly where you want your car to stop. So let's say we put it there, and now you'll see that the card sits up nicely and doesn't slide around. Now it's an important thing to note, obviously, is where you put your your fold will determine how upright the card sits. So if you Andi also where you put the stuff, so at the moment this is quite upright. If I had a smaller stop, question the front you to see that the this part of the card had a shallower angle on here . It's steeper than you know. If I would put it back here, it would be steeper. Still, also the position of this. Generally it's 1/2 way, but if you wanted to put it a little bit further back or a little bit closer to the front, that also changes the appearance of your car. So when you've got the basic shape, you can play around with the position of this fold and also the position off this stopper, Teoh and see what effect it has really on whatever design you use that this card is in landscape, and so you end up with this kind of shape. But if I was just to take another a four sheet of paper, But this time I've cut it length ways into the width ways, so the center point here would be at five and 7/8 Andi, then the quarter point would be at around three inches. So that's just leave it at three, and then we fold this one. You'll see that you end up with in much sicker portion of the card here from pads to this one. So again, that's something to consider when you're folding your card and choosing which orientation the orientation will little effect the shape of the evil. How much how much you in a real estate you have to play with here. You can see there's quite a long a big space here in the square, a heavy space here. Where is here? It's It's a lot narrower, as you can see, so that's another thing to consider. When you're making your card, you can play around with the orientation. You can play around with the position off the fold, and you can play around with the position of the stopper. So now that you've got the basic diesel card shape, join me for the next lesson and I will show you sharing my ideas about how to decorate the card to get the most out of the state and to really maximise the well factor.
4. Achieving the Wow Factor: most easel cards will take what would have been on a flat greetings card and simply fix it to this area here so that when the card is assembled, it will sit up. Like so. For example, here's a card that I made. It's just unordinary greeting card. Um, if you imagine that I stick it to the front like this, and then it becomes a sort of stand up diesel, and it's it's interesting. It's it differentiates it from just the standard greetings card by having it sit on the easel. But I think that in order to really maximize the wild factor, you need to start thinking about using incorporating the easel shape into your car design. So what I mean is, for example, I see allege, or a step or a seat, a shell for divider between two different things to different surfaces. You've got all this space here that you can do a scene with, And then there's this space up here, which, on the face of it looks like it can't be used. If you mount, hesitate onto the card and then you can stick things in this area up here, it gives the illusion that your elements, your design elements are floating so you can incorporate that into your card. You can cut the agitate into strips, and you can have strips stuck to the front. So if you look at the shape of this easel, anything that stuck on this side will have. This angle will lean back in. Anything that stuck on this side will lean forwards. So if you imagine you use strips of agitate, you can have the illusion off depth by having some things projecting forwards from the card and some things for projecting behind the card, and it will still fold flat and go into an envelope.
5. Let's Make a Card: So now that we've mastered
the basic card shape and we've had a discussion about
some design principles. Let's make an easel card. So I've gathered my
supplies and I've done some of this beforehand so that it doesn't make the video too long. I'm going to use an
A4 sheet of card, cut length ways to make
that a top folding card. And I've already scored it in the right place
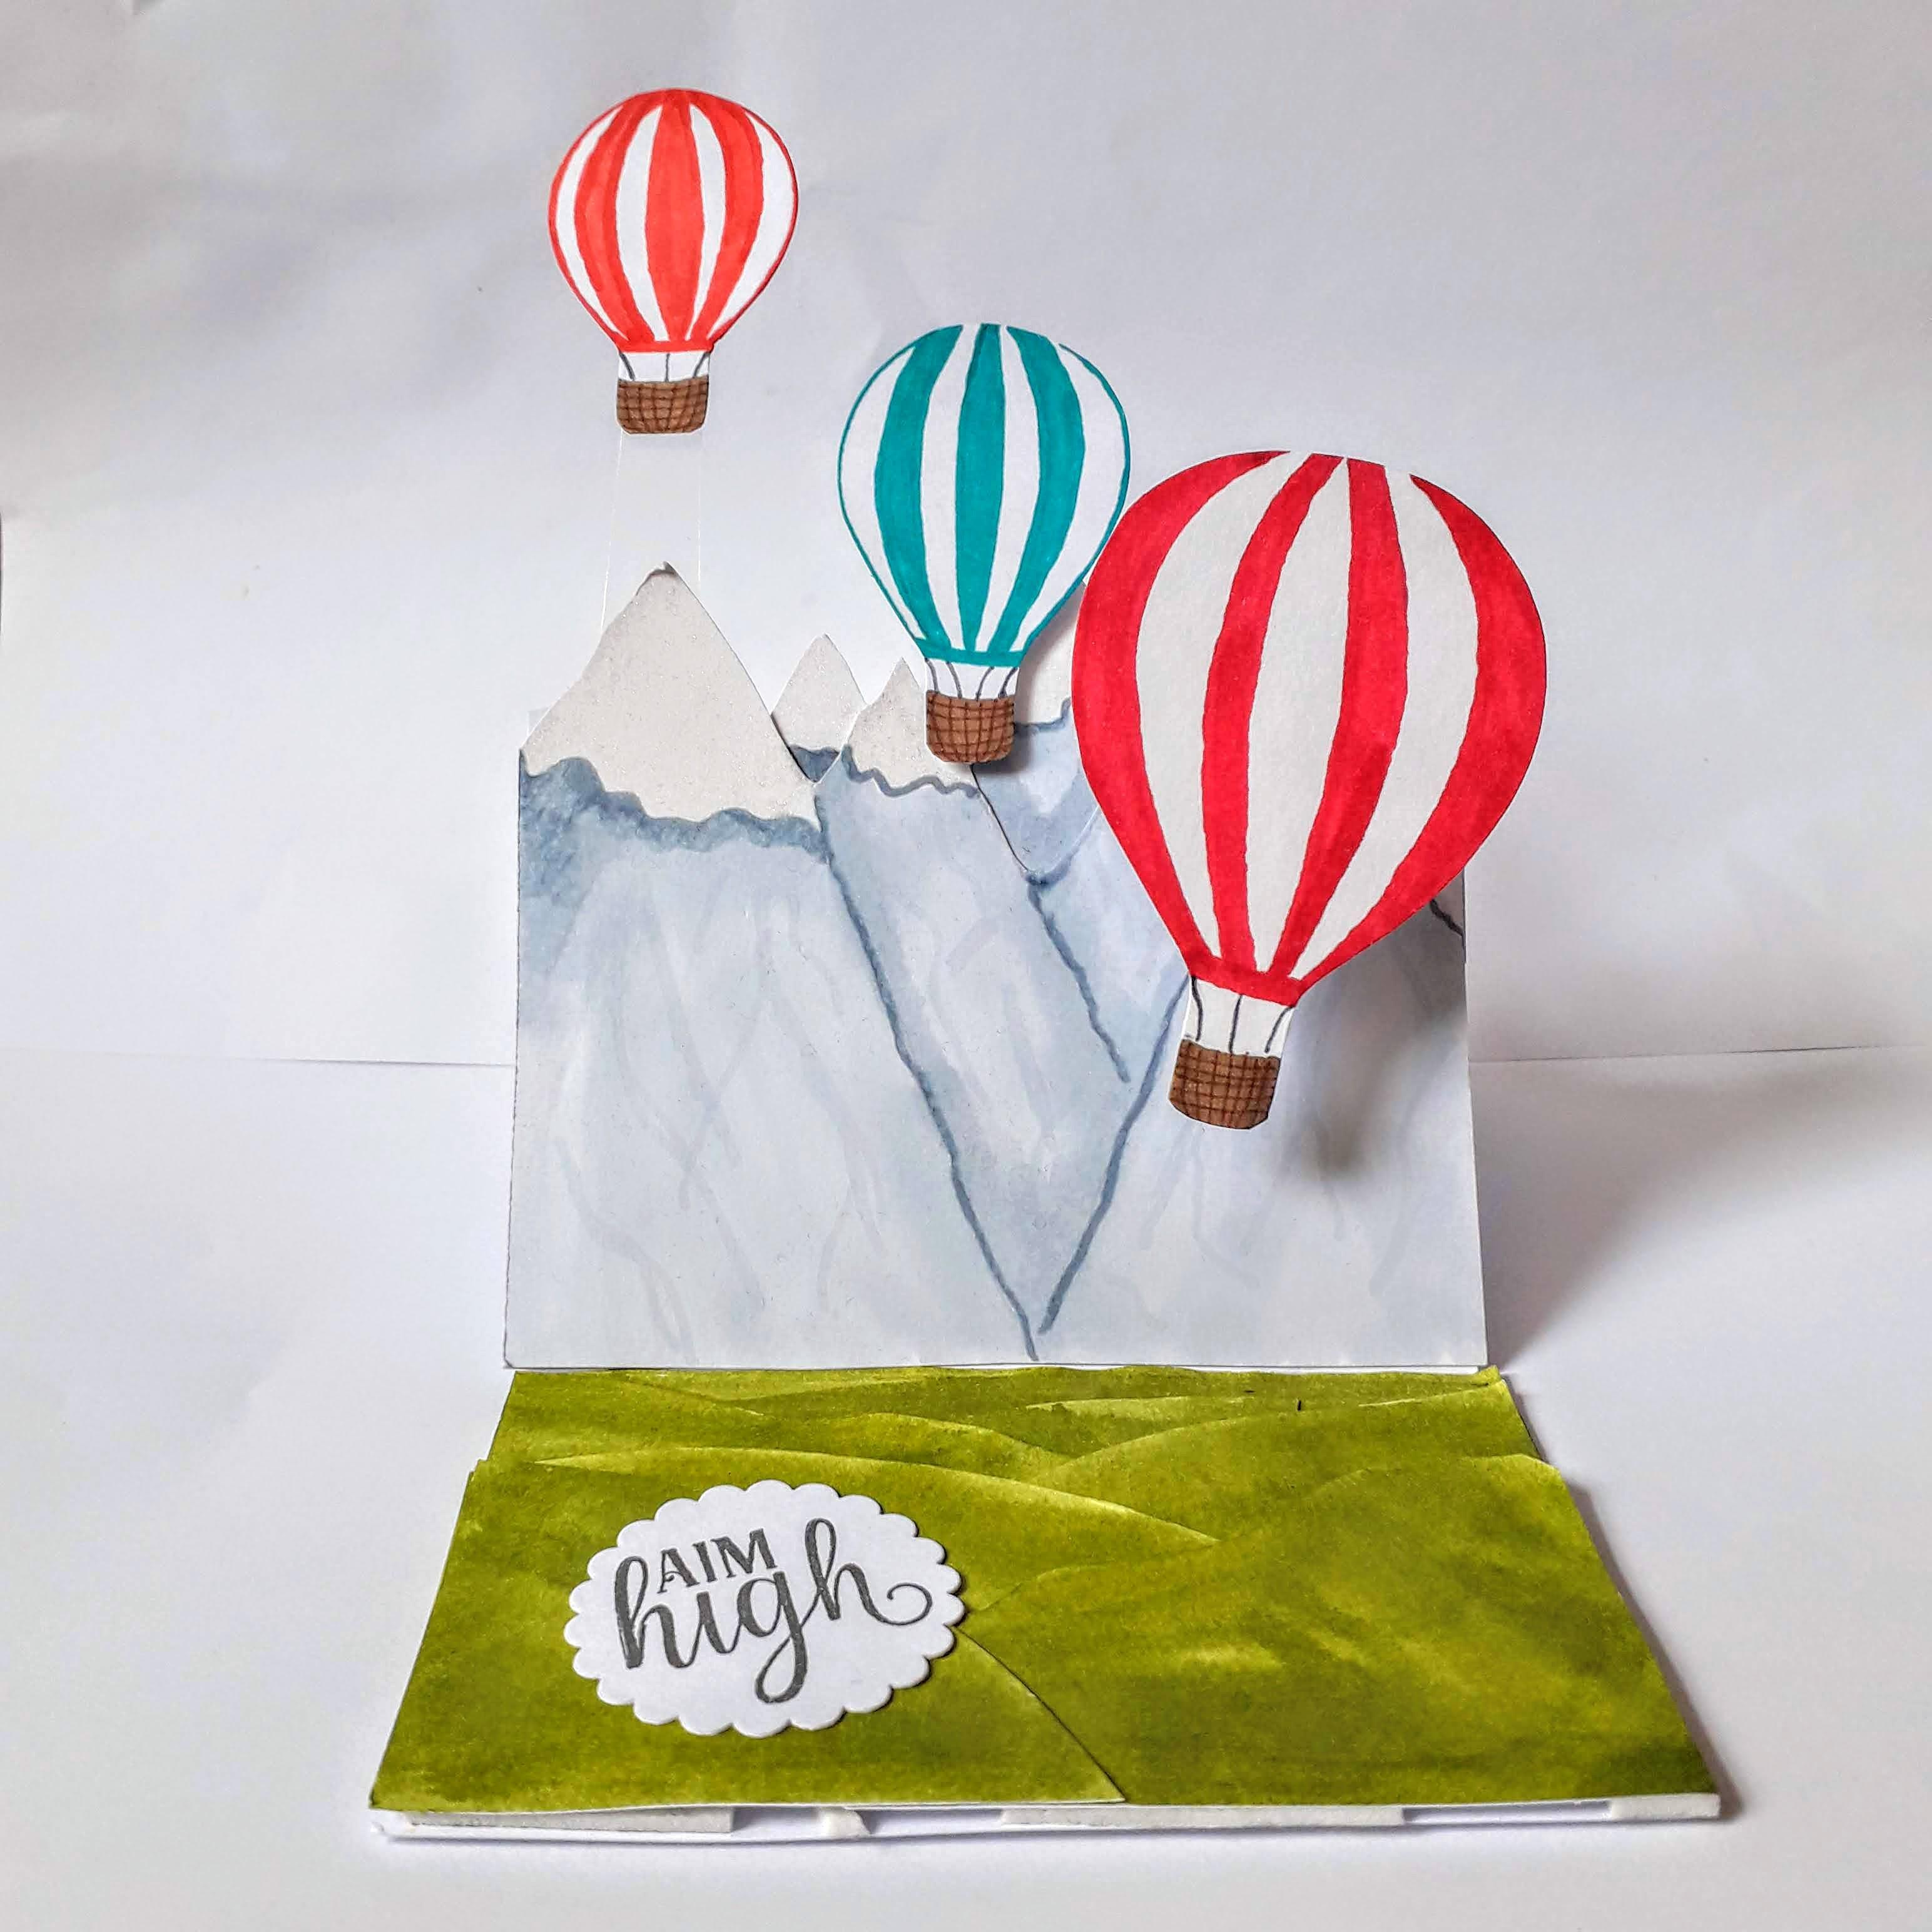
to get the fault. So the scene I'm going
to do is a mountain, hot air balloons floating
over the mountains. So what I've done is I've
taken a piece of card is about two-thirds the
size of the card front. And at energy can make it out. I've just sketched a
mountain range in here. And then I will cut out this
mountain range very quickly. Okay, so then you end up with
this piece and this piece, which slots in there. So in order to fill in any gaps, once you put it on
the front, you can see there's a couple
of gaps here. So in order to fill in any gaps, just flip the top
piece that you cut up and it will fit nicely behind your existing
mountain range and then fill in any gaps. Now, I want to have one of the balloons
projecting forwards. So I'm going to put
some acetate here. So I need this area to be clear. Otherwise, it wouldn't
sit properly. So once you position
your pieces, I just basically snipped off this mountain top here so that there wouldn't
be any obstruction. And then you basically
color it in. So here's my colored mountains. I've used alcohol
markers to do this. And then I've got
a little shimmery. We've gone over
the snow caps with a little shimmery shimmery pen. And then the same for this. So you can see this is the
one that I've snipped off the top in order to leave it. In order to give me
the room I need to put my acetate down. When you're designing your card. Bear in mind. You don't
want anything to come out of this area here because otherwise it
wouldn't fit in an envelope. You'll need a
special envelope to fit things in there when you're when you're
making your car, just keep that in mind. Okay. So then another
thing that I've done with just plain white card. I cut out some hot
air balloon shapes. So I've got three sizes. I have a large one, a medium-sized one, and a
small one for cut these out. And I use these as my
templates then I didn't have to worry about poems,
recreate this card. I didn't have to worry about
doing it again and again. So here they are. I've just colored them in again
with alcohol markers. And we've got three
hot air balloons. So the plan is that
this one will be hovering over the foreground. So that's why it's
the largest one, the mid one, the mid-sized one. We'll just kind of
slot will stick on the actual One of
the mountain tops. And then I'll have
another piece of acetate so that this one
will be suspended in the air or give the
impression of that that's the case now for
the inside of the card. So the stuff that element, I just need to decide
how upright I want it. So as I said with
the previous video, you can sort of see
here you can change the angle of the front partners. So how much space you have
done here to work with just by sliding it further
back or further forward. So our minds, I'm quite
happy to have mine kind of halfway at the halfway point, which is fairly standard. So I've just taken a
piece of white paper. This is just copy paper that is the same
width as the card. Just again, to
provide a background because some of my
pieces might not. It's going to be some areas where there would be white
showing him I don't want that. So that's just
going to be there. And then I've got various bits of cards that I've
colored in green. So I'm just going
to figure out how I want this to sit to give the
impression of rolling hills. So once you've got an arrangement
that you're happy with, you can stick
everything down and I'm going to use the phone tapes. The phone tape, the that I
talked about earlier in the in the tool supplies list video to prop this up
so that it doesn't, it doesn't slide for
it, and that will be the stopper element. Okay? So there you can see we've got a nice the beginning of the
ninth rolling hill scene. And the great thing about using. The firm tape as well as
that it casts shadows. Which means that
you get another, a great feeling of depth. Okay. So now just turn the
card over and trim off any excess from the
sides carefully. Should end up in
nice neat thing. Pops up nicely. Like so. Okay. It's time to
sort the front out. So I will stick this
piece on first and my guide is this flat PCR. I don't want that to go over the folds because like I said, I'm going to be
using I'm going to be using acetate on the
backend projecting forwards. That's another thing that I
should mention about acetate is even though it's clear and
you're using a clear glue. When you add glue tasks that you will be able to see the
outline of the glue. So in those cases, you
really want to try and you want to try and hide anywhere that
you glue the acetate. And also obviously,
if your card, if you're more for my card, I'm going to have one of the
balloon sitting up here. So I really need to
put the acetate down first so that it's behind
all the other stuff, all the other elements, so that it's nicely hidden. Like so. Okay, so I'm going to put the finishing
touches to my card. This starting off with this
piece of acetate here. I'm just going to trim and then stick it to the front of the car using some
double-sided tape. So you can see what
I mean when I was talking about the fact that you can see
through the acetate. So it's a good idea to
hide it behind an element. Or if you've got a big sheet of it and really put glue
in strategic places so that you don't see and the
tape or the glue through. Okay, Now for the
hot air balloon, I'm going to stick
double-sided tape on back at that as well, just in a straight strip. And put that down. My acetate. Except when it
popped up like this, it gives the illusion that the hot air balloon is
floating in the air. Put that up a bit further to make as much
space as possible. Okay, now I can take
my mountains dance. I'm gonna put this
one down first. I'm using my that point as a guide as to
where that should go. And be sure not to glue anything above this fold blind
or this score line. Obviously, if you do then it
will not sit up properly. And the second one
slot, just like so. Let's take care to line
it up with the edges. And there we have it.
So already you can see I think that the tip shape, it looks really, really cool. So what I've done for it, I'm planning to do for the large balloon is I've
just got a piece of FLSA. This is just gotta tape from
packaging and it's folded. So the plan is that I will
stick it to the card like so. And then attach the front
like this so that it will project in front of the card and give the
illusion that it's floating in the foreground. So again, some double-sided
tape on this bit. Position that just
double-check where I want this to actually put too much
tape one, but don't worry. Okay, and then we want
some tape on here. And you can just pinch
this little bit. Hold it, right. And then you can just open it up a bit so that
it flows better. And so you can see then
you get the illusion that our tabulating is floating
in front and one behind. And then we'll have
the final balloon just position there. I might use some foam pads just to give it a bit of dimension. And we're pretty much done. So when it comes to putting
the card in and ambulate, you'll see it still will fit. Everything is still
contained within the area of the cards. It will still fit
in an envelope. There.
6. Advanced Techniques: Twisted Easel Part 1: So now that we've
mastered the basic easel, let's try some
advanced techniques. So in this example, I'm going to show you
a twist at ease off. So I have a piece of
card here that is 29 by 14 and a half, so I'm gonna make a square card. And as with the normal score, your card or halfway,
in this case 14.5. So that will give you your
standard greetings card. Now, what you want
to do for an easel, for a twisted easel is to call, to score from corner to corner. So what I would do
is locate a groove. Put that corner in there, and then line up your scoring, line up your scoring
tool in this groove. And then you know
that when you score, you will go from
corner to corner. So now fold your cards. You will have this shape. So when I look at
this first thing that I thought when
I saw this shape, was it reminded me of a sundial. Second thing I
thought when I saw this shape was that
it looked like it could maybe be a boat
of some description. Is that the sale? And then another
thing that I thought was it would be fun
to have this as customers slope something or
someone was sliding down. So you would put your stopper here to stop it
from sliding shut. But yeah, there's a lot of
different possibilities for using the shape. Of course you don't have
to make use of the shape. You don't have to incorporate
this into your design. You could just make a
sort of regular cards, kinda like I described
in lesson less than one. You could just make a
regular card but put your elements on this as opposed to putting it on the flat front. But I think it's because
you have this structure, it would make sense to use
it and I'm looking at it. It has a very sculptural
field to it, you know, so you could do something
if you were quite artistic. You could kind of
incorporate that somehow into your Cloud and I think
it would look amazing. So bear that in mind when you're coming up
with ideas for how you can really sort of show off this structure to
the best effect. I just wanted to have a
quick word about folding, scoring the card properly. So this is an A6 card
and I'm scoring at 10.5, which is the halfway point. Now, in most places, the fold would be on
the left-hand side. Obviously in some places
it's on the right-hand side, but in most places
It's on the left. Which is important when it
comes to putting in your, your score line for
your twisted easel. So in order to get it, so that this fold
stays on the left, you need to score from
top to bottom left. Now this will anchor your easel in the
left-hand corner so that it sits up like this. That means that if you
were to put some sort of sentiment or imagery on here, when it's slid up, it would
be in the right direction. And also when McLeod was flat, it would look like sentiment or the imagery that's
facing the right way. Now, let's just assume that
we did it the other way. So we went from top-left
to bottom-right. And we'll see, but this time
it's anchored at the top. And you'll see that your easel then it's kind of upside down because
if you were to write, if you were to view it this way, if you put some
sentiment on here, we wanted to view
it the correct way. Now you've got a card
fold on the right. Now if you're displaying
your card in landscape mode, it doesn't really matter. Because one way or
another it will, it will look fine. But if you are designing your cards so that it's
viewed in portrait mode, then that is something that
you should bear in mind. So just when you're
making your cards, just remember that in order
to have a left Cloudant, the fold on the left, score from bottom-left
to top-right. To have it everything in
the right orientation.
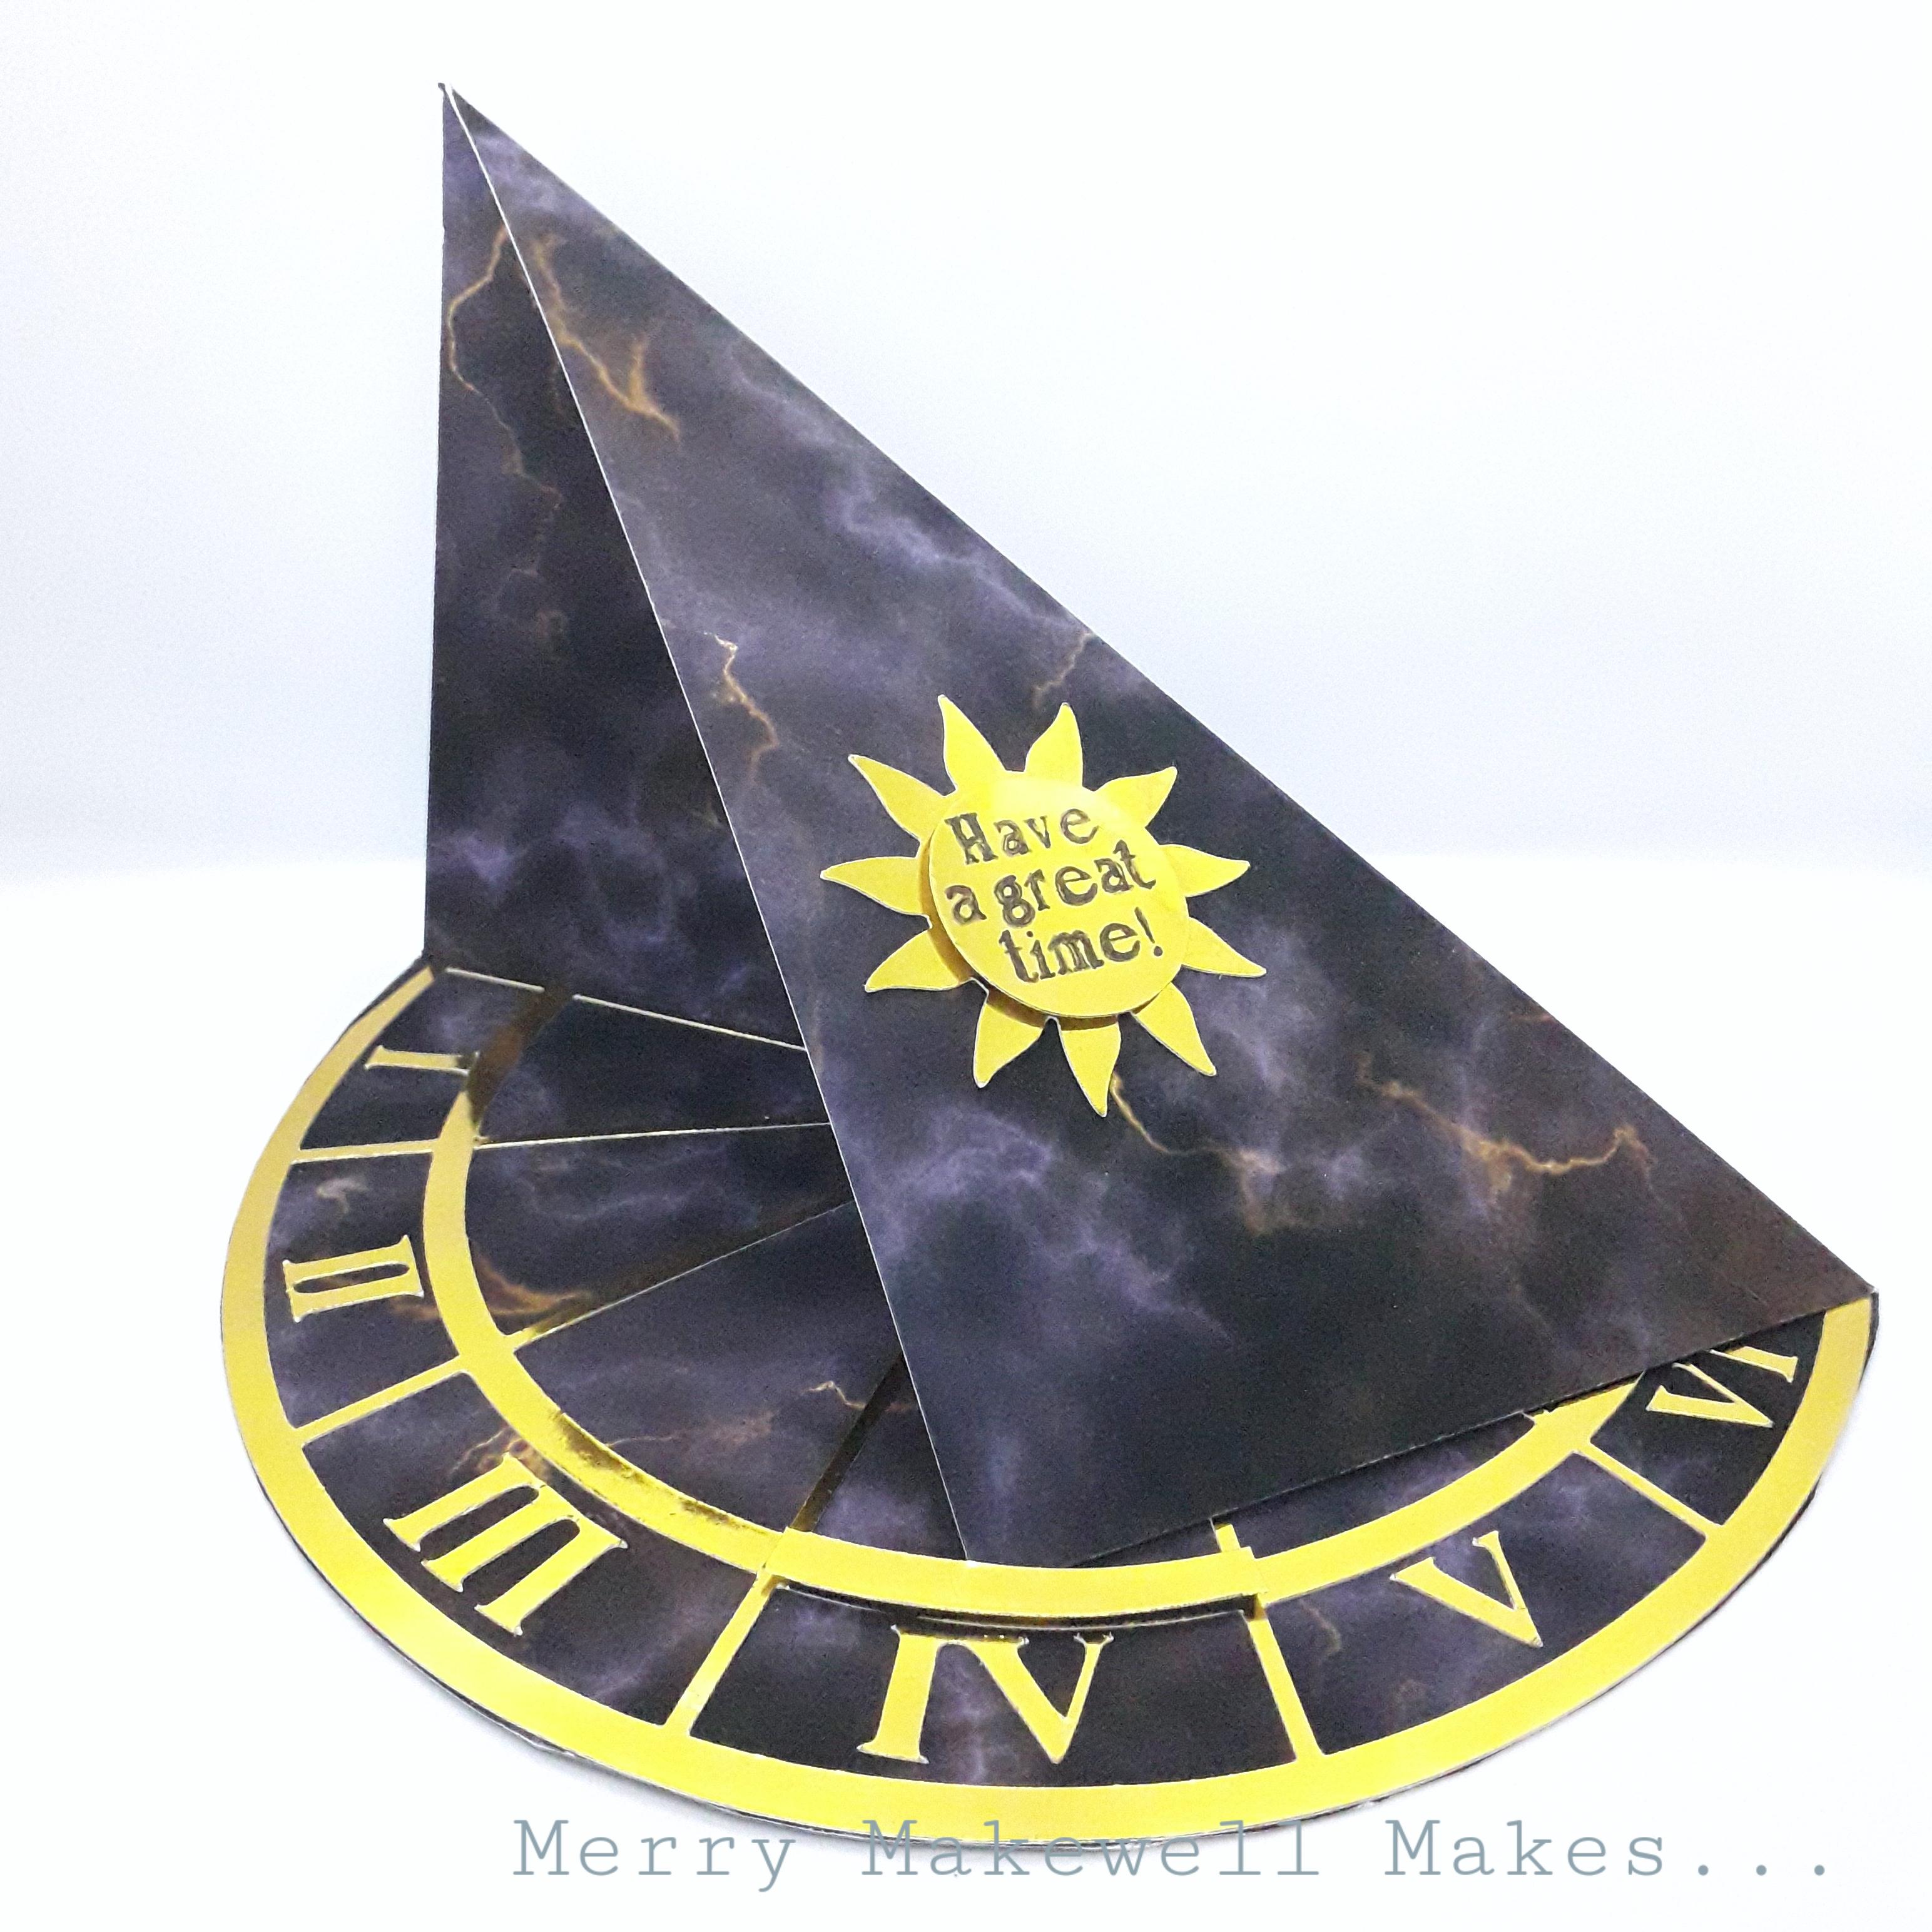
7. Advanced Techniques: Twisted Easel Part 2: If you remember, at the
start of the last lesson, I said that the easel shape
reminded me of a sundial. So I thought it would be really fun to make a sundial card. So to start off with, I have a piece of A4 paper that I've printed double-sided. And of course, if you don't have double-sided paper, then, sorry, if you don't
have a printer, then you can use, you can just cover both
sides with Patton's paper. So the first thing I'm gonna
do is trim this to 2020. I'm going to keep the width. I'm going to shorten it
to 25 centimeters long. All right? Okay, so now I'm going to
make the card base as usual. So bringing the scoreboard and turn it so that
it's in landscape mode. And then score, so this
is 25 centimeters long, so I'm gonna score at
12.5, the halfway. And then I'm also going to score from this top corner
to the bottom. So I'm just going to locate my scoring tool in
one of the groups. It doesn't matter which one. Well, it does just make a note. So that's 14 centimeters there. Then place that corner at the 14 and then line up the other
corner with my scoring tool. And then I know that I'll
have the right situation. So I chose this paper
because it kind of has a marble effect to it. Although slightly shiny paper
would have been better, but you have to use
what you've got. So just burnish
this crease lines and then you will end up
with your kind of shape. Now, I went into, I have a physical machine. So I designed these kind of these elements on and cut off from the old
marathoner, my cutting machine. Because when I was
making the prototype, I did try and paint, but it was extremely untidy, so I thought it would be
better to to use cut paper. So I'm just going
to line it up to there and glue that down. I did shave off a little
bit off that edge, but let's just pretend
that it's perfectly cut. So be careful with mirror
card because it does show up, blemishes and you glue. Just be careful
with how you lay it down roughly with the
edge and stick that down. Okay, So then I also cut. I also get some Roman
numerals to sit in here as part of a
sudden died element. So I'm gonna go ahead and
clear those down as well. If you have a cutting machine, check the project
resources section for the SVG download of
sundial components. So now we're in need of a stopper in order to get
them to sit properly. So what I'm gonna do this, so I've cut them or one
of these and I'm just going to raise that
would apportion there. So just cut that away. And then using some foam pads. Prop this up like that. Right? So I'm just going
to, I'm going to use this dark film tape because
of equipment dogfight ground. So hopefully it won't
show up quite as much. Just a couple of bits. Okay, so now we've
got the stopper. So the card will
sit really nicely. So this this part here, we can probably just you could leave it like
that if you wanted. I thought it'd be
nice to have a bit of a a bit of decoration. So I've got, I've cut out
this son's sorts of shape. So I'm going to
stick down there, put that in there. And then I've got
all the sentiments that says have a great time, pen, very much intended. And I'm going to use
some impacts on that as well to raise it off the level of the sun so that it doesn't
all look really flat. And just put that down there. That is the card done. So you could leave it like this. If I show you my prototype,
again, not complete, but I actually cut, cut the bottom into semicircle shape that I
actually prefer that look. So you could leave it like this, but I think I'm
going to cut around, cutaway these bits here so
that the bottom part is run. Okay, so now we've cut
away the corners here. And there we go. We have a sundial card. I think it looks really
effective and love it. So there we go. Now twisted easel.
8. Final thoughts: Okay. Hello.
 Lilian Barker, Papercrafter & Surface Pattern Designer