Transcripts
1. Welcome: Hello, everyone.
Welcome to my class. I am Mal Armstrong, and I am super excited to
have you join me here today. So in this class, we'll be diving
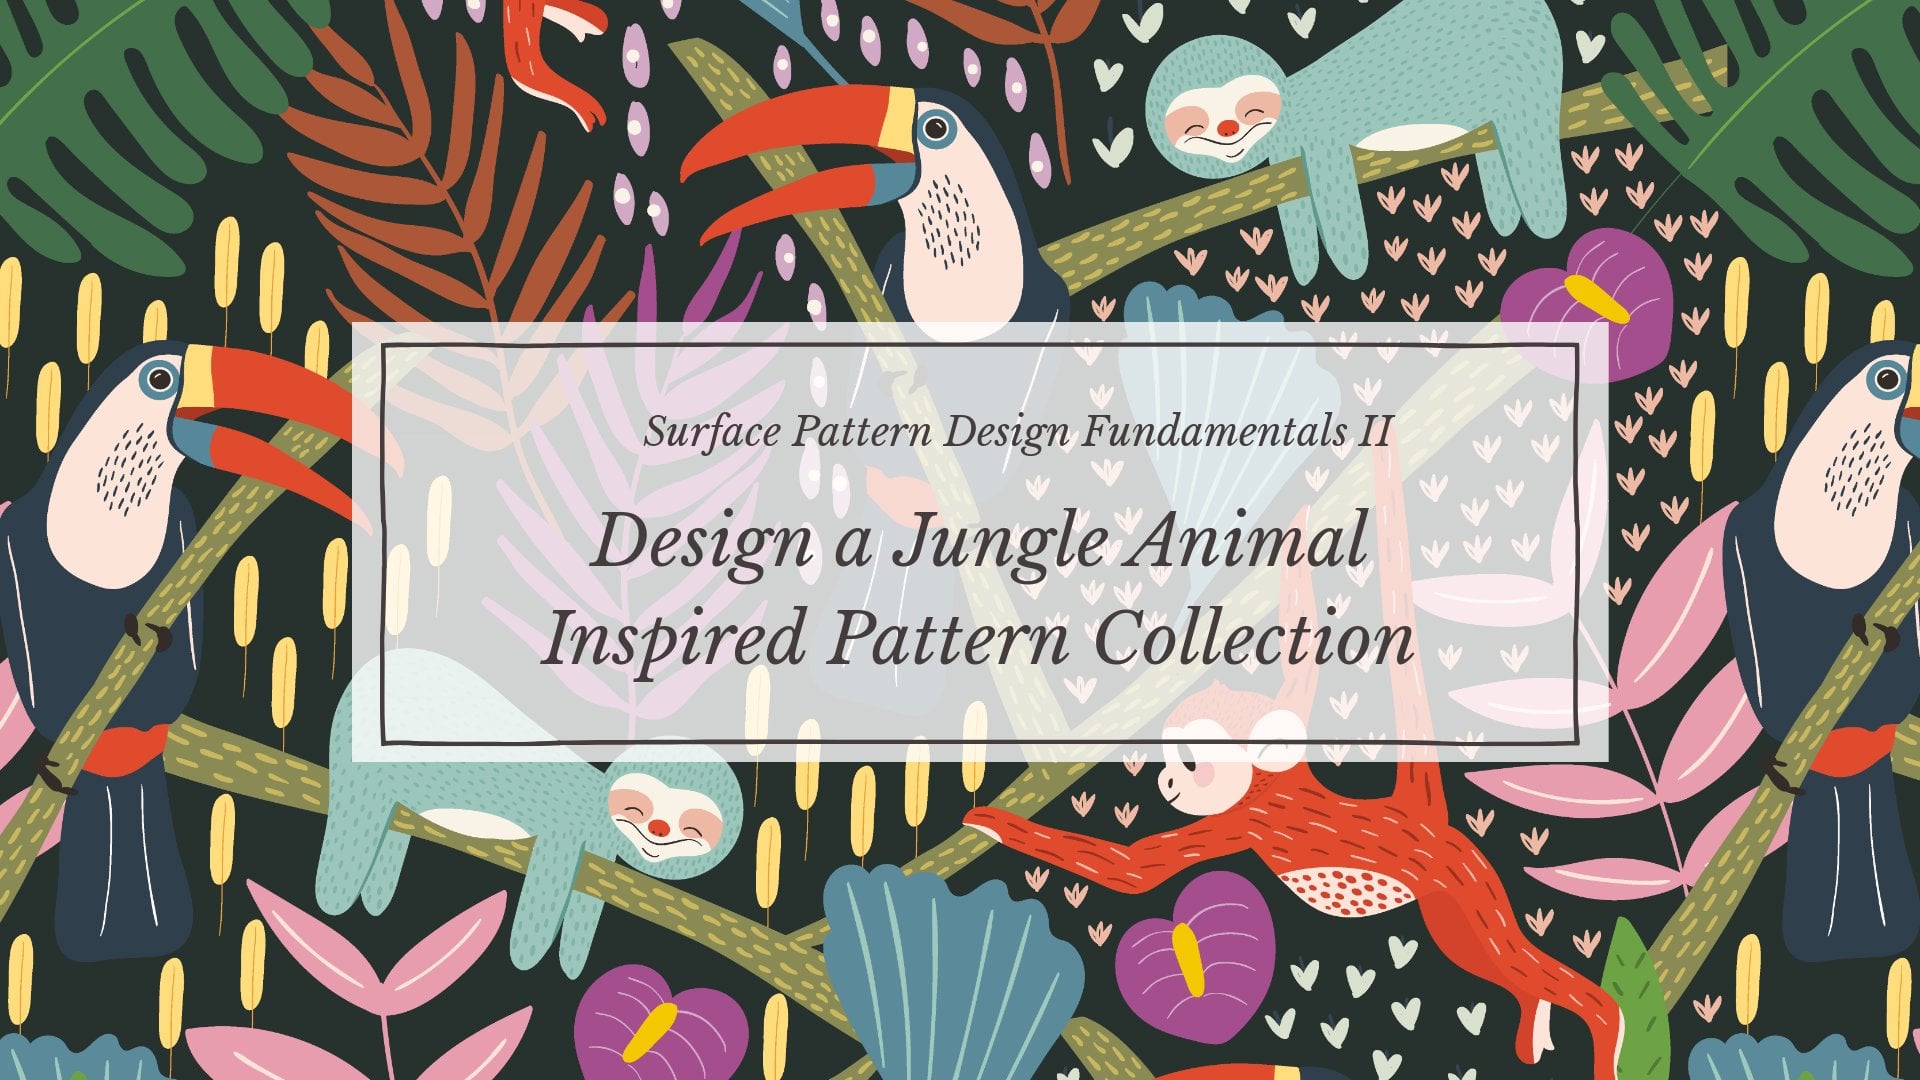
into the world of symmetrical design using
a mushroom tile template. You'll learn how to
transform your moth inspired sketches into a seamless
repeating pattern in Procreate on the iPad. Now, you might be wondering
why you use a template. Well, this template offers a beautiful blend of
structure and freedom. It provides a strong
framework for your designs, ensuring the symmetry and perfect balance needed
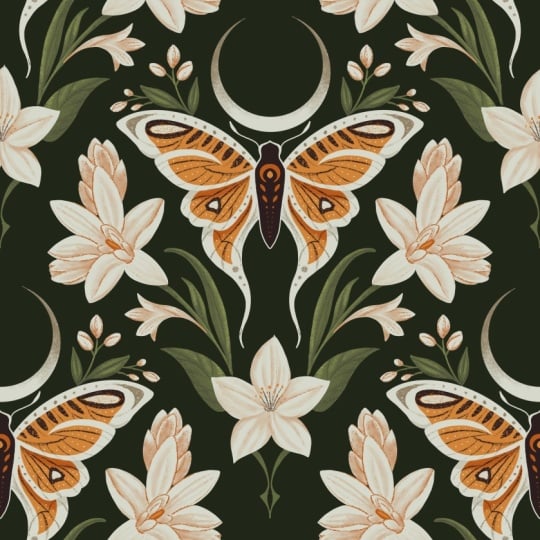
for a polished repeat. By the end of this class,
you'll have created a beautiful moth pattern
that will be ready to be used on any products such
as fabric or wallpaper. To get started,
grab your iPad and make sure you have the Procreate
app and an Apple pencil. I've also included some
more reference photos in the class resources as
well as the template itself. If you don't have it already, we'll be walking through each
step of the process from sketching to planning and
creating the seamless repeat. Along the way, I will
share my tips and tricks for creating beautiful and
professional looking patterns. I'm so excited to
see what you create, so let's jump in
and get started.
2. Inspiration: For this class, I'm
going to search for some inspiration
on Unsplash, which is a stock website or app. You can download
it on your iPad or just search for it
on their website, and they have a lot of stock images that you
can use as references. There's no copyright
attached to them, so you're free to use them to use as inspiration
or to use as studies. So what am I going to
do? I'm going to search for Moth and Oops. Probably want to spell
that right. Moth. And I'm just going to
download a few to my iPad. I like the shape of this one, so I'm just going to hit
that and download it. And what I'll do is I'll
use a bunch of these. Maybe I'll take
the shape of one. Maybe I'll take the
colors of one other. Maybe I will use some of
the textures from another. But basically, just grab a
bunch that jump out at you and you like I love these little spots here. So
I'm going to grab that one. Because you want to
create something that is not a complete replica of
what you see on these photos, but maybe a combination of the different
moths that you see. So I like to look for these amazing patterns on the wings. They're super, super cool. I think moths are absolutely beautiful. My
partner hates them. If there's one in their house, there's generally
some screaming, and I'm trying to get them
away from my partner. Anway, jump onto Unsplash and
download a bunch of those. This one, I don't know
if you can see this, but when I saw it when I
was scrolling, I could see, like, these heads coming out
of the edge of the moth. I love that. I'm going
to download that one. You could also do
butterflies, if you want. I just find moths have really amazing details
on their wings. Okay, so that is it. And I also want to
find some flowers. Basically, I just want to
have one or two shapes, and I am going to basically create some
lovely leaf textures, leaves and branches around my mouth with a
couple of flowers. But the flowers are all going to be the same sort of flower. So I could say pick
this one here, the sort of flower, but it
have it at different angles. I might just download
that one as well. You can also obviously use your own images,
which is fantastic. But this is just another way. Okay, once you've
got all your photos of your moths and your flowers, we're going to shut them in
to procreate onto a document and use that kind of as
our reference board. So I'm just going to
create a new document. I'm just going to
select screen size. And then I'm going to
go to the AtonsTol then add then insert photo. And I'm just going
to pop them in here like this and
move them around. Turn my snapping off. I use my pencil. I'm just going to
arrange them on here. Another way you could do this is bring up your Photos app if you hold and drag it up and
then drag it onto the side. Then you'll have them there. And then you can just click
and drag them across like this and move them on, make sure you deselect them
before you grab the next one. And then I'm just going
to close the photos up there and just fix
these up a bit. If I take off the edge
and then deselect it, and then select it again,
it will crop it for me. So I'm just going to
do that because I don't want the whole
image on there. And then I might do the
same with this one. Okay. So what I'll do is
I'm going to save that. I'm going to go to share
and then share as JPEG. And then I'm just going
to save it to my photos. And then I'm going
to go back out and create a new artboard. And this time, I'm
going to create a 12 by 12 inch or 3,600
pixels by 3,600 pixels, 300 DPI, and this
will create a square, which is my typical
go to when I'm creating a pattern in Procreate. And then what you
can do is go to the actions here and then go to Canvas and then go to
reference and go to image, and then we can import that reference board
that we created, and we can just put it
off to the side and use it as a guide for when
we are sketching, which we will do in the next
lesson. We'll see you there.
3. Sketching: In this lesson, we are going to sketch our main part
of our pattern. So the first thing we want to do is actually set up our canvas, and we're going to use
a template for this. So I have provided a download for it of the template that
we're going to use. It is from my procreate
pattern template pack, where I have a
bunch of templates, and I'll leave a link
for that as well. But I have provided you with the one that
we're going to use, and that is this mushroom one here. I'm just going
to select that. I don't need to go
into it, select it, tap on the canvas, and then go to the
selecting tool there and then click
on Fit to Canvas. And then we can
lower the opacity and lock that layer and
then create another layer, which will be our sketch layer. And then the other thing
we want to do is that we want to turn on
the symmetry tool, as we want to create
a symmetrical design. So go into the wrench here
and then go to Canvas and then turn on drawing guide and then select
the edit drawing guide, go into the symmetry
button there. And it should
automatically default to that vertical option there. But you can go into the guide options here and select that. There are a number
of options here, but we want the vertical one. And if you have trouble
seeing the line there, you can increase the
thickness and the opacity, so it's a lot clearer. You can also change the color by just moving the bar
at the top here, and then click Done. So now we've got that set up. If I draw on oh, let me change my brush here. If you draw on one side, it's going to mirror
on the other. So the way to turn that on and off each layer is in
the layer itself. Just go into the
layer, click on it, and then you've got that option here that says drawing assist. You can see the
little tick there. If I click it again,
it will turn it off. You can see that it's
taken that tick away. And now if I draw on that side, it will not mirror it
on the other side. So let me just clear that layer and I'm going to select
my six B pencil. Let's just turn the
drownss back on, and then we are now
ready to sketch. And so I've got my moss here. I'm just going to use sort of a combination of these shapes. So I don't want to take
up too much of the space because I also want to make sure I've got some room
for some florals. So basically, I'm just going to roughly sketch out
where this is going to go, and then we can refine
it a bit later. And you can make this as
simplistic as you like, or you could put
a lot of detail, or you could even put flowers on it if you wanted to. You
don't have to do it. So it looks exactly like a moth. I like to make it simple, and I think that works
really well in patterns. So now I'm just sort of
making it up as I go and adding things that I feel
like needs to be there. Is where I start kind
of doodling and just add things and see
how it ends up. I'm going to move on
now to my floorls. And for this, I'm
just going to create some sort of viny leaves and then add some flowers
inspired by these. I might actually move this down. So I'm going to select it. Make sure that snapping is on, I want to make sure that it's
still in that centre bit. It's turned to snapping
off, so it doesn't snap, but it still stays on there
with the magnetics on. And I'm going to create another
layer for this and make sure that my drawing
assist is on. And I'm just going to mark out
where I want some flowers. So I want one here.
I want one here. And I want one here. All right. Now I will draw in
the floral, these flowers. And I think I'm going to stick with
something like this one. So I love this bit in the middle and then
little dots around. And then for this one up here, I will turn back on
the During assist and just raise us out a bit. And for this one,
I'm just going to do it's kind of a bud, one that hasn't opened yet. Alright. I'm going to
turn this reference off. That is looking pretty good. One more thing I do want to
do is I actually want to put a little border
around it as well. So I want to maybe resize
it down a little bit. So maybe if I hadn't gone right to the edge, I
wouldn't need to do this. But I'm going to just
slightly resize it down, and I need to make sure we've got those two merged to that. Just slightly. And then I will place it back
in the center. Okay. And then I'm going
to create another layer. We can turn on the
drawing assist again. And I'm going to basically just draw some dots around the edge. Okay, I'm pretty
happy with that. In the next lesson,
I will show you how to test this
to make sure it is going to repeat
nicely before we go on to coloring it.
I'll see you there.
4. Test Repeat: Okay, in this lesson, I'm just going to
show you how to test that this is going to repeat nicely before we
move on to coloring it. So I'm going to turn
off the template layer. I'm also going to turn off
the dots around the frame. And then with this layer, I want to duplicate it. And then I want to make
some marks in the corners. I've got drawing asiston so
it's put the four marks, but you only really
need one on the right, bottom left or vice versa. And then we'll
duplicate that one. So we have a total of four plus our original,
which is five. So with each of these layers, we're just going to move them
into the four quadrants. So let's go with the first
one, select it up here, make sure that magnetics
and snapping is on, and we want to slide it up. We get to the orange
mark and then slide it across until we get
the orange line again. Sometimes it will be
tricky to get it. Just go back and restart
it if you don't get it. And then if we turn on the
dots, we can see that there. And then let's merge those
four layers, not the original. And if I turn off the original, you can see those marks in the middle there. We
can just remove those. And then turn it back on. So that is basically a
tile, a repeating tile. We can test this
further to see what it looks like at a smaller scale. So if we swipe down
with three fingers, copy all, swipe down with three fingers
and then hit paste. Basically, that has now pasted a copy of
the entire canvas. So if we create three
more layers of that, and then what we need
to do is select one, and then you can
either click and drag a little nodule down to
there till it snaps, or you can Click on it
and then type in 1800, which is half of the 360, and it will jump down
into that position. And this is a good way to see if there's been any mistakes as well with your original
when you're moving it. And quite often, there is, and you have to go
back and start again. So let me just do all of these, make sure that they work. Okay. So they've
all snapped down. You can see that pattern now. I like to zoom in and just
make sure that it works, and I've just got those
dots on from the original, so I'm just going
to turn that off. And that is looking pretty good. I can't see any lines where it hasn't met the
repeat properly, the block. So that's going to look
pretty, pretty pretty pretty. That's going to look pretty
good when we go to color it. So if you go in here and you see that there
might be an overlap, you just need to basically
go back to the beginning, sorry, and start again. So we can get rid of that
as it's just a test. We can even get rid of
that those outside ones. We don't need them
anymore. But basically, you go back to here and then repeat that process to make sure that everything is matching up properly. So I was
happy with that. I didn't need to go back
and repeat anything. In the next lesson,
we are going to start coloring.
I'll see you there.
5. Colour: I Okay, let's get into coloring. I have got my sketch on
a layer here and I'm going to turn on the
blending mode multiply. You can get to that by
clicking on the end and then selecting multiply and
then lowering the opacity. Then I want to
create another layer below the sketch layer, and this is going to be
my background layer. I have a color palette
here already selected. I have provided
this as a download, but I do encourage you to create your own color palette just so that it's more
yours and not mine. I'm going to select
this navy blue and paste that in there. And I might just increase the opacity of the sketch so I can see it a
little bit better. And then I'm going to
create another layer on top of that and start sketching. I think I'm going to
start with the butterfly. So for that, I need to
have my drawing assist on. And then I'm just going to
use this orange color here, use the monoline brush. The monoline brush is in the um the calligraphy library
in the classic library. So we'll use that to just block out the shape of the wings. And then make sure
you close it so you can then drag in the color. And then I'm going to create another layer on top of that, and then I'm going to clip
it to the base layer there. So I'm going to
click on that layer and then select clipping mask. I also want the drawing syst on, so I'm going to
select that as well. And the clipping mask
basically means that I can draw inside their wings and
it won't go off the edge, so it'll just keep it all
contained within those wings. So I'm just going to block out another layer of color here. I have no plan for this. I'm just kind of
making it up as I go. I want it to be pink and orange, and I'm going to put probably some black and some
more paler colors in there and a bit
of texture as well. And let's just do these
little bits down here. And then I'm going to
create another layer. Again, I'll clip it, turn on the drawing assist, and then I'll select
the lighter pink. And this time, I'm going
to use another brush. I'm going to use this one here. It's a Ink one, but I've adjusted it so
that it's got taped in. So the ink brush,
if we do a search, we can find where it belongs. There's the original Inc. It's in the Inking library
in the classic library. And I have created
a copy of that and then just made the ends
a little bit more taped. So it's just a modified version, but you could use the
Ink one if you wanted. Then with this, I'm just
going to add some texture. Now, I wanted to stay
on those pink bits. So what I'm going
to do is I'm going to click on the pink layer, select it, and then say, select. And that way, it's
only going to draw on those pink areas when
we're back on that layer, so it won't go off the
edge because I only want to have just a little bit of texture along the edge here. I like the way that Inca has
this lovely texture to it. I might just turn that sketch
layer off just to have a quick look then add
a little bit more. I'm going to add another layer, and this time, I'm
going to use a black, and I'm actually going to use the six B pencil
for this, as well. And it was going to create some lines. It's a bit too big. And I'm going to go
back to my pink layer, and I'm going to use
the arrays tool, and I am going to just erase out a little bit of the pink to reveal
some of the orange. And let's just turn off the sketch just to see
what else I want to do. I'm actually going to
create another layer with the orange and move it up
above that light pink layer. And I'm going to go back
to my inca and just create some other
little lines down here with a bit of texture. And let's just turn off that background layer
again, the sketch layer. I'm also going to
add a little bit of shading on the orange. So I'm going to click on the bottom orange layer,
create another layer, turn on my drawing assessed, and then change the
blending mode to multiply. And I've got my orange
already selected. So what that will do,
it will just create a lovely sort of shaded area. And we can lower the opacity a little bit if you
don't want it so harsh. So I just want it a
little bit more subtle. And I'm going to go back to my pink layer here as I realized I've missed a little bit
in here that I want. And I'm also going to go back to the light pink layer and
just add a little bit more and I might lower the opacity
slightly with that one, too, and actually make it a lighter color
or maybe an overlay. Let's go with a lighter and just lower it down so
it's not so bright. Okay, I'm going to
add the body now. So I'm going to group
those wing layers. So I'm selecting all of them by swiping right and
then selecting group. And then above that, we're going to create
another layer for the body. So I'm going to select black
and then use my monoline turn my sketch back on and
make sure my drain assists on. And then above that is I'm going to put another
layer and clip it again, turn on that drawing a cyst, and then select the
white maybe and my ink. Just add a little bit of
interest and texture to it. And also to make sure
that it stands out on that navy gives it a
bit of an outline. I might actually turn
the drawing a cyst off and draw some marks here. They don't need to
be symmetrical. And that's all I'm
going to do for that. I might group those
and group that whole bunch there and
call that one the moth. And then let's
start with some of the greenery and flowers. So it might start
with the leaves. And I'm going to use a
pink for this and use my monoline again and turn
on the drawing assist. So I like to start out
with a monoline and then add texture on top. I'm just going to
fill those in whoops. Make sure I've closed them off. And I'm going to add some
texture to these leaves, so I'm just going to turn
that background layer off, add another layer and clip it again and turn on during a cyst. And then I'm going to
select that lighter pink and select my inca. I might change this one to lighter color as well,
the blending mode. And I'm just going to add
some random texture to this. And I'm going to lower
the opacity a bit. I just want it to be
a little bit subtle. And then one more layer for this to just put on a center line. And we're going to use the navy, the same color as the background
and just draw that in. I love adding sort of a texture that's the same color
as the background. Okay, I'm pretty happy
with those leaves. So I'm going to group those and now move on to the flowers. I'm going to create
another layer and I'm going to select
this just off white and go back to my monologue monoline
brush and make sure we've got drainsyst on again to
block out these flowers. I might for the center one here that's on the center line, I might turn off the
symmetry for that one. So I might just start
with these ones. So my first layer is
always a block layer, pretty much is just the
whole shape of the object. And then I use layers
on top of that to define those edges and
add texture and interest. And then one more down here. For this, I'll turn off
the drawing assist. And then let's add
a layer and clip it and turn on the
drawing assist. And I'm going to select this sort of
copper color here and use my pencil to draw out some textured lines here to define the petals
on the flowers. I actually changed my mind, and I think I'm going
to not use that pencil. I'm going to go into
the new library. So I'm going to
pinch that together, and it will bring up the other
libraries that you have, and I'm going to go into
the new Procreate library. And I've discovered this pencil
here called MinkiO Mink. And I'm going to try that one. And it's pretty cool, bumpy kind of texture to it. So let's go with that. It's just a bit more
defined than the pencil. And then I'm going to
add another layer, and I'm actually
going to put that below that detail layer, draw on turn on den asyst. And then I'm just
going to grab the pink be the light pink and go back to the classic library
and select my ink. And I'll turn off
the sketch for this. I'm just going to
add a little bit of texture to this at the bottom. And also, in the petals
that are at the back, so this is going to act like
a bit of a shadow, I guess. We could turn it down
a bit or leave it. Okay, and then one more layer, I want to add some little dots, so I'm going to go
back to my monoline. Drag this one to the top. So I'm just going to
have it on the top. I'm going to have
it on the top layer and add some little dots. Okay. And the final
thing we need to do is add our border dots. So first of all, just group
those flowers and name them and maybe lame
the leaves as well. And then on the top layer, I'm going to select
the light pink, keep my monoline
and jump in here. I need to turn back
my sketch layer, make sure my drawing
assist is on, and tap out some dots. I want them a bit bigger. Okay, let's have a look at that. Turn off the sketch layer, and I might go in here and
turn off the drawing guide. So under Canvas, turn
off drawing guide, and that's looking pretty good. That is the coloring complete. In the next lesson, we are going to compose the
pattern. See you there.
6. Pattern Composition: Okay, now we're ready
to compose our pattern. And because we already tested
this in our sketch lesson, hopefully it should
all work out fine. So what I'm going to
do, I'm going to turn off the dots and the background layer and make sure my sketch and
template are hidden as well, and also turn off the
actual background layer. And then I'm going
to use three fingers to swipe down and select, copy all, and then three
fingers down to paste. And what that's done, created a merge layer of everything that
was on the canvas. So I can now turn on my
background layer here. And with this one, I want to add a
couple little marks. So at the moment,
if I select it, it selects it just the
outline of that motif. What we want is to select
the entire canvas. So to do that, I'm
just going to add a mark there and a mark
in the bottom left. And now when I select it, you can see it selects
the whole entire canvas. And so this makes it easier to move it into the
right position. So with that done, I'm going
to create some duplicate, so just swipe it to the
left and duplicate it. And we want four copies. So we've got four merged copies, and then we've also got
our original down here, and I might actually just
put those into a group, so they are on their own. Alright, so with
these merge layers, we're going to put them in
each the four quadrants. So let's start with
the first one. This can take a little
bit of practice. First, make sure
you've got magnetics and snapping switched on, and the distance and velocity
should all be at the max, and that should hopefully help to get it in
the right position. So now if I drag it up, I should be able
to get it to snap, and you should see an orange
line across and then down, and then in the
vertical going down. There, and then I'm
going to let go, and then I'm going to
drag it to the left. And once again, we should get those orange lines
and then let go. Sometimes when you let go, it does nudge a little bit, and you have to
then start again. This is why you have that
original layer and don't remove that because you may need to go back and do
it all over again. But once you get
the hang of this, it's generally not so bad. Okay, so I've got them
all in the four corners. I'm going to turn
back on my dot layer, and that is our repeating tile. So one more thing
we need to do is merge those corner
ones together. So I'm just going to snap
them with my finger. And then if I turn off
that original one, you can see that it's got the marks there that we created. We can just remove those. And then turn back on
that original layer. So what we can do
now is test this. So what I'm going to do now
is create another copy. So three fingers just
wipe down and copy all three fingers
down, and then paste. And that's created another
merged copy of everything. Duplicate that one. So
we've got a turtle of four. And then these ones we want to scale down into
the four corners. So I'm going to select it, and you can either
click and drag it until it snaps at 1,800 pixels, or you can also just tap the blue.in the corner
and type in 1,800. And this is half of the
size that we started with, which was 3,600 pixels. So if you started with
a different size, and just make sure this is half, and then I'll go
around and do that for the other ones, and there it is. And just zoom in and have a look and make sure you
can't see any bits that are off that may have jumped when you were
trying to create the tile. But otherwise, you should end up with a lovely pattern
at this point. In the next lesson, I will
show you how to export it to use for various
things. See you there.
7. Export: Okay, in this lesson,
I'm just going to show you how to
export your pattern. So at the moment, we've got a small scale one. So I'm just going to
merge group them together and rename them to small scale. And then we've got our
original one here. So I'm going to group those together and call
that one large scale. So if we turn off
our small scale, that is our large scale tile, and then we've got
our small scale. So I'm going to
export both of those. So let's start with the large. So make sure you turn
off the small one, then just go to the
wrench tool, go to Share. And there's a number
of options here. Generally, if I'm going to be uploading it to somewhere
like spoon flour, then I would just
export as a JPEG. You could also export as a PNG. If I want to take
it into Photoshop, which I do quite often, then there is the option
of exporting it as a PSD, and that will export
all your layers. So basically, I would
generally do the PSD. Just so that I can have it on my computer with all the layers, and I can manipulate
that if I want to. So once you hit Export, you just need to airdrop
it to your computer. Or if you want to
save it on your iPad, you can just hit Save
Image and it will save it to your photos app. But generally, I
like to export it, and then I like to airdrop
it to my computer. And then that way I can open it up in Photoshop if I want to. And with a PSD, I wouldn't have to then export the small scale because the PSD actually sends everything over. But if I wanted to
create a small scale, then I could export
that maybe as a JPEG, and maybe I then want to
just save it to my photos. So if I went into my photos, see them both here
in my photo library, you've got the large
scale PSD one, and then the small
scale JPEG one there.
8. Final Thoughts: Well, we've reached
the end of the class. Congratulations for
following along and making it to the end. I hope you are incredibly proud of the work
that you've done. You've not only mastered
a complex repeat pattern, but you've also created a beautiful pattern asset that is ready for your portfolio. So please upload your
design to the project area. Absolutely cannot wait to
see what you have created. And also sharing your work
is the best way to get feedback and also to inspire
the rest of the community. Secondly, if you decide
to post on social media, don't forget to tag me. I love seeing your work. And also, I love to see
what else you create using symmetry and
this template. It doesn't just
have to be a moth. There's so many other things
that could work as well. So I'd love to see
what you create. Thank you so much for
spending your time with me. Keep designing happy pattern
making and see you later.
 Mel Armstrong, Illustrator, Pattern Addict & Teacher