Transcripts
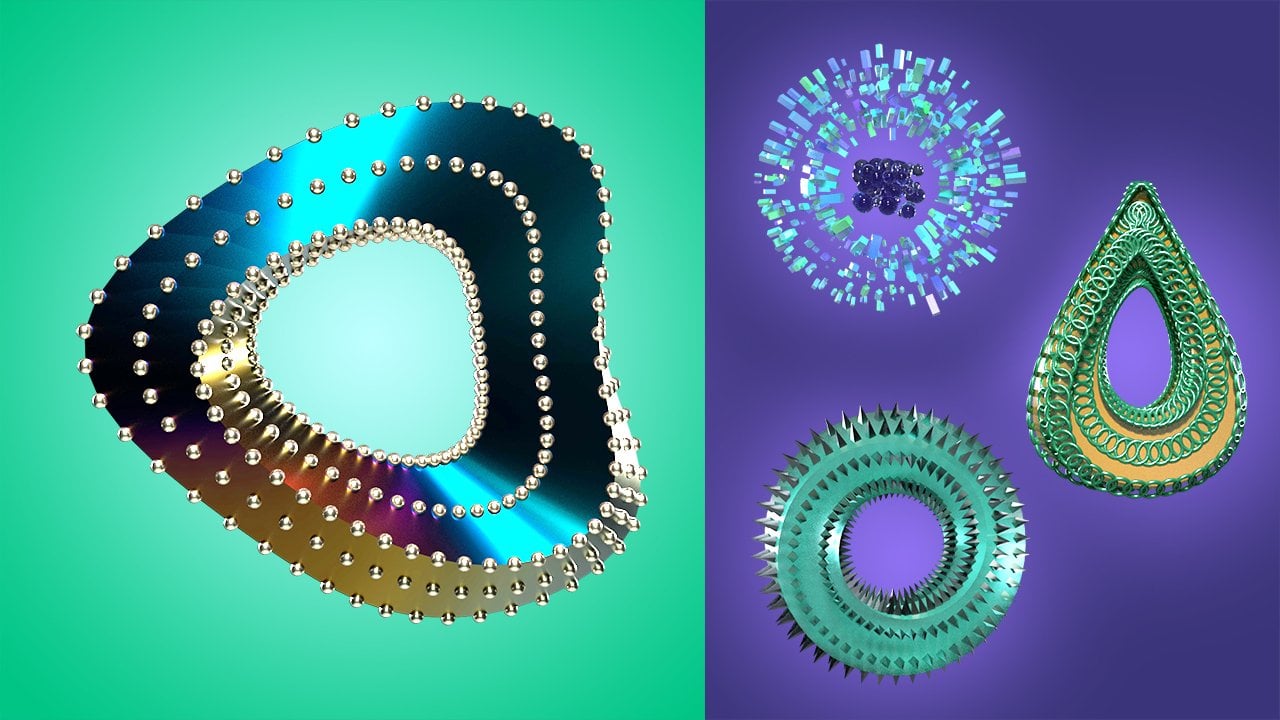
1. Course Overview: Hi, welcome to this course. My name is Lucas Ridley. I will be your instructor and in this very short course, you're going to learn some really cool techniques to create this loop bubble 3D animated blob floating enforced. We're going to use Autodesk Maya and you'll also need after effects to do some compositing, but this effect can be applied to any object inside of Autodesk Maya so I'll also show you how to do it on a text as well. This course is intended for people who have opened Maya before but even if you haven't, I think you can follow along because I animate and show little tool-tips that are common knowledge that you should have by now if you're an intermediate user of Maya, which this course is directed towards because we move pretty quickly. Even if you are a beginner, just watch it at one-time speed. Re-watch a lesson if you need to and I think you can follow along even if you're a total beginner. Download the project files if you need to follow along with those as well. I look forward to seeing you in class and let's create this cool effect together. See you there.
2. Create the Blob: Before we get started, as always, you want to set your project by going to File, Set Project, choosing the correct folder that you want your project to be set in, and then go back to File, Project Window so that all the correct folders can be created so that when it comes time to render, that your images will be the correct folder where your render images will go, and the scenes that we're going to save as working files are going to go in the Scenes folder. Let's start by creating a sphere. You can do that by creating a normal poly sphere or I'm going to go to the Platonic solid, and I'm going to go to the Inputs here and increase the subdivisions to three. I want to hit "F" to frame up on the object here, and I'm going to go to Deform, Texture deform. Then I'm going to add a texture to this deformer by clicking here. I want a 3D texture. For this effect to work, we need a 3D texture. The solid fractal or volume noise works well. The volume noise has a more obvious immediate effect than the solid fractal. It takes a little bit more work to give it more drastic results. I'm going to choose "Volume Noise" for now, and to make sure that the texture is being applied to the normals, so instead of just straight up and down based on the handle of the texture deformer, I want to go into the Texture Deformer and choose direction Normal. Now, the texture deformer is being applied to the normals of the faces of the sphere by clicking the place three texture object here I can scale up the three texture so I can adjust the effects to be more soft or more sharp based just on the scale of the place 3 texture object here. I just want to go for something a little bit softer. The next thing we can notice is that the texture deformer is reaching a limit here, we can start to see the surface of the sphere. If we go to the texture deformer into the texture itself, we can dial down the amplitude so that it's not hitting that limit of the shape of the sphere any longer. Next, I want to create a curve, circle and then choose the 3D texture while the NURBS is still selected and go to the Animation menu, Constrain, Motion Paths, Attach to Motion Path. Now if we play this back, you can see it looks like it's just rotating so need to go into the motion path settings by selecting the NURBS circle, going to Motion Path, and unchecking Follow. Now if we hit Play, the texture will move through the object instead of just looking like the object is rotating. To get rid of the slowdown of the motion path, we can select it to display the keyframes in the timeline. Double-click the timeline, right-click and choose "Tangents Linear". Now, it will loop seamlessly from the end to the beginning. We can also get rid of the last frame by changing the timeline to 119 instead of 120 because the first and last frame are the same now. For it to loop, we need to get rid of one of those frames, the first or the last. Now we have the start of the looping blob. In the next lesson, we'll refine this a little bit more and start lighting and rendering it.
3. Add Materials & Lights: In this lesson, we'll start lighting and rendering this object. But before we do, I just wanted to mention one extra level of complexity you can add to a loop, is actually by animating the NURBS circle as well. We could actually rotate the NURBS circle through time. I'm going hit Shift E to set key frames only on rotation. We can jump to the channel box to see those key frames. I want to move to the frame 120. Remember now that we're looping, again, we need to jump back to that 120 in-frame. I'm going to rotate this through 360 degrees, so I'll type in negative 360. Now when I play back, we have an added level of complexity to the animation that it's also moving through space, not just rotating around in a circle. I'll double-click and choose tangents linear, so there's not a slowdown at the end, and I'll move the timeline back to 119. One other thing I want to address is the texture former and go into the texture, increase the strength a little bit so that we have a bit more of an exaggerated effect on the blob. Next, I'm going to add a material for Arnold, I'm going to assign a new material by holding down right-click and going to assign new material. I'm going to choose Arnold, shader, and go to AI standard surface. Then from the presets menu here, I'm going to go down to blood, and choose Replace. Next, I'm going to create a light by going to Arnold, sky-dome light. Then we need to choose an HDRI image from hdrihaven.com to use as the light source and as the background for our image. I'm choosing autumn forest O2 because it has a little bit of green in the background that will help contrast with the red of the blood. Back into Maya, I'm going to choose the sky-dome light, and go to the color, and click here to add a file texture. Then I'm going to click the folder and navigate to my HDRI image that we've downloaded and hit Open. Now, I can do a test render to see what the initial result is like. We can see that the object itself is still fairly low res, it's a little bit spiky here on the silhouette. What we can do is click the object, go into its shape controls under Arnold, and we can go down to subdivision, and turn on Catclark. We can see that it will smooth out the silhouette and add some subdivisions at render time. We just want to increase that to two. In the next lesson, we will continue to refine the lighting and increase the subsurface scattering effect of this object. Thanks for watching.
4. Enhance the SSS: Welcome back. Now through lighting, we can enhance the subsurface scattering effect of this blood preset material through adding a few more spotlights in our scene. I'm going to hit the snapshot image here so we can get a before image. I'm going to close this and add a few lights. Let's go to the rendering tab here and get to the spotlight. We're going to hit W to get the movement emulator and move this back. I'll rotate this in a 180 degrees here by going to the channel box, typing in a 180. Move this back a little bit, and I'm going to hit the Arnold render view here again so I can see how much spread we need to increase this and also the intensity. I'm going to go to the attribute editor here and increase the intensity of this light until we can see its effect. We'll start typing in big numbers like 50, maybe something even more like 100, and I'm going to increase the cone angle so it captures the entire piece. Now when I move back to the front so we can start to see the subsurface scattering effect, to figure out what kind of intensity we need to increase the light by. Because the idea behind this effect is that we want to see the light coming through the material. I'm going to add a five here, so we're going to 500. We can start to see that there is a bit of lightness coming through the object. We can keep increasing the light intensity or, and, or we can also adjust the material attributes by going to the AI standard surface, going down the subsurface, and we can adjust the scale or the radius, so that we get more intense subsurface effect at the edges coming through the object. Now, depending on how you want your blob to look, you can adjust this here. You can also adjust the color of course, and then scale also has a similar effect based on the scene scale, depending, on if you scaled up your object or not. I'm going to reduce this down just a little bit because I don't want the effect to be too strong, but I do want to be able to see some difference between the center of it and the edges of it. It gives it a bit more dimensionality and gooiness We can see if we compare it to the beginning image, this looks a bit plastic and solid, and then if we jump back to our current render, this subsurface scattering effect gives it a much more liquid fluid field. I also want to reduce the reflectivity, the specular aspect of this a little bit. I think we can increase the roughness, maybe just a little bit, 0.15 instead of 0.1, just so the specular reflections aren't as sharp. In the next lesson, I will show you how to animate a camera and get the final rendered image ready to batch render. Thanks for watching.
5. Create Camera Animation: In this lesson, we're going to create our render cam, so I'm going to go to create cameras camera. Then I'm going to W to pull up the movement emulator and move the camera back 10 units in Z. Now the idea is I'm going to attach the camera to a motion path, but I want to do that through the means of a locator so that our camera is still freely animatable. I'll show you what I mean here in a minute. Let's create a curve, scale that up by 10 because we know we moved our camera back 10 so that the render cam and the curve line up with each other. To see the render cam view and our perspective view at the same time, I'm going to go to layouts, two panes side-by-side. In the right view, I'm going to hold down spacebar, left-click the Maya icon in the middle and drag and release my left mouse button over perspective view. In this panel, I'm going to choose the new camera. I'm also going to rename it by double-clicking in the outliner and calling it a render cam, hitting enter. Now I'm going to turn on the resolution gate, hold down the backslash button on your keyboard that's underneath the backspace or delete key, and I'm going to 2D pan and zoom out. We're not actually moving the camera, we can see it's still staying where it's at. The other thing, we can see both views update at the same time is in the render settings. You want to make sure under Time Slider, your playback is set to update view all. Now, I want to create a locator for our motion path for the camera, go to Create Locator. Before we attach the locator to our curve, I want to extend the timeline out to frame 120 again, which is our loopable frame because when we attach this to the curve via a motion path, it's going to automatically set a keyframe at the beginning and end, and we know that our loopable frame is on frame 120. That's why we want to extend it before we shift-click the nerve circle and go to constrain, motion paths, attach to motion path. Now our locator is animating along the curve that we've just created. We went to attach our camera to that locator. Let's rotate the circle around 180 degrees in Y by typing in rotate Y 180. Now because this is scaled to 10 and our camera is moved in 10, we know that the locator and the camera are lined up with each other. I'm going to middle mouse button drag the render cam into the locator. That means the render cam is now a child of the locator and it's going to follow it. Now when I scrub, we can see that the camera is actually following the motion of our motion path. What's special about this relationship though is the fact that, if you look at our render cam channel box, none of these transforms have attachments or connections coming to them. Whereas if you look at the locator because it's attached to motion path, you can see that these transforms are locked because they're already in use by the motion path. That means that we cannot animate the locator, but because the render cam is a child of it, it will follow and we have access to animating these transforms if we want to add more animation to it. But first, let's get the camera moving exactly how we want it to. I'm going to select the curve and rotate it to the correct start position that I want to have for our animation. I want it to just move off center just a little bit. I will scrub forward in time to about the same distance apart on the right side of this. If you're looking at the grid here, I can just hide this sky dome for now by holding Control H to hide it, and you can see that the animation of the camera can be roughly even on either side just by scrubbing forward in the timeline. Now I can select the curve or the locator, go to the attribute editor and choose motion path too, right-click on the U value and set a keyframe. Now you can see that frame pops up as a keyframe and our motion path. To get access to these keyframes on our timeline, I needed to select the motion path by choosing the select button here. I can go to the in-frame here, right-click and choose Delete, because now we have our new end frame here which is actually going to be the same as the start. I'm going to go to frame one, middle mouse drag in the timeline all the way to the end, and then go to the U value, right-click choose set keyframe. Now we've just copied and pasted that U value to the end. Now I just need to move this middle keyframe to the actual middle of our timeline which we know half of 120 is 60, so I'm going to move it to frame 60. Now if we play back this camera, we have a loopable animation that goes back and forth between these two distances. Let's jump back into seeing the sky dome light, which is also going to act as our background, and I just want to rotate this so that the middle frame includes the green background. Just for aesthetic reasons of having something green behind our red object, we'll add some color contrast to this render. Now if I want to move the render cam at all, all I have to do is just adjust the actual curve by scaling and moving it to reframe our object here. Scrubbing in the timeline that looks pretty good, I might need to rotate this back so the end frame has some more green and frame as well. If we wanted to add more handheld motion to this, we can choose the render cam, go to the attribute editor, and I know I only want to animate the rotation, I'm going to hit Shift E and you can see it'll only set keyframes on the rotation so I'm going to go to beginning and end keyframes and hit Shift E to make sure that they match. Then I can just rotate the camera at different angles throughout the animation to make it have a bit more of a handheld feel to it. I don't want to go too far off the zero values, and I just want this to be a very subtle effect. I'm just barely rotating the camera, and we have a little bit more of a handheld feel to our animation. In the next lesson, let's take a break from this orb, and I'll show you how we can apply this same effect to text.
6. Create Text: In this lesson, I want to take a quick break from the orb and show you how we can apply this effect to text inside of Maya. Now, this scene is available in the project downloads, I encourage you to open it and check it out to inspect it for yourself. But I'm going to run through this scene very quickly and then recreate it as much as you need to know up to this point. Basically, we've created text with the text tool, and then I've duplicated that mesh out and then separated each letter so that each letter can have the texture deformer applied to it separately. That's why we have so many texture deformers here. But everything else is the same up to this point. It's just the matter of creating the text and then getting enough deformable geometry that will look good as the texture deformer is applied to it, and then applying the same effect we've done with the nerves curve and the texture deformer attached to a motion path on it. It's just the fact that we're separating each letter because if they were all on the same texture deformer, they would all loop together, and it wouldn't look very unique because it would look like they're all part of the same blob when they are individual letters. So that just wouldn't make sense. That's why I've separated each out into their own mesh and made a texture deformer for each one. Let's create a new scene, and before I do that, I just want to show you where this is. It's called Text_04. So I encourage you to open this up. Everything is the same as the next lesson is going to be at the end of the course, and I've just added this to basically what we'll complete in the next lesson. But for now, and just to show you how to create text quickly, I'm going to create a new scene. To access the text tools, you just need to go to Poly Modeling and hit "Text", and then I centered the text and I made the font fairly small based on the current camera we had in the scene, and then under the geometry tab, I can adjust the depth of the extrusion here by decreasing that a little bit. I can also increase the amount of curvature for the letters themselves, so there's a little bit more resolution there, and then I can also add a bevel so that the edges aren't very sharp. So I can enable bevel and then I can reduce the bevel distance down so that the letters aren't too puffed out. Now the other thing I can do to give myself some room between letters is to increase the tracking under text. If I go here and increase the tracking, this way, the blob kind of effect, will have a little bit of gap here so it can be applied to each letter and they won't intersect with each other. We can actually increase that beyond 10 and type in whatever value we want. Now we just need to duplicate this out. In case we ever wanted to go back to the original one and access this tab here, we can do so. You can see with duplicate, we no longer have that and this will live as its own geometry now. I'm going to hide the original by hitting "Control+H" and now focus on the duplicate. I'm going to go to the modeling tools and go to mesh, separate. Now we'll separate each piece into their own mesh, each letter into their own mesh, and then I'm going to go to edit, delete by type history, and that'll just clean up the history of each object, and then I want to go through each letter and center the pivot. So I'm going to go to modify, center pivot. That means basically where the manipulator will show up. You can see if we don't do that, it'll be at the center of the world. So if I hit modify center pivot, it'll snap to the center of that object. Now that I've done that operation, I can just hit G to access the last operation and select each one and hit G. The advantage of doing that is then you can use a custom script I'm going to provide in the project files, and you can also access a YouTube video where I describe how to use a custom script and how to load it onto a custom shelf. Of course, you're free to ignore this step and manually place each circle curve at the center of each letter if you want to do it manually. But for speed's sake, we're going to use the script here. Now, all we have to do is select all the pieces of geometry by click-dragging them and then running the script, that will place a curve on each one of the objects at their center because that's where we want the texture deformer to be rotating around. Now the last thing that we need to do before we apply the texture deformer is add more geometry so that the faces can deform properly because as it is now, this isn't enough geometry, the face is a single face and that wouldn't deform properly. We need more edges here. The easiest way to do that in Maya 2020 is go to Mesh, read. It's turned green because it has lost the shader. So we can just right-click and say "Assign Existing Material" and say "TypeBlinn". Now we can go through and do the same operation with each one of these meshes. For whatever reason, some of these are losing the shader and some of them aren't. It's not that big of a deal. We can just reassign the shader to all the geometry that's lost it, by going to "Assign Existing Material", "TypeBlinn". Now that it's had more edges placed on its faces, we can just increase that by smoothing the mesh of each one of these. So we can go to "Mesh", "Smooth". Now you can see that's increased the subdivisions one level and that's all we need. I'm not going to increase it more than that. Now we have enough geometry for each one of these to apply a texture deformer as we've already done and you've learned in this course. Go to deform texture. I'm going to choose the direction normal and apply our 3D volume noise. Then I'm going to reduce the amplitude a little bit and go back to the texture itself and decrease the strength quite a bit. I'm also going to scale up this. So it's a bit softer of an effect, and then we can do what we've learned and just constrain this to the curve with a motion path. Then we can choose the motion path, uncheck, follow, select it, double-click the "Timeline", right-click the "Timeline" and choose Tangents, Linear. Now, we have the same effect we had on the orb, but it's on a letter, and we can adjust each one of these to give them a bit more variation by simply repositioning the curve itself. Even if we use the same scale amount for each texture deformer, we can adjust them slightly so that each one has a slightly different type of deformation because they'll be oriented differently based on the curve. So that's how you do that, and then you would go through and apply the same material, and don't forget to go to Arnold and increase the subdivisions at render time as well. So it's nice and smooth, but everything else is the same for the rest of the course. You just have to go through each one of these letters and do this. So it's a little bit more tedious. That's why we're focusing on doing it on a single orb. In the next lesson, we're going to wrap up rendering the orb and how to batch render and bring it into After Effects for compositing and exporting as a movie file.
7. Final Rendering & Compositing: In this lesson, we're switching back to the orb, so you can open the Blood loop underscore o three Maya file if you want to follow along with the project file, or if you are already creating your own, just pick back up with the progress you made at the end of Lesson 4. Let's take a quick render preview and see how our render cam looks. We want to make sure we have it selected in our drop-down here so that it's actually rendering the render cam. If we scrub our timeline, we can get a quick preview here. Because we only have one spotlight, we're not seeing a rendering artifact that I want to point out. If you actually add more spotlights or have them not positioned directly behind the object, you might be getting specular highlights that you don't want to have. Here's an example where I had three spotlights behind the object and so because they are not positioned directly behind it, it's casting this glancing light that's catching and creating these very hot white bright areas of the blob. If you want to turn that off, if you have spotlights in other positions other than right behind the object, you can actually turn those specular highlights off by going to the actual light itself and scrolling down to the Arnold drop-down menu, going to visibility, and turning off specular, that way this light will no longer be emitting any specular reflections onto the object. The next thing that we can do is also optional, but we can add a depth of field effect to our camera. Let's choose our render cam, go into the attribute editor of the render cam, scroll down to the Arnold settings and turn on enable depth of field. We can increase the aperture size to increase the depth of field effect to create a blurry background. Now we just need to make sure we know what the distance is between the camera and the object itself so that the object is in focus. If we select the curve and go to the scale attributes, we can see that we've scaled it up by 11.29, which is actually going to be the same as the distance from the object. If we control C copy that value, choose the render cam again, and go back to that depth of field attribute, we can paste that value into focus distance, control V, I'm going to hit "Enter" and we can see that our object will come into view. Now all we have to do is choose the aperture size to decide how much blur effect that we will have on the background itself. Finally, we need to adjust the render settings so that we can reduce the amount of noise in our image. I'm going to go first to the lights and increase the samples on the lights by going to the Arnold tab of the lights and choosing a sample of two. I'm going to go to the sky-dome light and do the same thing and choose a sample of two. Then I'm going to go to the Arnold Render tab in the render settings and increase the camera settings to four and increase the subsurface scattering to three. Now we can see the image is a bit less noisy, but it looks like we still have some noise here in the image. So I'm going to continue to increase these render samplings until we have something that's less noisy. If you want to compare before and after image of these types of settings, you can always hit the snapshot icon down here for it to save that preview render that you can compare to the next adjustment you make. This will also help indicate how much time your render is taking, we can see in the bottom left and we have 18 seconds versus this one was 12 seconds, so we've added six seconds to our render time, which isn't that much and we can also zoom in and compare how much that's improved our render by toggling the last image on and off. We can see it might still need some more help. One final thing I can do to help clean up the noise is adding a imager, we scroll down under the Arnold Render tab we can see imagers and I can choose add imager, denoise, or noise. Now if we zoom into our image and we compare with the previous render, we can see how much of an effect that denoiser has on the image by reducing the noise of the entire image itself. We can go to common and we can choose the name for our renders. You can choose the image format. Just keep this simple, I'm going to choose JPEG. Typically I'll choose EXR if I'm doing any kind of compositing, but I'm going to choose JPEG because this is a fairly simple render, then I need to choose name dot number dot extension so that we get the frame range available now to render, and I can change the end frame to 119 because we know that frame 120 is a duplicate of frame one because this animation is looping, so we can just exclude that from our render, so that's why I'm choosing frame 119 instead of frame 120. Then we can scroll down and make sure we have our render cam selected, and then we can choose a preset for the dimensions. I'm just going to keep this at 540 since I'm only going to be sharing this on social media and I don't need a high-quality render. I'm also trying to keep my render time low and right now we have 25 seconds per frame, which is pretty reasonable. A general rule is that your render times will generally increase as a direct result of your dimensions, so if you increase your dimensions by two times, your render times will also increase by two times. Because we set our project at the beginning of these lessons, we can see that the path of our filename is going to be in the images folder. So let's go to the Render tab under Rendering and go to Render, and as soon as we hit Batch Render, it's going to initiate a render and it will create an image for every single frame of our animation. I've already done that so we can jump into after effects to create a movie file from those rendered images, I'm going to right-click in the project window and go to File Import, and then I'm going to find my images folder and choose one of these images. I previously had export EXRs, that's why those are showing up instead of JPEGS, so whatever file format you have will show up here. After effects should recognize this as part of an image sequence based on the naming convention of all of these images, so this option to have a sequence checked on should already be enabled by default, even if you just select any one of these, it doesn't have to be the first one. I'm going to choose Import. Then I'm going to check to make sure that the frames per second match our Maya project. If we look in the Maya project, we had 24 frames per second here in the bottom right. We can change that, of course, and re-render it whatever frame rate that we want, but that will mess up our current keyframe locations. You always want to make sure you set this before you start and 24 frames a second didn't need to be changed at the beginning because that's the typical frame rate that movies use and most animations use. But back in after effects, we can see it's decided that it wants to interpret these frames as 25 frames a second, so to change that, I can go to right-click the footage and go to Interpret Footage Main and type in 24 where it says assume this frame rate. Now I can click and drag this over the icon here or here, and I'll create a new composition for our animation, all we have to do then is hit "Control, M" to add it to the render queue, choose lossless to adjust our settings to whatever we want. I'm going to choose QuickTime and Apple ProRes 422 LT from the video codec settings here, you might have others that you want to choose from. I also want to choose where to save this. I can hit Render, or if I want more options from Adobe on the codecs I can choose, I'm going to queue it in the Adobe Media Encoder. If I hit Render, it'll automatically dis-render it at these settings. But if you don't want something as high res as QuickTime, Apple ProRes 422 LT, which sounds really fancy it's just a nice higher-end codec. You can choose from an H.264 codec from the Apple Media Encoder, an option that we didn't have in After Effects. This will be appropriate for something like YouTube or social media, which will take up less hard drive space because it'll be a smaller file size, but it will reduce the quality a little bit. You can see that it's choosing 720 HD instead of 540, so we can click that to actually change the source settings, so we can say Match Source, and it'll change the dimensions to what the source composition was set to. I'll hit "Okay" and then you can hit the play button in Adobe Media Encoder to create your video file. If you want to do some advanced compositing, choose the EXR format and go to merge AOVs and go over to the AOVs tab and scroll down, and choose one of these cryptomatte layers here and we can just choose object maybe, and you'll get a hidden layer within that EXR in that same EXR past, so I've duplicated it here and we're going to use that as a matte. You can actually apply the cryptomatte filter to this and get access to a nice matte system here where we can select just the blob and we can isolate it as a matte only and then use a luma matte, track matte so that an adjustment layer by right-clicking and saying New Adjustment Layer and adding a hue and saturation effect to it, we can actually keyframe that so that we can either animate the hue and saturation or we could just set it to a single color and It's a nice way to isolate the blob by itself and change the color of it in compositing. Thanks for watching this short lesson. If you enjoyed this and want to go deeper into creating animated loops, I have a course that will teach you how to use Mocap and bring in a character and do a similar effect for a sci-fi looking animation loop. Thanks for watching this lesson and let me know what you think about it, and if you want to see more like it, I hope to see you on social media under all my Digital Creators School accounts. My name is Lucas Ridley. Thanks for watching and I'll see you next time.
 Lucas Ridley, Professional Animator