Transcripts
1. Course introduction: Hello and welcome to the high converting Wix website course. Have you have this amazing idea or project that you would like to start, but you just don't know how or maybe you're feeling overwhelmed with all the information out there on how to get started with your online business. Maybe you already have a website, but it's just not converting any clients. This course is designed to help you create a stunning website that looks professional and most importantly, that converts visitors to Leeds. First, you will learn how to do web site planning. This includes brand assets, sitemap creation, call to action, competitor research, and the six-step high conversion method. Then we'll move on to step-by-step website creation, which includes creating an account, choosing and customizing your template and publishing the website. Lastly, you will learn how to optimize your website for search engines that will increase your website traffic. My name is Stella for Saatchi and I'm a marketing strategist and coach. I have over seven years experience working with clients in different industries and I help businesses create their digital footprint and have a solid marketing strategy. If you're ready to take your website and business online, I'm here to help.
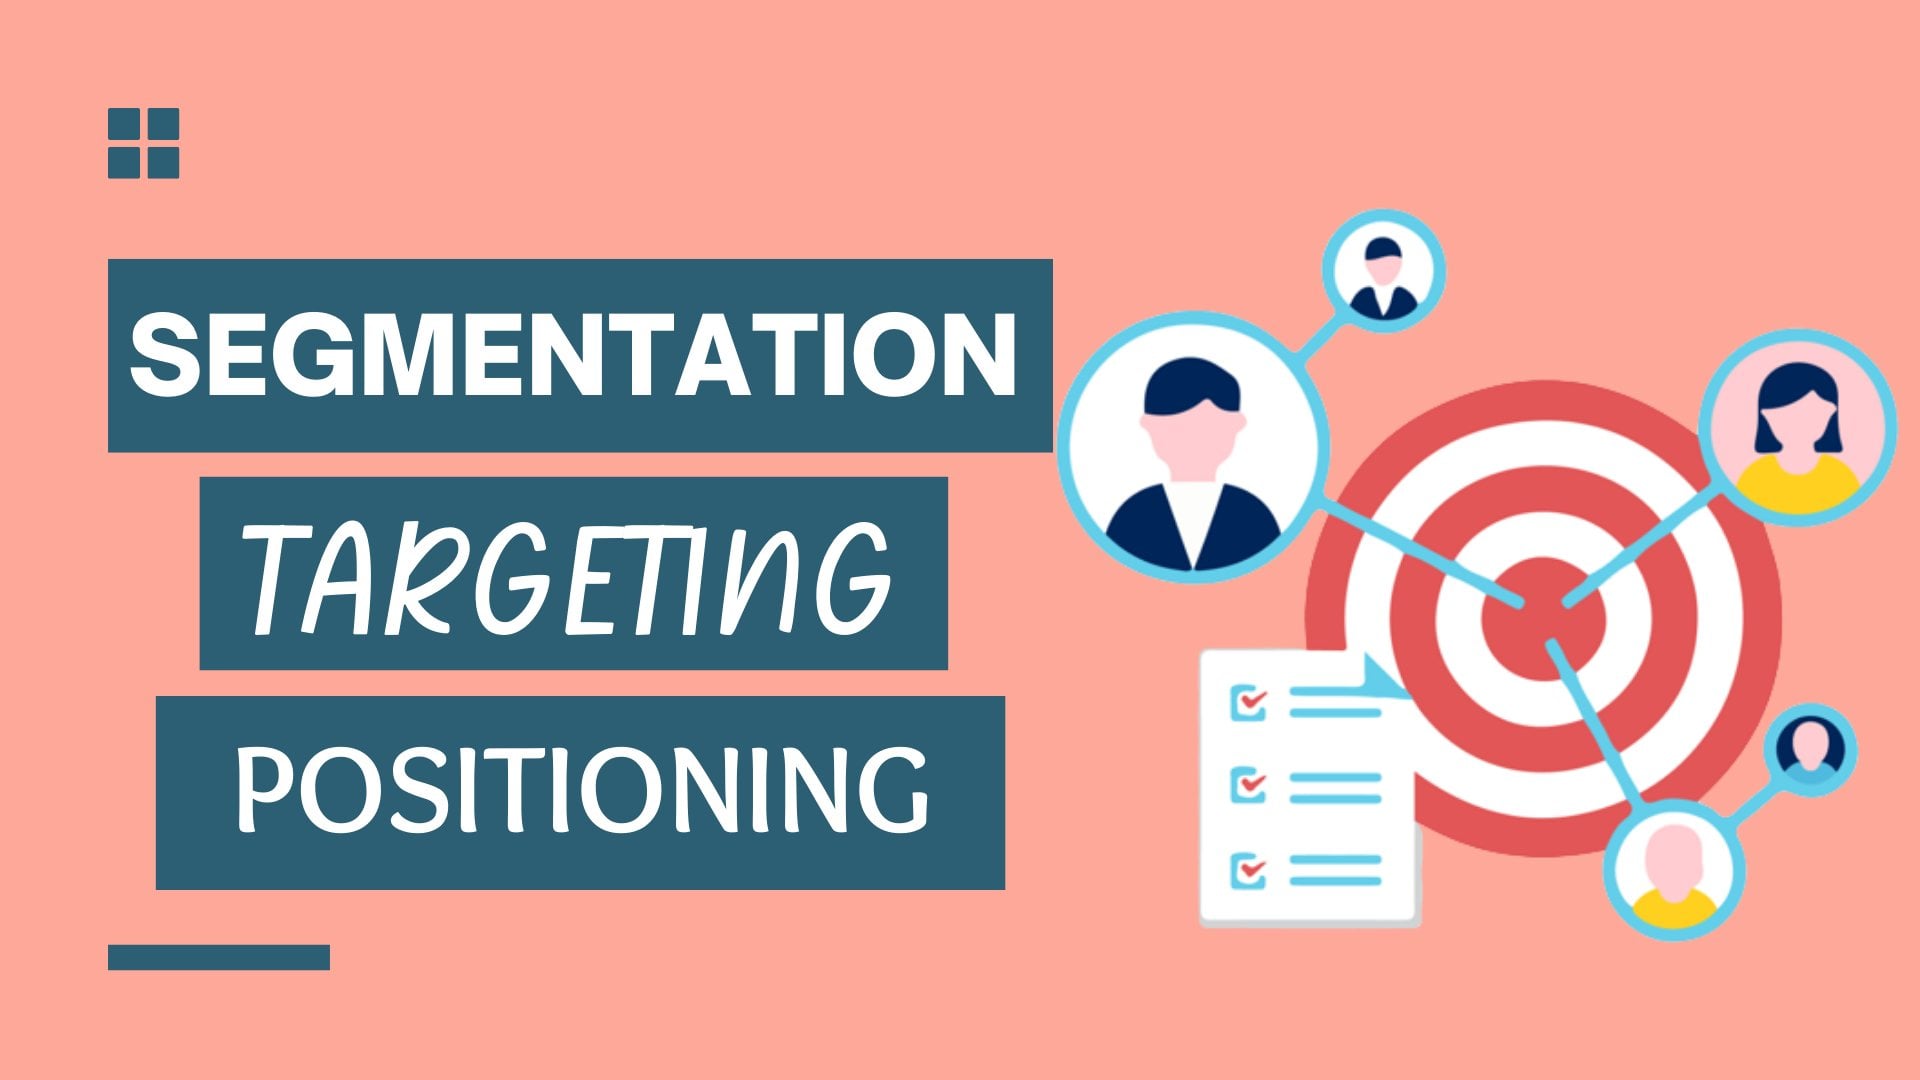
2. Website planning: The first and most important step before you start designing your website is to planet. You need to know what type of website you want to create. What's the purpose of your website? Who are your competitors and what they're doing, your brand assets. You need to create a sitemap. And you also need to have an idea of the type of content you will add to the site. There are three types of websites. An e-commerce website that accepts online payments, a business site that is created for brand-building and credibility, and a personal site that's ideal for blogs or a portfolio. You need to have a clear idea of the type of website you want to create. Before you move on to the next step, deciding what type of website you want to have will help you create the content for your website and give you a clear purpose on what your website is trying to achieve to help you decide the type of website that you want to create, you need to be able to answer two questions. Why do you need a website and what actions do you want your visitors to take on your website? So what's a website per pose? The core purpose of a website is to turn your visitors into prospects and get them to take the next step. For them to do that, you will need to ask them to take an action on your website. And this is what we call a call to action. Otherwise, you will see being written as CTA. A call to action is a phrase that's used to tell the user exactly what action to take and how to take it. For example, you can have a Buy Now button or a subscribe to my mailing list. It's important to define what actions you want your visitors to take on your site and be clear about it. Do you want them to submit a request to subscribe to your newsletter to complete a purchase. If you have an online store to download content, or maybe learn more. After you identify the purpose of your website and your call to action, you will need to do some competitor research. You can start by identifying your top five competitors and then reviewing their online presence. What is the look and feel of their website? Is it modern, minimal, contemporary, or maybe an old-fashioned website? What CTAs do they use? What actions do they ask their visitors to take? Check their social media, what images they use, and what type of content do they have? Check the content they have on their website, the vocabulary that they use, and how formal is it? Content also check what type of offers do they have and how often do they have offers. By doing this exercise, it will help you get ideas on your marketing strategy as well as your web design. It will help you identify gaps in the market, do things better than your competitors and better define your ideal customer. The next step is to help your brand, assets, content, and image ready. And that includes a logo, defining your brand colors, writing the content of your website, and finding the right images. If you don't have the skills to create a logo for yourself, you can create Canva, which is a free tool that you can create your logo for free, or you can hire a freelancer to create the logo for you, Fiverr and Upwork, or really good options for that. Choosing your brand colors is very important. Make sure you have an understanding about what all the colors mean before making your choice. For example, red could mean a negative color and green a positive color. In addition to that, you need to choose colors that identify your brand's essence. Just think of your brand goals. Do you want your customers to be happy to get rich? Be more informed, think of your target audience. Do you want them to feel confident, positive, or intelligent? What are the personality traits of your brand? Is your brand fun? Is it serious or inspirational? Identifying your brand essence will help you choose the right colors for your brand. And another very important aspect of your website planning, the content that you will have for each section of the website. What is the tone of voice that you want to use for your target audience? The vocabulary, how formal do you want to be? In which keywords are you going to use that are best for your SEO? And last but not least, images are very important to your site. A good ratio of images and text can make the page is your to the eye. Make sure that the images that you use for your website, a royalty-free images, and the files that you upload, our small files so that they can load quicker. You can use an splash or Pixabay to download royalty-free images. Creating a sitemap is essential before you start designing your website. A sitemap is an outline of all the pages and content your site needs. It helps you organize and clarify the content that needs to be on your site, and it also helps you eliminate unnecessary pages. This is an example of a sitemap. You define which pages you want to have in your site and what's the flow of the pages? For example, on the homepage, we will have five pages. The About Us, the services, a gallery, a blog, and a contact us page. In the about us page, we will talk about the story of the company, the team, mission. In the Services page, we will list the services that we offer and so on. Think of what pages you need to have on your website and modern information each page should include. Then create your site map. Now that you have your website planned, you're ready to start designing your website.
3. High Conversion method: Having a standing, professional-looking website is essential, but there is one thing more important than this, and that's having a website, but converts a website that makes sales and brings you profit. In this video, we'll talk about the six step methods on how to create a high converting website. This method I'm about to show you can be applied to London pages, social media, or any other ways you're using to make sales. The first step is to relate to your audience, make a connection with them, let them get to know you and what your experiences have been. Talk about where you've been in the past and what problems you faced and how you overcame them. Make sure to avoid oversharing irrelevant stories about your life. The second step is to show them that you understand their pain points, the specific problems that your prospective customers are experiencing. The third step is to show your experience and credibility, show them that you can solve their problem. Step four is to use social proof. A potential customer before buying from you is more likely to seek the advice from others that have experienced your service or product before. If others are talking about you are living positive reviews. If their friends have used your service or product before, then they're more likely to use your service or product. You can do that by having reviews, testimonials, and case studies on your page. The fifth step is to have a prominent call to action. Your main goal with the call to action is to have a quick and simple form to collect their information, be clear what you ask them to do and not the call to action in more than one places on your page. Last but not least, our sixth step is to follow up with them. After you've collected the information, you need to make sure that you follow up with the potential customer to make sure that you convert them. When a visitor lands on your page, they might not be convinced from the first time if they keep getting reminders from you about how you can solve their problem, they're more likely to convert into customers. Do the follow-up process minimum five times. To summarize the six-step high conversion method, your page should have the following information. Step one, relate to your audience. Step to show that you understand their pain points. Step three, show your experience and credibility and that you can solve their problem. Step four, use social proof, have reviews, testimonials, or case studies on your page. Step five, use a prominent call to action. Step six, follow-up with your potential customer minimum five times. The best way to use this method is to combine content and video. For example, step 12356 could be text, and for step four, you could use video reviews or video case studies. Lastly, to follow up with the people that you've collected their information, you can use a combination of email marketing, phone calls, and social media.
4. Creating WIX account: We will learn how to design a website like a pro with no experience or coding skills. But let's start by creating a free Week's account. To do that, we type on our browser, Wix.com, and we will land on this page. This is the wicks home page. On the top right corner, you will see a sign-in button. Just go ahead and click on that. Once you do that, you will land on this page here. Makes sure that it says sign up up here and not login. You want your email a password. And then you click here on sign-up. And that's done. You have a Week's account. Now, after creating our Week's account, we will come across this page here where Wix wants to find out what you want to achieve so that it can suggest the best templates or the best experience for you. So let's click on, let's do it to provide weeks with some details about what we want to achieve. When we come across this page, we want to choose a template. So click here. We're ready to select our template. Now that you have created your Wix account, you will need to confirm your email address, go to your inbox, and then you will see an email from weeks that asks you to confirm your email. And you're all done.
5. Choosing a template: The next step after creating our account is to create a new site. You see the option here, creating new side or up here. So you click either of the two. Now, you might want to create a business website, a blog, a fitness website, a portfolio, or any other type of website. So you have all the options here. And if you click on one of them, you will see the templates that are suggested for this category. For our example, I will create a business website for a hair salon. We want to choose a template. On this page, you can see all the templates available that are on weeks and you can choose any one you like to use. Each template has different features or showcases a different thing. So it's important to type the category that you're interested in if it's a business side or a blog site. And then you will see the options that are best for your category. For our example, I will create a website for a hair salon. You can see I have an option here, beauty and hair, or click on that. And immediately I see so many templates that are relevant to my topic. You can even view a template to make sure that you like it before selecting it, hover your mouse over one template and you get two options. The first one that says edit, it means that you are selecting the template and you're ready to start working on it, the view option, it allows you to view the template before using it, we'll click on the View option to make sure that we like this template. While you're looking at the templates, you can also get ideas that you want to apply on your website. So I click on edit, and there you go. My template is ready for me to start customizing it.
6. Deleting extra pages: When you select the template, you might find that there are pages that you don't need and you want to delete. In this section, I will show you how to do that. On the left-hand side, you will see some options here. Click on the first one where you can see the menu and the pages that you have on the website. As you can see here, we have a member's area and a store, or we want to do is to delete those two before we start customizing our page. To do that, on the side menu, we hover our mouse over these options. On our case, I want to delete the shop. So you see the three dots here. Click on that, and then you click on Delete. I also want to delete the members page. Here's the members page that I want to delete. There is an icon here that says Actions. I click on that and then you get more options here. One of them says Delete Members area. I will click on it and confirm that I want to delete the member's area. It might take a while to delete the pages, so just give it some time until it loads. You want to make sure that your website is saved by clicking on the Save button on the top right corner next to the save button, there is a Preview option where you can see how your website will look like. The publish option, you click on it when you're ready to publish your website, when you're done with all your pages and you've added all the information. Once you click publish, your website will be live, will do this step up the very end.
7. Editor dashboard and background: After you choose a template, you will see the full Wix editor dashboard. You have three key areas inside the w6 dash board. The central part here is your website and as you make changes, you can preview them in real time. On your right, you have options that let you delete, duplicate, rotate, and adjust the placement of the various elements on your site. On the left, it's all your building blocks and design options. We will take a detailed look into all elements in building blocks and design options. If you want to change your sides, background, wake support solid colors, images and videos. You can do it here, where it says background. Or you need to do is click on the Color option. And you will see various colors that you can choose from as you hover on any color from the palette weeks, we'll show you a real time preview. If you prefer an image background, you can either upload your own image or choose from a collection of free images. This is the option. You can upload your images here just by drag and drop or choose from the images that weeks already has on its library. You can select any of these images or type your keywords to find images relevant to your topic. These are stock images royalty-free that week's allows you to use. If you want to try a video background, again, you can either upload your own video or choose from one of weeks his collections. You click on the video button, media from Wix. And this is their video library. For the website I'm designing, I will keep the white background.
8. Adding and editing strips: On the left menu, you can see a plus here that says add. This option lets you add any design elements to your website, from text to images, buttons. You can see all these options here and many, many more. All these design elements are completely customizable. By clicking on an element, opens it's designed toolbox where you can choose the font, color or anything else that you can change it. Let's start by adding strips. Strips give structure to our website. As you can see, our website has different strips for each section that we want to add. This is a strip. This is another strip. This is a third strip. Within a strip, you cannot content and images and they're all grouped together. If you want to move this strip higher, you can just drag it and move it higher or lower. Within a strip, you can have multiple columns. For example, this strip here has two columns. You cannot more or delete them. To do that, you click on Manage columns here and you can see the Add Columns option. There you go. You can also delete this one by clicking on this icon here. If you want to delete any element on your website, you have to click on them, right-click and find that the lid option here. Otherwise, you can click on this delete button here. If you accidentally press on x and the toolbar goes away, you can bring it back on your screen from the Tools option up here. It is also important to know that you have some grid lines were your text should be within those lines. If you go outside of this lines after you publish your website, that text might be cut out. We then strips. You have many options. If you click on a strip, you will see these icons up here. To change the strip background. You click here. And then you can either have a solid color, an image, or a video. I will replace it with an image. I'll use this image for now to select an image, click on it and click on change background. If you click on settings, you can change the background of the strip. Or the scale could be a tile scale to fill, or it could be the original size. Best practice is to choose the scale to feel. If you change the color behind the strip. For example, if you choose this color and then you add transparency to your image. You can see that the background color starts appearing on your screen. I want this image to be on a full screen. So I will click on this full screen and I want this to be on 0%. Another option that will give some effect to your website is to click on this icon here where you can add effects like parallax or a reveal option. Let's choose this one. On our preview mode, you can see that the image has a parallax effect.
9. Adding text: Let's start customizing our page even more to add text, you click on the plus, on the left-hand side, we click on text. And let's say we want to add a heading, will go ahead and select this one and drop it on our strip. When you click on the text box, you will get these options right below. One of them says edit text. We will click on that. And then you have options to fully customize your text. You can change it from a heading one to a different type of heading or a paragraph. You can change the font, the size, or even the color. I will double-click on this textbox to change the text. Now that it's selected, you can start typing. So the main thing we want to achieve with a website is for someone to understand from the first couple of seconds what their website is about. As soon as they go on the website, they know immediately what you're offering without even having to scroll down to read the other information that you have. So I will make it very clear that this is a hair salon website. And as you can see, I have placed some text on the strip. The problem is that you can't read the text very well because we have an image on the background. So a few ways to change that. You can either add a background color to the strip and then make the image transparent, or are the different color box just behind the text so that you can read it better. I will show you how to do both ways. Now, we click on this icon, will find the option that says box. And select one that we like. Keep in mind that we can fully customize the design of the box. To change the design. If you click on the box, you will get these options, will click on change design and then customize design. As you can see, you can change the background color and the transparency of the box. We can change the border at corners or add a shadow. As you can see, the box is in front of the text, so we can't read the text very well. What I wanna do to fix this, I want to send the box behind the text. To do that, we will select the box, right-click with our mouths, and we'll see some options here. We'll click on a range and then select this option, move backward. And now we have our text in front of the box.
10. Header, footer and menu: Updating the header and footer of your website is simple. Click once on the strip on the header, makes sure that you're not clicking on the text or the menu. And then you will get some options that allow you to change the design and the settings. You have many Header options. You can select one that has no background color, that has some shade. Or you can even customize it. You cannot draw ONE color at border or change the corners. I have added some transparency to my header. Click on settings. You can choose what happens to the header. Once you start scrolling down, you can freeze the header at the top so that it stays there even when you scroll down or you can have the header go away completely. So I want to keep the header frozen for now, but we'll change the name. Now that I'm renaming my website for consistency, I want to keep the same phoned. To make the header thinner. I'll click on this icon here. Drag and drop it higher. This is our menu. If you don't want the menu that came with your template, you can just simply click on it and delete. We will go ahead and add a new menu. To do that. Again, will go to this icon here and find the menu option. As you can see, you have different menu options. You can add a vertical menu. You cannot the traditional menu, or you can add and course, which we'll talk about at a later stage. I like this menu here, so I will click on it and add it to my site. I will drop and drop it on the header. You can see there is an option that comes out that says a touch to header. And this is exactly what we want to do. So I will move this to one side. Now I will move my text within the grid lines. And all I need to do now is customized the design. When you click on the menu, you will see the same options that allow you to customize the design of your menu. Or click on customize design. And from there you can change the color of the border that corner, and the spacing of the text. You have options here where you can select what happens after you hover your mouse over some of the text and what happens after you click on an option. You also have the option to stretch the menu from one end to the website to the other. And I will show you how to do that. This is the option, stretch to full width. And here you go. You have the menu stretch on the website. You can even change your margins. We will do the same thing with our footer. So our header and footer, when you select them, they become Orange. They have an orange line. When you click on a strip, there is a blue line and that's how you understand when you have selector footer or a header. On our case, the footer starts from here. So I will change that to fit in with the look and feel that I'm trying to achieve for my website. The easiest way to do that is to delete everything that you don't need. Now, I want to adjust the height of my footer. To do that, I will select this arrow here, click on it, and drag it to make it smaller. You can always change the height of your footer. As you are more information. You cannot text icons, links to other pages. You can not use social media icons or even a subscription to a newsletter. All you have to do, you will click on a text that you have somewhere else. You will drag it and then you see an option that says moved to footer. And then you'll click on that. And there you go. This is your text. As with all the other elements on the website, you also get options to customize the design of the photon. To do that, you will click on it to get these options and then you can click on design, or you might want to change the settings.
11. Adding images: In this video, I will show you how to add images to your site. First, let's add a strip. On the left-hand side, will click on the plus, find the strip options. You can choose any of the predesigned strips, or you can select a plane strip to design yourself. To add an image, you will click on the plus and find the image option. You can either upload your own image or use one of WIX is collections. To upload your own image, you will click on this option here. You cannot your files by drag and drop. To use images from weeks his library. You can click on the media option here. To find an image you like. Type a keyword on the search bar and then scroll through the images. Once you find the image you like, click on it and then click on up to page. You can adjust the image size by clicking on the site. When the image is selected, you get some edit options. You can change the settings of the image. You cannot links so that when someone clicks on the image, a link opens and you can add alt text here that helps with your SEO. The alt texts that you add should be a description of the image. You can change the design of the image from this option. And you cannot frames or shadows. To get more options, click on customized design. Once you click on an option, you can adjust the border, the corners, or add a shadow. You can crop your image into different shapes or flip it. You cannot filters to your image. You cannot animation to add some effect on how it appears on the screen. And the last option allows you to add a link to your image. It can either linked to a different page on your website, a completely different website, an email, and I'm core or a light box. Make sure that your image sits within the strip. And this is how you add images to your website.
12. Adding pages: In this section, I will show you how to add pages to your website. From the left-hand side menu, you will click on the first option that says menus and pages. As you can see, we can already view the pages that we have. On the side. At the bottom, there is an option that says add page. We will click on that. And our new page has just been added, gives you a new page, a name. And click done. On the right, you will see an icon with three dots. If you click on that, you will get more settings for your page. The first option is Page settings. On the page settings window, you can adjust the page information, the layout, the permissions, the SEO settings, and the social share settings. On here, you can rename your page. You have the option to HIV your page from the menu. That would make it a hidden page. Which means that people can only find it if they have the direct link to the page. Layout settings. You can choose to have a standard layout or a layout without a header and footer. In the permission settings, you can make your page available to everyone. You can add a password to your page, or you can make it available to members only. In the SEO settings. You can update the information of your page to improve how it ranks on search engines. You cannot descriptive text here to explain what the page is about. And you can change the display name here. You can also change the URL. In some cases, you might not want your page to appear in search results. You can't control it from this option. In the social share settings, you can control how your page would appear when it's shared on social media. You can not text and images for that. You also have advanced SEO settings, but we will look at SEO after we finish our website. Our new page appears on the menu automatically. To change the order of appearance of your pages. Click on a page, drunk and drop. On the left-hand side, we're still in the menu and Pages tab. You can see another option that says page transitions. From here, you can control how one-page changes to the other. And this is how you add pages to your site.
13. Adding videos: Adding videos to our website, it's quite simple, and it follows the same way as adding images to your website. On the left-hand side menu, we will click on the plus and find the video option. The option allows you to add videos as well as music to your site. To add videos to your site, you have different options. You can either upload your own video. You can choose one from Wix is collections, or you can link to a video that already exists online, such as YouTube or Vimeo, with the options below, you can choose how you want your video to appear on your site. You can also add music to your web site either by uploading your own or adding music that already exists on SoundCloud, Spotify, or iTunes. There is another way of adding videos to your site, which is quicker than this. Click on media. Then scroll down to weeks videos, and then click on show more. As you can see, the filters of our selected here are the videos. So we're only seeing videos. And you can also choose the category, or you cannot use keyword on the search bar. Select the video that you like, and click up to page. Make sure that your video is attached to the strip. When the video is selected, your editing options will appear. You can change the settings of the video. You cannot short description to what the video is about, and that will help your ranking on the search engines. You can edit the behavior of the video. For example, you can choose whether you want your video to start playing automatically. What happens when someone clicks on it and what happens when the video ends. If your video has sound, you can enable or disable the sound of the video. You can change the design of the video by adding a cover, by adding a pattern overlay on your video, adding contour, adding border and shaped. You can also change the shape of the video and animation as well. And this is how you can add videos to your site.
14. Buttons and boxes: Mm-hm. In this video, I will show you how to add buttons and links to your website. I will show you how to do this using an example. We will lack the different services that we're offering and linked to the services page. Let's start by adding a string. On the website. I will offer four different services. So I will start by dividing this strip into four different columns. Now that this is done, I will start by adding the buttons, but we'll link to each service on my service page. We'll click on the plus button section and we will find different designs and different kinds of buttons. You can fully customize the design of the button that you will choose. We will click on the button that we would like to add to the page. When the button is selected, that customization options will appear. You can change the text and the icon. You can change where the button links to. From this option. You can either link to a different website, a page on our website, and Angkor, an email, a light box, or a phone number. You can change the layout of the button from this icon here. You can change the color, the border, or add a shadow. You can change the design. You can choose a completely different button or fully customize it. You cannot add animation to your button. That way you are more effect. And you can change where it links. When you click on the design and choose the customize option. You can't control what happens when the button is on the website, when you hover your mouse over your button and when you click on it. If you're happy with the design of your button, you can duplicate it to create more. That's exactly the same. To do that, select your button first, click on it once, then right-click with your mouse and click on the duplicate option. This is how you add buttons to your website. To make the Services section look more appealing, I will add some images and boxes to make you want to click on the buttons that we have just added. We will select the box option. There are many books options, but we want to add an effect to our boxes. So I will choose one from the hovered boxes section. Our box has been added to the page. Once our box is selected, you can see that we have two options, the regular and the harbor option. The regular option shows how our box is displayed on the site. The hover option shows what happens to our box when our mouse hovers over the box, you can add text, images or buttons. You can change the background of the box, change the design. And if you choose the Applied to hover, option, changes you have made to the regular box will be applied to the hover box. I want to add some transparency on the image. So when you hover your mouse over the box, the box will change color. To do that, we will click on settings, make sure that you're on the harbor option. And enable that overlay option. You can choose any color that you like and control the transparency from here. Now that my box is done, I will duplicate the box three more times. And now we want to make sure that our buttons are attached on the box. Click on the button and drag it over the box. Makes sure that the option attached to hovered box appears. You want to make sure that the button also appears on the regular box. You can click on the button and click on the Apply option. That way you can match the exact same position of the button on the hover option and the regular option. We will save and preview our website.
15. Anchors and drop-down menus: In this video, I will show you how to add unconscious and drop-down menus to your site. And course are uneasy way to direct people to sections of your site quake, uneasy. They are invisible position markers that you can place anywhere on your site. On our example, I have edited our Services page. I have added the services I want to be offering and I will show you how to add uncaused to those services to make it easy for visitors to find quickly what services you're offering. It's important to make it easy for the visitors to find what you're offering that will improve the user experience of your site and will result in higher conversions. Let's go to the services page. To create this page, I have added strips, images, text, and buttons. Let's do an example together. Hi. And this is how I've created the strips to move this trip higher or lower, just select it, click on it, and drag it. Make sure to regularly save your page. Two on, on course, you will go on the left-hand side menu. Click on the plus icon, and you can find the course under the menu option. Click on it and drag it on your page. You want to make sure that you give a name to the course. It will make it easier for you when you're linking them on your site. I have added my anchors now to move a non-core, you simply click on it and drag it higher or lower. If you want to delete an encore, right-click on it with your mouse and then click on the delete option. Now, we will create a drop-down menu under the Services section on our menu to link our on course. To do that, we will click on the menus and pages icon. At the bottom, you can see the Add Page option, and next to it you have some other options. You can either add a folder to group your pages together, but this will not be visible on your site. The other option allows you to add links and non-course to your menu. We will click on that. We want the Ankur option to be selected. This is where you choose on which page you're unquote is. In our case, we've only created unconscious on the services page. If you had created uncaused on other pages, you will be able to find them from the drop-down menu. And from this option, you select which unclear you want to link. You can see all the course that I have added and renamed. I will rename it. As you can see, the encore has been added to the menu to remove it from the main menu and add it as a drop-down option. Under the services, you have to click on the Encore and move it slightly to your right. Once you see this line that shows the connection between services and your encore, it means that it's part of the drop-down menu. Let's preview our page. Uncus can also be linked to images, buttons, or text. I will show you an example of linking buttons to unconscious. We have our services here, and I will link the buttons to the UNCLOS that I've created. Now, I will link the course to the buttons, will click on one button to get the editing options. Then we'll click on change text and icon and select to add a link. We have different options depending on where we want to link the button. On our case, we will click on the uncork and select which encore we want to link the button two. We'll save and preview our page. And this is how we add uncaused and drop-down menus to our website.
16. Testimonials and shapes: In this video, I'll show you how to add client testimonials to your site. But first, let's understand what social proof is and why it's important. Social proof is the influence that the actions and attitudes of the people around us, either in real life or online, have on our own behavior. The proof element is the idea that if other people are doing it or saying it, it must be correct. And what I mean by that is that customers trust customers more than marketers. On our case, we will build trust and credibility to increase the conversion rate of our website by adding an element of social proof, which are the testimonials. Let's start by adding a strip. As you can see, we can find some already premade strip designs. One of the options are the testimonials. You can either choose one of these strips or choose a plane strip to create your own design. Let's choose this option. As you can see, this is a strip with three columns. In each column there is an image, text, and the shape. You can edit your strip by changing those elements. But let's create a testimonial section from scratch. I will delete this strip and add a plane strip. I will show you a few different ways on how to add testimonials to your site. The first way is by adding slideshows. You'd usually choose that option if you have many testimonials and you'd want to show all of them. To do that, we'll click on the plus, go on the interactive option, and then choose the bulk slide shows option. As you can see, I have two slideshow boxes that are ideal for testimonials. I'll choose this one. You can either have just one slideshow in the center, or you can not. Two or three of this slide shows. Right-click and then duplicate. For our example, I will just keep one. When you select the box. You will see that you have the editing options. You will also see that you have different slides. Every few seconds the slideshow will be changing and another testimonial will becoming on the screen. Make sure that you update all the slides that you have on the slide show. To do that, we'll click on Manage slides. You cannot more slides by clicking on this option here, Agnew slide. When you select one slide, you will see the three dots icon here. If you click on it, you will get some options. You can rename your slides. You can duplicated or deleted. You can change the colors and text font of your slide. And you do that by clicking on the slide background. The slide boxes behave exactly as the strips. You can change the color or at an image or a video exactly the same way. You can also add an effect to your slideshow. If you click on an effect, you have the option to customize. You can choose the duration and you can choose the timings of the effect. How long does it last? Or if you want to add any delays. Now, as you can see, all the other slides are different. So to make it simple for me, what I will do, I will click on Manage slides. Click on the slide that I have designed. And I want to delete all the other slides. Now that I have deleted the other slides, I will duplicate this slide as many times as I want. Now you only need to change the text and the name. I'll change the background of my strip. Another headline to this section. When you click on the slideshow, and then click on the settings of the slideshow. You can choose how this slideshow behaves. You have the option to choose how each testimonials stays on the screen. What happens when the user hovers the mouse over the testimonials and how the slides transition into one another. Let's preview our slideshow. Another way of adding testimonials to your site is by adding repeater lists. Click on the plus, go on lists and grids, and you will find some elements that repeat themselves. As choose this one. When the repeater is selected, you get the customization options. Click on Manage items. And this is where you can rename, duplicate, or delete the items on your repeater. You can change the layout and how the items are displayed. You can stretch it to full screen. If you stretched to full-screen, you'll have to pick the spacing between the items. And you can also add animation to the repeater. Let's break your website. Another way of adding testimonials to your site is by adding a testimonial strip within our main strip. Will click on the plus. Find the testimonial strips. Will click on this one. When the strip is selected. You can click on the stretched option and feet to the page. Click on the strip and drag it within the other strip that we have created. We do that to group the two strips together. And it will be easier when, when convert our website to the mobile site. Let's change the background. To edit the shape, will click on it. And again, when the same way as we added all the other elements on our side, we get these options and we'll click on design. If you want to add different shapes to your website, you will click on the plus. And you can find all the shapes in the decorative section. You cannot different lines, arrows, shapes, or icons. If you find something that you like and you want to add it to your site, click on it and drag it to your site. You can make it bigger or smaller by clicking on one of the corners and dragging it. When the shape is selected, you will get the customization options. You cannot have link to the shape. You cannot affect, change the color, or even change to a different shape. To change the image, you can select it and click on the Change Image option. Okay, let's preview or site. And this is how you are testimonials to your website.
17. Adding forms: In this video, I will show you how to add forums to your website. This is a great way to collect your client information to use at a later stage with your marketing. Let's start by adding a strip. To add a form to your website, you will click on the plus, find the contact and forms option. And then you will see all the options available depending on what kind of form you want to add. It can either be a contact us form, a payment form to collect feedback, or a subscription form. Let's add a newsletter subscription form. Once the form has selected, you get the options to customize your form. You can make the box bigger and also click on each element on the form to move it or change its size. You can change the form settings from this option here. Under the form settings, you can control what happens to your subscribers. We will click on this options at the very end after we've finished with all the other settings on our form. You can rename your form here. And you can also choose how you get notified. When someone fills in a form, an email will go automatically to the site owner. Or you can also choose this option and not more emails. You can add more emails here. In the submit message option, you can control what happens after someone submits a form, what kind of message they see if they are directed to another page or if a pop-up window shows up on their screen, you can only choose one of these options. You can have a display message here. You can choose to direct them to another page of your site or have a pop-up window. You can choose a page from here. Or you can choose a pop-up window, which is called a light box, and we will get to that later. Or you can link to an external URL. If you choose to show a success message, you can control how long it appears on the screen. You cannot customization to your form. You can choose what fields you want to save in your contents table. You can have an automated email being sent to them every time they submit a form. You can create an email campaign. Or if you need any help from weeks, you can get in touch with them from this option. All of these options are important, but let's focus on the settings. We want to make sure that we give a name to our form and we know how we get notified when someone submits a form on our website. We also want to make sure that we know what message the subscriber sees after the submitted form. As you can see on our form, the only field we have to collect it formation is the email address. You can collect more information from your subscribers, like their firstName, lastName, phone number, or any other information you want. By selecting the Add new field option. You can choose what fields you want to add to your form. You can change the layout and design of your form and not animation as well. We have added the subscription form to our website. Now, every time someone fills in a form, we collect their information to view our subscribers. There are two ways to find them. One way is to click on the form, form settings, Maine, and view submissions table. This is our submissions table. Every time someone submits a form and we collect their information, they will appear on this table here. I will show you another way of finding this admissions table. Go to your dashboard, hover your mouse over customer management, and you will see an option that says form submissions will click on that. You can see all the forms that you have on your website. This is the form we have created. This is our submissions table. This is how you cannot forms to your website.
18. Adding lightboxes: In this video, I will show you how to add light boxes to your website. Light boxes are pop-up windows that are used to grab your visitor's attention. They are a great way to tell your visitors unimportant message. There are three types of light boxes that you cannot do your site. A center light box that appears in the middle of your page aside by light box that appears on the left or right of your page or a full-width light box that appears on the top or bottom of your page. To what? A light box to your site. We will click on the plus icon. That interactive. And then there is a section that says light boxes. Let's add a light bookstore website to customize. As you can see, we have options to customize our light box. Once you're ready and you have customized your light box, you can click on the exit mode button here to return back to your website. When you're light box is selected, you will see the customisation settings. If you have more than one light boxes, you can click on the Manage light boxes option where you can manage your light boxes from. You consider triggers to your lightbox to control when it appears on your visit or screen. First, let's change the name of our light box. The light books can either appear on the screen automatically or it can be triggered by an action that happens on the site. To have the light books appear automatically on the screen, you click on the yes option here. You choose which page you want it to appear on. And after how many seconds you want it to appear. You can also choose how the visitor closes the light box. If you want the light box to be triggered when an action happens, click on the no option so that it doesn't appear automatically on the screen. To set a trigger for your light box, you will need to find a text or a button or an image. And when you add a link to that element, you can choose whether it's a URL and other page or a light box. From this option, you can control the layout of your light box. You can choose where on the screen it's displayed. And you can also customize the design of the light box. If you click anywhere outside of the light box, you can change the overlay background. Two images and text to our light books will use exactly the same way as we have been doing for our website. We'll click on the plus and choose a text and image option. Now that we have added a call to action, we can link to a form that we have added to our website to make it quick for them to book, let's add a booking form first and then click the button. If we have finished the customization of the light box, we will click on the exit mode. Let's add a book, an appointment form to make it easy for them to book appointments. We can even make the strip more enticing by adding images and effects. Now that we have added a book, an appointment form, we will add an encore. Now, I will go back to the light box and link the button with the encore. To access the light box, click on the drop-down menu. And then you will see the option that says light boxes. Click on your light box. Let's link our button. Let's preview our website. And this is how you are light boxes to your website.
19. Social media icons: In this video, I will show you how to add the social media icons to your website and link your account. To do that, let's click on the plus. Hover your mouse over the social option. And you will see the social media options here. You can choose how you want your social media to appear on your website. You find the one you like and you click on it. To move the social media icons. You click and drag. I will move the social media icons to the footer. When the social media icons are selected, you will see the customization options. To link the icons to your social media accounts. You will click on Set social links and you can delete the ones you don't want. Click on one icon. And on the right, you will see some options. First, you can replace the icon to something else. You can change the name of the icon. And from this option, you cannot delink to your Facebook account. Double-click on the link and up your own account. Repeat the same process for the other icons. And this is how you cannot the social media icons to your website.
20. Adding a blog: In this video, I will show you how to add a block to your website. Having a blog on your website, it's an amazing way to drive traffic to your website and increase your SEO. The more you block, the more content that search engines have to crawl and index. This means that they can easily recognize that your site is a resource of information for people to access, but not just that, you can use your blog to create content that your audience is encouraged to share with the connections. Now, let's add a block to our website. From the left-hand side menu, we will find the icon that says start blogging. It's the one that looks like a pen. Will click on that. And then we will click on that. Now, you get two options. You can choose which type of block is right for your website. It can either be a blog or you can have a blog and a member's area. We'll keep it simple. This is our main blog section. This is where all our posts will be displayed. To manage and customize your blog. Click again on the Pen icon. Once you click on it, you will see some options here. You can manage your blog. You can manage the individual pages. You cannot block elements such as accustom feet, a post list, Recent Posts, RSS buttons, or you can even find related ads to boost traffic to your blog. Let's start with a blog pages. If you click on this option, you have selected the main blog. If you click on the post, you have selected a single blog post to edit. We'll click on the blog to select it and get the editing options. You can find options such as managed your posts, changing the settings, or you can choose to habits stretch to the full width of the page. We have clicked on the settings to manage the design of the block. From the display option, you can choose what information you want to have displayed on your blog and your blog posts. You can deselect this options by clicking them. We'll click on the layout, choose the best layout for our block. You have different options here, but you can choose from depending on how you want your posts to be displayed. You have image resizing options and additional layout settings. You can control the spacing between the post, the margins or the text putting. And from the last option you can choose how many blog posts you you want to load each time. Changing the design options. You can choose the colors and font for the menu. You can customize the design of the blog post. You can change the font and color of the title and descriptions, as well as the borders and the background. Now let's customize the design of the single post pages. Again, click on the blog to get the editing options. Then click on settings. The options that you get are the same as with the main block. You can untick the information that you don't want to display on your blog. You can hide the block menu from this option or choose what you want to show on your blog menu. You can choose to have social sharing icons. And you can control what happens to the posts and comments. From the design option, you can customize the look of your blog post. You have customization options for the headings, the paragraphs, and the background. You can change the style of the buttons and control how the tags and keywords appear on your blog post. To create a new post or manage existing posts, you will click on the blog manager at the top. Let's click on manage posts. On this page, you can see your already existing posts. To edit an existing blog post that you've already published, you click on it. And you get the ability to edit the text, the images, the SEO, that settings, or the tax. Just click anywhere on the blog post that you would like to edit. If you click on an image, you get editing settings. You can crop and change the dimensions on the image. You can flip the image. You can control how the image behaves around text. You can edit the colors of the image. You cannot old text on the image or at the link. On the left-hand side, you get additional settings. When you click on settings, you can change the display image and you can see information such as the published date, the author date, and you can add a description of what your blog post is about. You can choose to make your blog posts a featured posts, and you can also enable or disable commenting. When you click on the SCO option, you can control the title and the description of your blog post so that it ranks better on search engines. You can choose to create different categories for your blog posts. Let's say you want to have blogs for traveling, for cooking, and for fashion. You can create these categories and link your blog posts with the relevant category to create a new category, you can click on the option here that says Create category. The tags are very important for the blog posts. They are essential keywords that you want to add that are relevant to your blog posts and they help with SEO. If you want to use your blog for business than you can choose to sell subscriptions to enable that feature, you will need to upgrade your Wix plan. To add a new blog post, you simply click on the top right button that says Create New Post. Here you cannot your headline, your texts, images, even videos and hashtags. You can start by typing. And at the bottom you will see some options where you cannot images, a gallery of images, videos, spacing between your elements and files. Now, we have added a block to our website. There is one last step left to make sure that visitors confined our block. We will add the block to the footer of our website. To do that, we need to add some text to our footer and hyperlink that text to the block. Double-click on your text, and then click on the link option, make sure that your text is selected. We want to link a page and on the right hand side from the drop-down menu, we will choose which page. You can see that you now have the blog option here. You can choose whether you want the blog to open in a new window or the current window. We'll save and then preview our website. And this is how you add a block to a website.
21. Appmarket: In this video, we are exploring the up market. The app market is a marketplace with lots of third-party and wicks ups that let you extend your site's functionalities or marketing power. Be mindful though a lot of the apps are free, however, some of the apps have premium versions too. We can access the app market from the left-hand side menu by clicking on the fourth icon from the top. The up market has many apps for marketing, sales to boost traffic gets subscriptions and many other functionalities that you may want to add to your website. You can search for the apps from the search bar. You cannot any keyword that you like and you will be presented with relevant apps. As you can see, each app has information such as rating, price, and description. Before adding an app to your site, you can click on the app. You like to get more information about the app. To add an up to your site, click on the up to side button. The app has been added to my site. When the app is selected, you will get the Settings option. As we've most of the apps, you can choose to change the settings, the layout, and design of the app. If you want to delete an app that you've added to your site, you will click on the Add Apps icon. And from the left-hand side menu, you will click on manage apps. In the manage Apps section, you can see which apps you have already installed to your site. You can delete them from the three dots icon here. And you will get options on how to delete them. This is how you are apps to your site.
22. Mobile optimisation: In this video, we will learn how to optimize our website for mobile use. This should be the very last step after you finish adding all the elements to your website, it's very important to have a mobile optimized website. Stats around internet traffic revealed that most traffic comes from mobile phones. That's 50.48% of traffic comes from mobile phones, against 46.51% that comes from desktop. Not only that, but it was also revealed that 50% of business to business inquiries are made on mobile. This is why it's important for your website to be optimized for mobile. To optimize our website for mobile use, we will need to adapt every element of every page to start optimizing our website, lets click on the mobile icon on the top bar menu. As you can see now, my home page is displayed on a mobile view. On the left-hand side, we have Settings. We can go to a different page, change the background, choose from the available mobile tools. We cannot equate ActionBar, a quick buck to the top button, a welcome to screen, or a Chrome Theme Color. The fourth option shows you any hidden elements. And the last option is a page layout optimizer. This is a quick way to optimize the pages on your site. Let's click on optimize now. Now you will notice that your page is not fully optimized, so you have to drag a few things around to make it look stunning. To do that, you simply click on an element and drag it to wherever you want. You can also drunk the strip to make it smaller or bigger to fit your text. When you're optimizing your website for mobile is important to make it friendly to the eye that text shouldn't be too small or too big. Also, the buttons shouldn't be too small or too big either and should be clickable. Makes sure that everything is aligned and delete any extra space. On the top right, you will find the Mobile Menu icon. Click on it to edit. We'll click on the Edit menu. From here, you can change the background, the layout, or the design. If you believe in people. No matter what happens. It's important to mention that you shouldn't delete anything on the mobile view. Any changes you make to the mobile view will be automatically made to the desktop view. Instead, if you want to remove an element from the mobile view, you have to click on it to select it. And from the options available, you click on the height element option. All the elements that you feed in can be found here. To add an element back, you click on the plus icon that says show element. Make sure that you optimize all the pages and light boxes that you have on your site. And this is how you optimize your website for mobile.
23. Website publishing: After finishing our website, we will need to get it live on the web. There are three steps in doing that. First, we will publish our website, Then we will upgrade our w6 plan. And last but not least, we will connect a domain to our website. Let's start by publishing our site. Click on the publish button at the top right. Now your side is published, and this is the domain that wicks gave us. We want to change this domain to a branded one. The options to upgrade your plan and connected domain can be found at your main dashboard. First, you will need to upgrade your week's plan. You can click on the Compare Plans option here. Depending on how you want to use your website, you have plants for two different types. The website and the e-commerce website. If you're planning to accept online payments, you will need to choose one of these plans. The features of each plan are displayed right below the price. If your website will not accept online payments, you'd want to choose one of these three options. The first option, which allows you to just connected domain, will have the w6 plan on your website, which is something that we don't want. If you choose any of these three plants, you will get a free domain for one year, which works well. If you haven't already purchased a domain to go ahead with a plan, click on Select, Select a subscription period. You could be paying monthly, yearly for two years or three years. And then go ahead with the payment. To connect a domain to your website. Go back to the main dashboard and click on this option here that says Connect domain. You can either purchase a domain through weeks or purchase it from any other domain provider. If you have purchased a domain from somewhere else, you can connect it to your website by clicking on this option. If you would like to purchase a domain through weeks, click on this option here. You can search whether the domain you want is available or not. If the domain you want is not available, weeks will present the available options and you can choose the one you like to purchase a domain from weeks. Click on the one you like, and then follow the instructions. To connect a domain that you have already purchased from somewhere else. Click on this option here. After you select the connect your domain option, type your domain in the search bar. And wicks will present you with some instructions on how to connect your domain. First, you need to login to your domain provider. Once you've done that, click on the i locked-in option. The second step is to find your domain settings page. The settings page can be found in the control panel of your domain provider. After you've found your domain settings page, come back two weeks, and click on the iPhone my domain Settings button. The third step is to find the name servers in that domain settings page. They're usually called DNS, name servers or ns. The name servers look like this. They will need to be replaced with the w6 name servers. After you've found the DNS, click on the i found the name servers option. Now the last step is to replace the name servers with the w6 servers. These are the weak servers that you will need to copy and paste to the name servers of your other domain provider. After you've done that, save your changes and come back to this page, click on the Add replaced my name service option. Now w6 will verify that connection and you'd have to allow a few hours for the domain to be transferred. This is how you publish your website.
24. Search engine optimisation: In this video, we will talk about SEO. If you're not familiar with the term, SEO stands for search engine optimization. It's the process of improving your site to increase its visibility for relevant searches. So the better visibility your website has in search results, the more likely you are to get attention and attract new clients. An example of SEO would be for a coffee shop that's based in London to appear in search results when someone searches for a coffee Latin in London. So how it works, the search engines use bots to crawl on webpages and collect information. Then they determined the order the pages should appear in search results for every search in the green box, I have added the golden formula that you can follow to have high-quality content on your site and improve your ranking on the web. There are three elements to this. One is a keyword search. You have to use relevant keywords to appear in search results. There are free online tools that you can use to search for the right keywords that you cannot. Your website, such as the Google Search Console, you can search for keywords relevant to your industry, your product, service, and you can also check what keywords your competitors are using. After you've defined your keywords, you need to incorporate them in your content. So good continents, very important to have on your website. In addition to that, you need to do on-page SEO and optimize your website for search engines. To summarize, the golden formula to use for your SEO is to have a combination of the right keywords, good content, and on-page SEO. On-page SEO consists of three things. The optimization of each page on your website, the HTML heading tags, and the image alt text. You might not be familiar with the terms. So I'll explain what I mean by HTML, heading tags and image alt text. Then I will show you how to optimize your on-page SEO. Html stands for hypertext markup language, and most website use this language to create webpages. Tank is a snippet of code that tells you web browser how to display the content on your site. Html has six different heading tags, H1, H2, H3, and so on. That H1 is considered the most important tag and the age six is the least important. You're adding content to your site is important to mark each content with the appropriate HTML tag. Alt text, which is also known as ALT description, is used within an HTML code to describe the appearance and function of an image on a page. Adding alternative text to your photos improves your website's accessibility. It's useful for users that use screen readers to understand what the image you are displaying is about. But it also improves your SEO because it provides a better image context to the search engine crawlers. Now that you have finished creating your website, we're ready to move to the SEO part to help us improve our websites. Seo weeks has created a step-by-step tool. It's called there weeks SEO ways. And it shows you how you can boost your online presence by outlining the weak points of your website and also provides helpful tips. Now let's start. On the main dashboard of your website. On the left-hand side, you will see some options. Hover your mouse over marketing and SEO, and click on the get found on Google option. Let's start by clicking on the Start Now button. Weeks, we'll ask you to change a few things on your website to help you get found on Google. So just follow the instructions and steps. Then click on Create SEO plan. Weeks has come up with some steps, but you need to follow to improve your SEO. Your SEO plan has a three-step process. For each of the things that you need to fix, you will see an exclamation mark. When you click on an option, it expands with details on what you need to fix and how to fix it. There is a how to do it section that tells you exactly where you need to go to fix it. If you're still not sure how to do it, click on the seeds step-by-step option. Below the how to do it section, there are two options. One takes you to the editor to fix the problem. And after you've done it, come back to this page and click on refresh. Once you do that, this exclamation mark will become a tick. Follow all three steps to improve your SEO. For better results, make sure to connect your Google account as well. After you're done with the Wix SEO ways, one last step is to check the HTML heading tags and the image old text. To change the heading tag. Select the text. And from the Text Settings, click on the themes. You have different heading options and paragraphs. This is our menu headings. So we will select the heading one. After you choose the right heading, if the font, size and color changes, updated back to how it was originally. In addition, makes sure that the body copy text is tagged as a paragraph. You will need to do that for all your pages. To add alt text to your images. Click on the image and then click on the settings. You can see an option that says image text, and this is where you add your ALT text. This is the process of ranking higher on search engines with SEO, make sure that your keywords are correct. You incorporate the keywords in your content and you update your on-page SEO.
 Stella Chrysaki, Digital Marketing Instructor