Transcripts
1. Introduction: Welcome to oil painting
with Steve Simon. In this class, we'll be exploring the realm
of composition, and more specifically,
how to improve your designs by using
sacred geometry. As artists, we tend to
choose to paint things that are simply pleasing to our
eyes. Makes sense, right? We might see something
visually inspiring and jump right into
painting it just as it is. Sometimes we might even feel like we shouldn't
alter real life because doing so would
somehow be dishonest. After all, a landscape is
sacred the way it is, right? A portrait must accurately depict the person's actual face. I still life must convincingly represent the fruit,
flowers or whatever. But we also realize
we can pose, arrange, or illuminate our subject in a way that subjectively
pleases us. And so we set about trying
to capture the landscape in certain pleasing light or pose
the model in that elusive, flattering posture or arrange
and rearrange distill life until it feels good. This intuitive approach is how most of us start our
journeys as composers. The next step, however, in improving our
compositional chops is by adding analytical means to our design process to
more efficiently and objectively achieve
engaging compositions. The great masters
didn't only use intuition when
composing masterpieces, they supported their
creative ideas with proven analytical
techniques. So in this class,
I'll be focusing on these analytical tools. First, we will walk through the various
elements of design. These are the composer's tools. Then we will examine the
principles of design. These are the ways
in which we use the tools for the desired
compositional effect. Then in our project, we'll focus our attention on a handful
of these principles and employ the assistance of secret geometry to
enhance the results. Thank you for your interest in exploring composition with me, and I'll see you in class.
2. Elements & Principles of Design: So what is composition exactly? The term composition
is derived from the Latin componere which
means to put together. In visual art, composition
refers to how elements of design are organized according
to principles of design. So we have elements
and principles. Let me explain what that means
by way of some examples. First, what are the
elements of design? The elements of design are, firstly, line, pretty
straightforward. Shape, also pretty
straightforward, simply areas defined by edges, form, similar to shape, but adding the suggestion
of a third dimension. And there's space, which again, is similar to form, but space can be
positive or negative. Then there's hue and saturation. Here we're alluding to the
color family like red, green, blue, whatever, and how intense
or neutral that hue is. Then there's value that is
how dark or light an area is, and then finally texture or surface qualities that
create tectile illusions. So those are the
elements of design. What then are the
principles of design? Principles are the
ways in which we use these elements to create
the desired effect. In other words, how we compose. Some principles include,
firstly, shape and proportion. Here, shape is not just geometric
but rather associative. How do I use basic shapes
like ovals, triangles, and lines to produce
a believable face, for example, or render one in a way that makes
a desired point. And how do I size these elements
for the desired effects? And there's balance and harmony. Going all the way back to 1941, the famous landscape
artist Edgar Payne wrote the definitive trees on this entitled Composition
of Outdoor Painting. Although Payne in his book
focuses on landscape art, his principles are
largely universal. In the book, he
introduces dozens of balanced and harmonious
patterns for composition. I highly recommend
taking a look. In fact, you can
download his book for free in the download section. Then there's
arrangement, which is closely associated with
balance and harmony. This will be the
focus of our project, so much more on this later. And there's path or direction
followed by the viewers I, which is also very
important principle of art. This, too, we will be
exploring in our projects, again, more on this later. And there's negative space, which allows our
designs to breathe. It also is a necessary ingredient
in balance and harmony, as well as creating
the illusion of depth. Then we have rhythm. This refers to the
sense of dynamic flow. And as the name suggests, hints at a kind of
musicality to our work. And there's repetition,
which as a principle of art refers to the use of
repeating lines or patterns. It can be used very
effectively to impart a sense of energy in a
prevailing direction. Then there is perspective, which of course is the idea of creating illusion the
illusion of depth. Then there's color.
Color has a myriad of compositional uses
such as creating mood, tension, or unity. You can also make elements
stand out or blend in. Then we have contrast, which plays a huge part in composition, maybe
the biggest of all. It's particularly evident
in style of art called Kiaroscuru clear and
light in Italian. Here, we use stark differences in value to create
interesting designs. Artists use no tens
and value patterns as tools to evaluate the impact of contrast
on their compositions. A no tan is a concept
borrowed from Japanese art. In Japanese, no tan
refers to dark balance. In its strict form, a no ten
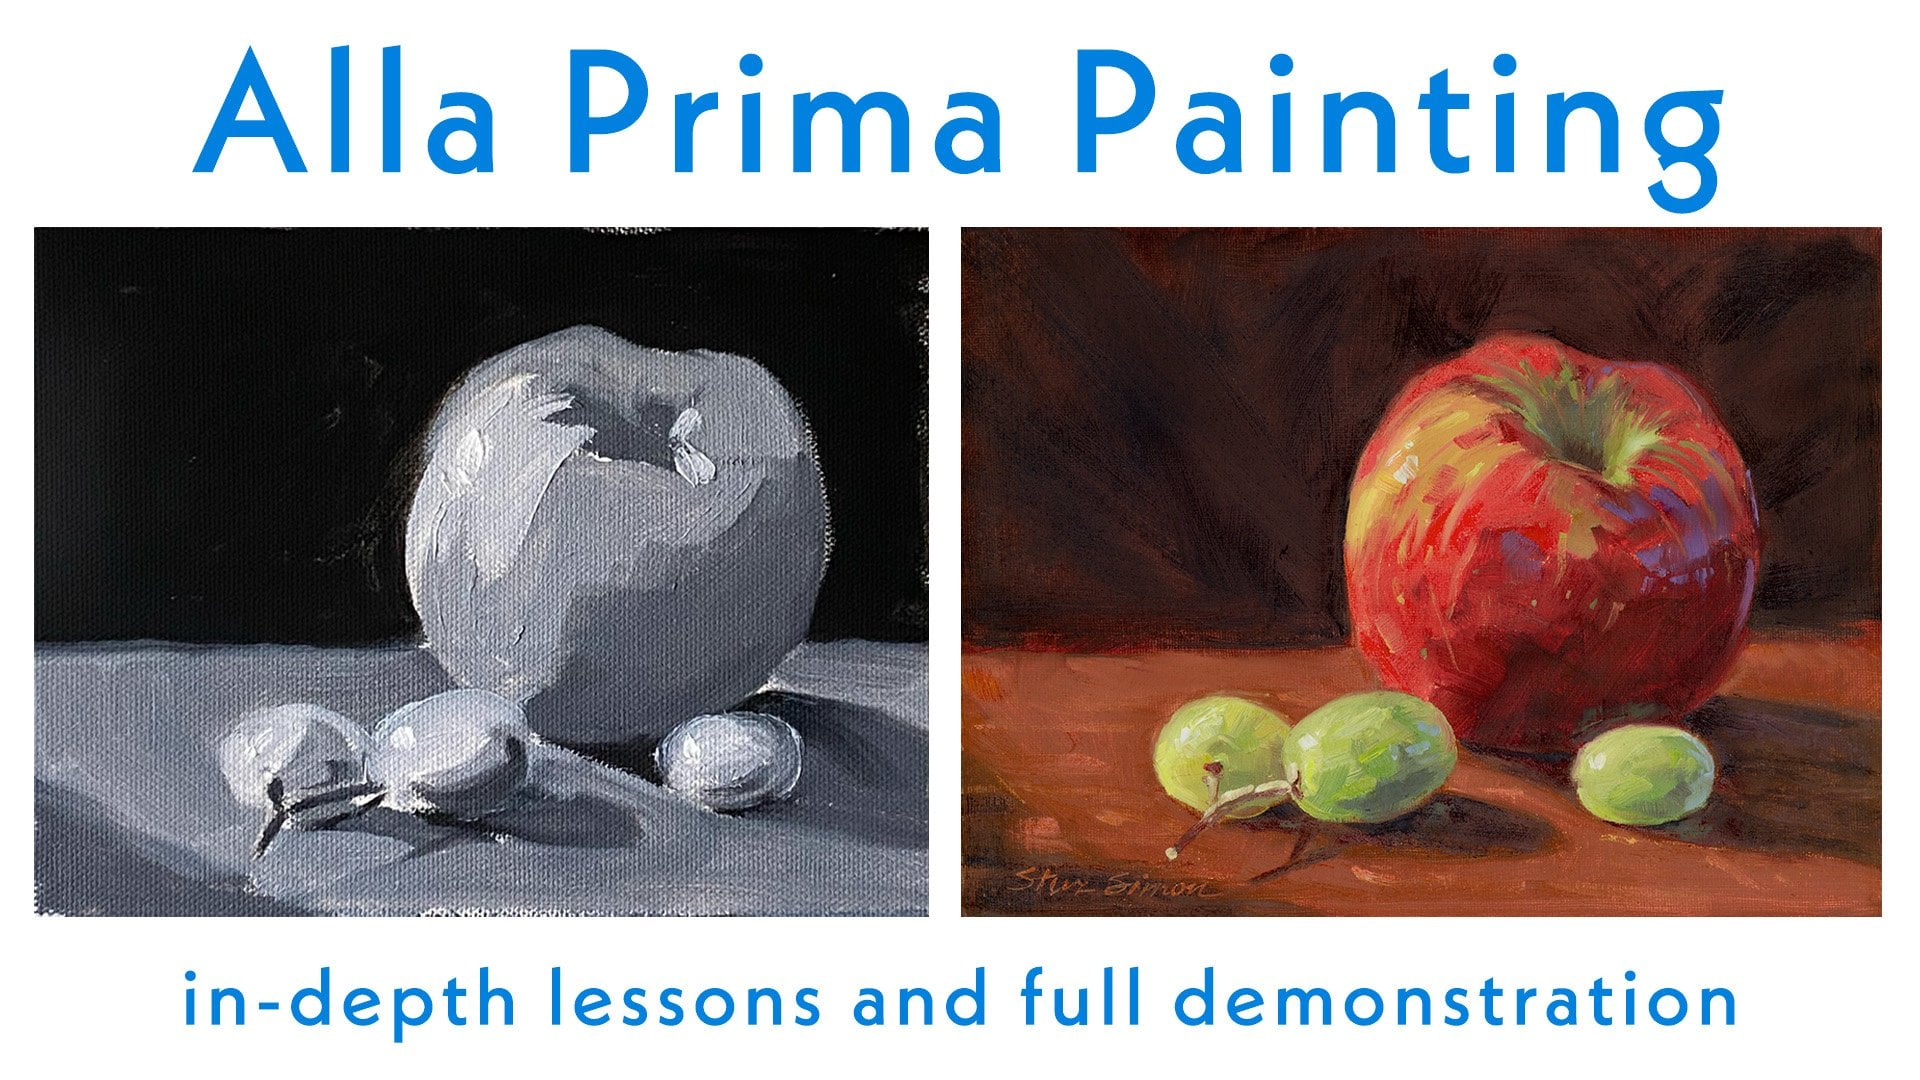
uses only black and white. This, for example, is a no tan representing
this painting. Creating a note ten during the composing stage of a
painting gives us an idea of how our future painting
will read and lends us the opportunity to improve upon our design before we have
too much invested in it. The concept of a value
pattern is the same as a note ten except we allow for more values than
simply black and white. We'll be using a value
pattern in our project. Then there's finally
illumination or lighting, which is obviously
related to contrast, but with some
subtle differences. Here, it's more about the quality of the light
we're talking about, including temperature and mood. Contragur, for example, meaning against
the day in French, is a style of illumination
where the subject is backlet as the viewer
looks against the light. This is often used
to give paintings an ethereal or
spiritual quality. And then one more actually. Lastly, when I call
intentional unconventional. This is the idea of breaking the rules as a means
of drawing attention, eliciting an emotional response, or expressing ideas abstractly. So that's a lot to digest in
terms of how elements and principles of design
impact composition. In the next video,
we will undertake our project and explore
some of these principles. We will particularly be
focusing on the principles of arrangement and the path
followed by the viewer's eye. What's even more exciting, we're going to be
using sacred geometry, the sacred geometry of
the golden ratio and the Fibonacci spiral
as tools to guide us. In the project, I
will also be using Photoshop to help compose. But don't worry if you don't
have access to Photoshop. You can just follow along
and glean the same lessons.
3. Sacred Geometry: Let's begin by taking a look at the sacred geometry of the golden ratio and
Fibonacci spiral. So if we create a line we call AC and then try to
place a point B on this line such
that AC is to AB, as AB is to BC, you will have discovered
the golden ratio, and that number is 1.618. Alternately, we can
express the ratio of AB to AC as 0.618. Or more practically speaking, we can say that according
to the golden ratio, point B is about
62% across line AC, and this is the number
we're going to be using as we compose
our painting. This golden ratio is
found on faces, fingers. And throughout nature, even including the structure of DNA, the golden ratio also shares an interesting relationship
with the Fibonacci sequence, a mathematical sequence in which each number is the sum of
the two preceding ones. When the numbers in this
sequence get sufficiently large, the ratio of two successive
numbers will be 1.618. The same number as the
ratio of the golden mean. And it gets crazier. If we tile squares whose side lengths are
successive Fibonacci numbers, we get a grid that
looks like this. If we then draw quarter circles from corner to corner
in each of the squares, we get the Fibonacci spiral. And once again, this pattern
shows up throughout nature from the smallest seashells
to the largest galaxies. In fact, the golden ratio and the Fibonacci spiral show up so much in the world around us that we barely even
notice they're there. They hide in plain sight. In other words, we
don't even notice them until they're absent. It's when they're absent that things begin to feel a little bit off out of kilter
in disharmony. This is why architects, designers and artists
going all the way back to at least ancient
Greece have used this sacred geometry to create a sense of
balance and harmony. So now let's see if
we can do the same.
4. Project Part 1 - Compose: Welcome to the project for this class where we'll be
going through a step by step process of creating a composition from
multiple photos. You can download the three
source image files from the Download resources
section located under the Projects and Resources
tab for this class. When you've completed
the project, please upload an image
of your composition to the My Project
section also located under the project and
resources tab of this class. In this project, I'll be
using Photoshop to compose. If you have Photoshop and
would like to follow along, great, if you don't have
Photoshop, don't worry, you will still glean the same composition lessons
by simply watching, or you might prefer to draw
the composition by hand. A second bonus project
follows this video featuring a demo in which I will paint
our composition Alla Prima. If you choose to paint with me, again, please upload
your project. This gives other students the opportunity to learn
from your experiences and gives me the opportunity to offer any feedback
you might be seeking. Okay, we're going
to work on creating an engaging composition from
these two source images, and a third one we'll
reference later. Now, recall our
principles of design, we're going to focus
on these four, balance and harmony,
arrangement, path of the viewer's
eye, and contrast. Now, we're not going to ignore the other principles,
somewhat by default, we'll also be considering
shape and proportion, negative space, color,
and illumination. But these four are the
ones we'll focus on. To assist us in addressing
these principles, we're going to use the
sacred geometry of the golden ratio and
the Fibonacci spiral. As you might have guessed,
we're going to borrow elements from both of these
source images. And as you may
have also guessed, we're going to
borrow the flowers from this one on the left. Which are much more
interesting than the flowers on the right, but we are going to
borrow the leaves, the pot, and this cutting board that we're going to turn
into a round table. We're going to borrow
those elements from the image on the right. We're also going to use this
background on the left. So these are going to become
three separate layers. In other words, the flowers over here are going
to be a layer. The background is
going to be a layer, and then the leaves pot, and table from this
image on the right, are going to be another layer, and we're going to
mash these together and use the Fibonacci spiral, we're going to change
the orientation of these flowers to follow a little bit more of a Fibonacci spiral, and we're going to place
elements according to the golden ratio and
see what we come up with. Okay, let's start by
creating our layers. We're going to use the magic wan and choose select subject. And then we're going
to add the table. Then we're going to
inverse all of this. We're trying to create a
background layer here. So we're going to
copy that and create a new document with the same size and then
paste the background. So that's going to be
our background layer. We're gonna go
back to our image. And deselect everything
that's not the left flour. There we go. And now we can copy that and drop that in
place as a new layer. Once again, go back to
our original image, hit Command Z, that'll bring
our old selection back. And now we're going to go
about deselecting everything that's not the right
flowers, copy that. Again, go back to our new image and or a new file and
drop that in place. So we've got three layers now. Now we're going to go to
our second file over here, our second source image and choose the leads
pot and table from it. We're going to copy that and then drop that in as
another layer over here. For clarity's sake, I've
renamed all these layers. There's the background,
leaves pot and table, the left flowers, and
the right flowers. And now we're going to
come up here and get rid of one of these images
by consolidating the layers. I'll enable us to just
focus on our composition. And we're going to hide all the layers except
the background, and we're going to work on
cleaning up the background. We're gonna use the
magic eraser tool. This does a
surprisingly good job of just kind of filling
in the background, AI at work here. So we're going to
use that and then I'm going to use
the smudge tool to further kind of clean it up and give it the idea of some
painterly brushstrokes. And now we have a
filled in background. Then I'm going to bring back
the visibility on each of these layers and clean
them up a little bit. There we go. Next thing we're
going to do is to place the flower pot in the horizontal according
to the golden mean. So in other words, 62%
of the way across. Or image is 3,000 pixels wide, so 62% of that is 18 60, so we're going to drop a
vertical guide at exactly 18 60. And what we find is
the pot is actually pretty close to properly
positioned already. So we're going to just kind
of tweak that a little bit, get it nice and exact. Next thing we're going
to do is bring in our Fibonacci spiral
for guidance. I've brought in this PNG file with a transparent background
of a Fibonacci spiral, and we're now going to work on tweaking these flowers on
the left to follow this arc, this fibonacci spiral
as best we can. So to do that,
we're just going to use our transform tools of rotating and magnifying
and, of course, repositioning these flowers
in an effort, again, just to get it to follow to get these flowers to follow
that fibonacci spiral. Okay, that feels like progress. But what I'm starting
to notice is a lot of dead space in the center
of my composition here. So to rectify that, we're going to start
magnifying some elements, and we're going to start
with the leaves pot and table right here. And we'll scale that up. But as we do that, of course, as we're
scaling up this layer, we notice that our pot is
moving to the left slightly, and we had placed
that according to the golden ratio before. So now we're going to
have to bring back that guide and
reposition our pot so that it is lined up with our guide for
the golden ratio. Little extra tweak. Now you notice something
very interesting. Almost by accident, this
leaf is starting to come very close to tracing
our fibonacci arc. So I'm going to use my Lasso
tool and select that leaf. And then we're going to come up and choose transform warp. I will give us this grid. And then we can
tweak the vertices of this grid to make that leaf follow our fibonacci spiral
a little bit more exactly. So far, we've scaled up the bottom part of
our composition. Now we're going to do the
same thing to the flowers. We'll start with the
flowers on the left. And then the flowers
on the right, and just kind of fine
tune things as needed. I'm going to use the warp
function again to place the stem in a position that makes a little
bit more sense. So since this
project is all about composing according
to the golden ratio, maybe we can use that golden
ratio somewhere else. And I'm taking a look
at this table here. What if we tried
to make that table 62% of the horizontal dimension? Let me show you what
I mean by that. So before we calculated that 62% of the horizontal
3,000 pixels is 18 60. So I'm going to make an ellipse
that's 18 60 pixels wide, and then I'm going to put
it in position and see if we can make our table
follow that ellipse. To do that, we're
going to select a table working together with our magic wand
and Lasso tool. And then we'll scale and reposition according
to the guide that we've created
with our ellipse. Similar to the
manner in which we created our different
layers at the beginning, we're going to create
a different layer now for the table and also use the magic eraser tool to fill in that void
area in the table. As I take a step back now and
evaluate the composition, I feel like it can be
improved upon if we move the table over to the left slightly to give the whole
thing a little more balance, and then to take
all the elements of the composition and bring them down a little bit, as well. I think these tweaks will just
help the overall balance. Next thing I want
to do is to create a center of interest
using the golden ratio. I have already created
that guide that's 62% across the canvas, and now I'm going to create
another guide that's 62% of the way up my canvas. So using the golden ratio
in both directions, we're going to get an
intersection of those two lines, and it's at that
point we're going to drop our center of interest in. I've pulled up this image
from my photo shoot, and I particularly like
this one flower here. I have selected it using the
magic wand and Lasso tool, and now we're going to copy
it into our composition. I've worked on the
center of interest a little more, enlarged it, and rotated it, put it in place, made it feel a bit more natural. So things are starting
to look pretty good in terms of where all
our elements are. Now what we'd like to
work on is the lighting. I'd like to make that a
little bit more dynamic, and that's going to
affect our values or what we refer to
as our value pattern. Now, when it comes
to composition, artists will often tell you that color gets all the credit, but value does all the work. In other words, how light
and dark elements are in your composition
can dramatically affect your overall composition. So to discern value, a great tool to use is just
our ability to squint. So if you squint at this
image, at some point, you'll start to
see common values start to sort of blend together, and you'll get an idea of what your value pattern looks like. We can also use Photoshop to give us an idea of
what that looks like. We're going to go into
mode, gray scale, it's going to give us all
kinds of dire warnings. Don't worry about that.
We're going to be able to control Z out of this. And we're going to go into the filter gallery
and choose cut out. And let's go up to five levels. Command zero to give
you a full image. And this is going
to give you an idea of what our value
pattern looks like. So you can definitely
see our Fibonacci spiral coming into play. But I think and certainly our center of interest
starts to pop, but we can really
work with this sma to improve upon that composition. So that's where we're
going to be after next. First thing we want to do is
make our focal point pop, so we'll go ahead and select
the focal point layer, and then we're going to
create an adjustment layer. We're going to use curves. And what I want to do is amp
up the contrast on this one. So what we're going to do is
kind of tweak our curves, kind of go back to curves and hit Option Command G so that our adjustment layer is just altering the
focal point layer. So if we play around at this, we can get the shadows a little darker and the highlights
a little lighter. So maximum contrast in
our focal point area. And the reason we'd like to use an adjustment layer instead of just altering this layer
is it's not destructive. I can go back in here and take
out that adjustment layer, you can see if I click
off the eyeball, or I can go back in
and change this. So this might be
something we refer back to as we get
deeper into this. I think I'm going to
work on the layer that I've been calling right flowers, and I want this area
in particular to recede back into the
background a little more. So in other words, I want
these darker values. So we're going to go into right flowers, adjustment layer. And again, we're going to go
into curves, and on a Mac, it's Option Command G to
just isolate that layer. And so I want this to be darker, so we're going to drag it
down, something like this. And we can change that. And it's this area that I
want to remain light, right? That's part of our
Tibonaci spiral. So I can go into the
mask right there, make sure you're on black, and I'm going to use my brush. And this area that I
don't want affected, I'm just going to paint. So this area where I still
want the light to hit. In other words not
to be affected by what we're doing up here, I can mask off. And once I've done that, I can still play
around with my curves, and it'll only affect the
area that's not masked off. So, something like that. If you do your
little squint test, you can see your value
pattern starting to come in to focus
a little bit. Next, I'm going to
play around with the left flowers, and again, we'll create an adjustment
layer and work with the curves on this layer and
see what we come up with. That feels pretty
good right there. Next, we're going to
work on the table. So again, an adjustment
layer, and again, curves. And this time, I'm going to play around a little bit with
the Fibonacci spiral again. So let's bring that
back into play. Back down to our curves. Um, you're going to
make this darker. I do want this to recede a little bit back
into my background, but I also want to bring in this Fibonacci
spiral into play. So we're gonna
click on the mask, make sure we have paint
brush selected and black. And then we're going
to go in and mask off this area so it's not
affected by the curves. It's like that. So that area is gonna be a little
bit more lit up. Get rid of the spiral and
then take a look at that. Pretty cool. I like that. Next, we're gonna work on
the leaves in the pot. Ken, a chesut layer. And again, curbs. Isolate it to that layer. And here, again,
we're going to be after cloth kind of contrast. I want these highlights, especially out on
this edge to pop. This is part of our spiral. And I want the darks to remain dark and maybe
get a little darker. So come down to our
mask can paintbrush, black, mask off this. Keep that. I like the little highlights that are kissing this area, so
I'm going to keep those. And then some of these
darks should remain dark. A little more
interesting contrast. Now, I don't want it
to affect the pot. We're gonna tackle
that separately. So we're gonna make
another adjustment layer for the pot. Again, curves. And in the interest of time, we'll just fast forward
through this a little bit. In this last step, I'm going to apply an
adjustment layer to the background and choose
color balance this time, and then just kind
of play around at the color balance levels until I have something that feels
just about right to me. Now if we return to
our value pattern, you can see a marked
difference, right? There's our Fibonacci spiral. Everything's properly in
place. Can back out of this. And we can also take a look
at where we came from. So there's our composition and the two source images
that we drew upon, this being sort of the original composition and
borrowing elements from this one to the right, and coming up with a
substantially more dynamic and interesting
composition that we're ready to paint. I
5. Project Part 2 - Paint: Welcome to the second
part of the project. In the first part
of the project, we use these two source images, Photoshop and sacred Geometry
to design this composition. Next, we're going to paint
this composition la prima. To get started, please download these two files from the
Download Resources section, located under the project and resources tab for this class. When you've completed
this part of the project, please upload an image of your painting to the
My project section also located under the project and resources tab of this class. This gives other students the
opportunity to learn from your experiences and gives me the opportunity to offer any feedback you
might be seeking. Okay, we're ready to
paint our composition. I'm working on a linen panel. And I'm going to start by
just toning the canvas. Then we're going to
bring back our grid on our reference image and measure off that
same grid on our canvas. I'm just using the paintbrush essentially as an eraser here. Now with the help of my grid, I can start drawing in my composition by negatively
painting in the flowers. In other words, pulling
off paint from the canvas, again, using my
brush as an eraser. To do this, I need to repeatedly wipe the brush
off on a paper towel. At this stage, I'm primarily interested in the shape
and form of things and only secondarily interested in the value or how light and dark each of
these elements are. C tips can also be effective
at pulling paint up. And for larger areas, you can also use a paper towel. And we'll finish up the
drawing with our table. For this painting, I'm
going to be using zinc white, cadmium yellow medium, Alizarin crimson,
French ultramarine, Vidian and burnt sienna. I like to keep the
palette fairly limited. It helps maintain color
harmony throughout the work. I'll start by adding some of the darker values and then
massing in the background. Not trying to exactly match
the background colors, but I do like the idea of the
cooler greens to the right, upper right, and then
the warmer greens to the center and left. In general, I like to
work from back to front. So next we'll start working on the table using mostly
burnt sienna in this area, and we are painting
Ala Prima here, so I'm not going to get too
hung up in the details, but we're going to
establish the shadows, the midtones, and the highlights and then add a little
bit of texture, a little wood grain
to the table. When painting prima, I prefer
to use squared off brushes, so brights and flats. And the aim is to be as efficient as you
can with brush strokes. So in other words, to try to minimize the amount of rework that you're doing
or going back over things. So it's a kind of paint it and forget it kind of mentality. In this composition, the
shadows are quite cool. They're being influenced
by a secondary blue light. And then the highlights
are quite warm. They're being illuminated
by a warm yellow light. So here, I'm painting the pot according to those
differences in temperature. And of course, these differences in value and temperature will be evident throughout
the flower part of the orchid, as well. Cool shadows and warm highlights and using the interplay
to create form. Alla Prima, in Italian
means at the first. So in the spirit of
alla prima painting, we are to do this complete
painting in just one sitting. Most Aprima painters, however, will let a painting dry
and then go ahead and add some details after
the piece has dried, and that's what I'm doing here. So to recap where we've been, we started with these
two photographic images as source material. Then we use Photoshop
to mash them together and applied
sacred geometry to create this composition. And finally, painted
the composition in Alaprima Thanks for watching
this class to the end, and don't forget to
upload your painting to the My Project section located under the Project
and resources tab. Thanks again and happy painting.
 Steve Simon, Simon Fine Art