Transcripts
1. Story First: Hi, Welcome to this
web-based learning program about how to make comics. You probably already know a bit about it since you
found this page. You may even know more than me, but I hope this
little video series, we'll give you some
inspiration and maybe help you look at some new
perspective on things. My first 48 page comic was
published in Denmark in 1999. Since then I've been working full-time as a freelance writer, Illustrator and
comic book artists. And last year my graphic novel, The Devil's Concubine, was released in the US
from my DW, published. In my 13 years or
so of experience, I've read tons of books
on writing and drawing. But this video format is a
really cool way for me to share some of my
experiences with you. A sort of easily accessible way. Now, while there are
plenty of tutorials out there for
artists and writers, I have yet to see
something that covers all the bases in making comics. What's so great about making
comics is that you can tell any story without
spending a dime. You can have
three-headed monsters, exploding spaceships or hordes
of gun-toting elephants, anything you want, as
long as you can draw it. And if you can't
draw it right now, well, I have a few tips for you. I'll also be going over how to write and plan your story so you don't end up in the ditch like so many other aspiring
comic book artists. I'm constantly learning
new things myself and I tried to share what I
learned as much as possible, both here and on my
personal web page. I'll also be available for questions or comments
to these videos. So to be sure to check the
comments below for more. In this first episode, we're going to be talking
about getting started on your story. And other episodes. We'll be going over
script formats, planning your story, sketching, inking, layouts, texting, coloring,
anything you want to know. I'll try to be as
practical as possible. I'm not here to tell you
how you should make comics. I'll just tell you how I go about it and see if you
can't pick up a trigger to, okay, so let's get started. A lot of cartoonists start with a blank page and a vague idea
of what they want to do. I don't recommend doing that. Well, usually happens
is you're all fired up when you draw
the first page or two, then the story gets stuck
or your interests dwindles. Usually when you get to
something that's hard to draw. While there are creators
out there who do great work without so much
as a written outline. I will always, always work out a script before
I start with the drawing. This doesn't have to be a full script with each
picture described, especially if you're going
to be drawing it yourself. There are no rules to how
your script should look, but looking at movie scripts
can be an inspiration. When you open up a new document on your computer or
in your notebook, you sort of have
the same problem as I talked about earlier. That blank page, a blank page is never
a good place to start. When I start a new story, I usually have a bunch of ideas, characters, or
scenes in my head. It can be a location, it could be a piece of dialogue. So what I do is I try to get
some of that down on paper, get a notebook for
the project and keep it with you at all times. Write down ideas,
do little sketches, maybe put in a clipping or
an image that inspires you. This is one of my favorite
parts of cooking up a story. Everything is possible. Nothing is set in stone. After awhile, you need to take a look at your
list of ingredients, see what kind of
dish you're making. You'll find that not all
of it belongs in the pot. You can make a
little mind map with notes and see if you can't
make some more sense of it. All. The great thing about comics is you can do
basically whatever you want. It doesn't cost a
thing, just hard work. But you have to limit
yourself in a way or your story probably
won't make any sense. One of the first
things to decide the genre is it a romance, a space opera, a
detective story? Maybe there's a particular
film or book you can use as inspiration
to sort of set you off. Perhaps there's a style, a tone, or a plot structure
that you can borrow. Don't worry about stealing. Your story will be your story. More about stealing
in less than five. Okay, so now you know what kind of story
you want to make. The next thing to decide is, who is it about? Every story has a
main character. Now, we go over character
design and less than four, but that's more about
the visuals right now, let's focus on the story. A story. Any story
is about somebody who wants something and is
having trouble getting it. Stuff happens, things
get in the way. So he has to work even
harder to achieve his goal. Maybe he gets what he wants. Maybe it doesn't. Maybe it gets what he wants, but finds out it wasn't
what he wanted. After all. Here's a little
checklist of what you need before you start
working on your script. One, genre to a main character. Three, a setting. For a beginning, a
middle, and end. You don't need to be absolutely sure about everything
on this list. You can still change
things around later. But having an idea about
this helps tremendously. The great thing about
working on the computers, you can undo everything and move everything around
and your document. That's a lot harder to do
once you start drawing. So make sure you get
the structure of your story right before you
start drawing page one. Sometimes you need to get
to know your characters a little bit better
before you start writing. We'll go over character
design in lesson 4. But right now, if you're not turned off completely
by the amount of work, it's time to start
writing your script. So on to lesson two.
2. Writing Your Script: Welcome back to episode 2 of this video series about
how to make comics, about writing your script. This episode is probably the
one that most people are going to skip because they want to get right
on withdrawing. But you made it. So
I tip my hat to you. A good comic or graphic
novel is just like a movie. Without a good story,
the heart of it, it doesn't matter how
many explosions or babies or cool CGI
monsters you have in it. You need characters, you can relate to problems
that seem important. Now, let's go over the
list from the last episode about what you need before you start working
on your script. One, genre to a main character. Three, a setting. For a beginning, five, a middle, six, and end. If you don't have a clue
how to fill this out. Well, maybe now's a good time to pause this video
and get it done. It will save you a lot of grief down the line, believe me. So let's assume you have a loose idea of your story and your main character.
What does he want? You need to figure out what's
at stake for him or her. What will happen if he fails? Let's say he's
applying for a job. What happens if he doesn't
get it? He gets another job. Okay, pretty boring story. But what if he's about to lose his house and his son
and his mom needs an operation and
if he doesn't get a job so we can pay
for it, she dies. Little bit more
interesting, right? This is what most screenwriters referred to as
upping the stakes. Making it important for your
main characters who succeed. If it's not important
for him or her, why should we care about it? Sometimes going at
your story from a different angle
can be necessary. I sometimes do a
test page just to get the idea of what the
final book will look like. I also skip around quite a
bit when I write the script. I might get an idea
for a scene near the end while I'm working
on the opening scene, I let myself jump out of it, knowing I can always
jump back in. As long as you
finish the script at some point you have my
permission to skip around, but don't start drawing
actual pages with actual dialogue in before
your story is done. Drawing comics is hard work. You don't want to have to
draw the same thing twice. And that will happen
if your story is not all laid out beforehand. You don't want to
have to go back and redraw things and do
a lot of corrections. When you do that,
nine times out of 10, that makes you dump the
project altogether. So before you enter the glorious
realm of drawing pages, take a good look at
the entry sign here. Is your story done yet? If not, well, now's as
good a time as any. If this is your first
attempt at making comics, I would recommend keeping
it short and simple. The stories about
somebody who wants something and is having
trouble getting it. That's the story. You can do all sorts of fancy storytelling
devices around it. But basically, every
story is about just that. Even if you have
multiple characters, for each character,
the setup is the same. They have to have
something they want. Most actual scripts contain
these basic elements. Scene description. Where are we, what
time of day is it? What's in the scene? In comic scripts,
this is often broken down into panel descriptions. Action, what takes place
in the scene or the panel. Remember that a
character and usually only do one thing
within a panel. So no catching a
ball and looking out the window and sweeping the
floor at the same time. Dialogue, the name
of the character, followed by a colon. And what he says. Usually dialogue is centered
to make it stand out. In a comic. That dialogue is the only
text of your script that ends up on the actual page
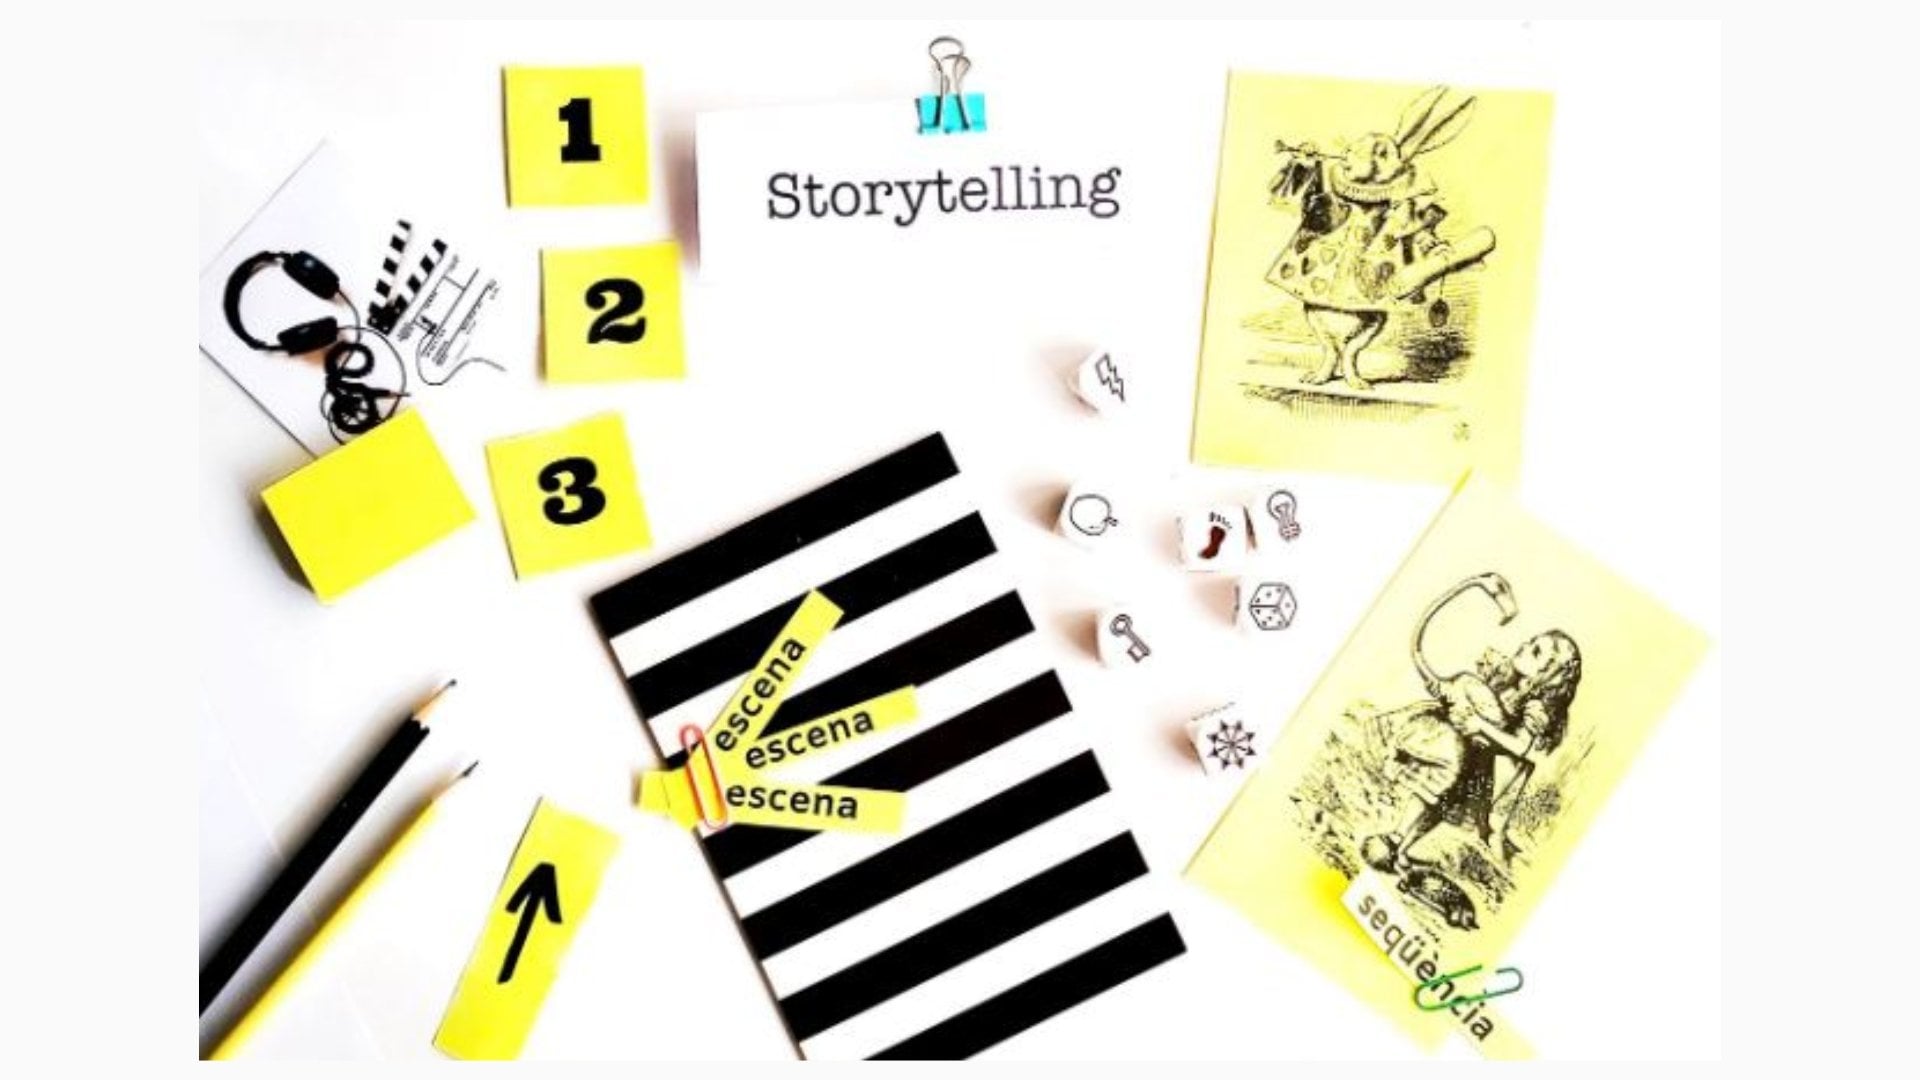
inside the word balloons. Now let's take a moment to
look at story structure. You may have heard of something called the three-act structure, which is used in movies. But Hollywood has become
such a huge influence on all of us that you find
this structure almost anywhere these days. Dividing your story
into manageable chunks. Chapters, sequences will
help you as a writer, but also help the reader understand where they
are in the story. The first sequence of a story is usually setting up
the main character, the world he lives in, and a hint of the
problems to come. Be careful not to let this
sequence play for too long. We don't have to know
everything right off the bat. Your readers just enough
information so that they can follow the story and
relate to your characters. Within the first 10
minutes of the film, in the first few
pages of a comic, something out of the
ordinary needs to happen. Something to which our
hero needs to react. Once our hero realizes that he has to solve this
problem himself, he often has to go out
of his comfort zone, go on a journey
when he goes from his ordinary world to
a new special world, he enters the second
act of the story. Things get continually
more difficult for him as his
opponents strike back. When we reach the middle of
the story and event occurs that commits the hero
fully took his quest. This is often referred to
as the point of no return, where he can no longer
just give up and go home. In a love story. This could be the first kiss in a
thriller. The first kill. After the midpoint, we need
a little time to breed, but we soon find our hero
racing towards the final act. Now remember that a story
is like a piece of music. If all of it is a crescendo, it will just sound
like deafening noise. Pacing is important. Let your hero succeed for a bit before things get
even more difficult. This is what is called
turning points. Basically it means
things don't go as planned or as we expect. By the end of the second act, we find our hero at his lowest, the place where all seems lost. But in this moment of
despair is also hidden. The key to success, our hero needs to use what is learned in this process
in order to succeed. Now you've probably noticed that not all stories have a
happy ending though. An unhappy ending can
be just as satisfying if we understand the
reason the hero fails. Most of the time,
it's because of a fatal flaw on his part. Just because a piano
falls on his head. And what should a
script look like? Well, some artists write
the script as scribbles, some have dialogue, some are just impossible for
others to understand. While this may work for you, it has its advantages to
write an actual script. The main advantage is that
you can have others read it. The point, of course, is to not get everybody's random opinion. You'll get lousy feedback. If you ask your mom
or your best friend, they'll tell you it's
great when it isn't, or they'll pick it apart, tell you a bunch of things
that are wrong with it. And they might be right. But I would recommend
asking someone a little more removed from your
daily social circles. Someone who you can trust to
give their honest opinion. And if they hate it, at least you won't
take it so personal. Like if it was
your girlfriend or a close friend who just
hammered away on your story. When you let somebody
else read your script, make sure they understand
the ground rules. If it's drama, they shouldn't criticize it for
not being funny enough. And if it's a comedy, their main concern should be, how can we make
this even funnier? This Is Your Story,
not their story. They shouldn't go in thinking they should change
everything around. You're the boss here. But having a couple of
readers is a great way of making sure everything
works to your advantage. Get someone who's used
to reading stories. It should be someone who sort of shares your taste in stories and someone's smart
enough to not only tell you if
something doesn't work, but also why it doesn't work. You can set up some
ground rules first, like what parts of the story you want them to look at
is that the plot, character motivations,
dialogue, or even grammar. Make sure to tell your
readers what to look for. Let the mass questions, rather than just
telling you it's sucks. I'm not sure why your hero
reacts like this on page five. You probably already
know the answer. It might not be
clear in the script, or maybe this person
just doesn't get it. But if you get the
same kind of feedback or criticism from
several readers, That's when you have to think maybe there is a problem here. But as with everything
else in this world, you really have to rely
on your own judgment. If you don't have any moons
opinion that you can trust, ask yourself, is this funny
enough, exciting enough? Well, how can you be objective about it when
you just wrote it? Well, you can't. That's why the best thing
you can do after you write a script is put it in
a draw and forget about it. Your brain is really good
at forgetting things, you know, put the script away for at least
a couple of weeks. Try not to think about it. If you can start working on another story that's
great, keep yourself busy. Then after some time, open up that drawer and you will look at your script
with fresh eyes and you will be
able to tell what's good and what's not. Believe me. Now, I know this might
seem like a lot of work, especially if you're just making a three-page comic for
your school paper, my stories are usually longer. That's why the whole script writing thing is really
important to me. But I also just enjoy
getting it right and not have to go back and
redraw entire pages. Writing is a lot faster
to do the actual drawing. So do the work now, and it will save you time later. Smart Hub.
3. Layouts and Sketching: Welcome back. You made it. You wrote a script? No. All right. You're out. It's all right. You can watch this episode. We're going to be
talking about how to break your script into pages. Breaking your pages into panels. Like I told you in episode 2, I always write a
script for my comics. I don't describe every panel just what happens in the story. So when I get to
the actual drawing, I print out my script
and read through it, marking it wherever
I think it might be a good idea to
cut to a new page. There are techniques for this, like the cliffhanger
ending where something exciting is
just about to happen. That's a great way
to keep your readers interests in the
story and the page. Just were they open
up the Salvador or just want a hand grenade
go through the window. All right, maybe
not on every page, but you get the idea. Mark your script way, you think it might be a good
idea to cut it. And then when you're done, count the pages you
broke it down to, Is it too long or too short? Only you know that
it's your story. But try to have at
least something vaguely interesting happen
on every page. Not only does that make
for a better read, it's also a lot more
interesting for you to draw. A great location or a great line of
dialogue should do it. You don't need hand grenades. Be careful how much information
you cram into every page. Remember you have to break
it down into panels. More than six or nine panels per page is usually very
hard on the eyes. And more than three
speech balloons in one frame makes the story
kind of hard to follow. Also, think about what
kind of pacing you want. Some scenes, you might
want to be calm and quiet. That's usually done
with the use of big pictures with not
a lot of dialogue. You might already have some, some key images in your
head already sketched out. Make sure you leave
room for those images. They're probably one
of the main reasons you're even making this story. When I break down my
pages into panels, I usually do small sketches
that some call thumbnails. The reason for that is they're
faster to draw and you can get a feel for the layout a
lot easier than with a big, expensive piece of
oversized drawing board. Again, this preparation will
save you time and grief. You don't want to be
halfway done with the page only to find out it needs
two more panels to work. Do the thumbnails and
get a feel for the pace, then start doing the sketches
for the actual pages. I know we're three episodes in and now he starts
talking about drawing. Well, not just yet, exactly. What I do is I usually text my pages before I
start drawing on them. There are two reasons for that. One, it's boring, so I want to get it
done, get it over with. And two, it's a
lot easier to fit my dialogue into the balloons. Afterwards, I'll go into details about texting in episode five. But right now before you
start laying out your pages, here are a few guidelines. Make sure you have an
establishing shot. You know that technique from the movies or even
better television. You start out with
a new York skyline. You then you see a house
and zoom in on a window. The next image is probably two people sitting in
a kitchen talking. That scene is shot in
a studio somewhere. Most certainly not in
the city of New York. But because we had the
establishing shot, we all know and believe there inside a building in
New York City on TV. They do this to save money. In comics, we do
this to save time. We don't want to have to show the whole city of New
York in every panel. And we also want to give the reader an idea of where we are, which helps them
follow the story. If you do your
establishing shot right, you can get away with drawing very little background on
the rest of your page. We go over backgrounds
and perspective drawing in less than six,
so don't worry about that. Now, the next guideline I
wanna give you is variation. Makes sure every panel
is not the same. Variation in size is good. When I started out
making comics, I actually copied a bunch of
page layout just like this, just to get an idea
of what to do. But variation within the
frames is even more important. And that also saves
you some time. If you already had to close ups of your
characters talking. Let's shake things up a bit and show them
in full figures, silhouettes for frame 3, because we know what
they look like now, no need to show every detail. When you have a specific
reaction panel and emotional outburst or
something like that, it might not be the best
time for a silhouette. But then again, that
might be exactly right. Only you will know
it's your story. Before we go on to lesson
3 about character design, I want to give you a few
ideas for page layouts. Now, you can't really go wrong
with the nine panel grid. If you want to shake
things up a bit, make some variations in
size and numbers of panels, but more than nine panels on a page tends to give
a very hectic feel. The bigger and more
detailed your panels are, the more attempts to slow
down the reading of it. An open panel here and there
is great for variation, but works best with
a single character, object, a car, or a
building in full view. You can also skew
your grid and make irregular panels giving off the idea of a world
gone out of whack. If you've read American
superhero comics, you'll know the splash page, a panel that stretches
across a two-page spread. You'll also have
noticed that a lot of us comics tend to lead, meaning the art goes all the
way to the end of the page. If you're using this
method for print, be sure to have your art extend over the edge of the page. Another interesting idea for a layout is the
split panel where something that really one image is split into several panels, giving off the illusion
of time passing. When you're experimenting with your grid, proceed with caution. Always be aware of
your reading order. Your view of the page
should flow naturally. If you have to stop
and think about what panel or speech
balloon to read next, that hurts the storytelling. It's time to wrap it
up for Episode 3. So what have we learned? Thumbnails, variation,
reading order, those are very important things. Now, let's put some
people in your comic onto episode for
character design.
4. Character Design: Hi, welcome to comics
for beginners, episode for about
character design and a little bit about
props and locations. And in case you're wondering
this location we're in right now is my home studio. So let's begin. As an any story. The main character in a comic is the single most
important thing. Before you start drawing. It's a good idea to design
your character so you know how to draw them
from all angles. It's also a great way to get
to know your characters, what kind of
expressions they use, their style and clothing,
stuff like that. A lot of artists do character design sheets
or style guides, often to present to the writer or the
editor for approval. But even if you're doing everything yourself,
it's a good method. Here's a little pop quiz. A great comic book
character needs to be cool, memorable, funny,
or recognizable? Well, the answer
is, of course, DES, to be recognizable, you need your readers to be able to tell the characters apart. Specific posture, a
choice of clothes, or a specific hairstyle. Anything that can help your
readers navigate the story. Character archetypes can
be a good starting point, especially if you twist
the cliches little bit. The lesser of the character, the clearer their
function should be, and the less you have to
develop their personal look. The major characters should be distinctive enough that the
reader can tell them apart. You need to know what their
role in the story is, their personality, and
perhaps some backstory. And of course, the
visual design for the character identification
is important. So try to think of what makes us care for this specific person. Often it's because
they remind us of something within ourselves. I suggest you make a
style guide for each of your major characters or put your thoughts in a sketchbook next to the character and makes sure every character is
different and recognizable. If you have a large cast, tried putting them
next to each other and compare heights, et cetera. Style guides are also
great for locations, cars, or props that appear
often in your comic. I'm sure there are style
guides for the bat Mobius, tin, tins apartment, and
Thor hammer for instance. Like I talked about earlier, doing these style guides can be a great way of getting
to know your characters. And it's also a great
warm-up exercise before you actually start
working on your comic. But be careful not
to spend hours designing something that's
hardly in the comic. Try to think of how many pages this particular
prompt appears on. And is it really important to know what it
looks like from all angles? When designing a cast of
characters, try the silhouette. Approach. Lining
up your ensemble cast and blocking them
out as silhouettes. Can you tell who's who just
from their outline form. If not, maybe you can change
a posture or hairstyle, maybe come up with a
completely new design. Now that you have a great cast, it's time to have
them do something and start interacting
with each other. Now, a lot of that
is in the script, the writing of the
story obviously, but when designing the
character is not only looks are important, but
also outlooks. How does that character
see the world? How do they see themselves? What's their value system? What's important to them? And most importantly,
what do they want? This is equally important
for supporting characters. If your characters don't have their own lives,
their own agenda, they become cardboard figures, a story devices only there to provide information or
resistance to your hero. Now, a word or two on dialogue, assigning each major character
with a voice of their own really adds an extra
layer to the storytelling. If every character
of sounds like you, then maybe you should try changing things up a little bit. If you can tell who is speaking, even when they're off screen, then you're onto something. Sometimes going against
type can be interesting. Think of some of
the archetypes like the gentle giant
or the sad clown. You can also try basing your characters on
people you know, use their personality
or the looks. But make sure your characters
are not a gross parody of your friends or you'll end up with not very many friends left. Making your characters different from each other in as many ways as possible is a great way of adding conflict to the story. And conflict is story. Now let's go on to something
really interesting. In episode five, we are
going to be talking about texting and borders.
5. Balloons and Borders: Hi and welcome to Episode
5 of comics for beginners. Today we're talking about words. While it's perfectly possible to make comics with
no words in them, a speech balloon is
what most people think of when they
hear the word comics. A speech balloon can be
shaped in many ways. It can give off
emotions like anger, frustration, or even lobe. You can hear people
thoughts with a thought balloon
or even a caption, much like the voice
over in a movie. Or you can have your
characters whisper or shout. And a number of ways. You can also put
sound effects in your comic to help us understand
what's going on. A few words about
speech balloons, they should always be placed in the least intrusive
areas of the panel. That's usually in the top. And the tails of
the balloons should point towards
whoever is speaking, if possible, towards
their mouth, as that's where the
sound is coming from. Beware of the reading order and be careful where you place your speaking characters
so you don't have tails crisscrossing and
confusing your readers. If you draw your speech balloons first and then put the
text then afterwards, you might end up with
balloons that are either too small or too large. That's exactly why I always text my comics before I
start sketching. In the old days
before computers, us cartoonists had a much
rougher time than now. Making layouts and texting has never been easier
before computers. Measuring out the borders for gutters between
the panels was done with a ruler and texting
is usually done by hand. Today we can rely on computer programs
and fonts for that. Later you can print out
your entire comic and trace the boxes and
balloons on a light box. That's what I do anyway, I like the hand-drawn
look of it. Some artists make their own
font so they're texting, looks like their
own handwriting. However cool That sounds, and it does sound cool. I would advise against it
unless you have a lot of time on your hands and the skills
needed to follow through. Go online and look
for Free Fonts, see what you can find
that fits your story. I often use a place
called the font.com. But there are lots of places online where you can
find free fonts. Just make sure
you're not spending Bayes looking and wind up with a trial version of something that you
can't really use. A lot of sites
advertise free fonts. And then when you click through, they still want your money. When deciding on
what font to use, you need to think of the
tone or voice of your story. Is it a wacky cartoon
or a horror story? The font is part of that. You might also need some special characters
for your language. So make sure the font has
those before downloading. In the last episode, we talked about layouts
and thumbnails. What I do is I use my
thumbnails as a guideline. I do rough sketches
of my entire story. I do that in print
size or even smaller. This is still the
planning phase. I don't want to be
worrying about the details or what paper to use
for the final comic. What I then do is I scan my rough sketches and paste
them in an InDesign document. Some use Photoshop
or Illustrator, I'd say use whatever program
you're most comfortable. First, make a standard page that fits the format
you want to use. Us comics, for example, are taller and narrower
than European comics. Find the comic on
your shelf that fits what you want
and measure it. Use that as your standard.
While you're at it. Measured the space
between the panels, often referred to
as the gutters. Use that as well. You will notice that there is no industry standards to how wide the gutters should be
or how thick the frames are. Pick a standard you
like and stick with it. Experiment, but be
consistent within the story. In your layout
program of choice, set a standard bleed for the entire page and
make a standard border. If you don't plan
on letting your art go all the way to the
edge of the page. You don't need to
worry about bleed. But if you're doing a cover, you will need it for
the print shop anyway, so it's a good idea
to think it in. I always draw the
finished panels by hand. So in my layout document, I just make a box to
represent the gutter, copy that, and paste
it wherever I needed. The text is a little trickier. If you did what I
recommended in lesson 1 and 2 and wrote an actual
script for your comic. You'll have your dialogue in a Word document or
something like that. So you can easily just
pasted in your text boxes, in your layout document. Begin with pasting it all in one box and cut the
dialogue as you go along. Don't worry about placing
it to begin with, just do the boring
work of getting the dialogue on the right pages. Use the same standard
box for all texts. One with no frame. Make sure your dialogue is centered and your
captions on left aligned. When you've finished
pasting in your dialogue, adjust your boxes and maybe edit down some lines or divided
in two separate balloons. If your dialogue is too long, then you place it on
the page where it fits. As a rule, two or
three sentences per balloon is quite enough. You don't want the
reader to lose their place or their interests. When I've done the tedious
work of lay outing and texting my entire
story this way, I feel like I need a reward. And that reward is printing it all out and actually
start drawing. So let's go on to lesson 6, perspective drawing
and backgrounds. Hi.
6. Perspective Drawing and Backgrounds: Hi, welcome to episode six
of comics for beginners. Today we'll be going over designing your backgrounds
and perspective drawing. I'll be honest with you, I don't particularly like
drawing backgrounds. And perspective drawing
has a lot to do with that. It's two logical for me. Too many rules, It's like math. But backgrounds are
a necessary evil when he wants to tell the
story in comic book form. So let's get to it. One of the basic
elements of perspective drawing is the horizon line. You need to figure out
where the horizon line is because that's where your perspective
lines are all going. Here's a classic example of the road in the
middle of nowhere. Notice how all the
lines are going to the same point
on the horizon. That's what we call
the vanishing point. The same goes for city, forest or a room, lots of people in it. The problem is you can get lost in all those
lines trying to figure out where and how to
place your objects. Or more importantly,
your characters. As in any story, your colleague is about people or dogs or
aliens or whatever. But you have some
main characters and they should be the focus
of most of your panels. So instead of drawing
the surroundings and getting every line right
from the beginning, I tend to put my
characters in the shot first and then figure out
where the horizon is. Let's say I'm doing a shot of these two characters are
walking down a street. I want the man to be
walking a little bit behind the woman and the woman to seem bigger and more determined. I draw my two characters
largely on instinct. Now, I want them to be
walking down a street. So how do I do that? Like I said, we need to find out where the horizon line is. To figure that out. I need to see my
characters in full and then pretend they're standing
on an invisible line. I traced the top of their heads and the
bottom of their feet. And those two lines
go back towards yep. You guessed it the horizon line. As you may notice, I've set
the angle a little low. The reason for that
is just what I said. I wanted the woman to appear
bigger in front of the man. I tend to think of
my drawings as if I was seeing it through
a camera lens. Where would that camera be? Up high? In iron level download. Had I set the
camera and I level, my drawing would look
something like this. Notice that the horizon line is always where the camera is. I put my characters in the shot first because they are
who the story is about. If I start thinking
in lines and boxes, it just takes the fun out of drawing for me right
from the beginning. So I start with a foreground and kind of work my
way around that way. The trick is never to draw more than two characters before figuring out
where the horizon is. Or you could end up
placing everything wrong. If we want to understand
how perspective works, let's look at a real
picture instead of a blank piece of paper that
tends to work better for me. You can take any picture really
and just trace the lines, see where they're going. That point is called
the vanishing point and it's on
the horizon line. As you can see, it's
quite possible to have more than one
vanishing point. It all depends on
how the objects, cars, houses, milk
cartons, whatever placed. So what if you want to draw
a room from above like this or you can't see the
horizon line in the picture. Well, you can add more papers
or your drawing and have a vanishing point placed
three feet out of the frame. Or you can cheat in a way same as before
we need something. We can take the vanishing point from take the two
characters, for example. But instead of tracing them all the way to the
vanishing point, we find somewhere along
the way and end with a parallel line to
line in top here. We now have a nice
square in perspective. See, by the way, I recommend doing
perspective lines or help lines like these in a different color pencil or maybe on the
back of your board. So you'll lose your way in all these lines crisscrossing
across your drawing. The square is going
to be our guide in constructing the entire room
around these characters. You start out by finding
the middle of the square, by doing an X between
all four corners. When you found the middle
of that square root, you can find all of the other
perspective lines you need by continually dividing
your squares in half. You can also add more
squares and perspective by dragging a diagonal line through a quarter of
your first square. So where it meets
the parallel line. I know this is kind of hard to understand and it's also
very hard to explain. But after you do it
yourself a few times, or rather a few, 100 times, it will make perfect
sense, I promise. Here's another classic example
of a perspective drawing. As you can see, the trees
by the side of the road appears smaller as they
approach the horizon line. And they also appear to
be closer to each other. Find out where to
place those trees. Again, we need a square
that we can divide into. By finding the middle
of that square. We now have a midway between these two trees where we
can put a third tree. You want to put in a
fourth, fifth grade, you find the midway
between DES and so on. Here's the same exercise
done with the street. Instead of constantly
dividing my squares in half, I now divide my height into six because that gives me some
more help lines right away. Notice that even though the vanishing point
is way off camera, I can still get the
right perspective. If you really want to learn the art of perspective drawing, I suggest you spend hours, days, or even months doing the
tedious work of drawing boxes, dividing them, and tracing the lines to the
vanishing point. I promise you, it will pay off. Unfortunately, there's
no quick fix in this, unless of course you
just trace a picture. But even in this case, you need to know where the
camera is and you can wind up placing your characters
four feet in the air. Or even worse, one of
your characters four feet near and the other two
feet in the ground. I won't go into 2 or even three-point
perspective in this series. But trust me, it's really not as complicated as it sounds, as long as you understand
the ground rules. And the only way to really
do that is through practice. If I could leave you with
just one final trick about drawing backgrounds. Before we go on to lesson 7
about sketching and inking, it would be to put something in the foreground
of your picture. For example, if you
drew this nice picture of a park in your first panel
as an establishing shot. Make sure you put a tree or
a bench in the foreground. Objects in the
foreground help cover up your background so
there's less to draw. And it also gives us the
illusion that it's all part of the bigger picture or real-world that expands
beyond the panels. If we stay in the
park for a minute, a branch extruding from the
side of the panel gives us the illusion of an entire
tree just outside the frame. Even just shadows from leaves above can give
the same effect. We need to know where we are. We don't need to see every
detail in every panel. In fact, that can take our
attention off the story. You get the little
details right? Like a few vertical
lines in the grass, a tree line in the background. You don't have to draw
the entire picture. Less is more. Okay, so no more
backgrounds for now. Hope this was helpful to you. See you back here for Episode 7 about sketching and inking.
7. Sketching and Inking Comics for Beginners episode 7: Okay, hi and welcome to Episode 7 of
comics for beginners today with tips on
sketching and inking. The inking process is where
everything comes together. Some artists do very
thorough sketches, so they're, inks are
basically just tracing. Others tend to do most of the
actual drawing in the inks. Some artists do stick figures
that they then flesh out. Others make use of
help lines to make sure everything is
in the right place. Now I don't really cover anatomy and basic drawing, this program. You'll have to pick that up
elsewhere through practice. That's how I did it. Like I've showed
you an episode 5. I print out my layouts and use those prints as
my sketch pages. Now that I already have the frames and the dialogue
to fit in the balloons, it's much easier to
dig in then if I just had a bunch of blank pages, I sometimes print
my layout out in a light-blue and ink directly
onto my printed pages. But usually I just sketch
on it and then ink using a separate piece
of paper and a lightbox. A lot of artists use blue pencil for their
rough sketches. In olden days, we did that because the photocopy
machines couldn't pick up the blue lines that
went for most scanners to, and then you don't need to
erase the pencil afterwards. Nowadays, a lot of scanners
are much more sensitive, so you have to
remove the blue in Photoshop after
your scanned it in. But that's easily done
by adjusting the levels. The other advantage of using
blue pencil is that you align art is clearly
visible on top of it. With a regular pencil. You can sometimes
find it hard to tell the lines apart
and you need to erase your pencils with the
risk of the ink going pale. The blue pencil is
not a magic tool. It's just a basic pencil
in a light shade of blue. You can get those anywhere. When it comes to inking, there's no one right
way of doing it. People need to be able to follow the story rather than be
impressed with the line-up. That's the important thing. I would recommend trying out different tools like
the famous Quill, different kinds of
brushes and markers. You need to find
what works for you. It's not just a question of what you'd like to see
in other comics. It's also a question of
what your hands want to do. And that's not always
the same thing. Now, while I love really
tight inks done in Quill, I find my particular
drawing method doesn't work very well
with that instrument. Nowadays, I use different
kinds of markers, but also even just
pencil sometimes, and then adjust the contrast
in Photoshop afterwards. When inking tried to think of your drawings in terms
of light and dark. Decide where the
light is coming from and what you want
to be in focus. You can take a photocopy
of your sketched page and experiment with markers on that to get the
composition right. Oftentimes when people
start out drawing, they're afraid to screw up. So they go at it really
careful with the pencil, slowly rendering every
image to perfection. And that's cool. That's
the learning process. But you also learn a lot from doing the same
drawing again, with a big black marker. Use a light box
or even a window. Put a new piece of paper over your sketch and trace the image. If you botch the job completely, you still have the
original sketch and you can just redraw
the whole thing. If you're using a
marker that leads, get some stock paper with a little weight to it so
it doesn't bleed through. You need to experiment with
different kinds of paper and different kinds of markers to find out what works for you. If you're really good
or just in a hurry, you can also do your
sketches in blue and ink directly on
your sketch page. But you run the risk of
ruining your original. For beginners and people
who want to play it safe, I would always
recommend the lightbox. Also because you can adjust
your drawings before inking. You can also use photo
references for tracing. More about the art of stealing. In Episode 9, when
inking on a light box, you also had the
opportunity to flip the board over and
sketch on the back. Sometimes flipping the board will also reveal mistakes you hadn't noticed before and give you a chance of a
different perspective. Always be aware of what's most important within the panel. You can use thinner
lines for backgrounds, but your main characters
need to stand out. If you're coloring your comic. You can help the
storytelling that way. But if it's a black
and white story, you need clear inks so people can understand
what's going on. We talk about this
in episode three, but the layout of the page is equally important
in the inking face. Thumbnails are half
size photocopies of your sketched pages can be really helpful
when deciding what parts of the images
to be rendered black. Do a test run with a marker and see what it does to
your overall page. Another tip for inking is
to be aware of structure. Now there's a huge difference
between an object made of stone and one made
of steel, wood, or even for adding tiny flecks of ink can really
make all the difference. How to convey various
materials and structures is different
for every artist. You have to find your own riffs. But remember, less is more. Don't worry too much about making mistakes
when you're inking, you can easily correct your
mistakes with white out or by pasting a white piece of paper over your art and
just go over it again. I use acrylic markers
because they're easy to apply and the
paint dries really quick. Sometimes I just
leave mistakes on the board and do my
corrections in Photoshop, but I tend to make
my original line art as finished as possible. So to sum it up, use the tools that work for you. Use a light box to try out different techniques without ruining your original sketch. Try out the distribution
of blacks on a photocopy. Use thinner lines for background and thicker
lines for foreground. And finally, less is more. All right, that's it for now. Hope you're all fired up
to get some inking done. Join me back here for Lesson 8 about coloring in Photoshop.
8. Coloring In Photoshop: Okay, welcome back to episode 8 of comics
for beginners today about coloring
in Photoshop. Now of course, you can call
your comics in any way you want with crayons or
watercolors or whatever. Just be sure to
take a photocopy of your original art so you
don't ruin your original, at least until you have a
couple of years experience. What's great about coloring in Photoshop is that
you can always undo. The trick is to keep
your line art clear and use your colors to
help tell the story. I like to keep it simple and
I send to mute my colors quite a bit and using splash of color here
and there for effect. Now of course, this
is all a matter. Personal taste. You might like other kinds
of colors and that's great. But I can't really tell you how to call every character in a gazillion different
tones except to tell you that it probably
takes a long time. So how do you get started? First off, you have
your line art. I'm old-fashioned so I still draw on paper and
then scan it in. Sometimes I'll have some
blue lines underneath my inks that can
easily be removed in Photoshop like we talked
about in Episode 7, by adjusting the levels. Or you can scan in bitmap if your scanner will allow you in the blue will usually disappear. Make sure you scan your line
art in high resolution. If your page is
done in oversize, 300 DPI should be enough, but less than 300
dpi is never enough. Especially line art
has a tendency to get pixelated if it's scanned
into low resolution. So if it's in the same
size as the print size, I would always go with
at least 600 DPI. Once you have your
scanned pages, open them up in Photoshop, you might need to do
a little clean up. I find there's
always little dots or grabbed from the scan. I tend to never zoom in
more than 50 percent when I'm doing the cleanup
to avoid needless work. If it's not visible at 50
percent on your screen, it won't be visible in print. So there's a place
to save some time. When you've got your
clean line art, you need to make a separate
layer for the colors. There are several ways
to go about this. My method is to convert my bitmap image to
grayscale, then to RGB. I duplicate my background layer and set that layer
mode to multiply. Then I click off the
original background layer. I don't deleted. Trust me, you will accidentally paint in the wrong layer
once in a while. So keep the original
sort of a backup. Now you need to put
in a new layer in normal mode for your colors. You put that under
your background copy. This is a quick, basic way
of getting ready to color. You can of course, make as
many new layers as you want. I sometimes make a new layer on top of my background layer or line art where I put in special effects like bright
lights and stuff like that. You'll have to
experiment yourself. Just remember always to
make a new layer for those experiments
and don't forget to save your Photoshop
file along the way. My approach for coloring
comics pages is this. I tried to set a
certain tone for every new setting to help the reader understand
what's going on. Oh, this is inside
the nightclub 0 now we're outside early
morning, stuff like that. I usually do just
a flat color or a gradient on every picture
or even the whole page. Then in a separate layer, I put in the colors on
characters and objects. I often set the opacity of that layer to 50 to 60 percent. That way everything
sort of takes on the color tone
of the background, Just as the background color is often visible in a painting. Now here's a little
tip that will save you a lot of time and frustration. Instead of painting every object or character as you
come upon them, try flattening out all
the major elements. First, trace the outer
borders of a character. Use the select tool
and fill out the form. Now you have a nice
figure to work within. Again, use the select
tool and go to work. And now you won't
have to worry about painting outside the lines. Always remember that an image
consists of foreground, middle ground, and background. Some artists tone
down the line art and the background to make the
main character stand out. But that's probably something
for a more advanced lesson. Let's just say you had to have your primary character stand
out against the background. And there are many
ways to do that. One way is to call them in a warmer tone than
the background. That will make them
appear closer as long as they're not painted in the same tone as
your background, you'll probably be fine. And the stronger the line art, the easier it is to call her. Like I said, I tend to drag
my color palette over in the more gray areas and stay
clear of primary colors. But that's a matter of
personal taste, of course, and it all depends on the
type of story you're making. When you're finished
with a page, flattened all the layers and
save it as an image file. Format is the best. Jpegs are fine for web and
lower resolution copies, but for print, always
go the tiff format. Also, you need to
convert your colors to CMYK if it's for print. Rgb is great for web, and it also gives
you some more room for effects when
you're coloring. But if it's supposed
to be printed, CMYK is the way to go. Okay. I hope you picked
up a trigger to here. Now it's time for a little
lesson in stealing. Onto Episode 9.
9. How to draw everything Comics for Beginners episode 9: Hi, welcome to Episode 9 of
colleagues for beginners, how to draw everything. Now, this is actually
a lesson in stealing. If you've downloaded
the free ebook we offer at comics
for beginners.com. You'll know what
I'm talking about, but let me go into
some more detail here. Is it ever okay to steal? I would say yes. Well, there are degrees
of stealing anyway. There's inspiration and then
there's blatant copying, but there's no way
to get good at something unless you practice. And what better way
to practice than to copy something that
already exists? You can't be expected
to be able to draw everything just off
the top of your head. That comes with practice, lots of, lots of practice. I would recommend you
draw the stuff you're not very good at drawing over
and over and over again. Let's say you have
trouble drawing hands. Hands are very
difficult to draw. But luckily, you have two of
those right in front of you. If you don't have hands, I don't know what you're drawing with your feet
maybe, I don't know. But anyway, watching how
hands are constructed, copying pictures and
drawings of hands will vastly improve your
ability to draw hands, make a journal, and
keep adding to it. Whenever you see an
interesting pair of hands in a magazine
or a photo book, try to draw what you see and put the sketch
in your journal. The first many pages
will look like crap. But you need to keep those
first sketches to track your improvement and see that you're actually getting better. You will often find
yourself thinking, man, I'm a lousy artist. I'm never going to
be any good at this. But keep your failed attempts
on file so you can take them out and look at them and see that it actually
have improved, that you are getting better. I bet you think US
pro artist can just draw anything right or wrong. We still, just as
much as anyone. We're just better at hiding it. Let's say you have
to draw a dog. Or you just going
to try to think of what a dog looks like
and then draw it? Or are you going to look
at some pictures of dogs? Technically, that's
called reference. We all do that. Now what we don't do is take a well-known dog picture
and just trace it. Now, I'm not a lawyer, but I'm pretty sure
that's illegal and the results will
often look weird. So don't go there. Use several references,
flip the image, or use just parts of it
and do the rest yourself. Don't waste hours looking at Google images for something
you already know how to draw. But if you need a
picture as a reference or for inspiration,
Go right ahead. I often start up finding
photo references as a sort of warm-up or
inspirational source. When I'm starting a new project, I use references to
jumpstart my creativity and get some details
in there that makes it all look more real. You need to find a
balance that fits your style and that saves you time instead
of adding to it. That's how I feel anyway, I wanted to get some work
done not to get lost in the details that nobody will
probably notice anyway. I used to think tracing
was the same as cheating. It was all right to
use a photograph, but tracing was just wrong. I'm not so adamant
about that distinction today I'll trace a
photo with no shame, especially for backgrounds since I find it saves me an
awful lot of time. The trick here is to have it not stand out from the
rest of the comic. Get the same level
of detail and style. So it blends in seamlessly. If it looks like it's
Trieste, don't do it. Comics is all about
storytelling. The story has to flow. If the, I get stuck on
something that looks much more detailed than
the rest of the page, then that hurts
the storytelling. So here's my list of tips
for stealing efficiently. Number one, use different
references for one image. It's a lot less obvious if you combine different
pictures instead of copying directly number
to make it your own, do it all in the same
style and level of detail, whether you're drawing
cars, houses or people. Number 3, disguise you're theft. Flip the image on a
light box or only take parts of a picture and make
up other elements yourself. Number 4, use another media than the one you're working in. If you're painting, use a photo reference,
not another painting. If you're making comics, don't copy from another comic. Number 5, never, ever trace another artist's work.
Learn from the best. Sure. Yeah. But directly copying a character pose or
a frame is a no-no. Now, did you know all about
when and how to steal? Go do it. I'll see you
back here for Episode 10. Thanks for watching.
10. Becoming a REAL Artist: Welcome back. You made it all the way to
the end of this program. So now you know almost
everything there is to know about making comics. But I do want to leave you with a few more parting
words of wisdom. Some good advice for
you hopefully about developing your
own personal style and where to go from here. So you might have
ambitions to become working professionals
in the comics industry. I'm not sure I would be the right person to give
advice in this area, the industry where I am is
virtually non-existent. There's certainly no
money going around. I make my money doing illustrations and
storyboards mostly. But here's what I do know. Only a few years ago, putting your comic on your
own webpage could hurt your chances of getting published. Why
would a publish it? Think they could
sell something you already gave away
for free, right? Well, these days it was seen putting your work in front
of the readers first and gaining a following
of loyal fans is probably the best way
to get published. If you can show numbers proving that you already have an
audience for your story, that can help convince a
publisher your work is bankable. And as it turns out, people are actually
more than willing to pay for something they
already got for free. As long as you ask them nicely. Look at Kickstarter and other
crowdfunding resources. It is possible to get people
to pull out their wallets. But there are no get rich
quick schemes in comics. If you find one that
works, let me know. Okay. Publishing is undergoing
huge change these days. Whether it's a benefit or a hindrance to new
talent is up for debate. What isn't debatable
is that it is happening and it's
happening fast. The best thing we can do is try to navigate this new world. You probably know the phrase, It's all who you know. And that's not entirely true, but it's not entirely
untrue either. If your work is
not quality work, it doesn't matter if
you're best friends with a major publisher or play
tennis with a famous writer. They won't help you
put out bad work, but they might be
able to help you get better at what
it is. You do. You see knowing the
right people gives you an opportunity to present
the work you've done. And it also gives
you a chance to get feedback on your work from people who know what
they're talking about. The web has made it easier for everyone to get feedback
on their stuff. The challenge is to get
the right feedback. Like we talked
about in Lesson 2, getting everybody's
random opinion is not necessarily a good idea. Finding your peers has
never been easier. Ten years ago you
would have to go to a convention to meet
people in your field, which is still probably the
best approach by the way. But nowadays you can find peers online forums through their blog or even
Twitter and Facebook. When approaching
someone whose work or opinion you admire, be sure to respect
their time and respect whatever answer
they have to your request. Even if the answer is no. And no answer is also a note. By the way, if you've tried reaching out to someone two or three times with no
reply, leave them alone. It's probably not personal. They're busy people following
someone on Twitter, commenting on their blog
or friending them on Facebook is a great way of
getting to know people. Tell them what it is you
like about their work and provide value to them
by sharing their posts, leaving insightful comments, or try to help in any
small way you can. Chances are when you have
a small favor to ask, like a portfolio review, piece of advice or a referral. They'll be glad to help out. Do not start out with
asking them for a favor, build the trust first, and respect that they
are busy people. And here's another
very important tip. Always say thank you. Even if you get feedback,
you disagree with, just thank them and go
about your business. Who knows? Maybe
some part of it will resonate or make sense later. Maybe not. But don't go into an
argument with them. They have a right
to their opinion and you ask them for it. Now what you should be aware of when you stick your neck out, put a story or a piece
of art out for everyone. Not everyone's going to like it. And some might not be so
polite in telling you. But don't get discouraged. Make comics for your own sake
because you love doing it. Team up with others who are into the same kind of comics you are. Connect to others online or
at your local comic store. Get a writing partner or a
drawing buddy joined a studio. You need encouragement and inspiration if you
want to keep at it. Making comics is hard
and lonely work. And if you want
to be good at it, it takes an enormous
amount of time. We already talked about
stealing in less than nine. But I feel a few more words on developing your own
personal style as relevant. Some of us are lucky or talented enough to have several styles
depending on the project. I tend to tone down my
level of caricature and go towards the more realistic
look for certain projects. It's something I can
adjust hopefully without losing my
unique expression. I can't tell you what
style is right for you. Hopefully you'll
develop your own. You need to find a style that fits the kind of
stories you want to tell or tell stories that
fit your way of drawing. Developing your style is not really something
that can be taught, only done through practice and through copying
from other artists. Not by copying
everything they do, but by observing the
riffs, techniques, and graphic shortcuts they use to develop your own
unique expression. So stop looking at me
and go make some comics. But remember, start with a
story and build from there. I hope these videos were helpful
and inspiring to you and I wish you all the best with
your comics making progress. Thanks for watching
and take care.
 Palle Schmidt, Writer/Artist