Transcripts
1. Intro: Hello everyone. I'm Mauricio Perez, a digital illustrator
and digital painting enthusiasts
based in Mexico City. To me, color and color theory
are fascinating subjects, but they have an immense amount of subtopics to choose from, and it can be really easy to get lost in their complexity. You have primary colors, secondary colors,
tertiary colors, color schemes, color harmony, color temperature,
chromatic aberration, the list goes on and on, and if you're looking at it from a purely theoretical
perspective, things can get really
complicated and really frustrating in no time, but it doesn't have
to be that way. I decided to make this
class about color because it's a topic I've
struggled with my whole life. Also because I know that
every artist who aspires to become a professional needs
to master this skill. If you just got your hands in a drawing tablet
and you want to filled you digital canvas with amazing and colorful artwork, but you don't know
where to start, this is class is for you. If your pieces rely heavily
on linework and you find it hard to transition to more volumetric
drawings and paintings, this class is for you. If you fancy two-dimensional
graphic art, but you're interested
in experimenting with a more plastic approach, this class is also for you. I want to keep things fun, I want to keep things simple, and at the end of the class, I want you to have
a finished product, a finished illustration you can actually share on
your social media. Here's how it's going to work. First, I will show you
my tools and worker. You'll get familiar
with the brushes I use, my settings, and how I
keep my layers organized. Then I'll teach you about
the fundamentals of shading. I'll show you how to shape basic volumes with some
of my shading techniques. You'll learn about the three
building blocks of color; hue, saturation, and brightness, how they relate to
the color wheel, and how they relate
two key concepts; color value and
color temperature. After rushing through
those three topics, we'll begin a step-by-step
process in which you will learn how to apply local colors to your character, how to pick up light source, add some shadows, some
lighting effects, and so finishing touches
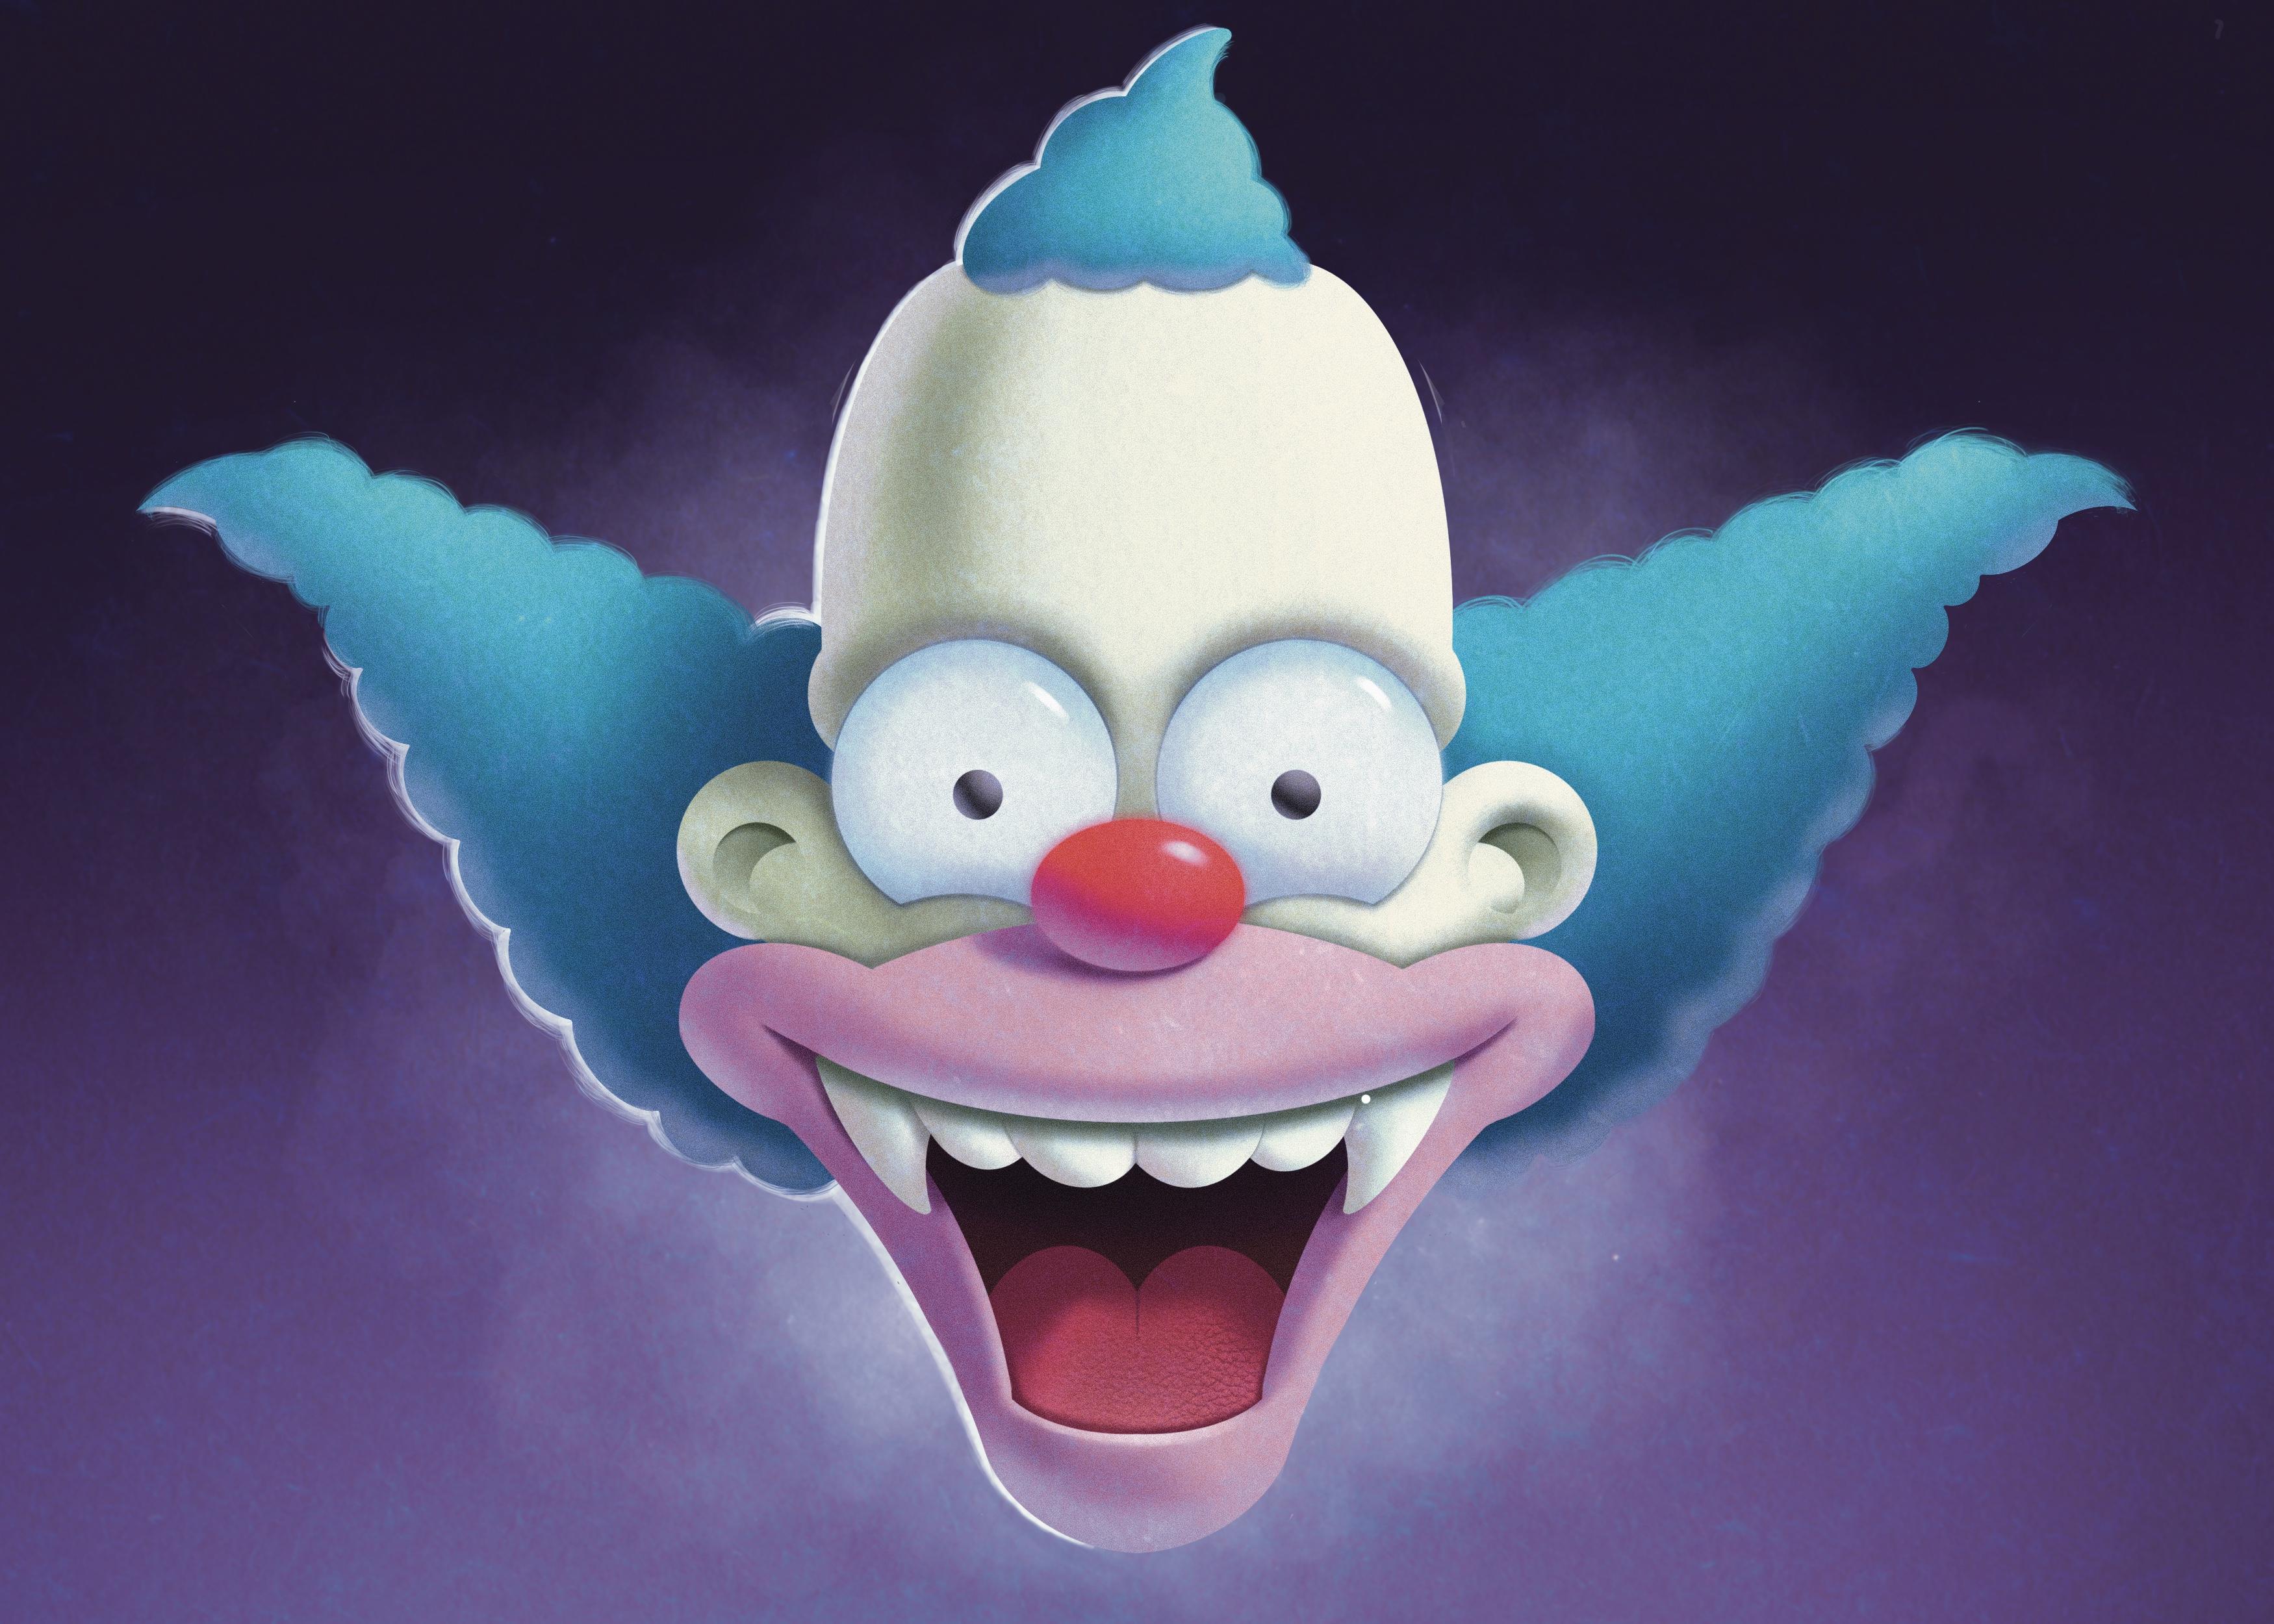
to complete your project, which will be a 3D version of your favorite 2D
characters head. I created this class
to help you in your own color
exploration journey and to make color
theory a little bit more enjoyable and a
lot more palatable. Let's not waste any more time. Let's get to it.
2. Tools: [MUSIC] Okay, everyone. I thought I'd made a little
introduction video to show you the tools I'll be
using during this class. These are very simple
tools that come by default in any digital
painting software. Even if you're not
using Procreate, you shouldn't have any
problems to follow along. First, I'll open up
my brush library, which is the brush icon at
the top-right Menu bar. Go to the airbrushing brush set and select a
soft round brush. As you can see, it's called
a soft brush because it produces dots and lines
with a blurry soft edge. Next, I'll pick a hard brush, which as its name also implies produces crisp and hard
edge dots and lines. Speaking of lines, Procreate
has a very cool feature. If you draw a line
and hold the tip of your finger or
Apple pencil down, it will create a
perfectly straight line. Before you lift your finger up, you can change the length
and direction of your line. Something similar happens
when you draw a curved line. If you hold down your
finger or Apple pencil, it will let you change the size and orientation of your curve. After you lift your finger, you'll be able to keep
modifying your lines further by hitting the
Edit shape button. If you draw a circle like shape and hold your finger down, it will create an ellipse. If you press and hold
down with another finger, it will create a perfect circle. Something similar
happens when you draw a rectangle and hold
your finger down. Except this time if you press and hold with
another finger, you will create a
perfect square. By the way, if I tap and hold the color selection tool
at the top-right corner, drag the color
with my finger and lift my finger on
top of my rectangle, I can fill the entire
shape with color. Moving on to our next
tool, the smudge tool. This is a very
powerful tool that allows you to smear
pigment around the canvas and create smooth and soft transitions
from one color to another. But there's a couple of
things I must mention. Number 1, as with
the brush library, the smudge tool library
lets you pick and choose from any brush
in your collection, but I will always use the smudge tool with the
soft brush selected. Number 2, I make sure to adjust my brush opacity to
about 40 percent. Then I started smearing
pigment using my finger or Apple pencil with swift and
gentle touches on the screen, going from black to gray, then from gray to black, and also with vertical strokes until I get the gradient I want. Up next, we have
the eraser tool. If I use it with the hard
round brush selected, you helps me create
crisp and hard edges. In this case, it's helping
me define the edges of the rectangle I
had created earlier. Then if I use the smudge tool, I can blur that
edge and even make it disappear into a gradient. Then I can take my eraser
again and redefine my edge. I can also use my eraser
with a soft round brush selected to create a
blurrier and softer edge. Then we have the selection tool. To activate it, I hit the selection icon at
the top-left of my menu. This tool helps me select
a section of my canvas and modify it without altering
the rest of my piece. In this example, I
selected an area of my canvas and filled it with
paint using my brushes. We can also use
the selection tool to make other modifications. This time I'm using it
to select an element of my canvas, this black dot. Then by activating
the transform tool, which is the little arrow icon next to the selection tool, I can make even more
radical modifications like changing its size, move it around, or even distort it to change its
shape completely. That's about it. We're now ready to move on
and start painting. In our next lesson, we'll be talking about
light and shadow. I'll see you there. [MUSIC]
3. The Color Panel: [MUSIC] For our first lesson, I want to show you the
easiest and fastest way I know to shade a simple shape. But before I do that, I need to introduce our
friend, the color panel. On the right-hand
side of the top menu, you'll see a little circle that represents the active color. Tap to open the color
panel and then tap the "Classic" tab at the
bottom of the pop-over. In its classic version, the color panel allows us to adjust the saturation
and brightness of a color by moving a radical around this rectangular
color field. To change hue, we must use the first of the sliders below. But wait a minute. What does hue saturation or
brightness even mean? Well, hue is just a
fancy word for color. We move the hue slider
left and right, and the color field changes
color. It's that simple. Saturation or chroma refers to the brilliance and intensity
of a color or hue. Move the slider to
the right and it becomes more vibrant
and intense. Move it to the left and it
becomes muddier and grayer. Notice how when we
manipulate this slider, the radical moves in
a straight line from left to right inside
the color field. Lastly, brightness,
also known as value, describes how light or how
dark a color or hue is. If we move the slider to
the right towards white, our hue becomes lighter. If we move it to the left towards black, it
becomes darker. Notice that this time
the radical moves in a straight line from the top to the bottom of
the color field. For now we're going to
move the saturation slider all the way to the
left, towards the gray. By doing this, our
hue slider becomes irrelevant since our hues
are fully desaturated, which means there are the
dullest they can possibly be. This way we can paint
in grayscale and focus on the very
foundation of color, value or brightness, up next in Lesson number 3.
4. Value: [MUSIC] During this class, you'll see me change my
opacity levels all the time. But what does lowering the
opacity of a brush do exactly? I'll give you a quick example. I'm going to paint with
the hard round brush using this dark gray. While the opacity is
set at 100 percent, I can paint that exact value in a single stroke just by pressing down with
the Apple pencil. When I lower the opacity
to a 29 percent, even when the color
selected is the same gray, a single stroke overlaid over itself is never going to
get me to that value, no matter how hard I press
with my Apple pencil. In order to make
my value darker, I'll have to lift my
stylus and paint over it. This approach allows
us to build up our values in a much
more controlled fashion. To begin shading an object, the first thing I
must establish is the local value or local
tone of that object. Simply put the local value is the real value of
an object without the influence of
light or shadow. One easy way to figure out the local value of an object
is by painting a background. Now I have to ask a
very simple question. Is my object lighter or
darker than that background? If I decide that it's lighter, I'll paint it in
a lighter value. If it's darker, in
a darker value. Makes sense since things are not light or dark in
and off themselves, they are always darker or
lighter than other things. Now I have a flat shape. To make it appear
three-dimensional, I have to introduce
light and shadow. In order to do that, I need a light source. Let's imagine that the sun is illuminating the sphere
from this angle. Now, one lucky break
for us artists is that light travels
in a straight line. To determine the shadow
area of my object, all I have to do is draw
two straight lines from the imaginary position of my light source and I'll
get these two points. Now, all I have to do is join those two dots following
the shape of my object, like a latitude line in
a globe of the earth. What value should my shadow be? That depends on many
aspects like the texture, material, and reflectivity
of my object. I've heard people say that
a good starting point is halfway to black
from your local value. But I think that it may
be a little excessive. I recommend that you go just a tad darker than
your local value. If it's too light, you
can always go darker. But as with traditional media, if you go too dark, trying to make your shadows
lighter is much harder. To add my shadow, I'll
go to my Layers menu, create a new layer and
make it a clipping mask. That way I can only draw on the painted area of
the underlying layer. Now I take my soft brush, decrease its opacity, increase
its size considerably, and start adding my shadow. A quick and very important note. While I'm painting in
my lights and shadows, I'm not putting my
finger stylus down and rubbing it across the
screen without lifting it. Instead I'm making
little strokes, barely touching
my screen as if I were drawing the letter U
with my finger in the air, in a back-and-forth movement, starting from way outside my
shape and working my way in, slowly building up my value. I'll make a new layer and
place it underneath my shape. Remember those two lines I drew to establish our form shadow? Well, now I just need to stretch those lines to where
I think the light is touching the floor and join those two new dots to
create my cast shadow. I'll use the selection
tool on the left side of the menu bar to
create an ellipse. Then with the transform tool, I'll give it the
shape I need and tap my finger anywhere on my canvas. Now, what value should
my cast shadow be? I use the color
picker by tapping and holding to select the
value of the floor. Now I make it a bit darker
and paint in my new value. Cast shadow done. I'll create a new layer and
name it occlusion shadow. I go to my color wheel
and go way down in value. I make my brush a little
smaller and paint away. This will be the darkest
value of this painting, since light has the most
trouble getting there. Shadows like these
tend to appear where two surfaces or objects meet, like my sphere and the
floor in this case. See how this type
of shadow makes my scene a lot more volumetric? [MUSIC] Let's paint
in our light. Let's start with
the least popular of them, reflected light. Besides traveling
in a straight line, light has another property, it likes to bounce a lot. As soon as a ray of
light hits a surface, it bounces at an angle, losing some of its intensity, but preserving just about enough to lighten the areas in shadow. When I paint my reflected light, it's imperative
to make sure that its value is lighter
than my formed shadow, but darker than my local value. To do that, I can
open my color panel, pick the value of my shadow, then my local value, and choose a value between them. By adding reflected light, I created the darkest
value in my sphere, a border or frontier that marks where light is
no longer welcome, commonly known as
the terminator. One light down, two more to go. I'll create a new
clipping mask layer, color-pick my local value, and this time I'll make
it a little lighter. Softly and slowly, I'll add some direct light. Finally, in another layer, I'll paint a little
specular highlight by going a little
lighter in value. My specular highlight should be pointing directly
to my light source, by the way, because it's literally a reflection
of that light source. We're done. This
practical little exercise has taught us a lot about
lightning an object, and controlling our values. They will be very useful when it's time to resume
our class project. Now, we'll finally
introduce color by learning a little something about
saturation and hue.
5. Saturation: [MUSIC] In the previous lesson, I taught you how to manipulate
the brightness slider on our color panel to
obtain different values. In real life with
actual pigments, the equivalent of
that would be to mix black and white paint to get
different shades of gray. Whenever I went up
in the color field is like I added white to the mix and when I went down is like I added
black to a mix. Now we need to examine
what happens when we add color to our
digital pallets. Now you know that if we
move the radical all the way up to the top-left
corner of the color field, we get the lightest
possible value, which is a pure white. Conversely, if we move
it to the bottom left, or right corner, we get the darkest possible
value, a pure black. But if we move it to
the top-right corner of the color field, what we obtain is a
pure color or hue. A pure color is the most
intense version of a hue, a color that hasn't been contaminated so to speak
with black or white. When we move this circle
around the color field, what we are effectively doing is adding white or
black to a color. Let's demonstrate this in
a more traditional way. Adding white and black manually like we would do with
actual pigments. I'll start with this pure red. I'll sample it and
add some white to it. I take my red at
100 percent opacity and add white at 50 percent. Then I pick that sample
and add 50 percent white, sample that and add
another 50 percent. Do that a couple of times more
until I reach pure white. Now let's analyze what happened with the help
of the color picker. If I color pick my samples, we can see how our pure red
is moving towards white, losing saturation or
intensity in the process. Now let's try the same but
adding pure black this time, you'll notice that
our red got lower in value but it didn't
lose saturation. We can finish this lesson
by saying that when adding pure black our color
got lower in value, and when we added
pure white our color lost saturation and
got lighter in value. But wait a minute now, I
thought you said that if the little circle was at
the top of the color field, that was the lightest value
we could possibly get. That's true when
working in gray-scale. If we go to pure white and start saturating that white
towards any hue, we increase its intensity
but also affect its value. Not all colors are
saturated equal. When we saturate a white
towards purple, blue, or red, it gets
darker super-quick. Green, orange, and
especially yellow are late bloomers and it's harder for them to get darker in value. In other words, when we go from a lighter value to a darker
value in grayscale or reticule travels in
a straight line from the top left corner to the bottom left corner
of the color field. But when we add
color to the mix, it travels in an L shape from the top-left corner
to the top-right corner, and then to the bottom-right
corner of the color field. Like I said before, red, blue, and purple at full saturation are darker in value than yellow, orange, and green
at full saturation. Take that in mind when
working from grayscale to color because they can
really mess up your values. That pretty much
cover saturation. Let's move on to my favorite
part, the hue slider, or as I like to call it, the color temperature slider. [MUSIC]
6. Color Temperature: [MUSIC] I know what you're thinking. I know that you know that
I'm about to talk about the primary colors:
red, blue, and yellow. If you're guessing
that I'm about to tell you that if you mix
those colors together, you get the three
secondary colors: green, orange, and purple,
you'd also be correct. I'm also pretty sure
that if you guess that, then you must know
that if you keep combining primaries and
secondaries together, you get another type of colors
called tertiary colors. But let me stop you right there, before we talk about
tertiary colors, I'd like to separate
these six colors here into two different groups. [MUSIC] Two different nations
separated by a border. We'll call these two
nations in dispute, warm colors and cool colors and these two nations
each have a ruler. On the one hand, there
is orange which we would consider king of warms
in the color wheel, and on the other hand, we'll declare blue as the coolest color
in the color wheel. This is just a metaphor
by the way; in real life, the warmer a source of light is, the bluer it gets. [MUSIC] Look it up,
it's pretty cool stuff. Also, color
temperature is pretty subjective but for the
purpose of this lesson, let's say that our
warmer color is orange and our cooler
color is blue. [MUSIC] Let's hit politics aside for a minute and
keep mixing colors. I'll follow the same
methodology as in the previous lesson,
only this time, instead of mixing colors
with black and white, I'll mix them with
the adjacent colors in the color wheel. I'll start with this
green and add a bit of yellow until I change hue, and then I'll do the
same but with blue. Then I'll repeat the
same process with each color and I'll
talk to you in a bit. [MUSIC] By mixing
colors together, we've created paths, lines of communication between
colors of both nations. Even when their
respective rulers wish to draw their citizens towards them and force them
to pledge their allegiance, the other colors can't
help but talk to their neighbors and in doing so, some of them change their
political inclinations. Let's start with green again. We know that green
is a cool color because it's on the cool side of the border but these greens that gravitate towards yellow
are more liberal, more open to dialogue
with the enemy. They embrace
multiculturalism and consider themselves warm greens. Some of them are so radical that even cross the border looking
for political asylum. Conversely, the greens that gravity towards blue
or more conservative, they're loyal to their
king, they're cool greens. By now, it should be
pretty obvious to you that every primary and
secondary color has two possible
political inclinations. Yellows that gravitate
towards green are cooler, and the yellows that go
towards orange are warmer. Oranges that traveled
towards red are warmer than those who
travel towards yellow. Blues that go towards green are cooler than those who
go towards purple. In some, there are warm, warms and cool warms, and cool cools and warm cools. But then, there's a third
type of tertiary colors. These colors don't just
mix with adjacent colors in the political
or color spectrum. These colors mixed
with the colors on the opposite side of the color wheel and they do so because they simply
don't get into politics. They consider
themselves neutral. To them, all colors are created equal and they should live
in a world without borders, in peace and color harmony. I would like to talk about
a little bit more about them in our next
lesson and after that, we'll begin to work
on our class project. [MUSIC]
7. Color and Light: [MUSIC] Now we know that every hue in
the color spectrum can move in two
different directions. Depending on the
direction they take, they can get cooler or warmer. But how do we know in which direction a color should
move when we're painting? The answer lies in
the light source. Just as color can be
warmer or cooler, light sources can be
warmer or cooler as well. Our first step when
lightning and coloring any scene is to establish the temperature of
our light source. Some examples of warm light
sources include sunlight, of course, a
tungsten light bulb, or a bonfire, an overcast day, the moonlight or the light from your computer monitor are some examples of
cold light sources. The color of the light will determine the direction
your colors are going to travel in both the
light and shadow families. You might have heard
the phrase warm light produces cool shadows
and conversely, cool light produces
warm shadows. Do you remember how I
talked about a border that separated the
light from the dark in the gray-scale exercise called a terminator and that I also use supporter analogy to separate warm and dark colors
in my color wheel? That's because those borders
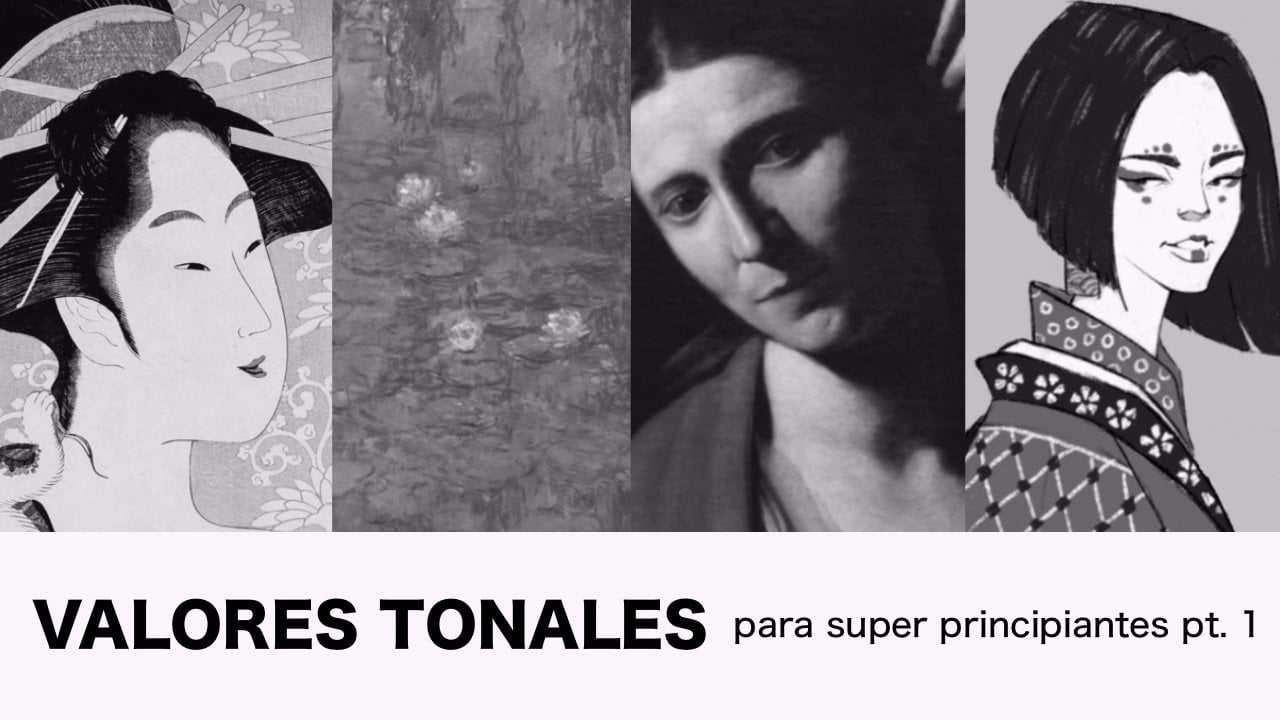
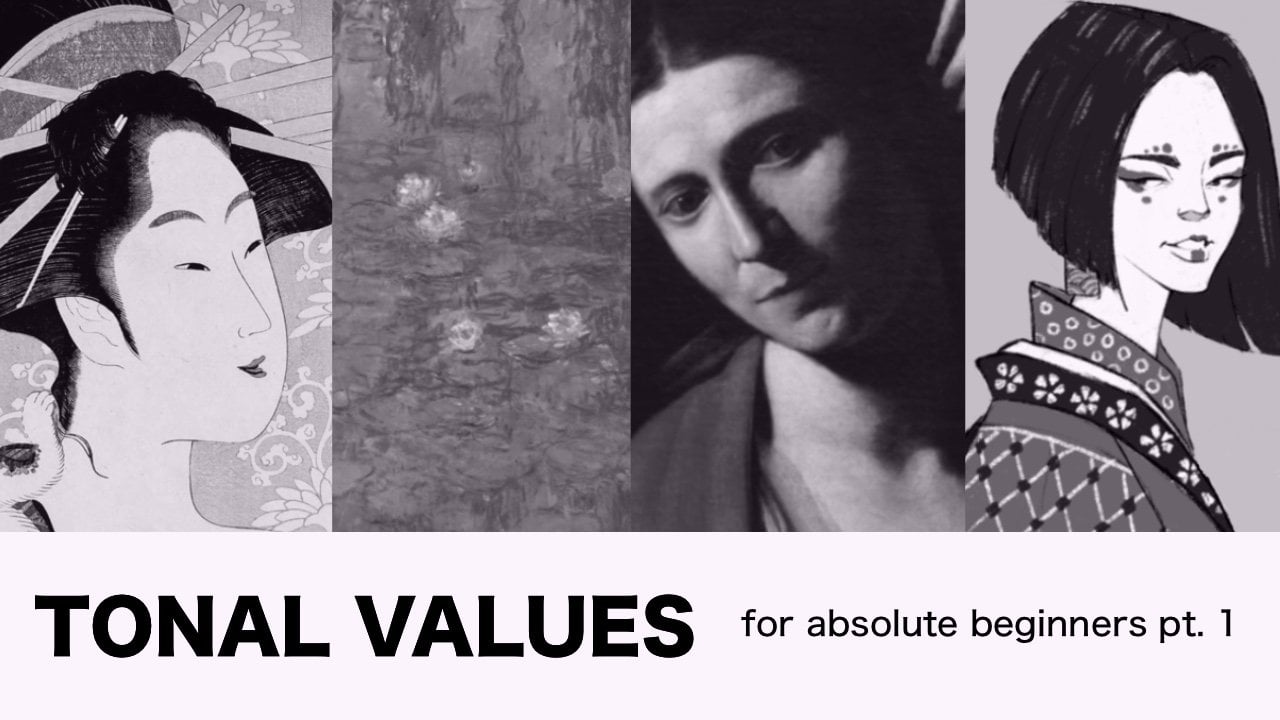
are one and the same. To better illustrate this point, I'll use this
portrait of Matisse by French painter Andre Derain. Hopefully, you can see a very conscious decision
by the artist to clearly separate his
light and shadow families using
color temperature. I don't even need to sample these colors for
you to immediately acknowledge that the warmer
colors are facing the light, which is most likely
produced by the sun. You should also feel that
there are cooler counterparts. Those blues, greens, and purples are in shadow. There is an idea I
got from Marco Bucci, he calls it the bully principle. I'm paraphrasing,
but Marco basically says that light
is like a tyrant. It wants to influence
all the colors it touches and make them
more like itself. In Derain's painting, you can see this
principle in action. The orangey-yellow light of
the sun is so overwhelming it overpowers the local colors of Matisse's skin and pipe and
also the grass behind him. The warm colors on this
painting live in tyranny. You can feel how yellow is contaminating them and
controlling their behavior. Meanwhile, on the shadow side, things are a lot more
loose and anarchic, and cool colors are
allowed to wander around the color
wheel more freely. In fact, things can get
so relaxed that there's a really cool party going on in the shadow side of
practically any painting. A party's so wild that it can challenge our
perception of reality. I'll use this other painting by Claude Monet to
explain what I mean. This painting also has warm
lights and cool shadows. But the way Monet
achieved that contrast is less evident and more
fascinating than Derain's. In this painting,
the coolest colors are these purply tones
in the background. But when I color pick them, the little circle
in my color panel doesn't place them in the
cool side of the color wheel, it placed them in the warm side. In fact, there are no hues of the cool family
in this painting. How can it feel so
balanced and colorful? Then I thought about
tertiary colors. I remember that when we
mix two opposite colors, we get those neutral
earthy tones. I picked an orange from
Matisse's painting and choose a dark blue because that's its opposite in the color wheel and tried
mixing them together. After a while, I was able to match its value
and a few minutes later I was able to match
its hue. Then it hit me. When we neutralize a color by mixing it with its
complementary, we also changed its temperature. That means that neutralizing
a warm color makes it look cooler and neutralizing
a cool color makes it look warmer. That's why all the hues in the painting stayed in the
warm side of the color wheel. That cool purply tone was in
fact a neutralized orange. It looks cooler because it does have some blue in its DNA and because it's surrounded by all those saturated
yellows, oranges, and reds. In lesson 1, I told you that an object is a lighter
dark in and of itself and it turns
out that colors aren't cool or warm in
and of themselves either. It all depends on the
context that they're in. Well, that's about all the
color theory that I know. Now the time has finally come to start working on
our class project. [MUSIC]
8. Rough Sketch: [MUSIC] It's time to sketch
our character. I will begin my
sketch by activating the drawing guide in
the Actions menu, which is the grange at the
top left of the screen. Then I'll tap on 'Edit Drawing Guide' and select the
'Symmetry' option. Now, everything I
draw on one side of my Canvas will be drawn on
the other side in real-time. This would allow me to finish
my sketch in half the time. When I'm sketching, I try
to break down the figure I want to draw into
basic shapes first, leaving any detail for later. I use the same approach
for a cartoony characters, as well as for some more
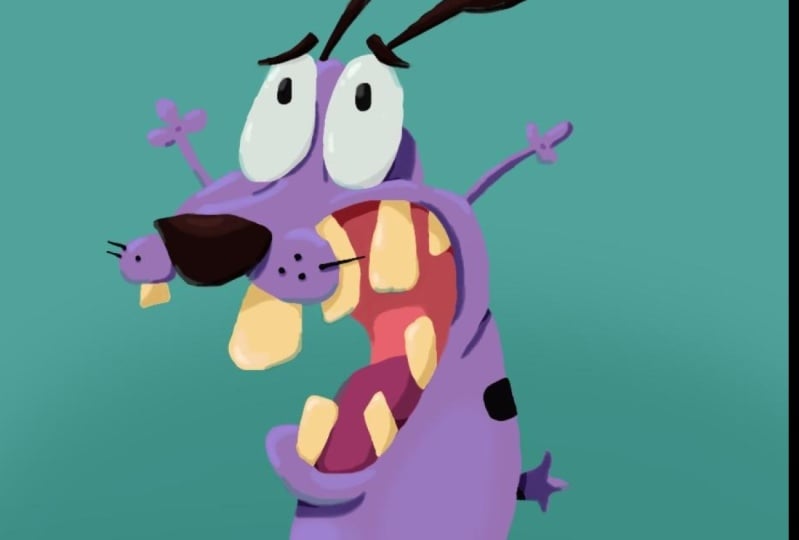
realistic and organic shapes. I think you should
have guessed by now who this character is. So let me give you an
example of what I mean by breaking down a character
into simple shapes. I think of the cranium
as a circle shape. I do the same for
the eyes and ears. The upper lips are like
a deflated football, and the cheeks are
two circles as well. I'm using the peppermint brush included by default
in the brush library. It leaves the mark similar
to an HB or 2B pencil, and it is in my opinion, the closest thing to sketching
with an actual pencil. But you can use
whatever brush you feel most comfortable with, or you can scan or
take a photo of a sketch you've drawn
traditionally as well. There's really no right
or wrong way to do this. After I've defined
my simple shapes is all about adding details and refining my drawing until I get the character and
expression I'm looking for. This sketch doesn't
need to be perfect, since we will not
use this line work in our final illustration. Just make sure to clean
your lines so you know exactly where all
your contours are. Don't be afraid to
steer away from the original design
of a character. Here I'm adding some fangs
to my design because I want to add a personal
touch to my piece. It might take you
some time to get used to drawing with
the symmetry option on. But trust me, it's
absolutely worth it, and it's a lifesaver when you need to finish a
piece in a hurry. Here I'm using simple shapes
again to draw his hair. You'll notice that it takes me a couple of tries
to get it right. So my advice to you is not
to try to jump straight into clean lines at the very
beginning of your drawing. Clean lines are the result
of many layers of sketching. Do several rough passes, lowering the opacity
of your brush, and drawing loose lines until
you feel like you're ready to commit to harder
and darker lines. And we're done. On to the next phase,
the color block.
9. Color Block: [MUSIC] We'll begin
our coloring process by making a blocking
with flat colors, separating and naming
the largest shapes of our subject in
different layers. [MUSIC] I'll start by creating a new layer and
placing it below my sketch. Then I'll pick my first local
color and begin painting without any regard for
the edges of my figure. Remember that in Lesson 1, I told you that your local
value was the value of an object without the
influence of color or light? Well, the same idea applies
with local or flat colors. They are supposed to serve as a starting point from which we will begin to add our
shadows and lights. A color blocking is
essentially a layer of color that serves
as a starting point. Flat colors referred
to areas of color painted in uniform or
identical tone and hue. [MUSIC] When I'm done coloring an area of my drawing, I'll pick my eraser with
the hard round brush selected to create a
nice and clean contour. I can also set my sketch
layer to multiply and lower its capacity to see
what I'm doing more clearly. [MUSIC] There are many ways to do a color blocking depending on what kind of
software you're using. Some people prefer the
Lasso tool, the Pen tool, or the magic wand while using
photoshop for instance. The cool thing about
Procreate is that it lets me use that feature I talked to you about
in my introduction, where if I paint a
straight or curved line, Procreate with
automatically polish it and then let me modify it. Only this time I'm not
using it to paint, but to erase all the
paint I don't need. [MUSIC] When I'm
done correcting, I'll open a new layer. This time I'll place it above my skin layer since the
eyes are in front of it. That is also the reason
why I didn't polish those edges because I knew they will get
covered in paint. With drawing assist
node activated, I draw a circle and Procreate
does half the work for me. Then I tap and hold
my screen with another finger to make
it a perfect circle. Then I tap and drag from
the color circle to the inside of one of my
eyeballs to color them. [MUSIC] During this process, we won't be focusing
on any details, but rather on establishing the major masses of our
subject in our color range. It's very important that every time you color
a new element, you do so in a different layer. Placing elements that
are the closest to us in layers above
our first layer and the elements that
are the farthest away from us in layers
below our first layer. It may seem like a lot of
work now but trust me, it'll make our life much easier later where we begin to
shade our character. [MUSIC] I will also make sure to include
the PSD file of this illustration so you can see how I organize my layers. This is a pretty
straightforward process. It's not particularly hard, but it can be time consuming depending on the complexity
of your character. So put some music on, loosen those shoulders,
relax and enjoy it. [MUSIC] Choosing the right
colors for a painting is a subject matter that
deserves its own class and that's precisely why I think this exercise of painting
a cartoon character is so useful because the color palette is
already established. Cartoon characters already have very distinctive colors
assigned to them, which we can use as flat
colors for our illustration. By the way, you've
probably noticed that I'm picking my local
colors from a palette. I created it by tapping the palettes tab in
the color panel, then I tapped the plus sign in the top right corner and
selected new from photos. Then I loaded a screenshot
of my character that I saved in my camera
roll and that was it, I had my palette. But you don't necessarily
have to use that method. You can pick and
choose your flat colors following your gut. Changing cooler tones for
warmer tones or vice versa. Don't feel limited or
afraid to experiment until you get something
that looks good to you. [MUSIC] Don't forget to
activate the drawing assist every time you
create a new layer by tapping on it and selecting drawing assist from
the options menu. [MUSIC] One common mistake
when painting eyes and teeth is to color them
using pure white, but you need to
remember that you need to be able to go lighter in value to add your direct light and highlights in those areas. I prefer to use a light gray for the eyes and a light
yellow for the teeth. But again, give yourself
permission to experiment with different options until you get something that
looks right to you. [MUSIC] It's also a good idea to deactivate your
linework layer every once in a while to check for imperfections and
wobbly edges in your flats. [MUSIC] Our color blocking is complete and we're
ready to start shading. [MUSIC]
10. Shadows: [MUSIC] Now it's time
to add our shadows. To do that, I'll start by establishing my light source and the direction from
which the light is pouring down my subject's face. I drew these blue guidelines
to help me establish where light and shadow
areas will begin and end, and also to help me
create any cast shadows. In this example, I'll
shade the nose by painting in my shadow where those
two blue lines touch it. [MUSIC] You'll notice that the red I chose to
paint my shadow is traveling towards purple
or getting bluer. By making that choice, I've already established that
my light source is warm and therefore all my shadows will be cool throughout the
rest of the piece. Everything we've
covered in this class revolves around
this simple idea. When you're applying shadows and lights to your local colors, you are changing their value by making them
lighter or darker. But every time you
change values, there's got to be a
corresponding changing hue towards a warmer or cooler
version of your flat color. The direction your
colors take will be determined by the temperature
of your light source. If it's warm, your highlights should be warm and
your shadows cool. If your light source is cool, your shadows should be warmer. [MUSIC] Now you've seen me using
my guidelines to paint in the shadow cast by the
nose of my character. Both the technique and the
brush I'm using during this whole process
are the ones that I showed you in the
lesson about value. I'm using a soft brush with a very low opacity
and I'm building my shadows working from the outside to the
inside of my figure, gently lifting my Apple
Pencil after every stroke. Don't forget, you can also sculpt your shadow shapes using the eraser tool. Quick tip. As I'm adding my shadows, I keep thinking about
each individual area of my character's face in
terms of simple shapes. I'm thinking about the cranium, the nose, the eyes, the mouth, the cheeks, and chin, essentially a spheres. The only difference is
that some of them are more elongated or less
perfect than others. You can see that reducing
your character to simple shapes is not only
useful to sketch them, but also to render them. I told you in lesson
number one to avoid going too dark
with your shadows. But it seems like
I failed to follow my own advice in the mouth area. No problem though, all
I have to do is tap on my clipping mask
layer and adjust it's opacity to make those shadows
a little less intense. I'm sure by now you
have noticed I'm adding my shadows
using clipping masks. To use a clipping
mask and procreate, I simply create a new layer
above any flat color layer. I tap on my new layer and select clipping mask from
the Flyout menu. Any changes made onto
a clipping mask will be clipped to the layer
directly below it. You can layer as many
clipping mask on top of your flats as you need. I could also use the
Alpha Lock option in the Flyout menu to add in
my lights and shadows. But if I choose to do so, all the changes I do to my
image will be permanent. I like to have the
possibility to try out different color
temperatures and delete any changes I'm
not pleased with. I typically use one
clipping mask for my shadows and another
one for my lights, and once I'm happy with the
direction my piece is taking, I merged them together. But that will happen
further down the road. [MUSIC] The process is always the same. To create a new shadow, I color, pick the local color of an area, change its hue, making
it slightly cooler at a little bit of saturation
and make its value darker. [MUSIC] Remember to work
slowly and progressively. Don't make your shadows
too dark too soon. It's better to keep
reevaluating and tweaking your values as you add more lights and
shadows to your image. [MUSIC] That's the point of using clipping
masks to be able to make changes to your
image at any step of the way and as you
deem them necessary. [MUSIC] Just remember this is my first shadow pass
and I'll probably keep adjusting my values as I keep
adding details to my piece. [MUSIC] Well, these form shadows are
looking pretty good to me. I think they've added a lot of volume to my character already. With that in mind, let's get to the next step,
occlusion shadows. [MUSIC]
11. Occlusion Shadows: [MUSIC] Occlusion shadows, also known as ambient occlusion
or contact shadows are a type of shadow that is independent of the
directional light source. To select the color of
my ambient occlusion, I simply pick the color of my form shadow and
make it a little lower in value and increase
a little bit of saturation. It also doesn't hurt to make the hue a little
cooler if you wish. To paint the shadows, I need to make my brush a lot smaller in order to
create a hard edge. Then I'll make it slightly bigger to create a
smoother transition. You can think of this
type of shadows as the places where
two surfaces meet, where the light has
no way of getting. You'll see me painting them where the nose meets the mouth, where the eyes touch the face, in the corners of the mouth, the inside of his ears, and any other place I think the light would have
trouble getting in. I mentioned that light
would have trouble getting into the corners of
my character's mouth, which will create a cast
shadow over my teeth. To achieve that effect, I'll now use the selection tool. If I tap the
"Freehand" option in the menu bar at the
bottom of the screen, the Lasso tool will
let me draw freely over the area that
I want to work on, creating a dotted line indicating the area
that I've selected. When I'm happy
with my selection, I simply tap on the
gray dot that appeared when I started drawing
to close my selection. Now I can use my soft brush to paint at the very
edge of my selection, effectively creating a hard
edge and my cast shadow. Now I just have to repeat the same process on the other side of my
character's mouth. Then I have to select
my teeth and darken the cast shadow I painted
earlier a little bit more. [MUSIC] During the flat colors phase, I painted and shaded my teeth
as one solid structure. But the selection tool
allows me to separate each individual tooth and paint the occlusion shadows between
them quickly and easily. I simply have to go
over the edge of one tooth and select a small
area of an adjacent tooth. Then by using a soft brush, I start painting
near the edge of my tooth to create
the occlusion shadow. This way, I can give the
impression that his teeth are in contact with each other and that they are one in
front of the other. Now I just have to repeat the same process
five more times. [MUSIC] I think that covers the occlusion shadows present in my character's mouth. Let's move onto his face. I will add some
occlusion shadows in every area where
two surfaces meet, like the eyes and his forehead or his cheeks and his eyes, at the top of his head
where that lump of hair and his cranium skin meet. Another obvious place to add an occlusion shadow will
be the inside of his ears. I think this part of
the process is when our characters really
start coming to life. In my opinion, occlusion shadows really sell the illusion
of three-dimensionality. As I mentioned in
the previous lesson, adding shadows to your image
as well as adjusting how light or dark they should
be is a long process. I usually don't paint
in my lights and shadows so orderly
and methodically. Being completely honest, I tend to go back and
forth from shadows to light and back to shadows in a much more intuitive
and unruly fashion. But for the sake of clarity, I'm trying to keep things
as orderly as possible. Just remember that most of the time you'll have
to make a second or even a third pass in
order to get the values of your form shadows and your
occlusion shadows right. Great. That's it for
our occlusion shadows. Onto the next step, painting in our light.
12. Lights: [MUSIC] This is probably the easiest
part of the process. To create a highlight, I'll simply color pick
my local color and go on the opposite direction in the hue slider
towards a warmer hue. Then I'll decrease the
saturation considerably. Finally, I'll lighten
this value by sliding the bottom
slider to the right. But remember, try your best
to not go to pure white. I'll begin by adding
direct light to the iris or pupils
of my character. This is pretty much like
adding light to that sphere we painted in gray scale at the
very beginning of the class. Next, I'll paint in
the direct light on the nose of my character. I make sure to desaturate
my local color and move it towards a
warmer hue this time. Don't overdo it, a
little bit will do. [MUSIC] Now, it's time to
add some highlights. This should be the lightest
values in our composition. I'll go with a super light red for the nose
of my character. [MUSIC] Try to be subtle
with the highlights as well. If you overdo them, your character could end
up looking too plasticky. [MUSIC] I'll also put a highlight in the lower lip since it's facing
the light as well. [MUSIC] Next, I think I'll add some
direct light to his tongue. But this time, I'll
use one of the texture brushes that come by default with Procreate instead
of my regular stuff brush. After a few experiments, I decided to go with
the old skin brush in the materials section
of the brush library, but you can try other
texture brushes as well. [MUSIC] For the
highlights in the eyes, I'll use almost pure white
and a hard round brush. [MUSIC] Don't forget to turn off the symmetry option
while painting highlights, since all of them
should be facing right towards the light source. [MUSIC] I think that in order to make
these highlights pop, I need to darken the
value of the shadows in the eyeballs to create a
little bit more contrast. This is what I meant by
making several shadow passes. As you progress
with your painting and keep adding detail, this type of adjustments will become more and more necessary. [MUSIC] Then with the
help of my eraser, I'll create a softer edge at
the bottom of the highlight, erasing it with a soft round
brush at a very low opacity. [MUSIC] I think we're done. Now, it's time to work
on our background. [MUSIC]
13. Backgrund and Reflected Light: [MUSIC] To work on my background, I like to create a new
layer and place it below every other
layer in my project. Now, it's time to choose a
color for our background, which will then inform us about the color of our
reflected light. I love how these
neutral pink looks against the more vibrant
colors of my character. But since I gave him fangs, I don't think it fits
the mood of the piece. I need something a little
darker and macabre. I decided to go with
a dark purple since my character is a pale yellow and purple is
it's complimentary. Then I'll pick a lighter
version of that purple and create a gradient using
a big soft brush. Then I can use the
Gaussian blur adjustment to make it even smoother. Now, I'll add some
reflected lights by picking a lighter and more desaturated
version of the purple in the background because
this phenomenon is produced by the
light produced by your light source bouncing
off your background. Mind you that this type of
light is less intense and only visible in the shadow
areas of your painting, so make sure to paint it
gently and smoothly by using a soft brush with
a very low opacity. I will add reflected light in every area of my character
that's facing the floor, like the bottom
of the upper lip, the bottom of the
ears, the chin, the bottom of his hair and
the bottom of his nose, and also the bottom of his eyeballs and the
bottom of his pupils. You must also keep in mind
that its value should be lighter than your
form shadow value, but darker than your
halftone or local value. To help you with that, I think this is the
perfect time to introduce a little hack
that can help you to keep your values under control even when you're working
directly with color. This is what you need
to do. First, create a new layer and place it above every other
layer in your project. On the right-hand
side of your layer, you'll see one or more letters, these tell you which blend
mode is active on your layer. By default, normal
mode is active, shown by the letter N. Tap it to open the
"Blend Modes" menu. Now, select the "Color" option at the bottom of the list. Now, paint your whole layer with white paint and you have a gray scale
version of your piece. This will make it
a lot easier to judge if your values
need adjustments. The awesome part
is that by using this layer with
this blend mode on, you get two illustrations
for the price of one, one in full color and
another one in gray scale. I love how reflected
light really helps to sell the true dimensionality
of the character. I forgot to mention
that I'm still creating new clipping mask and clipping them to my
local color layers , but at this point, you could choose to paint
reflective lights in your shadow layers or
your light layers, or you could merge
those layers together to keep things more
simple and organized. You'll learn more about that on the next lesson. We're done. Now, let's go to our final
lesson where we will refine and add some final
touches to our project. [MUSIC]
14. Final Touches: [MUSIC] Now I'm going to do something I think I
should have done earlier, which is merging my layers. You can merge a layer
by tapping on it, bringing up Layer Options
and then tap "Merge Down". Here I'm using another method. I'm merging multiple groups by pinching them together
with two fingers. Simply pinch together the top and bottom layers
you want to merge. Much better. Now what I'm going to do is create
a new group of layers by tapping on a layer and then selecting every other
layer I want to group by sliding my finger to the right on top of each one, then I'll tap on the
option "Group" at the right corner of
the layer panel. After I group my layers, I will swipe left with one finger and select
the option "Duplicate". I'll tap on my new created
folder and select "Flatten". Now I have a copy of my
character in one single layer. It's time to add
some final touches to our painting to
really make it pop. I'll start by adding a texture. I've gathered some textures from the Internet
and saved them in a procreate file so I can
have easy access to them. But I'm pretty sure
you can find a lot more by browsing
through the Internet. I'll pick this old book texture. I'll press in slide
with three fingers in my screen and
a menu will pop, then I'll tap on "Copy". Then I will go to My File, I slide three fingers
down and tap on "Paste". The texture will
appear in a new layer. Now I have to
enlarge it until it fits my Canvas using
the Move Tool. Next, I'll tap on the layer and choose between
the different layer most procreate or any digital
painting software offers. First I try multiply, then I'll scroll down to see if there's something else I like. I'm really digging
this divide mode. It has made everything cooler. Now I can go to the
Adjustments Menu and add a little bit of noise
using the noise filter. I'll make it harder or smoother sliding my finger
left and right. I think I'll add some blood in his fangs by creating
a new layer above my teeth and playing
around with the brushes in the elements section
of the brush library. I lower the opacity
of the clouds brush and create some
bloodstains on his teeth. This clouds brush also allows
me to add a little fog in the background that I think will add a nice touch to the piece. I just need to
create a new layer, place it above my
background and paint away. Then painting on the same layer, I'll pick a hard round brush
with a rather small size, low rate opacity and paint
in a little rim light. I think his hair could
use some work too. As you can see, I broke the edges of the hair on
the left side of his head. I did it by selecting the fine hair brush in the materials folder
in the brush library. Then I color pick the sample of his hair and added some
loose hair strands by adding some
brushstrokes following the curved lines of
the edges of his hair. When you're done adding
details to your character, all there is to do is keep
adjusting your values using the color mode layer we created earlier until you are satisfied. You can keep playing around with the vast array of filters and effects your
digital software of choice provides and with all the incredible
texture brushes you can find online if
you look around. Once you are happy
with the result, it's time to save your file and export it to share
it with the world. Congratulations. [MUSIC]
15. Final Thoughts: [MUSIC] Hello everyone. If you made it all
the way through here, there's just one more thing
left to say, thank you. I really hope you enjoyed
watching this class as much as I enjoyed
creating it. Believe it or not, during the long process of
writing, filming, and editing this class, I solidified a lot of
concepts that I understood. I made this class
trying to include all the theoretical and
practical information I wish I had when I first got my
hands on a drawing tablet, and I barely scratched
the surface. This class is meant
to motivate you to deepen your understanding
of color theory, to study the old masters, as well as allow you to
understand the workflow of many contemporary
artists that upload their digital painting
process videos to the web. Remember that getting
good at anything is all about effort
and consistency. Don't hesitate to leave a
comment or review of the class, and please don't
hesitate to follow me to receive more content like
this if you like this class. Once again, thank you so
much for taking this class, and I'll see you next time. [MUSIC]
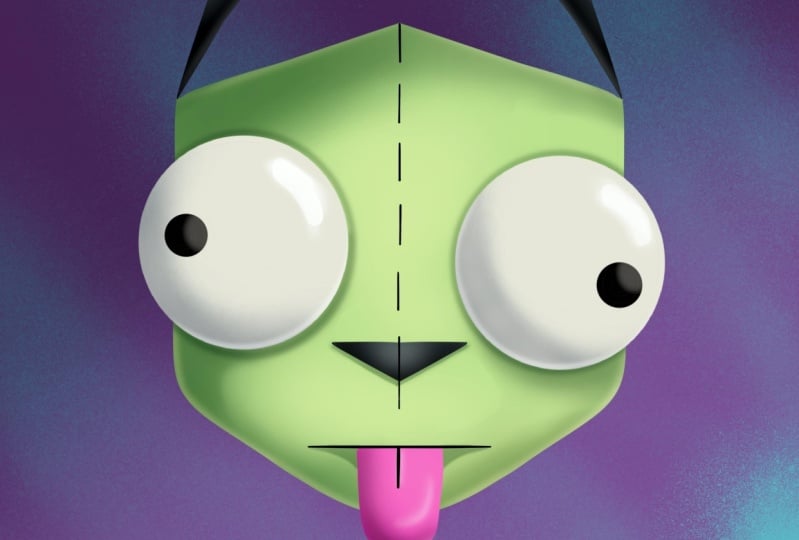
16. Bonus Video: Student Project Critique #1: Hello everyone and welcome to the first installment
of the critique rig, a space dedicated to offer
you some feedback on the class projects you submit through my Skillshare class. Coloring digital art, a
practical approach. To date. It will feature artwork
submitted by Edna. I'd like to start
by pointing out all the good stuff
about your project. First of all, great drawing. It's impressive to think you
didn't even use a stylus, but rather your computer
mouse to draw it. So kudos to you. Secondly, it seems
to me you have a very solid understanding of older lighting principles
discussed in class. I see you use one light source. I can see the direction
in which the light is traveling through
our cast shadows, occlusion shadows, and
even some reflected light. That lets me know you have
a pretty good grasp on the concepts and ideas
discussed in class. In a solid enough
foundation to keep building on it and improving
through practice. But there are a couple of
issues with your painting. To better illustrate them, I'll take advantage of
the color layer hack I showed you in lesson 13. In case you forgot,
here's how it works. You open your Layers
panel, create a new layer. Tap the letter N to open
the Blend Modes menu. Then select the option color, fill the whole layer
with white paint, and you have an
instant grayscale version of your project. I'll duplicate the layer
to be able to show you the before and after versions
of my quick paint over. The first issue I see has
to do with your values. Can you notice that even when
the colors are different, the value of the
background is almost the same as the value you use
to color your character. In fact, if you squint
your eyes in some parts is difficult to see
where the character ends and the background begins. That is called a lost edge and it's not always a bad thing. In fact, many artists use this technique to enhance
their compositions, improve their shape language, and direct the attention
of the viewer. Making them lose interest in
the areas that blend with the background and pointing their eyes towards focal points. But in this case,
given we only have one character in a
solid color background, my guess is that it
will be better to have a clearer and higher contrast between character
and background. The second issue has to do
with color temperature. I feel that the difference in temperature between
the areas in light and the areas in shadow could be a little bit more
emphatic or dramatic, as it is, the purplish
stones you use to color carriage are
both pretty cool. I feel like they also don't
have enough contrast. So we have a lack of contrast in both temperature and valid. And I can address both issues by color picking the
purple you used in the shadows and
making it a bit more desaturated,
brighter and warmer. I will also color the inside
of his mouth a little darker to create a bit more contrast
with the yellow teeth. Now you'll see me
coloring the teeth in a lighter yellow to create a
bit more contrast as well. Finally, let's address the darkest areas
of the character, which are the nose, the
ears of the browse. While using black or
any color close to it, you might get tempted to be
very conservative when it comes to paint in
daylight. But don't be. It is as important to have a clear distinction
between light and shadows in those areas as it is when you use lighter or more
vibrant colors. And finally, never
neglect adding bright highlights in
areas like the notes. Especially if your
character is an animal. Dogs, cats, bears,
wolves in creatures alike tend to have very
wet and bright noses. But focus in the
eyes since they are the ultimate focal point
in any portrait painting. Now when I activate
my Grayscale layer, hopefully you'll be able to
see a clear distinction, a higher contrast
between the parts of the character Dorian light and the ones that are in shadow. It's getting a little better. But I think we can get
an even higher contrast this time by altering
the background color. I'll use a less saturated and slightly brighter
version of this green. And what that does is makes the background recede
into the distance, making our character pop seem closer and draw the
attention of the viewer. So in conclusion, every
time you want to figure out if your values and color temperature are working nicely. You can do two things. When working digitally. You can use a white layer in color blend mode to get
a grayscale version of your painting that
will remove color from the equation and let you
judge your value selection. And if you're working
traditionally, you can simply
squint your eyes and see if the areas of
light and shadow are distinguishable from one another in both value and
color temperature. Here I'm using the
Gaussian blur tool to simulate what happens
when we squint our eyes. If you can see the border
between light and shadow and warm and cool color families that we discussed in lesson 6.7. With enough clarity, it probably means you need
to adjust your values. And that's all for the
quick tip of today. Hopefully you'll find
this information useful and helpful
in the road ahead. Lastly, I'd like to
encourage you to post your artwork in the project and resources section of the class. I'm looking forward to see what you're working on
and that will be more than happy to critique your artwork and
help you succeed. Also, don't hesitate to leave a review of the class
in the review section. It may not seem like much, but it really makes a
difference in terms of making this class accessible to
more people in the platform. Thank you so much for your time and I'll see you very soon.
 Mau Perez