Transcripts
1. introduction: Hello, everyone. I am Verna, and I've been working as an art educator for
the last five years, and welcome to my class Color pencil Shading
master class. So in this class, you will
learn all the basics and all the fundamentals about color pencil in a very
beginner friendly way. In this course, we will create a realistic lips drawing
together while learning the important
layering techniques and blending techniques
step by step. First, we will learn some
essential shading and blending techniques
that are very important for creating smooth
and realistic artwork. After that, we will go through the art materials and tools
required for this drawing. Then we will draw and shade
artwork step by step, while understanding
how to build the tape, texture, highlights,
and realistic details. Throughout the class, I will share helpful tapes
techniques and common mistakes to avoid so you can improve your
confidence while drawing. Remember, realistic drawing is not about perfection
from the beginning. It's about patients
observation and regular
2. Class Project: Now let's talk about
the class project. For this project, simply
follow the techniques and methods that I will teach
you throughout the course. You can either recreate the same drawing that
I'll be demonstrating or choose your own
reference image and apply the same shading
and blending techniques. Once your artwork is completed, upload it as your class project. This will help you practice
what you have learned, and it will also allow me to see the creativity
and progress. So don't worry about perfection, focus on learning, practicing
and enjoying the process.
3. Art materials: Hey, students, are you ready
to bring your creativity to life with just a handful
of color pencils? In this course, you'll learn basics drawing and
shading techniques, how to blend, layer, create textures, and
a step by step guide. But first, you need to know
basics about color pencils. Okay. As you know, that there is different types of color pencils
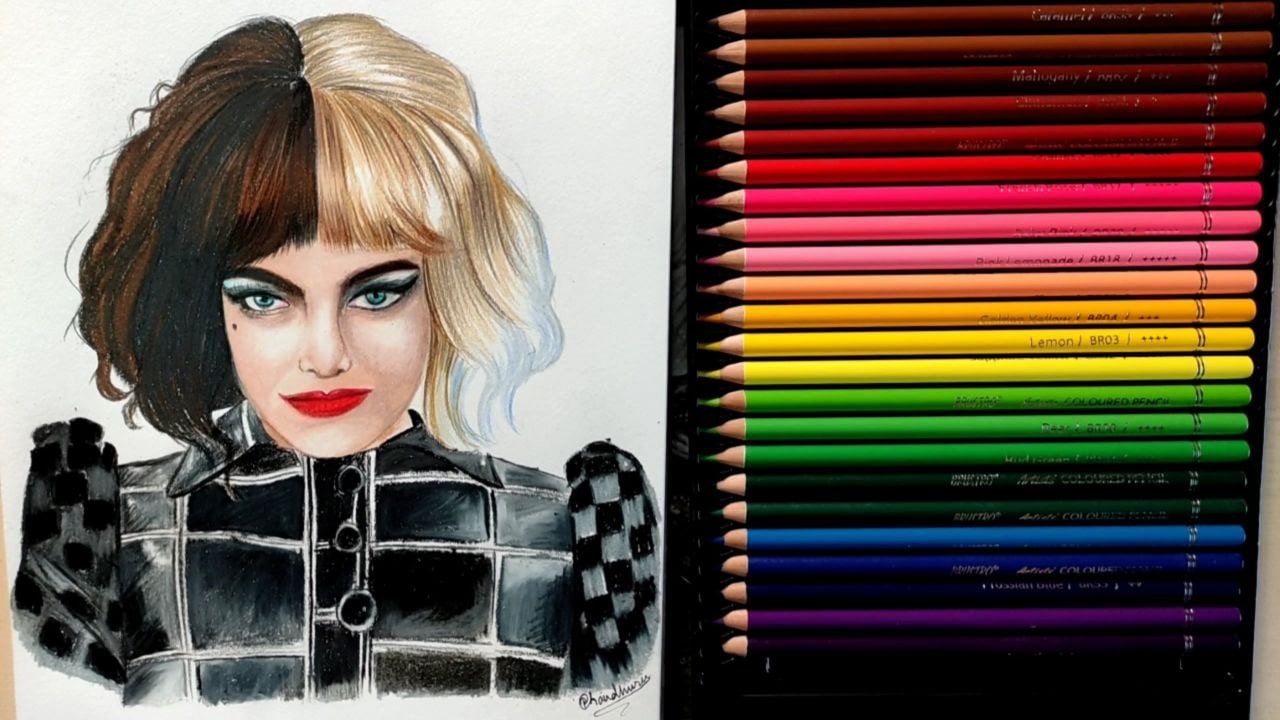
available in the market, and I have a few of them, and what are these? You can see two popular
brands here like this favor Castle polychromos
and prisma color premiere. But they are actually different. The price range
is quite similar, but they are different. Let's note something. This is color pencil. So then generally, there are three types
of color pencils. First, wax base. Second, oil waste. Third, water soluble, or
you can see water waste. So these are the
basic color pencils, but there are different
color pencils available like pastel pencils. But for this course, we don't need pastel pencils
or water soluble pencils. So let's learn the basic thing. What is water soluble pencils? They are basically water based. Water based. Okay. Because this is the water best
color pencils that I have, and they are generally soft. But you can use this
pencil in, like, watercolor drawings,
watercolor paintings. For watercolor portrait, look
at this. These are softer. You can use them for portraits also or
realistic drawings, but they are
generally very soft, so the lid may break easily. So for this course, we don't need these water
based color pencils or pastel pencils. Pastel pencils are great
for pastel drawings, like the soft pastel drawing. Okay, they are good for
soft pastel drawings. So we also don't
need these pencils. So now, what do you need? You can use Wax base
or Wild base pencils. Okay, so let's talk about
wax base and Wilby pencils. Okay, so you know, there is two popular brands
available in the market. One is favor castle poly chromos and second is Prisma Color. So I have two of them already. This is prisma color, and
this is favor castle. Prisma color is wax based. Favor castle polychromus
is oil based. Okay. So what are the
difference between wax based and oil waste? Let's see. So this is
the zest that I have. And these Prisma this is
favored castle polychromos, and they are very
primial looking pencils. I love the shade range also, and these are set of 60. Let's shade this. These are not like these
are very soft also. These are oil based but soft. Okay. So this is oil based. So I also have this is
prisma color, guys. I also have the prisma
color color pencils. This is oil based. Oh, sorry, wax based. Why I am confused
between wax base. And you can see this
is wax based pencil, so a little bit
messy, but wax base. Wax Based pencils
is more softer, much more softer
than oil base. Okay. If you're using polychromos, you will definitely feel
soft like soft shading. But generally, oil waste
pencil is little bit hard and less softer
than the waxpte pencil. And if you're like, shading skin, wax Base
pencil is better for that. And if you're drawing
and if you're like, if you need to draw
minor minor details, then il base pencils is better. So for this course, I'm going to use
wax based pencils. So I will suggest to you
to buy any one of them. If you're a beginner,
I think you should go for wax based. But if you are, like
medium type person, you know basics, then you can
use this polychromo also. Love my prisma color pencils, so I'm going to use this prisma color
pencils for this course. Okay. So for this course, you need a set of 48
or more shade box. Okay. But, uh, 24 set
is 24 set is also okay. But I would suggest you to
go for 36 or more shade. I have this prisma color, and I have this 72 set,
and they are very good. But one bad thing about
this is they break easily, so it can be sometimes
little bit costly. Okay, so let's keep it aside. Now what paper you need? You need more than
one eGSMPaper. You should use any paper which
have more than one eGSM. Now let's talk about what
shades we're going to use. So here I'm going
to use this shade, which is PC 927. Then we're going to use a little bit of
orange shade also. This is PC 1002, PC 1002. This is a little bit
of orange shade. Then PC 917, PC 917. Then we're going to use
this PC 918 PC 918. Then this PC nine to
one PC nine to one. This color, this is PC 922. PC 922. Then this color, this is PC 926, PC 926. Another color, I
choose the sellaron, but this is nine
to four, then 930. PC nine to four and PC 930. And white and black is the basic one that
we're going to use. Then I'm going to use this 9947. Then this color, this is 948. And a little bit
brown tone. So 945. Then I'm going to
use this dark color. This is 909. This light color, which is thousand four and 913. Also this color, this is 909. And PC 911. So these are the shade
wrens that I'm going to use for this class.
4. Outline Drawing Techniques: Students, let's
start the fun part, building the lip shape. So you can use different
methods like free hand, or you can use grades for a better idea of how
to draw the outline, or you can use tracing method. So use any method that you like. Here I am using a
free hand method. I already draw some shapes to draw better while
recording the video. So you can use free hand method, and to improve your free hand
drawings, what you can do, you can take 30 minutes, set a timer of 30 minutes and
draw at least one outline. You can choose any difference. You can choose your
reference from Google, Instagram or Pintrest Pintrest
is a very good option, or you can use some
AI tools to create a reference image of your choice and then
draw the outline. In this way, you can improve your outline
drawings better. On the left side of the screen, you will be able to see the reference image
that I'm going to draw. So we are going to
draw this step by step slowly and carefully. So don't rush the process. Take your time observing the
shapes and the proportion. As you can see here, I'm careful drawing
this water drop and then I'm drawing
this lower part. So take your time observing the shapes and proportions
before making each line. While sketching the outline, try not to apply too much
pressure with your pencil. Keep your hand relaxed and
use very light strokes. Think of this as a
stage of building the foundation of
your drawing rather than creating dark finer lines. Light sketching will
make it much easier to fix mistakes and refine
the shape later. So if you find free hand
drawing a little difficult, don't worry at all. That's completely
normal for beginners. Very helpful trick that
I used to use previously is I used to print out a reference image on
A four size paper. Why? Because having the image, having the printout of the reference image
physically in front of you can make it much easier to observe all the details
in the reference image, and you can compare
the proportions also and practice accurately. And in this way, your
outline will turn out more, you know, more realistic. So we completed the
outline process, and now we need to
select all the shades, all the color pencils that we need for this drawing
for the shading process. So mostly I'm selecting
these kind of reds, maroons and dark pinks because I can see that I need those kind of colors
for this drawing. And I have this prisma color. Prisma color color pencils
are mostly wax based. And I have this 72 set. So if you have the same on, you can use these colors
that I'm going to use. Black and white is a must
and these orange and colors, you can see the, you know, color names on the screen, and we need some green color to shade the strawberry part. But I will show you
that on the next parts, but mostly we need these colors. But if you don't
have prisma color, then you can choose
similar colors like this.
5. How to Shade Base Layer: Alright, everyone, now we are going to begin the
shading process. So take your time and work
slowly and patiently. Don't try to make the
drawing dark immediately. Realistic shading is all about
building layers gradually. And while shading, make sure to sharpen your pencil
regularly in between. A sharp pencil tape helps you to create a cleaner details, smoother strokes,
and better textures. Here I am using this
kind of sharpener. This is mechanical sharpener, so you can also use that. You know, if the pencil
become too bland, it becomes harder to
control small details and your shading may start to
look rough and patchy. So always sharp
your pencil first. Now, for this part, I am using this
dark brown color. Okay. And previously, I was using that orangish
type of tone. I already shared all the pencil shade
details in previous part. So students here, I am
using PC 922 shade. If you don't have prisma color, you can choose similar
shade like this. And this is basically kind
of like a orange shade. So following the
reference image, I am shading with this
color very lightly. And in one direction. You also have to do this to create the perfect
blend of colors. The main mistake that
Wigners do is they try to blend the colors
from the beginning, but don't do that. You drawing will look
flat if you do that. So don't do that. Try to shade the darker and the
lighter areas first. So here I'm using drawing, the first layer, and I'm
using the base color. And I choose this base color. And you can also use the dark to light method
because you are a beginner. So I would recommend you to use this light
to dark method. Now we are going to slowly start increasing the depth and the
darkness in the drawing. Remember, when creating
realistic shading, we should never jump directly to the darkest black
tones immediately. Instead, we build the values
gradually layer by layer. At this stage, carefully observe the reference image and notice all the different tones
and shades you can see. Even in dark areas, there are usually
multiple layers of values instead of
just pure black. That's why we should slowly
develop each tone step by step to create a smooth
and realistic effect. You can see that here I'm
drawing the lines of lips, and I am not using
black directly. I'm slowly applying
different types of colors, but not the black on. Most beginners, you do this mistake that they use pure black tones, but
you shouldn't do that. Now, start applying start by applying medium
pressure and gently, you know, deep in the
shaded areas little violet. Be patient during this process because realistic
drawings became beautiful through
gradual layering, not by pressing too hard. And you will blend
this thing later. But now, you need to shade
the darker areas first. Okay. So you will notice that as we slowly
build the darker sheet, the drawing will start to gain more depth,
contrast, and volume. The layering technique is one of the most important secrets to achieve realistic artwork,
realistic drawings. So keep observing carefully
and work slowly and build every shade gradually instead of rushing straight
into into dark tones. Here, I am using the red tones and I am laying
it on top of each other. And you can see that I
apply some dark shades too, but that was not black. There was a dark brown shades. And I am keeping it. I'm following the
reference and shading it. And you can see here I'm
using the dark tone, and I'm drawing the lines, but I didn't use a
lot of pressure. I use light pressure.
6. Shading the Upper Lip: All right, everyone. In
the previous chapter, we completed the first layer, and now we are going to
use this PC 922 shade. And if you don't have the
prisma color pencils, you can use similar
shade like this. So the first layer was very important because it helps us to create the base stones and prepare the surface
for the Dipper wax. Now we are going to move
onto the second layer, which is the top
layer of shading. This is the step where
drawing slowly starts to gain more depth,
contrast, and realism. To build the top layer, the top part of the lips, we will carefully
apply this shade over the first layer and continuing the following
the same method, the blending process that
I explained earlier. The main difference
this time is that we are going to slightly increase the pencil
pressure and work carefully on building
reacher tones. And now we are following
the blending method. Remember, even though we are
increasing the darkness, we still don't have to rush and press too
hard immediately. Continue building the values
gradually and smoothly. Use control strokes
and blend properly. While working on this top layer, pay close attention to the carves and
structure of the lips. The upper areas usually contains different type of
shadows like deeper shadows, and this will help
create dimension and make the lips appear more realistic and
three dimensional. As I mentioned before, layering is one of the most important techniques
in realistic drawing. If we directly applied very dark tones
from the beginning, without creating a
proper waist layer, the drawing would start to look flat, rough, and unrealistic. That's exactly why
we first created a lighter foundation with
all the shades that I use. Then I'm going to apply the main shade to
blend the first layer. This process will help us
to blend more smoothly, and this gives the artwork a softer and more
professional finish. You will notice that the more patiently you draw ar
and blend the tones, the more realistic the
lips will begin to look. So while shading, keep observing the reference
image carefully, increase the pressure
little by little, and focus on smooth blending. Try to avoid harsh patchy areas and instead create a soft
transition between the tones. Take your time with every step because
this top layer plays a very huge role in giving
lips proper dimension, volume, and realistic depth. The better you build the color
and you plent the layer, the more alive and realistic your final
artwork will appear. Now, if you fail to
do what I am doing, don't worry because
the more you practice, the more professional your
art is going to look. And yes, color
pencil takes time. This is a slow process. Color pencil medium is
quite slow process medium. So we completed this top layer, and now we're going to move
on to the next shading area. So let's move on to
the next shading area.
7. Basic Shading Techniques: All right, students, now we
have successfully completed the top part of the lips and finish that shading
process also. The lips are already starting
to look more dimensional. So now we are going to focus on the inner
part of the lips. So let's begin with this part, and we are going to shade this part with this
dark brown color. At this stage, we are
not blending yet. Right now, our main goal is to simplify to place and build
the shading carefully. So don't rush into
blending immediately. Instead, focus slowly
setting the tones, creating the texture properly. And here I am outlining
all the strawberry area, and I'm shading this area
with this dark brown color, and I'm going to blend
this area later. But for now, I am just
shading this area. Alright, now that
we have finished the shading that inner
textured part area, let's move on to the
water drop section. Okay. This part is very important because
highlights and water drops add extra realism and make the artwork looks more
alive and glossy. For shading this area, we'll follow the same method. That we used earlier. First, we will create a
soft light base layer, building a sobbed
light foundation before adding darker alles. This helps maintain smooth
blending and prevents the drawing from looking
muddy and w harsh or flat. So after creating
the base layer, we will slowly start adding cube tones and
darker colors on top of it. Like you can see that I
completed the base shading. For this course, I'm only
using the color pencils, so I'm following this method. But there are different
methods if you use mix media. I will show that
on another course. Okay. So now I am going to add some darker colors on
top of the base layer, and I am slowly going
to build the area. Then I will add another color, and then I will blend
all of them together. This technique helps to
create transparency, depth, and a more
natural finish. It will look more realistic. So as you continue, we will slowly blend the tons. We will slowly blend
everything together. From the difference, I can
see that in this place, there are some darker values. So what I'm doing here is I am adding this
dark brown tone, and I am layering this color
on top of the base layer. And then I am going to
use this red color, and I'm going to blend
everything together. So that it will look more even, and it will give
some depth to it, and it will look
really realistic. These are the few short
techniques that you can follow to create realistic
color pencil artworks. And then I'm going
to blend everything. And now I am using a
little wet pressure. Now, slowly blend
everything together. And once again, walk slowly, keep your strokes controlled and focus on layering instead
of rushing into dark tones. Realistic drawings always
become better through patience. So soft laying and careful
blending will make your drawing looks more
realistic and better. So practice and draw better.
8. Shading the lower part: So students, now let's draw that lower lip part
and to draw this part. At first, I'm using
this deep pink colored. This is a deep dark pink color, and I've shade with
this color first. Then I'm using this
dark brown tone, and I'm shading this area. So I already mentioned
the shading methods in all the parts in all
the previous parts. So you already know what to do, use light pressure
for the base layer, and then after you complete it, layer the darker toe and
then blend them together. So here I'm outlining it, and then right now I am
blending this color with the same deep pink color
that I used previously. And I am right now
outlining this area. Now let's use a little
different method because for the top
part of the lips, I use light to dark method. But now I'm going
to show you how to apply dark to light
shading method. So it's also very quite easy. So first, you're going to do, you're going to use a
dark shade like this. Like here, I'm
using a deep pink, like a dark pink tone, and I am shading
this area with it. So this is going to
be the medium tone, and now I'm going to slowly shade all this area
with this color pencil. I already mentioned
all the color shades, all the shades that I'm going
to use in the first part. So after shading
with this pencil, I'm also outlining some areas where I think I need to outline. Remember, we are still
building the base stones, so soft layering is
very important here. While shading, carefully
observe the natural curves of the lips and follow the direction of the lip shape
with your pencil strokes. This helps to create smooth texture and make the lips look more softer
and more realistic. Try to keep your strokes
clean and control. So the shading looks clean. And when you blend, it will look very natural. Once we finish the
building the lips layer, we will start applying the darker tones
and the red tones. Here you can see
that I am applying this dark brown shade and
I am shading with it. So it will look so it will
look very good shaded, and now I'm applying
this base layer, which is the same red
that I used previously. And now we are going to
blend everything together. You need to apply a
little bit more psure for this blending process
to blend it smoothly. This red layer will
help bring the warmth, the richness, and the
life into the lips. Instead of coloring the area, flatly, slowly build the
red tones little violet. Really layering colors gradually
helps create depth and gives the lips a more natural,
realistic appearance. As you continue shading
with the best red color, you will notice the lips
will slowly start to look more vibrant
and dimensional. So for the hand pressure, you can keep it medium to light in the beginning and then slowly increase the intensity only where the darker
tones are needed. Okay, so after I
apply the red color, you can shade the darker
area a little bit. As you blend, you will notice the lips becoming more softer, smoother and more realistic. It feels like the color
will start melting together naturally and creating a
glossy and dimensional effect. A few things to remember. Don't rush the shading process. Well colors layer by layer. Keep observing the
reference image carefully. This is very important to keep observe your reference
image if you are following any reference image and maintain the soft pencil pressure
in the beginning, then blend gradually for
smooth, realistic result. The more patiently work
on layering and blending, the more realistic and
professional your lips is going to look when
you finish a dry. And now, here I am shading this drop area
with a dark brown tone, and I'm going to shade
little bit here. First, I'm outlining with
this dark brown tone. Then I'm shading a little
bit with this area, and then I'm going to
use another shade. This is kind of like a
yellow type of shade. And here I'm shading
with this color pencil. This part was also completed, so let's meet in the next part.
9. Shading the dark tones: So students I completed
the lower but drawing, lower lip pd drawing. So now let's color this area. And here as you can
see that I choose this light pale skin
tone type color, and I am blending this area with this color
so that it looks realistic, and I'm going to add
highlights and shadows around it later after I completed
my desired coloring process. So you can see that here I'm
using a red, brownish tone, and I'm shading this area, and I'm going to slightly shade it so that
it looks smooth. You can see that I'm
lightly shading this area. So you can follow my steps and complete the whole
drawing process. And now let's blend
this area with the previous color pencil, which is light pale color. So I completed the
blending process here, and it looks good. I'm going to add a shadows
and highlights later. And here you can see that I
am using this dark brown. This is almost like
a black color. And let's use this color
and shade this area. So here you can see that I actually I'm using
this dark green color. This is also known as sap
green in some color palette. So here you can
see that I'm using dark brown dark green tone. So this is actually leaves, solids color the leaf
part of the strawberry. So for this part, you need three basic colors. One is dark brown
sorry, dark green. Then dark green is black. But this is optional, but you basically need
three green colors. One is light, medium and dark. These three tones. And you can choose similar tones according
to your reference. Here you can see that I did
use the medium green tone, and now I'm using
dark brown tone. And at last, I'm going to
use the light light tone, which is very light, almost like a yellow color. And I'm going to use
that for blending. Okay? So here also, I'm following the same steps. First, I'm using dark color, and then I'm going to
use the medium color. And then I'm going to blend the whole thing
with light green. Now let's color this area with the same black tone
that I used previously. So this color is
actually not 100% black. This is like a 95%
black colored tone. It has brown hint in it, but I'm using it. And you can also use
the black color also. But I choose this color. That's it. Nothing special. And just shade this
area and blend it after you've completed the
first shading process. Okay. So now let's blend
this with dark brown color. And I'm going to I did
mention all the shade names. And you know that color pencils
are best for beginners. Why? Because this is one of the easiest and most
beginner friendly forms of drawings on
Sunder staand, yeah. But and this is
hassle free, also. You don't need to, like, in your hand or anything. You just need few pencils and paper and just shade
with it, uh And, um, you know, realism is
all about building depth, and that's what I'm
doing here, right? And color pencils are
so perfect for that. You don't need to blend
like a pro from the start. You can just start with slow
baby steps and understand the basic some key methods
that I am using and I dictate you in this course and just
slowly shade all the area. Realistic color pencils
art isn't hard. Yeah, it might feel
that it is very hard, but it's just a slow
and patient process. And that's actually
a good thing. Anyone can do it, right? You can do it, and I can
do it. So anyone can. So you just need some
right techniques, and you will learn
eventually with time. And yeah, this shading shading this
area is almost complete. I'm just here using
the layer techniques. Yeah, Colored pencils
is all about layering, layering and layering. Yeah. Um If you want to do 100%
full realistic look, it will take it
can take 10 hours, 15 hours, 20 hours. But I actually did this
drawing under tour. Yeah. And now I'm
shading this area. I'm creating a line, and this is the strawberry area. So I'm going to shade the strawberry area in
the next part. Thank you.
10. Strawberry Base Shading: Alright, students, now we are going to slowly start working on the strawberry part
and carefully build all the details to make it look more realistic and attractive. So the very first
thing we need to do is draw small
strawberry seeds. Those tiny dark dots that keep the strawberry, its
natural texture. For this type, we
will slowly creating the sees using a black
charcoal type sheade. While drawing the seeds, try not to make every dot
exactly the same size or shape. In real strawberries, the
seeds naturally vary a little. So keeping them slightly
irregular will make your drawing look
much more realistic. Also, avoid placing them
too close together. Leave small gaps, gaps. Once the seeds are complete, we will move on
to the next part. For the base layer, we will first use this
dark pinkish type tone, and we will shade this evenly. I already discussed
how to shade. So I think you know so use
that method and shade it. In this place, when
you're shading this area, when you shading this area, you should follow
the reference to see where the light
and dark places are. So shade according to that. At this stage, focus
mainly on building a soft foundation and always remember that the more patiently you work on
texture and shading, the more realistic and vibrant your strawberry
drawing will appear. So always keep that in your
mind and share slowly. And now you can see
here I am applying an even layer of this dark pink color
so that when I blend, it will look much more better. So follow everything
that I told you the techniques I teach
you and draw and shade. In the beginning,
when you first try to sketch or shade and
draw by yourself, it may feel little
difficult or confusing, and that is completely normal
for every aginar artist. Don't get discouraged if
you are first few drawings, don't look exactly as you
want them to look like. Ristic drawing is a
skill that improves gradually through patience observation
and regular practice. The more you practice, the more comfortable
and confident you will become with
shading and blending. And creating realistic textures. As you continue
practicing step by step, you will slowly notice that
things which is difficult, which you felt is
very difficult. You will feel that is very easy. Your hand control will improve, your shading will
become smoother, and you will start
understand how light shadows layer work
together in realistic art. So keep practicing,
stay consistent. Try following the
techniques that I taught throughout
this tutorial. And choose different
types of images, different types of
reference image, and try to draw that at least draw one R every
day or two every day. If you don't have enough time, try at least one
drawing practice every day and 30 minute of
outline drawing practice, free hand outline
drawing practice. You will see improvement and you will know what
mistakes you did. And your hand will
become more, you know, more easy to blend
and shade everything. So don't be afraid of
mistakes, keep learning, keep practicing, and
most importantly, enjoy the process
of creating art.
11. Shading and Blending Strawberry: Hey, students. So welcome
to the next part. So you can see that I
switch to my camera. So now I'm recording
with my camera and before I was
recording with my phone, and you can see the
difference because camera captures the real drawing
better than phone. So here I am using this
red type of shirt. This is like a mid red tone, and I'm shading this area. Yeah, I'm applying pressure
like I'm doing it real fast, and you can do it too. And so after I shaded this, I'm using this dark pink color, and I'm sheding these
areas with it to make a little bit of
the dark dark value. And you can see that I'm
using this red color. This is like a proper red color. And I'm going to shade the
whole area with this color. And yeah, you need a white pencil that I'm going
to use later in this part. But before that,
you need to shade the area with this blood
red color. Look at this. This is like a proper red color, and I'm shading with it. And you can see how much
better result it gives. So always layer your depth, like the darker areas
and lighter areas first, and then use the base color. That is the main color. For this reference,
for this drawing, this red is the main color, and then I'm using this
orangish color little. This is also close to red color, and I'm shading
this area with it. And then I'm going to
use another shade. So I am just fixing the edges
with this dark pink color. And yeah, then I'm using this orange light
orange color on top of this. It will not affect
the drawing much, but it will give a little
bit light yellow tint, so that it looks different
than the lip color. And I'm using the
charcoal black color again because I
blended the area, so the dark color looks
a little bit faded. So now let's reapply the dots
and then I am just going to use some light colors and some dark colors to create
the light and dark area. And you can see that I'm
using the dark color, and I'm shading these areas to create depth in the drawing, and it will make this drawing
looks more realistic. Okay. And I'm just following
the reference. That's it. Always follow your reference,
what you're drawing. And after you learn the
shading and everything. You can use your imagination to draw creative
creative things. Yeah. Now, I
completed this area, and now I'm again
using black color too, and I'm sort of creating lines, like, not a rough, not like a line line. It's like a little
bit shaded line. And yeah, it looks
good, isn't it? It already looks very realistic, but we need a white color
to make it life like. Okay. So here I'm using
this light green color. It's not a light green.
It's like a lime color, and I'm using it in the
leaf area because earlier it look it was looking like
a little bit odd, right. So here I'm using
sakura jelly roll. This is actually my favorite white colored
pencil and not pencil, why I'm It's a pen. It's like a gel pen,
but white color. And this gel pen is really good. Most of the artists use this. And this is very cheap. Like I get set of three
for two or $3 only, and I'm just following the reference and drawing
these white lines. Okay, so do it slowly because you can't fix this
if you did something wrong, and I am shading all the areas where I
need this white color. And you can see that this is
turning to look real good, and it is already
looking very realistic. So let's see you in the next but
12. Highlights and Final Details: Okay, so let's use this white cudgel pen
and add highlights. And I already add highlights in the strawberry and lips area. And here I'm following
the reference. And according to that, I'm going to add highlights and do this part slowly,
very slowly. You need patience for that. Okay? So because you
can't fix the mistakes, but, you know, many
people assume that creating realistic
art is super hard. But actually, here's the truth. Realism with color pencil
is actually one of the easiest and most beginner
friendly forms. Why? Because it's hassle free, you just need few pencils and
you can create realistic, good art pieces, right? So now our drawing
is almost complete. At this stage, we
are just adding the final details
using a white gel pen. To make the artwork room look more realistic, clean
and attractive. These small details, these small highlights
may seem simple, but they are actually one of the most important parts
of realistic drawings. Tiny details like
light reflection, shine and highlights helps
bring the artwork to life and make the lips look more glossy and three dimensional. While using the white gelpen apply the highlights carefully. And only in the areas where light naturally
hits the surface. Try not to overdo it. Because soft and
control highlight usually look much
more realistic. So when you do this stage, when you add highlights, always follow the reference
and think on your own that where you
should add highlights. This final stage is very
important because it adds depth, realism, and finishing
touches to the artwork. Most of the time,
these little details are what makes your drawing, stand out and look more
professional and eye catching. So now, our artwork
is almost completed. I hope the techniques and methods that I taught
you throughout this tutorial helps you understand realistic shading
and blending more clearly. Keep practicing
slowly and patiently. Follow the steps regularly,
and don't worry. If perfection doesn't
come immediately, the more you
practice, the better your drawings will
become over time. With consistent practice
and observation, you will slowly
improve your shading, blending and detailing skills. And one day, you will
be able to create beautiful realistic drawings
confidently on your own. And here you can see that I
am adding some final touches to this drawing to make
it look more realistic. So think on your own that where you should
use some shading, like here, I use the dark shading and look how
realistic it looks, right? It looks so good
and very realistic. So follow all the instruction, all the things that I teach
you and draw this sketch.
 Parna Chaudhuri, Artist