Transcripts
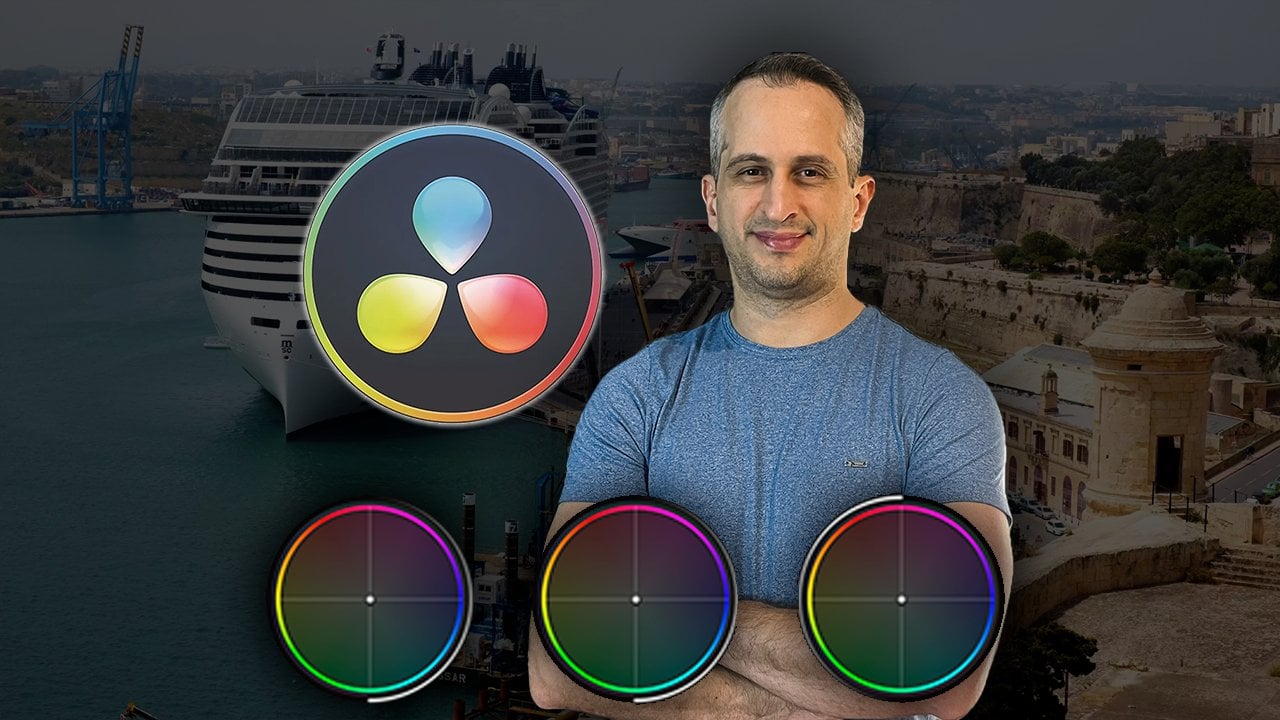
1. Presentation: Do you want to learn how to do color management in
Adventure Resolving, as well as having
a great overview of the color post
production process? Then this course is
perfect for you. My name is Ali and I have over six years of experience
in Adventure Resolving. And since 2022, I
have been teaching thousands of students how to
use this powerful software. This course focuses
in the first step of the color post
production process that's called the
color management, which is essential
for anyone who works with videos recorded with
professional cameras. We will do all types of color management available in the vent resolve in practice. In addition, I will detail
the theoretical party of the color post production
process so that you have a solid foundation
to advance with confidency on your
studies on this process. At the end of this course, you will be able to
understand the steps of color post production process and the purpose of each one, and you will also be able
to color manage any video. Important that you already
have some knowledge about video editing the vent
solve to take discoursing. If you need, I have an
in depth course about video editing the venture
resolve here in the platform, take a look and
here on the scours. We will start with some
theoretical classes about the color post
production process, and then we will move on to the practical part
within the vent Resolve, managing the colors
of several clips. At the end, there will
be a clippy where you will do the color management
following what was taught. So you start the course now and I hope you in
the first class.
2. Who is Color Grading useful for - theory: Let's take a look
in this lesson. Who is color grading useful for? Do you need it? Is it for you? Because it's not only
useful for colorists. It can be useful for
a lot of people. So let's discuss it
here in this lesson. I will read these
slides in this lesson, but I will not only read it. I will explain it to you. So it's not only downloading
the slides and reading it, I will make it clear
with explanations. So let's go. Color grading is useful for any
professional chin that values and
attractive and the professional looking
the videos or films, and look at how important this part is
conveying emotions or messages through colors or provoking emotions
through colors. That's one of the main
purposes of color grading. It's especially
important for those who record videos with
professional cameras, but it is not important only for those who use
professional cameras. It's important also
for other people who use common cameras
like phony cameras, for example, but it
is just especially important for those who
use professional camera. That's because
videos recorded with professional cameras
usually comes out in a log color profile. I will talk about the
log color profile later in this course, you will understand
what's a color profile, what's log and how to deal with log footage because it's
an in depth course. Let's go to the next slide. Cool grading is also useful for those who need
to standardize the appearance of clips from a film recorded with
different cameras. That's the famous such match that we will learn
in further lessons. Even if you don't have
a professional camera, a picture in log profile, you can need to standardize
the appearance of clips, and that's not only if you
record with different cameras. Also in the case you
have recorded in different days and times or in different
clutching conditions. All the clips of your
timeline look the same, have the same color, have the same appearance
throughout your entire timeline. Because if you have a different appearances
between clips, it can be distracting for your viewer and that's not good. For everyone who wants to have a total control over the
colors of their videos, color grading is
useful and necessary. In the case that
you want to achieve a specific look in your
videos if you want to control all the aspects of the
appearance of the video talking about colors or talking about
illuminess or brightness, to make your videos to have exactly the
look that you want. Color grading is
useful for you too. Believe me, it's very good to have this control
in your hands. It's one more power that you have to make your
program even better. And the vent resolve is very powerful in the process
of color grading. I'm very sure that you like to learn how to
control the colors of your videos using the several tools that
Daventsov offers to you. Let's go. Let's follow the
lessons because I promise you that color grading can be
very useful for you too.
3. Understanding the Color Grading (or Color Post Production) Process - theory: Now in this lesson, I want to show you
what's the process, an overview of the process of color grading
because it's a process, it's important to know that's a process and that it has steps to follow to make
a better workflow for you and to have
better results. So let's know this process. Let's go to the next slide here. So we have three steps in the color grading process that
are the color management. This is the first step. We have the color
correction that's the second step the last
step is the color grading. As you can see,
we are using here the color grading
term interchangeably, to name it the whole
process that encompasses those three steps and to name it the last step of
this whole process. If you prefer, you can use the name color post
production for the whole process color grading for the last d step
of this process, but it is not uncommon seeing people using color
grading to refer to the name of the
process and to refer also to the last d
step of this process. Now let's know a bit better
each of these steps. The color management
step is the first step, as you already know this step aims to ensure that the
colors of the input and the output videos are properly treated in the
color grading process, since the input and the output videos can have
different color profiles. We will talk about
color profiles. Later, you will know what's a color profile and color
spaces and Gamma curves. But now the important
thing is to know that you need
to treat the colors of your input videos that are the videos that you have
to make your sequencing, to make your timeline, and the output video, that's the video that
you will export. You have your timeline
done, your editing done, to have a proper
conversion between color profiles of the input
videos and the output video. You already know it's the
first step in the process, and it is especially important. Take note of this,
especially important for those who record with
professional cameras. That's not to say that it
is not important who record videos with other
cameras that are not professional
like phone cameras, for example, it can
be important too. We will see it later it is especially important
for those who record with professional
cameras because usually video that
comes out from professional camera are in a log flash color profile that I will teach you later too, what it is a log profile, and for those people, the color management step
is totally necessary. Let's go to the next step now. Oh, no, not next step. Let's see before and after color management.
We have the before. This is a video
that comes out of the camera this way
with this look, it's a log profile video. That's the reason that
this video is all grayish, as you can see, it
has low contrast. We need to color
manage this video and here we have the after
of color management. Here we have just
the color management of this video to have a
comparison to say this is a video that I'm putting a link for you to
download it so you can follow along and
make the same thing with me in practice
in further lesson worry because we
will know how to do each of those things in
practice in Daven resolving. We are just starting
now. So let's go. Let's follow to the next slogy. And now we have the color
correction step of the process. It's the step where various aspects of
the videos colors are corrected to achieve a neutral appearance
without color bias, for example, that
can happen when you have an incorrect
white balancing. It can happen if adequate
exposure and contrasting, and this is also
where the shot match between the clips is done. The shot match is a very important thing that we will know further
on in the scars, how to do this, and it's done in the color
correction step. The shot match
means uniformizing the appearance of the various
clips in your timeline. To give you an overview of
the shot match technique, this is what this
technique means. We will dive deeper in it later. In the color correction step, we prepare the material
or the footage for the artistic or creative work that comes in the next step. That's the color grading step. The last step that has
a artistic purpose. Let's see an example here
of a color correction. Here we have that
clippy only with the color management key here we have the same clippy,
now color corrected. As you can see, we have here a darker clippy I have
made it brighter. Also, this clip is a
bit too yellowish, I have made it more neutral, as you can see, mainly, for example, here in the lights, we can see the yellowish
thing and here we have a more neutral look
in the overall imaging, and that's the goal of
the color correction step because we need to have a
neutral i in our clips, we need to have in all
clips of your timeline, a neutral look to start the next step,
that's the grading. That's a creative step. So we want you to start
neutral then after we can make all our choices
of grading after this, we also make all
the clips to look with the semi brightnes with
the semi color appearance. They look like they
live in the same world, even if they start with
different appearances. Let's go to the next one. Now finally in the color
grading step of the process, it's the final stage
of this process. It has an artistic
objective of intensifying certain emotions
in the viewer or transmitting some
message through colors. That's very important
because you will do the grading according to what is happening the
scene that you have. So if you have, for example, a more sad scene, you can do, for example, a more bluish color grading, or if you have a
more action scene, you can do a more
reg color grading. But remember it's a
choice that you have. You don't need to do this
way or the other way. You will have the choice
to make the way you like. The best way to transmit the emotions are
the messages that you want in that scene for your viewers. Let's
see the next. We have here a
comparison between the color corrected clip
and the color graded clip. Here you can see that
you have made a grading, but in something
like a bluish look in the darker areas
of this image. More reggy color in the
brighter areas of this image. And to remember, that's a way to make the color
grading because there is many ways there is infinite possibilities
to make your grading, and that's why we tell that
it is an artistic choice. You don't need to do
necessarily this way. This was my way in this grading, but you can make
the color grading tappy with your own tasting. That's important to know. Let's go to the
next here we have a comparison between the look that came out of the camera, the video that cames out
of the camera, this way, more gracing without
any step done. We have the final Lie with all the three steps
done in our video, the color management,
the color correction, and the color grade. Let's see another
comparison here between one grade that I have
made and another grade, just for you to know
that it is really important to remember
that you have many, many choices to
make your gradings. It's not only one
way to make it. Obviously we have
some classical looks, and that will show
for you later how to make some of these
classical looks. But you always remember
that you have the choice to make your color
grading your way. So we had here an overview of the steps of the post
production process, and in the further lessons, we will dive deeper
in those process, not only in theory, but mainly in practicing within
the Adventure resolving. We will know how to do
each of those things step by step in detail inside
the Adventure resolving.
4. Color Management - theory: Now let's dive in even deeper in the color management
step of the process. First of all, you
need to know that the color management is
all about converging. The clips of your timeline between color spaces
or color profiles. Those two terms are many
times used interchangeably, but technically, they
are not the same thing. But I will explain for you what color spaces and color
profiles are in the next. Here we will see
the four methods that we have to make it
the color management. That's the display referred, the lets based, lets
stands for lookup tables, the node based are
mantis called the CST, and the Aomrki methody or
the projective based method. So let's know more details
about each of those methods. The display referred method is done using various controls
on the color page. I will show you later
how to do this. It's more laborious than the
others because it's manual, it's a manual color management
and because it's manual, it's less accuracy, too. And again, it's
less consistency, also because it's manual. So everything that's
manual is less accurate and less consistent
and more laborious. But sometimes we need to do the display referred
color management. Only when we don't have
the input color space, the information of the input color space of your clipping. So in this case, we can do the display referred,
the color management. Let's see the next the let's
base the color management. It's done using lets like the name says, applied to anode. You will see what Node
is in further lessons, we use the nodes all the time in the vent resolving
in the color page, and the let's base
the color management is more accurate than the
display referred one, but less accurate
than the next ones. Then we have the
node based methody. That's done using the open
effects color space transform. I will show you later
the open effects, these open effects and how to configure it to
make the node based the color management
and it's more accurate and it's more accurate
than the previous two, it's also more laborious, but more flexible
than the merci one. It has the semi accuracy as the AmericiO and that's
the main difference. It's more laborious,
but more flexible. And just to remember
those are not steps. Those are methods. You choose one methody
or other methody. Let's see the last one, the Aomerc one or
project basoDy. This one is done by setting up color management in Dant
resolve it correctly, and it's important indicating the input color spaces in
the eclipse if needed. Because sometimes
the vent resolving, look in the metadata
of the Clippy and dealready know by the
metadata information, the input color space of
the eclipse and sometimes it doesn't have this
information in the metadata, the eclipse don't
we need to inform DaventRsolv then put color
space of some clips. I will teach you how
to make it correctly the Aromic setup of color
management in DaventRsolving, in our practical
lessons further on, and this is the most accuraty
and least laborious. It has the same accuracy
as I said before as the nodbsod and both of them are the most accuraty methods, but this one is least laborious, but less flexible
than the nod basid. You will see so now that you understand more about the
four options that you have, the four methods to make it color management in
Daventry resolving, we will see the
following lessons how to do that color management, how to make it work
inside DaventRsolving, using each of those methods.
5. Color Profiles - theory: Now in this lesson,
we are going to understand the color
profiles. Where are they? That's because we need to
understand the color profiles to make the first step off
the color grading process, that's the color management
because in this step we are going to deal with
many color profiles. We are going to convert our
clips between color profiles. So we need to understand
what color profiles are. So let's go. Let's see
in the next slide. That's the color profile is a thing that every
digital image. It's mainly composed of color
space and the gamma curvy. So let's understand in the next slides what color
space and the gamma curvy are. Let's go. So first,
the color spacing. We need to understand that
the real colors need to be represented in a digital
image using argB values. That's because we have
pixels in our monitor and pixels have three colors
that are the reg green, and blue, so argeB
and real colors are directly related to
the wavy length of light. So for a given wavy lengthy, we have a specific real
color physical world, and each color has
its unwave length. And then comes the question, what should be the RGB values
for a given wave length? Then we have that
the color space of the digital image will
determine this the color space, determines the RGB values that will be storage
in the image that corresponds
to the real color or the wavelength
that the camera sees. So the color space correlates
a real color to RGB values. It's like a
mathematical function. That makes that a correlation. And here we have a representation
of some wave lengths. Just to give an example,
this one, for example, is a higher frequency
wave length, and this one is a lower
frequency, for example, and each of those wavelengths
needs to be represented in the RGB model because the
pixels have RGB colors. Here, for example,
we have a pixel with reddy green
and blue colors, and that's the reason
that the wavelength of light needs to be
representative in RGB values. Say to the pixel,
how much intensity of each color needs to
have in each pixel. Another thing to know
is that the cameras do not capture all the colors
that the human eye can see, and also montors do not reproduce all the colors
that the human eye can see. So that's a good reason
to have color spaces because the RGB values
is stored by a camera, do not correspond
to the RGB values of a montor to represent
the same colors. So for example, if an
image is captured by a camera and that it
has semi RGB values. The RGB values of that
image will not represent the same colors when
it is reproduced by a montor because they have
different color spaces. Here we have some examples
of colored spaces. So first, we need to understand
that this thing that has those colors is a representation of all the colors that
the human I can see. Note that I say that
it's a representation because your monitor and my
monitor cannot reproduce, I said before, all the colors
that the human I can see. So that's only a representation. Those triangles
that we have here are representations
of ed spaces, some common colored spaces. So for example, this
one directly 2020, the continuous line is
represented by this triangle, the CIP tree in
this white lining, for example, and the
c seven or nine, a very common colored space in monitors in this dotted
the here we have an example of what
happens if you put an image of a
colored space in a different colored
space without converting the RGB values between
those two colored spaces. Let's say, for example, you have a camera that
captures an image in the directed 1020 colored space and we have in some
parts of the image. The color represented by this
semi redis color color will be represented in the image with some RGB values related
to this triangle. Now let's say the semi
image will be represented reproduced in a monor without converting
between colored spaces, and let's say that motor has direct seven or
nine color space. So the RGB values
of that color will be represented in
something like this color. So the wrong color, not the same color that was captured, and
that's a problem. We need to converge the RGB values between
those two colored space. In the final image, we have the same color that
you was captured. And that's the importance
of color management. We need to convert
the RGB values to reproduce inaccurate
image in terms of color. And what's Gamma curve? It's how the brightness levels of the image are distributed. That's because the brightens
levels are not infinity. We don't have infinite
number of levels to store. Have a limited amount of levels. For example, let's
say you want to distribute more
brightness levels in the dark areas of
the image or in the mid tones or in the
bright areas of the image, and that's determined
by the Gamma curvy. We are going to work with logi gamma curvis in many
cases here in the cursing. So to understand
logi gamma curvy or log arrhythmicy
is intended to store the maximum amount of
information or to say details of the image in both
the light and dark areas, especially in the dark areas. Log Gamma curvy preserves the high and low
end of the image. So now we have the understanding that we need to go to
the practical part of the cars because
we don't need to go so deep in the
color profile subject. So that's an overall view about color profiles to dive in
the practical lessons.
6. Downloading the Media to Follow along: Now in this lesson, I will show you how to
download the media that you need to make the color management in
the following lessons. I don't have the license to distribute those
meds for you. So because of this, I
will show you how to download those meds because it's available in the Internet. You can download and you
use follow along with me. You just can't use those media
for commercial purposes. So let's see, this one, the DJ video, I will put a link for you to
download all those meges. So let's see this
one we have here, cite the raw Dutch filmy
that you need to create an account and you need to be logged in to
download this video. So after you have the account
and you are logged in, you need to click
in this button, GF then you can go
to this first one. And I want you to download the progress version
of the video. You can download this far K
progress or this HG progress. Don't download the raw film, the raw video because we are not going to work with
raw at this moment. You choose four K or HG, and let's see the next one, this one, and the other ones, this one, two, and
one and this one. They are all in the same site, and also putting all the links for you in the resources
of the lesson. So let's see here.
We have this page. You can go to this firstly
and click here to download. That's the grouse clipping. You can go to this next one click to download
again, the same. Other ones that are
this one and this one, they are here at the end
of this bunch of clips. We have this one that is dclippy and this one
that is D clipping. So you click there to download. Let's see the next ones. This one, for
example, it's here. I will put a Link to
this video on YouTube, you need to go to the description
and click in this Link. To go to the site where
you have the download. The other one, this one, again, you have here, the
same thing in YouTube, the YouTube video, you need
to go to the description and click in the Link where you can download the original file. Don't do the downloading
directly from YouTube, that's different
because YouTube always compresses and transcodes
the video to another format. Here we have this video and this one that you
are here in Pixabay. I will put this page for you. You need to create an account in the Pixabay site and then you open those videos to
download, and that's it. I will put the last one for you to download
in another moment. Download those images for your computer to follow along with me in the next lessons.
7. Understanding the Color page interface: Now in this lesson,
we are going to understand the interface
of the color page. For you to get familiar
with this page, to start working with it. So let's take a look. Over here, we have some buttons
to activate to open. So panels. So, for example, the gallery or the leads
panel or the Mija Pu. We are going to understand
better those panels. In further lessons, don't worry. This clips panel, for
example, opens under here. Have you also the quick
export option that you have already seen in other
lessons to expoch our video. It's present in the majority
of pages this option. We have also those other options that we have here to
open close some panels, and all these
panels we are going to understand better
than another lesson. Here we have another very
important part that is the node editor because we work with nodes in
the color page. We can have many nodes here. Each Nodi w is some color work. We have the viewer that
works the same way as the viewer or
almost the same way as the viewer in the other page. Here in the middle,
we have some buttons, many buttons that opens,
different panels. So if you click in
a button, it opens, a different panel in that
part of the interface. And each of those panels that we have has a
different purples and all those panels under here have controls to work the
colors of your video. We also have the
same thing here. We can change the panel
that she opens in the sige. So all those panels that
she opens under here are used to make the changes
that we need in our video. But now we need to understand the general operation
of the color page, and we are going to do
this in the next lesson.
8. How the Color page works: Then now in this lesson, let's see how the
color page works. The first thing that
you need to know is that you need
to have a timeline loaded so you can
access the clips of this timeline that
is loaded at the time, and to load the timeline, you can go here in the list and change the timeline to the
timeline that you want, or you can go to the media pull, you find the timeline
that you want to load. You can see here, let's go. We can see by this
icon that this is a timeline you double click
in this timeline to open it. Now I have this
timeline load digit with the clips of this
timeline the here, let's close the media pool once we have a timeline loadig. We can change the clips
of your Timeline. They are shown. They are shown. In the clips panel that
you can open and close it. By clicking here, every clip of your timeline will show here. If you have many clips, you will need to scroll with the mouse wheel to see the other clips to the
right, not the case. So for example, let's say I
want to work in this Clippy. I need to click in it
to select the Clippy, and then inside the Clippy
I have the nodes tree. It starts with one node and we can put another
nodes to work with. And each Noje has the
parameters that we can change it to make the
color works in our clippy. But how to change the
parameters of the node? We don't have an inspector here, but we have a special farmi of inspector, much more power. Are the panels
under here that we can access through
those buttons, all these buttons
that we have here that we have already
seen the last lesson. We need to have a node selected, and then we change
the parameters of the nuge in these panels. If for example, you
have two nodes, I will press Ouch as your
option as in the Macy. Now I have it two nodes. If I change anything here, I'm changing the parameters of this second nudge and not the first one because
this one is selected, and if I want to change the
parameters of this first nog, I need to select then I
will go to these panels, I can change the
panels and choose which panel I want to
change the parameters, and now I can change everything
that I want in this node. Let's delete this node by selecting it and
pressing delete. And that's it in charge. We need to load a Tlining. We need to select a clip
from that time lining. We need to have a node selected, and we work in the node that is selected at the moment in
the panels under here. That's the way how
the color page works.
9. Node Based Color management or Color Space Transform: Now let's make the color
management in practice. Here in DaventRsolve it the first type of color management. That's the node based one, also known as color space
transforming color management. So we will start with those clips that are with
this Luki wash Duchy. As you can see, it has low
contrast, low saturation. You can see here, this one, too. This one and this one and
this one, and the other ones. That's because all those files, all those clips was recorded
in a logi color profile. It has a different
gamma curving. It has a different
color spacing, then your monitor has. So for the colors to appear as the colors that was
captured by the camera, you need to convert
between color space. Do this, we are going to use it in this type of
color management. In open effect is called
color space transforming. To find these open effects, we need to go to
the effect tabby. You find the color space
transform open effects. You can even use the
magnifier if you need it to find the
effect by the naming. You can type in parts of the naming like
space, for example. Now you need to grab
these open effects to the Node If you have
messed up with this NOG, you need before this
right clicking the NG and reset nod grade then
you put the open effects. Now that we have the CST
node indicated by this icon, you can see that we are in the setting staby of
the effects panel, not more in the library where you can find
the open effects. So we can change the settings
of these open effects here, what we need to we are going to see the main stings
that we need to change that you are
the first seings that are the input color space. Here, you need to know the first color
space of the Clippy, the input color space, and you need to find
this information in the place where you have
downloaded the Clippy, or if you have
recorded the clip, you need to know the camera, the color space of the camera or the person that she
has recorded it. This video needs to say to you, What's the color
space or the camera, at least. This clipping. In the case of this Clippy, I know that it was
recorded with a red camera and I have already search for the color space
of this camera. I can inform you that this
is the red color too, so we need to put it here
in the input color space, reddy color to, and
in the input gamma, we need to pug. In this case. Red log filming. That's the gamma for the
clippi because I know this. Now we need to put the
output color speci. Of your monitor, that's reg 790. So we put here is Rex 790
and the output gamma, we need to patch Gamma 2.4. Now we have the colors for
Discli play this clip, you can scribe it.
Just see the clipping. Let's see the before and
the after, and that's it. We have made it the color
management for this first clip. And basically, that's
the way we make color management with a CSG
in the venture resolve it. So remember, you need to know the input color space of the
camera and the input Gamma, and the output color
space needs to be the output color space
of your distribution. So for Internati, you need to distribute in rex avon
nine with Gamma 2.4. Same thing for broadcast. So that's the color
space and gamma curve that we are going to
use as our output. We are going to make the same
thing for the other clips, but I will show you an easier way to make
this by copying. The same thing that we
did here that's putting the color space transform
in the next lesson.
10. Copying color management to other Clips: Now we need to do the same
thing to the other clips to convert between color spaces
using the CST open effects. To make this the easy way, you can copy the node tree that we have in the
first clip that is only one node with the
CST to the other clips. And we are going to
copy this clip to this clippy and not to those elastic tree clips
because those ones, I don't know they are input color space and the gamma curve, so we need to do in these cases a different type of color
management in a further lesson. So let's go to this one to select from this
one to this one. I will have the
first one selected. I will hold down the Shift
key and click in this one. Now I have selected
all those ones, and to copy the same thing, the semi node structure that
I have in the first one. I can click with
the mouse wheel, or if you don't have this option to click
with the mouse wheel, you can we click in this first. Then apply grade. The nt resolve will prompt you to replace the
existing grades. You have enough in
the other ones, so you can replace without fear. Just take care if you have made something in
the other clips, you will lose by doing this. So now let's replace it. And now we have the same
thing in the other clips. As you can see, we have the
icon here indicating that we have the CST in those
nodes of the other clips. But now we need
to configure with the correct input color space in the Gamma curvy
of each clippy. This one, I know that the input color space is
the A white gamut tree, and the input gamma
is the ARI Logit. That's the right one
for this clipping. The same thing we need
to do in this one. That's the semi input color
space in the input gamma. So let's go to ARI white
gamete and AI logit. This one is almost the same
thing as the other ones. Let's put here ARI game
three and then put Gamma as ARogCfour not
log C three for this one, if you put Log C three, you will see it doesn't
become quite well, let's put the log C four. The same thing with
this one ARIAD game three and ARI log C four. One, we have a clue in
the name of the file, as you can see here
in the ad page. We have here the Fuj filmy. If you select this clip
and go to the inspector, you can see Fuglmelogi in the final of the
name of the clip, and this Fuji film
camera records with a Rec 2020 color space. So let's go again to
the color page and we put it in the color
space, Rec 2020. We don't have the option here, Fuge filmy as the
input color spacing. So the right one
is the Reg 2020, and the input gamma in this
case is the Fuj film efflogy? Oh, that's it. That's
the right one. And for this one, again, we have the same clue in
the name of the file. We can select this file
and look here, Sony alpha. And in the final of
the name log tree. So let's go again here, and we are going to
put the color space Sony SgamugTre Sn because I know that in this case,
it is the right one. We need to know if
you don't know this, you need to know what's the
color space of that camera. You need to search
in the Internet. The input Gamma curvy. In this case is the
Sonny Asilogi tree. That's the right one. We have the color management maj In all those clips,
as you can see, we have now the colors of those clips and that's
the basic of making the color management using the CSG or the node
bas color management. We need to put the
CST on node and you need configuring
the input color space, the input gamma, the
output color space for our distribution
and the outputchGamma.
11. Where should the Node with CST be placed: So in this lesson,
let's go to see where should you put
the node with a CST? The answer is you need to put the CST node in the
ange of the node tree because you want to work with a larger color spacing to
have more accurate colors, and then in the
ange of your work, you make the conversion
to a smaller color space. Just for your engine result. But the thing is, you need to
do this step first because you need to see the end result of your image with
the conversion. So for example, let's
say I will create another node here
before this node, and then this node is at
the end of the node tree. I can make the work. A in the previous nodes, the color correction, the
color grading, and so that end, I do the conversion
to the color space. That's the basic setup for
your color space transform, putting it at the end of
your node strip so you can work the colors of your video
in a larger color space.
12. Advanced Node Based Color Management: Now in this lesson, I will show you an advanced
color management using nodes because this one
that I have shown to you before is a base
color management. So let's see a more advanced
decolor management. That's more consistent
than this one. To make the more advanced the color management
using nodes, you need to put another
CST in the first node of the nodes tree that will convert your footage in
intermediate color space, also known as time
line colored space, you working colored space. Bigger than any
other color spacing, so you don't lose the
accuracy of your colors by converging first to the
bigger color spacing. And what's the advantage
of doing this? By doing this, you are using in all the clips
of your timeline, the same intermediate
color space work. This way you can copy
the color corrections and the color gradings
that you make here in the middle of the nodes you can have a more consistent
work between all the clips and other advantages that the
twos will work the same way. We respond the same way in every clip that you
have because you are working in the same
intermediate color space because you can have
as we have here, a reggi colored space. We can have NR colored space and so
on, fum colored space. This one is a Fuji filmy camera
with actin colored space. You can have clips with
different colored spaces. And by putting a CST at the
beginning of the node stream, you can convert them
to common color space, and then you work in the semicolred space
in all of the clips. Let's make this to
see exactly what we need to do in
this conversion. I will put here a CST
in this first node, and we need to configure
this first CST. This way, we need to convert it from the input color space to this bigger colored
space that I have told you that's the
Daventi white game. Remember, just name it
Davinch wide Gametin. That's a colored space
specially created by DavinchRsolv to make this
type of color management. So we're going to put here, what's the color space? Rec 1020 in this one. So we put here Reg 1020. Then put Gamma is
Fuji film flog. Fuj film flog. Then the output color space needs to be the
DaVinci wide gamut. The output gamma, we need to
put the Dawnch intermediate. That's the right
one to work with Davinc wage then at the end, we need to do a
different thing that's converting from Danch white gat. Let's see Davin white Get, and then the input gamma needs to be the Davinc intermediate, and we convert to
reexavnine and Gamma 2.4. Now we have the same
result of the final image, but here in the middle, we working in Dawnch
white game a bigger color spacing than any other we can do the same thing
to the other clips. We can copy. We can copy
this node structure. We don't need these two nodes. At the middle, we can create
another node as needed. But what is important
is that you need to have the first node with this SD converting from the
input color space to dantitGamut and the input game of this clip to
Davinc intermediate. At the end, you need
to convert from the Vinc white gamut to Rec 79. Let's select the other clips
less this one and we click with the middle mouse will and clip it to copy to
the other clips, this node structure and
we need to change it. In the other clips, only
the input color spacing. In this case is red
color um but it is here and the input
gamma is red log film. This one is we need to go to the first NodiRmember and change here every
white game tree. Input gamma needs to
be A logit this one, the first one, ARI game
three and the ARI Lx three. Here, the first one, again, RY game three, ARI Lxifour. This one, R game three
and the AI Lxifour. This one and this
one sname three C and then Son log
three, that's it. We have configured the way our divernsity color management.
13. Automatic or Project Based Color Management: Now in this lesson, I
will show you how to make the automatic E coolor
management or projective based ecolor
management because I want to show you all the
options that you have, so you can choose the
best one for you. So the projective based
decolor management is less flexible than this one, but it is easier to do
to set up it and DT work with every clip that you have in your timeline unless
you bypass it. To make this type of
color management, we need first to get
rid of this one, that's the node based
because we don't need to have two types of color
management at the same time. You can simply click in
an empty space and then reset all nodes and grades
or all grades and nodes. You can select the other clips, hold Shift and select this one, and then press with the
mouse wheel in this one to copy to the other clips the
reset the empty nodes tree, replace now to make the project based the
color management, we can go to the
project settings. That is accessible by the File Menu project
settings or shift nine, or you can click in this little gear and then go
to the tab color management. What we have here, we
have the color science and when we have
this DaVinci Y RGB, the same thing as saying we don't have a color
management working, in this case, project based, and then to enable
the project based. We need to do this one. We need to choose this
one, the color manager. We can do it many ways. But I will show you how to
do a Mr custom way with Mark control so you can disable this automatic
color management. Then in the color
processing module, let's choose this custom. Here we have now access to many configurations
that we can choose. And the thing is that we have the semi options that we had in the node based the
color management. Input color space, a timeline color space or
intermediate color space, and then output color space. And here, to have more
flexibility and control, we need to activate this use separate color
space and Gamma, so we can choose the
Gamma separately. Then now we need to put
in the input color space, the most common
color space that we have in our timeline
in our clips. In this case, we have the ary
digame tree in four clips, this one, this one,
this one, and this one. We are going to choose
the ary game three here, and then the input gamma
should be RI Lxitre. We are going to change
for those two clips, I will show you how to do this. The timeline color spacey. We are going to choose the Dave wig gamete
that's this one. It's in charge here with WG and the timeline gamma should
be DaVinci intermediate. Put colored space x
anon and the pat gamma, gamma two punch four, that's it. We are going to save this. And now we need to
tell the ventures v. The writing put colored space
of the clips that don't have the same colored
space as these clips that are with R white Game
three colored space. So this one, for example, we need to tell the
venture sovi by right clicking here and
going in put colored space. We need to tell the ventures
v. It is red color two. It's already. Input gamma, we need to put a log
filming, it's already here. But if it was not here, we would need to put.
Here it's right. We can see that we
have configured it before in the project
settings. Same thing here. Here we need to change it. Then put gamma to AI ogifer. It's already right.
But if it is naughty, we need to change it here. Same thing with this one. It's right. We can
see AI ogifour. Here we have fog film a logging and then Reg
1020 right this one, the right one, two,
Sonny log tree and color space
Sony agamut scene. It's right. The ventures of
reno it's all done here. If you it doesn't it
happens to be done. You need to change it, then put Gamma or the
input color space of these clips to the right ones by going in these options
that we have here. We have set up our
color management in the project settings. So the color management
is happening now behind the scenes we are working
the timeline color space. That's the Daveng white
game for all the clips.
14. LUT Based Color Management: Now in this lesson, we
are going to see type of the last type of
color management that we have available
in the ventures OV. That is the ts based
color management. Not really the last one
because we already have the display referred to color management in
the next lessons, but this one is the last non manual color
management type. When you use the let's
base the color management, when you have a
team that makes the color work in different
video editors, that's a good choice to use the let's base the color
management because you can use the same lets between those editors and they
have consistency results. When not to use it, the let's base the
color management. When you have all
the color work made inside event resolve it
because it's not so accurate. As the project based one, also called the automatic one and then nod base
the color management. So when you have all the work done inside the
venture resolve it, the best choice is to
use the project based or the node based
because of the accuracy. So to use Alerti, we are going to open
this panel to see many folders that we
have alerts inside and the thing that you should
note is that we don't have all the alerts that we can need to make the color
management alerts based. You can also search
for alerts in the Internet if you let's
see what we have here. This verse one, this verse Glip. We know that is from a g camera, so we are going to see
in the red folder, and we have here only one type of lute for a ragged camera. And that's not the right
one for this camera. If you put in this type of view, we can see the full naming
of this lug as you can see, it says Logie three G ten
to reg seven oh nine. Have a clip with input color spacing that
is ready Color two, and the Gamma curve
is dilog filming, so that's not the
right one for us. You can search in the Internet
if you need this loud but it's not available natively
in the Adventure resolve. So in this case, that's another limitation that
we can have when you try to apply a loud to a clip to convert
between colored space. So let's jump in this one are going to see this other one. This clip is from ERI camera. So let's go to Erie. We have here the gi Ari
Alexa, Log CituRxevennin. We are going to apply this soon. But first, we need
to disable or to bypass the color management that we already have
applied in the clips. Make so we are not going to disable the full
color management that we have set in our project. Instead of this, we
are going only to bypass this color management
directly in the clips. To do so I will select this
first one, I will hold shift, and I will click in the last one that I have made the
color management, and then we click in any of them and we check the bypass
color management option. So now the color management
that we have set in the project is
bypassed in those clips, as you can see, and to apply
this latch to des clipping, we need to put the
luch in the node. So we are going to put
it here in this node. And now, as you can
see, we have set our color management with
the Lutch. That's it. To apply a color
management with a Luch, we just drag the luche over
a Nodge and here we have the icon of the lech applied to this noge and it
is done for the S clippy. Now we are going to apply
to these other clippets. But here, another way to
apply those lets is by Rach click in the Noje then we
need to go to then here, and we find the same
lets that we have in the At panel inside
this menu option. Another thing that
you should want to know is how to
remove the alert. To make this, again, right click in the node where
you have the Lut applied, you go to ut. Patch, no lt selected. Now you have removed the
luch from this node. Let's put it again. Let's make the same thing here. Let's put this one here. As you can see, this one is not the right one
for this clippy. So I'm not going to use
this lut in this clipping. I will just remove
this luch and then I will uncheck the bypass
color management to have the project based
decolor management in the the same thing for this one because
I know this one has the same color
profile as this one, so I will uncheck the
Bypass color management. This one is a Fuj filmy clip. This one, if you try to find
the natively in the vent res of alert to convert
from c 2020 to Rex 790, you won't find this option. So let's say you find it
in the Internet to use alert to this type of conversion
from Rec 2020 to Rex 79. How do you install a let? Where should you install a let? To find the lets folder, you can go to Pio then you
go to project settings. Here in the color
management tab, you need to go under here where you have
your lookup tables. That's what lets means, and then you go to
open let folder. You have here the Lets folder. You can download from the Internet the lets that you want. You can save it here or you can save inside you the
folders that you have, or you can create new folders. For example, you create a folder for Fuze
film, for example, and that folder that
you create will show up here in the Lets folders
inside you the vent resolving. So that's it. You just
need to know how to use alerts to make color
management if you need. But here, if you make
all the color work inside the vent resolve it, there is no reason to use lets. You can use the project
based the color management. So I will take out the alerts
that we have put here. NLD Selectogy and
this one No Let Selectogy will
select all the clips that I have bypass
the color management, and then we clicking and
check the bypass, that's it. We have set up again our color
management project based, and we can follow along.
15. Knowing the Color Wheels part 1: Now in this lesson,
let's take a look in those three clips
that we have here. Those clip is have a
log color profile, as you can see, they
are washed out, but we don't have any
information about the camera of those clips
or the color space, the input color space
of those clips. So how to do the color
management in those clips? We need to do the display refer to color
management in this case, this, we are going to use
the primary scholar wheels. So let's know the
primary scholar wheels to make the display refer
the color management. The color wheels are this panel that we have
here, the third panel. Don't confuse with
the HDR panel that is very similar visually
to the color wheels. The primary scholar wheels. This one is the HDR color wheel. We need to go to the 31 and
here we have the primaries, how the primaries
color wheels work. First thing that
I want you to do is to put it here in the scopes. You need to go to this
panel by clicking here. If you are in the
keyframe s panel, you click in the scope s panel, and then I want you to
put in the parade scopy, the first one that
shows the RGB channels. They are going to help us to
understand the color wheels. But first, let's understand what's happening in the scopes. Here in the scopes, we have
a graphic representation of the luminous levels of your from left to right
in each channel, the red, green, and blue
channels, and vertically, we have the luminance level
of each pixel of the image. For example, let's pass
here to this parch. You can see here, for example, that we have the pixels of
those mountains represented. In this parch, as you can see, the darker pixels can
more here under here. Brighter pixels,
it stays up here. Another example, here we
have a bright parch of the image and this bright parch is not represented under here. It's under here in the image, but it's a bright part,
so it's representative. Over here, as you can see, if you go to the
qualifier tab and you patch here in the three dots,
display qualifier folks. You can go with the Muse over the image and you see
in each channel where exactly those pixels that
you behaving the mouse on at the moment are representative
in the parade scope. It has a circle there in the parade scopy indicating
that part, as you can see. Another example, we have a dark area here that is
representative under there. So here in the scopes, we have totally blacky the zero. So everything that is
totally blacky will be touching the zero
or next to the zero. The mid tones will be next to the middle
of the parade scope and everything that
is brighter will be over here, next to the top. So the peridoscopes
will help us understand better what happens when we make adjustments in
the color wheels. Let's close it here
to make more space. Now, let's take a look in the color wheels. How they work? We are going to
look specifically at those wheels that
we have under here, that are called
the master wheels. Each control has its
own master wheel. So let's take a look at
the gain master wheel. It does, the master wheel adjusts all the color
channels at the same time. So for example, if I change this gain master wheel to
the left, for example, I'm changing all the
colors at the same time as you can see here the
values of the colors, and we can see also
in the paid scopes, the change of the values, the luminous values
of the colors. They are going down
if I put to the left. If I put to the
right, they go up. In short, we are changing
the luminancy of the image or to say the
brightness levels of the image. In this case of the
gain master wheel, it's like pinning the bottom
of the luminous levels and changing proportionally
much more from the top of the
luminance of the image. It's like adjusting
more the bright areas of the image and
less the dark areas of the image. Take a look. If I put to the left, it's
pinned here in the bottom and the changes the top parch much more if I put to the right. It is still pinned
in the bottom, and the luminous levels
stretches much more, in this case, up in the
bright areas of the image. The opposite does the
left master wheel. The left pins the
luminous levels at the top and it
stretches from the bottom. So if I pull to the left, you can see that the top parch is pinagy in the peridoscopes, and it stretches
from the bottom. Let's put to the left fin. The third control
that we have to change the luminous levels
of the image is the gamma. Do you remember the gamma curvy? That's a similar thing
that we have here, and the gamma changes
the distribution of the luminous levels of the image in the middle of the
luminous levels, or to say in the middle
of the parado scopes. It's like pinning at the top and at the
bottom at the same time. Let's take a look if
I put to the left fm, you can see that it is pinned at the top
and at the bottom. If I put to the right, again, it's pinned at the bottom and at the
top at the same time. And what the gamma control
does in practicing, it changes the distribution of luminance levels
between the dark areas. As you can see, if I put to
the wing, as I have done, the luminous levels become
much more stratey at the dark areas or to say it's much more distributed
at the dark areas, and if I put to the left. Can see that we have
much more distribution of luminous levels at the
bright part of the image. In short, the Gamma master wheel will change the distribution of luminous levels
between the dark areas and the bright
areas of the image. Let's resettle by clicking here. That's the reset button. Each of those controls have its own reset butto as you
can see, that circular arrow. We have the master wheel
of the offset that changes all the three
channels in a fixed way. It doesn't pins the bottom or
the top part of the scopes. I just changes the
luminous levels the same way in all luminous levels of the imaging. Let's reset it. That's how the master wheels of the primary scholar wheels work. We are going to use
those master wheels to make adjustments in our
image in the next lesson, to make the display refer
the color management, since we don't have
the information of the inpuiclar space
of those three clips. Let's go to the next lesson
to see how to do the display, refer the color management.
16. Display Referred Color Management: Now in this lesson,
we are going to make the display refer to
color management. And to do so, we are going
to use the color wheels, the master wheels of
the color wheels, and we want to have more contrast in the
image. What's contrast? Contrast is to have
marked difference between the bright areas of the image to the dark areas of the image, or to say better, we
want the dark areas to be darker and the bright
areas to be brighter. Do so, let's first
take a look at the lift because we want to
make the dark areas darker. We can see it's not so
dark because we have some spacey under here in the paridscope
without any color. So let's put the
lift to the left. With an eye in the pard scopes, as you can see, we are
reaching the zero lining, and we don't want to
pass the zero line because if you pass the zero
lining with the colors, you will have some
areas with pure black, that's not a good thing. You lose details by
passing the zero lining. It's called clipping. Not going to pass the zero lining in the bottom of the
padcopes and that's it. It's good for now. And the same thing
in the topping to make the bright
areas brighter. We don't want to
pass the 1023 lining because we clip the image, you will have
totally watch areas. So in this case, we can't
mess much with the game. Let's put the game to
the right, just a bit. Now at the moment, we have a more contrast image,
as you can see, you can also press with
this node selected the Control D short cudg or common D in the MC
to see the before, you are disabling this
node to see the before, and again, you can press
Control D to see the after. Enabling this node. The same thing you
can do by clicking here at the number of the node, you can disable the noge by clicking here,
to see the before, and you can click again at
the number to see the after. That's a very good
idea to make this, to see the before and after
by turning off and on a note. Every time you make some
type of k. And now, as you can see here
in the pidscopy, we don't have much room
to work at the bottom, and the same thing we don't
have much room to work. At the top, we have pulled the gain master wheel
to the right to make the bright areas more
bright he bullet the lift master wheel to the left to make
the bottom areas, the dark areas of
the image more dark. But as you can see at the image, we don't have much contrast yet. I want to a more contrast
imaging and how to do this. We can even use the
Gamma control to change the distribution of lumines between the dark and
the bright areas. Let's say here,
always with an eye in the peridscopes to
see if we are not clipping the image at the bottom and at the
top and another eye at the image to see if our image is becoming
nice looking. Other thing now that we don't have much space to work with the luminous levels at the
bottom and at the top is to use the contrast control by pulling right and the left. This control, we
can click and pull. We change the
contrast of the image from the middle of
the luminous levels. If we pull to the left, we reduce the contrast
if we put to the right, we increase the contrast. Let's exaggerate it to see what's happening
in the peridscopes. You can see that
we are stretching the contrast from the
middle and we use the contrast control together
with the pivot control because it determines the
pivot point of the contrasty. So it goes 0-1. One means that we are pinned at the top and the contrast
is pinned there. So we are making more contrast from the top and
if we have zero. Are making more contrast or less contrasty
from the bottom. And we have, for example, if we click here
and press dot five, we can put the values
by typing it and enter, you are making more contrasty exactly from the middle
of the luminous levels. So let's make it
more contrast here. For example, like this, we can look to the image
to see if it's making a good contrast we can change the pivot to see what
is better for us. In practice, the pivot makes the image more
bright or brighter. If we put to the left and
darker if we put to the right. Let's see the image if it's good for us. I
think it's good, so. Now let's press Control
D to see the before and Control D to see the
after, that's good to me. The contrast is good. We can even see the image
bigger if you want to. By pressing Shift F, we can see the image
in almost full screen. If you want the full screen, you can press P in the
keyboard and P again to exit the full screen can
press the Control D to see the before and Control D to see the after. And
that's good to me. Let's press again the ShiftF to exit this big screen mode. The last thing that
we are going to use here is the saturation control. If you see that the image
lacks saturation, for example, not much the case in this one, but let's say you
want saturation, more vibrant colors
in the image. You can use this
lighter to the right, it makes more saturated, stronger color to the left, you take out the saturation, the colors of the image. If you put in the zero, you take out all the
colors of the image. The last thing, if you want to reset that control to
the default value, you can double click in
the name of the value. A of those controls
that we have here, you can double click
at the name to reset that value or that control to the default value,
and that's it. I think the image is good now. We have made the display refer the color
management to this image. Let's now make in the next clip. Now I don't need to open this clips panel to
access the other clip. I can just press the down arrow to pass
to the next clippy. And if I want to go
to the previous clip, I can press the up arrow. And as I know that they
are in a sequence, I can press the down
arrow to see the next, and I can make here the contrast adjustment that I have made in the
previous clip. So let's go to the
game master wheel, and I will pull to the
right. I think it's good. Let's go to the
lift master wheel and let's pull to the
left, make more contrast. Let's adjust the gamma
with an I in the imaging. I will make more contrast
by using the contrast. Let's make it more dark. I think it's good. Let's
press Control D to see the before and Control
D to see the after. Let's press the up arrow to see the last clip and the down
arrow to see the next clip. Let's see again, the
last one and this one. I think this one is
brighter than the last one, and they are similar clips. So I'll make it more dark
with the Gamma control. Let's press the up arrow to see the last t and the down arrow to see this one, and that's it. I think it's good let's press Shift F and then Control
D to see the before, control D to see the after. Let's scrub to see the clippy
that's very good to me. Now let's press the down arrow. This clippy I want you to
make the color management. The display refer the
color management as I have made in those
two clips using the color wheels by adjusting
the contrast of the imaging with an eye at the
paradecopes and that will be your
project in this course.
17. Saving a frame and uploading to the Project Gallery: Now we are in the last
lesson of this course, and I will show you
how to save a frame of this clip of the
ship and how to upload it to the
projected gallery of the course so I can give
my feedback to you. Don't forget to
make this upload. So you have this ship. So you have the ship clippy like that's the original file, the original image
of the s clipping, and you are going to
make the adjustments in the color wheels to get something like this
as the result. That's the replay refer the color management that you are going to make in this image. I want you to use the
lift master wheel, the Gamma master wheel, and the game master wheel. You should also use the contrast
and the pivot controls, and this image lacks
saturation, as you can see. So probably you will need to use the saturation control in the bottom of the
color wheel control. I want to show the color wheels now for you because
I don't want you to copy the values that I have used to make
this adjustment, the display refer
the color management because I want you to
make it your own way. So once you have done
the color management, to a frame from this video, you will first to choose
A frame to save it. Let's say I want to save
this frame where we have the birds flying over
the screen over the imaging, let's press Shift F now to
exit the big screen we need to open the gallery panel where we are going to savy our steel, there still is a frame of the video with all the nodes and all the adjustments
that we have made in the nodes together
with this framing. But we can use this steel
that we are going to savy to export to an image like
a JPEG or PNG image, and that's what we
are going to do. So first we need to grab it. I still by right clicking at
the framing of the video, and then we click it at
the grab still option. You will have the
image here that's the last still saved
in your gallery. You can write
clicking this still to parch clicking parch. And here you go to
the folder where you want to save the
image and take care to change the type
of the image from the DRX file that is IT
file that will save IT with all the nodes and all the adjustments that
you can also impart to the vent resolve with all that adjustment
we don't want it now. We want to save an image. So let's change the type to
PNG or JPEG. I went to PNG. I like a PNG. Let's put a name
like ship display referge. Let's click Export
press Enter and now in that folder that you have saved this image. You
have the imaging. Now let me show
you how to upload this image to the project
gallery of the course. We need to go to the
page of the course. Here you go to the tab
projects and resources. You can go here in
upload Project. Here you put name a
title to your project, like for example, hip
Clip Color Managed. You put a description
to your projecting. You can now put an image by
clicking here in this button. That will be the
cover of the project. Let's put that image. You click in Send, and now you click
here in image to put the image as the
image of the project. Let's upload it again the
same image and that's it. The image is we can now publish this project to the projective Gallery of the Corsi,
and that's it. That's the way you can
upload your project to the project gallery of the
Corsi, and we are done now. We are at the end of the Corsi. Thank you very much for
finishing this Corsi, and for your trust in me. I hope you have
learned many things from me in Discourse,
and that you like them. I ask you now please to make a rating of my Curse
if you like the, and thank you very much for
coming until here. Bye.
 Aurélio Ferreira, Editor de vídeo e programador