Transcripts
1. Introduction: Watercolor is an amazing
medium to work with and it, isn't as hard as
people would have. you believe it just needs a little bit
of breathing space. Hi and welcome. My name is Nadine Dudek I'm a professional watercolor artist based in Melbourne, Australia. I've dabbled with a few
different mediums over the years, and in my opinion, watercolor is by far the best and most rewarding
medium to work with. And I love sharing my
passion for watercolor with other people and teaching
them that really there are only two things
you need to remember. One, don't fiddle and two it's just a piece of paper. Now, I'm probably
recognised mostly for my wildlife paintings and
I do paint a lot of birds. Probably 90% of my
work, would be birds and really because they suit the way that
I like to paint, but something
else that I love, is a really loose cityscape And that's what we're
going to do today. We'll be doing three
little cityscapes today. The first two are very similar. So a small version and then
a slightly larger version to get you to extend across
the page a little bit. What we'll be thinking
about for the first two is perhaps were
in Italy looking out over Rome and we can see lots of old buildings and church domes. So I don't need to be looking
at a reference for this. The idea is to be really
loose and to just let the shape of the brush
and the movement of the water and the pigment
do the work for you. Once we've done those two, we'll move on to a third one, which will be a more
modern cityscape. And I'm going to make it
even more simple for you, we'll use one brush and one color. So I want you to really
focus on the kind of shapes that your brush will make
on the page and how effective that can be and
really the whole lesson is about how little you can do to make something
really effective. So we'll go through the materials that you'll
need for the class. It's not a very extensive list. And then I'm hoping
that you enjoy the process, relax into it. and I'd love for you
to post a photo of your finished paintings in the project section
so that I can have a look and I'm always
happy to answer questions and give you
feedback. So let's get started.
2. Materials: Okay, so first up
we'll go through the materials that
you need for today. So there's no reference. I want this all
out of your head. There's no sketching.
I want you to just paint straight
on the page and I'm using 300 gram
Arches cold press paper. Normally I paint on a board. but my cat spilt my water
all over my board. So my board is out drying, so I'm just painting
on my on my desk. But if you do paint on a board, I don't tape down, I just
leave the paper loose. In terms of brushes. I think we'll start with,
we're just using two today. I've got two little synthetics. I've got a flat brush
and a round synthetic. I've got the sizes of
these in the materials. It doesn't really
matter what brand. Just pick something reasonably. We're going to keep quite small, so don't use anything
too huge for this. I've got five paints I
think that I'm using today. Actually, you can use
whatever paints you want. It doesn't have to be these. This is just what I'm using. So I've got a bunch of
Daniel Smith paints. I've got Daniel Smith lavender. I've got some
quinacridone violet. I've got some indigo for these little darks I've got
some pyrol red. And I'm also using
a little bit of Winsor and Newton yellow ochre. I have my palette. Jar of water, clean than
that preferably and just a tissue to take off
the excess paint and water. So we're going to just go
straight onto painting, not mucking about today.
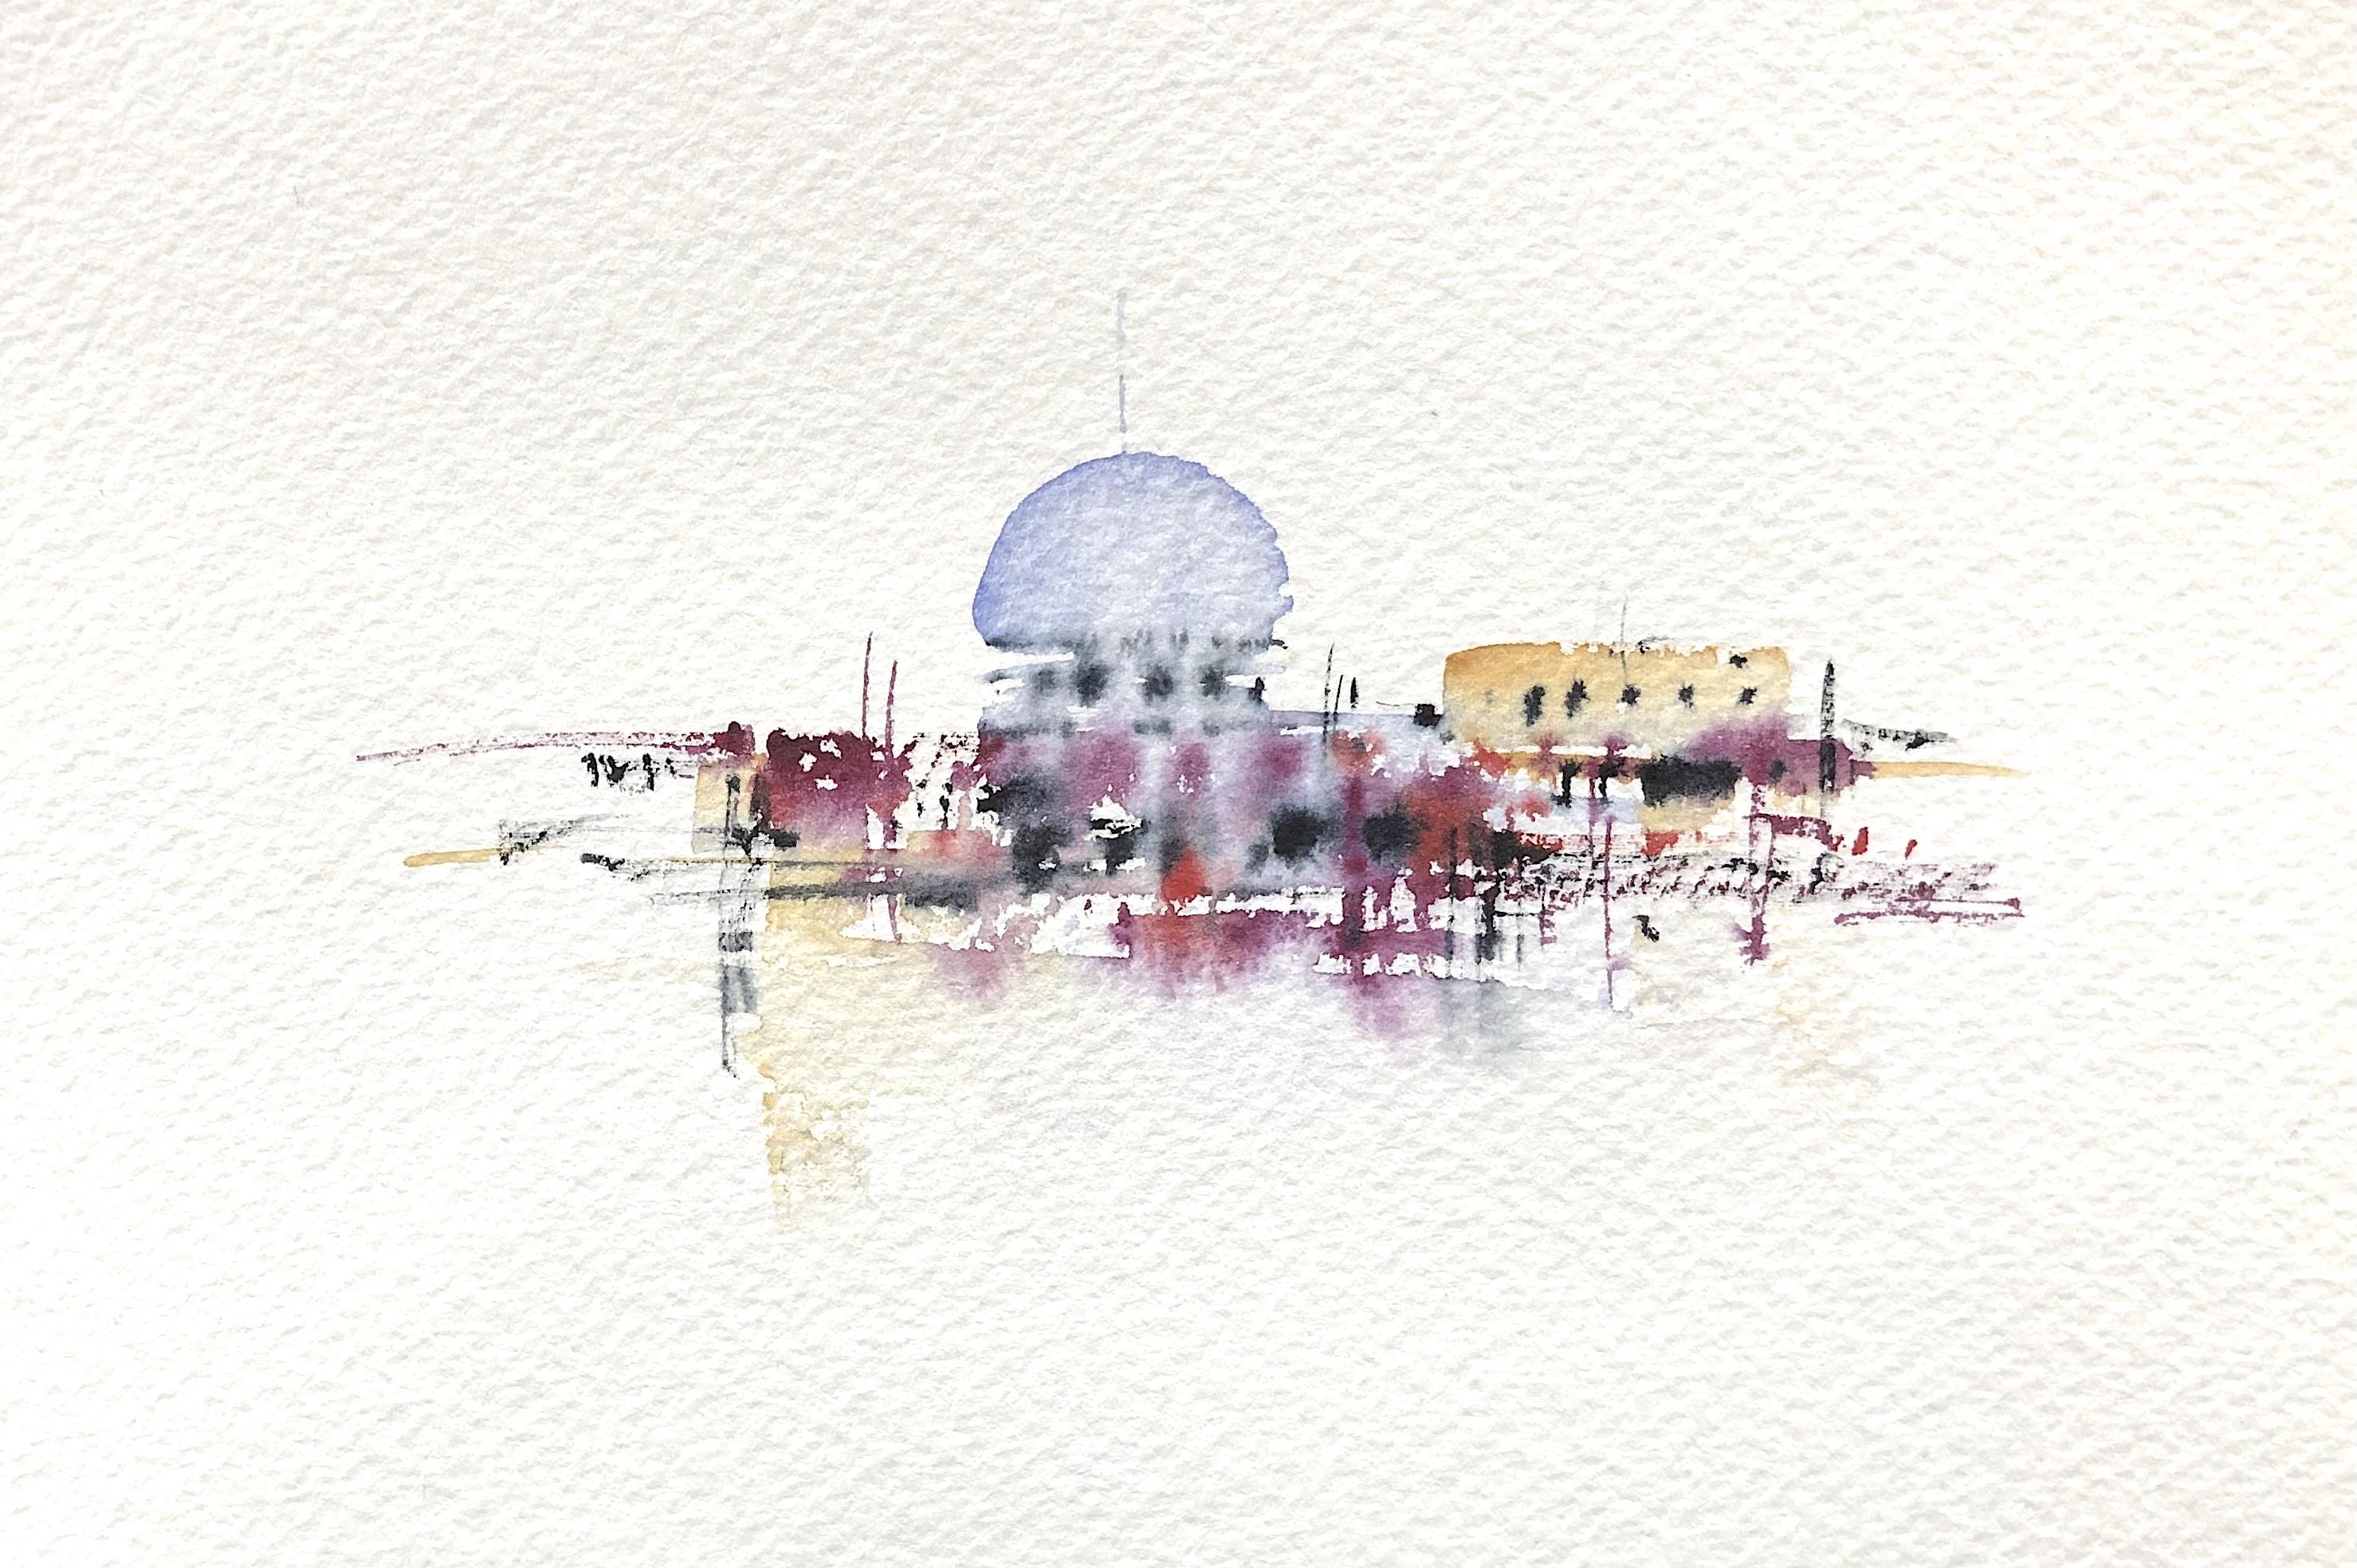
3. Small Cityscape: Okay, keeping it really simple, I'm thinking about
maybe a dome of a church and some other
buildings in here. But I really just
want to rely on the shape that my brush
is going to make. And I don't want
any thought involved. I'm going to take
my flat brush and Im going to come
into some Daniel Smith lavender
just a milky wash. come onto my page, push down to get a dome
shape, closing that dome. Few lines, a few broken lines underneath
and then I'm just going to drag that down, I don't mind if theyre
broken. That's not a problem. Pick up a bit more paint, give myself a couple of horizontals. And one up there. Then I'm going to pick up
maybe some yellow ochre. I'll give myself a bit
of a building up here. Maybe one on this side. Again, I don't mind the
broken lines, they're fine a couple more horizontals and I'm going to drag a little bit of paint down on each of those. Now, while this is
still wet up here, I'm going to tilt my page. I'm going to grab some water. I'm going to paint underneath
with some water and just touching to that area at the bottom and
give that paint. Somewhere to move. Last thing before I switch
to a smaller brush, I'm going to take a little
bit of lavender. I'm going to turn
my brush sideways. I'm just going to pop
on a bit of a spire. Switch brushes. Now I'm going to
pick up a small, my smaller brush and pick up some Daniel Smith violet, and into
this while it's still wet. I'm going to just drag some marks. I want you to, I'm
coming sideways, dragging my brush, coming and putting in
some vertical marks. And I'm moving from the wet areas of the
page to the dry areas of the page to give
myself some interest. Yeah. I don't want to just, I'm
not trying to think about buildings I'm thinking
about brush marks. Okay, then I'm going to grab
I reckon some red. I've got some pyrol red.
Red is always good. Alright, so just again,
just a little bit. I don't need very
much, wash my brush. Now I'm going to go into
some indigo and give myself a few little aerial, spires, few little darks, suggestion of windows,
that kind of thing. So don't want very
much water on this. This is starting to dry. So I don't want to get a whole lot of water on here and
cause cauliflowers. So pretty dry brush, pretty thick indigo I've got here. Still on a tilt. So now I'm going to
come and put, acutally. get some paint. So I'm doing the same thing, varying my brush marks
and pulling some across. I'm letting some bleed. I'm filling in some of
the lights that I've got. So I might put a
few. They're just nonsense. They don't have
to mean anything. Maybe a few suggestions. So I've still got quite a bit
of water in that dome, so it will bleed a little bit. And I've got that wet to dry. happening. I might just pop. A few more little lines
on the cathedral. Then maybe a few more solid
bits of my indigo in here. Okay. That is, that is all I want
you to do for that first one. So really simple. Letting all of these paints
bleed into each other, getting the mix of white dry paper there and
then all these bleeds. I want you to form these
nice clean shapes. and just let them dry. Don't, don't fuss over them. But I am after you. Horizontal, vertical
changing the two brushes different shapes, letting the pigment
do the work for you. So that's where I'm going
to let that one dry. Then we're going to do
one slightly bigger. I think we're going
to put two domes in. So effectively
the same, same colours just so that you can
practice another one. And I want you to just breathe and be calm while you're doing it Let the brush, do the work for you
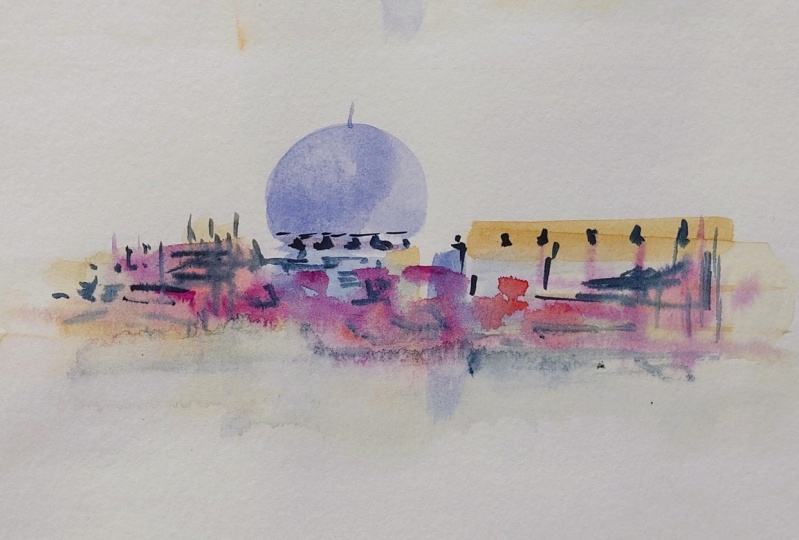
4. Go Bigger...: Okay, we're going to go again. Same, same thing, but we're
just going to go bigger. So this is just now.
to encourage you to move a bit further
across the page. I realised you can't see what I'm doing when I do
the dome underneath my wrist So all I'm doing is when I'm pushing down on the
page and dragging that brush around so that the dome is making the shape
with the shape of the brush. Lavender again. I'm going to start over here. I think, I'm going to push down the bit that you can't see. I'm just having my
brush go all the way around close in that shape. I didn't do a very
good job there. Drag a couple down, now I'm
painting flat at the moment. I'll tilt it once I've
got some more water on, a couple of horizontals. a few verticals. Either side. No thought. Other than where am I going to
put another dome? So I might put another one here. Push down all the way around. Horizontal, vertical mixture of dry brush strokes and
getting water in there. I might pop the
spire in. So just brush on the side. Switch and get
some yellow ochre. Keep not getting enough
water in my brush. Probably this would be easier with the slightly bigger brush when
you're going slightly bigger. But I don't want to do that
to you mid lesson, so we'll stick with this one. So I'm just, nonsense, I'm just putting in nonsense. Then I'm going to tilt my page. And this is where a big
brush would be easier because I've got to fair
distance to cover here. So I'm going to grab some
water and paint underneath and then come up and
touch into that paint. So it's got somewhere to move. Okay. I'm going to grab
my small brush, just flicked paint everywhere. Then. I'm going to pick up some
of my quinacridone violet I'm going to come into
these wet areas. Change the angle of
my brush through the wet parts of the
page into the dry. Just more nonsense. Change the direction
of the strokes. Not, not thinking at all. Right, then I'm going to
grab a little bit of my red and do the same thing. Less red than
the other colours. So I want to go a
little bit easy. I don't want to overdo it with the red. Just walking around each side. Then I'm going to take my indigo. Now I want this
to be pretty dry. So grabbing some paint,
painting my tissue. Happy to have a little
bit of bleeding, but I don't want to
introduce a whole lot of water in there, just dragging my brush through. Okay, and then I'm going to
change the angle of my brush. And down, down here, I am going to get a few more, few stronger bleeds, so
a bit stronger pigment. Then down the bottom here. Just to break that up a bit. Balance it on that side. So whatever I do here, I kinda need to do
on the other side. Well, that was a bit heavy. doesn't matter A couple of little fine
marks. So when I'm doing,
these fine ones, I'm kind of, I get
the movement of my wrist first and then come
down and meet the page. Otherwise, I'll come and draw a really solid line
which I don't want. So I'm hovering above and
then come down and touch so that I don't get
really chunky lines. Okay. All right, so I'm going to
come out of that, and let that dry. So again, same idea, gone a bit bigger side-to-side, just using the
shape of the brush
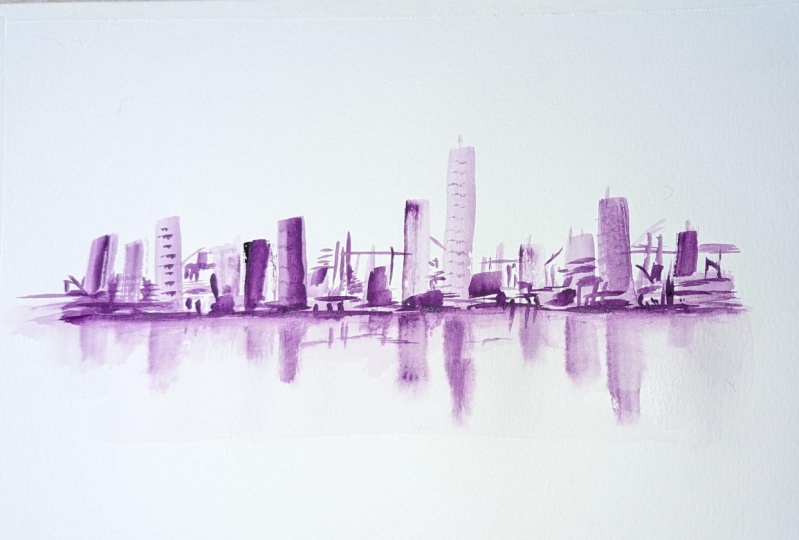
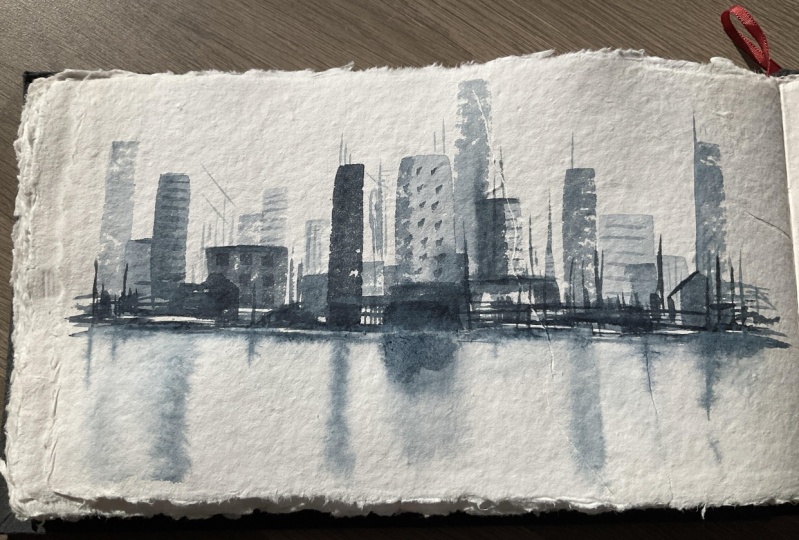
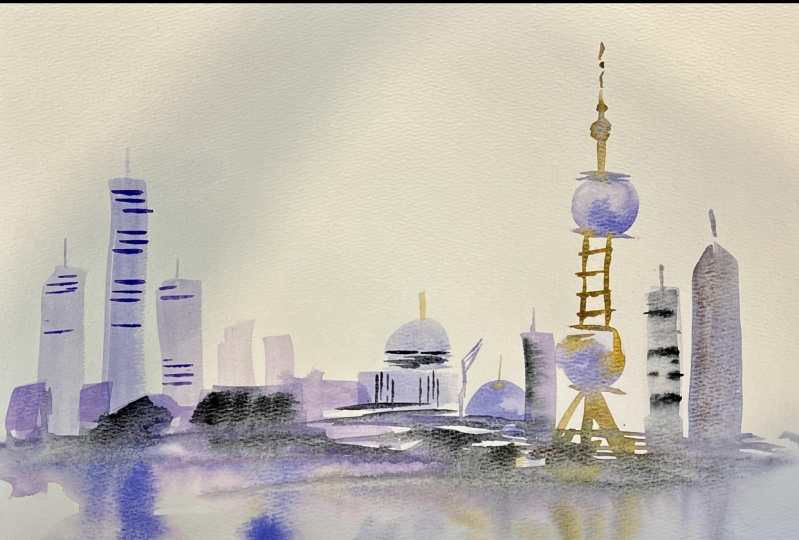
5. A More Modern Cityscape: Okay, last one, I'm going
to make even more simple. So I'm only going to let you
use one brush and one color. And the reason for that is
I want you to be thinking about the different shapes
that your brush will make depending on
how you hold it and how much pigment and
water is on the brush. I don't want you to be
having to think about color. I am going to go more modern now we're
thinking about skyscrapers, cranes, that kind of thing. But again, no
reference for this, we're just using
our imagination. So I want you to
vary the strokes. So what I mean by that,
we're going to do some really solid wet strokes
where the whole page is covered we'll have some dry
where we've got broken. And then we're going
to also do some thin, some horizontals and verticals, that kind of thing to
make our building shapes. So we're going to use
same brush but changing, change the angle of our wrist. Ok, you don't have to go this big. It's just this is the scrap that
I have. I'm going to start somewhere in the middle with a weak
milky indigo vertical. Give myself another one. Maybe over this side I'm going
to go slightly stronger, slightly wider, varying tone. And how much breakthrough
there is the paper. So not as much not
as much pigment and water on the brush will give you a really dry, broken stroke. Okay. Maybe I'm going to go a really tall number in the middle here. Well, not the middle. Don't put it in the middle.
Don't put your central, your most prominent one in
the middle of the page. So I might come this way, so still just working
on the verticals now I want to break
that up a bit. So now I'm going to go horizontal. So I'm going to pull like we were doing the yellow
ochre in the other one, I'm just pulling some
horizontals through. Now I'm going to make some
smaller ones, turn my brush. sorry, smaller buildings. And then I'm going to turn
my brush vertically again. But I'm using this
side of the brush now. I'm So just walking, I don't want to stay
in any one area. I want to keep moving around. I don't want to get
hung up in one spot. Picking up more
pigment, dragging, dragging through, varying
the marks that I'm making. Now as your
brush gets dry, you'll be able to make fine
the fine marks so I can make little aerials and that kind of thing on the
side of that brush. If my brush is quite
dry and I've already put most of the pigment on the page. If I've got if I've got a whole lot of
pigment on my brush, I'm going to get a big a
big lump, really solid. line when I do
that, which isn't what I'm after. So coming through. Now while that's still wet. I'm going to do the same
number where we wet the page and come up to meet. where I think maybe the edge of the
retaining wall will be and while that's wet I'm going to drag
through some reflections. of some of these buildings, so I'll take a milky wash
and I'm just going to drag some paint and
just let it bleed. I'm actually, I've
actually stayed flat because I haven't got room, my papers too big to try and tilt it up without
getting into strife. So I'll just
let it stay flat. Okay Alright, so that's all
starting to bleed. Then I'm going to pick
up really solid paint and I'm going to close
up some of these lights. Vertical, horizontal,
changing, keeping some
lights, but closing in. Others. Again, moving from side to side. Don't stay in any one
place for too long. I've got to, I've
got a little bit too much too many sparkling
one's over here. I might close in some
that wasn't what I was trying to do. I was trying to close that in a bit. That's quite solid,
so I probably need to balance that up. In a few other places. If you have a look, if you do have a look at
some city scenes, there are lots of different
shaped buildings. So you can put in some
curves and nonsense and various different
shapes doesn't all have to be rectangles. So as it's drying, I'm adding more marks that
will bleed a little bit. And still as this is because this is starting
to dry in the water here. The marks that I
pull through now, will stick a
bit harder, painting over a couple of those, leaving a few
lights, I'll sit back. Probably close to saying That's alright, I don't
want to fiddle. I want you to remember with
these that all these are, this is meant to be
just practicing, seeing what shape
your brush makes. I'm just seeing if I can put some cranes and
that kind of thing. So a few different angled lines just to break that up a bit. It doesn't have to make sense because there's all sorts
of things happening. When you look at the city scene. I want to leave that there
and just let that dry. Go and do this with
different colours as well. Try different brushes and
see how you feel about them. And just have a little
bit of fun with it. And I'd be really
interested to see. I'm just that's just
bled a bit too much. I'm just redefining
my shore line there. I'd be really interested to see what kind of combinations
you come up with. So it's meant to be fun. It's meant to be no thought
good with the coffee, good with a glass of wine. If you're happy with the little sketches that you've made, pop them online for me so
that I can have a look. I'm always happy to answer
questions and always happy to leave feedback. So that's where I'm
going to leave it. Nice and simple, keep it
really, really straightforward
 Nadine Dudek, Professional Watercolour Artist