Transcripts
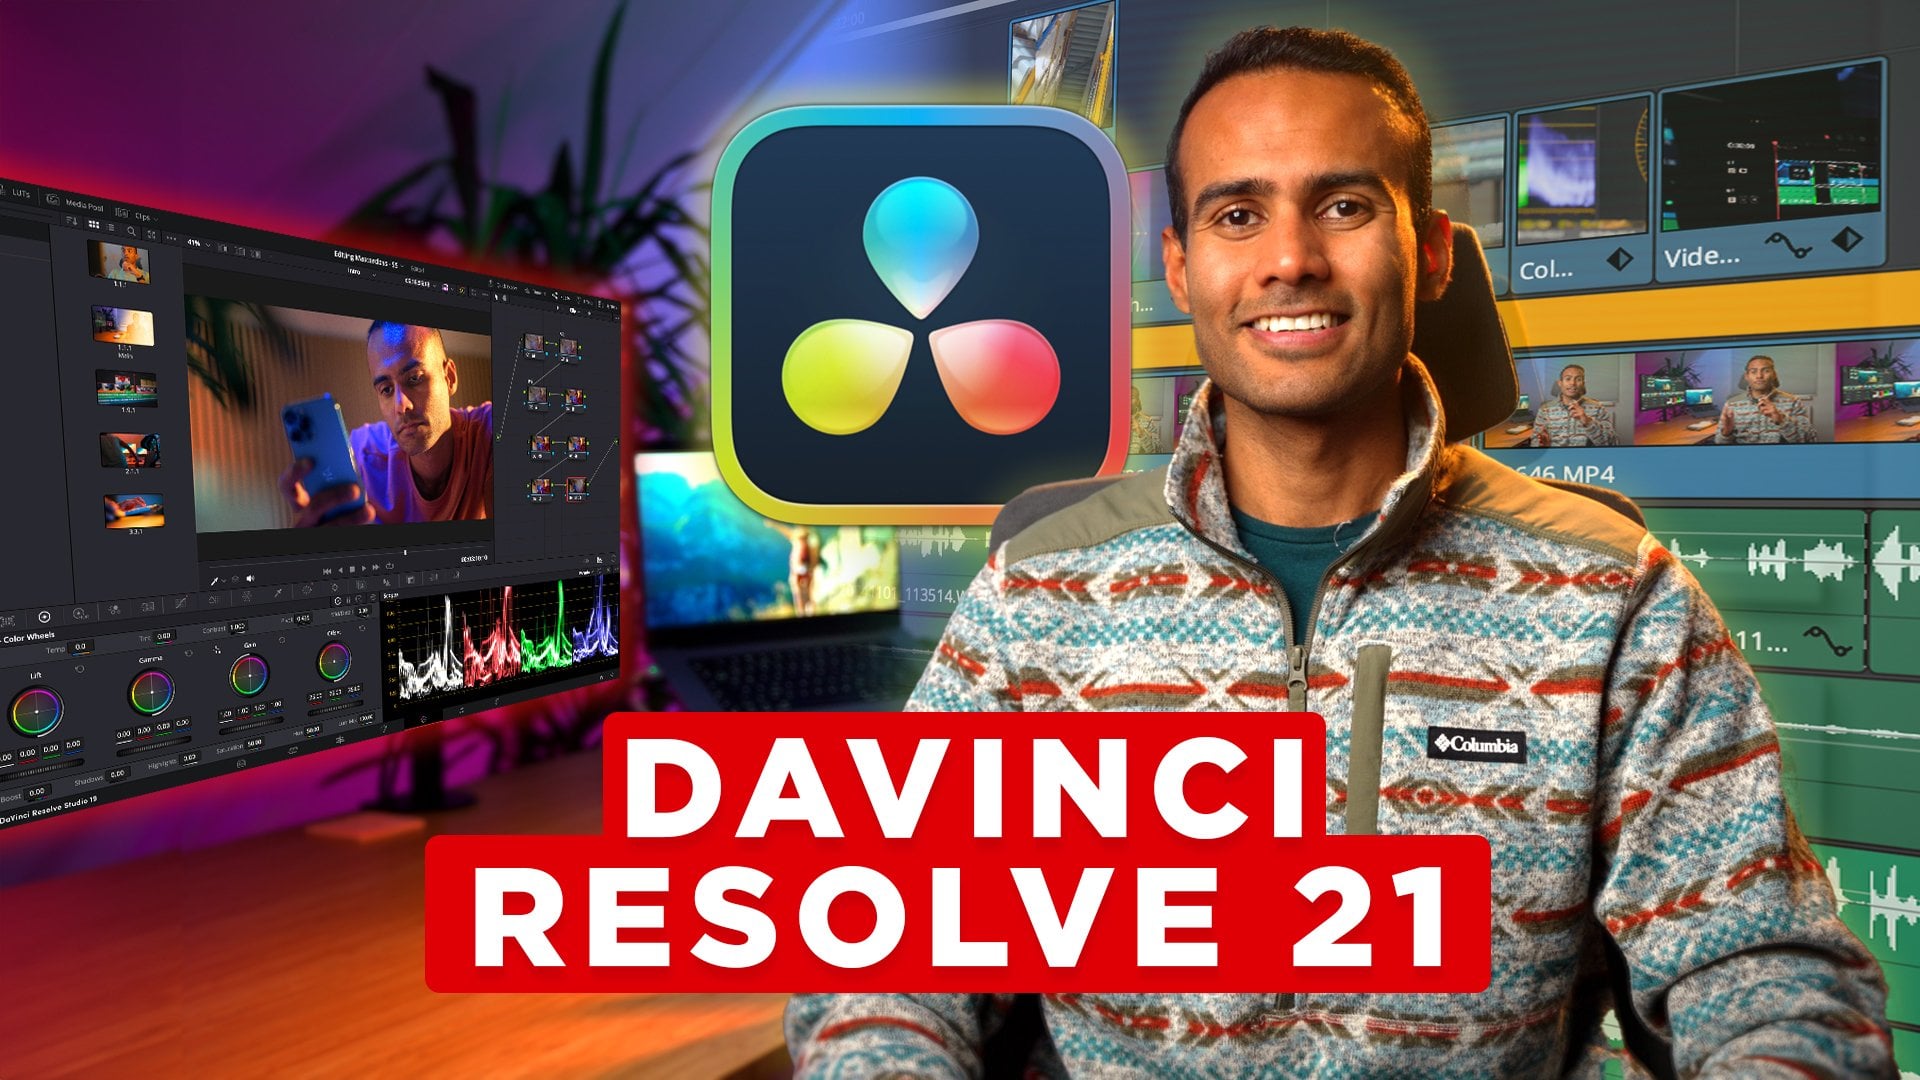
1. Introduction: I've been using
the Winter resolve for the last ten years. And if there's one
thing that I learn from this software is this, creating a cinematic look
doesn't have to be complicated. I've discovered a few handful techniques that will transform your videos from this
to this in no time. And none of it requires
advanced color grade. Overwhelming video
settings, and of course, you don't have to be a
professional colorist. I'm not. My name is Adi. I'm a videographer, a youtuber
and a course creator. And for all my video work, whether it's video
editing or color grading, I'm using the Wines off. When I started learning color grading in the Winter solve, I watched a ton of tutorials, and most of the tutorials, it just sounded like
a rocket science. But in reality, it's not. I'm here to show you the
easier and the faster way. In this class, I
broken down how to achieve cinematic look in steps. And whatever I'm teaching, I provided all the rocklts in the description below so you
can collaborate with me. So if you want to level up
your color grading skills, then let's get started.
2. Class Overview: Before we go any further, I'm going to be discussing
a few things that is important for you to know before you
begin this class. This class is not for
absolute beginners. I'm not going to teach here video editing or
I'm not going to go through all the tools available in color
grading panel. If you want to learn the
winter resolve that way, then I've made an in depth tutorial about the
winter resolve. It's like a 7 hours long class, and that will teach
you everything about the winter resolve. But in this class, we are
just going to be learning some specific techniques to
get you that cinematic look. In the first few sections, we would be editing
from all the tools which is available in the
Winter resolve free version. Also some lots of
bitters provided. In the free version,
we're going to be using that to create some
beautiful looks. That would be in
the first section. In the second
section, I'm going to be using the Winter
Resolve studio version, which is the paid version
and show you how to achieve cinematic look
in a super easy way. So if you're a studio version, you really should be
watching those classes. If you are free version, that is a good chance
for you to convince yourself that you might
need studio version. In the last section,
I'm going to be using an external plug in
for color grading called the answer P. It all
sounds really complicated. It also did for me, but it is a plugin which is
from an external source, so you need to install
that in the Mint resolve. I'm going to show
you how and once you install it and once you use
that for color grading, it's going to change everything. I've been using De Hanser Pro for the last couple of months, and like the film looks that
I get within a few clicks, it is just unbelievable. So De Hanser Pro is, of course, a paid plug in, but they give you a free trial that you can also use
on Studio version. I tried that free
trial for two weeks, and I was convinced
that I need the Studio. I would really encourage you to try out the free trial with me because I'm going
to be collaborating two to three clips
using the Hanser Pro. And after the two weeks, if you don't like it, you
don't have to buy it. So yeah, these were
the three sections on which I've divided
this entire class. So if you're ready
now, then let's get started with collaborating
in the Winters.
3. Project Setting: M so here we go. We're going to be
starting to edit color grading in
the winter resolve. So first thing first, of course, you open the Winter
Resolve here. I have the Studio 20, the winter resolve 20 version, but whatever I'm
teaching, you can do the exact same things in the
winter resolve 19 as well. So I already have
this project open, so I'm just going to open it. And I have a new timeline here because you can see that there's nothing
on this timeline. And all these clips, whatever
you are seeing here now, that's all provided
in the description. So really don't
worry about that. As I'm dragging the clip, you can also drag the
clip in your timeline. But before going any further, the most important thing, what you should be doing
while color grading in the inch resolve is going to the project setting and then
changing the color management. So if you haven't changed it, you should change the color
signs to Dawnci YR GB, and then you should uncheck
it separate, leave it there. Then timeline color space is Dawnci white gamet intermediate. So we have a lot of
options, select this. This would be really important
in the coming sections, and yeah, I'll let you know why. Then output color space is
Rex seven oh nine Gamma 2.4. This is the most
common color space in which you see all
the videos online. So that's the color space
we going to choose. And one thing I would
really like to mention, especially for Mac
users is this. So this setting, what
I just told you now, it is really good for Windows. But you're a Mac
user and if you want super accurate output on your laptop screen
and on your iPhone, then you need to
choose this setting. So we chose Rex 79 Gama 2.4. What you need to
choose is Rex 709 A, and that would give you
super accurate colors while exporting the files. I would cancel it because
that is my default setting. So if I just press
the setting button, this is how it opens. And if you want to
use this setting, every time you
open the computer, and if you don't want to
forget it, what you can do, go to the three dots here, and then you can save current
setting not as a preset, but save the current
setting as default preset. So every time you open
your Mac or your Windows, you would have whatever
settings you have chosen now, that would be the settings saved every time
you open your Mac. And also for Apple users, there is one more setting that
you need to keep in mind. You need to do, go to D
venture solve here in the corner, go to preferences. Once the preferences is
open, you go to GenO. And in general,
you have to select use ten Bit, select this one, turn it on, toggle
this one on as well, use MAC display for color
profile for viewers, and this one is
really important. Automatically tag Rec 79
scene clips at r79 A. Once you have these
settings selected, then you get super
accurate colors.
4. Film Look LUTs - Part 1: So the first clip,
what are you going to drag is one of my
favorite clips. I'm just going to check
here in the clip section. So this is the clip. I'll drag it down here. If you have no clue what am
I doing in the edit page, then really go check
out my full on the injuries of class where I have taught everything
from scratch. If you're a beginner,
like, really beginner, then you should check
out that course. But here what I would be
doing is I'm just going to see where the clip is useful and then I'll
just scrop it here. And we are in the edit page now. So let's go into the
color rating page. So if your color grading
page doesn't look like this, then you should be going
on the right hand side, then you should be
checking the parade here. And if you go to this arrow, you check the parade. You might have waveform, you might have vectorscope. I would keep it to parade. And if you just have
red, green, and blue, what you can do, you can
go to this settings panel. Then you can choose YR GB. So you can also do RGB, but I chose YR GB because
this Y this section shows me the luminance or the brightness or the
shadows of the entire image. And then at parade, you can also increase or reduce the
opacity of these graphs. So I would just
leave it like that. And then this side,
you should have the primary color wheels or HDR or these kind of
panels on this side. And on the right
hand side top, yeah, you would have all the stills, what you have, I'll go through everything, so
don't worry about that. You have some stils, you
have some power grid, you have some timeline clips. But anyways, let's get rid of this gallery so we have
more workspace to work with. And this is how my
image looks here. So this would be
the master frame. A master frame is
something where you choose the most important
frame in the image. So here we're going to be
making some new nodes. How do you make new nodes? You can press Command S or Controls for Windows,
Command S for Mac. And in the first node,
what you need to do? So now, this is a normal image. This is not a log image. It looks like a normal
picture profile. What we need to do is
we need to convert this picture profile into log picture profile because
we're going to be using some lots which are only applicable to
Log picture profile. So what we're going
to be doing is if you select the first node,
really important. This step should be
always on the first node. We go to effXs and then you
go to color space transform. So I'm just going to
drag and drop here. And then what we're
going to be doing is we're going to leave
everything the same. But in output Gamma, we would SyeonFlm log because the lots what we're
going to be using is only applicable on
Sineon film log clips. And once we have changed
the output gamma to Sineon film log, you also should go here, change it to rec seven oh nine. Now you can see that the
clip is really desaturated. Output color space Reg
seven oh nine as well. And then input Gamma, the Gamma what we
choose before was 2.4. So I think it should
be there Gamma 2.4. And then we're going to
get rid of the effect. So what we are doing basically now is that we are preparing our clip for the lot what we're going to be
putting in the inter resolve. So this is, say, color
space transformation, so I'm just going
to label it CSC. And then what we're going to be doing is you go
to the last node. So this is always a process. First, you do color
space transform, bring the footage to
whatever profile you want. Sometimes it's the other way. Sometimes you bring the footage from Log to Rec seven oh nine, you know, for it to
be normal looking. Here we are changing the
Rec seven oh nine image, a normal, colorful
image to log for a lot. And you might be really
surprised that some of the lots like film lots are available
in the winter all for free. So how we can access that? You go here, and
then if you just scroll down to film looks, this would be
available to anyone. If you're a studio version, free version, it would
be available to anyone. You're just going to
make some space here. And if you want this to fit the screen here,
you just press Z. Here we have some lots. We have Rex 79 code at 23 83. Look at this, how it looks. So you just hover the cursor on the lot and you can already
see how your image would be. You see, with just the in
build the winters of lot, you can get look like this. I think I really like
the RexaaeFuji film 351 because it gives
that cool look. You can also go for warm look if you want to use the Kodak lots. But I think I would go for this. I think they
all look good. That's the whole thing
about beautiful out pack is that you would be so
confused which lot to use, but I would still go
with this because I really like the
nice and cool look, and it really looks cinematic. So we just going to
get rid of the lot. So, yeah, that's
how you can have cinematic look in the minus off. Now, I'm just kidding. We can do a lot of things on
this image as well. So if I could just
go before and after, because I really like it, it's just so satisfying. If I just disable everything, which is Command D, this was before,
and this is after. So how many steps was it? One and two. If you're just in two steps, you can achieve beautiful
cinematic look. You can leave the image here, but we are not done here. So I would keep the image
to the master frame. And here next to the color
space transformation node, I would start changing the image a little bit
according to my taste. So this could be
really subjective. Also, choosing the lot
can be really subjective. It's really up to you which
look you're going for. But here, what we're
going to do, we're going to be changing
some exposure because I have a feeling
that like this area, it looks a bit harsh, and also these lights
are a bit too harsh. And I also think
that the shadows, it's a bit too much shadows. I don't know. We'll see. That's what I feel now,
but once I change it, then I would know
that maybe this was better or the next
previous was better. So here we're going to be
changing the exposure. So when I started everything
in the meter resolve, I was always changing
the exposure with primary color wheels.
They were good. But the problem with
primary color wheels is that if you want to
change just the darks, that also changes the lighter
part of the image as well. And that's why I choose the HDR color wheels
now because that gives me a bit more flexibility in exactly what path
I need to expose. And you can also go right or left because there
are so many of these circles like that and
each circle has a point. So if I just go on black
and if I just click this, then it would show
that which area it's going to affect.
In this image, none. And if I were dark, then you can see that all the dark areas. If you do anything with dark, it's going to affect all
just the darker area. If I just change the
color like this, it would only affect that area. I would just reset it,
same with shadows. If I go shadows here, everything
which is highlighted, that is in the shadows. So if I change the
color of the shadows, you can see that the only
thing which is highlighted, the color of that
thing is changing. But we are not here
to change the color. We are here to
change the exposure. So to reduce the harshness
on the image here, what we're going to be doing
is just go click here. Then you have this
highlight panel. What we're going to be
doing is if I go here, then you can see that this face here lies in the
highlight panel. So we're going to be reducing the exposure of the highlight. And you can already see
that we retain a lot of information in the
skin of the subject. So if I go say full screen
and if I go before, you see how over lighted and
how harsh it was the light. And then I reduced it with
the yeah, highlight panel. And then with the light,
I would leave it. I think the shadows
are a bit too much, so maybe I will
increase the shadows. Maybe I regret it
later. I don't know. No X, you have to
increase exposure. So you can go like
that or you can also just leave it here. Probably about this. So this was before and this is
after before and after. That looks kind of good to me. I would also maybe want to increase the exposure
of this entire image. And how do you do
that is by going to the global heel and
changing the exposure here. So that's going to lift the
exposure of the entire image. Maybe I'll reduce the
highlights a little bit. Now, increase them a little bit, so that it's not too harsh. I think exposure
is a bit too much. So let's go full screen
before and after. So you can see that what we did was we reduced the highlights, we reduced the intensity
of the brighter areas, which was these
lights, the face here, and we increase the brightness
of the darker areas. This was just to bring the image in a normal looking plane. That was good. And here, what I would be
doing is contrast. In this image, I don't
think contrast is needed because everything already looks like it's kind of peaking. So if you see the graph here, you can already see
that the brighter areas are at their brightest, the darker areas are
at their darkest. I wouldn't touch contrast
maybe in the future, but let's not touch it there. Here what I can do.
Here, I can also change. Remember, I told you that I
really like the cool look, but what if I want to
make it even cooler? Then what I would be doing
is I go here and then in the global section
and just kind of move drag this thing to
a bit more cooler side. So let's go full screen. This is before. This is after. I really like this, maybe a little bit less. Before and After,
before and after. But here, what I
personally think is that the skin is now becoming
also a little bit bluish. It's not too intense, but
I would like to retain the skin color to
be a bit more warm. So for that, what I would
be doing is I can either add a serial node or I can
also add a parallel node. So I would just go
add node, parallel. Here in this node, whatever I'm going
to be changing, that wouldn't affect
what I changed here. That is the information
is coming from this node. So here I need to change
the color of the skin. To have a perfect skin color, what you need to do, go to
parade, go to vector scope. Here in this scope, I'll
show you something. If I go in the curves, if I go to Hue
versus Hue curves, and if I just select
the skin on the face, which lies here, if I
drag this upward down, you can see the change
in the graph here. So you can see it going
like this, like this. But you might be wondering, what is this line? If you don't tap this
line, what you should do, go to settings and show
skin tone indicator. So if our skin color
lies on this line, most of the time, it shows
a really good skin color. So that's what my
goal is here is now, and this is going
to drag it until the line until this point, you see this point
is a bit shifted until this point
goes on this line. So I'm just going to go up to add more warmth in the image. And I think maybe
it's a bit too red. So I'll just go down.
This looks pretty good. So if I go before and after, it just adds a little
bit of redness, a little bit of
warmth in the skin. You see it adds a little bit of gives a bit more
life in the skin. This is also really subjective. You can choose to have
it or not have it. So that looks pretty good. And here, if I just get
rid of these two nodes, you can see how much
change we made. So this was warm,
which it was fine, but I just wanted to
change something so this is a bit more cool tone. Now, the image is
looking really good. So if I just disable everything, you can also disable everything
by option D or all T. But if I do that because
I'm using this cursor app, you know, which is showing the yellow thing
around the cursor. That kind of enable. So
what I would be doing is I will just select all the nodes and then disable that. This was before. Let's go full screen. It's
so satisfying to. This was before this is after. Now, there's
something else which is bothering me is that
our subject is here. Like usually in the image, the subject should be
the center of focus. And here in this
image, what I think is it like this whole
area is super bright. So to take care of that,
what I'm going to do is I would add another
note, option S, and then here I can just
do blue blue and skim. Here we're going to be taking
care of this bright area. So what we can do is you go
to the windows panel here, and then you choose gradient. What gradient does is that?
I'm just going to zoom out. It helps me to make changes to the area which is
visible in the screen. So this area is not visible, so whatever change I'm
going to make on this node, that would be only
applicable to this area. So next thing, yeah, you
know what I'm going to do. I would just reduce the
exposure of this area. And how you can reduce
the exposure of the entire area is very simple. You go here to curves, go to the main curve here, custom curve, and then we
can just pull it down here. I'm going a bit too aggressive. But then what you can
also do is that you go to Windows two and make
it a bit more soft. So if I just make
it a bit more soft, you know, so that it
doesn't look like one lime. I think that looks pretty good. So if we do say full screen before and after and afterwards, you can see we are just
making change in here. That kind of helps me to
focus more on the subject. So yeah, in my opinion, it looks pretty nice. So this was an image.
We can also go full screen and see
do before and after. I'm just going to select
everything. This was a image. This is before, a normal
looking image. This is after. And now, if you want to, save the same effect and we want to put
it on the next clip, you can just go grab still and that would be
saved in the gallery here. I already have few other
things saved in the gallery, but that I'm going to
be showing you later.
5. Film Look LUTs - Part 2: So next thing, what were
going to be editing is some daylight clip because
we had this night shot. Let's do some day shot here. So maybe just from
here to there. Just go to drag it
in the timeline. It is a long clip, so
maybe just from here. And yeah, edit page doesn't
really matter in this class. We are focused more
on the color page. So let's go to the color page. What we can do now
is that we can copy the exact same settings
in this image, but I don't think it's
going to look nice, but let's just do it
just to save time. If I go apply grade, we get rid of the calory. And here we have some nodes which was only applicable to the previous clip,
such as this one. So I'm just going
to go reset node. Here we also don't want
the blue skin we also don't want exposure was
applicable to the last node. So I think I'll also just do also maybe skin,
get rid of it. So this is how the
image looks here. So I'll just
deselect everything. So this was how it
was looking before. We did the color
space transformation, how we did in the last
image with these values. And we have put a lot here. So I'm just going to go
to master frame, maybe. Yeah, that looks pretty decent. That looks
like a master frame. What we're going to be
doing, we go to lots, and maybe I'm going to use some warmer lots now this time. This looks really cool. I think this maybe the
Fuji looks nice here. So I have the 79
Fuji 3515 DI d55. That's what I'm using for this because I wanted to
go for a warmer look. So I'm just going to
get rid of the lots. And this looks beautiful. You see, if we just
go before and after, you can see that
with these tools, we really didn't have to
buy any other external lot. We didn't have to learn rocket
science with two steps. We already have a
beautiful film like image. What we're going to
be doing is we're going to be changing
a few things. If I go to parade here, I can already see that there
are some things peaking, I'm sure, which
is this mountain. So we're going to try to reduce the exposure of the area here. So what we're going to
do go to HDR drag down the highlights
because highlights always refer to the
brightest area in the image. If I reduce it down, I can retain some
of the information. So if I go before and after, you can get a bit more
information here, but this side is really peaking. So if I just go
reduce the light, that would also
reduce the exposure. I'm just going to not touch the light,
just the highlights. So highlight is reducing the exposure of whatever
is in the image. Let's go to specular. So that looks like
something we can use. So if you reduce the specular,
really aggressively, you have some information back, but it also looks like it
looks a bit artificial. So maybe we just going
to leave it to there. So this was before
and this is after. So you can see that
we have reduced so much of exposure here, of the brightest path. And now I also want
to increase or have a bit more contrast in this area because everything
looks well exposed, but you can see that the
blacks are really lifted. So what I'm going
to be doing is just going to reduce the sorry, I'm just going to
reduce the shadow. I'm going to reduce the
shadows until this point. Let's go full screen
before and after, before and after. That
looks pretty good. Now maybe we can
reduce the contrast in this image because I want to give that punchy
look in this image. And it is not really
looking that punchy. So what we're going
to be doing is we're going to go to the
primary color beads. Here, what we're going to
be doing is we're going to be playing with gain
lift and gamma. We're going to increase gain a little bit that would increase the brightness of the image. And then we going to be
reducing the lift a little bit. And now if we go
before and after, the image looked quite flat. This is a little bit punchy. What we can also be doing is reduce the gamma
a little bit. And we reduce Gamma and maybe increase the shadows
a little bit. Maybe lift again. Now,
let's see, full screen. There's a really subtle change, but I really like it.
You don't have to do it. It's really up to you, but I
really like this image here. What I also think now is that I wouldn't want to change
the blue or the skin color. Maybe just leave this node to avoid confusion. Are
we doing anything? No, this node is empty. What I want to do
in this node is maybe I feel that this image
is a little bit desaturated. So I want to increase
the saturation here. So what we're going
to be doing is just not label it saturation. So when I started editing in the int resolve, I was always, if I had to use saturation, I would just bump up
the saturation here, which made the image like this. Then I learned that
color boost was a way to do saturation.
Then I would do it. That also makes the image
look a bit more artificial. I didn't do. I'm not doing
color boost anymore. Now there is a really
cool way how I learned is to increase the
saturation organically, increase the saturation
really smoothly so that it still looks like not
an oversaturated image. It just looks like super
cinematic film look. How you do that? You go right click and then
you go to color space, and then you choose
HSV, not HSO. Once you have chosen HSV, now you go to channels. So HSV is highlights saturation. I don't know what V is, but we have to worry about saturation. So we're going to
be in the channels, we're going to be checking
off the highlight section, and then we're going
to be checking off the channel three, which is the V, which I
don't know what it is. You don't really
need to know. But we are worried about Channel
two, which is the saturation. Now you can play around
with these wheels, and that would only change
the saturation of the image. And that would
give, for example, if I play around with this, that would bring
the saturation in the image in only the
highlighted area. If I change the
saturation in this, that would bring the saturation
in the mid tone areas, the areas which is
a bit more here. If I change the
saturation of this, that would increase the
saturation in the darker areas. But I wouldn't touch that. Maybe this looks nice, but I think that it
might be a bit too much, so maybe I'll reduce
the saturation in gamma maybe gain a little bit. And now if you go full screen, this is before and after. Let's go full screen
before and after. You can see how much
information we are bringing back and how
beautiful this image looks. But here I think is
that the red jacket, it is a bit too oversaturated. So what we're going to
be doing is we're going to be opening another node, and then what you can do,
maybe we can use the graphs, the custom graphs again. So here what we're going
to be doing is we go to Hu versus saturation panel. So here, if you select reds, then the reds are selected. Here you can reduce the
saturation of the red. If I go full screen, you can
keep an eye on the jacket. This was how it was before. This is how it is after before and after, before and after. So I think now my image
looks a little bit complete. Maybe I also think that the
contrast is a bit too much. So what we can do
is that we can just reduce the opacity of this
node and how do you do it? You go to contrast
node and then go here to the Kier panel
and then reduce the gain. So if I go to say 0.5 or
something somewhere around that, whatever changes we
have made in this node, it would be half
of that intensity. So if you go before and after, it looks beautiful,
in my opinion. So you see, we didn't use, we didn't use any crazy
color grading technique. Everything was in the Vinci in the free version and the
image looks beautiful. This is before, just a normal looking
image. This is after. That's crazy, right? So we're going to be editing
one more image, or in the next section, I'm going to be teaching
you how to get the exact same look
with log files.
6. Film Look LUTs - Part 3: Let's get another
clip, maybe this one. So here, the image, it already looks really pretty. So what we're going to be doing is we can just select this file. And we can just reset node or maybe just
delete all the files. So we are back to basics. So we had the color
space transformation. This was this is how the
image was looking before. Then we did the color space transformation to
bring it to Log, and then we put a lot which
was in Dan chi already. To be honest, this lot
looks really nice. But maybe something I
think the Kodak 23 83, maybe a bit of warm look
looks also really pretty. So you see with one node, with the in dealt
node in the vinci, we can get from a
normal looking image to this. That's cool, right. Here, what we're
going to be doing is I want this image to look
a little bit more dramatic, a bit more like greenish look. So what we're going to
be doing is we go to the primary color wheels
and bring down the offset. To a bit more dramatic scene. So here we can do his green. So this is before and
after, before and after. Maybe we can go a bit more
intense before and after. This looks nice, but my
problem is that I don't want the orange color on the
taxi to have a green tint. So for that, what
I would be doing is I would go add node, and then I would go
once I did parallel. Now I'm going to be doing layer. So what happens is that when
you add a node in layers, then whatever the image
is coming out from here it goes through the layer node and then
it goes through the top. But if I select something
in the layer node, say, for example, if I select
this orange taxi, if I go to the highlights,
taxi is selected, I'm just going to be changing
the hue a little bit so that I'm sure that the
entire taxi is selected. Also, maybe the here,
Cab increase aluminum. So you can play around
with these tools. So now I'm kind of sure that
the entire taxi is selected, the red light is also selected, but it doesn't really matter. So what happens now is that? Because I did a layer node here, what's coming out
in the output is colspas transformation
plus this green. But because we added
this layer node, it took out all the effect from everything what
we have selected here. So if I get rid of this node, the orange on the
taxi is also green. But if I activate this node, the oranges are not
affected by the greens, what we have done here. I hope this makes sense. I think once you start
doing it by yourself, then you would know
that what I mean. And the mixture of these
two is coming out here, and then we are
applying this lot, which is available in Dainci. And now we have this
beautiful imague, and I don't think that it needs any sort of exposure or any
sort of other adjustment. In my opinion, it really
looks nice. So you see? From Let's go full screen
from this to this, we achieved in one, two, three, four steps. Crazy. So that was
it for this section. In the next section,
we're going to be playing around with some log
files. So let's go.
7. Film Look LUTs with Slog3- Part 1: So what we're going to
be doing now is we're going to be playing around
with some log files. So we can choose this clip 8622. This was a shoot, what I did for a client. So maybe I will start from
here and just end here. So I'll just drag
the video file, and now let's go to the
color grading page. We're going to be making
three nodes in the beginning. So this process would be
a little bit different. So what we want to do now
is that we're going to be bringing the clip in the DaVinci resolve
wire GV color space, which is this is how you do it. So input color space it was shot on my Sony AMS three
with this color profile, and input gamma, was
also Sony Log three. And now, output color space, we want to change
the color space of this image to DawnciYRGB. So Dawnci white gamet
that's what we had, and then Dawnci intermediate
was the color space. If we go here, you see Danci white Gamet
intermediate. So yeah. And at the output, usually what we do is that we do another
color space transform, color space transform here. And usually what we do
is DaVinci white gamet, DaVinci intermediate,
Rec seven oh nine, and Rec seven oh nine. And that gives us this
beautiful normal image. I'll just so this
maybe here, yeah. So that gives us this
beautiful image, how it would look
in normal life. But because we're
going to be using the same Fuji or the
lots from Da inci, these lots, we have to
convert this into Sinon. So to bring it into
Sinon film log, what we're going to be
doing is we're going to be choosing Rec
seven and nine here and then Sineon
film log here. And now we can apply any
lot we want from DaVinci. So I'm not sure
which one to go for. Maybe this a little
bit too warm. It's a bit too cold.
Maybe this one. Yeah, I think I like the look. It looks like it looks like it's kind of a mixture
of a film look and a commercial look. But we're going to be changing
a few things as well. So here we have the lots, so that we don't have to touch. So the only thing now we have to worry about is
changing the exposure, changing the saturation if we really like, and
then we are done. So let's change the exposure, so we can label exposure. And here, if you see the skin, I still feel that it's a bit too overlighted because what happens is that as soon as you
put these Fuji lots, they make the skin
a bit too bright, a bit too fake. So we're going to
be reducing the highlights in HDR panels. If I just go here, that would bring a lot of information
back in the skin. Oh, see here we are
changing the HDR here. So we just resetting
this SDR panel, we have to go in exposure. So you always have
to make sure that what node is selected
for what setting. So we go to highlights, reduce the highlight here. And now, if we just
go full screen, you know, this is before. You see how over
lighted and yeah, how harsh skin was before. And you see how nice
and soft it looks now. It also reduces the
highlights here. That looks beautiful, I
think, in my opinion. And I think other than
that, it looks really nice. Yeah, maybe we can increase
the contrast a little bit. So what we're going to
be doing is that we go to increase the
gain very slightly. So that gives that punchy
look and reduce the lift. Also maybe reduce the gamma. Increase again again. So
this is really subjective. Either you choose
to do it or not. So maybe we can
choose this frame. As a master frame, this
was before the contrast, after the It gives a little
bit more punch in the image, which I really prefer. I still think that her face
is a bit too overlight, I'll go to exposure, change the highlights, reduce
the highlights a bit more. See how it was before and after. Yeah, I am really
happy with this. So I think it looks pretty good. Let's check how
the skin tone is. I think skin tone is
a little bit shifted. Here you can see it's not
really lying on the line, so maybe we can
change the skin tone. So this time, we're going to
be using a different method. Earlier, we use the curves. We chose the curve here
in Hue versus Hue. Here maybe we can
choose the color slice. So color slice, what
it does is that it will select the specific
colors in the image. So if I go check the skin, then you can see that it
is kind of identifying that skin color are
lying in this range. You can see in the
color wheel there it is choosing this place. So what we're going to be doing is we're going
to be changing the hue changing hues means changing the colors
of a specific thing. For example, if you want
to change hues of yellow, if you go towards the left, then you make the
yellow a bit more red. If you go towards the
right, then you make the yellow bit more green
or the other way. So we want to make
it a bit more red. So you can see that as
soon as I move that, my vectorscope is also moving. And if I go to here, maybe a little bit less,
let's go before and after. So this was our skin before, so we can focus
on our arms here. You see it had
this yellow shade, and now it looks like a
proper nice skin color. I'm focused on the
arms. You see? I had this green tint, and now it's a
normal skin color. So that's how you can change
the skin color as well. And I think it looks
beautiful this image. What we're going to
also be doing is because we want our
subject to be in focus, I'm going to be adding
some vignetting. What vignetting means is that you kind of
darken the sides. How do you do that? You
go to Windows Tool again. Check the circle just make
it a little bit bigger. So if we do any
changes, for example, if you reduce the brightness, then everything inside
the circle would change. But if we go to Windows, and then if we choose
this inward to, then everything outside
the circle is dark, but we want to make the
dark areas come in in the image a bit more
not that harsh. So we can increase this, keep it on the subject, make sure it's not affecting the subjects before and after. So you can see that makes so much difference
that even here, we can really focus
on the subject. The sides are a little bit dark. And this was before, really flat normal image. This is after.
That's crazy, right? So in just a few steps
using simple tools, we have achieved this look.
8. Film Look LUTs with Slog3- Part 2: Now, I don't want to
copy the same look, but I want to show you a
really cool image that I have from a
client. This image. This is a really nice day
because usually you cannot get the most
beautiful color from an image if it's a
bit of a cloudy day. But you can get really
nice colors from an image if you have shot
in a really nice sunlight. So we're going to be doing
the same thing here. Make three nodes. These
notes would be here. We do color space
transformation, how we did exactly. What we can also do
is if you go before, you can just copy this setting. So if you just go
Command C or Control C, go to the next clip, paste this. So we have the
exact same settings from the previous image. Also here, we're going to be
copying the same setting, go copy and copy here, and then the lot, we don't know yet
which lot we want. So we're just going to be
making sure that it lies in the same profile,
what we want it. So with the lots,
which lot should we choose I think this looks nice. For sure, this looks nice. So look at this. This one was
before and this is after. It's a free lot in DaVinci. That's crazy, but of course, we're going to be
doing some changes. We're gonna be making it
a little bit more soft. We're gonna be bringing
our parade back. So we can see here
nothing is peaking, but I have a feeling that if the highlight goes
a little bit low, this image would
look even better. So we're going to be
changing the exposure, go to SDR, reduce
the highlights. So you see? As soon as
the reduce the highlight, you get so much
information in the skin. So this was before. Looks like super overlighted
image. This is after. Crazy, right? But
the entire image also goes a little bit dark, but personally, I
really like it. That's what gives
that film look. If you see the cinema, like if you take the screen
shot of a frame from a movie, and if you put it
here in DaVinci, then you would see that
nothing is crazy peaking. It can go bit dark, but nothing
is really crazy peaking. And that's what I really
like here as well. Maybe I'll increase
the overall brightness of the image by global. So I'm just going to be making sure that nothing peaks here. So this was before
this is after. We are reducing the highlight, but we still keep the
saturation in the image. And maybe reduce the
shadows a little bit. Or maybe increase the
shadows a little bit, because I still want to
see some information here. This looks nice. This
looks really nice. That was exposure with contrast. I don't know if I
would want to do it, but I will just
leave the lot here. What I would want to do is maybe increase the
saturation in the image. So how we did was we
went to the color space. We chose HSV, not ASL, and then we changed their
channel and selected only the channel to unticked
channel one and three. Now when you go to
primary color wheels, you can increase the game. You increase the gamma. That increases the
saturation very slightly. So the sky is a bit more blue. The skin colors are
really beautiful. And I have a feeling that here, the skin tones are perfect. But just to be sure, what we're going to be doing
is we go to histogram, sorry not histogram vectorscope. Here you can see
that the skin tones, they lie on this line,
which is beautiful. Maybe let's play around
with contrast. Why not? So we just go. I
just cannot help. That's the thing if
you know bit too much, you always want to
experiment in the vinci, but yeah, maybe a
little bit tie. And we can reduce the lifts
limit, maybe gamma as well. Let's go before and
after. This before. Contrast, this is after. I really like it. Personally,
I really like it. But I also want to
change the color of the sky to a bit more teal. So this was saturation, so we're going to be
doing saturation, and then we're
going to be making another node called blues. And then how do you change
the color of this to teal? You can either go
to the color slicer or you can go to the curves. I usually really prefer the curves because that's what I've been doing it for years. Here you go to hue versus hue. You just choose the sky, so then it tells DaVinci
tells where this color lies. And then if I go up, then it kind of brings
the color to a bit more. Teal and the later green. If I go down, it brings it
to crazy purple colors. But I actually
like it this blue. I also think that maybe
it's a bit too saturated. So it's a little bit
distracting my subject. This is my subject, you know? So what I would be
doing is I would also reduce the
saturation of the blues. So here, to reduce it, what you do, you go to
Hubers saturation curve. And then you choose
the blues again. And reduce the
saturation of the blue. Now if I go full screen, we change the color, but
we reduce the saturation. This was before this is after. There's a very slight change, but it really helps.
It really helps. And then what I would be doing is I would just do
some vignetting because, yeah, my subject
needs to be in focus, not the over lighted sky. I'm just going to make
sure that her clothes are also not dark and
they're already a bit dark. And then I will invert it, and then I go to the curves, go to Custom curve and
pull it from the middle. It does not always has
to be super harsh. So let's go full screen before and after,
before and after. So you see with just
a few simple steps, it is so cool, like the
looks what we are achieving. So before and after
for the entire image, before and after, I really
love the skin color. And of course, one more thing
what I would mention to beginners is that before
doing any color grading, you should always make
sure that the image is shot in the best
picture profiles in the highest quality
from the camera. Because if this
image was, I think, not log or if or if it was not shot in the highest quality, for example, in ten
wait 422 color space, then I don't think we would have this much flexibility
in the image. I don't think we
would be able to reduce the highlights so much or increase the exposure of the image without the
image falling apart. So that's why it's really
important to be filming the video in the
best video settings and also in the best
exposure settings. Even if I get rid of everything, the image here looks
really well exposed. You can see the brighter
areas quite clearly, you can see that the
darks are also not dark. So yeah, those are the things
you have to keep in mind. And if you keep those things
in mind while filming, then when you're color grading, then those steps that
becomes really easy.
9. Film Look Creator - Part 1: M. In this section, we're going to be
using a tool which is only available in
the studio version. So if you're a free user
of the Winter Resolve, I would recommend you to
watch this class that might encourage you to
buy the studio version. In my opinion, it
is 2,000% worth it. Not just for color grading, but for every editing
effect is just so good, and it's just one time
payment with DaVinci, so that's really cool. Here we're going to be
collaborating with a tool an in built tool in the Winter Resolve studio
called Film Look Creator. And that gives cinematic
look instantly. So let's choose This
file is also with you, so let's choose this file here. What I would also
do is maybe zoom in a little bit because I just feel that the subject is a
little bit too far, maybe like that,
something like that. This looks really
decent framing. So then I would go to
the color grading page. And here, we're going to
be doing the same thing. We're going to be
making two nodes. The first node would it's
exact same process every time. So what you can also do
is something really cool, which I learned way
later in my career. So what you can do, this was
shot in Sony Gamma three. Sony a slug. And then here we would
be doing the Winter resolve Winter
resolve intermediate. And in the other panel, in the other note we would
be doing the output. We have the winters
white Gameut, the winters all intermediate. This was inReck seven oh nine, and this is also inRec 79. Output Gamma, we
would be doing Oh, I've chosen Syno
that shouldn't be sin Syneon. It
should be like that. Output Gamma, you can
also just choose 2.4. It's not going to make
any difference because, yeah, if you choose Exon
and 9.24, it's the same. So here, you know, this process we're
doing every time of converting everything and
then using two nodes, what we can do is if
you go to gallery here, under the gallery, you
would have these stills. You know, the stills
are the things what we copy from one footage
to another, the settings. But if you go to a new project, these stills are gone, right? What you can do if
I do grab still, we have this process
in this still. With two nodes, the
process which we have to do on every Sony file
or every cannon file. If you're a cannon user, you can do the
conversion with Cannon. What we can do, we can drag
this still to Power grade. And what happens now is that
if you open a new project, for example, if I open, say, Apple ProRes, this project, and then if I have to do the exact same
process on this clip, if this clip was like this, you go to Power grade and
we just copy this far. So what we had the settings chosen in the other project,
you can just copy it. It's exactly same
as a Power bins, what we have in the edit page. So let's go back to our
project. So we have it here. So now, if you import any Sony
file in any video project, you can just go to Power grade
and copy this setting on the Sony file because that's
what you have to do anyways. Now, once we are done
converting the file from Log to Rec seven oh
nine with this method, you can still see that
there's a lot of room to play around because the footage
still looks a bit boring. So what we're going to be doing is we're going to be using an in built tool called
film Look Creator. So you just need to go to
EffX and then search for film Log Search for film Look, and then we have
film Look creator. So what you can do just drag
and drop on the last file. And now you would see that
the footage looks really bad. What we should be doing now is that you go to clean slate, and that clean slate is kind
of disabling everything. What we need to do here, we don't really have
to touch anything yet. Okay. Here, we also
we don't have to do any conversion because we have already done the conversion. This is where the things
start to take a turn. We go to film Lo blend. So there is a core
look called cinematic. So if you just increase it, then you can see that
something is changing. The footage is becoming
a bit desaturated, but let's keep it 100%. We just need to
see how it looks. And then from cinematic, you can choose different
types of lots, you can say, or different
types of filter. So let's leave it to vintage. And what we're going
to be doing is, I have a feeling that
the saturation of the clip is not the best. So what we're going
to be doing is, let's disable this first. Yeah? Let's do the exposure and saturation and all that sort of stuff first. Let's
take care of that. Because sometimes I do the other way around that if
I have the cinematic look, then I change the
exposure because even if I have the exposure
saturation, everything good. And if I put the cinematic look, the exposure needs to be changed. So then
it's double work. But yeah, maybe let's do it this way that we have the
cinematic look on, and we can just keep
these two clips here. And then we're gonna
be just playing around with exposure
and other things now. So let's take care of exposure. We have we're going to be
reducing the shadows now. We can also there's
not much to just reduce the highlights so that the skin tones are
a little bit back. So everything looks good here, and if you disable it, let's
see what changes we made. Everything looks good
here, but I feel like this image is lacking
a bit of contrast. I also think that I have reduced the highlights a
little bit too much. So to increase the contrast, we have to play around
with lift gamma gain. So I'll just increase the gain until it's not
really peaking out. So I go onto here, and then we're going to be
bringing the lifts down, and we have to make sure that
nothing goes below zero. So the blacks are looking black. The image doesn't
really look faded out. So this is what we
did after contrast. You see how nice
the image looks. This look already
looks really nice. But what we need to do is we need to make it a
bit more cinematic. So I'll just push it up. But
then what I would do here, I would just go to
exposure and reduce the highlight because
I have a feeling that her skin is blowing out. So just bring back the
information in the skin. Maybe it's a little too much. Skip it that way and
reduce the exposure. So these things you don't get
right everything in one go. You have to really play
around with the clip and then see how it looks because there's no hard and fast rule that with one image, you have to go with gain 1.22 Gamma minus three and
lift minus three. You have to really
play around to see how it looks actually. And then we're going to be
turning on the film creator, and then we see how it looks. It's still looking
a bit desaturated, but let's not worry about that. Let's worry about
the saturation. So we're going to be
doing the same thing, how we did with the saturation. We go to color space, HSV, and then Gama we
have to select channels, we have to select
the, not unselect, select the Channel two and
deselect the other ones. Channel two. So we
increase the saturation. So see how organically it
increases the saturation. Now, the skins and the greens are looking just so beautiful. This was all faded out. This is looking so nice. So if we disable
the three clips, this was how my image was after conversion from
Sony log to Rec 79, and this is how it is after
we did the color correction. Now what we're going
to be doing is, yeah, now we go to the cinematic node and see what's going on here. So I can see that it looks fine, but I also feel that it's a little bit too
intense the look. So we're going to be
going halfway or maybe just go this full and
then the global blend, what we would be doing
is just go to half. Now if you just
select and deselect, it gets that bit of
a dramatic look, but we have a lot of other
things to play around. So we can play around
with the skin bias, so that would change the
intensity of the skin. So you can see if I go up, it kind of increases the
brightness of the skin. And then contrast and these things I wouldn't
change it here. I would just change it in the Da vinci itself
with the other tools. Split tone, I would change, so you'd go enable split tone. And this kind of changes the color of the skin and
also changes the color of the background so
that there is a lot of difference
between the skin and the background or the reds or the greens so that now you
can separate the subject. But what you can do
if disable enable, you can see the difference
in the skin color. But what you can do
now you can change the colors of the entire
scene with hue angle. So if I go like this, now it's a bit more greenish, bluish, so if I just keep it here
and reduce the amount, and if I just enable
or disable it, that already looks quite nice. Vignette we're going
to be doing it later. Halation you can
do, halation would be just a little bit
of gloom effect. Or halation we can also do
it in then resolve itself. So we're going to
be disabling it. I will show you later
bloom we can do now. So bloom sort of gives a
little bit of bloom effect. It's not showing now
because this image is not the best to show
the bloom example. So let's leave bloom here
let's leave flicker here. And global blend, we
reduce it to half. And if you go to Rochester, you can choose different
different color tones. So this is how the image would
look to our normal eyes. It's a bit more commercial look, and this is how if you
do some cinematic look. But what we can also do now is that we had this cinematic, the film look not right. Now what you can do is you can change the colors
of the things here. So what we would be doing
is if we want I think we did that in the last
section as well that if we want a dramatic look, let's make it a bit more bluish, so we can move the offset, or we can also make it a bit more sort of dramatic
Summer wipe. A lot of movies they use
this kind of color grading. So you can see just with moving
the offset a little bit, it brings the colors like this. You might be thinking
that there's not much use of film look now, but if you disable
the film look, you see how weird it looks. But if you enable
it, it gets that really soft film look texture. That is why film look is really cool in
the inter resolve.
10. Film Look Creator - Part 2: Let's copy this setting and then use it in
some other video file. So if I have another video
file, Let's go here. Let's copy this
video file as well, and then let's go to gallery. We're going to be
copying this clip. Let's get rid of it.
So you see how nice it looks without the film
look with the film look. And what I also feel that my subject is a little bit dark, he should be a bit over lighted. So what I would be doing is
I would just go yellows. I mistyped it, but yeah, I'll just leave it that way. So here, what I would
be doing is I would be increasing the shadows, increasing the shadow
just here on my subject. So what we would be doing now is we would be magic
masking my subject. So if you go to magic
mass two, yeah, if you go to Magic Mouse Tools, if you go to the beginning of the clip, what we need to do. And this is only available
in the studio versions, what we need to do, we need
to select the subject. So if you're using Dawnci 20, then you would have these dots. But if you were
using Devin chi 19, then you can draw a
line on the subject. And I have three dots, but I don't know
what is selected, so then I need to
click this button. So then I see that everything
which is red is selected. What I can also do is
go to better here. So that would make the
entire process a bit slower, but then it would
select just my subject. And if my subject is selected, then I can do any change
in the selected area, which is the subject of course. And what we can also do now is I would also wanted to
select the bicycle here. And then everything is good. We can do simple refine increase or simple refine a little bit. So you see here the tree is also being selected so you can sorry, negative selector two
and get rid of the tree. FabreZ, the subject and
the bicycle is selected. And what I need to
do just play this. This would take a little
bit time because we have chosen the
better, not faster. So now what Dawnti is
doing is Dewnti is going through each frame
of that small clip, and it is choosing
just the subject. And once our subject is
chosen in that clip, then we can make changes just in the subject because my subject
was a little bit dark, I thought, according
to the surroundings. And our tracking is done. So what I would be doing now is that I would disable this, the toggle mask overlay,
then the reds are gone. And then if I make any
changes, for example, if I just make it bright,
it would only make the subject bride and
the bicycle bride. But what I need to do now is I need to increase
the shadows. I think that would help or maybe also the
global blend so that the whole subject gets
a little bit brighter. So if I go full screen, this is after before you see how much difference we
have made in the subject. And if we go from the beginning, I also feel that the subject is the highlights is a
little bit too high, so I would just reduce it here. Let's go full and you see
how much difference we make because the surrounding
is already so overlighted, so I need to make
sure that the subject was kind of the same exposure, and the whole focus
goes on the subject. And what we would
be doing now is, I can see that this area is
a little bit too bright. So what I would be doing is I would just go to Window two, go to gradient, and you
can just do like this. We can see what is
being selected, and to reduce exposure, what we did was we
went to custom curve, pull it from the center. So you can see full screen, this was before and after. Maybe maybe we can
change the angle of the thing a little bit
because I have a feeling that the light the light is
coming from the top, but it is falling on the floor. So before and after, you can see how much difference
it is now. That's crazy. So this was my clip
before. This is After. You can see just few playing
around with few tools, we have gotten such a cool look. And yeah, the film Look was
a champion in this chapter, so you can see this
was without film look, this is with film Look. So just an overview
of what we did. We started with converting the footage from Sony Log
to Rec seven and nine. We didn't use the CinonFlm log. Because a film look what
we are using now is applicable to Rec
seven oh nine footage, or normal looking footage. Once we had the
Rec seven oh nine, then we changed the
look to film look. We did some changes
in the film look, and that gave us a kind
of cinematic look, but a little bit desaturated. So to make the footage
still a little bit punchy, we changed the exposure here. We changed the
contrast, you know, so that the brights are bright
and the darks are darks. Then we changed the
saturation because the saturation was a bit too less when we
put the film look. So we changed the saturation. Then we made the whole
image a little bit yellow because like we just wanted to give a bit of summer
wipe to the image because now it just looks like
a commercial clip. I just changed the
yellows increase the warmth with the offset tool in the primary color wheels. And then next, what
we did was we Magic. We magic masked the subject to make the subject a
little bit brighter. And once we had the
entire image ready, then I thought that
the subject is still looking a little bit too dark as compared to the surroundings, then we changed the brightness
of the surroundings. And this is our final image. So you see just with
using a few tools.
11. Halation Tool: After the film look, we can use another tool which is just available in the studio version, and I use it all the
time is the halationTol. So halationTol, what
they do is that they kind of it brings it yeah, it's really hard to explain.
You have to see it. So the IPI do full screen, it kind of brings a
softer look to the image, and it also has this red kind of lighting effect in
the brighter area. So this is before and after. So that gives a soft
and dreamy look. For some of you, this
might be a bit too much. So what we can do is if you
have the hlation tool here, you can reduce the strength. So now if we have
reduced the strength, we go full screen,
there's a subtle change. So if you see on the
edges of the subject, there's a subtle
change in the image. I love this tool. So what I do usually is I
just change the strength. I don't do anything else. And if we want to use the same settings on
the previous clip, I'll just copy the halation to go in the clip
here that we changed. So you have to place
the halation tool in the end because
that's what we want, that we want the halation
overlay on the final product. So I'll just paste it here. So you don't see a lot of
difference here because here, there's no sunlight
falling on the subject, but you might have to increase the strength to really
see the effect. See if we go here towards
the hair of the subject, then you can see that there's
a bit of bright areas. So if we go full screen, it gives that soft look on
the edges of the subject. See this before and after. A lot of people, they ask me, how do you get that dreamy
cinematic look on your image? And halation tool is the secret. So, yeah, an Edition tool is only available in
the studio version. So if you're not
using Studio version, this might be the only
reason to buy a studio. Like, yeah, I use
it all the time.
12. Film Grain: And and one more tool. What I also use it every
time is the film grain. So film grain is if I just
zoom in on her T shirt, you don't really see much, but if I just go the opacity of the grain
to a bit too much, then you see, and then you
can also change the grain. I usually use the 35. No, I use 850 D. So what
happens is that if I go before, you can see the image was a bit normal looking like digital. Then if you go after, then
you have this grainy image. But it can be a good
effect in some cases, but you can also just reduce the intensity to make
it not too intense. I don't know if you can see
in the screen recording, but you have to really
try it for yourself in your system to see the
effects of the grain. So that is how you can also make the footage a little
bit more appealing, a bit more cinematic by adding the halation
and adding the grain. And now we're going to be
moving on to the next section.
13. Dehancer PlugIn Tool: Now let's talk about
a tool which I recently discovered and it is, I think, one of the
best tools to get cinematic look in any
video editing software. But the problem is it is
and it's not a problem. The situation is that it
is an external plug in. What external plugin
means is that? You have to download it
from some other website, and then you have to install
that in the winter resolve. And once you install that, then it would be there
in the Winter reserve. And if you see the
film Emulation tool, which is a tool which helps
you to achieve the film look, it's here De hanser
Pro, 7.3, 7.3 0.0. How you can install it. If you go to the description, it is clearly because
I already have it. I already have the paid version, so I cannot really show you how you can install
the free version, but if you go to
the description, there would be a link
saying how to install DhancerP trial for free. This DhanserP, it
is a paid tool, but the first two
weeks are free. And I would highly, highly, highly recommend to use at least the first
two weeks trial and see how you feel like. And once you are impressed by
that, then you can buy it. If you're not impressed by that, you don't have to buy it. You can still use the free
tools. They are still great. But yeah, I use
it for two weeks, and now I am using it in every video project if the goal is to achieve
a cinematic look. So I would recommend you
to pause this video, go to the description,
download the hanser and install the hanser
in the Deven serve. You can also install it
in the free version, so it's totally fine. But I really follow that
video which is provided, and once you have it installed,
then come back to me. Okay, so I hope that
you have installed the Hanser. Here, let's go. So how to use the Hanser tool. So what we would be doing is we're just going to use
it on a normal video. It's like a Rec seven
and nine video. It's not in any lot profile. So usually you do all the
changes in the beginning, like every other videos, and then you put the film
emulation tool in the end. So we just go to the Hanser. Then I would just drag and
drop here on the software. So like every film
emulation tool, as soon as you import it, the footage looks a
little bit weird. So what we need to do, you
go scroll all the way down, and then you do
disable all tools. And that would uncheck
all the tools. And what you also need to do
is you go to high and slow. So the quality would be good, but then the playback upp of the footage would
be a little bit slower. That's the only
demerit of the answer. Let's go to the first tool. Here you can choose the source Rec seven oh nine because our image is in
Rec seven oh nine. So here we have this. We don't need to change anything in the exposure here because it's best to change
the exposure with the Dent res of tools,
not the hanser. Here, first thing what I do
is I go to film compression. I enable it, and as
soon as I enable it, it kind of really preserves
the brighter areas. If I go before, you see,
it was a bit too bright. Now, it's a little bit softer,
a little bit film like. As I mentioned before, if
you see any film videos, they're not super over lighted. The brighter areas are
bright but not super, super bright, not crazy punchy. First thing I do is here, but you don't see that
much effect in this shot, but in the upcoming sections, I'm going to be showing you how much film compression
affects an image. Once we are done with that, then if I scroll down, I go to print. And with print, you can select either Fuji
film or Kodak look. If I do that, nothing happens
because it's not enable. If I enable it, you can see how crazy it looks
with just one click. So I've chosen the
Kodak 23 83 film print. In DawnciFre lots as well, they had Kodak 23 83. But the look was not
as good as this. Or if you want to
choose Fuji film, that also, I think the Fuji
film looks really great. So you see just by
using two tools, it already looks so cool. If you show this footage to someone who doesn't
know about the hanser, they would ask you,
how did you colorize? They would think that you are
this professional colorist. But in reality, you just need a de hanser tool and then
it's all good to go. Here what you can do. I wouldn't change anything in this case. I would go again up and
then film developer, I wouldn't choose anything here again because everything
the contrast boost, gamma separation, color boost, we can do all of this
in the winter resolve. So I just don't want to
make your life complicated. So input, also, we can close it. And now what we would be
doing is the answer we chose the Fuji film print so that gave a
look to the image. Now we have you can say lots. We have hundreds, thousands
of different thousands. We have so many lots available, what you can put on top
of the Fuji film print. So if you go here, like every
lot is just look at this, like how pretty it looks. Look how nice it looks. So you can choose
any of these lots. Sometimes these lots can be
a little bit too intense, but we're going to
take care of that. So there are so many of them. It's really subjective, like, which person likes which lot. I usually go for Kodak Supra, or I also do Kodak Vision
three. I also do this. With every footed, I just try it out and see which
one looks good. But sometimes it's
also really confusing because a lot of them
are looking really nice. Let's do Fuji color. I like this look. I kind of, yeah, I
really like this look. And what you can also do is
that you can do push pull EV, so that would kind of
give another look, but I would just leave
it in the center because this already looks nice. But if this whole thing is
a bit too intense for you, you can reduce the opacity, but that we're
going to do later. Color head, here
what you can do. You can change the color
tones of the image. So if I just enable it, so nothing happens now, but
if I go a bit more this side, the image becomes a bit yellow. If I go this side, the image
becomes a little bit blue. You can same do with
magenta or green. So yeah, you can play around
with that and you can also change the colors
of the shadows. You can change the
colors of the mid tones, you can change the colors
of the highlights. But I will just
leave it as it is. Maybe the green let's do before and after,
before and after. The green looks kind of nice, and now it's a film grain. So the film grain,
what we used in the previous section, you
can also use it here. But you don't have to use the
winter results film grain, you can just use the
Dhansers film grain. So you can go enable,
disable that looks nice. Which one I usually use
is 65 millimeter ISO 120. That gives a really
subtle film grain look, which is not a bit too much if I go all the way up to the amount, at amount 100, then
it's like this, but I usually keep it to 62 63 still looks a bit too
much, but just bear with me. And then we have halation as
well. So I make it enable. So if I go enable and disable, you can see that there
is a bit of glow here. And then the bloom
effect that also, you see the bloom
effect we were trying earlier in the DaVinci
in built tool, it was not doing that much, but if I just focus here. So if I just do the
bloom effect on, you can see the a little glow in the image that makes
the image look so cool. I don't do film damage because that just doesn't make
the footage look nice. I just don't touch it, but yeah, once you have the tool,
just play around with that. I don't do any of this. I
don't do nothing of this. Vignette, I also don't do it here because I can
change all of this. I can make my own vignette in
the inci, so I don't do it. What I do now is I can
change the output. So for some of you,
if it's too intense, you can still change the output. This was zero. This hundred. So I would just maybe
do it on the layers. This is before and after. You can see how cool it looks. But that is just dehanser. You can still change the
exposure, change everything. I wouldn't change everything. I would just change
the saturation. So let's just go here,
not label saturation. Yeah, I just I enjoy it so much using dehanser' just Yeah. Like, first, I
thought that yeah, I'll just do a two
weeks trial and then I would cancel it
because it's not cheap. But if you are someone who's really serious
about video editing, color grading, then you
should really invest in it. So I would be just
doing the saturation, changing the saturation
a little bit, because I don't really like the desaturated
look in the videos. I still want the saturated look, you know, to be
there in the videos. So I would grab
still and then if we have another clip,
let's say this one. So whatever settings are there,
I'll just get rid of it. This was the first
clip we were editing. So I'll go in gallery, and then I can just
paste the settings here. So if we go before and
after with the de handler, you can see this was just
a normal looking image. You see how nice it looks
with the film look. In some cases, in this
case, to be honest, I feel like the grain is
a little bit too much, so you can just go here
effects, reduce the grain. Once you know the
tool, then you know where exactly everything is. I cannot really find the grain, but we cannot find
it. It's here. So you can just
reduce the amount to, yeah, a little bit less. See how it looks
before and after. And if I want to give any other look, saturation is there. And if I still want to give any other look, you
can still do it. It's like if I want
to make it a bit more colder, you can still do it. It's really not a problem. And the Dancer is in the
end before and after. So yeah, it's so, so cool that, getting a cinematic look has
never been this easy. So I have another clip. It's all provided in the
description as well. So let's do de hanser on this
one. Everything looks good. Maybe I will change
the profile here. Let's do some Kodak
look, Vision three. So you really have to play
around with these tools. Now, I think I really
like the Kodak porta. It's This is nice. But here, what I feel is
missing is a bit of contrast. So we're going to add a bit
of contrast, how you do it, you go gain up up up, and then you go,
Let's down down down. Look at this image
before and after. Grains are a bit too much. So what we're going
to be doing is if you to film grain here
and reduce it, too. Say, 34 soc. You go before and
after. Really nice. And here you can just do anything like
anything, literally. If you want to
change the color of the blues, you can still do it. If you want to get this
image a bit more punchy, a bit more commercial
like, you can still do it. So yeah, everything is
possible in the hands or. So now what I'm going to do, I'm just going to change
the brightness of this image a little bit and then reduce the contrast
a little bit more, so it's still a bit more punchy. See how nice it looks. Also, for this image, we can do some changes. We go to gallery, paste the
Dancer setting what we had. And I have discovered
what the problem is now. So this image, I thought
that this image is inRe 79, but in reality, it is not, but it's still giving this look. So what we need to do we need
to disable the saturation, to disable this, and we need to change this image into Sony log. So what we can do is
just reset everything. You go to gallery, you go to Power Grid because that's
what we did before. Now this image is in a good. That's why I thought
that there's a bit of the image looks a bit
more desaturated. The brightness is not that good. The exposure is not that good. But now we can bring de
hanser here on Sony log. And now you can see that
now it looks so good. So what we're going
to be doing is we're going to be going to the output, reduce it to half, and then everything looks
good here, code and vision. This codec color looks nice. But here, what I would be
doing is maybe do Fuji film. Or codec. This looks
also really beautiful. So, you see, this was how my image was after converting
it to Rick seven oh nine. This is after I put D
hanser. It's insane. Now, if I want to increase
the contrast a little bit more, before and after. I also feel that I want to
change the color of this blue. So you can go here, go
to the custom curves, go to Hue versus Hue, select the blues here
and bring it to you. So you see, of course, you can get that fin look with the hanser but you can still do a lot of other
things after that. So what I want to do because this scene is very
similar to this scene, I would just copy the settings
here and see how it looks. Look at this. It looks so good. The brightness is
a little bit less. So what we're going
to be doing is just increase the brightness
a little bit, and then here we're going to
be reducing the contrast. Maybe add another note. Before and After. So cool. So that's why you should
invest in the hanser. Like, I have the
same bicycle clip. If I have the bicycle clip here. If I want the de hanser on
this one, just go Gallery. I can paste the same setting. I can choose also not to, but I'll just do it
just for the sake of this class because you
really have to play around yourself and see which
setting looks really nice. Here, if you go to de hanser, we can just try
different color patterns and see what looks looks good. I think it looks already nice. And here we can, of
course, increase the saturation brightness. So that was an introduction
to D hanser for you. And I would really
recommend to just play around with it
because, in my opinion, that is the easiest way to get cinematic look in the inch whether it's a free
version or paid version. And look what you get is just it looks so professional and the amount of color grading
knowledge you need to have to do that is
barely nothing. So yeah, I think we
are done with Dhancer
14. Thank you: That was it for this class.
I hope you enjoyed it. And for the class project, I want you to
collaborate your videos, your personal videos, and then summit it down
in the class project. Or if you want, you
can also collaborate all the resource file that I
provided in the description. And if you enjoyed this class, then don't forget
to give a feedback. That really helps me to push this class to other students. If you have any questions, then tell me in the discussion panel, I would be really happy to
answer all your questions, or you can just email me all the information is
provided in the description. And I will see you
in the next class.
 Adi Singh, Videographer and Youtuber