Transcripts
1. Introduction: In creativity there is no such
thing as the destination. It's all about the journey. That's why as artists, we are constantly
evolving, learning, growing, and what
better way to do so than with a little
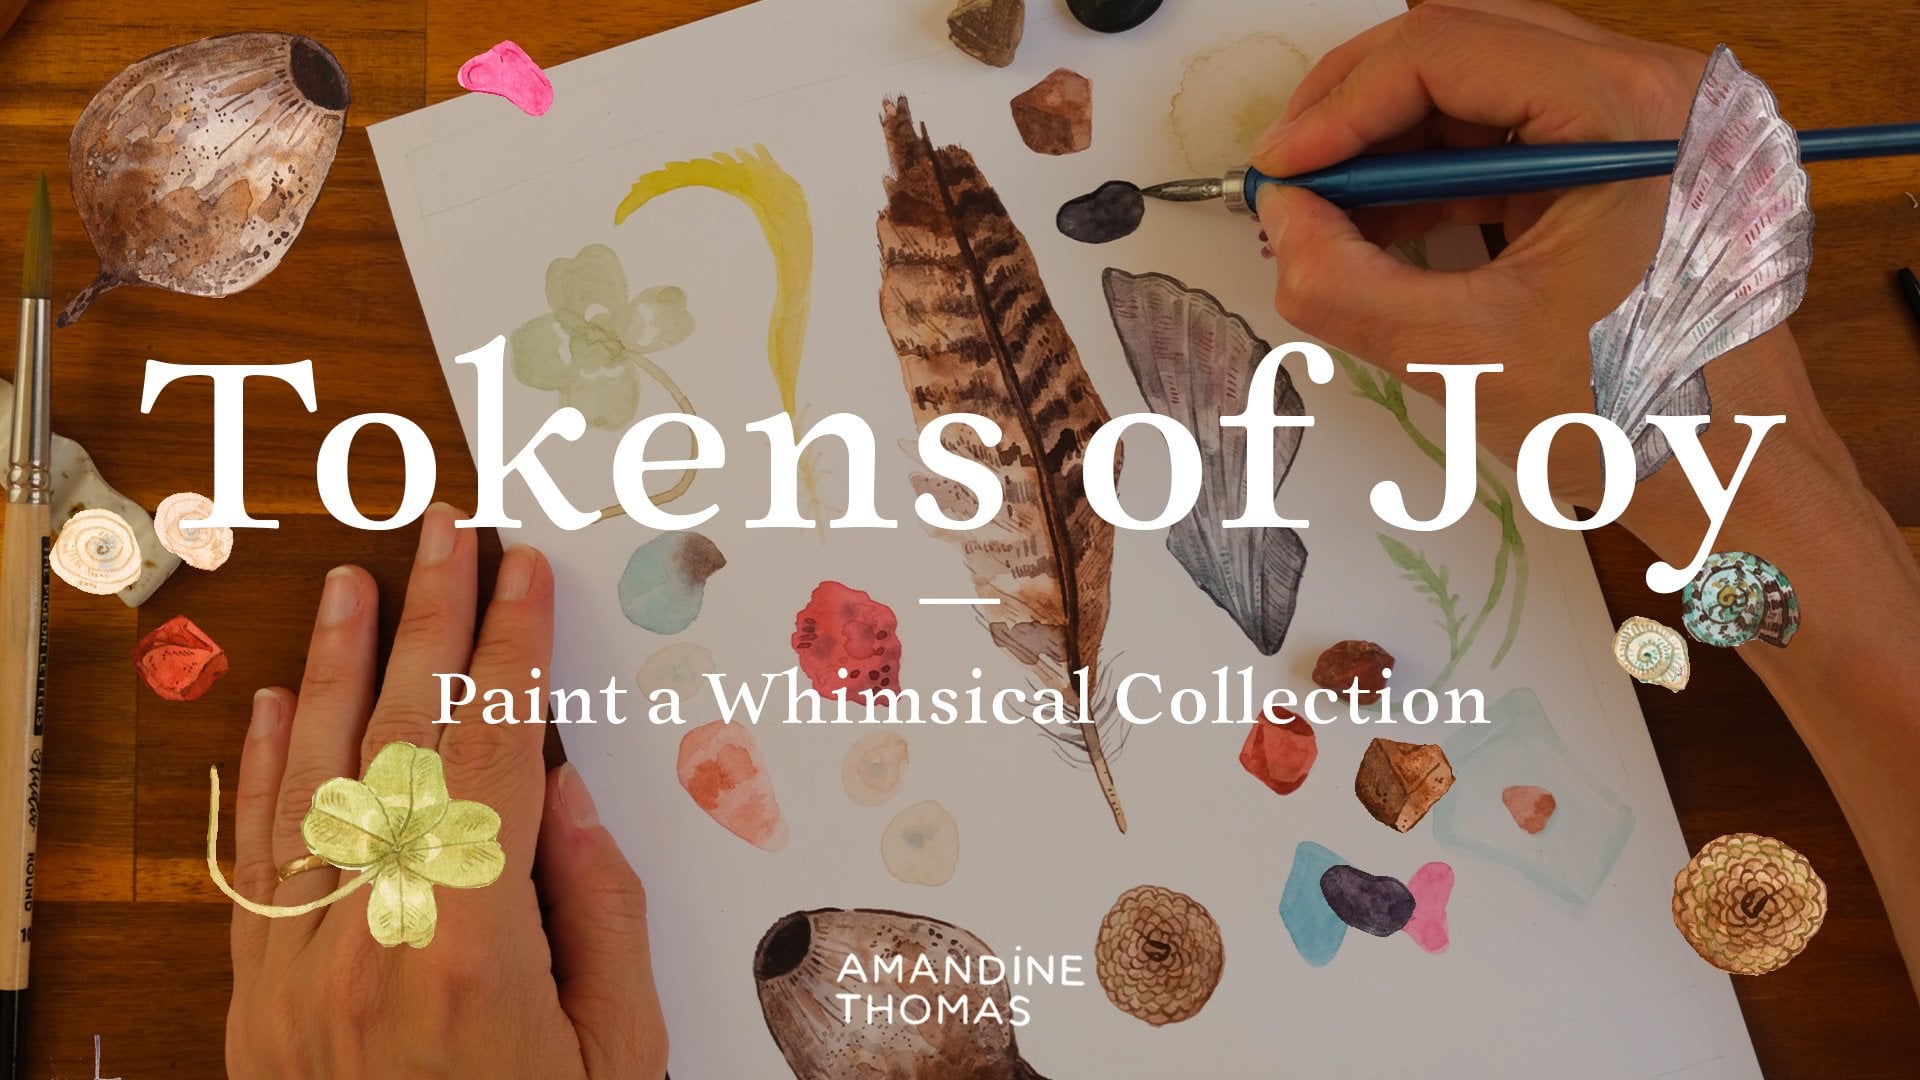
bit of a challenge? Hi, I'm Amandine Thomas, and I'm an award winning
author and illustrator. My work is playful, lively, full of colors and details, but most importantly,
it's ever evolving. My personal creative journey
is based on exploration. I'm constantly looking for
new ways to challenge myself and keep my style fresh,
original, and authentic. As a firm believer in the power of playful, creative
explorations, I know there is
nothing quite like a few constraints to help us spark ideas and give us
permission to try new things. That's why in this class, I'm going to lead
you through a series of exploratory fun exercises that will challenge your
approach to creativity. First, we'll talk about why
playfulness, exploration, and yes, failure are such important parts of
the creative process. Then I will walk you
through three, low pressure, open-ended exercises that will have you think outside
the box in minutes. From using your
favorite tools in unconventional ways to
hijacking everyday objects, to make art, get
ready for a fun, fast-paced class that is
sure to leave you inspired. Along the way, you'll learn to approach creativity
with an open, curious mind, how to experiment
freely with mediums, tools, surfaces, and more, and how to use creative
exploration as a way to strengthen your
own personal style. You might be a beginner keen to start your journey
with a bit of exploration, or a pro wanting
to keep evolving your style. Regardless, all you need for this class is a bit of
an adventurous streak. Even if you don't see
yourself as an adventurous, fearless artist, don't worry. I've put together worksheets
to help you along the way, which you can download in the resources section
of the class. You can also check out my
previous classes for a bit of an inspiration and confidence
boost before you start. That being said, I'd love if you could step
into this class with the mindset that this is a
safe space for you to play, to experiment, and to fail. Because yes, failing is an
essential part of creativity. There is no winning
or losing here, only opportunities to grow, to learn, and to evolve. If you're ready,
grab your brushes, the content of your
kitchen drawers or literally anything else and let's take a closer
look at those challenges.
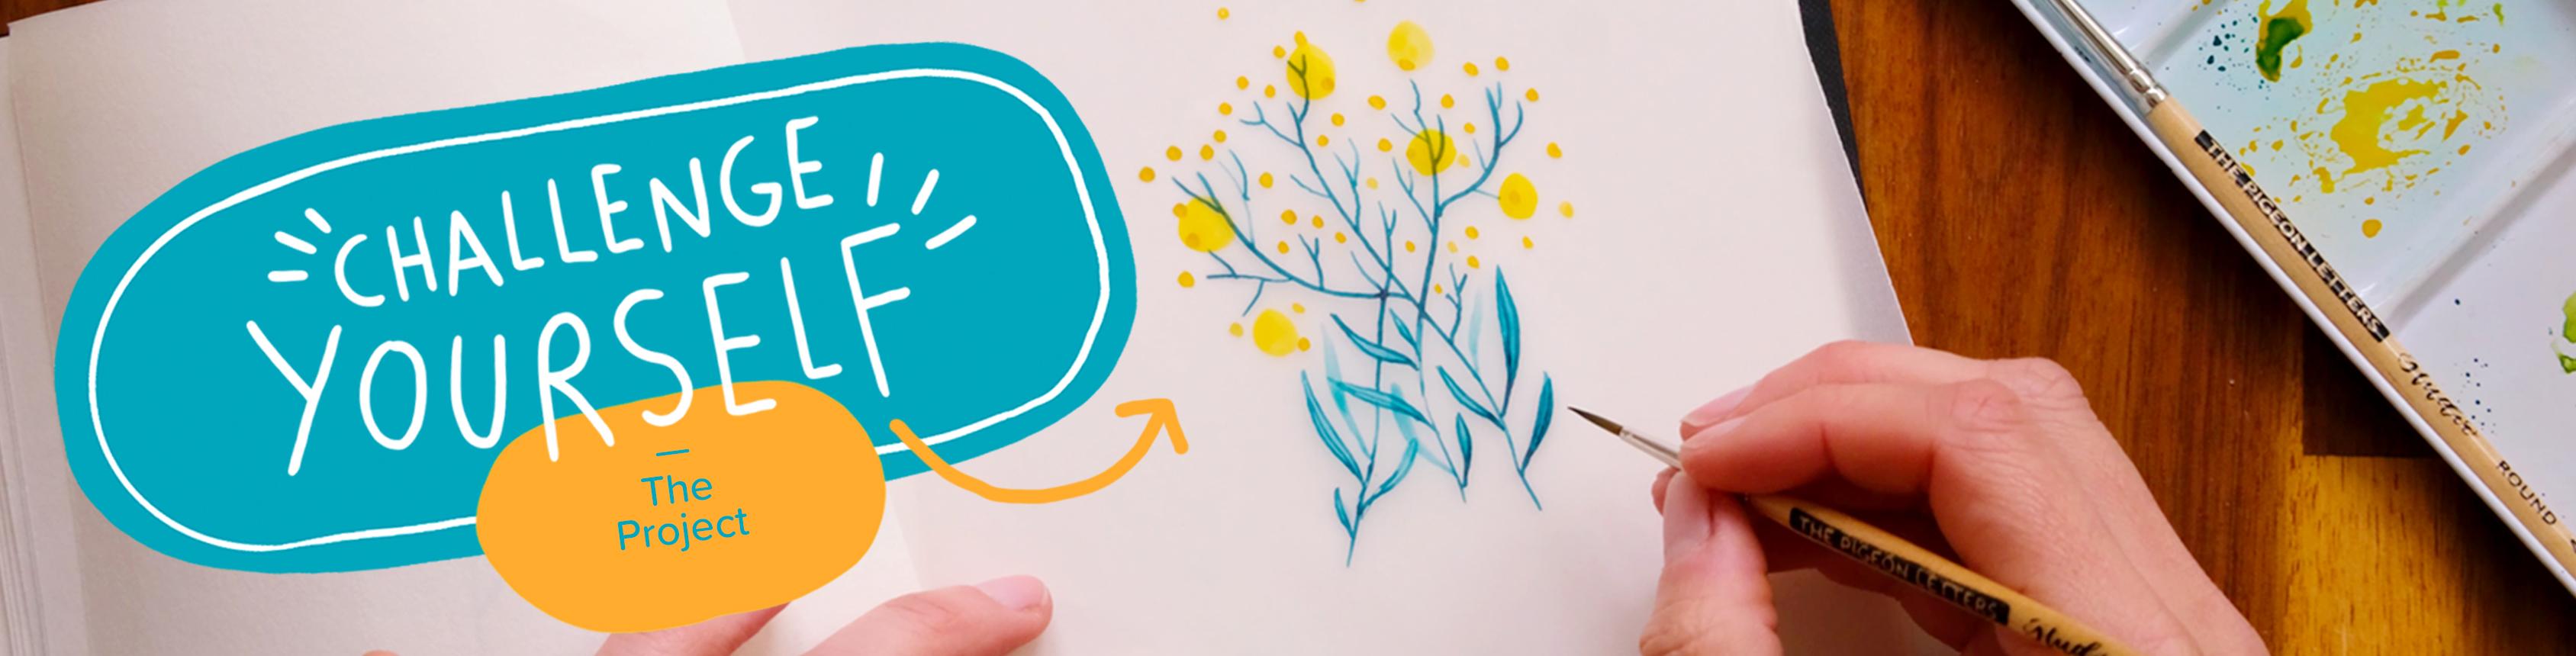
2. The Project: Hi again. Are you curious about the challenges we'll
go through in this class? Let me tell you more. I will take you through three, fast-paced challenges that are sure to boost your creativity. First, you will use
your favorite medium, but in an unexpected way. Then you will paint or draw, but on unconventional surfaces. Finally, you will dig
through your drawers and re-purpose an everyday
object as a tool. All you need to get
started honestly, is an open mind. It might feel silly or weird to go through these
challenges, but remember, there is no good or bad outcome, only opportunities
to unearth new, exciting, yummy,
creative nuggets. Every exercise will be covered
in details in the class, including prompts to
think outside the box, tips to keep your creative
practice fresh and exciting, and tricks to strengthen your personal style
with fun experiments, new techniques, and
yes, happy accidents. If you want a little bit
more direction throughout, remember to download
the worksheets in the resources section of the class and simply
follow along. As for materials, you will need your
favorite medium, from watercolor to charcoal, whatever tools you
have on han, from your oldest scraggliest
brush to your best pencil sharpener,
and an inquisitive mind. Trust me, you will
need it to unearth potential art supplies in
the most unexpected places. Once you've completed
all three challenges, feel free to share
the results of your exploratory journey with the rest of us by uploading them to the project
section of the class. In the meantime, let's take a closer look at
why playfulness, exploration, and failing are such an important part
of any creative journey.
3. Play, Explore... and Fail!: Over the last few month, I've been reflecting
a lot about how creatives present
themselves to the world. On social media, we scroll
through perfectly curated feeds; row after row of
beautiful images, consistent color schemes, instantly recognizable
visual styles. But what we see out
there is actually the result of countless hours of personal creative exploration: Scribbling half-baked
ideas down, trying new techniques on a whim, or following a creative
spark down the rabbit hole. Yet, the pressure to share flawless, out-of-context work, fully erasing the
creative process itself, is incredibly strong. I feel it. I'm sure you feel it. We all feel it. But remember, what we see is not all there is. No artist was ever born, in a sense, with a fully-fledged,
flawless style. There is a huge amount of work going on in the
background for all of us. In my case, for example, the refining and
perfecting of my style mainly came from experimentations
in my sketchbook, as you would know if you've taken find Your Creative Style; a class that explores
this very topic in depth. Yet social media
would have us think that no one has ever
produced a bad drawing. That's a shame because it
leads to a devaluation of that incredibly important
journey in any artist's life. What I want do in this class is create a safe space
for you to play, to experiment, and to fail. What happens when
play, for example, is fully integrated into
the creative process? Well, creating because it's
fun allows us to let go of self-consciousness,
and it gives us permission to leave
no path unexplored, no ideas unraveled, no
impulse unfulfilled, no matter how silly
they may seem. What happens when we let
ourselves explore freely? I personally believe
that there is no good art without personal
creative exploration. It generates original ideas, and keeps our work fresh and authentic. Because following
trends or copying someone else without anchoring
our work into some personal or emotional place is just not as
satisfying, is it? Creative exploration
also allows us to identify what we truly
enjoy in terms of tools, medium, but also influences
and inspiration. All this coming together is what leads us to a more
authentic style. Finally, what happens when
we allow ourselves to fail? What we see online, the work of people we admire, it really is the
knowledge gathered after a long series of failures. Because failing is a
wonderful way to learn, by letting ourselves be
bad at something and by accepting that not everything
we produce must look good, we learn to sharpen our eyes, to trust our gut, and to objectively
assess our work. It's 100% through this messy, vulnerable process that
the authentic voices of many artists emerge. By breaking this concept down before we get started
on the challenges, I'm hoping to help you step
into the practical part of the class with more
realistic expectations of what you might produce, and
why it's okay to create something ugly,
messy, imperfect. Remember, this is a safe
space and we're all about the journey,
not the destination. As you make your way through
the next three lessons, do nurture your creativity, embrace the messiness, and give yourself
permission to fail.
4. First Challenge: Use any Medium in an Unexpected Way: Are you ready to get started? In this first challenge, you're going to use a
favorite medium of yours, but use it in an unexpected way. This will help you
think outside the box, break creative habits and allow for growth
in your practice. Especially at times when you might feel a little bit stuck. I myself have felt stuck
creatively many times. Often it comes from some
perceived limitation. Either something we think we can't do or we're
just not good at. In my case, it had
to do with color. Earlier in my career, I wanted to use color, but I considered myself
a drawer, not a painter. I tried to get out of the rut
by imitating other people, which did not go well. I had to find a way
to use color in a way that felt natural
and authentic to me. The only way to do this is, you guessed it by playing
around and exploring. For me, that looked
like introducing color while keeping a
strong drawing foundation. Not magically turning
into a painter, but rather finding a way to integrate color to my line work. That's how I came about using
watercolors with a nib, a technique you'll
be familiar with by now if you've watched
a few of my classes. This challenge is designed
to help you overcome these struggles by taking a familiar medium and
flipping it on its head. How can you use it in a way
that is truly unexpected? Of course, to get started, you're going to need
your favorite medium, whether that's charcoal
or gouache or watercolor, and some loose paper or a notebook in which you feel
comfortable experimenting. You can also keep your
worksheets handy if you want. In the worksheets, you'll
find the following prompts. If you didn't know what
this medium was at all, how would you hold it? Use it? Imagine being a child presented with this
medium. What would you do? Site note, I have a
toddler at home and she's done some pretty
interesting things with my art supplies. For example, dipping
a watercolor pencil straight into water and
seeing what happens. What is something this
medium is missing? How could you improve it? I will be demonstrating
how to use watercolor in a few
unexpected ways, but please feel free to go
with your medium of choice. The tips and tricks I'm
going to be sharing in this demonstration
can be applied to all and any techniques. To start with, you might
want to pick a theme. It might be something that's
relevant to your day, something you've seen or done, so you don't have
to overthink it. For me, I'm going
to use one theme throughout all the challenges,
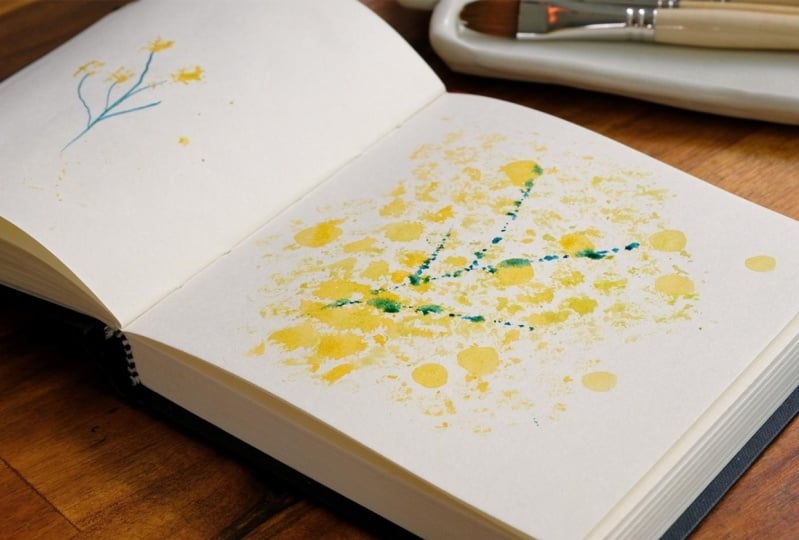
and that's going to be wattle, because it's a flower
that blooms when it's cold and we're getting pretty close to winter
here in Australia. Obviously I'm going to choose my colors based on
that theme, with a nice eucalyptus-inspired
green and a bright yellow. What I'm doing right now is
nothing too unconventional. I'm just painting a background. But then I'm going to
create a texture by pressing a piece of paper
towel onto the paint. I usually use a paper
towel to clean my nib. But it made a really
interesting imprint, which is going to
be my background. On top of that, I'm going to be using
my favorite technique, which is a nib or dip
pen with watercolor. What I do is that I use a brush
to fill the nib directly, which allows me to mix
my own colors and not be limited by the
colors of pre-made ink. It's lot more versatile
that way which I love. Then I can just draw with it just like I would with a pen. But today I do want to
challenge myself too, not just do things I
already know how to do. I haven't really prepared anything beyond picking a theme. I'm already doing something
I don't usually do, which is drawing on wet paper. That's giving me a
really fuzzy line, while I usually prefer a super
crisp, super sharp stroke. This is taking me a little
bit out of my comfort zone, but that's the goal. You might also be
feeling a little bit uncomfortable throughout
the challenges, but just lean into it and
don't overthink it too much. Now, you don't have
to pick a theme. You could 100% go abstract. But if you've decided to actually draw or
paint something, don't worry about doing it well or drawing something perfect. Just go with the flow and
remember it's okay if you make little mistakes or
if it doesn't quite work out. Here, I'm simply drawing a couple of branches of wattle, so just tracing the stems and the leaves with my
greenish color. You might be wondering
how I came up with this slightly tedious
way of using watercolor. But basically, I wanted
to use more color in my line work because I've always thought of
myself as a drawer, not a painter, but
I do love color. It started with experimenting
and obviously it took me a little while to refine
and master the technique, but it truly came from playing around and trying new things. As I said though, I do want
to challenge myself as well. I'm asking myself some of the
questions from the prompts. Like how could I
hold and manipulate this if I had no idea
what it was for. One of the ideas
that just popped into my head is to flip it and use the butt of the nib to draw my
little wattle blossoms, embossing them in the paper. It's probably a bit difficult
for you to see on video, but it's working
quite well because the paper is still slightly wet, so I can make an
imprint really easily. That's quite fun and
not something I've tried before, but I like it. I'm just going to keep on
adding blossoms everywhere. Usually when I draw wattle, I also make little dots but with the right side of
the nib, not the butt. But now that I have
embossed the paper, I am wondering what
else could I do? I want to be letting myself
be guided by intuition. I'm wondering what
it would look like if I painted on top of it. It might not actually be
doing much in terms of visual impact but I do
like the subtlety of it. If at any point
you want to follow your intuition and modify the parameters of the
challenge, go for it. For example, I'm just thinking
it might be good to use my finger to capture the
fuzziness of the blossom. I'm just following that
hunch and trying it out. But you could swap
tools or go back to basics and use
your fingers like me, you could even change
medium or mix them. There really are no rules. If you want to, you can
repeat this exercise multiple times and push and hone
and refine your ideas. That's how you can
build on a discovery and make it your own. You can see I'm going
back to my brush, just because I like the mix of the more fuzzy blossoms
with the sharper ones. If you are also reverting
to a more familiar tool or mixing traditional techniques with more experimental ones. That's okay. There is no right
or wrong way to do this. It's not about who challenged
themselves the most, it's really just
about seeing where exploration and inspiration
is going to take you. I really encourage you to think positively about the results
of your experiments. Maybe even think about
a couple of things you like about it for each of them. If you've watched my
class "Yes, You Can Draw," you'll be familiar
with that concept and why it's important. You can see here,
I'm just bouncing around going back to
my nib, using the tip, the butt, picking brushes,
putting them down. Not everything is
working but that's fine. I'm just going to
keep on going until I feel like the
piece is finished. Once again, even if you've only challenged
yourself a little bit, that's already super positive. Don't feel bad if
you've reverted to more familiar territories
halfway through, maybe you can get
more experimental in the next one
and the next one. Now I think I would like to
add another color to this, and I'm probably
going to ruin it because I actually
quite like it as it is. Adding anything else
might not work. But I would like to add a peachy, muted pink and see
what that looks like. Usually if I like
something and I feel like I'm done with
it, I walk away. But we're here to experiment
and play, so it's fine. I'm even going back
to the finger. Just having fun at
this stage really. No one else has to
see what you've made. Obviously, I want to see it, but this is your time to be
creative and enjoy yourself. Here is my little
series of wattle using the same principles
I just demonstrated. As you wrap this exercise up, I beg you please do not
throw anything away, no matter how ugly or
bad you think it is. Come back to it in
a couple of hours and you'll be able to
assess it a little bit more objectively,
and maybe even find some positive
qualities to it. If you feel
comfortable doing so, please share the results in the project gallery
of the class, and I will see you for
the next challenge.
5. Second Challenge: Paint or Draw on Unconventional Surfaces: Brace yourself for
the second challenge. No I'm kidding, it's
really not that bad. In this lesson, I will
challenge your creativity by imposing a new parameter
to your routine. Painting or drawing on an
unconventional surface. As we've discussed before, having strong
constraints can help us not only break out
of creative ruts, but also take a bit
of pressure off. For example I'm one of
these people that really hate having an ugly page
in my sketch books. I always put a little
bit of pressure on myself when I start a new one. Of course some pages are
ugly. It's inevitable. It's part of the
creative process. But that doesn't make it easy. Lately I've been drawing
with my toddler a lot on random bits and pieces, scrap paper, cardboard boxes, and huge rolls of butcher paper that keeps on going
and going and going. It's been quite liberating. Not only do I not have to worry about my sketchbook
being perfect, but it's also allowed me to experiment with new
tools and techniques I'm not particularly
comfortable with in a fun and relaxed way. This is the inspiration
for this challenge. This means that you
will need to find potential surfaces
to draw or paint on. It could be bubble wrap,
aluminum foil, cardboard... Of course, you will need
something to draw or paint with. It might be easier to go with something you're
quite confident with, but by all means, feel free to explore
and have fun. Once again, you might want
to use the worksheets prompts, like go for
your recycling bin. What can you salvage? Or go through your art
drawers. What's there? The back of a drawing pad, some Christmas wrapping paper? For this challenge,
I will demonstrate a technique I've developed
through trial and error, which is using watercolor
on tracing paper and how that's become
an integral part of my current style. But the tips I'll
share will apply to pretty much anything you might
want to experiment with. Please go with what
you have at home. Keeping with my wattle theme, I'm going to get started with
my tracing paper technique, which I naturally developed
over the past few years. What led me to experiment
with tracing paper in the first place is that
it's extremely smooth, amongst other things, of course, which I'll mention in a minute. But for me, using a
smooth surface with the nib is a huge
advantage because it can glide and create these
super fluid, beautiful strokes. I don't actually like using watercolor paper because the nib gets caught in the grain, it feels a bit
scratchy and I lose that nice, flowy
gesture which I love. But you can see right now how luminous and smooth the effect is without losing any of
the fluidity of watercolor. When you're picking your
unconventional surface, you might want to
think about what would work best
with your medium. Is it a super textured
grainy surface, or something you can get wet to get some beautiful water effect? Or does it need to be
really smooth and silky? Quick little tip. If you start to feel overwhelmed
with all of this, just pare back, stick to
only one or two colors, use a medium you're
very confident with... There is no need to
pile up the difficulty. The other reason why I love tracing paper is
because I really enjoy working with
transparencies, and I always layer my illustrations
for that reason. One thing you can do
with tracing paper in particular is paint
on both sides of it. I can have my line
work on one side, and then flip it and have
my color on the other side. The best thing
about that is that you can see when I add color, it doesn't impact my
line work at all. Because if I use this
technique on paper, once I come and add
color to the line work, often it will bleed and lose a little bit of its sharpness. Here instead I can lay all
these vibrant colors with my super crisp line
work and create all these transparency
effects which I love. What I liked and what I
wanted for my medium guided my experimentations in a way,
like an answer to a problem. I encourage you to think about your own experimentations
in that way. What is the problem
you could solve for yourself with
this challenge? But as I said, I wanted
to challenge myself too. I'm going to use a couple of other unconventional
surfaces with you for the first time today. Here I have some bubble wrap, which like tracing paper is transparent and very smooth. Why not give it a go? I'm going to start
with a little test. You can already see that the paint, because
it's water-based, is just not sticking to
the plastic super well. I'm going to have to
troubleshoot and maybe use the bubble wrap
as a stamp, to print. It looks a little bit like
water blossoms actually. Let's go for it and paint
the whole surface yellow. If you run into similar
issues with your surface not cooperating, by all means, troubleshoot and see if
you can use it to print, to stamp, to engrave... Don't feel like you
have to stick to the challenge to the letter. There is a lot of
wiggle room here. Here we go. Applying
a bit of pressure... You can see the paint is
transferring to the paper. That's pretty cool. The
bottom left corner in particular actually looks like water blossoms, which is great. I'm going to go for a
second layer to bring even more texture and
fullness to the page. This is pretty fun. Here, I'm going to revert
to a familiar tool, which is, by the way, 100% okay at any point in the process, to define some of the blossoms a bit more and highlight
a few of them. If at any point you
want to change tools, change medium, change
surfaces, please go for it. This is meant to be
playful and exploratory, so we're not tied to
any strict rules. In fact, if things get too hard, sometimes all it does is
make us want to give up. No need to push yourself beyond
the point of having fun. Stay tuned to how you
feel and remember, exploring basically means coming across the unexpected
and adapt to it. You do have to be a
little bit flexible. I'm just adding the stalk here. I actually really like this. I'm surprised at how
well it's turned out. But I have another
smooth surface to try today and
that's aluminum foil. My idea here is to use
the butt of the nib again and see if I
can engrave the foil. My hope is that once
I paint the foil, everything that is engraved will stand out like negative space. But the theory is untested yet, so we'll find out if
it works together. You can see I'm engraving
the foil with wattle again, using techniques developed
in the previous challenge, building on what I've
learned in a way. Now I'm going to apply the
paint and, without surprises, it's not really
sticking super well. But I think I might use
it as a printing matrix again and see if we can get something similar to
maybe a monotype print. Although that's very ambitious. But even if it
fails, that's okay. Remember, failing
is totally okay. We're here to try new things, not nail it straight away. I'm just going to add a few
little yellow blossoms here. I'm going to go ahead and press the foil into my sketchbook, giving it quite a
bit of pressure to make sure the paint
transfers well to the paper. Here we go, pulling it back and revealing... that didn't work. [LAUGHTER] We obviously can't
see the engraving at all. It's more of a lovely, quite subtle texture, but that's okay. I do like the texture. It's not something
I've produced before, but I do want to give it another go and to see if a more applied and maybe systematic pressure
can make a difference. Rubbing the foil into
the paper a little bit more to see if we can get
the engraving to show. Well, it also didn't work. But once again, that's
a lovely texture that I probably couldn't
recreate with my usual tools. I'm happy with that. Here are my three unconventional
surfaces together. The one I've mastered
over the years and two completely
new experiments. Once again, I would love to see what you've created
for this challenge. Feel free to share in the
project gallery and don't feel embarrassed if it look silly or weird. It's the whole point. This is a safe
space, no judgment. In the meantime,
I will see you in the next lesson where we will
tackle the last challenge
6. Third Challenge: Repurpose an Everyday Object : Ready for the last challenge? This one is all about fostering a curious and playful
creative mind, which is super important to continue to grow and
evolve as an artist. To do that, we're
going to repurpose an everyday object
into an art tool. Challenging yourself
to think outside the box is a great way to expand your creative horizons and avoid getting bored in
your own practice. Plus it's definitely fun. That's a tick for
that playfulness box. In my own work, I love mixing graphic patterns
and transparencies, which makes sense
since watercolor and line drawing are
the main techniques I use in my illustrations. This love for juxtaposing
graphic patterns and textures has led me to some pretty interesting
experimentations, like using a Stanley knife, a pretty utilitarian object,
as an engraving tool. First to correct mistakes by scratching the
surface of the paper, then as a mark making
tool in its own right. But there are so
many objects you could repurpose based on your own preferences for
tools, mediums, or techniques. So go on, go open all
your cupboards, all your drawers, and
find that perfect tool. Once you've gathered
a few candidates, select your medium,
tools and technique. Of course you can refer back to the worksheets for the
following prompts. Lists different mark
making techniques. What can you use to
draw or trace, dab, splatter, scribble, or stamp that isn't a
traditional art tool? Think about your favorite tools. How can you reproduce or
expand on their function? In this demo, I will attempt to use a knitting
needle, a fork, and some nifty little toothpicks to add a graphic
pattern to a texture. But if you have a
different object in mind once again, don't worry, the advice I'll be giving
throughout the demo is pretty generic and can
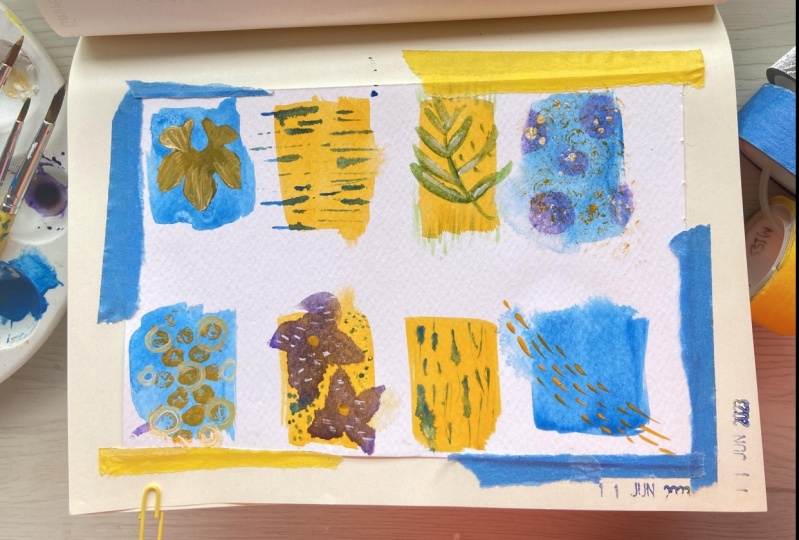
be applied to anything. I'm going to start
here by painting some simple colored backgrounds
to test my tools on. On these backgrounds,
we're going to use simple mark-making
techniques with your object. Can you trace lines, create graphic patterns such as crosshatch or simple dots? Or is it more suited for splattering, for
dabbing, pouring? Obviously, I'm
more of a line drawer, graphic patterns lover myself, so we'll see how that
goes for me today. Of course, keeping in mind
my theme of wattle, even though I might take a bit more of an abstract
approach here, letting the theme
guide my gesture, but not actually trying to draw wattle
if that makes sense. My first tool is
the humble fork, which I thought
would be great to trace lines and draw with. I tried to pick objects
that naturally matched my style and that I can
use like I would use my nib. Popping color on and then
applying it to the paper. That's actually not bad at all. I like the patterns
that are emerging. Of course, mark-making might be more suited to abstract art, but I am keeping in
mind my little blossoms here to once again guide my gestures and the
patterns I'm creating, but I'm not
overthinking it either. If you like something
you've done but your object
isn't nailing it, you can always try to
find a more suited one. Does it need to be softer, harsher, thinner, broader? Like I want to switch on to my knitting needle now to have more control over my gestures. Starting with that
embossing technique again, which as we've seen in
the first exercise, works quite well on wet paper. You know it's great
to start building on what we've discovered
and include previous findings into our work, even if they haven't
quite landed yet. What object can you repurpose to improve on these findings? Now, I'm moving on to using the needle
like I did before. But that's not really working. You can see I'm
having difficulties getting the paint
onto the needle. It's almost too sleek and I actually have to work quite
hard to trace anything. Even dipping it straight
into the paint, I'm not really getting a
smooth, nice mark here. But I am going to go
to my tooth peak now, which I have high hopes for, as it seems the closest
to a Stanley knife. But it's actually not
scratching at all. It doesn't appear
to be sharp enough so it's more like
engraving again. You can't really see the
engraving that much on paper, so let's try to apply color. Once again, changing the
parameters on the fly. That's actually quite nice.
It looks like a leaf. It's quite organic and earthy. Happy accidents! But I really want to try and
scratch that paper's still. I'm giving it a good go here but it might have worked
better on dry paper. Maybe something to remember
and try next time. But here it's just not
working super well. I'm making a mess,
which is fine. It's part of the whole failing
thing, embracing the mess. But I wouldn't necessarily
push this any further. It's just not feeling
right once again, but always good to try. We don't know what will come
of it until we've tried. I'm going to try the new
technique with this, like I did with the fork
and the needle, and try to trace by applying color
to the tip of the tool. But once again, it's the
same issue as the needle. It's just too smooth to
retain the paint well, and you can see, I have to apply a
lot of watercolor. They are literally
globs of color there and that's not really
the effect I'm after. A bit of a let down on
the toothpick front, but a pleasant surprise
with the fork. I didn't expect to enjoy
using the fork this much. I could try and push
myself further and use my favorite of the three tools
to create a bigger piece, which I encourage
you to do as well. Once you've gone through
this mark-making challenge. Pick your favorite
and see how you can integrate it into a
larger piece of work, either figurative or abstract. It might work, it might not, but that is fine either way. That's a wrap. How quick
and easy was that? Once again, if you feel
comfortable doing so, please share the
result of all of these fun experimentations with us in the project
gallery of the class, and we'll move on to the
next lesson where we'll unpack everything
we've learned and think about next steps
7. Where to From Here?: Congrats, you have
finished this class. Well done on
challenging yourself to step out of the box, to play, to experiment, to explore, and of course to give
yourself permission to fail. This whole process might
have felt a little bit uncomfortable
and not quite right, but now we get to
reap the benefits and that is the
best, juiciest part. Of course you might be wondering
how to make the best of all these challenges in your
own daily creative routine. This will help you value the importance of the
creative process itself, which fuels your imagination
and keep your art fresh, rather than simply its result. Detach from the
perceived perfection of social media and its
associated pressure, and use your creative
findings to further develop your authentic
creative voice. You might be thinking, this sounds good, but
how do I make it happen? Well, here are my top
five super practical tips to apply the concepts covered in this class to your
own creative process. Don't be afraid or ashamed to share your exploratory journey, the mess and the failures
behind it. Who knows? You might actually inspire budding artists to keep on with their own experimentation
rather than become discouraged by
the perceived struggles. Critically assess your
mistakes and learn from them. Every artist goes through this. That's how we hone and
refine our skills. It can be as easy
as making a list of positive and negative points about a particular
piece of work. Stay curious. Try new tools, new mediums, explore new techniques, even if you think
you're bad at it. There are no such
things as bad or good when experimenting,
just pure potential. If it feels right, integrate your
creative findings into your style, whether
it be a new tool, or a new way to use
your favorite medium. This will make your
authentic voice shine. Keep it relaxed. Remember, it's all about the journey, not the perfect Instagram grid. It might not look like it, but even the best artists
out there have bad days. With all of that said,
I really hope to see your work in the project
gallery of the class. Good, bad, ugly, messy, just anything you've produced
is worth sharing honestly. If you enjoyed this class and you would like to
see more from me, feel free to check
out my website, my Instagram, or sign
up to my newsletter. Plus of course, I also have a
whole series of empowering, fun classes for you to
explore on Skillshare. Congrats again for completing
this class with me. Please let me know
what you thought by leaving me a review, it's really important
for us teachers to know how our class resonated
with our students. Thanks in advance, and in the
meantime, happy exploring!