Transcripts
1. Intro slip casting technique: Hello everyone and welcome to our new ceramic glass with me posting things into this last one, I'm going to be learning how to do this slip casting technique with our moles. And we made a mold in our class and a half. So check it out if you don't have your moment. And I'm going to teach you know, how to use it. So the slip casting technique is really happy if you want to make a little reproductions of the same sign. So for this lesson I'm going to feature how this technique works. What do you need to get started? And I will give you some tips and tricks on how to do it. So let's go to the first lesson.
2. Materials : So now I will be showing you what materials we need for this class. First of all, we're going to need ceramic sleep. You can find these in powder version. So you just get like a power divider in use, have to run like water. So you Gatto silicate. And there's a saying in English, or it's very few. Astro, our distributor, like what does the material needs to get lambda consistency that were required for this? Yes. What I have here is a sleep that it's already perfectly made just for using. So it's already liquid. And we're going to mix it with these and t, So we need a driller. Drill. Yeah. And these sort of normal business for paint you can find at the hardware store. So this two are important for mixing the Thisbe. I'd like to have our Robert Hummer because sometimes if people want to get out of the, Get off the mould and with these you can hammering out your also wanted we needed one of these four before you put the sleeping the mall unit, deposit it through here, so it doesn't have any impurities. While also comes very handy is having an excuse or would I like to put these ones on top of my my book at? So when I do the sleeping, so when I take this leap out of the mall, I put it here and ended the molding hanging onto like this. So you will see in a moment how we do that. We also need one of these jars to Buddhist leak so it can help us yeah, pour it in the mall. And these things I like to use, these ones and these ones are from the tires, take the cameras of the tires. And I think that you're going to find this anymore because they make in the tires differently. But these can really handy like they stretch really well. And you can have it in different sizes. So you have a circle like a doughnut of the camera. You just cut like stripes and you can get like 20 out of one on one tire. So I really recommend this ones where you're gonna find these ones. And these ones are also cheaper. You can also use these one. I found it a little bit more aggressive with them on, but it also will you cannot reduce these ones. And these ones we're closing the moles that have a lot of pieces. So wherever these can work hard. And I didn't that's all we'll see if something comes up. Or yeah, of course, you need your holes. So here I have the moles that we made in the last class. So you don't have them all urinal hose to do it, go and take that cuts out. And they also have a few moles that I got in ceramic stores. So a lot of traffic stores, they oversell the moles, like basic shapes of like cups and bowls and distinguish. And you can get them already with your yeah. And your shrunk shop. So with this, we can get started.
3. Preparing slip and molds: Okay, so the first is to prepare our sleep. And you can see these one lose revenue watering on top. And he's because I bought it a while ago in having duty to them. So that's why you need to really, really mixed it in it so that it has this consistency that we need for sleep. So I will put my painted semi driller, my paint shaker, and semi trailer, and then I will start mixing everything until I have a nice Cree sleep casting surrounding sleep. It's not what looks like a link like this water applicable of love to hit the pocket. Because here's what's happened to me that I need the book that I recommend and everything was falling out of it. So it was horrible. This technique works for both types of clay. For the power one, you will also need this. For this one that's already gone. You can't do also needed is going to give it a good shake before they started. A little bit more Sylvie. Consistency. And once you're done, deliberately shields. So the balls come out slowly. And we can start doing our slip casting children. Okay, so now I want to prepare our walls for receiving this leap. So in this case that is just like a one-piece mall. You just living like that. They happen to be a really dry. Otherwise they're not going to relapse or the water of the play. So how this technique works basically is that you poured the sleep in demand in the plaster, absorbs the water of the mold and leaves only the glade TO them longer the clusters in the mall, the thicker the wall of your piece is going to be. So it sounds a little confusing. But now when new, you will see it when I applied to these models and you will understand the difference. But yeah, it's really important that the mall has to always be of plaster. Because a plus there is a material that can absorb and you use a silicon mole, the silicon will not absorb the water, and that's a really important part of the process. So why don't we use plaster in that it's dry. So sometimes if you do. So they won more probably know how to let it rest for one more day. Also depends on loading the weather of your country or in your workshop. If it's like a really wet or called area, it will take longer. If it's a really warm place and hot, it will take less time. So you will see dual understand that in a few minutes. Pretty I just wanted to mention that before we get started. So that's basically how the technique works. So well. In this case, you don't need to do anything. In this case. We just put them together. And then for this one I will use this one. So it has to be really hard, like, really like to be pressing really good. The multiple and open-ended Lindos follow all over the place. So you have to be really careful with that. First, let me do it. Where does it I put them in the corner of the table so I can do this. And remember the more tight it is, better. So we went this way and another one is to three or four. With the bigger moles. Smaller models don't need that much. Normal sometimes eliminate them much because this link doesn't make that much pressure because it's not that much volume than what it needs. But in bigger ones, make sure to really close it because it's horrible when sleep starts to get out of the mold. The mold gets really dirty. Then you have to clean it. You cannot save it and you have to do it all over again. So you waste a lot of claim. And that's, of course never nice. And does it well, we have this one. Here's the way it looks when it's all closed. Yeah, these modes only lead release agent or anything. You just for the egg in this living xy in there, all the cluster is going to make it like when it's dry, it will come out really easily. So you don't have to worry about that thing just to be sure that this is very small. The interior of the plaster mold that is dry and that will do the work. So I will go and get arrested.
4. Slip casting part 1: Okay, so I have my two jars in this thing that I learned English. And I will I will put a sleep through this. So to remove all the impurities in there from this jar domal part. So these are the things that you don't want in your well, inside her mom is like it is the same label. Like Harvard played a bundle, the clade. And we'll start. In this part. You have to be fast and you're gonna pull remained, go make a phone call and then finish it for another. You have to bring all at the same time. So this isn't going to be enough. I will have to do it again, and I have to try to do it as fast as I can because I'm all astronauts, they're playing its aim. It starts absorbing. So you don't want that the bottom is thicker than the top. Yes, we completely wall. You have to be revealing to leave completely them all. You really have to be checking because it does absorbing any glaciers to go down. So you have to be refilling it so it's the same thickness all over the piece. You will see now, I will show you. Anyway, always missed. So this has to be completely full all the way to the top. And you live like that. And then you have to be coming back and refilling. This goes low, lower, you have to put more response. And you see it's already going down. So you have to put it up. So now I have all my moles really filter it up. As you can see it now, I will put the timer and I feel like 20 minutes should be fine. Let's put 15 minutes and we're gonna be checking. So he wandered diamond is a minimal dose. Okay, so every improvement at lunch. So sorry, Siri already put the timer import the involvement in minutes. So 15 minutes I have to check if the thickness is okay. So you have two depending on the size of your mole, depending on the temperature, all these things, you have to see how long it takes for the mall to get the thickness and the one. So I had a few minutes. I will show you how you can check that thickness and how it works. You can already see that the it getting like different like harder. And that's because the plaster absorbs the water of the clay. So now we have like more clay them than water in this area. And it's happening in exactly the same thing inside. So the dryer, the mall, the faster it absorbs, the faster you will get the thickness and the faster you can pour the rest out. Have one really for revealing. So when this goes NCA again or approval now already and this one I have prepare for receiving their excess optically. Always clean, nice afterward Was it gets read. Claude, if you leave the clay there. So it's really good to have these really clean. So they wondered when these, they can get stuck in the Spanish. The clinics reindeers retreat and basically trying to tell you because we want to do one after the other, one after the other, or blood pouring is very tired and indeed every so now I will put my things. I like to put as much here. So when I pour my mod, I can put it on top of this. In. Everything can come out and they don't have to be holding it and you can leave it there for driving for a while. Normally, there is people that has like a special table. We're doing this when you want to do this like really for a living, I recommend that you do one of these tables. I can click the Crop picture. Basically it's a table that has like a lot of these things on DR is not our real table is more like it has a little of this. So you can put them all in on the bottom, you have zygosity by a girl plastic that goes like e in this direction. So when you import, everything falls in the voltage Arab rocket, a pocket at the end, Bogut plastic thing. So you pour a lot of multiplexing time. Everything falls into blasting, everything falls in the bucket. And you have everything ready. You have to be really careful not to mix clays like only used for one type of clay. And all these things are really important in a workshop, like also these things. If you induce these four from four glaze, don't use it for clay, like you have to, every piece has to have their own space. Bluster and claimed on get along really well. So if you have bluster pieces in your play, you're going to screw up your, your designs. Obviously going really fast. So maybe 15 minutes is going to be one of the not I will also feel what I was saying. Well, yeah, so love to be really careful with any algae hygiene. Well, do not mix like any thing like laser's going to glazes area and when the glaciers, everything you don't have, you don't want to do the glaze to get contaminated. You don't want to declare to get contaminated. And so you have a bluster area. I can have a cluster of area, but we would rule that Dr. beings and Judah bluster because it can get really nasty if you don't do that. We want is another important too. And this one has cluster. So that's what I'm telling you don't use plaster to historically about the worst example for this lesson. We'll see. And you see how it comes up really easily. And that's because kind of like repels the cluster kinda repels a Klee. And that's how we do it. Okay, so that was our open. You can already start to check and you can already see the thickness. So for example here, and you see that this is like a wall still then to pull it out. But you can see, you can also like kind of like do a little bit of this so you can check how would look like. Here. You can also see how it's getting more thicker. And you might be wondering, well, how can I check in this close mall and worry my friend, that's why this comes in really handy. So now we're going to just kind of like remove a little bit. And that's why it's also really important that you're refilling this part. So you know, you can see the thickness. So when it comes down you will, you will see it. So if I move the model a little bit to the side, it's still missing disease like really thin right now. That's how you check it. So when the timer KX, i will do you know what is a big mistake when they leave more time or if it's okay.
5. Slip casting part 2: So the timer is up and I feel like this might be ready, but this one is still number. So I will put for five more minutes. So let me calculate how much it takes. Because for the next production you have more of an idea of like OK, with this model, it takes me 25 minutes inside the mall pouring out little lot. So it's good to have to know the times and you can be prepared for. How long would you take the production? Close modes take more time than the open modes, like they have more regulation. So it's easier for them to kind of like dry up. And this will because it's so close, we don't know, so it's bare, although it's more complicated to take it out of the mall. So it's better to have like more thicker wall. You need to calculate like with time and with practice, you will understand that you will know what thickness is better depending on your piece. So also one thing that no only always happens like the first one or two. Because I had to make in your new mall, they normally don't come out really well. And something happens and you learn from that experience. So when you open your realized that there was a bubble or whatever. So there's there are bubbles in them. You have to move a little bit around them older, more when you import a plaza or it was too thin or it was too thick. So all these things will have to take in to consideration when Earth, when these technique always officer, always tried to calculate how long it took you to do is then maybe there will be a point that we will do it more like laterally meaning by instinct. But right now, if you're learning the first time, I recommended that you follow the steps of like getting home it takes and wherever k because it's coming down. Okay, so now we're going to do this work is what's first. And I heard it's good because I had as much space in my, in my Turing table. So first I will show you the thickness. You can see that it's like looking good at like five millimeters I feel. And it's a little bit more spin with a bowl. So it's not that complicated to take out of the mall. And, you know, the lighter the better. I had to do like in diagonal like this, like hold it like diagonally. And then wait, because if you did it right away like this, then you'll get some drops in the bottom and you want all the clay to go smoothly. And then and then you can put like this. I also recommend like a good time. They understood that the more that I made in the first level is more complicated. So maybe you should start with something like a one piece. Two pieces moral, and don't overcomplicate herself. Would like, what was that like, five or six, I don't know. Just crazy. So now you can see how it looks from the inside. Has like a little piece on their play. So wherever there for a while. And when we do the other one would remove them in two seconds. I don't know if I should do it already because I don't want it to break when I showed you. And I want to fail. And then onto repeated. That really comes out of the worst time. Okay, also these pieces that the leftovers that you have, for example, these ones, you might feel tempted to put it inside is it goes, of course you can recycle it. But I wouldn't recommend that because these ones don't dis alternatively and they wonder pouring back again. It can get really nasty and you'd like to log your being and is worth it. Like a pure liquid, the cleaner like mislead us pure as not full of bumps. You can sometimes when something doesn't work. What I used to do the rural days is that I will have it and I was like, okay, these would even work and I will make it like a bowl and put inside or break it and put it inside. And then when I was doing the rest, I will see like these big pieces and Jones of pieces in C. It was horrible. So maybe that bugaboo still recycling, but pretty near the front pocket. Endured that. Do do the whole process of recycling. Don't put in right away in your sleep because yeah, it can get really nasty. And there's another Dana e. Journals are lower level again. Oh my God. Took him despite all the staff were already poor. The mall let it come out slowly in diagonal and then reporting it completely like facing downwards. So it gets more dripping out. And then I recommend that you limit like at least 20 minutes, 30 minutes, at least an hour inside the mall like this, just chilling, having like a moment. So the clay can get harder inside. So the Morrill White the better. But I wouldn't leave it the whole night. Because then the model will get really wet. And also sometimes when it's getting dry, it's shrinking in. Sometimes when it shrinks, it breaks. So what I will recommend these rows like minute like for an hour or two hours or something like that. And then open the mall and take it out. And then they moved to dry for the next slip casting thing. And I don't mean that I wanted to mention is that it's important that you also know how many pieces do you want to make? For example, this technique is high one mol excluding you want to make life 20 years is. So you've got maybe three or four pieces of a approx. But if you want to make a 100 pieces, I recommend having more moles, like ten moles or wherever. Because already, so how is the process like it's a little bit slow. And if you only have on all that, it doesn't it's not worth it if you have ten moles, do you feel that ten moles per litre checking one the other one you bore them. Then at the same time, sometimes it's good to have 20 for example. Or you might you have 100 walls. You use 50, a one-day, and 50 the next day, like dirt changing. So you do give them time to derive because here you would use the same wall like every day for like programming along monday wet and it will not work the same and you will take a longer. So it's good that you give them all also some time to rest and recover from some work in the Dry basically. And I don't know if I mentioned this already, but I will do it again. Alive. Time for Melissa, approx, 100 slips, like a 100 pieces should come out of this mode. So that's good to know also. So you know that they also have a lifetime that they don't last forever and you have to really take care of it. Another thing that I wanted to mention is that sometimes when you have like all these this lip comes all over the place where the more than everything, it's really important that you clean the mall would like our white like our wet white. Not a terrible like 15. You know what I'm talking about? Another guy with the white things are white. But Anna, and remove the clay because if you let the claim them all and it dries and then you want to use it, you will not close the same. So all those tapes are really important to keep them all clean up after using removed all the access of the set of clay that you may have like with our width and white. Donna Washington, the Washington thing because you will get it wet and that's exactly what we don't want. We want to dry it molds so tragically, but after I ask Who can? And yeah, I think that that's all I really these one for longtime equilibrium no. Maybe like at least 40 minutes. And these ones there were things that I can see how they are. I can touch them and shaking their regular not too broadly, what do I do? Take out those ones first and at the end is one.
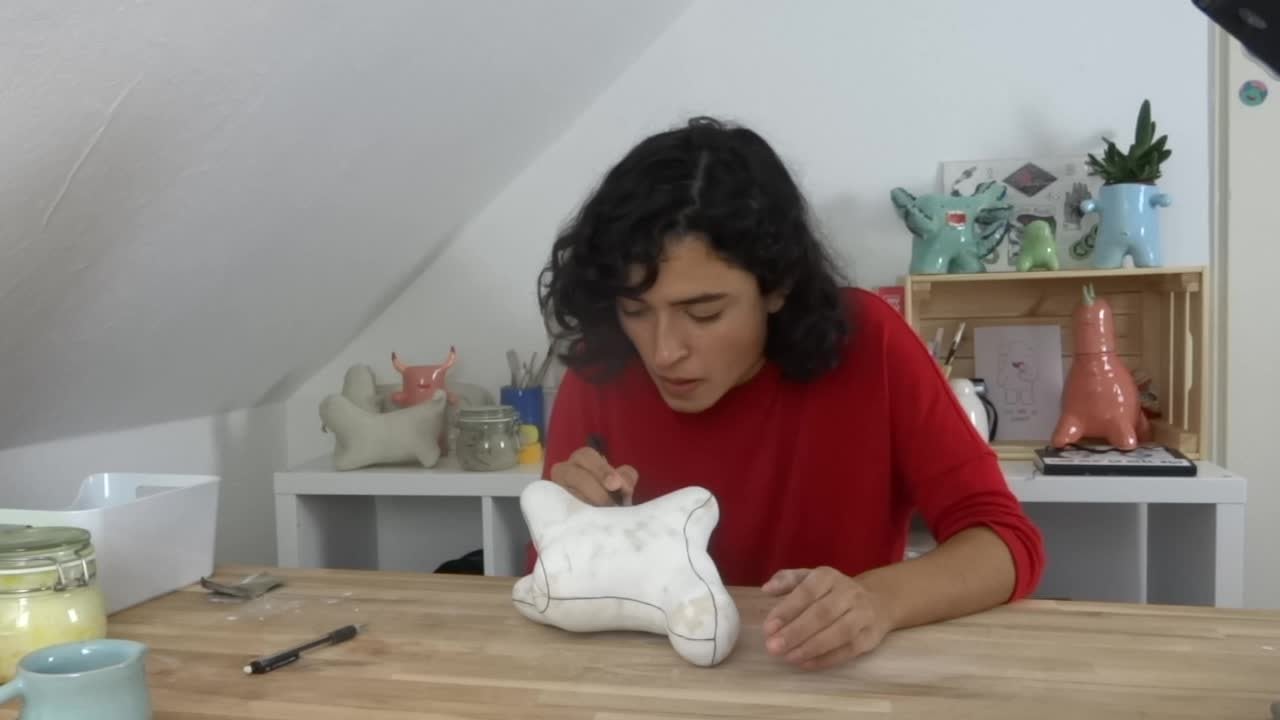
6. Opening our molds and final comments: Okay, so 30 minutes have passed. And now I will first these ones, first of all we have to do is to clean the edges of the law. I could do it like as like Warner is one. Which is how it looks. What I like to do is electric dude, some type shake things up. You force it to come, break it in half. So don't force it. Like this, though they seem like you should do, but sometimes they get less than because the house on the left here. So what we will do is you're going around in a little edge. That little bit of Aaron comes out really fast. While this one I will call them. So you have this thing. We have the string that is like the, the multi design like these, like sort of caught it. In this time. I want to call it just to exactly the border because I feel like if I correctly will help me to remove the rest of the mold. And this is what it's been like a real pain. This is the first part of the mold. The MATLAB is going to be easier than the other ones. Which is really ironic. You have to be careful with the hammer because he did things still like soft. It can do to remove this thing. So it doesn't right when you take it out. And magical partner. Oh no, I think they're moving in the wrong way. I scratch a little bit, but yeah. And then we have it. So we'll live with you for a while. So it tries a little bit more. Like I remove one of the like, half of it never lived for awhile and then I remove the rice. So he dries up faster when it's open and don't worry about this like lines. And these are the normal lines that the mold leaves, like the scenes of the mall. And these dukha really remove with jars special. We would do it do it when there's too wet. When it dries, it gets more difficult to remove them. So it's particularly when it's still a little bit what? Hard enough so it doesn't deform but soft, then you can this is what I mean. Like you have to clean the real well after using it doesn't dry. Mould fits good for the next time. And if you can tell like this line, you can see that it's wet. So it good to let it dry for a little bit. And here is our PSM Anatolian to let it dry before, because now it's still too soft. Vm here if okay, so now that we have our pieces ready on the Mall, which have to live in dry. Remove the scene, and then dragging it can look as verbal catch again. It's still a gap part. Hand me, Java is not, the mold is not magical, so you still have to do some back handwork here, but it should work. So yeah, there was that a dry when it super drive to biscuit in the brick layer between the kiln. Here I have an example of this big piece of this one. And then after the biscuit, you glaze it. May you hadronic final piece. So yeah, that's all. I really had to clean your moles. That dendrites are a little bit before the next US. And I hope that this class was useful for you. And any questions you may have, don't hesitate to ask in hearing the comments or you may use a robot Law bobo, human skill share. Yeah. Well, you see in the next one is I would already be Squid. And I added this corn with a little of the leftovers of the same clay. And it was really good.
 Pau Stephens, Mexican Monster Maker