Transcripts
1. Intro: Do you want to capture stunning portraits using
only environmental light? Have you ever
wondered how to take beautiful portraits in the
comfort of your own apartment? This is the perfect class
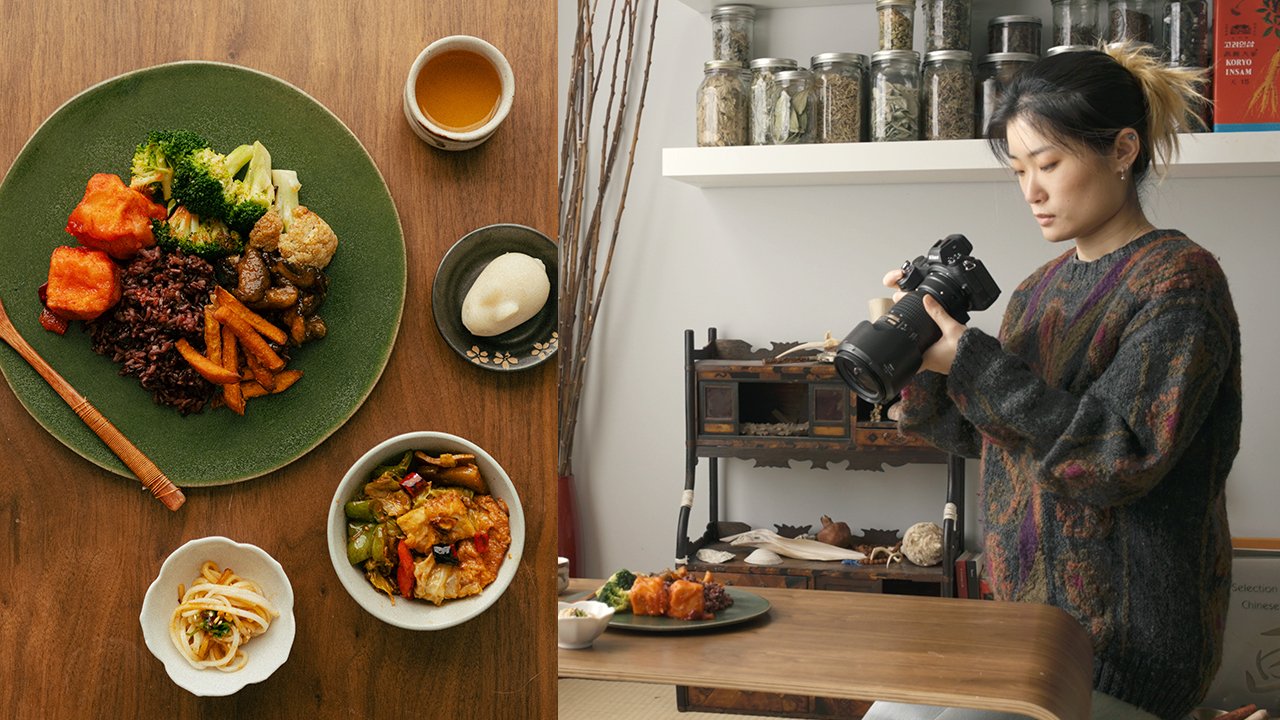
for you. Hi, I'm Cassie. I'm originally from
Shanghai China, but now I'm based in Brooklyn, New York, working as a
professional photographer. I specialized
photographing still life portraits and fashion
in the studio setting. However, there's moments
that I want to create casual yet beautiful portraits using only the light in
the home environment. And yes, it is possible to do this without professional
lighting equipment. In this class, you
will learn how to take lifestyle portraits using
natural and household light. Lighting is the foundation
of every great photo. We will explore the lighting
resources available in your space from window lights to table lamp floor lamp
or even kitchen lights. You will learn how to use these lighting sources to
bring your portraits to life. A theme can tie your portraits together and give it
a sense of purpose. Think about a specific concept or mood that will
guide your decisions from choosing the right
spot in your space to selecting complimentary
props and wardrobe. Once you understand
the basic of lighting, we'll dive into styling
and composition. People can look
completely different from the ngo, pose and framing. I will show you how to find the best combination to
make your subject shine. Finally, we'll put everything together in a hands on devil. I will guide you through a
lifestyle portrait session with my friend
demonstrating how I plan, style, and capture my images. Whether you're a beginner or just looking for a fresh idea, this class will be ideal for you to start taking
beautiful portraits. I'm so excited to share
my knowledge and help you to unlock your creativity.
Let's get started.
2. Orientation: Welcome to the class.
I'm so excited that you decided to join me on
this creative journey. For this class, having
a camera is ideal, but don't worry if you
are using a mobile phone. All the tips and
tricks I share here can be applied to any devices. Personally, I will
be working with my NiconZ 72 with
my 24 70 lenses. This versatile option allows for a wide range
of focal length, giving me the flexibility to adapt to different
angles and compositions. You also need a subject
for your project. It could be a friend,
a family member, or even yourself if you are
practicing self portraits. The key is to have someone to practice with as you
apply what do you learn. Your assignment is to identify
the lighting situation, you environment, and then use it creatively in your
portrait photography. Step one, find a great source of available light
in your space, whether it's the window, lamp or even the overhead light. Step two, style your
subjects in a way that enhance their feature
and complements the setting. Step three, capture
your portraits while experimenting with angles,
poses, and compositions. Be sure to share your variety of photos
as part of your project. This will give others a clear view of your
creativity process. I'm confident that you will find this course fun and inspiring. And I can't wait to see the beautiful portraits you
create. Let's get started.
3. Environmental lights: Welcome to my class on
lifestyle portrait photography. When I first start my
photography journey, I don't have access to professional photo studios or expensive lighting equipment. Instead, I learn to rely on the available lights around
me to make things work. What I discovered is that there are so many
available lights in your everyday space that can be super useful for
your portrait session. Window light is always my first choice to photograph
people or objects. On sunny days, the sun
creates harsh light while on cloudy days,
it softens beautifully. Smaller windows can
also work well with chess upshots that highlights your subject's facial feature. Table and floral lamps are household staples and fantastic lighting
tools for portraits. They're great on focusing on specific parts
of your subject, whether it's upper
body or just a face. Position your subjects close to light for dramatic effect. You can experiment, place
the lamp in front on the side or behind your subjects to
create different mood. Pendant lights and kitchen
lights are the same. They can act as a field to
light up the host space, or you can use them
more specifically to light up your subjects upper
body or facial features. Portable lights like
handheld flashes and smaller lamps are incredibly
versatile for indoor shoots. Their mobility allows you to adjust the light while
your subject moves, giving you flexibility to
play with different setups. In this class, I
will demonstrate how I use a projector as my
main lighting source. You will see how
adaptable it is, especially when
projecting patterns or other modifiable
lighting effects. By using these simple
lighting options creatively, you can elevate your
portrait photography without the need for
professional gear.
4. Theme and concepts: To create an
interesting portrait, I always start by thinking about an overall mood and
theme for the session. This framework help guide the creative process and ensure the final
images looks cohesive. Here is how I approach it. The subject is the heart
of any portrait session. So understanding
their personalities and preference is the key. Communication is essential. Ask your subject what they
are comfortable with. This creates a safe and
enjoyable environment. Some people shine with bright, happy expressions while others give this serene
and calm energy. Since we are working with
friends and family here, it is important to
adapt who they are naturally rather than pushing them to be someone
who they are not. Every corner of your home has its possibilities
and constraints. If the space is big enough, you can explore full body
shots and dynamic poses. In smaller spaces, you
might have to focus on the close up shots or create a framing that highlights
your subject's feature. The setting adds contexts and personalities
to your portraits. Each room offers
unique opportunities. In the living room, your
subjects could relax on a sofa, sip tea, or even reading a book for a more
cozy, homely vibe. In the kitchen, they can
engage in activities like cooking and cleaning for a
more candid lifestyle feel. For a bedroom scene,
lounging on a bed or leaning against a window can work well for softer, more
intimate portraits. Remember to use props and furnitures to complement
with the set. When working with environmental
and natural light, timing is crucial. Morning light is ideal for
bright and airy portraits. Gilden hours and dusk is perfect for moding and
atmospheric images. You can add ambient lights like lamps to enhanced setting. Once you've considered
these factors, you can decide whether
the portrait session is movement based or more
still poses focused. Action portraits show your subjects doing
something moving, interacting with the props
or performing an activity. Still portraits
focused on center the subjects gaze and pose for
a more introspective feel. I always recommend over preparing
for a creative session, while spontaneity can lead
to some incredible shots. Having a clear direction, ensure the process is smooth and final images
are visually consistent. When you think ahead, you
will enjoy the process more and your subject will too.
5. Props and styling: If you watch my previous
video on Food styling, you know how much I love using props and objects to
elevate the image. In portrait photography,
they can add context, storytelling and
personalities to the shots. For a living room example, props like coffee and a tea mug, a blanket, a book, or a magazine can add a
relaxed and home feeling. They are some everyday objects for your subjects
to interact with. It is an easy way to get
started off the sheet, having your subjects doing
something that they already know and moving on to
some poses later on. Choose pieces that not
only flatter the subject, but also harmonize
with the environment. Using props and styling in this way completes the
story of your portraits. By planning ahead, you can
maximize the potential of any space and make your subjects comfortable
and confident, which leads to better portraits. Remember to use
your imagination. Anything in the
environment can be turned into a tool for making
the scene more engaging.
6. Benefits of shooting indoor: Why shooting indoors is easier. Shooting in a
controlled indoor space like your apartment offers unique advantages that you can simplify your project
session and spar creativity. You can shift around freely without worrying about
disrupting others. You can also rearrange
the furnitures and props to create a
new scene each time. You are in charge of everything from the lighting to the setup. Some other compositional
tips like row of the thirds, placing your subject
on one third of the framing can create a balanced, yet
interesting composition. Experimenting with the angles, high angles make your
subjects looks delicate and smaller while lower angle shots convey
confidence and power. Close up shots focus on the
details and emotions while wider shots tell a broader story and incorporating more
of the environment. Think of your apartment
as a creative canvas. Using these lighting and
composition techniques, you can create dynamic and
professional looking portraits without even stepping outside. Adjust and play around until you achieve a style that
feels unique to you.
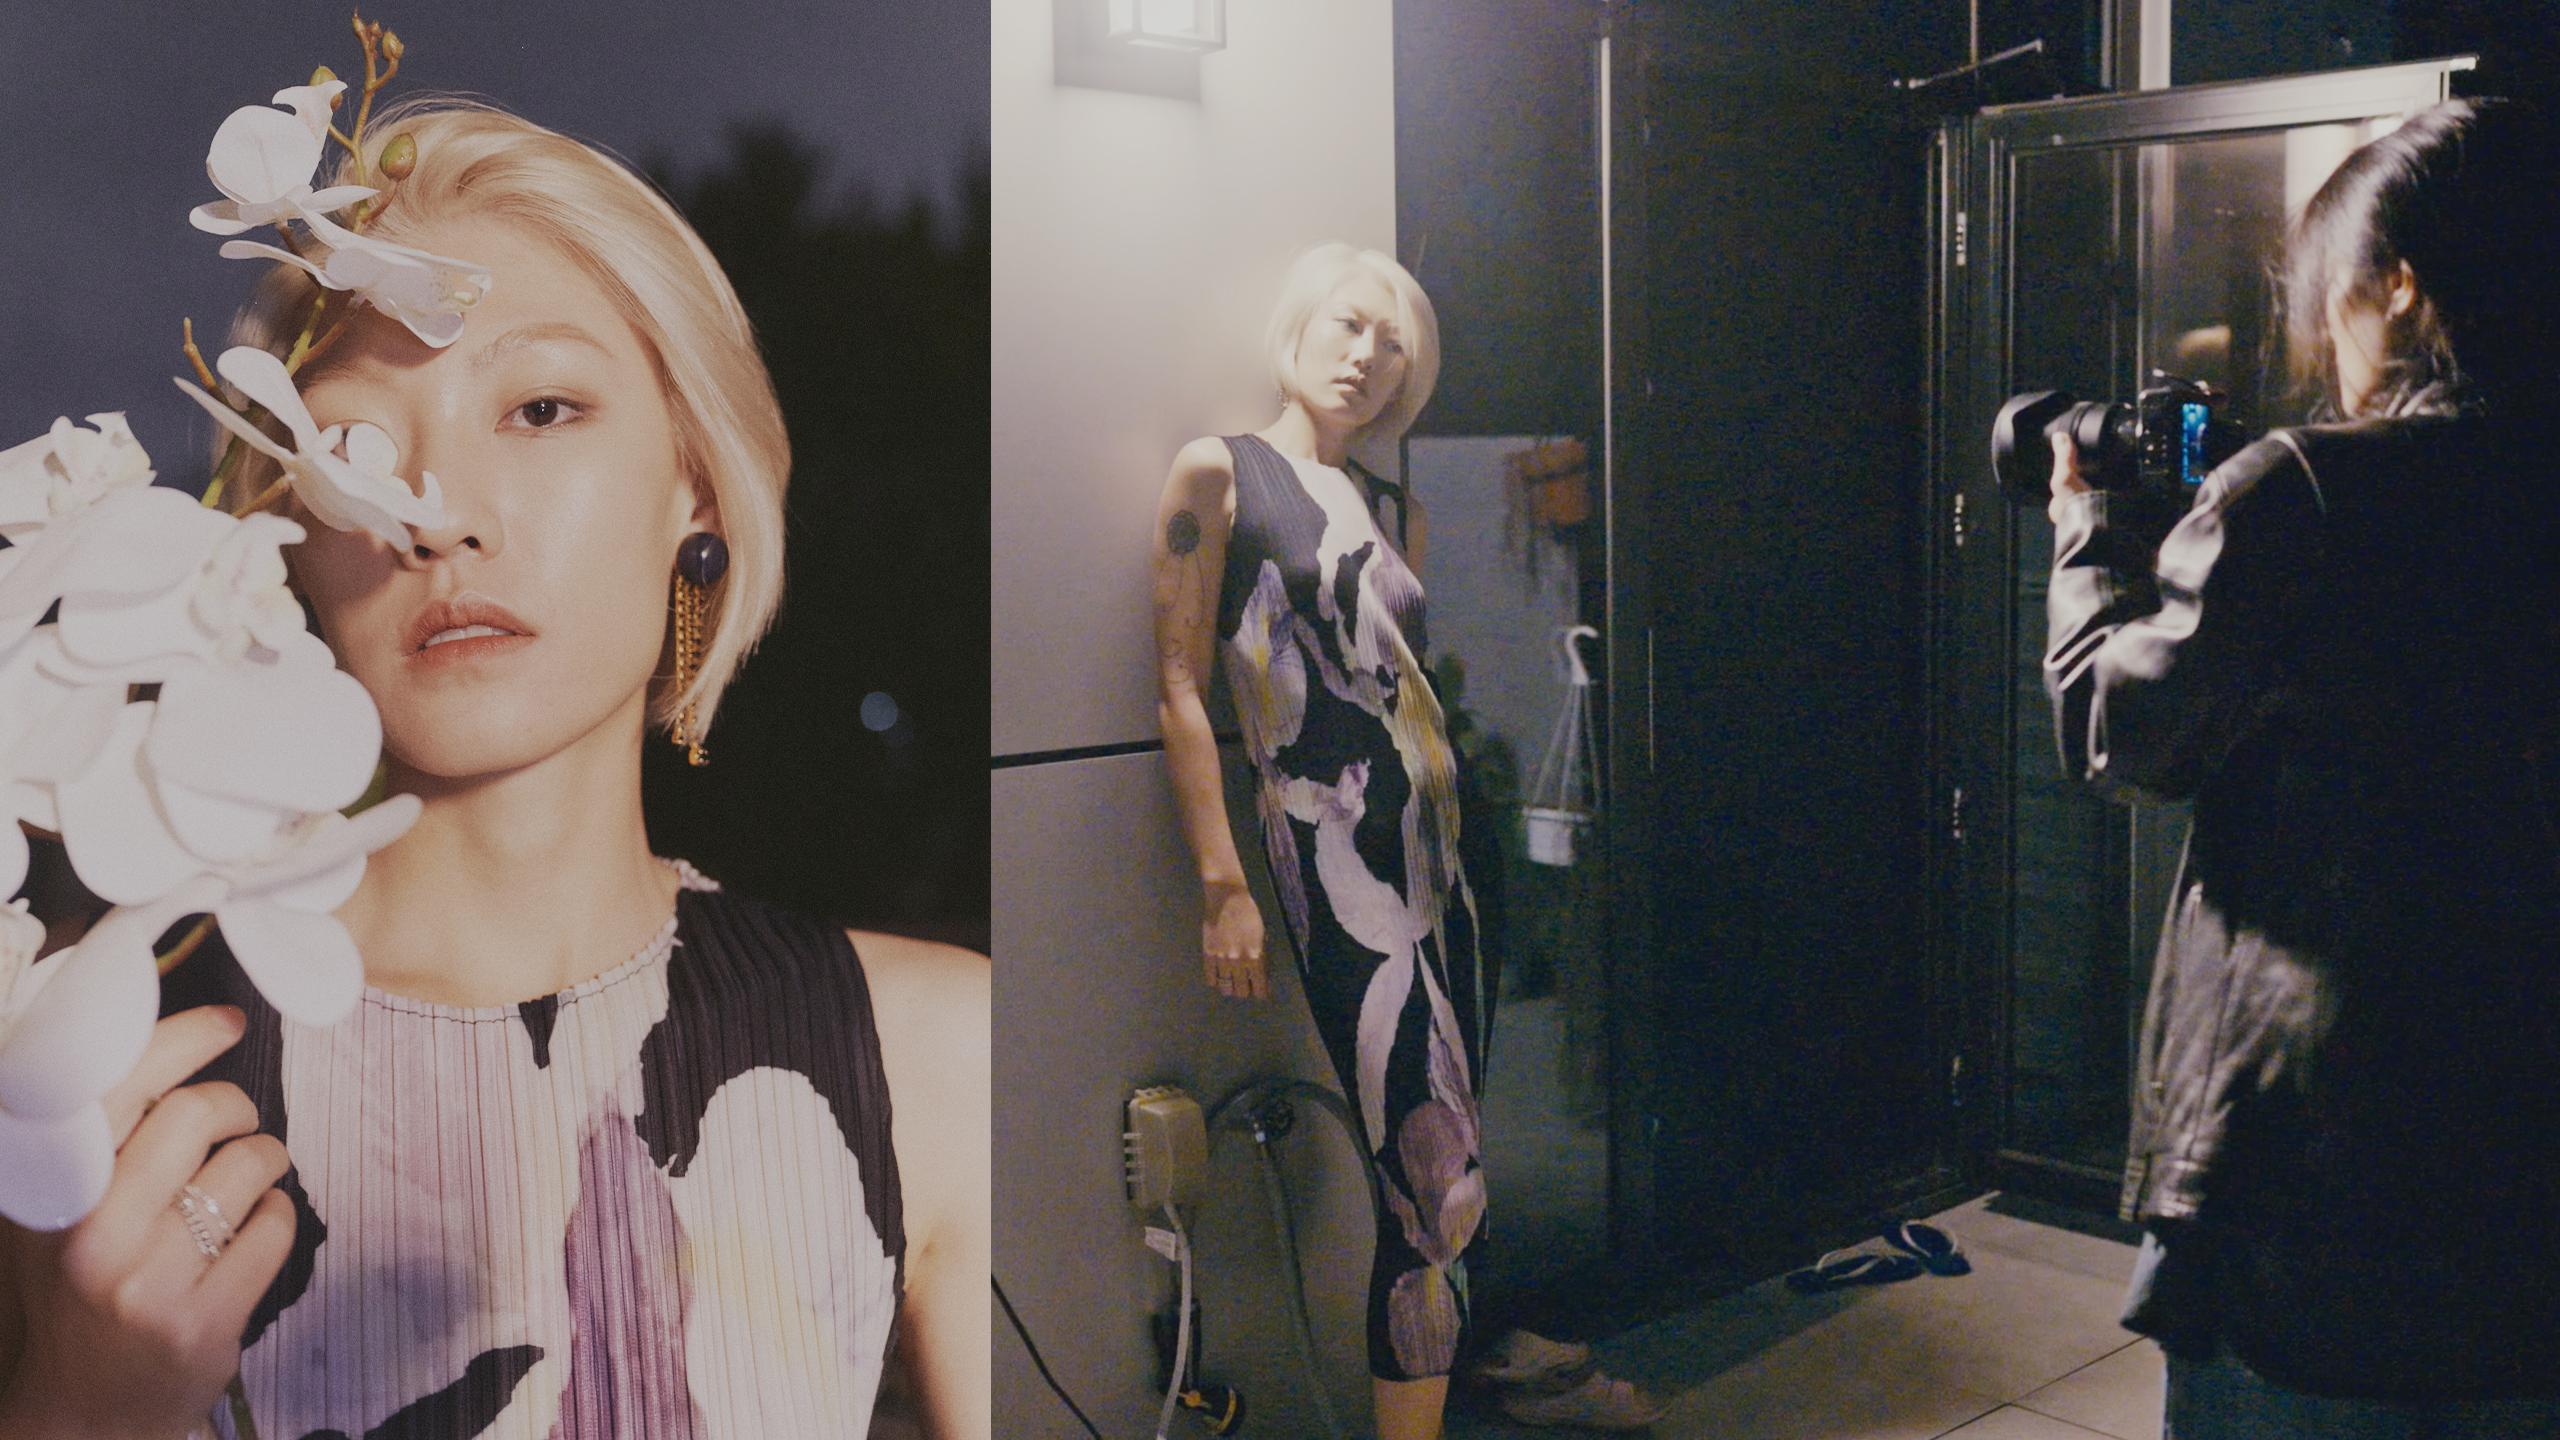
7. Shooting Practice: Exploring Balcony Scenes: Hi, everyone. I wanted to
take you along with me today as I photographed my friend Nan in her new
apartment in Queens. She just moved in, and the space already has such a
nice, cozy energy. It felt like the perfect spot to capture something special. None has this lovely
balcony filled with plants, and I knew right away it would
be a great starting point. We were keeping an eye on the weather since the rain was
supposed to roll in later, but we got lucky
with a little window of dry time to work with. So we started outside planning to move indoors
as we went along. To compliment the
balcony screen array, I suggest non wear a flor dress, which fits the
scene beautifully. She also has this wall
mounted light out there, which is the perfect
lighting source for lifestyle portraits. My goal for this shoe was to stick with
environmental light, keeping everything
organic and cozy. We started with a simple setup, a chair placed near the
light surrounded by plants. The angle I chose allowed the
lights to gently highlight her face while keeping the background clean
and uncluttered. Since the apartment is
still coming together, I avoid including too much
of the space in the shots. For me, simplicity always
makes a stronger image. I like to fill the
frame in a way that feels intentional and focused. It was such a nice, quiet moment just
us in the space, working with what was
originally there. I told Nan just to
get comfortable on the stool and sit however
she liked to start with. From there, I noticed
that certain angles, like tilting her head
slightly or adjusting her posture worked better with
her overall body language. So I guided her to look away at times or shift her position, keeping it all very
relaxed and organic. Once I had a composition
I liked with a control background
and solid pose, I started focusing more
on her expressions. That's where you can
let things flow, switch between horizontal
and vertical framing. To show the versatility
of the same shot, I also tried some black
and white editing here. It is a great way to
see how a single image can feel completely different
just with a change in tone. It's always fun to explore
those possibilities as you go. Here, I asked Nan to stand up and move a bit
closer to the light. I wanted to capture
some close up shots of her playing
with her earrings. It's a simple pose, but it adds a nice natural
touch to the portraits. The light here really helped
emphasize the details, her expression, the earrings, and even the texture
of her outfits. Next, I had none, move right under the light
and lean against the wall. It's such a simple adjustment, but it helped switch it up the settings and give
the show a fresh feel. I directed her to
face to the left so the light could fall across her face beautifully
from that angle. It create a nice soft
illumination while keeping the mood of the portrait
natural and effortless. This time, I positioned myself, so the light was coming
from her right side. The angle allowed me to create a more dramatic effect
with subtle shadows, adding depth and a
mood to the shot. It also helps me focus more
on her facial features, giving the portraits a
bit of a cinematic feel. Using the space
creatively is key to making a set of photos
feel dynamic and unique. For this shot, I decided to
shoot through the glass door. The slight blur and reflections create an effect that
feels less direct, almost like I'm peeking
into her space. It adds a private
and intimate vibe to the image as if we are catching
a quiet moment from afar. It is a simple technique, but it can really change
the mood of a photo. Next, I had nan sit down on
the ground near her plants. This let me use the leaves as a foreground element
in the frame. Adding the plants like
this created depth and give the image a sense
of layers and space, making it feel more immersive. The wind was gently moving
the leaves into her hair, which added a natural
dynamic touch to the shots. Perfect for creating
a little bit of motion and a life
in the composition. Remember to switch
up for your subjects pose and play with different
ango throughout the shoot. It's all about exploring
different looks and finding the one that feels
just right for the moment. Use your props wisely to
add inches to your shots. Here I had nine gently
touched the leaves, positioning them so that they frame her head without
covering her face. It creates a soft natural feel while still keeping her
as the focal point. Then I let the wind do the rest, adding movement and a little bit of unpredictability
to the scene. Since we had already
captured a lot of close ups, I decided to switch things up and go for some full body shots. I adjusted focal
length to include more of the surrounding
environment in the frame. This not only add a variety, but also help to incorporate more of the space
into the image, giving a more stronger sense
of storytelling and context. One thing I always like to do during a shoot is share what I'm seeing
with my subject. Showing them what's working
in the frame helps them understand the vision and adjust themselves for even
better results. Here, I shared my thoughts with Nan about what I thought
was working well, and she started
suggesting some of her own ideas like shooting
in front of the leaves. We decided to go with it, and it turned out
to be a great idea. We captured some
really beautiful shots together by
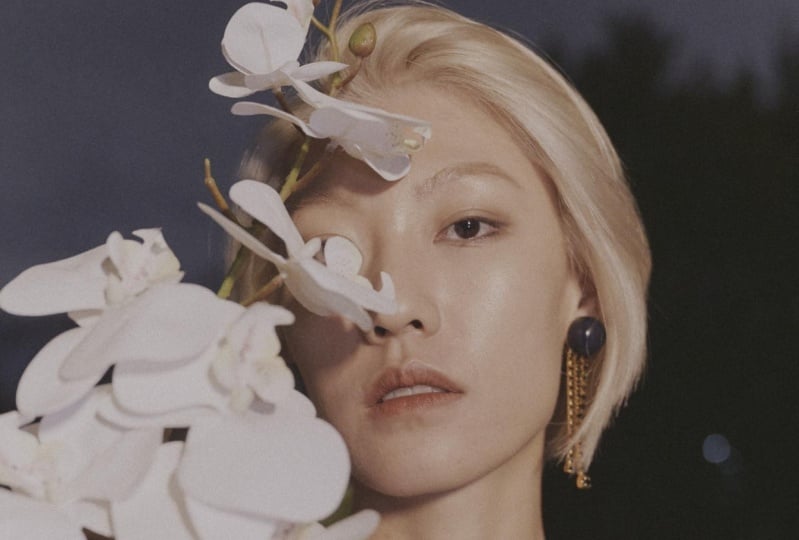
collaborating like this. I actually unfolded that the whole shoots became
floral and greenery inspired. So we decided to incorporate
some flowers as props. They happen to match
Nan's dress perfectly, adding a lovely
softness to the images. I asked Nan to hold a flower in front of her face to
create a sense of mystery. We played around with
deflacement adjusting it to see what worked best
with her facial features. The result was a
set of delicate, intriguing shots that tied the whole thing
together beautifully. I asked nine to turn around
and show me her back, holding the flower
stand behind her. This was a vision I had in mind, so I made sure to communicate
idea clearly to her. The key here was to focus on capturing the elegance
of her body shape, her neckline, and
shoulder structure while using her as a sort of natural frame for the flower. It created an interesting
composition almost as if she herself was the artwork and a flower was the
centerpiece within it. Uh placing a series of birth shots together
can also look amazing, almost like a stop
motion effect. It adds a sense of movement, storytelling to the images. I really love using
shadows in my photography. While shooting, I
noticed that one of Nan's plants was casting some really interesting
shadows on the wall. I asked her to position
herself so that the shadows would fall
across her face and body. The results were subtle
yet elegant effect. Those shadows added depth and acquire beauty to the image, almost like a delicate
layer of texture.
8. Lighting Exploration: Kitchen Light and Projector Practice: We wrapped up our session
on the balcony and moved everything indoors to
continue the portrait shoot. This time, the main light
source was the kitchen light, which was the brightest
option in the space. Since the light
had a cooler tone, I decided to lean into
that and aim for a cooler, moodier feel for these shots. To add a bit of atmosphere, I had her vape during the shoot. The smoke added a dreamy
ethereal element to the images, tying everything together
in a unique way. One rule I always
follow when shooting at night is to position the subject closer
to the light source. It helps avoid needing to
bump up diasle too high, which can lead to
noise in the image. I position myself
in the kitchen, shooting outward rather than including the kitchen itself, as there was a lot happening
in the background. This approach keep the frame
clean and focus on none. We also had an
outfit change hair, adding a fresh vibe
to the session. One trick I used here
was placing a piece of plastic wrap in front of the camera lens to
act as a DIY filter. This technique subtly
blurs parts of the image, creating a soft, dreamy effect that adds to
the moody atmosphere. It is a simple but effective
way to give a photo a unique artistic touch without
anything happy editing. Once again, I took
a moment to show Nan some of the images
we've captured so far. This helps her
understand my vision for the shoot and see how
everything is coming together. It's a great way to boost
her confidence and make her more comfortable with
her poses and movements. When you subjects
feel confident, it really shows in the photos. For most of the shoots, we had none facing
the light to take advantage of its
brightness and clarity. However, it is always a
good idea to experiment. So I had her turn away from
the light for a few shots. Changing things
up like this adds variety and opens up
creative possibilities. Since Nan was wearing
an open back dress, I asked her to face away
from me for a few shots. This allowed me to
capture the elegant lines of her back and highlighted
details of the dress. It's a great way to
showcase the outfit while adding a sense of sophistication
to the composition. For the next section
of the shoot, we stay indoors but switch to using a projector
as our light source. Unlike the fixed
lighting from earlier, the projector give us complete freedom to play
with what we projected. Staying true to the floral
and greenery inspired them. I chose a selection
of images featuring flowers and plants to
project onto an end. In this setup, none
become a living canvas. Each projected image create a unique effect on
her face and body, blending patterns and colors
into the composition. The versatility of the projector allowed us to experiment
with textures and moods, adding an artistic and surreal
element to the portraits. The same concept of using your
space wisely applies here. It's all about figuring out the right distance
for the projector and deciding exactly where you want the projected
image to land. Sometimes you don't even need a projection to be perfectly
focused on your subject. Letting it blur
slightly can create soft abstract shapes that add a dreamy quality
to the photos. For example, in one setup, the flower in the projection was the brightest
part of the image. I had not positioned
her face near it, so the light created a striking
shape across her feature. It's these little
adjustment that can turn a simple projection into something truly
creative and impactful. Next, I had Nan move closer to the wall
positioning herself, where the projected image was
more focused on her face. This made the shapes from the projection much
sharper and more defined. Even though it was
the same projection, the flower became much
more prominent this time, creating a bold and striking
effect on her features. With these images, I like to switch between
two approaches. Sometimes I include the entire projected
image in the frame. This creates a dynamic
composition where the projection acts as a
frame around the subject, adding context and
depths to the shot. Other times, I
focus on close ups, capturing just a portion of the projection on
Nan's face or body. This approach gives the image a more intimate
and personal feel, drawing attention
to smaller details and creating a connection
with the viewer. Both styles offer unique
storytelling opportunities, so it's fun to explore both. Here is another example
from the shoot. I was drawn to how to stem from the projection aligned
with Nan's body, while the flower perfectly
positioned itself on her face. I had her standstill for this particular setup to
emphasize the composition. For this one, the
projected image has such interesting shapes that I decided to focus
more on her face, capturing the interplay between the projection and her features. I also love this shot because
we were playing with scale. In this image, the
flower projection was oversized making none appear
smaller within the frame. This created a sense of her
merging into the image, almost becoming part
of the scene itself. It is a fun way to
experiment with propulsions and add a surreal artistic
touch to the photo. I gave Nan more
direction on how to use her body to add a touch of elegance and movement
to the shoot. I asked her to raise her arm, which helped break
up the frame and add a more dynamic element
to the composition. This simple gesture not
only highlight her form, but also brought an
artistic flow to the image. I hope you are not getting bored with us
playing around with the projector because there are honestly so much to explore. This time we experiment with different poses like having
none squatting down, which made her whole body feel more compact
within the frame. To complement this pose, I lower the projector's
angle so that the lights still illuminate
her face and body. It's all about finding
new ways to create dynamic and visually
interesting compositions. And the projector give us
endless possibilities. So that wraps up my portrait
session with my friend Nan. I hope you found
some inspiration here that you can take
into your own shoots. Remember, the key is
to keep experimenting, try different angles, lighting
setups and compositions. Photography is all about exploring and creating
something unique. Thanks for joining me, and I will see you
in the next one. Oh
9. That's a Wrap!: For joining me in this course on lifestyle portrait
photography. I hope you've learned
valuable insights and techniques that can help you create
stunning portraits using the space and
the lights around you. How to identify and
make the most of the natural and artificial
lights in your apartment. Create a theme and mood, how to plan your shoots based on your subject's personality, the character of the space, and the time of the day. Using props, wardrobe and creative angles to
elevate your portraits. We also have a real
world example that brings all these elements
together into practice. Remember, creating
great portraits aren't about fancy studios and
expensive equipment. It is about creativity, preparation, and
make the best use of what you already have. Don't be afraid
to try new ideas, take risks, and make mistakes. Photography is a journey. Every photo you take brings
you closer to discovering your own unique style and
voices. Keep practicing. Stay curious and
enjoy the process. Don't forget to share
the pictures you take along with any question
and thoughts you may have. Thank you again for being part of this class. I
hope you enjoy it.
 Cassie Zhang, Photographer