Transcripts
1. Canva Business Cards Trailer: Welcome. Business card is one of the key elements for your client or potential
client to present. It's designed. It should
represent your business. To make it simple, I will be using a KVA
tool in this class, and I'm going to tell you a
step by step guide how to use a pre set or
predefined templates and to make it a personalize. And not only this,
we are going to make a new templates
as well in this class. So after this class, you will be very
confident to make a business card for your use or for your clients
as a freelancer. Hi, my name is Anasik Bal. I have 14 years of tech
experience in Dubai, and I'm bringing here
technology courses, so you can follow me here to be notified for my upcoming
technology courses. Are you ready to make a creative
business cards from now? So see you in the next class?
2. Business Card Create Template Front Side: Session, we are going to
design a business card. So we're using a KvA, we have two types of designing. Either we use a template
or we call it presets, and then we can design
our own new template. So at this time, we are going to do a new design, but with the help
of the template. So to understand the
design template structure. So first thing, what we will do, we will come to this
Kanva home page. Once you come to the
Kanva home screen, You have two ways to
start your project. Either you simply click
to the pre set here. Like, this is a file type. If you pick a correct file type, so KNA will show you a
relevant content as well. So I will simply click to
the business card here or I can click here as
well as a create a design. So I will click create a design, and again, it shows to me a similar thing,
a business cad. I will simply select
a business cad. So as soon as I select
a business card, it already adopted the sizing
for the business card. The size is supposed to be. And this is good for
printing purposes, also. It's around 8.5
centimeter to 5.5 cent. Then I will give the name. So at this time, I am designing for the interior
design business card. So I will just say
here interior design. I would say the business card. So I have name to this
file here itself. So at this screen,
what we can see here, I have a like Canvas, where I will be doing a
designing. For the business card. At the left hand side,
I have a menu here, all the menu options. And down here, I have how many pages or sides of
this business card will be. So here I can see
that only I have one side at the moment.
So let's begin. So at this time, I want to select a predefined
design first. Once I select the design, then I will be creating
a new design concept. With the help of
the inspirations or a sample design concept
for our understanding. So here I can see you can
pick any design concept which you like for giving
you a step by step guide. I will be using this specific design template at the moment. So, this is a very
basic design concept. Here we can see that
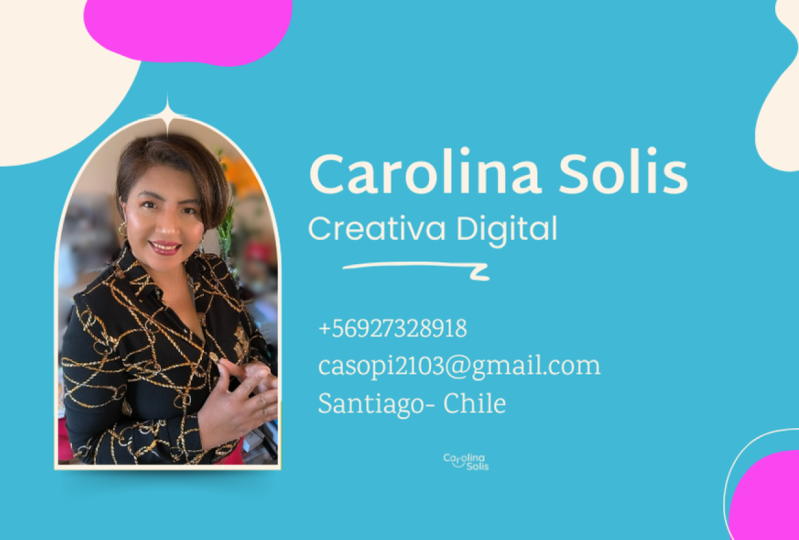
in this business card, we have a display picture
of the person who have this card name, a
designation here. And then some design
elements are around we have, and then the detail of
that person itself. But here we can see
that we do not have a back or the second
side of the basis card. That's what we are going
to design by ourselves. So for start designing, I will simply add a page, and I will call it my own
design page, by the way. So at this time, I want to make a similar designs. Doing it. So first of all, this background is already being colored. So here I can see once I
select the background, I can see that what is the
color of the background. So this is the light brown color itself is already
being selected. But for picking a color, you simply click to
the background of any design template here
to the screen and click, and then the toolbox will
be show on top of a. By the way, whenever
we select any element, either background or
a shape or a font, it will open a to
box on top of it. So now I can see that
I have this color, and this is the hat coat
of this specific color. Okay. Now let's begin. The first thing is
what we need to do, we need this this picture, and it should be look like
at this type of frame. So for doing it, so I will come back to my design screen here. And then I need this element. So we call it to put a
pictures into specific shape. We use elements. So I will bring an element or we call it actually in element, it's called a subcategory
name. It's called frame. So it's element,
but it's a frames. So I will bring a frame, a similar design shape. Which we use at
this business for. I can see here there's a lot of design concepts
are available. So can pick a specific design. This is what the design, it seems to be a bit similar. So I will click and drag
and bring to my screen. I will expand it
as much as I need. Okay. So now I'm I got this frame where I
want to put a picture. After this, I need
this picture itself. So having this, you supposed to have a picture in
your upload folder. Here, you can upload any picture by clicking to
the left hand side upload, and you can upload your
picture here or you can pick any picture from the elements itself
here as well. So you simply write a person, a woman, like Let's
say any movement. And then here in the
graphics or in the photos, you can have any
picture you want, and there are some royalty
free pictures as well. So you can pick whatever
picture you like. Okay. So this is one option. I want to give a similar
look and feel for doing it, so I want to use
this exact picture. So for using it, you can see it's already framed
into any specific design. So taking it out from the frame, simply right click. I will. Dog down the option,
click detach Image. Once you detach the image, now it's come out from
its frame itself. Now I can take
this picture copy. You can command see if you're using Mac control if
you're using windows. Just simply or from here. Also, you can just
copy the image. Come back to your design and
here repaste the picture. Now we got the picture. We need to bring it into the frame. I will simply click and drag
it on top of the frame. It will be fit
automatically by itself. Here, I can see
that for doing it, so I will bring this picture back into the frame
into our design, the design which we are
following at the time being. Now, the first thing, we
already got the picture. Second thing is now we need We need this title or
the name of the person, sir. So once you click to the font, it will open the toolbox or
we'll show the toolbox above. We can see here, the
phone is being used. It's Belza. Blesa phone is used. And here we can see
all over this design, Belza, phone is being used. Once you click, you can
click to this Belleza here. Here we can see the
document font is Beliza. So we are going to use a similar phone for
our design concept. We'll come back to
our design screen. And to adding a font, simply click a text here. Once you click a text, You can bring any
text which you want. I mean because we are going to put the design of the font. So once you click the heading, select the font, the
text which you written, and then click the
font here on top of the tool box and select the
document font, which is Beza. If it's not showing to you Bees or the font which
you want, simply, you can search the
font here on top of the screen and it will show you the
font which you want. So now we got the font. Okay. So I will simply
write my name here. Okay. And I have put my name, and this is my name
for this business. So you can align as you want for the time being
and this is good to go. We got the name, and now we need a title or the
designation copy page, this is the same font here. Or you can just simply drag and op another font as
well, another text. You can simply click a
drag and bring it to here. I will say here. Okay. So I got the name. I got the designation. And the next thing is, we need a color also. So if you can see here, it's a dark green color being used. So simply click the font
and click the text color, and this is the
color being used. It is a brownish type of color. We will use it the time being
a similar design sp and here I select my font and bring the ax code,
select the font. Okay. Now, good. Same thing
we will do for designation. This is being used
a dark brown color. Once you select the font, here you can see the ax code. Here, bring it to O design
here as quick as possible. We can move ahead
for the next thing. We got the name. We
got the designation. We can see it's being
a capital letters. This is for capital
letters, both things. For doing it, so simply
click your phone, click this upper case and it will bring the capital letters. Books. So now we are good. We got the designation
and things, right? So the next thing we need
to do is we need to bring this information for
our contact details. Simply come back to
here, bring this phone. Okay. After selecting, make sure the phone is Beliza itself. I will select the Besa back
again for my next phone, also, now start writing
the information. So the first thing
is phone number, e mail, address and the website. So I will just write here a Bill detail for the number. You can write you have. I'm just writing a dummy
number at the time being, and we have written
this details. So this is my number. Yeah. And then we
write in the e mail. I will just write
your domain.com. And then we will
write an address. I will write my address
here and the website. And then we need to make
it a left align. I do. Simply a left align this, and here we are good to go. So we have select the phone. Then the color we need
to be select back. Again, I have select the site. Now we are good. So we got the information
of the business part. Now we need to match
the phone size. Phone size is being
used for eight here for title also
eight and is 13.8. We'll just make it eight here. This also eight align it here, and this is 13 being used. Let's make it 14 for
the time being and now we So we have got
the information. We have now we need a su
design element, our screen. So once we select this design, here we can see this is
a pre design graphic. Okay. So now this is the
time to do the designing. So we can see here
we have one circle, one shape here, and
here also we shapes. So for doing it so,
we need shapes. Around to our design. Not necessity, we make exactly, but we can do exactly as well. So we'll click to the element
at the left hand side. Okay. Now we need shapes. I will just simply write
here, curve shape. So once I write a curve shape, it start showing me
to me a graphic. This is a graphics file. It comes into the
graphic category. So here I can see,
this is the one of the design which
is quite similar, which we need to use. I will take this design
and I will bring it here for using it. Okay. So first, I have
put this shape here, which seems to be
near to my design. The next shape is we can
use this shape as well, which is quite similar, the design which we need it. And now I have put this as well. Okay. One more thing is
I need one more design, which is bit a circle
type of shape. So these are the shape which you can use as a f
here, you can see, you can see it is
a crown or pro t, which means this is for
the premium or pro users. Those have a paid subscription. If you have a paid subscription, then you can use
this design as well. I will need a circle also. And I will need this
curve design as well. Okay, I will use this
design one more time here as it very similar to
the design which I needed. And then I need a
circle as well. I will come back here, and then I will tick to the shapes because in
the shape category, also, we have different type
of shapes which we can use. I will use this
circle as well here, and I have putting this
circle on my design screen. This circle, also, I think F. So first now for
starting so this circle, which we bring it, the
color which we need to use we'll come
back to your design. It's up to you. You can
bring colors as you want. You will simply select the exact color
which is being used. I'll take this hash coord here, and I will bring this design. Here, and then I
will put this. Good. Here we can see that this brown is behind
this shape by the way. For making it behind, I will just layer
it to back door. I will increase the
size as it seems to be. And now we need to put this dark green color
for this design. I will pick this dr green
color very quickly. And then we will put it as well, and we or it to go for shape. As well, and here I would. Here I can see that some
sizing we can increase. Align as you want.
And if you want, we can do a similar color self. You can use here a
bit darker brown. And here as well, we can light color itself. So now we guard the
designs which we need it. Next thing is, I need
a curve line also. So why we need this curved line, we need this curved
line like this to put under the designation
or the title. So for doing it so you can
take any curve line you like. And if you want we can use
the exact line design. Well, here we can see
the collection which we have in our free
if it's similar. I would like to use
as the time being. Looks bit good here. We're using it so we can bring it a little bit up the name, and this is a separator kind of stuff, which you can use it. Okay. So this is the one option
that you make like this, or we can use a
simple lines also. If we bring a single line and we can dedicate that line to bring the similar design
screen, similar design concept. So we can see most of
the lines are paid. Lines are paid here. So we going to use a design, which we can use it
in a p sign as well. So I will go for
ample line as well. I think let's go for this
line here. This line. And then color it as you want the color which
you want to be applied. So as you mentioned,
that we are going to use a predefined designs to make
a similar design concept. So now we are good to go
to our this exact design. If you want this exact design, you can draw as well
from the brush, so we will discuss
that how we can draw this kind of design
into a design. Okay. So the next
thing is we need this border line to
our frame, right? And we do not have
this kind of border, and the image itself is bigger. The image is being used, so we will just make
it as big as we can, and we need to bring it up to
the layer. Now we are big. Okay. So the next
thing is we need this type of border for this. So The design which is
being used is possible that when we bring a similar
shape behind this frame, and then we make it
color as we want. So we will bring the
similar shape by the way. We'll bring a similar shape, and we will bring it back to
this main picture itself. Okay. Now we bring it back and we will drag it a little bit. We'll make it bigger, and we
will consider it as a shape. Okay. We will make it the
way we want and here. And these are the steps
to bring a border type of design which is being
used for this specif. Because as the design is
being used, this is so. After this, we
need a fill color, so we will do a fill color. And for the borders, we need a border, by the way. And the border we need is
half border we will use. And for the border color, we will use this brown color. And now we will see how does it look like to the design
which were being used. After doing it, so, align it the way we needed as per the design. Here. I think it's bit similar. So now come back to the
design and the color is being used is a light brown, bit more light
brown, exactly this. So we are going to bring
the color is being used. Yes. So this is a design concept that we
supposed to be being used. So now we can see that a similar design concept,
which we needed. We got its exactly. So the next thing is, we need this exact color which is being used
to match our design. So now we can do a lot more. You can put more designs
and things like that. The next thing, we are going to do in the next
session that we will design a background back or you can say the second
side of the business. So see you in the next side.
3. Business Card Create Template Back Side: Welcome. This
session, we are going to design a backside
of this business card, which we will do a very
quick and very simple as our design is very simple. So for doing it, so simply we will come back
to our design screen, and we will add one
more page here. By the way, the first
page which we use, if you want to keep
it at the end or not, we just take it out that one will simply just
delete the design, which we use as a sample now. This is our main design. So this is what we want to keep it and we want
to continue with. So for doing it,
so simply we need a backside of the page
of the business card. So simply bring your
title as I very simple. I want my title on the middle
of the page itself here. This is very simple. Then after these design
elements which we used to the front, we will just select
all of these, and we will bring it
to the back side. Here we got our very simple and this design element being used, we will bring this
back here as well. So now we got our back
side of our page itself, which is very quick. And as quick as possible, we can make it and
it's up to you the design if you want more information or
the design elements. So here we got our
back side as well. So now what we will talk
about that how we can b, like, download this
our business card. So we got two pages or two
sides of our business card, and we are ready with our new custom design template concept. So now the next thing is
you want to download it, simply click to the share. The clicking here,
click download, and here you can
see that the file. The file d should
be a PDF print. It's best for printing. Select this, best for printing. And the next thing is, we have three options here. First is crop marks and bleed. Is normally used for
printing purposes. Is for marking that this is where you want the
design should be crop and normally is for printing companies whenever
you provide the design. If you can mark this and
it will put the bleeding for your bleed for
your for your design. So at the time being, I do not need it because
I will be printing by your own and flatten PDF. Flatten PDF, it's convert your content into a single
image or single design. So if any computer
which do not have these forms or any
alignments will not impact when will open this design to
any other computer. So I will react as a
picture as a image. So I would definitely prefer to select this option
as it will not impact your printing concepts. After this, I have been
selected these two pages, which we designed
page one, page two. And then there are two pro
files for the printing. This is they are saying is
for RGV for digital use, but you can use for
printing as well. And the next thing, if
you have a pro version, then you can select CMYK. CMYK is normally for
printing purposes as well. This is for colors. We are
talking about only for colors, but the quality will
remain as okay. So you can use RGB
and you can use for, but for better use
for better quality, definitely go for CNY K. Then you will need
a pro version, but you can go for
RGB S y for the big. And simply click download, then it we start downloading the PDF of this business card, and then you can use it
for your design purposes. So these are the very simple
steps to start designing. This is one of the concept. And in the upcoming sessions, we are going to
do a more type of designs in the upcoming section. So be around and we will have more information for our
business design ideas. So see you till that
in the next side.
4. Business Card Project Guide: Welcome. This session is talk about that what you
will be creating and what kind of project
you need to be ready for your disk class. So what you simply do, what you simply need to do, you try to make a
similar design concept. Put your pictures
here into the frame, and you can make any
shape which you like. At the time being,
this is the shave. You can pick any shape from
this from the elements. Come to the elements and select any shape you want or a grid. You can use a grids also, but grid is for multiple images. If you want a single grid also, you can use and you can pick any frame you want
and any elements. Design elements, it's up to you. You can design any
type of design around the business card, and this is one of the
design concept which you are creating as a
project for this class. And then put your
demi information not necessary to put and
share exact information. And then try to bring
a simplest back side. And here you can put any other information also like a company name only or a logo. Or the thing which you want. So I would like to see your project ideas
as simple as you can make and share with the projects community
with the others, and this is the inspirations, and you can see the others work as well to
get inspirations. So looking forward to see your projects as well,
see you in the next time.
 Anas Iqbal, Tech Mentor