Transcripts
1. Introduction: Hi, everyone. My name is Shannon. I'm an artist based off bang law. India. My instagram handle is water cools. Welcome to my first culture class. I'm going to be your instructor. Indecision. You're learning how to be lovely. Candy Skyland keeps using mortar colors. This is going to be a big enough drinking tutorial. At first, letters go through the art supplies required. And then I will briefly about the different watercolor techniques that may be implementing . Later we will discuss the elements that will go into our painting. For example, moon find rings loud. Exeter on. We will also have a small practice ation. Finally, let us conclude the Newtonian living behind a beautiful candy Skype.
2. Art Supplies: in this steptoe, I'll take you through the art supplies that I will be using. Let us begin with colors. I will be using currents and pasting dreams, watercolor palette from primary watercolors for decision using if he blew from marriage. All right, it was and crimson from basal dreams. Next up we have watercolor papers I will be using not just cold pressed 100% quarter on paper for our paintings, and you'd report to 70 years and paper for practice and learning techniques. You can use any other banned as well, but make sure it is 100% Corton. So that's a surface, absorbs more water and remain sweat for a longer period. I prefer painting on the side of the people. Uh, brushes the Al Prince and Martin. A 1.5 inch brush for washes. Princeton Neptune round Virtual face board. Fine. Size eight. Opening east warmer Wasn't favorite brushes. I excused them every day. Then we haven't bigger brush off size pain for dictating This brush is really good for breeding. Fine lines even use any other brushes off similar size that you're comfortable. Way have Buddhas of water cardboard Maskin tape on some tissue papers. Also, we have ceramic plate as a palace for mixing colors. You need not have the exact same place. What you can use, the ones that's off the purpose.
3. Watercolor Techniques: let us cover some of the widely use watercolor techniques. These techniques will believe the used for painting the time. These guys Okay, 1st 1 is we don't rate technique in this technique. Does her face needs to be maintained? This you need to wait. The people, before painting with the desire conduct he had a pain easily blends living behind a smoother finish. Okay, so next piece wet on dry. This my thirties used when you want to get you a vibrant subject since you are being on a driver, please No control off brushes. Mortifying that they went on with technique. When I see why don't write it does not mean that the service has to be playing paper. You can use this technique on great service. Okay, Next is lifting technique. This technique is used toe highlight areas or objects off interest. We can achieve this by lifting the pains using soft tissues or damn brushes. This helps to create shadows and light in any paintings. In general, I wonder widely using this technique in my painting. Next this issue listing or dubbing techniques this can be used on red painted surface. Now they could issue on dabbed onto the area that you want to lift up. Pains from this matter can be useful. Larger areas
4. Know your Colors: the next chapter is no your callus. In this chapter, we learn the basics off the bundles will be scratching and mixing the sheets based on being convicting blue for the different tonal values and use. Okay, so it's watching Is the process to understand different tonal values of a particular color ? No, I'll explain it briefly. First, load your brush with concentrated being. Apply a stroke off. Don't on a dry people. No, I have some water, the paint and make it di doot, and I don't think beneath we also the light associate. As we don't dilute the pain with water, keep adding water gradually until you reach your strands loose and save. - Knowing more tonal values to use is very important to create a depth and more in the painting. Now let us makes the two colors in various proportions toe. Observe the different shades we get. One can simply play around with a lot of clients and others to achieve the desired color. I'm mixing two shapes, press watching them from different directions and see how it blends together, giving us a beautiful new shit. These techniques can be used well pending guys and closed
5. Practice the Elements: let us know discuss the elements off our final painting one by one the elements making our final painting out the sky moon pine trees missed Firstly, I'll show you how to paint the sky You ever use wet on wet technique as just cost earlier We have over its surface over which we will be dropping some right means You can leave some white spaces in between to achieve the effects of cloud. And now I dropped some patients being color. No, I get that radiance or you can lift some paint as well on drop here are in there just to get a smoke door when men makes it totally depends on you how you want your oh sky toe Be like you can drop completely as you wish. Now let's known to paint them on We will be using lifting technique So artificial lifting take me on red surface to create the moon All you can even go with leaving a blank space in between On a wall painting around that area Now, firstly, I apply some pain using wet on wet technique I'm spreading humanly and next tied up off you . Leo's off issue around my thumb to the size and shape of moon. Dab it lightly to live the pain from the sky leaving behind an empty white's office. So this clear till beautiful moment, you see this little irregular areas. So I'm just giving it a finished your vehicle. We have a beautiful moon. Now find spending. Bint is one of the exciting things for me. It was always beautiful to be in mind. You can paint them in different base in depends on what kind you're comfortable with for pending fines. I really was printed rigger Brush off. I stand. Uh, you can go with any deal a brush that you have Lord of Graduate concentrated paint. Draw the trunk of the tree on on some loose brush, strokes up leaves with various hand Woman's. Make sure to keep it irregular in order to make it look more natural. Play around with the brush trolls filling the empty areas with the strokes off. Your choice on make it look more fuller. This way you will be able to achieve gorgeous looking fine. Yeah, I have another example off. Fine
6. Setup: Now that we have learned all the techniques required for this class, let us get started without fine and sleeping. You can pick your choice off colors and paint, using the same techniques like I will be teaching to make the process simpler. I have further divided this chapter in two areas. Spaces. They could be bold and plays the people with proper alignment. Take a mosque in paper and came down the paper to the clipboard. Make sure that on the edges are tightly seem so that the water does not seeping through on the foresight. Saving it tight helps us get a crisp. I need border. I will place my cardboard inclined toe around 10 to 20 degrees by placing some object 100. This helps the water tow slow down and prevent buckling off paper. I will have my required colors on the ceramic palate before I begin painting
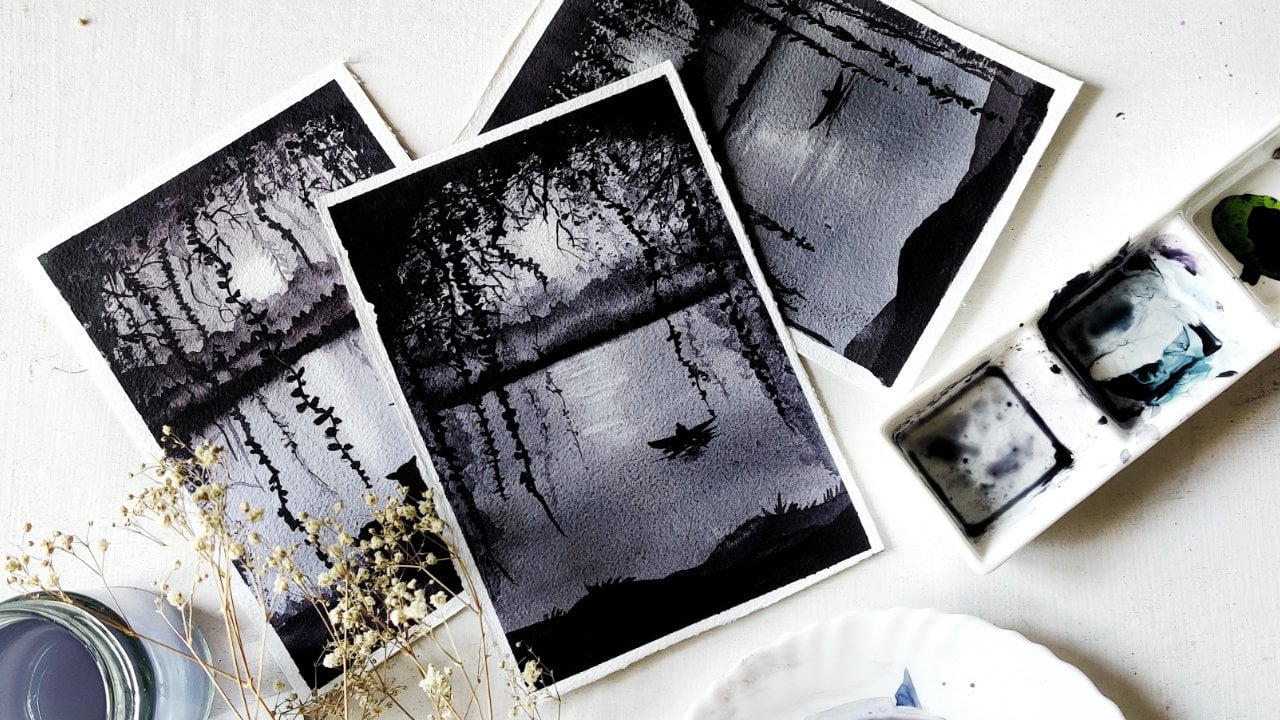
7. Painting #1 - Background: Let's get started with the pending process I will be using Returned were technique. I went the paper with print in mortal or 1.5 inch brush. Having a bigger brush helps to cover larger areas really quick. Our background is going to be sky. So load the brush with ample amount off pain and place the red colors on top. Part off the paper, which the picture darker. Skype. Tell the clipboard while spending so that the water flows down easily. Leave some white spaces in between the beans. This will give us some depth and highlight with the painting. Got the pains randomly here, and there's no particular order that such blended well with the background and make sure there are no sharp edges. I'm adding some darker goings on the top part, depicting the darker clouds. We will also pain the bottom most part of the paper with the same color living the middle part for the based on shared drop the pains randomly. I'm not focusing on the perfection. We can achieve it later. Now we like some drops of water for easier blending off colors. Okay, no load your clean brush with pastry color on dab some pains living white areas in between . There is no particular order as such. To do this, just dropping random beans. You just have to enjoy the process off painting. The colors will blend with the background really easily as a paper this week. That's the beauty off watercolors. Look how beautifully blends together, giving us a smooth finish when the paper is still wet, I add some more pains to achieve darker tones. No time. This is only possible in 100% quarter papers because it remains right for a longer period. Otherwise, you can wait for this layer to dry completely and then go for the second layer off paint by relating the paper with clean water. These techniques will help us at your greater vibrantly in our paintings. Okay, like a Spain, the moon now here to create the moon, I will be using lifting technique with tissue. Paper them into the area where you want to live the pain. I had some pains around this region. Give it a finished look. Let's make the colors look brighter by adding some more candy colors. Do not restrict yourself a limited strokes. Try only and see what works best for you on lead, the colors play their roles. Keep Harding pistol colors until you feel the vibrancy is great enough. Um, adding some deep sea blue on the top part. Oh, here have realized the clouds look a little darker than my expectations. So now I decided to lift some things from that area to make it lighter by using lifting technique. So here's how I lived my pain. I'm divert on other radio as well. No watercolors are really unpredictable in nature, but there's always a way to fix it Now. We add some wet paint in the bottom region of the people with the random brush groups on blended with the plain water with the Bagram, I'm adding some concentrated pains in the bottom part of the painting. Our bowl your is to create a mystery atmosphere, so I'm keeping the corners darker in color on the same dough part later, and sometimes I'll be lifting some pains in the middle region. I'm making it look more like Mr I will lift something's using or damn brush on dab it on toe tissue. I used lifting technique in most off my paintings. This helps me create depth. Onda highlights in the painting by pulling the paint upwards. I'm trying to depict a pine forest in the background, painting the tip of the pine trees which appears to be covered with Mr I had paint on lifted wherever this is necessary. Now I'm making the corners doctor to create their depth in the painting. Lift up pain wherever necessity on let it dry completely. You can wander painting another layer once this layer is completely dry. Also, I have lifted some pain from the center part, using the same lifting technique we belong are deeply into the pine forest that is in the background. Take diluted deep sea blue on in the pine trees. Use the techniques that we learned in the previous chapter. Keep the points irregular and asymmetrical. We used diluted pains because we wanted to appear as distant objects. Now the clean brush and blend a pine tree with the mystery background. Ive pain fine trees with number strokes. Repeat the process until you have ah, line off pine trees placed next to each other. Let it dry completely. Once you're done with this Leo, I will pain two layers off. Fine trees to queer depth in the Forest. Agent is a key to beautiful paintings in Water Palace. Let us mourn Waas again. Layer off fines He was a little darker. Don't this time being Define ting from top to bottom. Use a glass door. As I said earlier, under some is too bad No, I absent clean water and drop some paint on this work surface. This is true. Creators are present between to differentiate between Julio's Now repeat the procedure on keep piling More pine trees Now in the station The fines should be doctor so the pain will be off Concentrate. You can have some more time, please as well. That probably depends on you. I used to have literally extremely warm for
8. Painting #1 Foreground: once the background display, check the paper for the diners. It should be completely drive. Let's draw a straight line to depict the trunk off the pine tree. In the composition, we will be using wet on dry technique to paint the foreground, since the object in the foreground are clearly visible to our eyes. Hands amusing, concentrated. Don't know. Deep sea of Luke have used the no brush to paint the pine trees. I will be painting the pine trees using the techniques taught in the earlier chapter. Keep your breast strokes irregular. I try various hind moments. Do not force yourself to limit to particular strokes. Let go off all the fear on Even if you know bad in one painting, it's OK. You can learn from normal states and start with the first green things. I'm drawing the branches off the pine trees in different directions and further extending the leaves with random brushstrokes. Make the strokes. They're not on the outer part of the branches and keep it ticker. On the inner side, I had some wit toe the trunk off the dream fender. Empty areas in the centre part. This will make the pine tree look fuller. You can use any other brush for pine trees. It is good if you have brushed. Do find. No, I've been repainting the lines on the right side of the composition with the same techniques that I use on the left side. Avoid painting the straight lines and keeper little Kobe so that it looks more natural. Here. I will have to fines. I'll go the two trunks at the same time on filling the tree with branches. Using random brushstrokes. You can live some gap in between the branches of your point. Please, you need to flame an ideal what kind of trees you want in your paintings. There were ideals, pantries. You can check out the majors from Google or printers. For your reference, I'm feeling up the empty areas of the pine trees. Make sure the trees in the foreground are darker in color because of ours ascends off death depending. Now I'll paint this tiny by entries in the bottom. Most part of the painting, you have to use the same techniques for painting. This finds okay, so have completed their spending on now. Let mourn unexplained ing
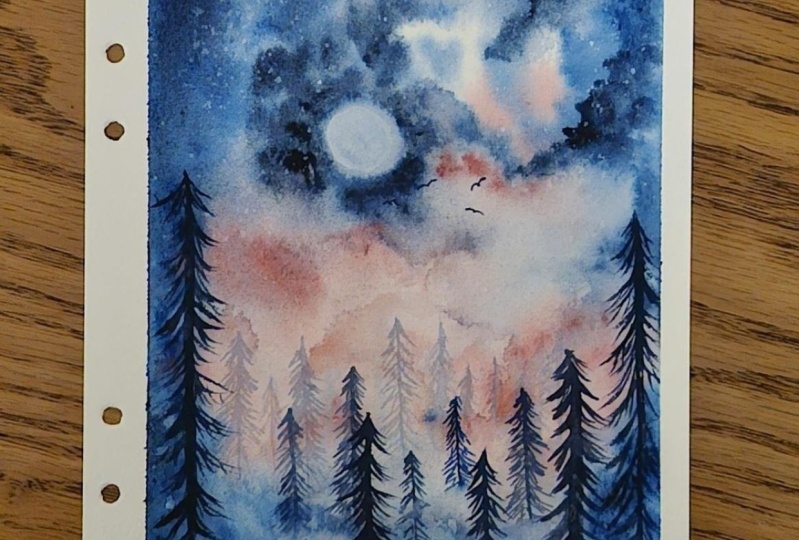
9. Painting #2 Backgound: Okay, guys. So let's paint as I can painting, which is a simple mystery landscape I will use. Why don't we take me my people This right? No, no. I'll makes the colors to paint the background of the painting. Mixing deep sea blue paint the top most part of the paper. Um, blending it well, using we don't wait. Take me. I'm building the cardboard that the colors slow down with the water easily and gives us a smooth finish. No, I'm going to add some basil, think in the center part, blending in with the background more. And I think some of those and claims, um together on blending in nicely. So that does not leave behind the sharp edges, adding some more tasteful pain in the same door to get more vibrancy while the paper is still right on the top. Most part, we had some concentrated blue toe depict their darker clouds, also adding the blue on pasty pink so as to get small door blend. I'm building the papers who died. The colors flow easily and mixing it with the water. Look how the colors are flowing down on the pace of pink as you can see. I have left the bottom part empty. So now let's beans paint This Calvert, the selfie is on, um, painting a diluted version off new. See, the colors are flowing down easily. Remember this You people form on alert Selfies on. We'll keep adding more colors in the corner on somewhere in the middle. No, this is to create a Mr Look. I'm just stabbing some color in the front door and day to create the light and charged with some plane drops off water on the painted surfaces to blend the colors. But it's another in creating a more in your. So this is the same technique that I've used earlier that he should have been Britney. Look, I lifting the pain from the paper. So here I have lifted the pains appeared on painting around the area off the to create that look, also adding some baseball pink in the bottom region. See how beautiful our moon has Come on. I'll also pick some colors randomly. The eight white spaces. Okay, so here I am, adding some water and blending it together Some droppings on water and beans on. Now I'll tented again again. Look how the colors are flowing down. This clears a natural Mr Look. Now let us had some darker, concentrated colors on the top part toe the big, darker clouds. Again, I'll keep adding more concentrated colors on the corners. I had some. Lose your in there randomly on drops, um, are clean water on that blended smoothly. Remember to keep the cardboard filter when you perform these tapes on adding some more drops on making a doctor and you are background is done. That's more doping, foreground. Okay, so let's pain the foreground. Now prevail. How pine trees Your as well. So let's broad drunk and start painting. The branches turned the leaves off the pine trees. I'm painting directly. Use a regular. I start in the previous chapters. I'll pick up some pains from the pine trees, using the tissue paper to create an illusion. Off. Missed paintings are more lines in the bottom part. I'm painting these points with diluted pains because they are at a certain distance. We'll also pain some darker trees, which is closer to the viewers eyes. It's now I'll be painting the by increase with a little less diluted beans
10. Painting #2 Foreground: Now I'm going to paint a new layer off pine trees, which will be little concentrated in color. Here we will have to paint many pine trees as we are going to depict the pine forest. Now, for the bigger point, we will use the same technique for us, drawing the trunk, then followed by the branches and leaves. I'll draw some branches here, in there randomly, with Luzon CUC's then filling it up with the leaves. Make sure there's little darker in color because it is the foreground. Okay, so we're almost done with the pine trees. Now let's more pain boots.
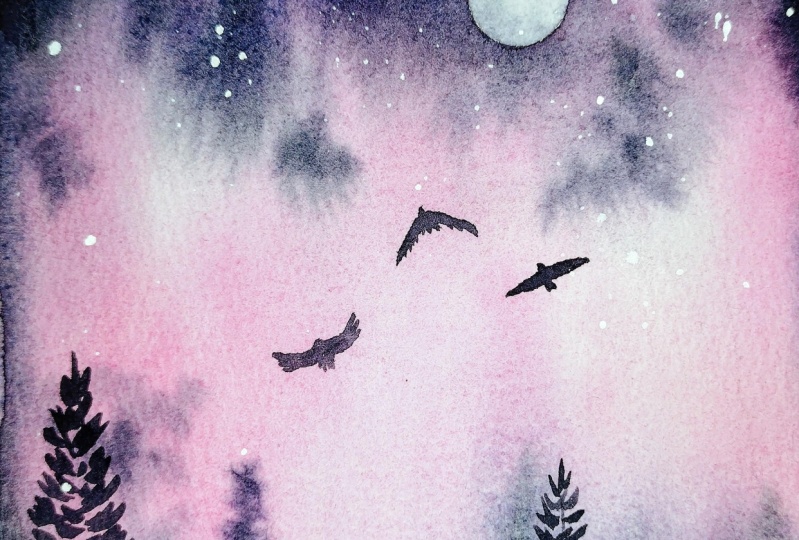
11. Painting birds and stars: the pain bugs Waas store, draw line overboard and then later fill in that area with no color. Kim. I just come to the big toe. Fido's Let's bring in some more balls drawing in watered. We like structure on. Do some more details. You can add any number of balls in the painting. It totally depends on you. No, I won't try some stars in the painting, so I'll make some white paint and Sprinkle it on the dog. Most part that is the sky using a brush you can even use. General Ben are acrylic panes your distance.
12. Final thoughts: we have seen is to spending Let's remove the masking day Make sure paper is completely dried. When you removed the left it with an angle off about 50 toe 60 degrees. This helps to get clean edges on our dripping off the people. All right, so we're done painting the candy skylines Capes I hope you enjoyed watching this class on. I'm definitely looking forward to see your paintings. Do post them in the project lt on kindly leave a review or feedback for the classroom. This will mean a lot to me. If you are posting them on Instagram, then do dad me mine Signem handlers Water cools I would love to reshape your works in my stories. Alright guys, Thank you for joining me on. I'll see you next time until then happy painting. But by
 Shanan Subhan, Watercolor/Gouache | Art Educator