Transcripts
1. Introduction: Are you ready to bring
your artwork to life? It can be really easy when
getting started with animation to end up with
motion that looks a little bit stiff and mechanical. In this class, we'll be
learning how to animate fluid, smooth looking character
movement using procreate dreams. Hey, I'm Jaron Fogel and I'm a freelance illustrator based in the Portland, Oregon area. I created artwork for
companies like Disney, Spotify, Facebook, Adobe,
and of course, procreate. Some of you might have
watched my other class from a few years ago about creating an illustration
of procreate. And I'm super excited
to be back to teach you how to get started
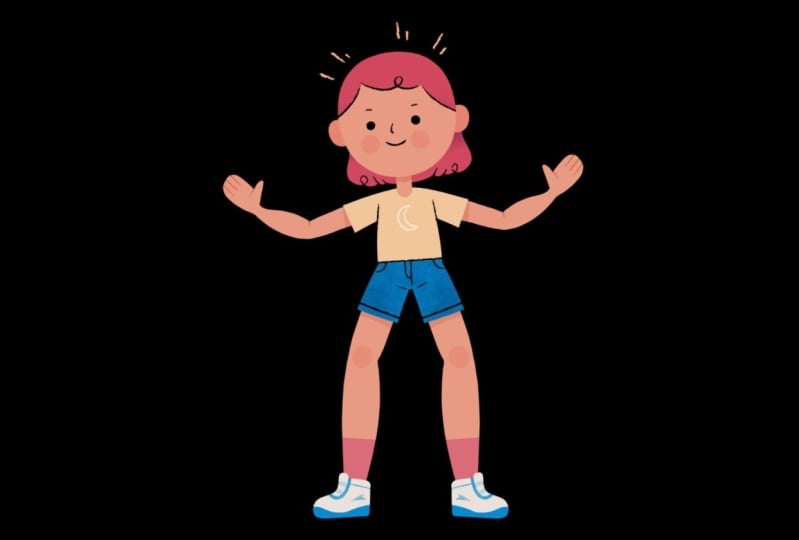
with procreate drinks. I chose the dancing
character for the class project
because I think it's a pretty approachable way
to learn the principles that you used to animate
and procreate dreams. The same principles
could easily be used to create a more
complex animation. If you want to take
things further, we'll be going over a lot of techniques
including creating, planning, and importing your artwork into
procreate dreams. Key frame based and frame
by frame animation. Easing timing, creating looping motion, and
a whole lot more. At the end, you'll have
a looping animation of your own dancing character. We'll start by creating
most of the pieces of our character as
layers in procreate. Then we'll import
those layers into procreate dreams where
we can talk about how to organize things for animation and start creating
some key frames. As we go, we'll talk about
some techniques to make your animation feel a
little less mechanical. And we'll also go
over how to add a bit more visual interest by including some hand drawn
frame by frame elements. We'll also talk
about how to create a three D head turn effect. When we're done, we'll export the animation so you can
share it with the world. Whether you're a
seasoned digital artist who wants to
learn more about animation in general or you just want to learn more
about perforate dreams. I hope this class has
something for you. I'm so excited to be teaching this class and to help you
learn more about animation. And about how you can
use this incredible app to bring your artwork to life. But enough of the chitchat. Let's get started to
make your drawing dance.
2. Class Overview: Before we actually
start drawing, we need to quickly talk about a couple of housekeeping items. While we'll cover some
illustration basics along the way, it will be a lot easier
if you already have at least some familiarity with
creating digital artwork. If you need a refresher or don't feel comfortable with
drawing on an ipad, I'd recommend
checking out one of my digital illustration courses. Aside from that,
you'll need an ipad, an Apple pencil, and of
course, Procreate Dreams. You should be able
to use pretty much any ipad that supports
an Apple pencil. Although you may run
into some limits around how many
tracks you can use, I don't expect to hit that
limit for this project, but it is something
to be aware of. Along with this
course, I'm including a few custom brushes that
I'll be using along the way. I'm also including a layered
propriate template file that I'll be working from to help you quickly get started. You can download these
from the Projects and resources tab below. Well, I'll try to make this as straightforward as possible. Animation can get
a bit complicated. If you're worried about
messing something up, it might be a good
idea to create duplicates of your project
at the end of each lesson, in case you need to
start over on a section. While animation can
be challenging, don't be afraid to try new things and push
the boundaries. As with all art,
I think animation is at its very best when you're having fun with it and really should put yourself
into your work. It can be so rewarding when you start to see
your artwork move.
3. Sketching & Planning Your Character: Okay, so we're just going to get started on a sketch here. I'm going to first
create another layer, and we're just going to tap
to rename this to sketch. Then you don't have to do
this, but I think it's fun. So I'm just going to switch
the blend memo to difference. And what that does
is because I have this black background and
this light character, I just want to be able
to draw anywhere and automatically get this
contrasting sketch color. So I don't have to worry
about what color my sketches. Obviously, you can
change some things, so that's just not
an issue here. You can just choose a color
that's going to contrast. So up to you. But I think
this is kind of fun. But I'm just going to get
started with some hair up here. We'll talk about this
a bit more later. But because we want to create this three D head turn effect, I'm going to extend the sides of the front of the hair
out just a little bit. This is going to be
masked to the shape of the head when we're
actually working on it. You won't see these parts
that come out except when we move that side to
side and we'll talk about that more when we
get to the head turn park. But just be aware that you might want to plan for
something like that. Then let's do maybe
a nose of some kind. Eyebrows, a little
chin shadow here. Something like this. I
would draw some ears. I think I actually
have some in ears. If I open up my body
group and then open up this head group and then
turn on these ears, we'll just use those as
you are going with this. You're totally
welcome, of course, to just create your
own character. You can use this template as a starting point to make
your own character. You can follow along exactly
with what I'm doing and just copy my character if you just don't want
to think about it. Or you can just use this
as a reference and create your own document all the way from scratch if you'd
prefer to do that. Yeah, let's just keep
going on this sketch. I'm going to create
some cheeks here, then before we start on the clothes with the sleeves
and things like that, we're going to set up symmetry. And then I will show
you what I'm doing with this little swaby Quick menuing. First of all, let's set
up symmetry on this. I'm going to tap on the
wrench menu up here. And then we are going to go into the canvas tab and then
just turn on Drawing Guide. Mine will automatically
be on Symmetry that might come
with the document. I'm not entirely sure if it
doesn't just tap on Edit, Drawing Guide here, then down here you can
tap on symmetry. And that will
automatically create this side to side
symmetry for you. If it doesn't automatically
turn on assisted like this, you can tap on the layer here
and then just tap drawings. Then when you go back to draw, just automatically be drawing symmetrically on both sides. We're going to start creating
these sleeve shapes. Just something to
keep in mind as we go here is that when you
cap off these limbs, you want to create a rounded shape because we're going to be rotating that limbs you don't want like
a sharp edge on the eraser to stick out in places when you
rotate that around, because it's just going
to be really obvious. Just make sure you have
rounded shapes that could easily rotate within the
shape that it's overlapping. Let's talk about this
quick menu really quickly. You can see I'm swiping around and switching between paint
and erase really quickly. Like this. That's not turned
on by default inprocriate. If you're not aware of
this, you can turn it on by going into the Wrench menu. Then under pre your controls, it should be over here
on the left side. There's a quick menu item. And we want to turn
on tap modifier and touch what that's going to do is when you touch the
screen with a finger, you'll just pull up
that quick menu. Or you can tap on this to bring up the quick menu as well. Then if you want
to customize it, you can just tap and hold
on any of these things and choose whatever
option you want here. Just something to keep in mind. As you're doing that though,
don't choose something like merge layers or
anything that's going to be a destructive action that you might not notice right away. You could do like clear
layer because if you do that on X and you'll notice
exactly what happened. But just keep that in mind as you're choosing
what to put in there. Okay, so let's get back to
our actual sketch here. Again, I'm just switching
out to erase and I'm using the less scratchy pen, is my eraser from that brush
pack that's available in the project resources
section, I think it's called. We're just touching up our
shapes a little bit here. I might not want
that to stick quite so far into the body. So I'll just spend a
little time on this. And I'm using the sketch
Junior brush to draw with, by the way, as I'm going. It's not super important
with this because I've already planned out a lot of
the pieces in this template. But if you're creating your own, I like to just mark out where about I think my rotation points are going to be as I'm going. So we'll have one there
ish for the shoulder, something like this
for the head, and then something like here and here for the
arm and the wrist. We can play with
those a little bit more when we get to
procreate dreams. But as you're drawing
out your pieces, it can help to know about
where you plan to rotate. So you can plan out
those curve rounds, basically end caps,
whatever you'd call those. I'm going to create
just a little line for the elbow crease here. And then we're going to do
some finger separations and maybe a little
thumb game print. I don't know what you
call that. Then let's to the pants line. We do want some hair.
I'm just going to bring out some hair here. We'll probably finesse
this a little bit when we go to colors
because I don't want this to be perfectly
symmetrical. But just for planning, it's pretty easy to do it that way. Just went right back to paint. Like you can see,
it is pretty easy to use that quick
menu on accident. Again, just careful what
you decide to do with that. But once you get used to it, it can speed things up so much. It's a really nice option to, we need to use it
wisely basically. Okay, so we're just creating
these shorts shapes and then I want to create
some little pocket shapes. Again, just our
rotation point will be something like that.
Maybe maybe a little. We'll play with it a little
bit when we get into appropriate dreams and we can play with those a little
bit more specifically. And then I think I'm going
to turn off the symmetry for just a second to create
the zipper on the pants. So we want to draw it right
in the middle here, ish. And then just do our zipper. Okay. And then we can turn
that symmetry back on, so we can do some shoes
and things like that. Again, you tap and then
choose trying Assist, Let's do a little cuff on
the bottom of the pants just to make them look
a little bit, I guess. Shorts, whatever you
call these things. Okay, let's plan out
our shoe shapes. We're going to make them
sporty looking shoes. Do a cool little swooshy
logo on the side. Not to be confused with I need particular swoosh logos and then a little tongue
for the shoe and maybe, I don't know what
you call this part. Somebody who knows
sneak Rita Atomy. Let me know in the
comments. Then we'll do like some or something here. We can clean that up again when we get to colors
a little bit more. But the only other things I
want to do are just plan out our knee rotation here
and our ankle rotation. This one I want to do, I don't
know what you call this, a ruddy patch on the knee. Whatever you call that, like reddish circle that
you put there. Then our ankles will probably
rotate right around here, maybe something like that. Then I'm going to turn off the symmetry again,
just really quickly. Let's just do a cool little
logo as a shirt design here. Something along those lines get her a little
bit more character. I think with that we should be pretty much ready to
move on to color.
4. Painting Your Character: We're going to go over a
few different techniques for how to color
this and procreate. So I'm just going to open
up the layers menu here. And then on the sketch layer, we're going to tap on this little letter off
to the right side. And then there's an opacity
slider right below that. And we're just going
to drag that down to about 50% Then you can
tap on that letter again, to close that menu, you'll see we have three
different groups here. We have our body group and
then each leg separately. The reason we have it set
up this way is I want the body arms and head to
be able to rotate together. Basically, from here, that's
the root of our character. And then each leg
we want to be able to control a little bit
more independently. You can rotate each leg
independently as well. Then if we open up
that body group, you'll see we have the
body shape itself, we have the head, and then
we have two different arms. Within each arm, you're going to have just the upper arm,
which is this part here. And then the lower arm which includes the forearm
and the hand. The reason we have
it set up that way is basically you want to think about your parent,
child relationships. We're going to be leading
from this upper arm. If we rotate the entire group, we'll rotate all
of those together. Then if you want to keep going
down the bone chain here, then you can rotate
the fore arm. And then if we open
up that group, then you could rotate the
hand separately as well. We'll talk about that more
when we get into animation. But just consider those things as you're setting up
your layer stack here. Especially if you're
creating this from scratch rather than
using the template. Let's start just coloring
some things a little bit. So I'm going to go over to this body shape and
you'll see there's kind of a checkerboard
pattern in the background of
that layer thumbnail. And that means that alpha
lock is currently enabled. So what alpha lock
means is if I go open up my brush menu here and
just start painting on it, you'll see I don't
paint anywhere that I haven't already
painted on that layer. So basically, if something is transparent, I
can't paint there. That's going to be really nice because we want to just be able to fill all of these shapes
with color really quickly. So I'm going to go
choose this pale yellow that I want
the shirt to be. And then in my group
here on the layer, I can just tap on it to
bring up the layer menu. And we're going to
say a fill layer that will fill that entire
layer with this color. The way that I'm actually
going to be doing this though, because that's a
little bit tedious to keep opening up
the layer menu for each one is I have fill layer set to my top left in
my quick menu here. And then alpha lock is
on the bottom right. So if you want
toggle alpha lock, you might have
noticed that you can just tap on this and
choose alpha lock there. You can also slide
with two fingers from left to right to
toggle it really quickly, but I think the quick menu is probably the fastest
way to do things. Okay, so again, we just have
that on alpha lock already. And then I'm going to
quickly flick up to that upper left to
fill it with color. And now I want to show
you another technique just to kind of speed
up this process. We're going to open up the
wrench menu over here. And then under the press tab we are going to go down to
gesture controls again. And then down here,
towards the bottom there's this section
called layer select. And I'm just going to
turn on this section called Modifier
button plus touch. And so you can see it's on here. And then I'm just
going to tap done. What that does is if
I tap and hold on this modifier button between
my size and opacity sliders, then I can move one finger around the screen and you'll see you get whatever layer I'm currently touching
pops up basically. It's just a really quick
way to select a shape. And then we'll just choose the color we want
to fill that with. And then we can fill it
with that quick menu. Again, we can just go really quickly through all of these
and fill them with color. These all have Alpa
lock enabled already, which is why they are
just filling like that. If I go up here to the neck, I think that one
has it turned off. So you'll see if I
try to fill that, it will just fill
the entire canvas. So I'm just going
to do quickly use Alpha lock in my quick menu
and then fill the neck. The other thing I wanted to
talk about is clipping masks. We're going to go onto this body shape and I'm just going to create
a layer above that. Then I'm going to tap on that layer to bring up
that layer menu again. And then say Clipping Mask here. And you'll see it in
dense a little bit and we get this little
arrow pointing down. And we're going to
rename this to pants. And then I'm just going to use my selection tool
here and set it to a rectangle to fill in a little pants section
really quickly here. And I'm switching to
my brush tool and just choosing the color that I want my pants to be and
then filling that in. The thing that clipping
mask did here is you can see this is actually
a rectangle shape. And if I unclip it, it shows up exactly where
I made that selection. But if I clip it
to the body shape, then it only shows up
where they overlap. And this is also
going to be useful on the head, for instance, where we want to create
this hair in the front, we can, I'm going to use
the freehand selection tool to just create this
shape really quickly. Then we want this to overlap
the head a little bit, which we'll talk
about more later. And then I'm just choosing
a different color. This can be useful when we go to create that head turn effect. We're going to want to
slide that hair back and forth across the head shape. You can see I can move
it back and forth and see all of that
overlapping stuff when it overlaps the head. Then the only other
thing I wanted to quickly touch on is we need to create some sleeve
shapes and shorts shapes. And I want to talk about
how we're going to do that and flip those
over to be symmetrical. I'm going to create a new layer here and then I'm just
going to rename it. We should go rename
all of these layers. By the way, I'm calling
this sleeve right, because it is on the right arm. This is called
sleeve, right, And we're going into
the selection tool. And just quickly
creating that shape, I need to overlap this a little bit more than
I did in my sketch. I think we'll just tap and hold on this body shape to select that color
really quickly. Now we can duplicate this shape, flip it over, and move
it over to the side. So I'm just going to
slide from right to left. Hit Duplicate. And then we're going to tap
to rename this. Then we want to go
into our move tool, and you'll see we have this flip horizontal
button down here. Then tap on the snapping option. So you have a couple
of options in here. The one we want for right now
is going to be magnetics. So I'm going to turn on
magnetics and turn off snapping. And then I'm just going
to move this over to the side and put it in
place where it should be. What magnetics does is you
saw that blue guideline. It snaps to the direction
that you're moving it in, I think 15 degree increments. And it just makes it a little
easier to move something without going up and
down, unintentionally. Now, I'm going to
select both of these. Open my move tool again, and you'll see that I have two
different layers selected. And then if I open this up again and switch it to
snapping and turn off magnetics the snapping tool snaps to landmarks
or other layers, you can see I got
that orange line. That basically means
that now this is centered with the
center of the canvas. I just need to move my sleeve left layer into the
arm left group. And I want that to be a
sibling to my upper arm left. And this one is a sibling
to upper arm, right. But yeah, I'm gonna
switch it to time lapse while I fill in the
rest of the details. And just kind of like paint
a little bit more on this. All right? I think we're just about
done with colors here. But I did just want to point
out one more thing before we move on to organizing
things to export. And that is that we
have this nose left. But because we want to do a
head rotation in three D, we're going to need
a nose or right, so it's pointing the
other direction. And then also just
a front on nose. So I'm just going to really quickly combine this
nose outline with the little bit of
color that I have underneath and maybe you
can see this better. I'm just pinching to merge
those two layers together. And then we're going to
rename this nose left. And then just like we
did with the sleeve, I'm just going to
duplicate this and then use the move tool to
flip it horizontally. And then we'll just carefully
move it over to the side so it matches up with
that other nose. And we're going to rename
this to Nose, right? And then I'm going to
turn that one off. Turn the Ocacity down on this one just so we
can see what we're doing. And then with my scratchy
pen and a black active, we're just going to
create a little loop for the front view of the nose here, Okay, Then assuming you didn't redo the eyes
or anything like that, then you should already
have a closed eyes version and an open eyes version that we'll also be
using in there. And then let's talk about how to organize
this for export.
5. Organizing Your Layers for Animation: Okay, before we actually
start animating, we do need to do
just one more thing. While we're in procreate,
We're just going to swipe from right to left on our projects here in the gallery and we're
going to duplicate. So we're going to open this up. And our goals here
are basically we want to simplify our layer
structure as much as possible. We want to remember to name groups and layers if we
haven't done that already. And then I just want
to double check that everything overlaps
how I expect it to. For instance, I
think I'm going to need to reposition
the neck and here. So let's just start
going through this. I'm going to open
up my layers menu. And then we'll just start
at the very bottom. And for each layer and kind of especially layers
that are clipped to it, we want to consider, do
we want these things to move independently of
each other at any point? And for the sock and
lower lake, probably not. So I'm just pinching those
together to merge them. If you don't want to
use that gesture, you can just tap on this and open up the layer menu
and hit Merge down. So same thing with the shoe.
We just want to merge those. And those are both named
how we want them to. I'm just going to start
merging some things. So it was just the Nee patch, we have an outline
on the shorts. And then I'm going to start closing these groups as we go. But you need to make
sure you go through each subgroup and
just clean things up. You could do this in appropriate
dreams to some degree, but I think it's going
to be easier and appropriate because
once you're over there, it's just a little harder
to keep track of where different layers
are and things like that inside of the timeline. I think it's better to
just approach it this way. Again, we're just doing
that same thing as before. Double checking
that everything is named how we expect it to be, and then closing layers. We're merging some things here. Merge and then opening up every group to make
sure that we are doing the same thing and
covering all of our bases. Okay, I've got both of the legs and both of the arms
already done here. Then this is just some
lines that are on the bottom of the
back here piece here. I think all of our face things
we want to keep separate except for this little outline along the hair front piece. Then we'll merge the pants and the body and this little swoop of the neck down
together with the body. And then this is just
some outlines on the body that we can
also merge down. I think everything should
be named how it is. Our only issue now is if
we close this head group, you'll see that if
I move the head, the neck moves along with it. Which seems like it
would make sense. But when you actually
go to animate this, it feels a little
weird to rotate there. You actually probably
want to be rotating here. I'm just going to
pull that neck out of this layer group and
put it right here. That looks like
the same, but you can see it lost its intense. Now this is right above
that hair back section. Let's close that
head group again. Then we should have our
neck head, our body. But I actually want
this neck to be in front of the body
so I can merge it together and get rid of this silly little loop
thing we had to do. So we're just going to
merge those together. But now you can see the neck
is in front of the head. We're just moving some
things around as we go here. Now the head is in
front, then we have the body with the neck
and then the hair back. The only problem here
is when we go to rotate the head and
that hair together, we want to make sure
that the hair does not go in front of things that
it shouldn't go in front of. Basically, we need to
move that hair down. It's also below the left
and right arm groups. This is going to be
just a little bit hard to keep that hair and
the head in sync, but I think we can manage it. With all of that done, I think we should be
ready to start in an
6. Getting Started in Procreate Dreams: Before we import our artwork
and start animating, let's take a quick tour
of Procreate Dreams. So this first screen that you'll see here is called The Theater. And this just has a grit of icons that represent
your movie projects, just like you'd seen procreate. But there are a couple of
cool things that have been added here we don't
have in procreate. So let's just take a look first at this little
icon on the top left. If you tap on this,
you'll notice that there's a locations
section in here where you can choose
to store your files in icloud drive or on your ipad. We're going to stick
with on my ipad for now, but it is really nice
to have that option. We'll just tap that
again to close it. And then if you tap and
hold on any of these icons, you'll notice you have
the option to rename, duplicate, share, delete a
bunch of things like that. You can also tap the Select
button up here to choose multiple projects and then decide to delete
or duplicate them. Or you can create a new folder. And you can actually nest
these folders as well, which is not an
option in procreate. Currently, we'll
just call this test. Okay, When you open this, you might notice that you can't currently dragon drop files in procreate dreams
as of the time of this recording. Just
a little pro tip. If you want to
organize your files or do some heavy folder, something here, you can go
over to your ipad files app. So we're just going to go back
over there and if you tap on this little sidebar
and choose on my ipad, and then find the
Procreate Dreams folder, and then theater. You can do whatever
you want here. You can rename files, you can create folders, you
can dragon drop them, whatever you want
to do, and it will all be reflected in
Procreate Dreams. When you go back,
we'll just move those back here and
delete this folder. Now when we go back
to Procreate Dreams, you'll see my folder is
gone and my files are back in the theater here. A lot of nice little
additions here. Let's talk about how we
would create a new project. There's this plus icon
in the top right. If we tap on that, you'll
see that you get a list of some pretty common sizes
that you might want to use. So you have square, social, vertical, some different
widescreen options. We're just going to go
with square for now. There's a couple of things here that are worth
pointing out. So if you tap on this little
spot where it says HD, you'll get the option to
change the resolution. So we can do 722 K
or four K as well. I'm just going to
stick with HD for now. Then if you tap on the little ellipsis up here
in the top right, you can also change
the frames per second. I want to leave this at
24 and the duration. I think this might be
something else by default. But we're going to create a two second project
for the moment. You can change the hours, minutes and seconds that
your project will be. I would recommend just
switching that to 2 seconds. And then I'm just
going to tap on this little empty icon here to jump right into
an empty document. And you'll see when we do that, there's two main sections
on the screen here. Once you're in the
Propriate Dreams interface, you're going to have this top section which
is called the stage, and this bottom section which
is called the timeline. And this is going to make a
lot more sense when we get to a project that actually
has some contents to look at. Let's for now just tap
on this little icon at the top left of the timeline
to return us to the theater. Then we're going
to open a project that actually has
some things in there. But you can see if we zoom out in this stage
area at the top, there's basically three sections here that we want to look at. There's the actual stage, or you might consider this like the frame or the cannabas, depending on what you're
used to working in. But this is the highlighted
area in the middle. This is what will
actually show up when you export your project. Then outside of that,
you can see I have some extra artwork that's cropped outside of
the frame there. And that's really nice
because as we scroll through, you can see we can move
that artwork in and out of frame and just have it
in this backstage area. And then the other
thing in this top section is the time
code down here, which tells us what time we
are currently looking at. If I tap on this, you have some options to edit the
onion skin settings, which we'll talk about later. And you can also change
the background color, which we will come back to in our project that we just made. Then let's look at
the timeline section. Down here on the
bottom, we already saw the Return to
Theater button. And then if you tap on the
movie title right here, then you'll open up
a settings area that you can change some settings for your movie project
if you want to. Again, you can change your
parents per second here. Your duration, and then the resolution and
a few other things. We're not going to get into
this too deeply right now. Let's just tap done. And then over on the right you'll
see there's a Play button. So if we tap that, we can play our animation and it will
just loop through it. And there's a Perform
button that we'll talk about a little bit
more later then. This is called the
timeline edit button. Let's just pause that for now. We're not going to
get into right now, but basically lets you move and select multiple tracks down
here at the same time. Then you have your drawing icon. If you tap that, it puts you into drawing
mode and you'll see some pretty familiar
looking interface up here if you used
to appropriate much. So just your draw smudge, erase, layers, color, and then
size and opacity sliders. And then if we get out
of that drawing mode, then there's also this
add button down here which basically lets you import assets from a bunch
of different sources. So below that you're going
to see your timeline ruler, which is divided into
seconds and frames. You'll notice if you look
really closely here, basically this is 1 second
but divided into 24 frames, because we have our project
set to 24 frames per second. And then below that
you have your tracks. Right now you can see
I just have one group. If I open that up and
then scroll down, I have a whole bunch
of different tracks. These are a lot like
layers in procreate but arranged on a timeline. And then you'll also see
some key frame tracks that we'll talk
about a bit later. Aside from that, I think
it's worth just talking about how you get around this
timeline really quickly. And obviously, we'll
be going over a lot of this as we go and using
all of these things. But I think it's nice to have
the overview first quickly. You can pan around
with one finger, you can zoom in and
out with two fingers, which is pretty intuitive. One thing to note when
you're doing this though, is if you zoom in a lot, you'll notice that it only plays the section that is currently
visible in the timeline. And this can be a
really useful thing to focus in on a certain
area as you're working. But just if you think suddenly your animation is
clipped too short. This is probably why if you want to get out to
your full animation, you can quickly pinch
out with two fingers to show the entire
timeline all at once. You can also flick the playhead
here back to the start, and it will play from the
beginning of your animation. Like I said, this is
called the playhead. It shows where we currently
are on that time line. The other thing to note here is, and this is pretty unique
to procreate dreams. As you can scroll
up and down with three fingers to scale things vertically,
but not horizontally. And this can be really
nice to see what you're looking at a little bit better or get a bigger picture of you. Then you can also
scroll left and right to scale the
timeline itself. This doesn't affect like
how long anything takes, It just makes it easier to
focus on a certain section. Then last thing to
note is if you zoom in as far as you can and then
double tap on a section, it will zoom in just
a little bit more and let you focus on
individual frames. If you want to do
that, you can see you get a full label that says
what frame you're on there. That should be
basically everything. Now we can start pulling
in our own artwork.
7. Importing Your Artwork: If you haven't already,
tap the button to return to the theater and open the project we made earlier. There still isn't anything here. Let's import the artwork
we made in Procreate. You can do this by exporting your artwork from Procreate
to the Files app on the ipad, and then using the
plus button here to go into the Files
app and import it. But I think it's a little bit
more fun to use the ipads multitasking system
and Dragon Drop. You can see when you go up
here to the top of the screen, there should be a
little three dots menu. And if you tap on that, you have a couple of options here. We're going to use Split
View. Just tap on that. It will push Procreate Dreams out of the way for
just a second. And then you can choose another
app to open on the side. We're going to choose Procreate and open that up
on the right side. Then all you need to do is find that artwork that you
made in procreate earlier and then drag and drop it straight the stage area. In Procreate Dreams you'll get a little importing screen for just a couple of seconds and then you can just drag
on this little pill in between the apps to drag
procrate out of the way. Again, you'll notice this fills up a little bit more
space than we created for our canvas because the
artwork was a little bigger than we created our canvas
in procreate dreams. But I'm just going to go ahead and tap on that with my pencil, or hover over it, actually. And you'll get this bounding box around the whole artwork. And I'm going to scale
that down until it fits inside of my stage area. Then we're going to just try to center that as
well as we can. You'll notice we have some black outlines sticking
out on the sides. That's because we were drawing
on a black background. You can go in and clean
those up if you want to, but I'm actually
just going to go ahead and tap on our
time code down here, the background color, and
then switch it to black. The only other thing we need
to do here is you might notice that you only have
one track that's imported. If you tap on this to
make sure it's selected, it should be outlined
in pink like this. Then go into your drawing mode
and open the Layers menu. You'll see all of
our layers are here, but we need to convert
those two tracks in order to be able
to animate them. This is super easy
to do. All you have to do is tap and
hold on the track. And then choose convert
layers to tracks. And you'll see
this turned into a group with a little
dialogue here. And if we tap on that and
then scroll down all of our groups and all of our pieces of each of
those things is there. And in the order that
we created them in procreate, that should be it. The artwork is imported
and ready to animate.
8. Rigging Your Character: Now that we have all our layers in place, we need
to start rigging. Our character rigging is
basically where you set up a skeleton structure or armature for your character
to make it posible. Well, procreate reams doesn't
support true rigging, yet we can get pretty far using nested groups and anchor points. We already created most
of our nested groups when we were creating
this in procreate. So let's talk mostly about
anchor points right now. So I'm going to just tap on this body group and you'll see we get this bounding box around the upper body in the stage area. You might need to tap on it
again to make that show up. Sometimes it kind of
goes away on its own, but if I tap on one of
these little corner nodes, you see we get a little curve that shows up around the corner. If we grab that and
drag it around, you can see that we can rotate that entire group
around together. And there's a little crosshair here which is the anchor point. The anchor point determines
where the rotation is going to originate from and also where scaling will
originate from. We want to edit this one so we can rotate around this point. Instead, up by the hips,
I'm just going to tap on this little ellipsis and the top right, and
then tap Edit, Anchor. And then we can
move that crosshair up by dragging anywhere in the stage area like a track pad or you
can tap it directly. If you'd rather do
that, then you can tap done and then go and rotate it again just to
check how that looks. And I think that
looks a little bit better for what we're
going for here. But just as a pro
tip, you can actually just stay in that edit
anchor point mode. We're going to
want to edit those anchor points for the shoulders, the elbows, the wrists,
and maybe the head. Let's just go ahead and open up this body group. We'll
choose the head. Go back into our
edit anchor mode. And you can drag that anchor point up
here to about the chin. But instead of tapping
down and testing it, we're just going to
go ahead and choose the arm and keep editing
those anchor points as we go. Then same thing
with the arm left. This is going to be
our shoulder joint. We might need to
go back and finest them because we can't
test these as we go. But I think it's
useful to get that first stab really quickly. By the way, as you do this, I think it is a really
good idea to make sure that your groups and layers are named the way that
you want them to. Also, you can tap
and hold on any of these and choose
a highlight color. I think it's a good idea
to just choose those for everything because
it makes it easier to identify things later. I'm just going to
make the lower arm for each of these yellow, we're just going to
open up that group. Choose a yellow highlight
for the lower arms, and then make sure that we are setting those anger
points as well as we go. Then same thing for
the hand to left. We're just going to go
ahead and tap and hold, and we'll just make
the hands a pink color and then move that
anger point down here. Let's go find that other hand, wherever I left my
lower arm here. And move our anchor
point and then tap and hold to choose
a high light color. We will also want to choose a highlight color
for our right arm. So I'm just going to
do red for right. And then wherever
my left arm went, let's do green for left. Okay, we can go through and
set up all of these things. I think we should be
pretty good there. We've got our lower arm,
we've got our hand. And then we'll check that
same thing on the left arm. We've got the shoulder,
lower arm and hand, we already did the head
with all of that set up. Let's tap on done. And then just go ahead and test some of these. We're going to choose our tap on that little corner node
and then rotate this, and that actually
looks pretty good. We might need to slide
things or edit this image just a little bit to avoid that poking out at the
top of the shoulder. But I think this is going to
work pretty well for now. But I did want to point
out as we go through this, notice how when I rotate
the arm from the shoulder, because this is the
parent group of the arm, the lower arm and the
hand move along with it. But when I go and
rotate the lower arm, the upper arm doesn't
move with it. This is pretty intuitive. This is called forward kinematics when
you're talking about rigging or sometimes K. This is pretty
intuitive to set up, but it isn't always
the most intuitive to use inverse kinematics
on the other hand, or K works the other
way around and could feel a little more intuitive for certain types of movement. This is where you move
a foot or a hand and the limb follows along and bends how you would
expect it to. Well, procrate dunes
doesn't support this yet. We'll want to fake something
like it for the legs. The effect we're looking
for is basically we want to be able to move that
body group up and down. And we want the knees
to just bend and the hip joint to follow the
bottom of this body group. So we get a bounce effect, but we don't want to have
to keep repositioning the feet to keep them in place. We basically want to
lead from the foot, have that stay in place,
and then be able to adjust the upper
leg independently. So what we'll need to do
is actually go in and just reverse the hierarchy
for our leg groups here. So let's just talk about
how we would do that. I'm going to tap and hold
on this leg, right group. And we're going to say ungroup. And you should end up
with three pieces. We've got shorts,
right, upper leg, and then a lower leg group. And we want to
ungroup that as well. Now we should have four tracks total that make up that leg. What we want to do is just lead from the part that we
want to be the parent, which is going to be the foot. We're going to leave that alone. I'm going to tap on this
time line edit button here. And we're going to just choose the shorts
and the upper leg. And we want to create a
group of those because those are basically always
going to move together. And that's the tail end of our chain that
we're creating here. You can see with
the timeline edit, you can just draw over the pieces that you
want to include. And that lets you select
multiple pieces at once. And then I'm going
to tap and hold and say Create Group again. We want to make sure that we highlight these and
name them as we go to actually we need to get out of that
timeline edit mode to do that. Tap and hold and then say rename and we're going
to call this upper leg. Right and then hit Done. And then we want to choose
a highlight color again. Let's just choose maybe
like a yellow for this. Then I'm going to just
tap and hold to delete these empty tracks that we left behind as we group things. Then we want to
create a group that includes the upper leg
and the lower leg. We're just going to go back
into that time line it mode. Choose these two and hit Group. Now if I get out of that
time line edit mode, we can tap and
hold and just say, then we're just going to
do that one more time. Choose the shoe and the
leg and tap and hold and say group and then get out
and call this leg, right? It's a little bit confusing, but basically what
that leaves us with, let's go through and change those anchor points, is
that if you open this up, we'll have the shoe, which
is the parent piece, and then we have the
rest of the leg. And then inside of
that leg we have our upper leg and our lower leg. That's going to allow us to, if we get into our
anchor edit mode here, we can still leave that root of the whole leg for our
anchor point up here. If we want to rotate
the entire leg together for some reason it
doesn't really matter, You could put this at the
bottom instead if you want to. But for the shoe, I don't think we'll be editing
this independently, but we'll want the anchor
point right about there. If we do, then for the leg, we want that anchor point at the ankle because that's
going to be the head. We want to be able to rotate
this back and forth and just keep that hip in
sync as we go manually. For the upper leg, we want
this to be at the knee. This will hopefully make
a little bit more sense as we start animating it, but it can be a little bit
confusing to start with. Let's tap down now. If we go in and want
to rotate our leg, you can see we can
rotate the whole thing together from the hip like this. Or we can go and
just this leg piece here and rotate
that independently. And then go and choose our upper leg. And
rotate that as well. Basically, we could move that
body up and down and have the leg like Bob as we go while keeping
that shoe in place. If you want to, rather than redoing all
of that ungrouping and grouping and stuff on this
leg over on the left leg, we can just duplicate
it and flip it over. To do that, we're just going
to go up here to leg right. I'm going to copse
that group and then I'm going to
tap and hold here, say Track Options.
And then Duplicate. You should get two things
called Leg right Now, let's go ahead and rename this one while we're
thinking about it, to leg left, then I'm
going to tap on that. And then up here
I'm going to tap on the little ellipsis and
say flip horizontal. And that will get us most of
the way to where we want it. I'm just going to tap
and then hold with one other finger on
the screen to snap. We should be able to get it pretty close to where
that other foot is. Now, I'm just going
to go ahead and delete this original leg left. And then we'll delete
that empty track as well. We'll talk in the next
lesson about how to reset these rotations
and things like that. But for the rest of this
lesson, I'm just going to switch to time lapse
and we'll just be tweaking those anchor points
a little bit more and making sure that we have layer names and highlight colors
for everything. And then we will talk about
animating in the next lesson.
9. Getting Started With Keyframes: To create our animation, we'll primarily be relying
on keyframes. Keyframes in
procreate frames are states that you set for a
track along a time line. They can represent the
tracks position, rotation, scale, opacity, and a
bunch of other properties. For every frame in between
these two key frames, the apple automatically
interpolate between these values to create an animation from one
key frame value to the next. If we sclide that across, you'll see we automatically
get this animation just by creating these two
spots on the timeline. How do we actually create these, let's go ahead and delete
these two that we have. You'll see that keyframe track disappears and we just
have our playhead. So we're going to move the playhead to the
beginning of the track. And then we're going to tap on the little clapper board icon once to bring up our
action menu here. Then you can create keyframes
for either move and scale, or some different options here including opacity and blur
and things like that. We just want to
move this across. So I'm going to choose move, and then we're going
to say move and scale. That automatically
creates a key frame of that position that our
circle is in here. I'm just going to drag the keyframe to the
end of the track. Then there's a couple
of different ways that you can create
a keyframe here. The first one is pretty obvious. Grab this in the stage area and drag it straight across
to where we want it. We're just holding
one other finger to snap that to a
horizontal movement. Now if I press play, you'll
see that automatically just created a new keyframe
for me where I dropped it. The other way you
can do this, if you want to be a little
bit more precise, is you can tap on that
keyframe we made. I think we didn't have
one to begin with. You move your playhead down to that position and
then you're going to tap on the clapper board icon. Or actually you can
just move it down to the keyframe track and tap
on the keyframe icon there, and it will create
a new keyframe. But that's just a copy
of this one right now because it's in the
exact same position, we're going to tap
on that again. And then we can enter the
value that we want manually. So I'm just going to say 11 50. And you can see that
puts it over here. Now if we press play, you can see we get that same animation. The other way you can
do things, and this is pretty unique to
Procraate Dreams, is you can use this
new perform mode. You'll see there's this
little record icon here, and if I tap on that,
then it turns into a stop icon and it says
ready up at the top. This is really cool
because it basically just records whatever action you perform on the screen
and automatically creates keyframes
along the way for you. We're just going to tap that. Move it up and down and across. And then if we press Play, you'll see it capture that
full animation for us. That might look a little
bit rough, if you want to, you can smooth it out by tapping on the modified button up here and then just turning
up the motion filtering a little bit, and then you get a slightly
smoother animation. I don't know if we're
going to use this a whole lot for our
animation here, but it can be really useful
in a lot of situations. Let's use these
keyframe techniques to animate our characters. Arm, We're just going to zoom in on that arm
a little bit and then go find it in
our tracks down here. We're going to be using
this arm right group, we're just going to tap on. Remember, bring your playhead to the very start of that track, tap once to create a keyframe, we're going to tap, move,
and then move and scale. And you'll see that
created a keyframe for us at the very beginning. And we've got this
keyframe track now that we can work with. So I'm just going to tap
on this keyframe once. Remember I talked
about resetting things to default values. You can see that we didn't
rotate this quite to the right position when we were resetting it during
that time lapse part. So I'm just going to tap on
this and enter zero manually. And that will bring us back to our default position
for that arm. Then we're just going to go and move our playhead to the
very end of that track. And then bring it
down to the key frame track area
and then tap again. And this will effectively create a duplicate of that
first key frame. Because this is a looping
animation that we're going for, we actually want to have an exact duplicate of
the first keyframe at the very end of the
track that things circle back to the start
before starting over again. If you leave it on a
different position, it's going to look pretty weird when that looping motion starts. But now let's just go ahead and move that playhead
to the very middle. So we're going to do
this at 1 second. And then I'm just going to tap here to create a new key frame. Then I'm going to tap on one
of these corner nodes and rotate this arm up
just as a little type. You'll notice how my shoulder here looks just a
little bit weird. There's an indent, you
can just glide your limbs just a little bit to match up a little better
if you don't want to spend a whole bunch
of time trying to get your anchor points perfect. I actually think this
makes things look a little bit more
naturalistic as well, because your limbs
don't necessarily glide on like a perfect axis. I usually do just a tiny
bit of motion there. If you tap on this,
you can see we move to this about one pixel to the left and about 13 and down. You don't have to fix those to be exact if
you don't want to, but I think that will just help line things up a little
bit more easily. Now, if we press Play, zoom out on our timeline
and then press Play, you'll see we have this slow
up and down arm motion. I actually want to make the
arms move up and down twice. In this animation
though, we're just going to rearrange things
just a little bit. Remember we can slide up with three fingers to kind
of zoom vertically. And then left with three
fingers to zoom out or to condense things on
the timeline a little bit. You can actually
just tap and hold on any of these key frames and drag them along the timeline to re time things
if you want to. We're just going to go ahead and move that middle key frame to frame 13 and the ending
keyframe to 1 second. And then we're going to do
the exact same thing here, where we're just going to
tap on the ending frame, so that will duplicate
the last keyframe. Then we're going to
move to frame 13 here in 1-2 seconds, and
we're going to tap that, and then just rotate
that up again, And then again we'll just do our subtle little glide
to line that up better. Now if we press play, then we should get a
faster up and down motion that loops another
protyp for you. By the way, this isn't going
to be very noticeable here, but if you really want like a
seamless looping animation, you're actually going
to want to move this key frame one frame over. This is because if
it's right here, then this frame and this frame are the same and it will
actually play that frame twice. In certain situations.
That's going to be a noticeable stutter
when it starts over. To do that, we're just going
to go up here and make sure we expand our main
group by one frame. And then our body group, that's the head body group
by one frame as well. Now we can expand that
arm by one frame. And then we'll tap and
drag that right over. Outside of the bounds
of our animation. Now if we press play,
you won't really notice. But technically this is a
slightly smoother animation. Now let's do the same
thing with the fore arm. So I'm just going to open that up and we're
going to choose this lower arm group
that we made, yellow. We're just, again, going
to create a keyframe here. We're going to go to the very end, create
another key frame. And then in the middle we
can just rotate that up. Just glide that over. The elbow lines up a little
bit more nicely. Now press play. We get a
weird animation again. We just want to make
sure that goes twice. So we're going to
tap and drag things over to create that, pull it outside the bounds. Let's do that then. Tap there, and we will
just do that same thing. Now if we press play, you
get a little bit more of a complex motion where the elbow bends and the arm
moves at the same time. Now we're going
to just put it on time left to do the same
thing with the hand. And then we'll
recreate that same motion on the other arm as well. Okay, so now if we press play, you can see we get this arms
moving up and down twice. Action on both arms. And also I need to do this
on the other arm over here. But I also added just a little bit of a subtle animation to the sleeve so it kind of stays down a little
bit as the arm moves up.
10. Animating the Body and Legs: Next, let's add some movement to the upper body as a whole. We want just a bit of
subtle up and down bouncing motion along with a back and forth rotation
from the hips. Let's just show how to
create that really quickly. We're going to
collapse the arms. I guess someone has
already collapsed. What we want to be working on is just body group as a whole, this entire upper body area. We're just going to move the
playhead to the start of that track and create a key
frame if you haven't already. It looks like I
already have one here. We're just going to tap
on that and double check that everything is reset
to the original position. So it looks like
this one was shifted just a little bit
unintentionally. Let's just manually enter those values to put that back in the center where
we want it to be. Then to create that up and down motion, let's
start with that. First of all, we want two bounces to coincide
with our arm movements. We're going to be basically creating a copy of
the current position. We'll call this our up position
at the middle, 1 second. And then again at the
end at 2 seconds. Then let's drag that last frame outside of the bounds
of our play area. Again at muts. Just make a little bigger
so we can see what we're doing. There we go. Then at 13.13 1-2 seconds, we're going to create
more key frames. Then to move that up and down, we can either just move
it in the stage area, but that might introduce a little bit of side to
side that we don't want. So I'm just going
to tap on this and manually enter a
translate y value of, I think negative 15. You're just going to do
15 and the negative, and that should move
it down a little bit. And then we'll do the
same thing over here. Okay, now if we press play, you should see that you get
just a very slight bobbing up and down motion as
she moves her arms, which is looking pretty good. And then we wanted to add that rotation side
to side as well. So let's go ahead and do that. What we want to
have happen is have her start leaning to the
left here or her right, and then slide over at one
seconds to lean the other way, and then return to
that original position at the end over here. We're just going to go ahead and rotate a little bit this way. Let's just see what
that value is. Let's make it six,
just so it's easy to remember what we need
at the end right now. Let's go ahead and make this one negative six to
go the other way. Then over here for
this last frame, you can just tap on it and
say, whoops, not translate. We want six again, Okay, Now if we press Play,
that looks pretty good. But you'll notice
that she pauses on those up and down bobs, and we really want
that motion to go through smoothly in
either direction. The reason that this is
happening is basically when you create a keyframe on
this move and scale track, it will automatically keyframe every property that
it can control. So that's going to include
position, scale, and rotation. This is pretty easy
to fix though. All we need to do
is tap and hold on that track and say
expand movement scale. And now you'll see you have
five rows showing all of those properties that
can be controlled by this type of keyframe. And really all we
need to do is delete these unintentional
rotation points at the places where we
created our Y values. Let's go ahead and just tap and hold, and say
delete on those. Now if we press Play, that
should look a lot better. And you can see
that side to side rotation is a lot smoother. The next thing we
need to resolve here is to deal with
all of these legs. Let's go ahead and
collapse this so you can tap and hold and say
collapse, move and scale. We're just going to work
on the right leg first. I'm just going to open that up. And you don't want to
edit the leg itself because that will
rotate the entire leg. We want to leave that shoe
in place to remember, we're going to move our playhead down to this leg
group that we made, and that includes the
upper and lower leg. We're just going to
tap once and tap, move to create a keyframe
and move and scale. Then remember to tap on that and reset your
rotation to start with, we've had this weird leg position going
on this whole time. Let's go ahead and fix that now. We're just going to
reset that one to zero. And then the same thing
on our upper leg. We're going to move and scale and then reset
that 20 as well. If any of your translate
X or Y is off, make sure to reset those two. But let's go ahead and duplicate these initial frames at the 1 second and
two second markers. So we'll just move the
playhead here and tap once. And then same thing over here. We will need to expand
the parent leg, right group one frame past the end of our
play area again. And then expand
any group that we want to key frame
outside of there. And then we're going to
move those key frames out. Then same thing on our
upper leg right group here, which is going to duplicate that initial key frame and then move it outside the bounds. Okay, now let's move to
our first down position. We're just going to go ahead and tap here to create a key frame. And then we're going to rotate
this out a little bit and then do the same thing on
the upper leg right group. Then we're just
going to rotate this to match up with the
hips as well as we can. Now if we look at that, we should get a leg
that's moving down, as the body moves down. And I think that actually
looks pretty good for a first try now, we'll just go do that at our second down
position as well. Same thing. If you want to, you can copy your exact values. But I'm just going to
eyeball it here again. We'll see something like that. I think maybe we
need to rotate out this lower leg a little
farther for that second one. Something like that. Okay,
now if I press play, we should see something that looks pretty close
to what we want. Then we're just going to
do that exact same thing over on the other
leg really quickly. That looks pretty good. There is just one more thing that I'm going to adjust here. As the body rotates
back and forth, it looks like the hips
get off side to side. We're just going to
adjust for that by going up to that
main body group. And we're going to expand our move and scale
key frames again. And then just at
the first position, we're going to move
this translate x. So you can just edit
this x value directly. We're going to move that
five pixels to the left. And then at the middle
position we're going to move five pixels
to the right. And then at the very end we're going to do five
to the left again. And that will just make
it look like it syncs up with that rotation of
the hips a little better. If we press play, that
should look a little closer. We do want to delete these
intermediate ones though, because then it's going
to pause in the middle, weirdly, Okay, now if you press
Play, it's pretty subtle. But it does look
like it syncs up just a little bit
with that rotation.
11. Animating Warp: This is looking pretty good, but let's use warp to
make things feel just a little bit more organic
in a couple of places. Warp is a really
powerful tool that you can use to bend and
stretch elements a bit. Let's start by using it to just deform the
tops of the shoes. I'm going to zoom in on
my shoe right track here. If I tap on that, you'll see
this is the shoe over here, which I apparently
forgot to rename. This should be shoe left
because it is her left foot. Let's go ahead and
fix that then. We're just going to bring
the playhead to the start of the track tap once to
create a keyframe, we're going to move, then instead of choosing
move on scale here, we're going to tap on Warp and that will create
a Warp keyframe. And you'll notice you
get this little grid of dots over the element
that you're working with. This is called a warp mesh, and each of these little handles is called a control node. You can see before
we solidify that, you get a couple of options to change the
number of controls. You can choose to have
a whole bunch more, but we're just going to
leave it at four for now. It is really important with this one to make sure that you duplicate this original key frame before you
do anything else. Because there's no easy
way to go in and manually fix your warp mesh once
you've distorted it. We're just going to go and create those again, same thing, we're just pulling
this out and dragging this outside of the
play area by one frame. Now we're going to move
the play head over here to Frame 13 on our down. And you can see that basically what we're
trying to do is rotate just the top of the shoe to match the shin movement
a little bit better. Because it moves out
and it looks like the shoe is made of
something stiff. We want that to be a
little bit more fabric key and move with the shin. We're just going to
tap here at once to create a warp key frame. You can think of
this top area of control nodes as the area
that we're trying to warp. What we want to do is just rotate that entire thing
just a little bit. You can tap and drag on any
of these control nodes to just deform the
track underneath it. I'm just going to
grab each of those and move these up and
down a little bit. We're just taking
our best guess. This doesn't have
to be perfect, but we're just rotating
this around a little. Now, if we move
that, that actually looks pretty good
for a first try. If you're happy with that,
you can just leave it or you can go back and edit some
things a little bit more. I'm just going to go and do the same thing for the
second down position, and then the same thing
on the other shoe. Okay, now if I press play and make sure my whole
timeline is visible, you can see we get these nice
bendy, flexible shoe tops. And that looks a little
bit more natural to me. I'm also going to do this
on the shirt because I want the pits to stretch
along with the sleeves. When I raise those arms,
it doesn't look like the middle of the shirt is a different item
than the sleeves. We're going to go in
here. Just open up this body group and find
our body track here. Then I already made a
move and scale key frame. We want to make sure
we move the playhead to the track and not
the key frame track. And we're just going
to tap on, tap, move, and then create
a warp keyframe. And this time we're
actually going to increase the number of controls to six for both
horizontal and vertical. Because I really
am only interested in stretching this armpit area and not stretching
like the neck and the moon thing in the
middle quite so much. We're just going
to do that again. We're going to go
in and duplicate that original position at our down position
where the arms are up. We want to create
a new keyframe, and I'm just going to
grab these handles here and stretch this and
then these two as well. A little bit. This doesn't have to be perfect, but
something like this. Now that should stretch a
little bit as we raise the arm, which I think looks
a little better. And then we'll go
do the same thing on our second down
position as well. And then on the other side, now we zoom out and press Play. That should look
quite a bit better.
12. Beginning the Head Turn: Let's work on animating
our head turn. This is going to be a
little bit more complex, but if we break it down
into different steps, it should be completely
doable before we get started. A lot of the things we're
going to be doing here might seem like really
subtle adjustments. But layering a lot
of small motion can add up to a pretty
convincing effect. Knowing when to exaggerate
motion or when to use it subtly can make your
animations really shine. First we're going to just create a group using all of
the pieces of the face. When we're working in procreate, we have to create clipping masks of each layer individually. But in procreate dreams, you can actually use a group as a clipping mask,
which is really convenient. But that does mean that we're going to need to go in here and manually clip each
of these layers. Find your base head shape layer down here should be
just above the ears. Then we're just going
to tap and hold and choose mask. None
for each of these. The reason that we need to unmask all of these
is if we were to just create a group of all of these pieces without
unmasking them first, they basically
wouldn't know what they're masked to anymore. And it would just
effectively be invisible. Which is a little strange, but that's how it
works currently. Now that we have all
of those unmasked, we're going to go into
our time line edit mode. And just again, we can select
each piece that we want to include in this group and make sure you grab the
hidden ones as well. We're just drawing
over each one with that timeline edit tool and then we're just
going to tap and hold and say group now I'm
going to just clean up these empty tracks
that we left behind by tapping and holding and
then pressing delete track. Okay. Now don't forget to
rename this to face then. We're just going to
choose a highlight color of purple so we can
keep track of this more easily later
as we zoom in now. Okay, before we do
anything with key frames, let's go ahead and
create a clipping mask. With this, I'm just
going to tap and hold on my face group here. And then we're going to choose mask and then clipping mask, you can see that now clips to that head shape that we created. Now we're going to just keep our playhead right here at the starting of
the face group. We're going to tap
once and tap, move, and then move and scale to
create that first key frame. I'm just going to
tap on this once and then say under the
translate x field, we're going to move this
30 pixels to the left. Then we're just going
to zoom out a bit, move to the end of that T group and tap again to duplicate that. Just like before,
we need to expand our tracks so we can move
that final key frame, one frame outside of
the playback region. Now I'm going to
move the playhead to the 1 second mark and just tap once to create
another key frame. And then we're going
to manually enter 30 there instead of negative 30 to move
that head to the right. Now if we press play, you
can see we already have a okay version of this head
rotating back and forth. But we can do a lot
better than this. By the way, you might notice
as we edit that face, if let's expand, move, and scale and just make sure
our cursor is in the track. You might notice that as
we move this horizontally, it actually moves diagonally. The reason for that is the face is moving in its own
local coordinate space. Meaning it doesn't
know anything about the rotation or
position of its parent. It will only move relative to
its own original position. Let's go ahead and
undo. So we don't accidentally create a key
frame we don't want there. And then I'm just going
to tap and hold and say collapse, move,
and scale again. The other thing
that we want to do here is create a little bit of a head dip when the head is
in the passing position. The passing position,
basically each of these points is
called the extremes, where this is the farthest she's going to be looking
to that side. And then this is the farthest
or most extreme position that she's looking to this side. Our passing position is the point directly in between those. So this is going to
be our Frame 13, and our other Frame 13 here. I'm just going to tap once to create another key frame there. And then we're going to tap and hold and say expand,
moving scale. Again, we want to just create
a little bit of a dip. Move the face down
so it looks like the head is nodding
forward a little. We're just going to tap this.
Let's move the head down. We'll just see what we make that negative ten frames
looks like it should look like she turns her head and move it down at the
same time or nods again, we're getting a weird pause in the middle here on our
side to side motion. I'm just going to go ahead and delete that X movement
that we don't want. Then over here, we'll do
the same thing at frame 13. We're just going to tap once, and then we're going
to say ten down. And I did the same
thing, negative ten. Okay. To make this a little
bit more convincing, we're going to go up to
our main head group and actually move the head down
just a little bit as well. So we're going to
tap on here, tap, move, and then move and scale. Tap on to translate
this in the y axis. So we're going to say
maybe five pixels down. Actually, this only needs to be at our passing
positions as well. Let's go ahead and just create our main up positions
there at zero, 1 second and 2 seconds. And then at frame 13,
we're going to make this move down by five pixels. And then our other
passing position as well here should
be the same thing. Actually, we need
to go and reset. I don't know why these are
all negative five now. I might have done
that at the start, and now it's a little confused. Reset all of our ups to zero and all of our
downs to negative five. Now if we press play, you can see you get just
a little bit of a head bob in the
middle where it looks like she looks
down a tiny bit. Actually, I think we
could probably make that downward looking frame
a little bit more extreme. Let's make that
negative 15 instead. Now we'll press play and just
see what that looks like. I think that's
looking pretty okay. Then the other
thing we want to do here is at our extremes, again, at 1 second, 0.2 seconds. I'm going to scale the face
just a little bit as well. And we want to make
this very subtle. But basically because
we would be viewing the face a little bit off
axis when it's turned, we want it to be just a
little bit foreshortened. I'm going to go in here
with my key frame tracks expanded and I'm going to tap on the original one because
this is the extreme, this is where we're
going to be seeing this. Just a little bit foreshortened
and I'm just going to make this 0.99 on scale x. Then in the middle at
our passing position, we're looking straight on, so we're going to tap and then make sure that's a scale of one. Then again, on the other
side we're going to say 0.99 then passing
position should be one. Then 0.99 at the end. Okay. Again, very subtle and you might not
even notice it. But as we do all
of these things, they start to add
up a little bit. Let's go ahead and
do the same thing on our vertical positions at 01.2 This isn't going to be the extreme for
that up and down motion, because the up and down motion, the extremes where
the head bobs down. At frame zero, we're going to
make this one at frame 13, we're going to make
it 0.99 at 1 second, we're going to make it one. And then again, we're going
to do 0.99 at frame 13. Now if we look at that, it should be just a little
bit more convincing, and we're just making a
little bit of progress here.
13. More Head Turning: There's just a few
more things we can do to improve our
head turn animation. First, we want to add a
blink on that head turn. People tend to blink
during the head turn, right at that same spot
on our passing position. We just want to
add a quick blink. I don't know why people do that, but it's just a thing
that humans do. And we'll add a little bit of
realism if we add that in. First we're going to go down
and open up this face group. Then let's just scroll down until we find our
two eye tracks. If you prepared
things beforehand, then you should have an eyes open track and an
eyes closed track. If not, you might need
to use the drawing mode, add a new track and just drawing some closed eyes really
quick for this part, but we'll just assume we
have that ready to go. First, we're going to
bring our playhead down to the eyes open
track down here. Just put your
playhead on frame 12. And then we're going to
tap once and then say edit and split to cut
this track in half. Then we're just going to
grab the very edge of this and drag it
over three frames. We should have frames 1,213.14 We'll just appear
blank right now. If you scrub that
back and forth, you'll see the eyes
just disappear. Then what we want to do
is basically insert, this is closed track
into that little spot. You don't even have to
bring it down here. We just need to grab
that left edge, drag it over so that it
fits in this same space. And then we're going
to grab the right edge and drag it over so it
lines up with that gap. Now if we move our
playhead back and forth, let's see, you'll see we get a really quick
little blink animation. So let's just zoom out
and see what that looks like. That looks pretty good. Now we just need
to go add that on the other side as well on our other passing
position over here. Again, we're just going
to move the playhead to print 12 at it split. Then we're going
to tap and hold on this little section that we
made of our closed eyes. And we're just going to
tap duplicate up here. And that will create a
duplicate right after that. And then we can tap and
drag that over here. It matches up with
our other gap. Now if you press play, we should have a nice
little blink animation. The next thing we want
to do is swap out the nose when she's
facing to our left. Then we'll see a left view of the nose when she's
facing to the right, we'll see a right
view of the nose. Remember we prepared that as
we were drawing everything. We'll keep that face group open and we're going
to scroll down here. And we should have three
different nose tracks. There's the nose front, which is what we're
seeing right now, and then nose right
and nose left. Just exactly the same thing, except that we're going to
have the nose left part visible when she's facing
to our left over here. So let's turn that on. So
we're just going to grab our nose front and
we don't want this visible except on that
passing position. So we're going to line that up exactly with our
blink right here. Then on the nose left,
we're just going to put our playhead right
here at frame 12. Again, I'm going to tap once, tap edit split and then we're just going to go ahead
and delete that part. On the right side
now we should have a left nose view until we
get to that middle spot. And then we'll see
it at the front. And then we want the nose right to show
up right after that. I'm going to move my
playhead up here so we can split our nose front
group. Same thing. We're just going to delete
this extra part over here. Now we should have left front
and then it disappears. And then we're going to
turn on this right group, drag it over here. And then just make sure
that's visible all the way up until we go
back to the center. I'm just going to grab the right edge and
drag it over here. Then again, we're
going to duplicate our nose front here
by just tapping and holding on this and hitting Duplicate and
then dragging this over. And then we'll do the same
thing with nose left all. Now if we press play, we should get a nice little nose
turn animation as well. But because the nose is technically a little farther forward than the
rest of the face, we're actually just
going to give this a little bit of
horizontal movement so that it looks like
the nose moves farther back and forth
than the rest of the face. To do that, we're
just going to go to the first frame
of our nose left. We're going to tap once to create a moving scale key frame. And then I'm just
going to translate x by negative five to the left. Then on the regular nose, we're just going to leave it
centered on the nose, right? We're going to do
that same thing, but we're going to move it
five pixels to the right. So make sure that's positive. Then just same thing here on
our other side for the nose. Left piece, five negative. All right, now if we press play, you should see that lines
up just a little bit better when you're considering a head turn animation like this. Think about where your
pivot point is and where different pieces will
move in relation to that. As the head turns our face
because it's farther forward, in front of the neck is
going to move to one side, while the hair
that's in the very back is going to move
to the other side. Because your head is
rotating and moving these farther back parts differently than the
farther forward parts. If that makes sense, let's
go ahead and tap here to create a keyframe on
our hair back track. Then I'm going to just tap on this once and we're
going to translate x. We wanted to move the opposite
direction of the face. We're going to do maybe ten
pixels to the right here. Then I'm just going to
go ahead and duplicate that at the very end. Then we'll expand that once and move that key frame
out of the play area. And then we're going to
create another key frame right here in the
middle when we're at our other extreme over here. And we're just going to
tap that and then move it to the left. Ten pixels left. Now let's press play. And I
think that's already helping to solidify that head turn
effect just a little bit more. The other thing we
want to do is because the head is rotating on the X axis as well.
So moving up and down. We want to move that
hair up a little bit on our down parts for
the head rotation. We're actually,
let's not do that. Let's expand this. We're going
to tap and hold to expand. And then we just want to
create a Y keyframe here. We're going to tap here once, and then move the hair up
by let's say ten pixels. And just see what
that looks like. We want to make that a positive. I keep getting
confused. Which way is which On the y axis. And then we'll do the
same thing over here. Ten might be a little bit too much here, we'll see
what it looks like. Now if we press play, you can
see that the hair moves up, while the face moves down. Then we're going to do this
with the ears as well. We just want them to move
back and forth a little bit because this is a pretty
subtle head turn animation. We're just going to tap here, create a moving scale
keyframe for the ears, and then we're going
to move those again. I'm going to make this
a lot like the hair. We're just going to
move at five pixels to the right instead
of ten though, because they're
closer to the center, so they won't move
quite as much. Then we're going to do the
same thing at the end. Then right here in the middle, we are going to make that
at five and negative. Instead they move off
to the other side. Now if we press
plate, you can see those ears move back and
forth just a tiny bit. The last thing we
want to do here is to add a little bit of rotation to the head of the ears and the back part of
the hair as well. Let's do the back part
of the hair first. We're just going to come
down here to our rotation. I'm going to rotate this by, let's say ten degrees. That's probably a
bit much. Let's make it more like five degrees. Then over here we're going
to say negative five. Then here for our
last key frame, we want to make that five again. Now if we press Play, the hair should flop back and forth
a little as she goes. And then we're going to make a very subtle rotation
for the ears. Let's make sure we're only
editing that rotation value. I'm only going to do one degree. We want them to rotate
just a little bit this way when she's
leaning to the left, just a little bit
the other direction when she's leaning to the right, then one degree back this way. Again, we're just doing really
subtle little things but they a little bit more
character to the animation. Now we're just going to rotate the entire head altogether. I'm going to go ahead and
collapse this head group. Then we're going
to expand the move and scale keyframes for that. Then I just want a little bit
of a subtle head rotation. We're going to go
ahead and delete these rotation
keyframes that were automatically created at
the passing positions. Then I'm going to tap here, We're going to
rotate the head by maybe three degrees
on this side, maybe negative three here. We'll just see what this looks like. This might be
a little too much. Then we'll do three
over here as well. Now if we press Play,
you can see we get a little bit of a head rotation
going on multiple axes. So we have forward and back, side to side and left and right. And I think that
should be pretty good for a head turn animation.
14. Easing and Timing: Taking a step back and
looking at this again, I think I'd like to
add just a little bit more bounce to the dance move. One of the cool things about key frame based animation though, is that it's relatively easy to make changes after the fact. Let's try to exaggerate that up and down movement
just a little bit more. I'm going to go into the
body group over here. We're just going
to open that up, expand my move and
scale key frames. Then we're just going to choose this down position for
the translate y value. We're going to change
that from negative 15 to negative 50. You can see that moves the
body down a little bit more. And then we'll go
do this other thing for that second bounce as well. Now we're going
to need to adjust our leg rotations just a little bit to match
up with that better. I'm just going to come down here to my legs and we'll do that. I think this is
looking a lot better. But to really exaggerate
that up and down movement, I think it's worth playing
with the timing a little bit. This can add a lot
more character to the motion adjusting.
Timing is super easy. We're just going
to go up here and find our body group and all you have to do is drag this
keyframe over a little bit. Now this down motion is going to take a
little bit longer, and the up motion is going
to be a little bit faster. So she's going to
pop up in between. Let's do that same thing on
the other side over here. Just grab that
keyframe and drag it over about four frames. So we're going to line
these up with frames 17. You can see that
that's highlighted. If you look closely
on your screen, then we need to make sure
that we do the same thing. Actually, let's
press play first. Okay, so you can
see she goes down a little more slowly and
then pops up in between. Let's do that same
thing on the legs and the shoes just to
make sure that they all line up with those
same key frames. So we're just going to drag
these over to frames 17. Now if we press
play, you should see that she pops up in
between the legs, and the shoes should be synced
up with that animation. You can also consider
playing with the timing for any
other animations. If you want to, I'm
going to address the main arm animations
and the hair a little bit. Now you can see the arms are just a little bit
delayed as well. They move up more slowly
and down quickly, and our hair swings back and
forth at a different speed. The other thing we
can do to really emphasize our motion here
is to adjust the easing. Easing describes
how the speed of an animation changes
between two keyframes. If I press play,
you can see we have four boxes moving from the left side of the
screen to the right. These all have keyframes at
the exact same positions on the x axis but are using
different easing options. We have four easing
options in proc dreams. The first one, the top, is called linear and this
means that the speed of the animation will
be constant throughout. So it doesn't speed up. It doesn't slow
down, it just moves. At the exact same rate, ease
in means it's going to start out really slow and then speed up towards the end
of the animation. Ease out is the
opposite, meaning it starts really fast and
slows down at the end. Then ease in and out
means it starts out slow, speeds up in the middle, and
then slows down at the end. This is the default
in procraate dreams. Usually this works out super
well as a default option, but every once in a while we
want to use something else. Coming back to our
dance animation here, I think it might
be interesting to use easing to
adjust our head bob to bounce sharply at the bottom and then
pop back up again, like how a ball would
bounce on the ground. To do that first I'm
going to go and actually emphasize that head bounce animation just a
little bit more. This is just like we
did with the body. We're just going
to come in, expand our key frames for the head. We're going to tap on this
first passing point Y value. And we're going to change
it from negative five to maybe negative 20, and we'll just see
what that looks like. And then we're going to tap
here and do the same thing. Negative 20 on that
second passing position. Down value as well. Now let's just press play and
see what that looks like. Now we have a little bit more of an emphasized head
bounce in the middle, but to make that more dramatic, we're just going to adjust
those easing values. Still, with these
keyframes expanded, I'm going to tap
and hold between these first two Y keyframes and you're going to see
a couple of options. There's one to set all
easings and that will set every easing in that whole key frame track to
the same thing. We don't want to
do that right now, but we actually want to
do is on this first down, so we're moving from an up position to a down
position here. We're going to change
this to ease in. That means it's going
to start slow and then finish fast like
gravity is taking hold. It's going to come down fast and then really quickly
hit the bottom. We're going to tap
on this set easing option below that set. All easing is one, we're
going to choose ease in. And then on the next
one, again we're tapping in between
the two key frames. This is the actual
transition that we're affecting here which
happens in between those. We're going to tap set easing and then
we're going to choose ease out and then we're going to do the same thing
on this other side. Set easing, ease in
for the first part and set easing ease out
for the second part. Now if we press play, we
should see that there's a little bit more of a dramatic
Bob in the middle there. It goes down really quickly
and pops up really quickly. Then we're going to want to do the same thing on the face. Let's open this up. And we're just going to open up those
key frames for the face. We're going to
adjust this value to negative 20 for both
of our down positions. Then we're going to
do that same thing, just setting those
easings to ease in and ease out alternating. Now that should look a
little more dramatic. You get this blink and like
head bob in the center, that should feel a little bit faster and more snappy, I guess.
15. Overlapping Action: I'm pretty happy with the overall movement
of our character, but to make it feel a
little more life like we want to use some
overlapping action. The overlapping action is an animation technique
where you add a slight delay in timing between parent and child elements. For instance, the
arm in the hand to make it look like an object
has some weight to it. If we do this right,
there should be a subtle whip effect moving from the upper arm
down to the hand. You could do this by editing the keyframe values directly, but I found that that involves a lot of manually
copying keyframe values, which is a pain and it's just a little harder to line
things up correctly. We're going to use a trick
where we can trim and duplicate and offset
our animation tracks. This does get a
little confusing, but it shouldn't be too hard
if you just follow along. First we're going to open
up this arm right menu. So this is our arm over
here that we're working on. And we want to find
the object that is the farthest down the chain here, the one that doesn't have
any child elements itself. So that's going to be
the hand. We're going to start with that
and we're going to move down to this hand group. First we need to
figure out all of its parent elements
and we need to expand out a little
bit for those tracks. We're going to choose the
very top level group. This is a parent of the body, which is a parent of the arm, which is a parent
of the lower arm. So basically you go
down that chain, you need to go all the way
up to the top of that. And we're just going to
grab the right edge of that and expand it
out about 1 second. And this isn't going to mess up your
animation in any way. So this is all outside
of the playback area, so you won't see any of this. This is just to make it
easier for us to work, so we're going to
choose that one. And then we're going to
choose the body group. And then we're going to come
down here to the arm, right? Extend that out as well. And then the lower arm and we're going to extend that out. And then on the hand itself, we don't want
to extend it out. We actually want to crop
off this last frame that we used for making
that looping animation. So we're going to just take that right edge and
drag it over one. And that doesn't actually
delete that key frame, it just hides it from view. It's still effecting everything happens exactly the same way. And if we expand this out, that keyframe is right
there waiting for you. We're just hiding it because we don't want to
see it right now. What we're going to
do is actually go over here to the left
side of the track. And we're going to grab
that and drag it all the way over to the length that
we want our offset to be. I think I want it to
be right around here. If we put our playhead here, it should be a Frame 22. This is the amount of offset we're going to
add to that track. And I'm just going to grab this whole little track bite that we made here and then drag and
drop it back to the start. Now, now we're going to tap and hold on that
and hit Duplicate, and it will create a
complete copy of that track. We're going to take
that copy that it just made and
drag that back over this way so that
the left edge of it lines up with the
end of our play area. And you should get that snapping
pink line that shows up. Now we're going to choose
that, we're just going to drag the left edge out to meet this
offset piece that we have. Now, effectively, we've offset the whole thing by
about three frames. Basically, this is the part that was playing right here before, and we've just
moved it over here and then pushed the rest over. We'll still get the exact same
seamless loop right here. And if we press play,
you might need to zoom in a little bit so you can actually see what's happening. But you should see that
that hand animation is offset from the
lower arm animation. Just a little bit like
lags behind a tiny bit. Now we're going to do that
same thing with the lower arm. I'm just going to
hit pause then to make things a little easier
to see what's going on, we're just going to collapse
this lower arm group. Then we're going to do the exact same thing we did
with that hand. We're going to choose this,
we're going to crop off that last frame and all that
that we extended earlier. Then we are going to grab the left edge,
drag it over here. We offset it by
about three frames. Make sure that's on frame 22, or you can do a
different amount. If you'd rather
offset it more or less, then if I can grab this, we are going to pull this
over to the left side. Then we're going to
duplicate drag this over here so that it lines up with the edge of
our playback area. And then we're just extending
that edge back out. Now that should have created another offset with
the lower arm. And then these pile up too. If we expand this, you'll see
that the hand came with it and now our hand right
animation should be offset. I'm not sure what happened here. I think I inadvertently
didn't undo there. You'll see that we have
a cascading offset. This is offset a little
bit, and this is offset from that lower
arm a little bit. Now if we press play,
you'll see that you get this nice whip effect
like we were talking about. If we zoom out, you can see how that
compares to the other arm, where this one feels a
little bit too stiff, like she's holding it really
tightly as she moves. Where this one
feels a little bit more loose and free and nice. Now you can choose what you
want to add this to for me. I'm going to go and add
this to the head animation. It's just offset a little bit. I'll probably do less frames, so maybe like one or
two frames on that one. And then I'll probably
do the hair as well. So now I've got a
little bit of an offset on this on her right arm, a little bit of
offset on the hair, and a little bit of
offset on the head. And then I need to go do the same thing on
this other arm. Everything should be offset the way that we want it to be.
16. Frame by Frame Accents: We don't have a
lot of time to get super deeply into frame
by frame animation. But it's worth quickly
looking at how it works. And I think adding even
just a little bit of hand drawn motion can really
elevate our final result. We're going to just
draw some quick animated excitement lines
around the head here. The first thing that I want
to do is come down here and undo that overlapping action offset that I added
to the head group. If you do want to
edit anything in one of these that you've
offset like this, you'll need to undo that and then redo it when you're
done with your edits. Just because
otherwise you'd have to duplicate it in both
sides of that group. We're just going to go ahead and undo that really quickly. Then I'm going to
move to frame 13, so our head is centered here, or wherever that is
in your animation. Then we're going to tap
on this sketch group, and I'm just going to
tap the plus icon over here to create a new
empty track above that. Now I'm going to go
into drawing mode. And then I'm using the
scratchy pen brush from the brush pack in the projects
and resources section. You can just drag and drop that straight into procreate dreams. Or if you want to use
a different brush, I would just recommend
using some like pen or pencil that you can get
small straight lines. We're just going to
go ahead and start drawing those little
excitement lines in here. You might notice there's
not a ton of room to draw in this stage
area right now. If you want to, you can
grab this little pill in the middle and just drag that down to enter
flip book mode. This is really cool and we'll use it a
little bit as we go, but it lets you
more easily create new frames and just flip
back and forth between them. We'll go over that as we're
doing this a little bit, we'll just do
something like that. Then I'm going to
just quickly tap on the next frame down here
to create a new frame. This is one of the things
that's really nice about this flipbook mode. You might be able to see this
in the screen recording, but it's pretty hard to see on my screen to edit this
onion skin setting. Technically there's a very dim outline of that
previous frame here, but we want to make that
a little more visible. I'm going to tap on the time code down here
in the bottom left. And we're going to
edit onion skin. And I'm just going to
choose a lighter color and then increase the
opacity a little bit. You can also choose how many
onion skin frames you see, but you can play with
whatever you want to do here. Also, what color,
whether they are frames behind you or
ahead of you as well. I'm just going to tap
outside of that to exit my onion skin
settings and we're just going to start tracing over these little
excitement lines. You don't want this
to be perfect, definitely don't
agonize over it. Basically, we want a little
bit of variation between these because that's where the hand drawn look comes from. I want to create
about six of these. We're just tapping
on that flip book, next frame to create
another frame. Also, don't worry about
syncing up with the head, we're going to fix that later. Just try to trace over the
lines exactly where they are. Probably would have
made more sense to do this before animating the head, but shows you how to do it if you didn't have that
foresight. Like I didn't. Okay. Now just to quickly check that you
can slide back and forth between these and just
see how that motion looks. Then when you're happy
with it, you can tap here, and then there should be
a little X that you can tap to it, that flip book mode. Now we should have six
different frames down here, and they just show up as
individual clips on that track. If we zoom in a little bit, set that to our playback
area, we can pop. I want to redo that just to
see what that looks like. That looks a little
bit too fast. We don't really want those frames to play
back that quickly. What we want to do
is extend each of these to take about
three frames to play. You might notice if you
try to extend that out, it doesn't work, so you'd have
to like shift these over. But there is a really cool trick where if you just tap and hold on that right frame and then hold another
finger on the timeline, you can just slide
that over and it will push everything
to the right for you, which is really
convenient for re, timing, things like that. We're just going to do that
for each one and we want to extend each of these to
three frames instead of one. You might hear this referred
to as animating on threes. By the way, this is a really
old animation technique for being a little bit
more efficient with your animation and
also just adding more of a hand
drawn, crafty look. You'll hear animating on
twos and threes a lot. Now that each of those
is three frames long, we're just going to go
ahead and press play. You'll see that if we zoom in, that's playing back a
lot more slowly and I think looks a lot
more natural and nice. We want to duplicate
that so it fills up the entire duration of our
playback of our animation. I'm going to just exit
drawing mode and then we're going to go into time line
edit mode and draw over, and just draw over
all of those clips. Then I'm going to tap and
hold to create a group. Now we're going to just drag
and drop that group over it, lines up on the left side, and then we're going to
duplicate it a couple times. Now just to keep things tidy, we're going to exit
timeline edit mode, and then tap and hold on
each of those groups and ungroup them to go back
to our individual clips. Then I'm going to delete
these two extras at the end. Then we're going to go back into time line edit mode and just draw over all of
those and create a new group that has
all of them in it. Now if we exit time line
edit and just press play, you'll see that that
fills the entire length of our animation and
should loop nicely. The other thing that
we want to do before we sync that up with the head is just add a little bit
more subtle motion using our perform mode. In order to do that
we're just going to take our playhead
and drag it over to frame zero or the very
starting up our track here. And we're going to tap
once and then tap, move and move in scale to create a key frame that puts
it right in this spot. And then we're going
to go and make sure we duplicate that
at the very end. And then extend out our
track by one frame. And then pull that last
frame outside of there. Okay, now we can pull our play head back
to the beginning Again, we're just going to tap on
this lips this up here, and tap edit, Anchor to
move that anchor point so that it is in the bottom middle
of our bounding box here. And then I'm going to tap done. Then we're going to go
into perform mode here. We just want to add
a little bit of subtle rotation back and forth for this two
second duration. Then we want to
make sure we lift up before we get to
the second key frame, otherwise it might be
overwritten on accident. We're just going to open this up to grab our rotation
handle and then we're going to tap on that and
just start moving it back and forth a little bit.
Then let go before there. Now if we press play,
we should see that it just rotates back and
forth a little bit. Perfect. We're going
to do the same thing, but with scale,
we're just moving our play head back while
still in perform mode. And then we're just
going to grab one of these corners and scale it
up and down a little bit. And let go right before
we get to the end. Now let's press play and just
see what that looks like. I think with that
scale animation, it could be a little
bit more dramatic. So we're just going to tap
on the modified button and turn down our motion
filtering a little. Then we can see that it scales up and down a little
bit more that way. Let's go ahead and just press Stop on Perform and
pause that animation. Now we want to sync this up
with the head animation so it rotates and bobs up and
down how it's supposed to. In order to do that, we're
just going to grab this group. Make sure your head group is open down here
before we grab that. Actually then we want to
drag and drop this in between the face and the
top of the head group. We're just going to grab this and drag it straight down here. And we should be able to
drop it right in that spot. Now the thing that
you will notice here is that it's moved
down when we did that, because our head
is actually moved down a little bit
compared to that body. All we need to do is make sure that our head group is
extended out a little bit, so we can see that last frame. Then we're going to
open up our key frames. And then we want to
change our y value to about 80 or whatever. Looks good to you. I think I accidentally did
an undo there. And then we need to
make sure we change that for that last
frame as well. Okay, now if we press Play, you should see that
that sticks to the head and still has that little bit of rotation and
scale motion to it, along with our hand
drawn animation.
17. Audio and Exporting: Okay, so after all
that, I think I'm pretty happy with the
animation itself. Before we wrap up though, let's
talk quickly about how to add some audio and set
things up for export. So first I want to export my animation with some
music for sharing. So let's talk about how
to import an audio track. I'm just going to hit
Pause here and then bring my playhead back to the
starting of my top level group. So just collapse
everything else and use only the top group
for this next part. And then we're going to tap
on the plus icon over here. And we're just going to create a new track
right above that. So your playhead should
automatically jump up there. But if it doesn't, just
move your playhead to this track above
your main group, we're going to tap
the plus again. And we're going to choose files. And then I'm just going to go find a audio file
that I want to use. We're going to choose
this Chipolina track. This is a song that I
made in garage band. Definitely not a musician, But it should work well enough. Now if we press play, you should hear that song
playback as my animation play. And it should sync up pretty
nicely with the animation. If you want to
adjust the volume, we can just do them
in a little bit and just use the playhead
and create a keyframe. Just like with anything
else, we're going to create a level keyframe here. And we're just going
to change the volume to zero for the first frame. And then we're going
to move to frame 13, and we're just going to create
another key frame and then move it up to 100%
So you can see you can create this nice kind
of fade in audio effect just with anything else
in procreate dreams. You might have noticed
though, if we press play, that the music seems to
cut off prematurely. And the reason for that
is that my song is 16 seconds long and my animation
is only 2 seconds long. If we want that animation
to play back more than once in the exported video
to sync up with that song, we're going to have to
specify that to do that, I'm just going to tap on the
project title over here. And we're going to go into our project settings and up to this properties
tab at the top left. And we're going to change
the duration to 16 seconds. Then if I press done,
you should see that the playback area is now
extended to 16 seconds, and my animation is now
a little bit short. Remember, we extended
out this main group during the overlapping
action part to give ourselves a little
bit more work area. And you can see
things start to look a little bit broken
in that place. We need to just crop
off that last second. We're just going to pull
this over here and make sure that this is
exactly 2 seconds long. If you zoom weigh in,
it should look like the track ends just before
the two second mark. That means that it
is 2 seconds now. To make that actually fill the full duration of the track, all we need to do is
duplicate that a few times until it takes up the
time that we want it to. By the way, if you
set things up with the same frame rate
and everything that I did and want to
make your own music, this one is set to
120 bits per minute, in 44, time to sync up
with the dance animation. And now if we press plate, we should see that
the animation should loop pretty seamlessly and the music should plate through. So with all that, we're
ready to just export this. So I'm going to tap on
the project title again. And we're going to go down to
the share tab on the left. And then I'm just
going to tab video and you'll see an exporting screen
for a couple of seconds. So I'm just going
to save this to my photo library and now
we can go watch it there.
18. Conclusion: This is the end of
the class. If you made it this far, take a break. Stand up, Stare out the
window for a while. Maybe consider getting
yourself a fancy beverage. You've earned it. If you enjoyed what you learned here and want to take
things a bit further, you can use the
same principles we covered here to do a lot
more with your character. Consider making a walk or run cycle or even a simple
waving animation. Whatever you make though,
don't forget to upload your artwork to the class project section
when you're done. If you like my work, you
can check out my website at Jog.com or follow me on
Instagram as at Jonogel. Don't forget to check
out my other classes and follow me here on
Skillshare as well. I really hope you enjoyed
this class and learned a bit about animation and
about procreate dreams. Thanks for taking the class, and I can't wait to
see what you make.
19. Book a 1-on-1 Session: If you enjoyed this class and want to take your
learning further. I'm now offering
one on one sessions through skill share
where you can book an individual private video
call with me to answer any other questions
you have or just get some feedback and
pointers on your work. I'm currently offering
two types of sessions. One about illustrating
in procreate and the other about animation
and appropriate dreams. You can find a
link below to book a session or find out more
on my skill share page. I'm really excited to see
what you're working on.