Transcripts
1. About The Course: Hey, what's happening Monday, this is hey, numbers with a designer who codes. Thank you so much for taking a look at my Bootstrap bootcamp course. I really wanted to create a course where you feel confident using Bootstrap 5, both understanding the information inside the docks and understanding how everything works together. We're going to build a simple portfolio website. We're going to design the navigation first and foremost, and most importantly, making sure that it becomes a responsive navigation as well. Down below, we're going to focus on flex using Bootstrap five's information to move the text to the center of the page and also talk about how you can break down different pieces based upon an XL, an L, a medium, small, and a mobile design. Everything in our design will always be mobile first as that's what Bootstrap 5 is. Following this homepage, we'll also focus on the footer design to bring the Bootstrap icons of social media. If you want to bring in Facebook or other icons you're welcome to. For this project, we're going to focus on Twitter and Instagram. Moving into this design on our about page, I'll show you how you can use the floats inside of Bootstrap to position a picture on the right. And then when it hits the Mobile framework, drops right to the middle of the page. After that, we'll hit the portfolio page. And the portfolio page we'll focus on the grid. So thereby I have a three column grid and then inside a mobile design, I have a two column grid and then I have a one column grid. We're going to focus on the grid and also how these cards work. In addition to how these buttons work, this is a really great detailed page that is really highlighted with Bootstrap 5. End finally, we'll hit the contact page. And not only organ to build a contact form, but I'm going to build a contact form that I can submit information to. This form works. And using the power of Netlify, I can hit Submit and create a contact success page that says thank you for your submission. You'll come away with knowing all the important details of how Bootstrap 5 works in this course, the bootstrap bootcamp course.
2. Bootstrap starter template: Hey, what's happening when he says, Hey, datums, and thank you so much for taking my Bootstrap bootcamp course. I have two screens right here on the top is my Chrome little area could to view on my website it's width and test my projects out with. And down below, I'm going to use Visual Studio Code. This is one of my favorite tools to use for code editing. It's made by Microsoft. I can't leave him saying that, but Visual Studio Code is the bee's knees. When it comes to co-editing, you can use whatever color you want to use. But for me, I'm going to use Visual Studio code throughout this entire course. So again, you can choose whatever color you want to use Sublime Coda. You can use Microsoft Word if that fancies you, but overall, I must stick with VS code in this project. So to get started, I'm going to head over to getbootstrap.com. I'm going to come down and say get started, just to get started. And down here halfway through the page is if I look for it, the starter template, I'm going to copy this because this is everything I have to use order for Bootstrap to actually work. I'm going to copy. I'm going to come into Visual Studio code, creating new file and paste it in. And then I'm gonna do is I'm going to head over to my new folder, which is project new, and call this index dot HTML. And what's cool about VS Code is it auto color coordinates. All of the file are all the files, all the file names and other words that coordinate to the HTML or whatever document you're working on. So if you run through this for quick, in order for Bootstrap to work, it requires a couple components and the template already provide all of that for me. Up at the top, you have to provide some sort of language as if it is an Arabic. It'll switch around and we'll show down the road in this project that there's no longer a left and right, but a start and end as Arabic goes right to left and English goes left to right. That's right, left to right. I say it right. Yeah, I said that right. After that we're looking at the UTF or the character set inside of the code. This will just tell us essentially we want to use the characters that are English of UTF-8. We also need the viewport. This is required because as we scale and go up and down on our project, the viewport allows the project to grow and shrink with the width being the device with the XYZ width device with initial scale saying at 100%, the magic really happens when we include the Bootstrap CSS. This is delivered on a CDN or content delivery network, so it resides virtually awesome. And it's a style sheet. And the other piece down below is this script which allows the JavaScript to run, which was going to run especially our navigation. And a few other things in the background. Those three things, the required Meta tags, the Bootstrap, CSS, and the script is really what's required for Bootstrap to operate. This is separate Popper and Bootstrap JS. It's all highlighted because it's commented out. What to worry about that. So the only I wanna do is well on this index page, so you just heard is I want to create a custom CSS file.
3. Adding a custom css file: So what I do here is I'm going to add a CSS file, and I want to add the CSS after the Bootstrap minified file because I want to override or change hello here. I want to change eventually some settings that are default to bootstrap, not a lot, just a few things. So I'm going to say first is link a trap. I'm gonna go ahead and add the CSS file first and then create the CSS file next, I'm gonna say, I'm gonna say periods slash CSS slash custom. Css. And RHEL is going to be a style sheet. Drop that in and we'll close, not with an X, with a question mark, but a greater than symbol. If I save this and I'm going to create a new file. So I'll come into file or Command N for new file. And I'm going to save this file. And also about visual Studio Code is it remembers where you last saved your last file. So it knows to drop it in here. I'm going to say CSS for a folder name. And I will give this a custom dot CSS name. When I had to do a lot of times it's to make sure it works. I'm going to add a body and let's add a background color of 0 that hasn't come up in a while. Aquamarine give yourself a bright color to see that it's going to work because if we can see this background color, we know both the CSS and HTML are linked together. When I save this, I'm going to come back to my folder and drag my index file. And hello world. It is Hello World. With that really freaking ugly aquamarine. That's okay. I'm going to come to the CSS file, get rid of this body, save. And if I refresh the page on Chrome, that aquamarine goes away and now we have our CSS successfully linked.
4. The container: Now that we have the CSS file, we can put it to the side just for right now. I want to start working on the navigation, someone designed from top to bottom in this project. In the index file, if I scroll down, it says Hello World, right after the body is where I'm going to start working. I'm going to say div and then say class container. And that container is probably the most powerful tool that you're going to use within Bootstrap. And I'll show you why. Let's add the container and let's actually bring in the H1 tag into the container. So I'll drop it in. So if I save this and I refresh Chrome, watch, what happens? Hello world moves over to the, from the left over towards the middle of the page. Why is that? That's because if I move my design, watch Hello World, as it gets near and near to the edge, it jumps. That's because the container contains breakpoints. There is five main breakpoints to focus on. We head back to get bootstrap and I'm going to scroll up. I'm looking for the doc to make sure I'm in the right spot. What I want to show you is inside the layout is where you're going to find grid. And the grid has various breakpoints. Actually, it's in the container, which focuses on the grid. I jumped ahead a couple steps. The container has a couple of different areas. There's small, medium, large, XL. Where are these pertain our breakpoint. So under 576 is your extra small or essentially your mobile size. Your small at 576 is more of a vertical tablet slash horizontal phone. Your medium. More of the horizontal tablet slash larger tablet. And the large and extra large and double XL head to the desktop screen size. And you can tell they have various breakpoints. So we just use the word container right down here. At the mobile, it's a 100 percent wide, but then it becomes 540 pixels, 720 pixels, 960, 1140, 1320. So if we come back here, we can see how it's going to break at different breakpoints in this design. What's also important to note are these acronyms, are these little abbreviations that are SM, MMD, LG, XL, double XL, and fluid. Fluid we can almost ignore because it basically says make everything a 100 percent across the entire spectrum. I rarely use this only because I just prefer to use a container with all the rela for relevant breakpoints. But SM pertains to small, medium, large XL and double XL. You'll see that we're going to use these different pieces along the way along our journey. And if we want to make our container only a certain size, we can say container dash a certain size. For right now, I like to just keep the container the way it is. But pay attention those SM, MMD, LG, exile and double XL. Notice one other piece and if you've come from Bootstrap 4, this is a difference. Notice the extra small doesn't have the excess. In the past, you'd have SM and then dash X S. Bootstrap five changed the game. Now it's mobile first, or extra small by default. And then if I want to change it, we have to add the SM, MMD, LG XL, and double XL. So moving forward in this project, everything is mobile first, assuming it's going to come down, not up, meaning it's gonna go from mobile, everything else. And if we want to change it, we have to set something small and going down this way, I'll shoot down the road what I mean by that, but it seemed to be aware of that everything is mobile first and there is no other language to actually delineate extra small.
5. Setting up the Navigation: Welcome back to container later on. But the next thing I want to do after the containers, I want to add a navigation to this hello world. So I'm gonna move hello world outside the container for right now. We'll drop them right backward is, and inside the container is where I want to add my navigation. Let's write the following and making sure it's tagged properly. Perfect. I'm going to say less than sign and I'm going to say nav class equals navbar, navbar expand. I'm going to say LG and I'll show you why that is. And a little bit after the LG, we have to say is it light or is it dark? Navbar, navbar, nav bar. I'm going to say is light. This means it's a light-colored background. If we said dark, that's more for dark mode. So I'm going to say close it up, open and close my nav and I'm going to add something else. I'm going to add a container one more time just to hold the space div class container. And in here, what I'm gonna do is I'm going to add my actual navigation. My first art is I have to focus on the logo. So I will say logo goes here by save it. Hello, logos here. We're going to create a space for the logo were just some text. And then after that, we'll bring the logo in with the provided file to drop into the top left and put the text on the top right. So where it says logo goes here and Hello Worlds back outside of the container as it's on the far left of the page where it says logo goes here. When I'm gonna do is say a and then say class equals navbar brand. And in here I'm going to say H ref, and I'll say index.html. To link back to the index, I'll close it up. And right inside this a, I'm going to say John Smith designs. I save it. There it is. Note how it doesn't have a rollover when I roll my mouse over it. As a logo or a design on the top left, you should stay as static as possible. And thereby there is no rollover because we added the class of navbar brand to this, a tag. Totally fine. What I wanted to do, it's in the right spot. Now that I have place for my logo to go, I'm going to continue on and build my navigation on the right-hand side and then come back and drop in the logo. So after the a, I want to add a toddler, which means I want to add a little hamburger icon. So when this hits a certain size, let's say below the large, because I said expand at large, which means when it hits the medium, I want to see a hamburger or a mobile menu icon. So what I'm gonna do is after the a, I'm going to say button and then say class equals navbar, toddler. And for extra space, I'm going to do a couple of things for readability. I'm going to drop this down. And what I'll do is I don't forget to close it. I will close the button like that. And so in here I'm going to add one more, Sure, a couple more things. And after the class, dab bar toddler, I'm going to say type equals button. And then going to say data BS for Bootstrap. And we'll say Toggle equals collapse. And after the data BS toggle, I'll say data BAS, target and equal. And I'm going to put an ID here and we can connect the two and a little bit. I'm going to say nav bar, nav. I'm going to capitalize the end. Make sure if you are following along to the exact delineation. I did use a capital N as well right here. As uppercase and lowercase are two different things. The aria controls is going to be nav bar, nav. Aria expanded is going to be false because it's not going to expand by default. And I'm going to say aria, label equals toggle navigation. Lot of those, I know a lot just for a button, totally makes sense. So after that button, I'm going to put a span tag, LF span tags. They are the superheroes of the internet because they do absolutely nothing. Span, I'm going to say is class equals, I'll say Navbar, toddler, icon, drop in the span tag. Let it open and close. So a lot of work just for a button. And if I save this, nothing is going to show up because we haven't included the nav in here yet. There's nothing to open and close. In terms of a navigation. Half the span tag. I'm going to say div class equals collapse, navbar collapse. And then ID that I typed in above at navbar nav. I'm going to put back right here. I'm going to say id and grab that navbar nav, drop it in. I kind of it's a copy and paste to make sure I don't screw it up, which I'm very good at doing. And open and close the div inside this div class is where we're going to add our navigation. So I'm gonna do is I'm going to say UL. And in here I'm going to add a UL class equals, I'm going to say navbar. I know a lot of words for navbar, navbar, nav. And then I'm gonna say MS auto. And I'll show you a little bit what this does. This is when you won't see right off the bat, but I'll show you in a bit how this one works, MS auto and text center. So inside this URL, I'm going to add an LI. And in the LI I'm going to add an a H ref. And we'll put a pound sign for right now. And we ought to say, oops, I forgot the class H ref class equals nav link. And also in the LI which I also skipped over, we have to say class and then say nav item. I was thinking too fast on the nav link and forgot to jump into the nav item. Inside this a, we'll say link number one. And when I save this and drop it in and refresh the page, nothing happens. I realized when I was typing in the button, it didn't give me the close button. So I'm going to come back here. When I type in less than sign Close button, I want to encircle the span class with the button. I'm going to cut this and drop it down and add the span tag inside of the button and we'll drop it right about there. Some reason I'm not getting the spacing right all of a sudden, but it should line up right there. And the span class, when I also noticed I spelled collapse wrong, I said collage. This is COLS LAP messy. When I do those two things. And I save it up pops link number one. Let's resize the browser and see if the mobile menu comes up as well. So I'm going to grab my browser. And once it hits below the large, what'll happen is it's going to hit this medium and turn in to a mobile menu. Also note the type is in the middle of the page and the navigation is way over on the right-hand side. That's because for a couple of things, this MS Auto says margin left, but in the new ways of writing code in Bootstrap, S represents the left and English and the start slash write in Arabic, thereby this MS auto. If I take it out for 1 second, my navigation ends up on the left-hand side, right next to John Smith designs. I wanted it on the right-hand side. So MS. Auto moves it from the left essentially to the right. And if you're an Arabic, that'll move from the right to the left or the start to the other direction. What the text center does, if I take this out and I save it, and I drop it down. Notice how the words and you might want this in your design. Link number 1 will show up just below John Smith designs. I prefer it in the center for my design. And keep in mind when it comes to a mobile design, come into inspect inside of Chrome. It's really small. So once again, I prefer it more in the middle of the page, but it's up to you. For my design. I'm going to keep it saying tech center. Now text center essentially says everything from the mobile APP send to the tight. But since if we go out of the mobile design, this link one is in its own little cell. Thereby tech center remains moot because everything moves on its own to the right. Anyways, I'm going to save this to make sure I have it correct. So what do next is I want to add three pieces of navigation. So this nav item I'm going to duplicate, I'm going to say nav item. For some reason my tabs are not lining up perfectly. I don't know what's going on. No, I want to go back. Anyways, for some reason I'm not getting perfect tabs for some weird reason. It's all misaligned anyways, no big deal. I'm totally fine in that way. So in this area, let me copy and drop it in. And now I have link one. And if I say link number 2, link number three. Now I have link one, link two, and link three. I'm going to change this to about portfolio and contact. So in here, I'm going to say about, I'm going to say portfolio. And I'll say contact. If I can spell contact properly. And after this, I'm going to save to make sure it shows up. And I'm going to add the href because I'm going to copy and paste this index file down the road anyways. So I'm going to change this H ref and say about HTML, portfolio, dot HTML and contact HTML. If I save this, I won't click. But I've had Rahway mouse over it. You can see down inside of Chrome, it says about portfolio and contact. These are also to go in the future. When I duplicate this page for the about page, the portfolio page and the Contact page.
6. Adding the SVG logo: When I lastly have to do is add the logo to John Smith designs. I've included the picture for if you want to use my version or you can use whatever logo you want in your project. I'm going to create a new folder and say images. And in that, I'm going to come over to my other folder and go grab my images folder and find the John Smith title, SVG. I use SVGs because they are pixel list. They are essentially vector files online. And I also include the AI file in case I wanted to change something to that down the road on my web project. I'm going to bring in John Smith. There it is. John Smith designs. And in here I'm going to do is come back up to the top. And let's go find the place where it says a class navbar brand John Smith designs. I'm going to bring in the picture. So I'm gonna say, I'm gonna cut this, I'm going to bring it back in a second. I'm going to say IMG SRC and say dot slash images. And I want John Smith title. Now for my design, I'm also going to say with 225 and height is going to be 76. If you create your own design logo, then do pay attention to your width and height proportionally to your design. And then going to say alt, and I will say logo for John Smith, design, plural design, or got the S right there at the end. And after that image, I'm going to close it up because images self close. And what I also want to do within this, a tag is I like having information to say, what is this link? So I'm going to say span class. And in here, the D in Bootstrap is for display. I'm going to say display none. And I'm going to paste in John Smith designs. I like having actual text to show up inside of my code, but not visually on the screen to delineate the picture. So if I save this and come back here, now I get John Smith designs. And then also I like about Bootstrap, is if you look at it, the text is not sitting down to the right or down to the bottom, excuse me, or up at the top. But it sits more as a baseline in the middle. For a pretty cool design aesthetic. Awesome. We now have our navigation done, and now I want to do next is I want to build this hero graphic inside of my homepage.
7. Setting up the hero graphic: Sweet. Now that we have our navigation done is time to actually design more of the interior of this index page. I'm going to come down past the navigation and right between HelloWorld in the div, I'm going to say the word main, as this is the main content of our page. Inside of here, I'm going to say header. And inside of here, I'm going to add a couple of things. I'm going to add a div and close this div. And then inside this div is I'm going to add the one. What I wanna do, let me drop this one in here. Is this delineates a couple of things. One, the main is the main content of our page. Also the header delineates the title of our page. One I'm also going to do is I'm going to build a big picture in here, literally a big photograph. I'm going to add a color overlay, which is going to be this div right here. And the text isn't a go inside of it. So what I can do is I'm going to start with a picture. So if I come back to my Finder and with the pictures provided, I'm gonna go grab that image from my other screen. What I'm gonna do is I'm going to drag this index image, looks like this. I'm going to put this picture across the page at the top. So I want to do is inside this header, I'm going to say style equals background, dash, image, colon, and say URL. And this is where I'm going to place the picture. I'm going to say URL, single quotes, dot, slash images, and index image. Now by default, this isn't gonna do much, just going to be looking like that. It's going to fill its parent, which is fine because the text fills the space for right now, what I wanna do is I want to make this a little larger on the page. So off to the CSS, we go, what I'm gonna do here is I'm going to add a header. I'm going to say header, HA DR. And then inside the header I will say background colon. No repeat. And then center and center to make sure it's inside of this design. After that, what I'm gonna do is I'm going to say background size. And I'll say cover. The reason why I like to use cover is, is it holds the space no matter what size of the browser. And since I know this header is going to require some text color change, I'm going to say color is white. Save, refresh. And there it is. So you can tell it's fitting the space of this text. If I wanted to be a little bit lower on the screen, I'm going to add a color overlay and that's going to dictate the size inside this design. So what I'm gonna do is in this index, inside this div, I'm going to say class. I can spell class properly. I'm going to say color overlay. For your design. You may or may not want a color that's up to you how you want to accomplish that. In the color overlay. I'm going to come back to the CSS. And I'm going to say color overlay period with a class name. And I'll scroll up. And this color overlay is going to say a couple things. First, I wanted to dictate the background color. So I'm going to say background color, and I want to give it an RGB a. The reason why I use the a is for Alpha. So I'll say RGBA. And this design, I'm going to say 0 comma 0 comma 0.4. And when I save this, notice how it darkens the picture a little bit. Pretty cool, but it's still not dropping this down a little lower. So what I wanna do is in this color overlay, I'm going to say Min height. The reason why I use min-height is in the case I put a lot of content in here. This can expand past the minimum height of 60 vertical height. When I save that, now I get the design that fits in the space. Now keep in mind if I had the browser a little taller. Notice how the picture gross incrementally taller based upon the browser size. The one thing I do want to fix though, is that it's a little bit too tall for a mobile design. So I'm going to go ahead and write a immediate query to fix this from happening. So what I wanna do is if I bring this back to where it should be after the color overlay, I'm going to say at media and use the breakpoints found in Bootstrap 5, I'm going to say max width, colon 767.98 px. Open and close the brackets. And now this is going to change whenever it gets below 767.98 pixels, which is essentially 766 or 767. Anyways, I'm going to say color overlay in here. And I'm going to change the min-height from 60 to 30. So I'll say min-height, I'll say 30, vertical height. What this does, and I can get a little more space. It's just have it breathe a little bit on the page is now and I refresh this page when I go below a size of 767.98 pixels, it's going to drop in size just like that. Now obviously, we will never have a design of a mobile site that's this kind of rectangular. So in reality, what it will look like if I bring this a little bit bigger and I go to Inspect and drop it here. Now this design fits a lot better in this space provided so it's not super tall. If I had 60 here when I map this out a couple of days ago, It just felt that on a mobile site, this was just way too big. There it goes. So to me it was taking up too much space and I wanted more of that rectangular design. So thereby went from 60 to 30. And it fit now in that space. Perfect, well, almost perfect. Hello world sitting in the top left. But what I wanna do is I want to move it down to the middle of the page Q flex in Bootstrap 5.
8. Centering the hero text with Flex: Bootstrap 5 has flex, flex box built right into the framework. If I head back to Bootstrap 5, and if I type in Flex, There it is. So the flux will allow us to flex our design muscle. This is really cool and I love flex more and more. When I get to do is I get to say, Hey, I'm a Flexbox container. That's great. And using the flexbox, what I wanna do is if I scroll down the page, what I'm looking for is to justify the content not to the left, not to the right. But I want to put it right in the middle. I want to move Hello World right to the center. Middles want to move it into the middle, but also center it vertically. And the reason why we can do this is we set a height, or in this case a minimum height. So when I'm looking to do is do two things. I'm going to move it to the middle. And the powerful tool or flexes, I can align the items to the center right here. This is all outlined in Bootstrap 5 and you can choose what you want to use. And if you look at it right here, notice that they have the small, the medium, the large, and the XL. When you write any code in Bootstrap 5, you can write the SM in-between justify content start and centered between around evenly and medium, large XL. What that means is you can set breakpoints to do it. You want to do either all the way across the board or just partially across the board. Let me she mean by that. Well, I'm going to do here is come back to the index and a HelloWorld. Let's bring it back. We can see both our code and Chrome as well. And inside this Color Overlay, I'm going to say d flex to set it up as a flexbox. And I'm going to say justify content center. What this is gonna do is gonna send a set of Phi, is going to center the content across everything. Starting with the mobile design, I refresh the page, Hello World. So let's say I do not want this to happen except only at a certain breakpoint. If we come back to flex that justify content center, notice how we can say, You know what, I don't want it. Where if I just want this left-hand side again, it's going to start with the start. So let's say, I say, you know what, justify we look at down here. I'm going to grab the justify mediums start. So what's going to happen is if I add this, the justify-content center will be towards the center on the mobile and the small actor for design purposes. Let's do large. So the mobile, the small, and the medium will all be centered and the large, we'll go back to the start slash left. So if I take a look at this right here, notice how it's on the left-hand side because at the large or larger, it went back to the left slash start. If I resize my browser, we're going to hit a large, we're going to shortly we're going to hit the XML. And the large, I always forget there's a double XL in Bootstrap 5. And now when I drop down below a large right about here, the medium is going to kick in this responsive mobile design. And it's going to kick hello world to the center because we said everything from mobile APP be centered until you hit the large and then go back to the left. So if I take this out right here, refresh the page, and come across, it's going to center on the page no matter what breakpoint is, because it's mobile first. Now that we have justify-content center, what I'm looking for, if I scroll down here is a line items. And this gives me options to, I want to align items to the center as well. So what I'm gonna do is align items center is going to go to the middle, vertically, refresh the page, drop it down. This exactly what I want to have. Now, obviously this will not be a normal browser size. This is what I wanted to do. Hello World in the middle of the page. This is now perfectly centered, up and down, left and right. Thanks to align items center and justify content center. And again with Bootstrap 5, if I go back here, there is all the breakpoints inside Start, End, Center, baseline, and stretch. You can see the five options here. And there's small, medium, large XL, n double XL. This is the power saying maybe I don't want it in the middle. Once I get to a certain size, I might want the baseline. So you know what, Let's say large is going to get baseline. I'm going to copy it in. And now the baseline hits until I get below the large. And now it goes back to the middle because align items center is mobile first. For this project, amines align items just on its center across all sizes. So I'm gonna take it out, hit Save. And now no matter what size I work with, it's always going to be in the middle of this design looking pretty good. Let's continue on.
9. x axis and y axis spacing: For this next area of content, I want to build a section inside the middle of this page that's not too wide. So this is one of the few things I build that's outside the scope of Bootstrap 5, but I use it a lot. And what it is, I call it the single call. And the single call sits inside of the container and only expands to a max width. Inside my custom area. What I wanna do is after the color overlay, I'm going to add a single call and just say single call. What this is going to do is I'm going to say in the single call, make it max width. And in here of 750 pixels. The reason why use the 750 pixel rule is I want it to be wide enough to readable, but not too wide that creates eye strain on the page. That container is fantastic, but it's almost too wide for a single column. That being said, I still want to use the breakpoints when it comes into play. So wanna make sure it flows as best as possible. So what I wanna do next is apply the single call and then bring in the container as well in the design. So what I'm gonna do is I'm going to say in my index file inside this main section, but after the header, I'm going to say div class single call. Now note, I did capitalize the sea and call to delineate the word call. After single call. I'm going to say M x auto. And let's talk about spacing. If we look at the top up here, we use the M, S Auto. That's for the start or the left-hand side. In an English written design, the x auto is to say both sides, margin X as in the x-axis of start and end or left and right. The auto, essentially putting this in the middle of the page. If I then close this up and hit test, Let's drop it in. And now the word test sits roughly in the middle of the page on that 750 pixel size. If we go into our design, Let's just add a background color. And we'll just bring in yellow, green. That should be really interesting. Notice now that this is far as why does I wanted to read? That's all I wanted to do is in the middle of the page. And if we come back and we take out the Emax auto and save, That's going to just simply sit on the left-hand side. I don't want that. I want to bring back the MX auto in this design and something else. This is sitting real close to this design, almost too close. So I want to add some spacing into this design as well. So we've already used the m x, x for left and right. But now I want to focus on the top area and the bottom area. If the x-axis goes across, the y-axis goes up and down. Since I want it to be even across all sides top and bottom. I guess not all sides, but the two sides, top and bottom. I'm going to say m, y. And I can say MY one through 51 being a small additional space, which is too small, to a little farther, three little farther yet for jumping a little bit further, N5, jumping the farthest down the page, It's respective of its parent in terms of spacing, there is some bottom margin. So if we do run the inspect editor, notice how the div has top and bottom margins right there. That's how I want to have is down the road. I want the even spacing on the top and bottom of this design. So what we get is we get the x-axis to be auto or the same left and right. And we also get the MY 5. Now here's the thing. This looks great on this page. But as we see in the mobile design, that word test bumps right up to the edge of the page Q, the container for the auto Spacing in the design. So if we add the container div class container, and we close it up and dropped the word test in there. I promised that green color is gonna go away in a few minutes. So if I drop the word test in there and I think there it goes. Now watch what happens. Notice that kicked off the edge of the design. The container contains natural margin and padding that are across the board. Anywhere I put the word container. So thereby used the word container to contain the word test. Pretty great. I can leverage the power of the container. So it doesn't really get affected this part until it gets to a smaller and smaller size and it hits the size. Notice how the word test is not anywhere near the edge of the page. That container is inside that green box. So if we take out the yellow green, thankfully, the word test sits right along with it, and the breakpoints kick in below 750 pixels. Pretty cool. Now do next is I want to add the text inside the actual box.
10. Text center and lead: So the word test isn't doing much for me. I actually want to write some text in here. And since this is more of interior decorating and design company, I'm going to make some sort of title inside of the word test. Since we've already used the H1, this is more an H2. I should do is H2. I use the phrase, all, make your room look amazing. And if I drop it in and save it, there it is. Now for the H2 in this case, I do want it to the center of the page. If I wanted every H2 to be centered, I'd head into the custom and say H2 center. In this case, I'm going to say H to class, and we'll say text center. Now again, this is the power of the tech centering part, is I have the ability to say tech center, or I could say text M or will go LG center. And what's going to happen is, is if we go, whoops. I meant to say start. There we go. Start equals left. So it brings it back to the left-hand side. Anything above and the large and then below the large kickback to mobile first or centering. So if I come back here, if I come back and back, There it goes. Now the text goes back to the center at the medium or smaller. And we know the medium kicks into gear because the mobile part comes in. Everything looks fantastic. Now for me, I do want to keep it Tech Center so I will remove the text LG start. In this case. Once I save, it goes back to being in the middle of the page. After the H2, I'm going to add a lead. The lead is where you can have an opening paragraph in your design. Since I don't have any text, I am an bring lorem ipsum into this design. So I'm going to say p class lead in this paragraph. And I have an extension built into VS Code. Or if I start typing lorem, I can say lower them and just say Laura them. 25, hit the return key. And it puts in 25 words. If I save this, there it is. There's my Lorem Ipsum text right there. So the lead makes the type bigger and it adds a thinner weight by default. Let's take a look at that versus the default paragraph design. And I can type in lorem, drop it in, save. And notice how the lead looks a little different than honorable paragraph inside of Bootstrap. For design purposes, I like having threes, so I'm going to drop in one more paragraph. And just we can see the differences. I'm going hit the return key just to separate the three pieces. And now I have three bits of text. And note also that the spacing above this H2 and below this H2 is exactly the same. I like using the word lead, which is inside of Bootstrap 5 to just pull little weight so your eye goes, Hey, H2 first, leed second, and then the normal paragraph, third, fourth, and so forth and so forth.
11. The footer and bootstrap icons: So we have the top of the design done navigation and the hero. We've also added some text inside our main section. And the last step is adding the footer to the design at the very bottom. So wanna do is after the main, I'm going to add footer. I'm going to say footer. Drop it in. Let's just write the word test for right now to make sure it sits at the bottom of the page. And there it is. What I wanted to do with this design as wanna make sure I have spacing inside of this footer. And I also want to add some coloring to the design as well. So I'm going to add a background color to the footer. Inside of my custom, I joined, put the footer after all of my code and before the media query. So I'm going to say footer. And in here, not footer, p, just footer. And open and close curly brackets. And I'm going to say background color. And what color I'm going to use, I'm going to decide is just a dark gray. So I'll say background color and I'll say pound sign slash hashtag 333. That gives me a dark brown slash, actually dark gray, not brown color. Just looked a little brown on the screen for 1 second. Perfect. I have the word test, it's brown. We've added some margins in the past in our design, but I now want to add padding for my spacing. So if we head back to the index, we use the Emax in this design and up top as well. We use the MS. M is for margin, S is for start and auto. So what I wanted to next is I don't want to use margin, I want to use padding. So with this design inside of my footer, what I'm going to do is I want to say class. Here we go and say padding y, but the top and bottom and give it a maximum of five. And when I save this and refresh, now I get a lot more spacing in this design. What I want to do next is I want to move the word test to the middle of the screen. And I'm going to change the test and add icons for social media at the bottom of my page. So what I'm gonna do is I'm going to say div loops. Instead of doing that, I just get rid of it all. I'll say div class. And since I'm going to add icons across this page down below, I'm going to change the flex from simple columns as we've used up here, two rows down below for a row of icons in Bootstrap 5 flex. So I'm going to say div class equals d flex, flex row. And since I want it to go in the middle of the page, I'm going to say justify content center. And when I close this up, each individual child. So if I say div and we'll say test, and if I copy this, now these are going to become rows. So if I say test, test2 and test3. Now what's easier also, let's also make the font color just so it's readable. I was going to add that later, but since we're here anyways, we're going to say color white. There we go. So test, test2 and test3 can all go within the flex row. Let's also go looking for the flux icon. So I'm gonna do a Google search and say not flex icons. How about the Bootstrap icons? So if we search for the Bootstrap icons, it'll come up as icons dot getbootstrap.com. And this has been come up its inversion 1.4. There's 60 plus weather icons. Awesome. But I'm looking for social media icons and I'm going to start with the Twitter icon first. So what I wanna do is I want to scroll down this icons and I can scroll through them all. Or I can simply start typing to filter. And I'll type Twitter, and there it is. So the Twitter icon, I can copy this HTML file, copy that. And what I wanna do is come back to Visual Studio Code. And in the index, I'm going to take out these three divs and I'm going to have them, Let's having the devs be the rows. I'm going to add the a tag as the row. So a HREF, this is where you'll add your Twitter URL if you have one. Or in this case, I'll just say Twitter.com. And inside of this tag, should, should line up to there. His inside of here, I'm going to drop this SVG. Svg also comes with a width and height. And since we know it's a square icon, I can change this to whatever size I want. For this design. I'm going to say 25 and 25, 25, 25, Save. Let's take a look. Hey, oh, well kind of that's because the SVG takes into account the color of the link. And by default the link color in Bootstrap 5 is blue and dark blue. Let's change that to white and then an off-white inside this custom, I'm going to say footer. And then a, and then change the link color to color. We'll just say white at first, by save it. Now it's white, but it goes to that dark blue still. So I wanna do is inside footer a, I'll drop it down and say footer a hover and change it to a color pound sign. Not that usually comes up for me. Well, anyways, let's see if I can get any color to show up. All right. Off the Photoshop we go it usually used to give me the color. Let's try that. Let's Photoshop's coming up different screen. Let me try a white for a second. Let's try a white smoke. There we go. See if that works. Just give me some color Visual Studio Code. Let's save, refresh. And I'm not loving that white smoke. So I had to do inside a Photoshop or any one of your favorite editors is if I bring over Photoshop right here, I use it just to choose a color. So in Photoshop or whatever software you want to use for our color picker, I can choose some sort of color that's off white. So I'll never spring a gray. And just so it brings in some sort of tone, this one's DF, DF, and df. If I minimize change from white smoke to dropping in this gray color. Now it's looking a little better. We do have a changing colors so you can see when you roll over it. Perfect, we have the a and the hover. I want to come back and bring it a little more. We've done Twitter, so I can rollover, click on Twitter and up pops Twitter. And if I now come back, I can then go into Instagram or whatever I called I want. In this case, I'm going to bring two icons. I first brought it in Twitter. Now I'm going to bring in Instagram, instagram away. Searching for Instagram, finding it, copying the SVG. So what I'll do is come back down after this a tag, I'll say a HREF. Come on, HREF. And we'll say https colon slash slash Instagram.com. Again, you can add your Instagram handle right here. I close up the a tag, I drop it down, I indented and ignore all the paths. What I'm focusing on is the width of 16 and 16. I'm going to stick with the same at 25, 25, Save. And now what I get are two icons and they're really close together. So I wanna do is I want to add some more padding. Now I can use one of two ways. I can pad Instagram and push from the left or push to the left. Or I can push the Twitter icon away or from the right towards Instagram. So I'm going to look at Twitter. And up at the top at Twitter, what I'm looking for is the a, and I like to add more spacing. So in the Twitter area, I'm going to say a HREF. And then after that, I'm going to say class equals padding end, and I'll say four. It will have a clickable area. So if you don't want it clickable, you can always change it to m for margin. So the EMI, it'll stay the same. But now I won't have a clickable area, so it's up to you if you want to have a clickable space in there for padding or the m for margin and 4. So the margin pushes it away and thanks to the flex, it now keeps it in the middle of the page. Now that we have this page finished, we're going to continue forward on to the about page.
12. Setting up the about page: I'm gonna go ahead and hide Chrome. And what I wanna do is I'm going to come up to the index HTML and duplicate it and say about dot HTML. I'm going to bring this into my design and I start taking out pieces I don't need. I'm going to come back into Chrome, so don't mess this up. And yes, they will look the same at first glance. So I'm gonna do is I'm gonna take everything out except for the navigation and John Smith designs and the footer down below. So inside my about, I'm going to hide the index and I'll keep the customer up in case ADUs and the optimized CSS file. I'm going to scroll down, look for the main section. This is also why I like using the word main because they can tell what to take out and what to not take out. I'm going to take everything else out except for the main and right test and test. There it is. Looking good. Now since we're on the about page, I want the navigation to stay active. And I can do that by heading up to the navigation and where it says class nav link. I'm going to say the word active. What that's gonna do is it's going to turn the word about to a dark color to delineate the word about sums her on the about page. And while we're at it, let's add the word about into our title of our page as well. So if I scroll up Mine's line 13, looking for the word title, I'm going to say the word about vertical line and then hello world will change this once we're all finished. But for right now we'll keep it simple. And I'll say about HelloWorld. Cool. We have our title and we have the about being active and our navigation. Now it's time to bring in some content. In this About page.
13. About page content with floats and overflow: It's now time to add content to this About Page. And in addition to the text for this about persons, imaginary John Smith, person, I want to bring in a picture of John Smith. I've got a photo right here. I'm going to bring in I'm going to bring in this one. I'm going to copy from the front screen and bring the John Smith portrait in. Note, this design is a squared design. I wanted to use that. So I'm going to bring the square both as a mobile design and as a desktop designed to be resized. And so I felt the square was most appropriate for the design. It's up to you how you want to accomplish that. But for my design, we're using the square icon so that John Smith portrait will eventually be used. What I wanna do here is inside that main section, where is it? I'm going to bring in that single Call, Saul, say div class equals single call. And a couple of things I want to read, bring in the MX auto, and want to bring in a couple of different things as well. I want to bring it down the page. So I'm going to say MY for margin top and bottom. I'm going to say two because we don't have that hero graphic any longer. And I felt that when I designed it for something larger, I want to say MY m d For what I mean by this is, and we'll show it to you again. Is if I say the word test, notice how the word test sits on this page. That's because it's sitting at a four on the spacing. However, when I get to a mobile site, I realized it was a little too far away, so it's going to kick a little higher up on the mobile tablet slash small and medium or the small, excuse me and say T2. So that's why I said two Vs for. It eventually drops a little lower. And then we're all set to go. Perfect. The next thing I wanna do then is I want to add a div class equals container, not contact. And making sure the div closes. And I want to add one more piece because I'm going to add a float to this picture. And floats need hidden so I don't float off the page. So in this case, Bootstrap 5 has something called overflow hidden. So I can change my overflow to hidden, thereby it makes sure that the picture stays on the page. It doesn't go over flowing over the div. The picture is going to float around the text and then stop and not float once we get to a mobile design. So in this case, inside this div class container overflow hidden, I'm going to say H1, say about John Smith. And in here I'll say H1. I'm going to add a lead. So p Class lead and bring in our ever famous Lorem Ipsum by typing lorem. And we'll say 25, he's going to long intro. There it is. And if I save that, There it is about John Smith. And if we go up and down the page, you can tell that it gets a little closer and then we'll farther apart based upon the design. Pretty cool. So after this area, under this P section, I'm going to add another paragraph of type. And we'll add Lorem Ipsum. And we'll add one more paragraph of type to indicate who's going to have well, you know what, let's have making sure he's got three paragraphs. So we save it. And there it is. I wanna do next is I want to bring a picture up to the top right. However, if the text doesn't go that far down the page, I wanted to make sure that the picture doesn't bleed into the footer because we are going to use something called float, right? So what I'm gonna do is after the lead, I'm going to say p opening close. And if we just say image source on its own, we say images and John Smith portrait, and we say alt or trip of John Smith. And if I close this, watch what happens TO ease giant? That's great. But if you think about it, I don't want it to be so big because I want him to be small enough to fit on this right-hand side. So I have to make sure this picture also reflow, which it does, but I want a smaller when it really flows. So I'm gonna do a couple of things. First off, I want this picture to be a max height of 300 by 300. I'm going to say width equals 300. And a height of 300. And it's looking pretty good. There is huge just chilling in this size right here. What I next want to do is I want to position him to the center when I'm not floating. So what I'm gonna do is I'm going to say p class text center. Perfect. So the whole idea is that when he's not floating over here on the right-hand side, he's fixed to the design. This is more what I want to do when I hit the mobile site. And since Bootstrap is mobile first, this is why I wanted to look like when I hit them, Mobile framework looks really good. We have John Smith designs up and down for our navigation about John Smith a lead. And we've got this little smiling face into a wheat field and the whole picture and sun behind as well. So he's looking good here, but I don't want them in the center. I want the text to flow around him on a non-mobile design. So here's what we're gonna do. We're going to add a couple different things to this picture. Inside of this picture, I'm going to drop down the source just for readability. I'll drop the width down, drop the height, and drop the Alt. And we'll drop that as well just so we're in the alignment. What I next want to do is I want to add a class. So I'm going to add a class and I'm going to say float, MD end. But I also make sure it doesn't float when I hit the small or smaller. So I'll say float none and then float MD end. So what's going to happen is the end is like the right versus the left. So those 0s we typed in before stand for n slash right. So if I save this, now what happens is note how the text sits the left of this picture. And if we didn't have the overflow hidden, this is where the problem arises. Though. He just kinda floats and then that footer shows up in your design when you're writing your about section, you might not have this problem. You might have enough text, but I set that in case I do have an issue. Bootstrap 5 provides overflow hidden by default in its design. So that way it catches the bottom. And that M Y2 or MY for, catches the top and the bottom successfully in our design. Just like that, we have our about page finished and it looks pretty good. And we can test to make sure it's working by refreshing the page. And then I can hit this button. And he sits still in the middle of the design with no worries of it floating to the right because we stopped it floating at a certain size. So there's none for the float at smaller or larger. That's why I put the SSM in there to catch it. And since the default is not floating, I could say float none and it would still work. But just because for me, the default and mobile is already none. So I wrote DSM to make sure it catches at a certain size. So by default below the MD, it'll cache to monitor what I'd just like to say SM because I know it goes from medium to small in that respect, in that instant.
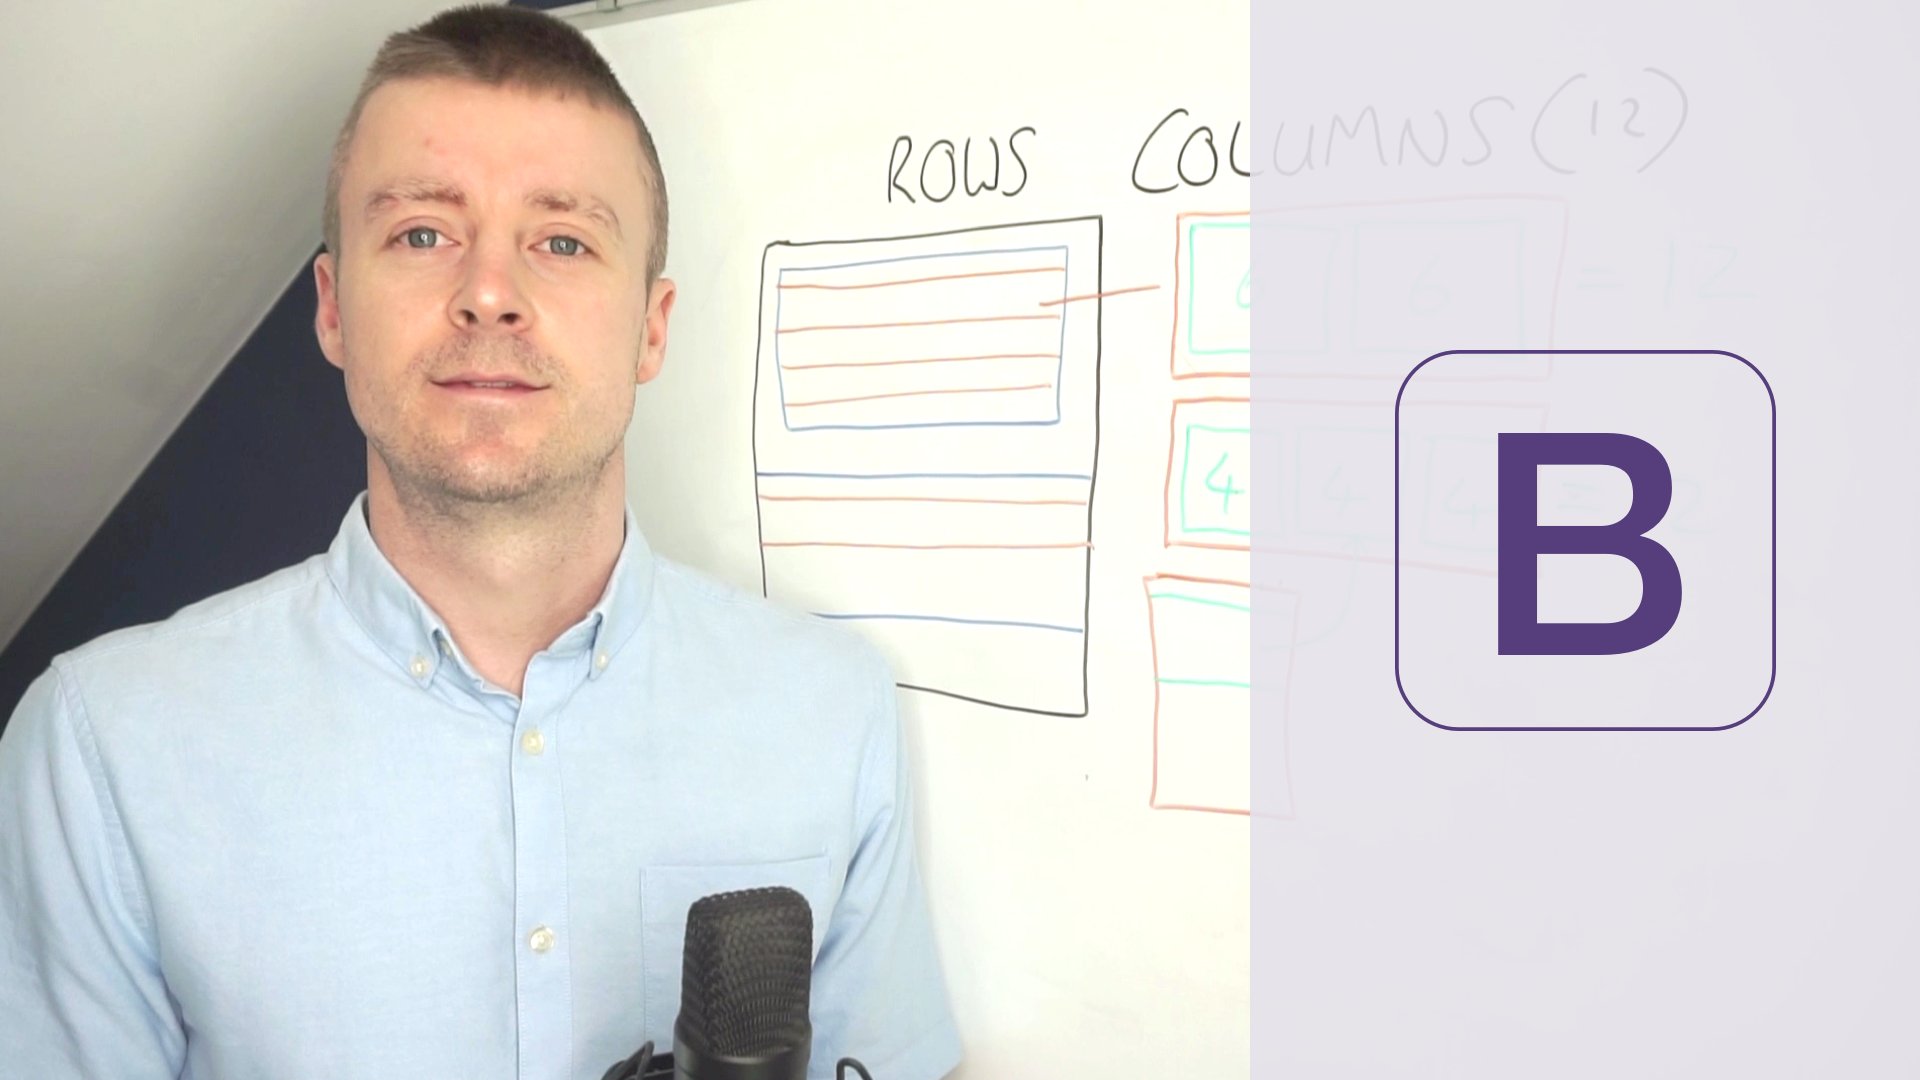
14. The grid: Awesome. We finished the about page. Next is I want to move into the portfolio section. I'm going to close these two HelloWorld just for right now. I'm going to come up with a project new. I'm going to duplicate the about. So we go from about copy two portfolio. And if I can type portfolio properly, bring it down to my code, I'm going to get rid of all the extra content I had for my about page. So where it says main, I'm going to get rid of the div to div and just say the word test, save. And let's come back and drag portfolio in. Perfect. So now I have portfolio, so I'm going to change the word a top from about two portfolio. And up here, I come to the top, I'll change the word about two portfolio. Now for this project, what I wanna do in this section, oops, I also have to create the active on the portfolio from the about as well. So in here I'm going to scroll down, take the word active out of the word about and put the word active into the portfolio. I refresh the page, we're on the Portfolio page and the portfolio page. So if we look back, if we go back to our homepage, we really had a one column design on this page. And we had a one column design on the about page on the portfolio. I don't want to three-column design that when it comes to the desktop. I want a two column design when it comes to the tablet design. And I want to, of course, 100% or a full column width when it comes to the mobile. The power of Bootstrap, which is arguably one of the most powerful tools in its arsenal, is the grid. If we head over to Instagram, Let's head over to getbootstrap. And in here, I'm going to go to get started. And what I'm looking for is the grid, because this is the most powerful tool that we get to use within Bootstrap. And the grid goes like this. The grid works by having a row and a series of columns. So if we type in row and col three times, we're going to get a three-column grid. So if I come down here into my main section, I'm going to type div class equals row. And it should have caught the close div. There it goes. And after that I'm going to type div class. And we'll say call, just like it has here. So if I go call, I will say column 1, and I'll duplicate this. Two, column two. And then column three. If I save this and come back to portfolio hello world, I have column 1, column 2, column 3. One thing I also have to add is I also have to add a container because that's going to add all of our breakpoints. Right now with no container, it just moves in a free form direction. So in this area, I'm going to cut the row, right? Whoa, not that far. Come back. There we go. And I'm going to add a container to this design. So I'll say div class equals container and drop in my rows. What I want to have happen is perfect, this aligns and this alliance column 1, 2, 3. The problem though, if we just type the columns is, is it doesn't work within the breakpoints of the container. Notice again, we have our drop-down for our mobile menu. By default, if you just started typing columns, you'll add columns until you run out of space. In terms of how many columns you can put across the page. The grid works on a 12 column system. So to me this doesn't have any breakpoints to say where it wants to go. So in terms of a grid, I'm going to write just to show something. I'm going to say col 12. Call 12, end col 12. Watch what happens when I type 12, 12 and 12 next to the calls. It drops down to a vertical line. That's because imagine we have 12 columns coming across this page. I'm saying for this first column, fill up 12 of those 12 columns. 12 divided by 12 equals 100%. Let's try something different. Let's add a new breakpoint because right now in Bootstrap 5, this is our mobile size. So when it hits the Mobile framework, it's going to always be 12 out of 12 calls or 100% across. Let's say we hit the medium size that we wanted cosine 50 percent, 50 percent. So what I'm gonna do is I'm going to say call. Dash AMD and 50 percent is going to be 6 or 6 divided by 12 equals 50 percent. So if I say col md six, col md six, and col md six without double spacing. Let me save this. Let me start back with the mobile menu. Let me refresh this page and now watch what happens. If I hit the small, now I hit the medium. Notice how it's 666. So column one, column two, column three drops down below because it goes past the 12 columns. That's totally fine. And when I go farther apart, it stays in a 50 percent capacity. Well, when I go large XL and double XL, I want a three column design. So thereby what I'm gonna do is I'm going to say call LG. And if I want three columns, 12 divided by 3 is 4. So I'm going to say, oops, go back to the top one as well. I'm going to copy this one. And so I have mobile at 12, medium, at six and large and above at four. Let's not forget the last one. There we go. Now watch what happens. Now I have column one, column two, column three in four columns. However, I dropped down and I get down to the medium. Now I hit 50 percent and now I hit 100% or I hit a mobile menu. The grid has a lot of powerful tools, but 12 I do not use almost at all is I call it the DOM columns where they're just sitting there by themselves. It does create three equal columns, but it doesn't have any breakpoint attached to it. So I can use a whole combination of different tools. But I use the power of the excess is gone. But I use the SM, MMD, LG XL and double XL to essentially set the breakpoints of my column. And that's how I use the col dash, the call SM. I use the col md, or we have column D dash number of columns. And then I use the col dash LG to say above that number, set them all in that design. And that's your choice when it comes to a grid, you can use any combination. The reason why I like when they use 12 as my 12 columns is you can divide that by 2, three, or six. And of course 12, giving you a wide flexibility. Now, you don't have to use just those numbers if you want to do a little different designs. Let's say we want the middle column to be really, really big and the other two to be really, really small. As long as I get to 12, I'm in shape. So let's say we want to make the middle 110. And then we'll make the top 11. And this 1110 plus one, plus one equals 12. When I save this and I come back, if I go back to that medium design. Now we're going to see, and the text is so small. Let's take that back. It's such a small column that we can't read column one. Let's just say two. We'll do eight. And then two again. There we go. Notice how much smaller column one is. Column two is so much wider. And column 3 again is as small as column one. As long as my numbers add up to 12. I can go across this design. Of course I want them all the same for my design. So I'm gonna go back to 666, but this is the power of the Bootstrap grid. The reason why use a grid is I want to fix it in place. The Flex was more to position things that certain positions inside a space. And the grid is designed to organize things in a uniform fashion or to create a sidebar to main content. I really started at the very beginning with a grid for most of my projects. And this project right here is no exception. Now that we have our grid in place. Column one, column two, column three, Let's go ahead and bring in some cards and add some content to this portfolio.
15. Bootstrap 5 cards: So what I wanna do next is I want to bring in some cards. And what the cards look like is if we come down to the content or in the component section, I'm looking for the word card. And all a cart is is it basically provides a flexible and extensible content container with multiple variants and options. Who that's a really, really vague definition. What a card looks like is this picture on top, card title some text and a button. Let's go ahead and build this. And the best part about cards is they fill the space of its parent. What that means is the cards will adjust based upon the size. The grid. There example in getboostrap is good, but they set an inline style to a width of 18 RAM. And that's fine, but I want to do something different. I'm going to take the cards and go, okay, let's build it were fills the space of the parent. So how are we going to write the card? So if we come down here to column 1, I'm going to take column one out. And what I'm gonna do is I'm going to say div class equals card. Open and close that cart. Let me also make hello world just by looking at the card in card twice. And the first piece of the card is I want to bring in a picture. So I'm gonna do is I'm gonna come over to this folder. I've already got an existing images folder here. I'm going to grab a dining rooms smaller and drag it into my images folder. I'm also going to grab the office smaller and drag that into my images folder. And also a sitting area, smaller picture. Let's drag that. So I have those three pictures because the cards in the pictures go first. I have to bring the picture in at the very beginning. So what I'm gonna do is I'm going to say IMG, SRC. And we'll bring in images and we'll grab the dining rooms smaller dot JPG. Don't forget to give it an alt tags. We'll say Alt and we'll say dining room. And after that I have to add a class because I want the car to conform or I want the picture to conform to the card. In this case, I'll say class equals card, IMG top. And if we close our card, What's also helpful is VS codes like something's wrong. You have this bright red div here. I'm going to close the card. And there's the picture. Note how the card curves around those rounded corners. And since we have no other content, the curvature will be at the very bottom as well. But I want to add some content or I want to add some information into the card body. So after the card top, what I'm gonna do is div class equals card body to establish the body part of the cart. Now, Bootstrap does recommend the h5, so I'm going to stick with the h5. H5 class equals card title. And in here I will say dining room. Note you can use whatever hg18 or a paragraph if you want. Just I'm fine. The rules which Bootstrap recommends using the H5 in the card section. After this one I'm going to do is I'm going to add a p class equals card text. And our old fan, Mr. Lorem Ipsum, so we'll say lorem 20 and bringing a 20 word paragraph. And if I save this, now what I get is the dining room with the Lorem Ipsum text. Now what I want to last is I have to have a call to action or a place for the person to click on a button to see more of this dining room. And when we do that is I'm going to use the Bootstrap button.
16. Bootstrap buttons: I want to stop and take a look at the Bootstrap, but I'm going to head back up to the getbootstrap section. And if we come down to the components area in getbootstrap, I'm going to head over to the buttons. I want to show you all the button combinations you get to use. And the one that I want to use for this project. So the buttons are great because they create a uniform way of drawing attention. It's already rounded corners and it has a series of colors. So by default, you have to add both the btn to identify the button and then the choice of colors. After that. The colors are uniform within getbootstrap. Primary is blue, secondary is gray, successes green. Danger of course is red, warning is yellow. Info is this kind of turquoise color. And you get light, dark, and of course, nothing but a link if that's the case that you want to have. I almost never use the link because a link's really just link. I really use three of these, primarily, the primary for blue because blue indicates it's a link color when it comes to the web. And then if I don't use primary, I generally use light or dark to fill in my design. Since I have more of this black and white interior decoration design in this project, I am going to go with the light and dark. But here's the cool part. To me. I like the dark, but I felt the button would just be too strong on this page. If I scroll down, you also get not just your normal buttons, but and you get linked but an important yes, that's for a form. But you also get the outline buttons. I love this one because this one's powerful, not being too powerful. What I mean by a powerful, as you can see these buttons, but these are almost so strong with full color going on. So I want the ability for the user to then know where to click.
17. Gutters: To see the full effect of the gutters working, we're going to bring in two more columns of information. So what I'm gonna do is I'm going to copy this card from card to card. I don't need to copy the columns because they're already there. And I'll drop it in, and I'll drop it into column three. Didn't get the capital C. So now what I have or dining room, dining room, and dining room. Let's change that to also include the office. So I'm going to change the middle one to not dining rooms smaller, but office smaller. And all say office. Now when I get is the office and the card body, I will change to office. And it's changed. And I'll change the last one to the sitting area. So I'll copy that URL or rather the file name. And I'll change sitting areas smaller to the sitting area and take out the word room. And of course, I'll duplicate the sitting area to sitting area for the H5. Now when I have are three columns. So note the gutters inside the design. And this is also an important Because when I flip this to mobile, but also happens is notice how crowded this space gets between the different cards and the appropriate grid. So here's how we're gonna do this. If we come back up to the row, what I'm looking for is div class row. I'm going to first say, I want some margin top. So I want a little more space between this area up here. So I'm going to say row, oh, you know, and I also forgot, I forgot our H1. Shoot. I was so excited with the portfolio. I totally forgot to put the title of this page in, let's say a one. And my portfolio. That's what it was to me. This was a little crowded when I had the H1. So that's what I was gonna do is empty for margin top one. There we go. Just a little extra space going on. So after the row with margin top one, I'm going to add a letter g and say m, D3. So in here I will say G for gutter at the medium size, I want it to have a three. When it comes to spacing. Just a little more room in here. But notice now right here at that the spacing is even and even across all four sides. Now to me, when I go to mobile, I don't need so much space that right now then of course there's no space because it only hits the medium and larger. So if I were to say G3, this would go mobile up. And to me there's space. But when it comes to a mobile design, I'm always considering how can I compress or bring things as close together. And so for me, what I wanna do is I want to keep M D3, but I want to say, Gee, T2. And I shall bring the g2 on the other side. I prefer to go mobile first and then MMD, LG XL, double XL as I go across and go up, It's up to you. Doesn't matter which way you place them because it'll work no matter what. But I want mobile to be two and then small to B2 and then md to be three. If I refresh this page, it just brings it a little closer together. I'm thinking about how can I compress or put things as close together as possible on the mobile side. When I hit the small, It's going to stay too. But when I hit the medium, it's going to drop to three for a little more gutter inside of this design. Now of course, the bottom part is not gutters. It's the middle area is the gutter. So I have to add a little more space inside my design. So what I'm gonna do is inside the container, I'm going to set margin. Why for the top and bottom to two. And then when I also want to do is I'm going to say padding. Why? I want a little extra padding when it comes to the medium and bigger. So I'm going to say adding medium for. And that gives me some more breathing room when it comes to portfolio in this design. And it brings down a little bit right here. So my portfolio sits a little bit off the title. And now everything moves and work successfully. For your design. You might want to increase or decrease the gutters. You can go of course from one to five and take it out completely. So if I say, I don't want any gutters, I can say 0 and they're going to crash right together. That's totally fine. If you want pictures to be right next to each other, then use 0. If you want them to be farther apart, say five. And now they separate. To me the number three was right in the middle where it gave me enough space in K me enough space between them. Where's the number six? There it is. And along this journey, everything is responsive. Whenever I use MDL, GSM XL, and double XL, everything become responsive. And I star with mobile first, mobile first and go up two mediums, in this case, mobile first, medium, large. This is the power of gutters and the responsive design of Bootstrap. In general.
18. Setting up the contact page: We've accomplished a lot. We've have our homepage, we have our about page finished, we have a portfolio page setup. And if you wanna go further, you are welcome to create these Learn more sections. The last page we want to work on is the contact page. I won't click on that quite yet because it's going to crash. So let's go over here and let's duplicate our portfolio page. And we're going to say contact. And we'll bring the contact page down below. And we'll change our navigation form portfolio active. To contact active. I'm going to take out everything else I don't need, including this div down below. So I'll start with the div and take out the second alas div. There we go. I'll keep the container in my portfolio should say contact me. So I'll say contact. Contact me. Now I can click on Contact, and now it's going to work. This looks good. And if your design is too far down, I might just go back to the m Y2 for right now. There it goes, brings a little farther up. If for you, you're like, You know what, this looks a little too far down, then bring it back up. So for my design, since the portfolios a little busier, I decided to bring one down. And for this design, so it's just a contact. I'm going to bring it back up. Now we're all set to work on the contact page. Oh, one more thing. Portfolio almost missed that. One last section. Almost was going to almost chair too fast, let's say contact me. And now our title says contact me. Contact me and we have the active in place in our design. Now let's go ahead and build a two column grid. We'll add some contact features and build a form inside this contact page.
19. Adding contact details: So after this, I have to create a row and add some gutters. So down below, we come back down looking for our contact me. I'm going to set up a row. So I'm going to say div class equals row and give it a G5 on a, given a lot of space in this design. And just so we have an appropriate, I'm gonna say 66 and I'm gonna use the medium to identify this one. So I'm going to say div class col md six. And I'll say column 1. And I'll duplicate this for column two. And we'll say column to save refresh column one, column two. Awesome. This left side column, or the start in Bootstrap 5 is we're getting rid of the left and right and now we're getting more into start and end. So this column one over here, I'm gonna say paragraph. Oh, how to do that? That's interesting. Paragraph and bring them a Lorem Ipsum, let's say lower arm of 25, a little bit of like contact me. Save. There it is a little bit of information about the person and how to contact them. And then I'll add both a phone number and an email. So I'll say phone is going to be area code. I'll use my San Francisco number for 15 by 55. 55. 55. Perfect. There we go. And then down below, I'm going to add an email address. I will say You're welcome. Email me. And we'll say John Smith hat John Smith designs. Please do not e-mail this because in theory, someone could have this email address. So just make sure this is just a dummy e-mail. So if I save it by default, it shows up, but I want to link this email. So I'm going to cut this for a second. I'm going to drop an a HREF equals. And if you're brand new to writing emails, we have to say male 2, colon, drop in the e-mail and put it back inside the a tag. And what happens is it now becomes a link that I can click on to then e-mail John Smith. John Smith designs. Totally cool, look and good. Now it's time to add the form on the right-hand side.
20. Setting up the form: All right. So we've got the information for the phone and e-mail. And this next side over here on the right, I'm going to add a form to this design. So in column 2, I'm going to take it out and say form. Well that's a more details later, but for right now we'll stick with the basic form design. All formed start and end with the open form and the closed form. And this design, I'm going to create two columns for the FirstName, LastName, make one column for the email, and then just a text area for some comments. So nothing too crazy about this form. So I'm going to do is I first create rows and columns for this to work. So I'll say div class row. And keep in mind that pretend this is a 100 percent because this is a brand new grid. Inside of a grid, the parents 50%, but inside of it we're still at a 100 percent. So in this case I'm going to say div class row. And inside here I'm going to add a six column grid div Class. And it says we're sticking with the medium format. I'll say col, md six. And now I'm going to say column 1 just to make sure it's working. And I'll duplicate this. And I have column one loops and column 2. There we go. So I have a two column design for my form. So in column one, what I'm gonna do is I'm going to say label. I always forget I do that. The clothes doesn't come with it. There we go. So this label is going to be 4 first name. And you'll see why this is important to connect the label with the input field and the second. And then the class is going to be, this is from bootstrap, form label. And inside the label I will say first name. After this. I then want to bring an input. So I need to put input information into this form. The type is just going to be text. The name, we're going to say is first name. And the class we're going to say is form, dash control. And an IED is going to match the word four. So I'll say id equals first name. So I use capital N for the second word to identify the ID as well. Keep in mind you can't have the same ID twice on a page. So we're good there. And now when I save this, what I get is firstName, cool. And I can type my name right in there. The second column I'm gonna say is LastName. So what I'm gonna do is duplicate this same style and drag it in or copy and paste and say last name, last name to last name, the name. I'll show you a little bit why we're going to use this. We'll say lastName and we'll say last name. Now what I get is FirstName, LastName. Since e-mail addresses are longer than usually people's first names and last names. I'm going to write the email across the entire field. So since we don't need to use 66, we have to use 12 or call 12. So after this section from this div to this div, I'm going to say div class and we'll say col 12. So no matter what breakpoint where working with, it'll always be a 100 percent of this part of the column. And just a test it out. I'm going to say the word test, drop it in and now watch what happens. So note everything moves around. If this is too close in your design, you might want to say small go 12. So I might want to say in this case, call SM 12, or just say col 12 in this case. And now what's going to happen is, oops, I have to say call SM 12. And we'll drop that. And we'll drop that. Well, that's medium. You know what, maybe we should go large. I'd take it back. Looking at it. We might need to do a large design in this case. So you know what? Let's actually say not M d2, I think we should say large 12th because that one gets a little crowded on the medium. So I take it back. Let's do this. I thought I had that pre-designed out and then a second look at change my mind. So I'm going to say. Lg is gonna go to six, and LG is gonna go to six. And now what happens is this looks much better in this case. Of course, it's a little crowded with this last name and the firstName because as we saw before, when it came to the portfolio section, we have to add some cutters. So in the form design, I'm going to add a row. So in the row section, I'm gonna say rho g dash three. And that gives now some space in this design. I can take this one step further though, because I have the form sitting by itself and the div class. What if we just combine those two together? I'm going to take out this div. I'm going to bring the class up to the form. So the form itself becomes a row. And I always say less code, the better. So I'm going to come down and right past the form. I'm going to then move the divs just back one command left bracket inside of VS Studio code will help me do that. A little clean up. On IL-3. If I refresh, it still looks the same. And again, this is also when I work with a grid that I might need to move things around. Md did work when I first did this. And then upon second glance, I think the largest better. So it has to go a little further out to fill the space in. Now we're back on track. Now the e-mail is a little different than firstName and lastName. So where we had col 12, this is going to go across the entire design. I'm going to take the word test out and I will use label for. And I can say email in this case, class is going to be form. Label. There we go. And we're going to say email. That's right. E-mail address in this case. And we'll close with the label. After that. We'll add the input. And the input is not going to be type text, but type email. So we'll say type email, name. We'll say email. And then we'll say class equals form. Control catches that. And the ID has to match Wu what I hit Return key. The ID has to match the word four. So the id is the e-mail and we'll close it up to the front user. They just think the email looks the same as this. What's also great about Bootstrap 5 is that it utilizes the focus pseudo-class. What's the focus pseudo-class? When I click on it, it turns this blue gradient glow around the FirstName, LastName. This helps the user identify which field there in this just one extra piece I like about Bootstrap because it really helps give a little bit actually user experience to the field that I'm working in. Perfect, Looking good. So next we're gonna do is I'm going to head down, I want to create a text area after the email address. I'm sure it's all saved. Which it is. So this one's going to be after the call 12. I want to make it full width again. So I'll say div, class col 12. Opening close. And we'll say label for comments. In class Is a form. Label. The label. And we'll say comments. And this one's not going to be an input. It's going to be what's called a text area. So I'm going to do is I'll say text area, class, form control. And after that, we're going to give it a name and it will show you later on why the name is actually important in this case, name, comments. Id equals the same as the word four. So we'll say comments. And rows. We're going to say is three. Here's some important. Do not drop this down after it closes. Put no space between the text area and a space in here will be a space in here. So if I save this, what I mean by that space is I want that little cursor. What's also nice about this is notice the nice padding that we get in here. And I don't know why it's showing me the form. So I'm gonna do is I'm going to do this just to get rid of dropping my email. There we go. That's, I'll fix a later on. Anyways, in this comment section I really like about this is it really creates this really beautiful padding inside my common section. But if I were to drop this text area down like this, what happens is, is there's actually all this extra space. That's a part of the comment section because I dropped this down. So it treats it as extra space in my design. Even if I were to create three spaces here. It puts three spaces here. Make sure that you're closed text area is right next to the open text area. This is an I C and a lot of designs, people don't realize that that extra space just drive. These are crazy excited. They have this extra amount of space and they have to essentially delete it TO work with it. Perfect. Let's not say that page. Let's save this page, refresh, and now we're back to the right text area. And of course, for a form to really work, we have to create a button to submit the information. So I'm gonna do is, I'll say div class and we'll say col 12 to make it one column. And I will say in this case, button type is a submit button class, we're going to say is btn. And then btn-primary. I'm going to use the typical blue. And we'll say submit. Now what I have is a form. But in theory, if I had summit, I could submit the form. Well, let's actually as a bonus to this course, I want to create a working form for you to use.
21. Netlify and the drag and drop method: For this project to really work, we have to put it on line up until now we've spent time just on the desktop. So I'm going to do is I'm going to come over and pull up Netlify. Here we go. Netlify, it is. Netlify makes modern web app ship faster, e-commerce enterprise, all that good stuff. But what it also does, it allows me to drag and drop websites right onto the web. I'm going to log in. And if you have not used Netlify before, go into signup. And in my login under this word sites, mine doesn't really have it in here, so I have a lot of other websites. I'm going to click on sites. At the very bottom. Yours will probably be empty versus all of my sites. I want to deploy a new site without connecting to get Sure I do, I just want to drag and drop my site output folder here. If I take this folder and I grabbed my project new folder, if I drag it right down here, notice how it turns to this white versus the outline. If I drag it right in, What's going to happen is it's going to build me a whole new website. How freaking awesome is that? In about 30 seconds, I just launched my website in a random string of words. So if I say Domain Settings, I'm going to come over to Edit Site Name. And I'll call this one John Smith, temp for right now. What I get is a URL that works. And I get the About page, I get the portfolio page, I get the contact page. That's stinking awesome. But what I really get, which I really loved Netlify for, is if I head back over to Netlify, they have formed section. And you actually can build in a form using Netlify and submit information automatically using their system. Let's go ahead and put the information in for the Netlify forms to work in this project.
22. Netlify forms: So I'm going to move this hallway for right now. And what I wanna do is come back to my code and in here add some additional information to the form. So if I come back up, I'm looking for the form. There it is. And the former is where I start. The class is totally fine. But what I want to add is a name. And this name is going to be the contact form or just contact. Now, there's two methods I have to set up. Those either get or a post. And GET is if you're getting information from a form like let's say Google. A post is if I want to post information to a form like a contact form. In this case, I'm going to say Post. I have to add a couple extra things. And for readability, I'm going to lose some space. I'm just going to drop this down and drop this down just so we have a little more readability going on. Method post. And the form's going to open and close. After the method post, I wanna say data Netlify, true to tell Netlify, Hey, this is a form. Check me out. After this section. I want to say action and this thing really cool. Because the action, I wanted to actually say, well, when you submit the form, give the user a response back. So I'm going to say action. I'm going to say in this case slash contact, dash, success. We don't have this page setup yet, but we will before you run this too far. So we'll say contact success. But HTML, this is designed to tell the user when I submit this information, it's going to work. The reason also I had the words name, FirstName, LastName, email, and comments is that this is going to show up in Netlify is form section. So when I save this, I'm going to come back into my safari account. And let me pull this back over here. So what I wanna do is come back to cite, overview and to read drag and drop it. I'm going to come back to production deploys, let's say reduction deploys. And in this case, notice need to update your site. Yeah, I do. And I've saved at all. And again, I can't really see the change here because it's more of the inner workings of the form. So I'm going to come back to Project New, open my version of Safari up and drag project new. Up here. It's going to upload the project shouldn't be too long. And I didn't notice that the uploading doesn't always change, so I have to then usually refresh the page and then it's all set to go right there. Let's try this. Oh, one more thing I gotta do. I said I was going to make myself a success page. I didn't do it. So I have to make sure I create a contact success. So I'm gonna do is I'm going to duplicate the contact page and say Duplicate or Command D on the Mac, control D on the PC, and say contact success. And all I'm gonna do is I'm going to take out the form and just say thank you for the information. So I'm looking for the form, comment on down and formed a form. And I'll just say in a simple paragraph tag, thank you for your submission. And we can't see until we actually run the form. So let's save this. It saved. Perfect. Now we're looking good. Let me upload this one more time. It jumped the gun, so it's going to give us an error message. I'm going to drag and drop this. And again it uses this doesn't change by default, so I have to go and refresh the page and now it's published. And now we should see in our form section, notice how we have a form. We have an active form called contact. And there is no submissions yet on this contact form. I said yet, well, now if I run my website, so if I run the John Smith design and contact, I'll put my name in and it will just choose something at something.com. Hey, let's see if this form works. And correctly it should be apostrophe. I'm going to submit the information. And thank you for your submission. Cool. So far it looks like it's going to work. So if I come back to Netlify and I go over to forms, hey, contact lacked submission at 1038 AM. And Hayden, Hey, let's see if this works. Note the first name matches the name, firstname. Note the last name matches the last name, email address, and comments. That's pretty rad. If you want to take it a step further, what you can also do is inside your site overview, if I go to Site Settings, this at first gets a little confusing because there's a Forms button up here and there's a Forms button down at the bottom left. But if you want to be emailed your form, you can set up Form Notifications to go a certain web hook, an email notification or a Slack integration. In this case, I would want to say email notification. And I can say, Hey, I can get notified via email when anyone uses that form, how freaking cool is that? Like Netlify rocks. But I can take it even one step further. Because if I go back to this form design, and if I go into the contact, there's also a way to prevent spam. So all forms missions are filtered for spam using a Kismet. But I can also add a honeypot field to catch additional spam in my design. And this is probably the most powerful tool of Netlify forms that goes undetected. Let's build an additional honeypot field from my design that it will help the spam inside of Netlify.
23. Adding the honeypot to the form: Let's come back to our form. And what I'm looking for is 0 among the contact success page, that's not going to happen. There we go. For our contact page, I want to add one more piece below the action. I'm going to say data, Netlify a honeypot to make sure it identifies there's a new field in here. I'm going to say bought dash field from here. I'm going to add a brand new field in this design. So below this data, Netlify a honeypot, but above the div class 12, I'm going to create an input and say type is going to be hidden. This is a new type of field that is not going to be shown, but only when boths try to go through all the inputs, then they can see it via the code side. And the name is going to be bought field, essentially saying if anyone, he fills this hidden field out which a normal person would never see, then identify this as spam. And I usually do also is I also make a note and say for the bots just in case I come back and figure out why I did this. So why did you put a note that says for the bots and then for the boths, just so I can have an identifying as a hidden field. Now again, if I save this, you shouldn't be able to see this on your contact page. So far looks good. Let's upload this project and see if Netlify identifies this but field as well. I'm going to bring back there it is. My forms and site overview, production deploys. I'm going to go back to the parent. And if I scroll down the page, let me bring project new into this new upload. And again, it doesn't change from upload to publish. So what I have to do is refresh the page and it is published. Now what I should see in my form section, if I go into contact, perfect extra spam prevention enabled via a honeypot field. So it just adds an extra layer of spam prevention inside of Netlify already.
24. A little additional cleanup: So if we look at our page, I'm just going to hide Safari again, that everything's pretty good. But the one thing that does irk me a little bit that I did see across my design is that John Smith designs is indented just a little bit in relationship to contact me, isn't really noticeable on the first page or on the about page, but we'll get to the Portfolio and the Contact. It's noticeable. So I'm going to do is I wanted a little extra clean up. And that's how I'm going to open all of my files and go to Project New. And in about contact success, contact index and portfolio. I just want to take out the padding on the left and right sides of my design. So I'm looking for is in the container for the nav bar. What I want to do is I'm going to say Px 0. And I'm on the about page. Take a look again at that one. So if I save the about, it, just take the space out on the left and right sides. I do duplicate this across all pages. So I'll come back to contact success. At the very top. Add the px 0. On my contact. What I'm looking for is container and PXE on the index. Come back up to the top. Don't get dizzy, or almost there. Px and portfolio at the very top as well. We're looking for is the container and P 0. Now when I go through page by page, it's all aligned in that way. Also, I kept hello world and they should say John Smith designs. So what I'm gonna do is I'm going to change helloworld to John Smith designs. In web design, it's an important to put the actual name, the portfolio, or the name of the page first, and the overall title second. So I have to duplicate this one more time. But since we're right next there, 0 index still has Hello World. I didn't fix that. Oh no. So let's grab the whole thing. Let's grab that design into the index. And we'll say, is all design and make your house look amazing. Just so we add something at the very top. Or we could also say, in this case, interior design. Interior design and decorating. Perfect. And we can also change helloworld to tidy that went up to match interior design and decorating on my index page. Let's come on down here. Chain to low world. Just so it looks a little stronger. There we go at the bottom. So to continue on throughout those entire titles, a little last cleanup to be had. I'm going to take the John Smith designs and just go right to the contact. Change that contact success. We can say instead of contact me, we can say submission successful. And the about page will take the HelloWorld. And John Smith designs. Let's upload this one more time and take a look and make sure it's all working successfully. Under forms, site overview, production deploys. Scroll down the page and project new. Drop it in. Again, wait for about 510 seconds for my InDesign, it's only not that big of a file. 3.4 megabytes, refresh the page and it is published. If I click on this link or in this case, I'll refresh the page. Now what I get is that padding taken out, interior design and decorating, John Smith designs. And about we haven't looked in pretty good. It should flow. Look in great. Looks really good. I think. Come back to our portfolio. We have our three column to two column, 21 column design looks pretty strong. And we have a contact page. I can say John Smith, something at John Smith designs. This is only a test if I estimate the information. Whoa, There we go. Thank you for your submission. And lo and behold, if I come back to forms, last submission happened at 1050 I am. And John, this is only a test and it works. We have everything working and it's set up and designed using Bootstrap 5.
25. A sticky footer: As I was looking over this entire website, it looked pretty good except for one little detail in the about section. We don't notice it because we're scrolling up and down. But when we hit the contact page, note that the footer goes up and touches almost the top of the form. What I wanna do is I want that footer to get stuck at the very bottom are to create a sticky footer. We can do that with flex. We have to go into our CSS in order to accomplish that. Inside my custom CSS at the very top is we're going to put this is right after. We're actually said before the header, thinking before and after, I have to add a couple of things. I'm going to say HTML comma body. And after this, I want to say height equals 100%. We have to dedicate this information to say, let's make this height a 100 percent, which it already is to bring in the flex. When I'm going to do is I'm going to say body display and then flex to make the body flux. I want to turn the children of the body or the divs, the mains and the footers into columns. So I'm going to say flex direction. And we're going to say column. After that, I can then turn the main into flux. So I'm going to say main flex 1, 0 and then auto making this a 100 percent as much it can be pushing the footer down. Now the trick is after the main, I'm gonna say footer. And then turn the footer to flex, shrink to 0. And what that's gonna do is it's going enabled this middle part, if we think have three columns, the header and the footer, this is going to expand to full width minus the footer at the bottom. I refresh the page. Oh, I'm on actually the actual domain name. Let's go back to Project New. And we'll pull up the index file and the contact page. Now what you see is this bottom footer sticking to the very bottom. And lastly, we have to do is pull open Netlify. There we go. And I will go back into my site. Overview. Production deploys and upload this one more time to make sure it works. Let me go find the drag and drop and wait for it to upload. Give it about five seconds. I'll refresh the page and it says published. Now when I come back over to the contact page that is on the John Smith temp Netlify, refresh the page. Now the footer sticks at the bottom. If you have a small contact page, I recommend doing this. So you hold the space for the sticky footer at the very bottom.
26. In conclusion: Thank you so much for taking the time to watch this course on Bootstrap 5, I really wanted to make a concrete project. We could use a majority of the tools within Bootstrap 5. For all more information on Bootstrap, you're welcome to head back into the docs and find them all. And Firmin who bought the advanced course, you can use those extra tools as the source code to rely and double-check your work as well. As always, I'm hit at UPS and thinking much for purchasing the bootstrap bootcamp course.
 Haydn Adams, Creative Technical Educator