Transcripts
1. Introduction: [MUSIC] Hey everyone,
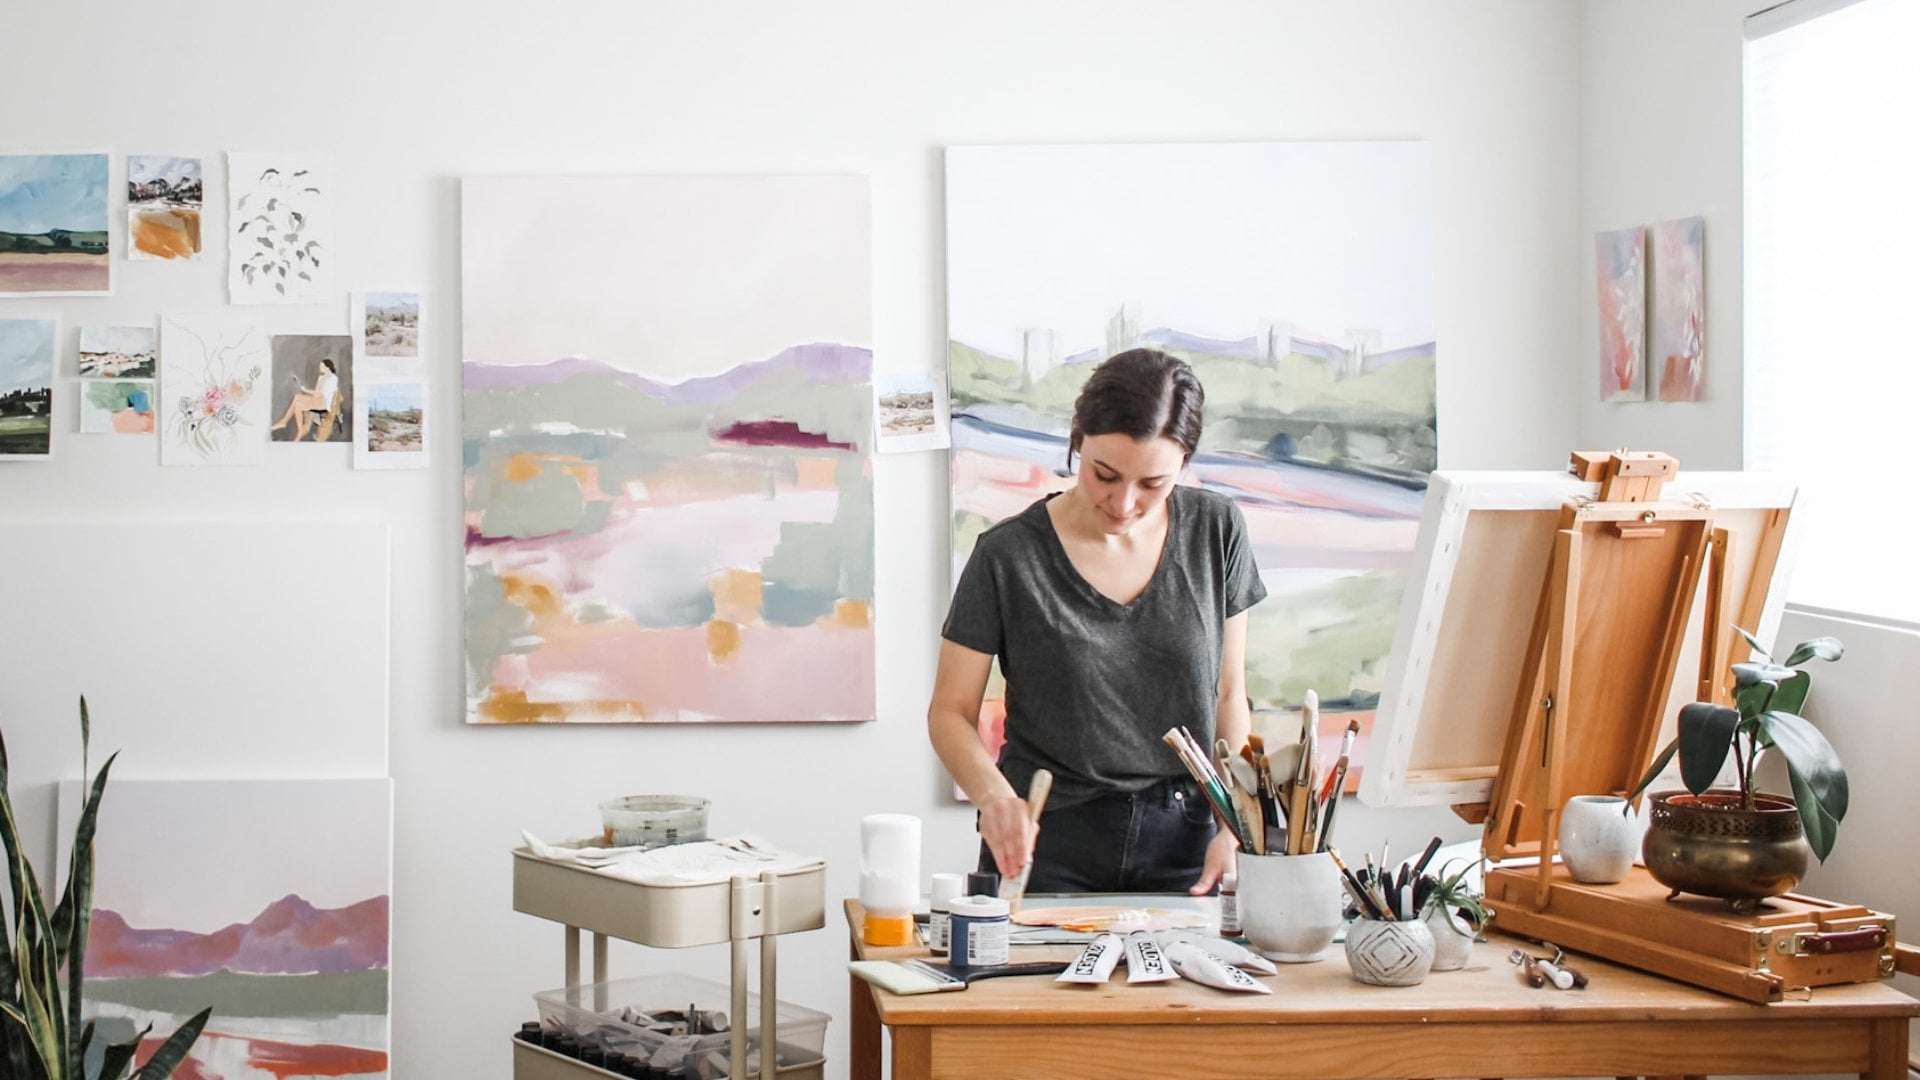
I'm Lauren and I'm a full-time painter
in Phoenix, Arizona. I mainly work in acrylic to capture all of my
travels and paint. But I also teach
painting classes and I created a course I offer
called art to print, where I teach
artists how to make professional quality prints
from their original artwork. Blind contour drawing is one of my favorite tools to
use as an artist. It is a really, really fun way to bust through creative blocks or if you're in a creative rut or if you just need
to loosen up and it's even an excellent tool
to refine your skills as an artist in a really
short amount of time. This class is all about the process of blind
contour drawings. I'm going to show
you how to do it, how it's helpful, and then I want you
to take what you learn and apply it to
your own subject matter. My favorite thing to do with blind contour drawings
is to draw plants. If you've got a plant nearby, grab your plant piece of paper and a pen and I'll
see you in class.
2. What is a Blind Contour?: Hello everyone. I am so excited about
this blind contour class because blind contour
drawing is one of my absolute favorite
practices as an artist, and I can't wait to
share it with you. Let's first go over what
exactly are blind contours. Let's start first with
what is a contour. The contour of
this paint tube is the outside outline
of the paint tube. If I were to draw this, I would draw basically just the outline
of the paint tube. A blind contour drawing is
where I draw the outline of the paint tube but
I don't look at my paper at all, so it's blind. Imagine if I were looking at
my paint tube and drawing it but I hid my pencil and
the paper from my eyes, I couldn't see what
I'm drawing and I draw the paint tube like that. Actually, let's just do a little example so it's very clear what
I'm talking about. I am looking at the paint tube, but I cannot see my paper
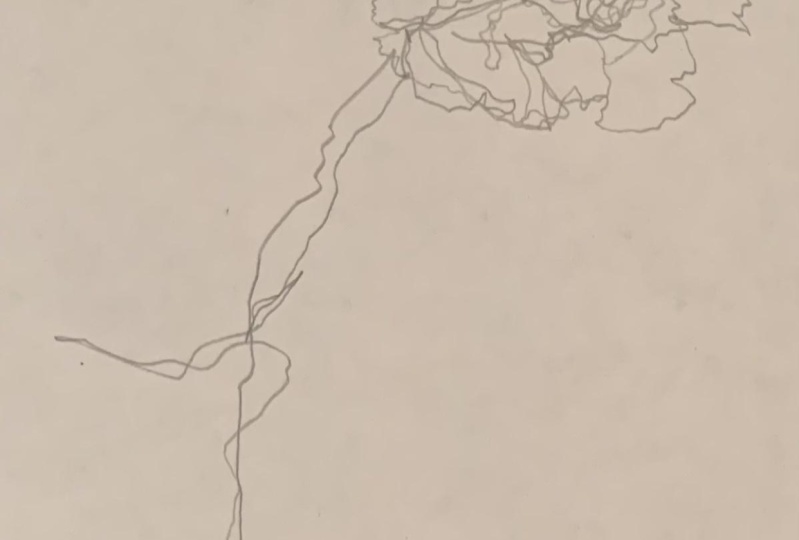
or my pencil at all. But I'm slowly just looking at the paint tube and drawing it. Pretty funky looking. Well, this is pretty much what
you'll probably get on your first few tries
of drawing blind, but it is so much fun and it's such a great practice
because what it does after you practice more, your eye and your hand are
going to start lining up. Say you can't see
what you're drawing, but you're really just
training your eyes and your hands to look at the object and draw the object together in unison
and it's really fun. Let's actually move
on from this because it'll make more
sense as we look at examples and as we practice. The reason why blind contour is so good is because like I said, it just really train your
eye to really look at what you're drawing and to match
it up with your hand. You really just improve your drawing skills a ton by
doing something like this. All right, I want to
show you some examples of blind contour drawings
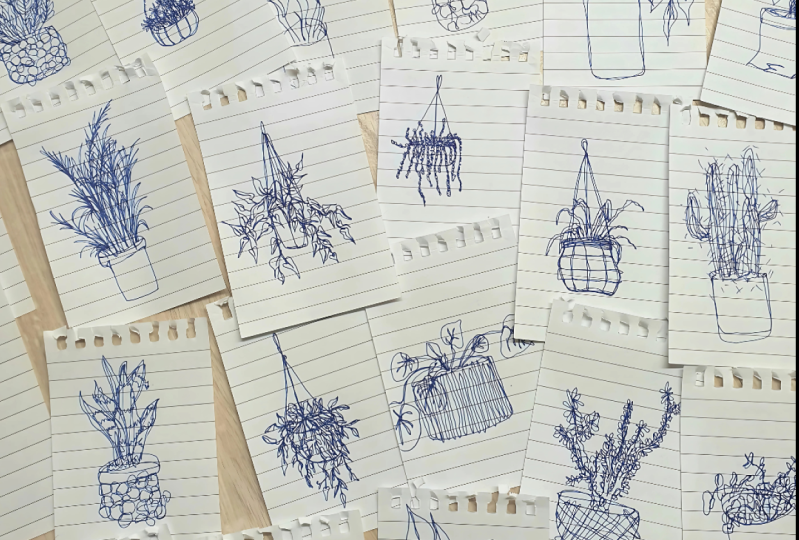
that I have done in the past. This is when, I think I was
drawing every single day. I think I was doing 100
day project for this. My favorite subject
matter to draw when doing blind
contours is plants. It's because they can
look really funky. Even if they don't look good, they still look really
interesting and can just give you some
really interesting shapes and this is one of them. This is just a plant that
I always had on my desk. Let's just flip through
some of these examples. You can see the leaves, here's a leaf and then there's a little leaf
and there's another leaf. You can pretty much make
out the leaf shapes. All right, moving on. I love this example. This is a pine cone
that I was drawing, which just is really
fun looking. I love it. Then this top page is
also one of my favorites. This is a walrus. I love this walrus so much. That's also a walrus. This is Hazel, my dog's head. You can see her little ears. Those are also pine cones
[LAUGHTER] But as you can see, it's never going to be perfect, but it's going to give you some really interesting shapes. The more you practice, the better you will get, which is what you will
see as we move forward. This is the same
exact plant that I was drawing in the first
example I showed you. But look, you can see
I've got so much better already and that was just with
a little bit of practice. All right, let's move on. Here is when I started drawing
some tulips that I had on my desk for a really long time and they were slowly dying, but they had the most
interesting shapes. I drew them a lot. This was one point and then you can see I
started getting better. Actually, this is
a funny drawing. This is Hazel [LAUGHTER]
It's a little scary looking, but you can see her ears, her eyes, and her nose. Those are the tulips. I'm getting better
with tulips as I go. I love these drawings. This is what's so cool
about blind contour is you eventually get so much better and you get
really cool drawings, these tulips are so neat. I love them so much. All right, last example
is a self portrait. This is probably one of the
easiest things you can do, especially if you live with someone or you have a friend who draw is do a blind contour,
drawing of their face, or look in a mirror and
draw your own face. Or like I did, you can draw your pet. It's really fun. Actually, that's a
pretty fun activity to do with a friend. Look at each other and draw each other's
face and then you will have many
laughs believe me. It can be really fun and
funny at the same time.
3. Supplies: I am going to be
looking at a plant that is on my desk right now. We're just going to do
some practice drawing. The plant I'm looking
at is right over there. I will pull up a photo so you
can see what I'm drawing. Let's just start practicing. I'm going to talk through
my practice in process so that you get an idea. We'll just do a bunch
of different ones. You can either draw from
the photo that I provide or if you have a plant, grab your plant and draw from
that, or really anything. You can literally do a blank
contour drawing of anything. But I'm going to
start with a plant and I'm just going to
talk through my process so you can see the way I think. Let's just get started. It'll be easier as we go. I usually like to
start from the bottom and I am just slowly
going up the plant. Try to match the amount that you are moving
your pencil or pen with the same speed you're moving your
eyes up the plant. Imagine you're watching
a little ant crawl up the plant and just follow it. Just go everywhere
that little ant goes. Now we've reached a leaf. The cool thing about this is that you're going
to see things in 3D so you're going to have
some funny angles. That leaf, I just looked
down at my paper so I can make sure
what I'm saying is making sense to you. I did cheat a little bit. But this doesn't really
look like a leaf. It's because the
angle of this leaf is pointing away from
me so it looks weird, but in the end, it
will look really cool. I'm going to keep
going and I'm not going to look at my page. Also very important, keep your pencil or pen
on the page at all times. Try not to pick it up. Try just to do as much as you can in
one continuous drawing. Like my plant right now and you can see
there's two branches, so I'm going to try to
do the right branch with one continuous drawing and then when I'm done
with that branch, then I'll pick my pencil up, start from the bottom and
do the second branch. Let's just keep going. I am just following
my little ant. You can go as slow
as you need to go. It's probably better
actually to go slow, especially when
you're first starting because it's not the easiest. Actually it is really easy. It just takes patience and
it takes just learning to line your eyes
up with your hand. But it is literally one of
my favorite things to do. I love this. Especially if I'm going
to create a block, I love doing blank
contour drawings because they're not going to be perfect so that
pressure is off of you. You can just do something and then you get
something creative, you get something
interesting looking. I don't know, it just
does something good for creative blocks so definitely try this practice if you
have a creative block. I am going to come
down the plant because I've missed
a leaf over here. Let's see. Wow, that's really
funny looking. I'm going to start on
the second branch now. I have this bear old leaf
that is just droopy. This is going to look funny, which feel free to to omit
stuff, to edit stuff out. I didn't have to draw that leaf. I could have just skipped it just for making my drawing look as prettier interesting
as possible, but it's up to you. Do whatever you want to do. My pencil got stuck
in the paper. Just try so hard not
to look at your paper. That is the hardest part of this whole thing is just making sure you're not
looking at your paper and just imagine the
little ant crawling along. If you're drawing on paper, I prefer ink, I usually
don't use pencil. It's up to you
whatever feels best. Just if you do drawing
with pens, awesome. If you like drawing
with ink, awesome. Wow. That's a mess, but I love it. Let's keep practicing. I'm going to draw with
a pen this next time.
4. Practice 1: Now that we've looked
at some examples, let's talk about what do you need to do a blind
contour drawing. All you need is a sketchbook
here or this one, or just a piece of paper
and a pencil or a pen. I personally really
like these micron pens. They are waterproof when
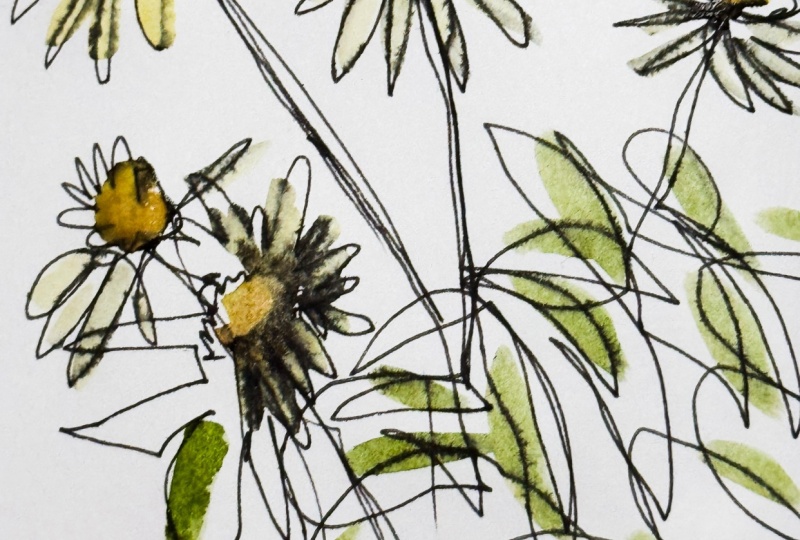
you're using them on paper. For example, I drew these with the micron pen and then I watercolored
them and they don't bleed. You can see the edges aren't
bleeding or anything. They're really great for working on paper
with watercolor. This is a strip of primed or
Gessoed watercolor paper, I had primed it with Gesso, and then I drew with
these micron pens, and then I went over with
water and they smeared. These are not waterproof when
on acrylic-primed paper. But they are if you
just are working on watercolor paper. That's great. But if you are wanting to
paint or draw a drawing and then paint on it later
on acrylic-primed paper, use a pencil because
it doesn't smear. I tested it right here. Let's move on. All you need is
something to draw with and a piece of paper, so simple.
5. Practice 2: Feel free to rotate, like whatever your
subject matter is that you're drawing with, feel free to rotate
it and change it up. This looks like a good size. I'm using a size 1
Pigma Micron pen, and let's see here. I'm going to rotate my
plant a little bit. There's a little bitty plant like at the base of my plant
that I'm going to draw. I want to try to get
more detailed with this, and just slowly. One of the things I love about
doing this is the drawing, like the dimension. Some of these plants you can
see there's an outer shape, but then there's an inner shape, lets say if the leaf is curled. I'm going to see if I
can go back in here and get that curled leaf. Just try to draw every line that you see if
that makes sense. Don't worry about running
into other leaves because all the
layers are really what makes all of this
so interesting looking. Just take your time. One of
my favorite things to do, which I know I've said
this already, there we go, to do this as a daily practice because the more you practice, the better you're going to get. For sure. I'm going to change
pen so you can see different thicknesses and
just how different pens work. This is a micron pen, but it's graphic and it has
more of like a felt tip. There'll be a thicker line. I'm going to do the same plant, but I'm going to do it up here. I haven't drawn
blind in a while, so I'm rusty for sure. These are not as beautiful as the ones you saw
in my sketch book, but there's still
super interesting, like look at that leaf. I love that leaf. There are so good. Where's the brush pen? Here it is. They also make this
brush pen which is cool. It gives you like you can
have thin and thick lines. I'm going to do the
same leaf again. Let me say a little plant part with this one, but over here. I'm trying to draw it
differently each time, like taking a different route. I don't know if I'm
successfully doing that because I don't really remember
how I drawing it before, but I'm trying to. There we go. Another tip is especially when
you're first starting off, it's easy to just not
really move your hand and you'll just stay
in one small area. Don't be afraid to move
and really go for it because it will just be more interesting instead of it all like on top of each other. But these are cool. These are three
different versions of the same thing in
three different pens. I like it.
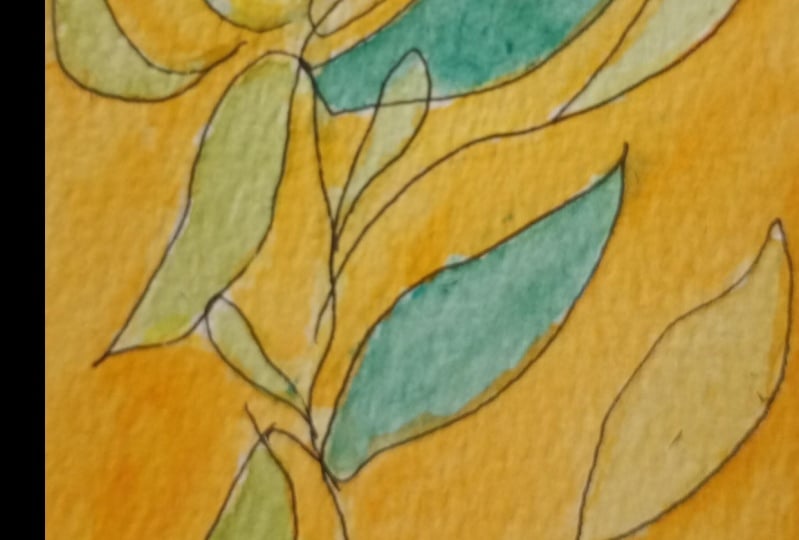
6. Paint Prep: Once you practice and you really feel like
you've figured it out, just practice all you can. Another fun thing to do is to actually paint your drawings. If you remember, I showed you how I have watercolored
my blind contours before. But I've also painted
with acrylic. Here's some others. These were tulips that I did. This isn't like the
best painting job by any means, but
it's interesting. It's a very
interesting way to get some cool looking paintings. Let's practice that today. I'm going to flip the page and this is a
piece of Gessoed or primed, I primed with Gesso
watercolor paper. It's the same kind of paper that I use in my
painting classes. The reason why you prime the paper is
because watercolor is created to soak in paint and it's wonderful
for watercolor. You don't really want
that to happen with acrylic paint because
it just makes it harder to blend colors, you get stuck, your
painting is like that instead of smoothly
moving your brush. You can also avoid
Gessoing watercolor paper and just buy acrylic paper
made for acrylic painting. I personally like the
process of priming paper and having this nice
brushy primed surface, but it's completely up to you. You can totally skip it and just buy paper specifically
for acrylic painting. It's whatever you want to do.
7. Paint Sketch: The reason I'm using pencil is because like I said earlier, the ink, if you use a pen, it will smear because
this is a primed surface, so we're just going
to use a pencil because it will not smear. This is just a 2B
pencil, nothing special. You can use any pencil
that you want to use. I'm going to draw
the same section that I was drawing with
these three of my plant. The other wonderful
thing that blind contour drawing does is it teaches
you to be patient, which I need lots of
extra doses of patience. It just makes you slow down and look at what you're drawing
and really pay attention, and just take your time. While also simultaneously
giving you a really interesting drawing. Feel free, once you
are done drawing, to go in and fill in some spots. Say you finish and you're
just like, I like that, but I would like it to be
a little fuller over here or whatever, feel
free to do that. I like this. But here's a great example. For this, because
this is going to be like a finished piece, it may be more
interesting to have another leaf over
here and maybe like one up here or however you
want it to be balanced. I'm going to put my pencil somewhere where I
think I want the leaf, and I'm going to add
it in because I can, because this is what
artistic license is. You can do whatever
you want to do. There are no rules, break all the rules, you can do whatever
you want to do. That is one of my favorite
things about being an artist. I am breaking the rules and adding in a leaf
that isn't really there, but I'm basing it off of a
leaf that I'm looking at. See that gives us a
little bit more balance. See you don't want one there. Yeah, I'm going to
stick one here too. I'm still looking at my drawing
or looking at my plant, and doing it blind, but just being more
intentional about where I'm going
to put that leaf. Okay, I like it. I think this is cool.
8. Painting: Now that I have my perspective up or I move the camera so you can see my palette and you can see everything that I'm
going to do over here. I'm now picking out some colors. This is green. I'm not going to get too detailed with the
painting because I like just the whole look of
these. They're imperfect. They're weird, they're funky and so it doesn't need to
look like a real plant. It's just fun. Like scribbling, sort of like a scribble and then
filling in your scribble. I used to do that as a kid. I would just do like a bunch
of scribbles and then paint in the shapes that we're connected and it always
turned out cool. Let's do that today. I have my bucket of
water off-camera. You can't see it, but
that's how I rinse it. Rinse my brush and have a
paper towel next to it and that's how I blocked
my brush as well. I'm going to just start to
get my paint loaded up on my brush and feel
free to mix a green. I like this green, this is. Where did I put it?
This is shaven. It is a French paint
brand and I like them. They've got really great colors
and this is called Khaki. I'm just using a
little round brush. Just a small little
detail round brush. What I'm going to
do is just fill in. It's like I'm coloring. I'm just picking the shapes that I see and I'm
going to fill them in. I like doing this
too with watercolor. Watercolor is really
fun for blind contours. But so is acrylic, I
mean it's just like a completely different look
like with acrylic painting, you're going to see all the
brush marks and the texture. But it's probably not going
to be quite as detailed and sharp as points and stuff because you just can't get you can you just have to have a smaller brush which I do have, but I'm just going to
use this one today. But it's going to be completely different
look than watercolor, but it's just what look
are you going for. What do you want
it to look like. I'll compare, I'll show you
my watercolor version of this compared to
this acrylic one so we can see how different
it looks. [NOISE]. I did a live class
on Instagram once where I taught blind
contour drawing and it was so much fun. People painted their partners, they painted their pets, and then I brought
hazel on camera my dog. Actually, sorry they
didn't paint they drew, it was a drawing class,
but they drew Hazel. It was the most fun ever because I got to see all these
fun drawings of Hazel, which she's barking right now if you can hear
her [LAUGHTER]. But anyways, it was so much fun having all these fun drawings
of my little doggy. But this is just a
fun practice to do. Highly recommend it. I highly, highly recommend it. I'm just going to keep on painting these shapes
and I'm moving it around weirdly because I don't want to smear it
with my right hand. That's why it's like
sideways and all the ways. You can see how I've
seen is that part of it. I like that because if I go
in and paint this shape, then you're going
to miss all these funky little shapes in there. I'm going to keep that for now. Just see. Keep in mind with
paint you can always add, and you can't really
take away that much. I mean, you can, I could
go and paint in white, but since this is a drawing, I would lose my drawing
because it will get covered up by white
paint or colored paint. I'm going to keep that for
now and then in the end, if I want to go back and
fill in that leaf, I can. The smaller the brush you use, the more detailed you can get. I mean, this is a
relatively small brush. I have smaller that make
really tiny brushes. It's just up to you
and what you prefer. But it's just up to you. There we go. I like that. I think this is really
interesting looking. I like that kind of line there. I'm going to clean
my brush real quick. But look how cool that looks. Let's compare this now to
the watercolor that I did. Just so you can see the
different vibes of paint. You can get really, really, really detailed
with watercolor, especially if you use a
really small round brush, you can really get in there. Acrylic paint you can't
get quite as detailed, but it's just a little
harder than watercolor. But there's two
really cool vibes with paint and I love it.
9. Final Thoughts: That is blind contour drawing with a little bit of painting, and I hope what you take
away from this lesson is to just try it [LAUGHTER]
and have fun with it, and let interesting shapes
come out of your hands. It's going to be really cool
just to see what comes out, and the more you practice, the better you get.
Have fun with it. Draw with a friend, or draw by yourself, whatever you want to do. It's also an excellent tool to use when you have
a creative block, excellent tool for that. But anyway, I hope you enjoyed
it and that this becomes a new fun practice for you
in your artistic journey. Be sure to check out the
class project section. I would love to see the drawings that you
make from this class, so post them there. If you enjoyed this class, check out the rest
of my classes. You can click on my profile and see the rest of my classes. If you want to follow
along on Instagram, you can find me
@laurieanneart. [MUSIC]
 LaurieAnne Gonzalez, Painter | Dog Lover | Bob Ross Wannabe