Transcripts
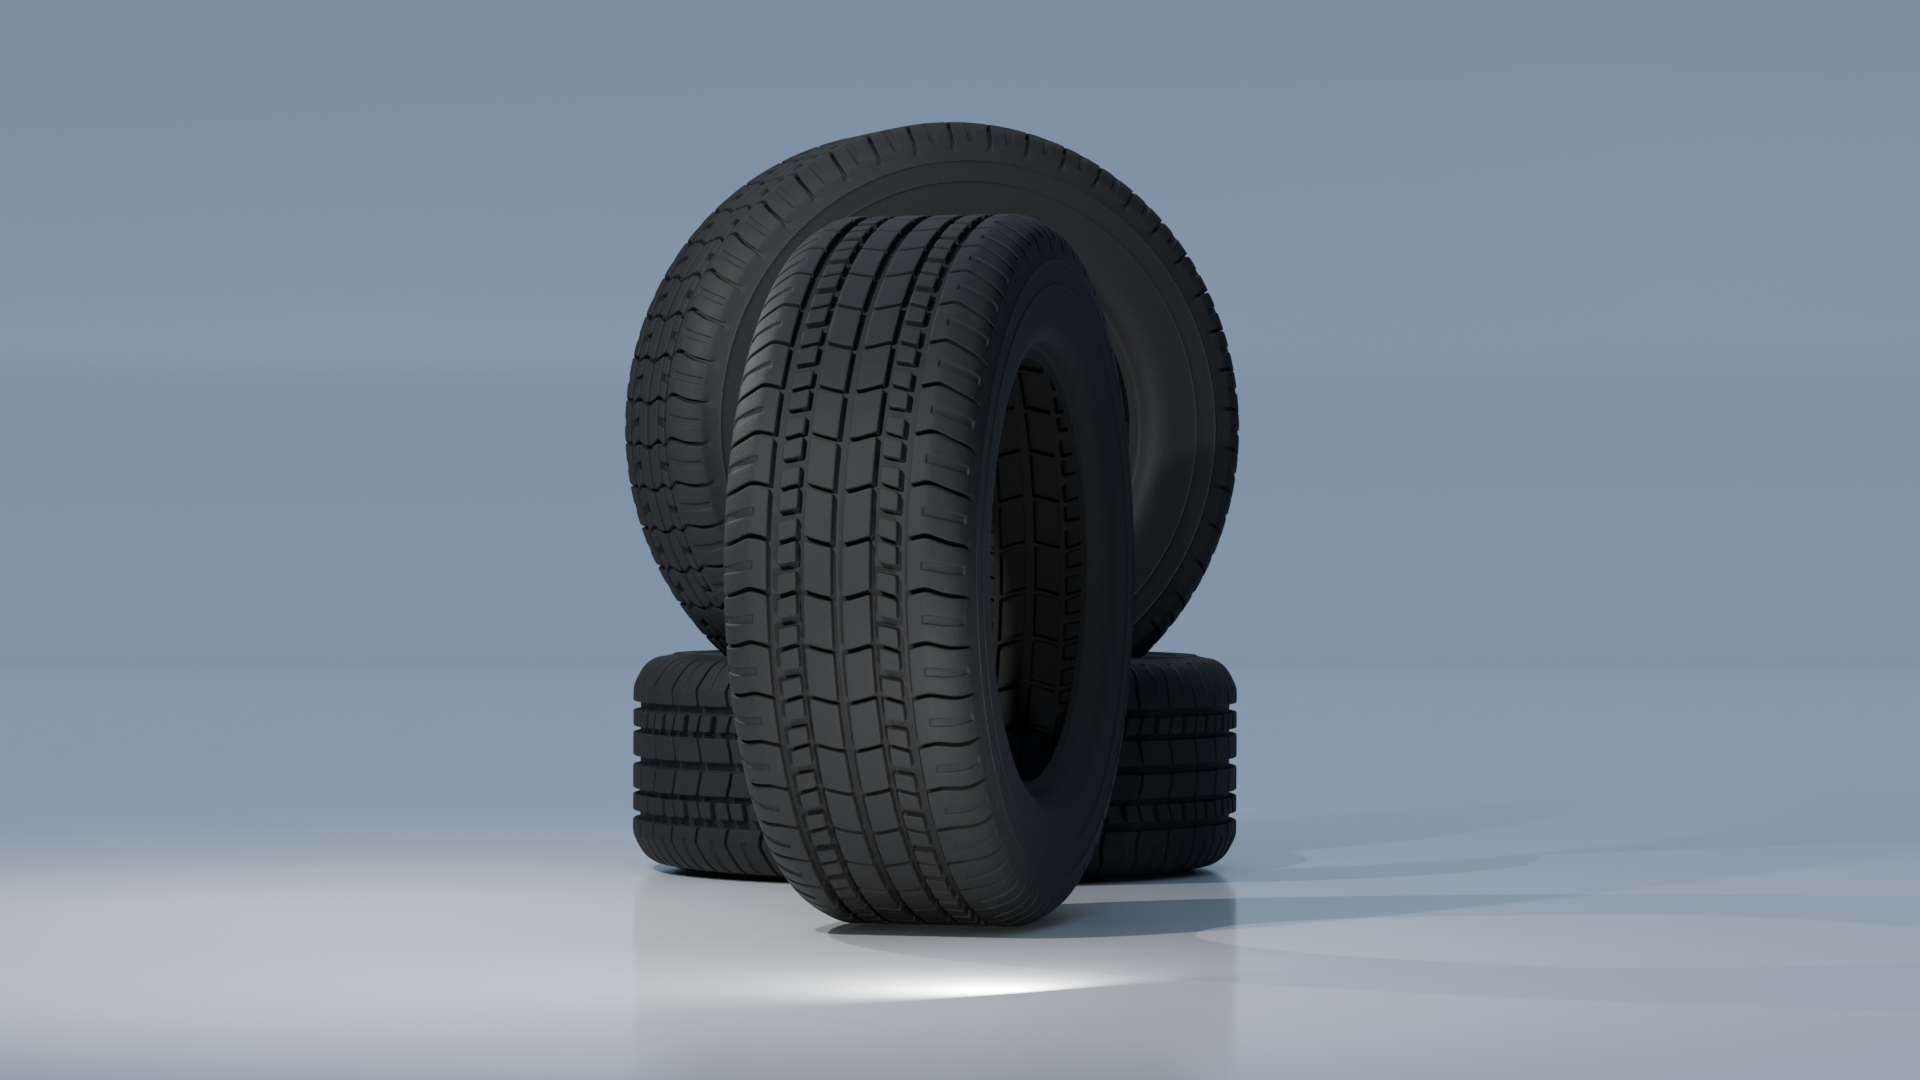
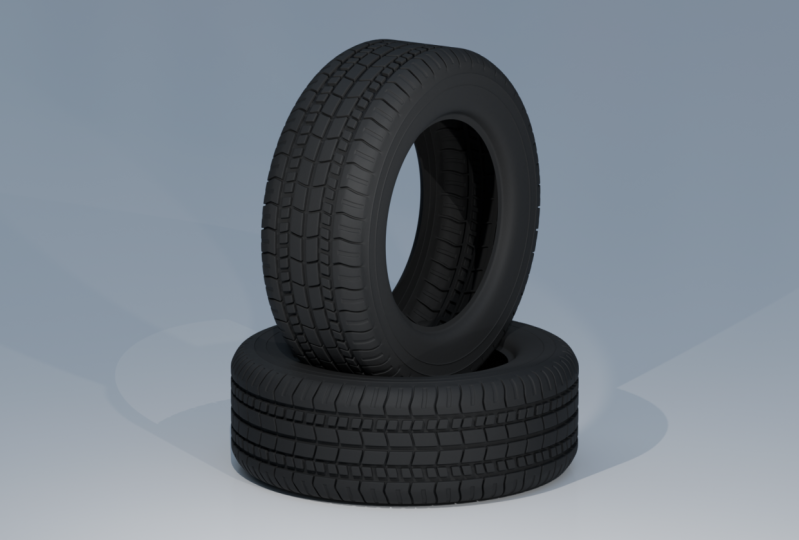
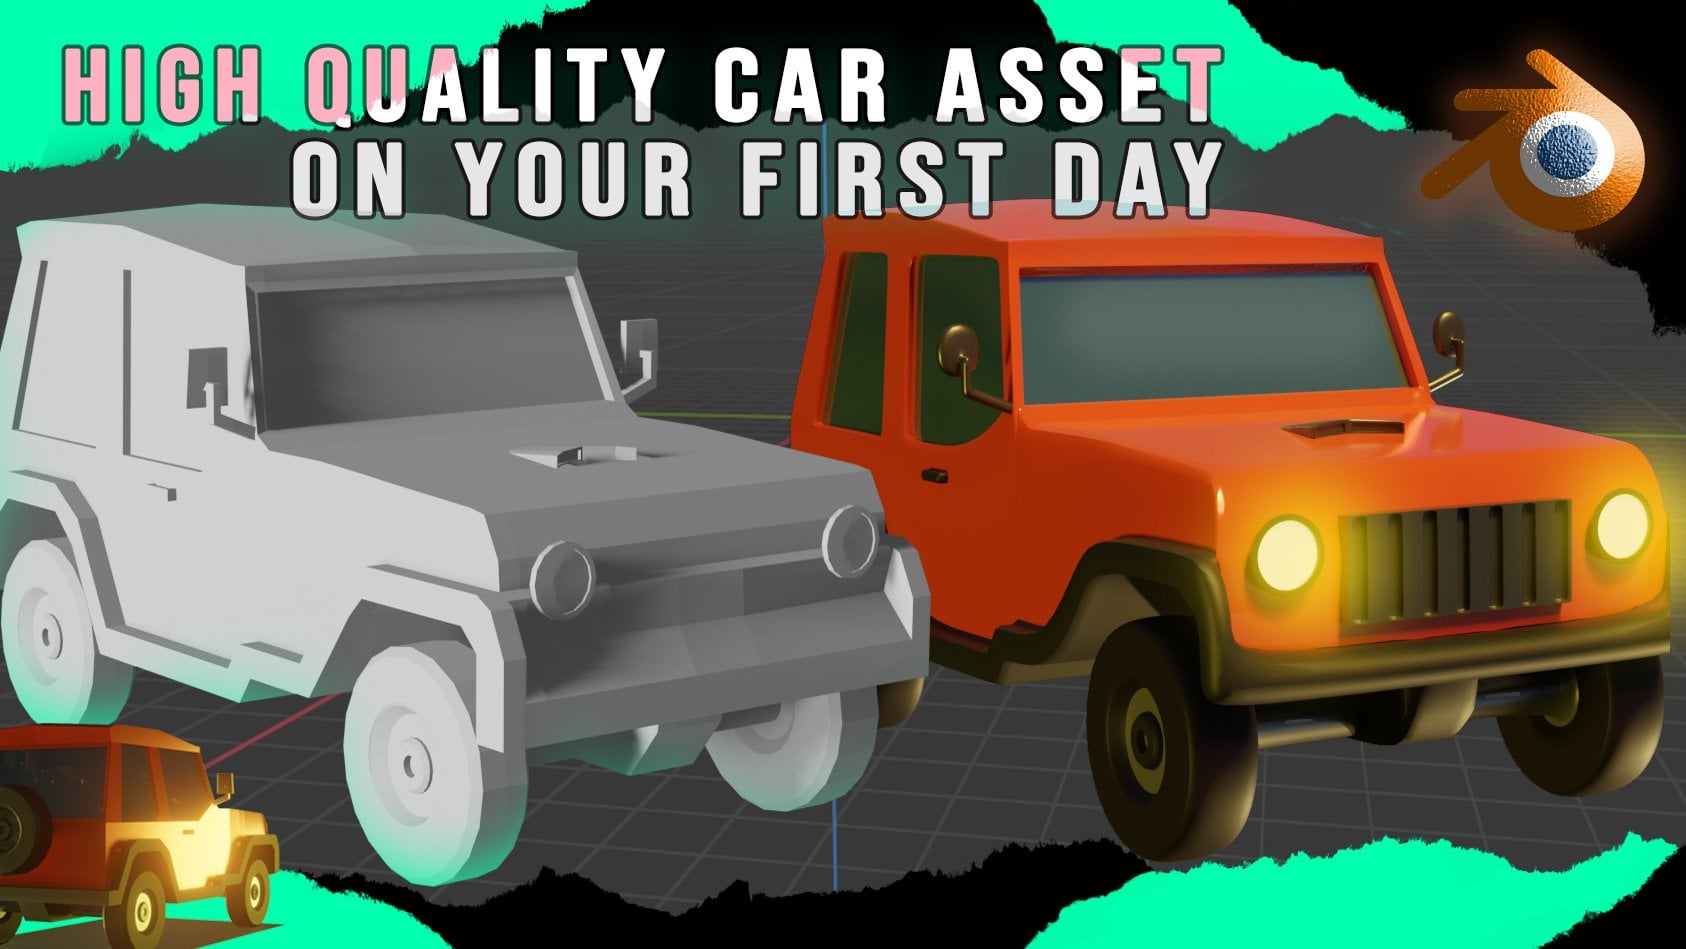
1. Introduction!: Welcome everyone to this class. Today, we're going to
learn how to create this tire that you are seeing
now on screen in Blender. This will be a step
by step tutorial, and you can follow along even if it's your first
day in blender. Also, at all times, you will see on screen the kits that I'm using so
that you don't get lost. This is a high poly tire, and we will start it by
just using a simple plane. And we will edit this
plane, give it a shape, then apply some modifiers, and at the end, we will achieve a very nice looking wheel. We will learn a lot of
useful techniques to achieve realistic looking tires, and you can use this tire in any of your projects
for your cars, trucks, robots, or anything
else that includes a tire. We will also add
some simple rims and materials so that
you get to see how to customize this tire
for your projects. So without wasting any more
time, let's dive into it.
2. Modeling the Tire and Rims: So here we are in
this new project, and we're going to start
by deleting everything. So we're going to
press the letter A to select everything
and press delete. And now we have nothing
here on the scene, but we will create a plane. So to create a plane, shift
A mesh, and we add a plane. And with this plane, what we're going to do is that
we're going to edit it. But first, we will
add a mirror modifier so that the tire
will be symmetric, and this will save
us a lot of work. So to add the mirror, we will leave the plane here as it is. And we're going
to go to top B by pressing number
seven on the numpad, and we're going to go to
edit mode by pressing Tab, and we will add a loop here
to cut the plane in half. We can do this by
pressing Control R. And this will place a loop. We can press right click so
that it goes in the center, and now we have the
plane split in half. What we want to do is
delete half of it. So I'm going to delete this
left side, for instance. I'm going to select
this phase with number three selected so
that we can select the pace. And we're going to
press delete in phases. Now we just have half
of the plane here, and we will directly add
the mirror modifier. So to add the mirror modifier, we go into Object mode. We go here to the modifier stab. We click Add Modifier. We can type mirror,
and by default, mirrors along the exacts, which is exactly what we need. So now we have
everything set up. If you cut the plane,
along the axis here, you would need to meter
along the Y axis, so you wouldn't need
to change this. But what we want to make sure
is to enable clipping here, and we can leave merge on here because we will
need it probably later. And you can leave the merge
on here. It can be useful. So what we will do now is
to start modeling the tire. So if you're asking, how will we make the tire out of a plane? Well, there is an interesting concept that we can use here, and it's a good technique to
edit something like a tire, which is symmetry, and it
has a repeating pattern. So let me just draw it here
so that you can get an idea. And I'm going to just try
to make an example here. So imagine that this is our
tire seen from the side, and this is the center
of the tire like this. What we're going to do
is that we're going to edit just a
section of this tire, let's say, some part here, and I'm going to
change color here. And as you can see,
what we want to do is create
something like this. So what we want to do is that
we want to actually edit only this part of the tire
that's within these two lines. We're going to change
again the color so that you fully get the idea. So this red part of the tire is the one that
we want to actually model. And then we will
use some modifiers to duplicate it and bend it so that it goes
around 360 degrees. And then we would just be
pasting this thing that we have created. Along the tire. And by using maybe 20 or 30
or 40 of these segments, we'll fully create
the tire and it will snap perfectly so that it
looks seamless and perfect. So now I hope that it's
a little bit more clear. And basically what we are
doing all of the time is model this red section, which is a part of the
tire and don't worry if it's flat because we will
bend it accordingly, even though if it's a
very small segment, let's say that this
angle here is small, it means that this will almost be flat, but
not entirely flat. Anyways, I'm going to erase this And you can delete the annotations by holding down Control
and clicking. So another iter be more clear, let's go back to the object. And I'm going to go to edge
mode by pressing number two, and I'm going to
select this edge, and we're going to
extrude it so E, then X, something like that. And what I will do is I
will adhere to loops. So control Rs, curl the wheel, and let's place it
here in the center by clicking right click. What I will do is
that I will just move this one a little
bit to the left. So double tapping G, G and G again. Now we can slide it
somewhere here, close. And this will be the
center of the wheel, the part that we divide it into. And here I will add
another loop here, and we can now play a
little bit with the loops. And here, there's something very important that you
need to consider. And it is that when we
are modeling this tile, we want the profile from the
bottom to follow the shape of the profile on the top or the other way around.
Why do I say this? Because let's see
that if I select this loop and I press G, then Y? Can create this pattern here. So now if I go back to Object
mode, we have created this. So if you remember from
what I didn't draw before, we'll basically duplicate and paste this section of the
wheel a lot of times. So if you press Six D and duplicate it and move
it along the Y axis, you can see that we
have this part of the tire and we want it
to perfectly snap here. So as you can see now,
it perfectly snaps. And this happens
because we have moved both the top and the
bottom together. And that's because we
have pressed G and Y while having both vertices from the top and
bottom selected. If, for instance, now I go to the vertex mode by pressing
one and I press G, then Y with this vertex. Because I have moved this up, this upper profile doesn't snap or doesn't fit
nicely with this one. So if I go to Object mode and press Shift D and move
it along the Y axis, you can see that this
it doesn't snap. There's no way that
you can snap it. And even if you
pressed it on top, it doesn't snap either. And here we have a problem. So that's very important. Whenever we make
adjustments here, we want to make
it in both sides. So if we move this
towards the top, so G then Y like
this or like this, we want to always
select both of them. Otherwise, they will
not fit like this. They will fit perfectly.
And this is very important. So always keep in mind and never make adjustments to
only one of the sites like this because then
you lose the proportions, and it doesn't snap anymore. So always consider that. We're going to press
control until here. And I'm going to show you
one trick before continuing. And it's especially very
useful in cases like this now where we are quite sensible
to making any mistake. And then if we realize
this a little bit later, we need to go back to fix. So we're going to go to edit
and we're going to go to preference And what we're going to do is that we're
going to go to system, and we're going to increase
here the undo steps. This is very useful because by default, the number
is quite low. And this by increasing it a lot, they have 150, but you
can add much more. This will make it possible
that after editing a lot, if we realize a mistake, we can go back 150 times
by pressing Control set. And this is very nice
because we can just fix a mistake that we have
committed a long time ago. So increase this quite a bit, and we will be probably using
it a lot because otherwise, if it's like a 30 or something, sometimes you realize a mistake and you cannot just go back. You will press control that, but there will be a point
where you've not to go back anymore, and
it's very annoying. So this is very convenient
here, and now we can start. Since we want the wheel
to be quite realistic, we will need to add more edges to make the shape smoother. So we're going to start by just moving this down to G and Y. And what we want is that
we want these edges, this transition
stability bit smoother. Right now, it's very
sharp and also here, this is a very sharp turn here. So we can just add some bebl. To do this, we can just select this edge and press Control B, and we can turn the
wheel to add more edges. But for now, I'm just
going to do one here. Because we don't
want to add so many. Otherwise, we will have
faces that are very small, and it will be trickier later to cast the shadows and to
get the bevels, right. So see that if I press
the control be here, it's good if you
want one or two. But if we add a lot like this, we have these faces, but
they are very small, and then this can cause
problems if we want to bevel because the faces
and edges will overlap, and this will be very
hard to fix later. So we're going to try
to keep it as low as possible while still
making it look good. So here, maybe I will
adjust two like this. And you can see that we have
a quite harmonious shape, which looks very nice. Now what we can do
here is that we will extrude this again
along the X axis. And what I will
do is that I will move this a little
bit closer here, and maybe this one as
well, a little bit closer. I'm going to select this
entire face holding number three and G along the Y axis, and I'm going to move
it down like this. So we are creating this
interesting shape. Here I will add small
bebo. Something like that. I'm going to select this
edge here and I'm going to move it a little bit
along the X axis, so G x. And what I will do now
is that I will change the view and I will go down like this or
press number one, make sure that this edge
is selected, number one, and I'm going to press G then Z like this so that
we're going to start creating the side of the tire. I'm going to press E, then Z to extrude on the Z axis, and
you can see we have this. We're going to press E again. And what I'm going to do here is first select this edge
and add a bevel here. Maybe even three times
here. One again. We're going to select this
edge here on the bottom. We're going to
make it relatively straight like this. Maybe at Some sort of curve here and now we're going to
start closing it. So something like this, like this and we're going
to finish it here. Now, what we're going to
do is that we're going to add a bubble, I would say in these
three parts here, maybe not here at the end. We will add bubble
here for these two, small, something like this. I think that I will
add small one here. So clicking it, Control
B, something like that. And I think I will move this
one here a little bit down. So G, something like that. If you hold down
shift, remember that you can make these
subtle movements. G, while holding down shifts
is much more convenient. So like this, as you can see, this starts to look a little bit like the rubber
part of the wheel. And then the rim of the
wheel would be down here. By the rubber part, I mean the part of the wheel
that's not the rims. So if you make the wheel, this would be the rim of the
wheel. Something like that. And all of this is
made out of rubber, which is what we are
designing. Not the center. This would be made out of metal, and we will do it
later just to clarify, and now we can continue. What you want to
make sure, though, is that the proportions are right. This is very important. So you have to kind of imagine
the size of the wheel. So this wouldn't make sense
if I just go press S and Z. This wouldn't really
make sense because, yeah, looking from the
top, it can be right. But there's no way that the
tire depends on the purpose, but usually the tires are
much thicker on the side. So you kind of want
to have this right. And something like this, I feel it looks quite proportional. So now we have kind
of the general shape. What we want to do now is
to add some extra details. And these details will
be like relief or, let's say, stuff that
comes out of the wheel. Let's say, like
topography, kind of, we will extrude low faces up so that they are like the
things that the wheels have. They are not entirely flat. They have certain
patterns that they make the wheel have more grip and
this is what we want to do. So let's go back to top view. So here on top view, what
I'm going to do that. I'm going to select this edge here on the bottom, all of it. You can see all of the edge, and I'm going to extrude it. So along the y axis,
something like this. And this will create
some separation between the extruded parts, which will be those faces
and the non extruded parts. We will not extrude
anything from this edge. Otherwise, if we were to
extrude and not leave a gap, then it wouldn't look
like we have extruded. We would just make
the tire higher, but we want to leave some gaps. You will see exactly what I mean with this thing that
we have left here, these extra faces extruded later when we start applying
the array modifiers. So I'm going to select
these two faces, and I'm going to
extrude them upwards. So E and Z, Z something like that. But what we can
do is that we can select all the faces
that we want to extrude. Let's say this two as well, and maybe this, something
like that. Even this one. And we will extrude them
along the axis or E and Z. Something like that, we can
always change this stuff. But for now, I think
it looks good. So here on this side, if we go back to front view, this might not look proper
now, but don't worry. This is how it should be. But maybe you want to
actually make this edge, follow a little bit
more the round shape. So we want to just
move a little bit, this edge here, going to one, front view and pressing
G on the X axis, we can kind of
follow the curvature and z a little bit, like that. Looks a little bit better.
And now we have this shape. It starts looking good,
but it's a little bit hard right now
to see the geometry. You can see that if
I'm looking like this, it's hard to see when the
edges change like this here. You cannot really tell
that there's a gap here, especially when looking it here. And if you go to seven, it just looks flat and this
is not really convenient here because we really
want to see what we are doing when extruding. So we can go here
and we can enable cavity and we will enable
also depth of fill. We can choose the type to both. And you can see now it's
much more clear when we have these edges
and these extrusions. So here we can continue
adding some details. So I will go to top
view and remembering that we always need to
edit on both sides. So whenever we
move the top edge, the bottom edge has to follow
or the other way around. So maybe I'm going to
press G and Y here, and I will add
something like this, and I will add a bebel
here, maybe even two. And what I want to
do now here as well, is to add some bevel to make it look a
little bit smoother, and we will not have this very sharp 90
degree edges here. So to do this, we want to
bevel these top faces, but we don't want to bevel this in the middle because
if we press Bble now, you can see that we are also
bebling here in the middle, and this adds nothing
but extra geometry, and it will create some issues because if I even increase
it more the bevel, you can see that now we
have weird things art ing. This is not what we want. So we only want to bevel the surrounding faces and not
the faces that are inside. So only this, for instance, we can do the same here by
holding down shift like this. We'll select the top faces. Here we can just click Shift
and hold on control and shift and kind of go
around like this. But here we can
just press shift. If we hold down
Control and Shift, it will just create the
shortest path between one edge and the other between the last edge and the one
that we are selecting, and it can be convenient. But here, it's a little
bit tricky sometimes because there are more
edges that go around. So if we select this edge
here and we want to go here, it will take this edge
here as the shortest path. But if we select
here on the side, and then this edge
here on the bottom, the shortest path from this edge to this edge are the
edges here on the side, which makes it very
convenient because it will select all of this line that
we're trying to select. So now what we're going
to do is press Control B. Then add slide bubble. Not too much,
something like this. If we go to front view, this is a good
amount, I would say. And now I will make
some last adjustments. First, I would want
these things that stick out to be a little
more square shape. So we can just
increase the scale a little bit on the Y axis. So we're going to go to
Object mode and press then Y. Something like this, they
look a little bit better. And to add a little bit of
a difference so that these two are not so
similar in this one, I will actually
select this phase, and we're going to
kind of go back to where we were at the beginning without extruding this phase. So in order to do this, we could press Control set
a lot of times, but we would lose all that
we have created here. I just want to go
back on this part. I'm going to select this phase
and this phase, the two, and I'm going to press Control plus to extend the selection, and I will press it
once more like this. And you can see that we
have selected all of this extrusion here and I can now delete these
phases, but first, I will diselect these two
edges here like that, and I actually will delete this selection here of
the edges of the bottom. Like this. And now I can just press X and delete the
edges, and we have this. So now if I go to Vertex mode, I will select these four here, press F, and this four and press F. Now we
were back at the beginning. Now it's quite convenient. And I'm going to
press Control R here, and I'm going to
create two loops, and I will leave them
here on the center. Maybe I will move them
a little bit closer. So I will select both of them and scale them
on the y axis, so S the Y to make them
a little bit smaller. And I will select these
two and extrude them. So I will go to side and I will extrude them exactly
the same level as this one. To do this, we can use snapping. So if we press E, then Z. It's a little bit hard to make it exactly as high as this. We can go very close, and
now we press E and Z. We can move it kind
of to match this, but we can use snapping. So we click this and we
will snap it on this edge. We'll use this edge from this space here to determine
the height of this one. So I will select edge here. I I press G out and then Z and
then place the mouse here, you can see that we have the exact same height here,
which is very convenient. And then these two
faces, I will beble. So control B and beble. And for the beble we
cannot really snap. We can do something
like this. And then we could just go to
Hemode and press G, then Z and match this one here. So now we have
something like this. I like how it looks, and I think that this is
looking quite good. I'm going to add
just one last detail here that it's quite
nice at the end, is that I will go
to this site here, and I was like,
let's say this one. Maybe I will move this
a little bit lower. So GG, double tap G and placing
it somewhere like this. And I will select
these two edges, and I will press Control B. Something like this,
and I will extrude them outwards. Just very little. But first, I will disable sting, and I will extrude
outwards a little bit. So E, something like this, if they are acting weird, you can just at E
and extrude wnrmals. This will fix it. So just
something very slight, something like this, and
that's maybe even too much. So oat E, like this. And if we have done this, we will delete those pass. So clicking shifts, clicking all these four phases
three and four. So X, delete phases, like this. And now I'm happy with
the look of this. So it's time to
add the modifiers and start replicating
the shape of the wheel. So this is very
simple. We are here in object mode, which
is where we have to be. We're going to minimize
this mirror for now, and we're going to
add another modifier, which is called array. It is. And you can see that it copies the same object on the side, kind of like a mirror again. But see that it's
placing it here on the X axis next to it, and this is not what we want. We want to place it after this, so it has to be
positioned on the Y axis. So we're going to
type zero on the X, and we're going to
type one on the Y, and it will not be exactly one, but this is the
separation between these origin points
of the object. So I'm going to go to the side view by pressing
number three. And we have to reduce
this factor of Y. Maybe for you, it's different. It will not be the
exact same number, but we want to adjust it so
that they match perfectly so that they touch one to the
other, but very slightly. So I'm going to show
you how to do it. You hold down shift to make it slow and you kind
of drag it down or up until they are very
close. Something like this. Now, you can see a little bit
if you increase the count. How the wheel will
look. And this will be kind of the pattern of the wheel, which is quite nice. But for now, we'll
keep it at two, because what we want to do and it's very important is to make sure that these are as close
as it's humanly possible. So I'm going to just separate
them a little bit now, and I'm going to go
very close here, very, very close to this
edge like this. I zoomed in a lot, and now I'm going to start
moving this again. And when you see that it
starts to get close like this, what you're going to do
is that you're going to press Shift Z so that you go to wireframe or you can
press up here to wireframe. It's Shift Z, not Control Z. Don't get confused
with these two because otherwise,
you'll go back. And what we are doing
is that we're moving this edge here towards here. You can see we want to move this here until they are one
on top of the other. Okay? They will never be exactly
one on top of the other, but we want them to be
as close as possible. So we will start moving this
a little bit, decreasing it. And as you can see
for me, zero dot 85 places these two edges
very close to one another, but it's not close enough. I want them to be much closer. So now if I drag here, while holding down shift, it's not going to
work anymore because the step of the
movement is too big, so I will have to start writing
and adding more decimals. So eight dot five, and I will try typing
number three here, 0853. It's not enough. So I will actually
need to drop it 0848, something like this. And this, you can see
that it has placed this edge that was before
on the right side. Now it's even too far away. So I need to place it a
little bit further back. So 849, you can see now
they are very close. So when you are
something like this, what I want you to do is that you need to get even closer. So let's zoom in. And moving. And if you use them in a lot, you will see that the edges
start to be far away again. And now I will move
this a little bit more. So 849, two, for instance, this is too far. So 8489. So this is starting
to look very close. 08489, and I will
try putting four. And as you can see now,
this is very close. And this is what I usually do. I go up to five decimals of trying to be as
close as possible, and you can go another one. But this is right now
extremely extremely close. I will go back and zoom
away and just press T Z. And like this, if we
increase the count, we can make sure that they are super close to one another, and this is very,
very convenient. What we will do now is that we will increase it quite a bit. And as you can see, this will
be the pattern of the well. You can always still go
back here and change. So if you go to Edit mode, you could just select
certain things like this. Let go to Vertex, and I could just press G then Y. If we want this to be
smaller like that, of course, then we
would need to go back and adjust the factor. But if we just go here and
scale it down on the Y axis, for instance, the factor
will remain the same. So you can kind of achieve
a shape that you like. So that's why I will
kind of want to make it a little bit
more square shapes, something like this. I
think it looks good. I'm going to verify that this is still very close
and it is, okay? So, something like that. And now what we want to do
is that we want to actually bend this so that it kind
of goes around in a circle. So to do this, we need
to add crater modifier, which is called simple
deform. Simple deform. And as you can see,
this looks super weird now because it doesn't
have the right settings. So we want to go to
bend because we want to bend this array in a circle, and this will not
look good still, and it doesn't matter if
you change the angle. This is not what we want to do. What we want to do is
that we want to add an object here so that it has an origin for the bend that will determine how to
bend this array. So we have to go to Shift A and making sure that
we are in object mode. We will add an empty plane axis. And now when you
select this origin, you can click here
and select the empty. And now when we rotate the
empty along the X axis, because we want this array, this array here to
be rotated along the X axis so that it will
kind of go in a circle. You will see that if we enable the form, you can
disable it here. It's quite useful sometimes
to see what's going on. But now if you select
the axis here, like this and you rotate
it on the X axis. You can see what's
going on. We start to kind of get the
shape of the wheel. In fact, what you want to
rotate it is -90 degrees, so -90 like this. And you can see what we have. This is starting to
look quite good. But here is when we need to actually open again the array. Also, we need to
turn on merge here, very important this option. We will increase the
count a little bit, and we will increase the angle to 360 or you can just drag. But you will see what
we achieve with this. See that now at 360. First, it doesn't
actually connect. Okay? This is completely fine, and it was expected to happen. So don't worry if it doesn't connect, we will fix this now. But with the count,
you can actually decide a little bit how big
you want the wheel to be. So if you increase the count,
you can see what happens. Now here it's a
matter of actually choosing the proportions
that look good to you. If you go too much,
then the wheel starts looking
very out of shape, very weird and not realistic. And if you go too
low, it kind of looks way too thick. It depends. If you want the wheel to be for something very robust
and like a truck, maybe you want the wheel
to be a little thicker. If you want it to
be a car, maybe something like this is okay. But we're going to go
for an in between. So something like this,
I like how it looks. I want my w to be quite robust. So I will decrease
it a little bit. Maybe 44. I think
it's a good shape. I could see this wheel existing
in real life, as well. So I like how it looks now. Now we're going
to fix this here. Also remember that you can
still go back to Edit mode. And if you want, you
can just press S and skelet along the axis
or however you want, and you can still go back
and modify certain things. So if you want, you can
just, for instance, select this and
extrude the inside. And if you want to place
like something like this, maybe it's quite nice. I will just maybe extrude it down a little
bit, maybe even this one. Extrude inside. It looks good. I think it looks
quite good as well. Is that an extra detail. Now what I will do,
maybe is that I will go to Toby and
I will scale it down on the Y acid so Y a little bit. And I will move this edge
GG little bit closer here. And maybe this edge as
well here that's kind of falling behind Gigi and
I will place it here. This kind of adds like
an interesting bubble. We could select also these
edges here on the top, like this and add the bubble. But for now, I will
leave it like this. So now we will fix
this gap here. So we're going to press number three to go to the side view, and we want to connect this. So what we have to do here is exactly the same as we
did with the factor. So I will minimize
the array here, and now we have to increase
the angle a little bit more. So in order to do
this, if you drag, you will see that you
cannot go higher than 360, but you can type. Higher. So let's go 361. You will see they get closer. So we're going to zoom in a lot, something like this for now. And I'm going to
perceive that and we want these two I
just to be close. If you don't see
properly enough, you can just select the
object and perceive that, so they will become
orange at least, and you can see them. So 361.5. Now that's a little
bit even too much. So if I go dot four,
it's not enough. We're going to zoom
in a little bit more, so it will be probably 45. Yeah, a little bit more, 45 and another five exactly. Now they are very close, but just if you think that
they are very close, go and zoom in a lot, and you will see that
they are quite far. And I like to put again, maybe another decimal here. So five, five. Let's try three or
four. It's not enough. Maybe seven. It's not enough. Maybe four, five,
five, and eight. You can see that they
get rounded the numbers, so sometimes you need
to delete so four, five, five, and nine. Yeah, I think this
is close enough. So now if we zoom out
and press siivee, you will see that
this is how it looks. But we need to make one final adjustment
here because even though these
vertices are very close, they are still not connected, and we want to
connect them so that the tire is a continuous
object and it doesn't have any gap or discontinuity here because even
though they are very close, they
are not connected. So we want to connect
this of course, save us a lot of issues with the shading
and the materials. So what we have to do here
is that once we are happy, let's make a check. I'm happy how it looks. Maybe I want to
change one last thing is that I don't like this
thing on the center, this gap on the center, and I think it's
a little bit too thick in comparison
with this on the side, that are a little bit smaller. In fact, they are not
really symmetric here. This gap here is smaller
than this one here, and this one here is the
largest one in the middle. We can adjust this a
little bit quickly, but the one I'm more concerned
is the one here there. So to change this, I'm
going to go to Top B. And I'm going to actually hide the simple
deform and the array. So now it's much
easier to work with. We can see we have
this empty object that's kind of here showing, and maybe these lines are getting you confused and you are thinking that these are
edges. Just you can hide it. Now, you can press the
letter H or hide this. But we're going to
rename it first, and we're going to
bend origin maybe like this so that we know
and I'm going to actually add empty empty. Like this, so that we know
it's an empty object, and it's for the invent
origin of this modifier. And I'm going to change the
name of a plane to tire. Okay, what we want to do now is, as I said, we want to make
this a little bit closer. So what I want to do
is I want to select all of these edges here. So all of these and
move it towards here. So this is very simple if
we go to top BO like this, and we can press heap that
and switch to vertex select, and I'm going to box
select all of this. If you don't have
box select enabled, you can go here to this
tool and press all W, and it will change
till you have the box select here like this, and I'm going to press G then X. Sap set now you can see that the gap
is a little bit smaller, and you can change other
stuff if you want. Maybe if you want this
to be different hep set, you will move this slightly
egg, but not too much. Something like this looks good. Maybe we can even
remove this line here. So if we hold down and click Control X, we
can get rid of it, and maybe now we can
press like this, use that and move all
of these on the Xaxis. But I will not really
do it because we lose a little bit of resolution here and it looks a
little bit worse. Maybe we could do something
with these two ages so maybe you select these two and we press
later I two inset. I mean, we can
extrude something, but this is up to you. I will leave it like this, and I will enable this two again. You can see now it's better. There's no big gap anymore
here, which is good. And we have this good looking
tire. That's very nice. So now there's a very
important step to do, which is to apply
these modifiers. But what we're going to do
is that we will enable, again, this empty object.
So you can see it here. Little bit hard to
see. It's very small. You can always scale it up
if you want, so you press S. You can actually now sit
a little bit better. What we want to do is that I
will select both of these. So both of these
selected, very important. And I will just make a backup. I will just press Shift D and move it along
the X axis like this. And with these two selected, there are copies here. You can see 001, tire 001. I will press the letter M, and I will click here
new collection, and I will name it tire back up. Just in case we need to fix
something later because remember that when we apply the modifiers here,
there's no way back. And when we apply the modifiers, it's called destructive editing, which means that we
will apply everything, and we will not have
any more the control of disabling this, and we will not be able to go back to this individual piece. So even though it's necessary, we still want to keep
this kind of as a backup. If we mess up something, we can always go back and use this again
and duplicate this. And this is a very
nice thing to have. But what we will do is
that I will just hide it because we will likely not
need it, but just in case, because as I said, if you go
to this and to apply them, you go to the object mode
with the tires selected, and you go from the first
on the top to the bottom. So you put your mouse on top of the mirror and
you press Control A, then Control A for the array and Control A for
the simple deform. Nothing has changed, but check what happens when
you go to Edit mode. Of all the vertices,
everything here. So now this is a very
high poly object. There's a lot of
things going on, and now it's much harder to change anything
here on the wheel. If we wanted to change the
separation between these two, then we would have a
problem because we need to just try to select everything here like this loop going
around the wheel. So that's why we need to
be happy with what you do before applying
the modifiers. So when we are here,
actually the middle, we don't really need to apply. So we can apply the
array directly, but making sure that we
have merged on like this. And then the simple
deform Control A, apply. Now there's something
very important here. I didn't apply the mirror
because we can add the rims of the wheel by
also keeping the mirror on. So whatever we do on one side of the wheel will happen
on the other side. So if I just click two in
edge mode and select this, if I press the letter F to fill, you can see that now we have
the tire kind of completed, and it will copy on the other side as well,
which is very nice. But I will press Control Z. Once we have this, there's something very important
that we have to do, which is the fact that we
still didn't connect the gap here that was think we
still didn't connect this, and this is very
important to fix. Otherwise, there's no
way this will render properly because we will have overlapping
geometry at some point. So in order to fix
this is very simple, we just go and
select everything. So in edit mode, just go to Vertex mode
and press the letter A. Now what we want to
do is to go to mesh, go here to cleanup and
go to merge by distance. And you can see here,
remove 30 vertices. You should see
something similar. Otherwise, it means
that whenever you placed your vertices very
close to each other, they were not close
enough to actually merge. So that's why we wanted
to place everything so close up to four decimals so that they
actually get merged. However, if they
didn't merge for you, you can increase this a
little bit, but not too much. Otherwise, you will start
merging all the faces, but you can see that
if you increase it a little bit, it starts, you can see decreasing and merging more
and more vertices. So of course, whenever you
use this tool, clean up And merge by distance, you need to make sure to have
it at a very low distance. So 0001 is the one
that comes by default, which removes 30
vertices for me. And I'm pretty sure the 30 vertices are the
ones that are here. But of course, you can go
select everything mesh, clean up merge by distance. If you apply it again,
it shouldn't merge, of course, because they
are merged already. But you can increase
this a little bit. Maybe another decimal go very slowly, and then
it should merge.
 Auripher ∞, Creator