Transcripts
1. Welcome to the Course: Welcome to the Blender course. If you ever wanted to create three D models and environments, but felt overwhelmed by Blender, this class is the
perfect place to start. My name is Caroline Code, amateur D artist with
seven years of experience, work with Blender for
stylized environments, architecture visualization,
and also T D game art. Over the years, I worked
on everything from simple beginner projects and Blender to more advanced ones. In this class, I'm
going to guide you through a Blender beginner
friendly workflow. You can learn Blender by creating Tree D from
start to finish. Blender is an amazing
treat software with tons of features. It already helped
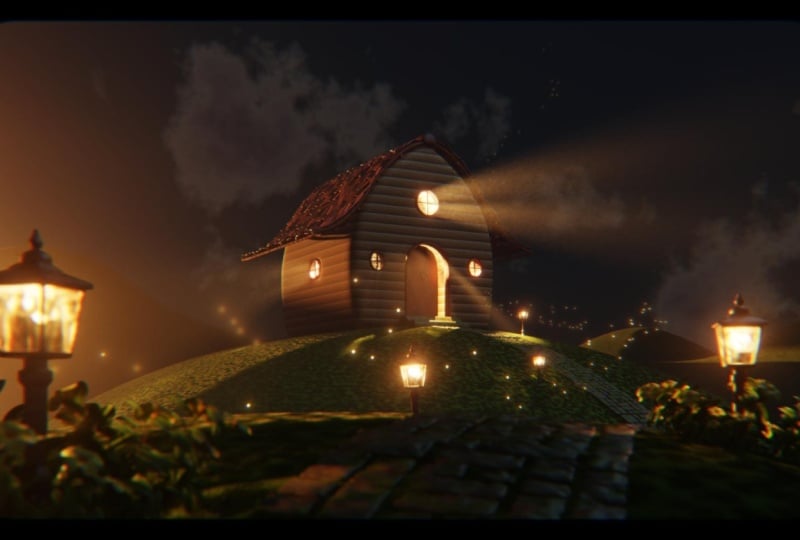
me by map creating, logo animation, video editing, and of course, in numerous treaty scenes and environments. This course, you will build a complete fantasy cabin scene while learning the core
fundamentals of Blender. We will start by getting
to know the interface, the navigation, and how to
transform your objects. Then we will get to know the
fundamentals of TD Modeling, like vertex, edges, and faces. Also, it's modifiers and
simple hard surface technique. As we progress, we will start to build the fantasy cabin itself, its structure, adding details, and organizing our
scene properly. After that, we will
bring our scene to life, adding materials, light, setting up the camera and render techniques to have an amazing
polished image at the end. This project won't require
any external assets, everything that will build
all of the textures will be the default built in procedural
textures inside Blender. By the end of this class, you will understand the core
Blender workfw and feel confident to create your own
tD models. Et's get started.
2. Downloading Blender & First Look: Welcome to the first lesson
of Blenders beginners course. In this lesson, I'm
going to download Blender and having a first
look at the interface. I'm going to show you
how you can manage your projects and what
you need to get started. So here is Blender's website. Blender is an open
source software company. So this means that
it's free to download. So we can go here
to the top part to download and click this
button right here. Once you click Dwload
you'll be redirected to the screen right here where you can contribute to Blender. Since it is open source company, you can donate monthly
or one time if you want. So here on the top
bar, if you go to Download and right here
on the requirements, you can see all the
settings that you need to run Blender smoothly
on your computer. If you have these
computers requirements, a keyboard with an Pad and
a mouse with a mouse wheel, you are ready to get started. Also here under support, you can see Blender
documentation. If you have any doubts,
you can search right here. Okay, so now my
download is finished. So to install Blender,
it's pretty easy. Just follow here next, choose your directory,
and click in Stop. So let's open Blender
for the first time. The first thing you see will be a splash screen where we have an art and version
that you're using. You can create a new file, or if you're already
worked with Blender, you can open your recent files. So you can click anywhere
to close this window. This is Blender's
main interface, and it is divided
by three areas. The first one is your
file management. Is this here on top? Then you have your different workspaces,
as you can see here. And the last one
is the status bar. It's right here at the bottom, and it gives you tips
and shortcuts about how you can move your sin. So the first thing
that we are going to do is give this project a name. So you can see here right on the top bar that we have
unsaved Blender 5.1. So you can go here to file, and let's go to save S. You can choose your folder and
name your project. So Blender first project. Click Save. Now you can see that your project is
named right here. Let's go to File again and see other options that we have. Here we have Link and append. These are both ways
that you can bring objects from another Blender
file to a current one. You also have Import and Export. Let's Import FBX, for example. Here, I have an asset
library that I separated, and I have a flower FBS, so I can click here to open it. You can also drag and drop file. So let's remove this, and I'll go here to
my browser and I can drag and drop
on my viewport, and you can also import
objects this way. So let's remove the cube. Okay, now I have a
flower in my project. Let's go here to the
shading workspace. You can see here that I have my model and I have
some textures. If you can see right here, if I click Open Image, it directs me to the file
where my texture is located. Now let's talk a little
bit about file management. So if I saved this
file and don't bring my textures to another
computer, for example, and go to open my
dot blend file, this flower will have
missing textures. So let me show you an example. I have all my
textures right here. So let's see if I move them, for example, in another folder. Now, I saved, and I'm going
to close this project. As you can see here, the flower turned into a
bright pink shader, which is signaling that
you lost your textures. So you can go here to file external data and
find missing files, go to Do direct
folder. And click. Now, everything is
reassigned automatically. Keep this in mind when you're working with
textures in Blender. Now, there's one more
thing that I want to show you about file
management on Blender. Let's say that I have
this flower here on this blend file and I want
to use it in another file. Blender has a system
of libraries, so you can go here on
Edit and preference. You can see right here under file paths that we
have asset libraries. Let's create a new one. I'm going to use this one. So here you can see
that we have a library. You have an import method. You can pack, you can append, which means that
you can bring from another Blender file and be
able to modify this object, or you can link where you
won't be able to modify it. Basically, that's it. I
have an asset library. If I go here, I can go to Asset
Browser or click Shift O. You can see that I
have nothing here. Let's press T and go
to our asset library. We already selected. So you can see there
is nothing here. So what we need to do is to save a dot blend file on that folder. So the first thing I need to do is go here to my outliner, my flower and click
at Mark as an asset. And let's do the same
thing for the material. And mark as an acid. Now I will go to File, Save S, and save my fowl
into the asset browser. I'm going to name it my flower. Okay, so now I'll open a
brand new file on Blender. You can see unsaved. Perfect. Now let's go
to the asset Browser. You can see that I have
some defaults here, but if I go to my asset library, you can see that I can
bring my object here. So this is one way that you
can use your asset library. So that was a quick
overview of how you can manage your projects and
files inside Blender. In the next lesson, we're going to learn a little bit more about workspaces and how you
can navigate your viewport.
3. Understanding Workspaces and Viewport Navigation: Welcome. In this lesson, we're going to learn more about Blender workspaces and how to navigate your
three D viewport. So before we get started, I will go to edit
and preferences. I want to increase
the resolution scale of my screen so you
can see better. So I can go here to
Resolution Scale, and you can see that all of my texts are increasing in size. So I will leave it at 1.1. Here you can customize a lot
of properties in Blender. Since the Blender
is an open source, we have a lot of add ons. So you can add, for example, a different format exporter. For example, this one, GLTF. You have Rig addons, UV, a lot of options. I'm going to add the
screencast keys. As you can see, my mouse showed up here at
the bottom left, so everything that I
click will be mirred. So let me activate it. There we go. Okay. So now let's get started looking at the different workspaces
that we have on Blender. This is the first one layout. So it is composed by four different editor
areas. You can see here. This is the first one is
the three D viewport. On the top right side, you can see the outliner. The outliner is basically
your scene collection. So you have a list of everything that you have on
your main viewport. For example, we have a camera. We have our flower that we edit lesson and we have a
light. You can see here. At the bottom, you
have the properties, and I like to divide the
properties in two sets. The first one, you have
render settings, the output, some scene properties, and your world properties
like the environment. The second one that is
not showing right now is going to be your
object selected. Let's go here to our flower and select and click
right left mouse. You can see that right
before the collection tap, all of these
properties got dded. We have our object properties, our modifiers that were going and get into the next lesson. Articles, physics, everything related to
your selected object. If we go here at the
camera and select, you'll see that this
property change. So keep in mind that this bottom part depends on what you have
selected at the moment. Let's go to our final editor
area right here below. Right now, I'm going to
show you how you can move around these editor areas. When you go to this line here, you'll see that you have
an era pointing both ways. You just click your
left mouse and you can do this for each one of them. So let's do this
with the timeline. This area is the timeline. Right now, we're going to hide it because we're not going
to use it right now. So for you to see, go ahead and click Space
bar and you can see that your timeline starts to run the starting frame
and the end frame. We can use this
to do animations. Now I'll go ahead
and click Shift and the left arrow to go back and
we are at number one frame. To close, you can personalize each and one
of these workspaces. You can go here
right at the bottom, the top Editor area, click and hold your left
mouse and drag it down. You can see here that
it shows join areas. What this is going to do is
remove our less editor area, that is the timeline right now. Now we only have three.
Let's select tar flower. Let's take a look at the different workspaces
that we have. Right beside layout,
we have modeling. That you can see when I
switch from one to another, it already switched
to the edit mode. But we are going to see how we can edit meshes
in the next lesson. Let's go to Sculpting. You can see here all of
your brushes that you have. Then we go to UV editing that we're going to
take a look later. But basically, you can unwrap
your mesh into a flat to the texture surface
to paint like I have it here or edit
different textures. Then we have texture paint. Like I said, you can
paint your texture. You already see how
this is working. Then we have the shading one. This is our material shader, and these are our textures. Then we have the animation with the timeline that
we had on layout. Then we got rendering here, it's not showing anything
because we need to press F 12 and you can see that
another window open here, but you can also see right here. Et's go ahead and close. In composition, you can grab
your rendered image and add, for example, glare, Bloom, vignette, you can edit here. Then we got geometry nodes, which is pretty exciting. It is a node based procedural
modeling function. Right here, this is
pretty exciting. Geometry nodes is procedural
node based feature. Then we got even
Pyton scripting. So as you can see, we have some advanced workspace and
some more simple workspaces, but we're going to start
right now with our layout. You can also add another
workspace if you want. Let's go ahead, start boarding. So here we have our
sequencer and the timeline. So this is pretty exciting and you can
create on your own. So let's go back to
our layout workspace. So this is our three D viewport. On the top right corner, you can see here that
we have our gizmo. You have the X, xs, the Y, and the Z. The X and Y represents
here your floor. As you can see here,
we have positive X, negative and positive
Y and negative. And your Z is the up Xs. In Unity, for example,
you have the Z, it'll be the Y, for example, and your
Y will be the Z. Keep in mind, the Blender
is a right handed software. Let me do ContrZ just so
we don't get confused. I'm going to go
to the selection. Before we start moving our
viewport camera around, I wanted to show you that
you can go here to Gizmo and click your desired viewport. Here we have our front
view, side view. And top view. And this you can control also with your num pD. So
you can see here. If we press numPEt 31 and seven, we can alternate
and this rotates accordingly even an under view, you can see we have negative Z. Let's go back to our nuptT. Now, before we learn
how to orbit R view, I want you to explain what
is our three D cursor. So you can see it
right here on our 000. What this means zero X, zero Z and zero Y. We have our t d cursor. Here, let me show you. If you go here to cursor, you can see that we
can move it around. If I press Shift S right now, you can see that
I have the option to move this cursor to grid, selection to A, but I will do
this cursor toward origin, and you can see that it moves exactly into the
zero, zero, zero. This is the pivot
point of our scene. I will not always
be your pivot point of your object
because if you move, let's go to select box because if we move
our object here, your object origin be different
than your world origin. So keep this in mind.
You can see here by pressing N and going into item. You can see here that the
location of a object changed. If we go to zero, now it's
exactly as the world. But we will take a look
at this next lesson. Let's go back to orbit. So we can orbit by pressing the middle mouse wheel and
moving our mouse around. You can see that as I did this, our viewport was changed from orthographic to a perspective
view. Let's do this again. This is controlled by pressing
the five on your numpad. You can switch from perspective to orthographic view
by pressing five. If we pressed one or three, it's automatically an
orthographic view. You can see if I
press one and five, it switches from orthographic
to a perspective. You can also control this by going on your
sidebar. Into view. You can control the focal
length of your viewport camera. It's different than your
outliner camera right here. It's just your viewport. Let's switch to perspective that we can see a
little bit better. If we orbit, we can
control of focal length, but usually it's best to
leave it at 50 or 30. Right below it, we have our
clip start and clip end. If I increase my clip, you can see that we have a clip cutting or object and
we also have a clip end. If I reduce, you can see that it starts slipping from
behind to the front. Keep this in mind. If sometimes you have
an object too far away from your viewport
camera, it can disappear. So let's continue
our navigation. If you want to pen
from side to side, you need to click Shift and your middle mouse button and you can pen up and down
left to right. So we can combine
in both of these, you can orbit, and you can pen. Of course, you can also zoom zoom in and zoom out
with your mouse view. If you get excited
and just start spinning around
and you get lost. Oh, my God, where is my object? You can press home on your keyboard and it will
frame all of your objects. Or if you have an
object sled it, you can press coma in the numpad and it
selects your object. For example, if I have
my camera selected, we can press NuPAD
and as you can see, we start to orbit around
the selected object. Let's click on the other object, NuPaD if you forgot
any commands, you can also check
our status bar. You can see right here
really small that we get some tips about
how we can navigate. We have left mouse select, rotate view, and you
can see right here. As I'm rotating, if I press
right click of my mouse, it cancels and goes back to
the way that it was before. We have our options
here that we will take a look later
in the next lesson. But yeah, if I press Shift, you can see here
that it shows how I can pan my view
and I can cancel. I can set my three D courser
by pressing my right click. So yeah, right now you have
an overview of how you can navigate your report and what are the
different workspaces. In the next lesson, let's get into our object, and we will talk a little
bit more how we can modify, transform them, scale, rotate, and also how they
interact with each other.
4. Understanding and Transforming Objects: Welcome. In this lesson,
we're going to be understanding and
transforming our objects. Here we have our flower. This flower is considered
one object in Blender. Let's select it. If you don't have your tool box showing here on the left side, you can press Right here, the first select box, if you long press
your left click, you have a few options of how you can select your objects. For example, if we select Lasso, we can select a lot
of objects at once. I like to use tweak
because you can click anywhere on your
object that it will select. If you have circle,
that won't happen. It will only select if you pass your mouse through the
origin of your object. As we mentioned before, all objects have
an orange point. In this case, it's right here. What does this imply when we are transforming our
objects in Blender? Let's go here. Let me just this is our cursor,
as we said before. Now we have move,
rotate, and scale. Let's start with Move. You can click here or you can
press G on your keyboard. You can see that you
can move your object. Usually, you don't want
to move it like this. You can go in your Gizmo
that it shows right here. You can press on
this little arrow. I'll be locked on your Xs. But you can also just press G. After you press G, don't
press anything and press Z to lock on Z or X and Y. This is the option that
we tend to use most. This is how you can
move your object. Let's go to rotate. You can press right here. Or you can press R
on your keyboard. As I said, when we press R, it's freely rotated
based on your viewport. But if we do like this, we can rotate on Z, we can rotate on Y and on X. As we did on move,
if we press R, we can rotate it in Z X and Y. Let's go to scale, and
it's the same thing. You can scale Z, X and Y. Let's leave it like this. Also you have a transform
where you have all of them in one if you want, like this. But we don't use it that much. Now you can see that I
transformed a lot, this object. Let's move it also. You can see what you did
with this object by going here on the left side bar
and if it's not showing, you can press N on
your keyboard to open it up or click
this little arrow here. But it's easier to press N. Let's go to item. As you can see here,
you will have transform where it shows everything
that we did on our object. You can see here that we
move 3 meters from our Y. We rotated 700 degrees here
and we scaled pretty messy. You need to keep track of
what you do. Your object. If you want to go back the
way that it was one, one, one scale, you just click and drag to the
bottom and press one. You have one scale
on X, Y, and Z. You can do this for all of them, so rotation and everything goes back to the
way that it was. Let's say that just in case
you want to scale this object on Z and you want it to stay
like this for some reason, you can see here that
our scale is one in X, Y, and Z, we have 1.8. So if you wanted
to keep this way, you can press Control A, and here you can apply the transforms you
did in this object. You have here apply location, rotation, scale or R. Let's go with scale. You can see that now our value for Z is one, and this is one. This might not seem too
important right now. But when you start
working with modifier, this will be crucial for
you to not get any errors. But let's go back
the way that it is. Okay. One other thing
about transforming your object is what I said
about the word origin. Here we have our word origin
and our object origin here. You can see as we rotate, it follows this origin, as we rotate Z. If we go here to
transform pivot point, you have various options of how you can transform
this object. So here we have three D
cursor. Let's select it. If I move, everything
stays the same. But let's say we have our object right here and I
try to rotate it. You can see that our pivot
is still on our word origin. Keep this in mind when
you are rotating, you also have individual origins if you're selecting
more than one object, a median point or
an active element. So let's duplicate our object. Before we start
duplicating our object, I want to show you the difference between
object and object data. Here we have one object right
here on our property step, we can see this object right
here and it's named flower. You can see here also in
the outliner named flower. But if we go down here to data, you can see that we
have another name. It's flower 0.002. This is the name of mesh data. You can have a lot of objects, different objects with
the same mesh data, and that is called instances. Let's rename this by
clicking and saying flower this is flower, let's duplicate this object. You can click Shift
D. I'm going to hold middle mouse and drag it towards what x
is I want to move. This is another way that
you can lock your object. If I want, for
example, in the X, hold a little bit
your middle mouse and direct your mouse the
direction you want to go. It's a pretty nice way to do
this. I'm duplicating it. You can see right here
that my mesh duplicated. We have flower 1.001. That is the way the Blender differentiates different
names when you copy them. If I click my origin
flower, can see. So these are two
separate objects with two separate meshes. Let's go to our outliner. Here we have flour, here
we have flour 0.001. We will get more into
this in the next lesson, but let me show you what happens if I go to edit mode to edit this
mesh and move this. Just this object
is being changed. So now let's copy this
object as an instance. Like I said, different
objects, one mesh. To do this, instead
of shift D, is. We click Add D. Let me
move it right here. Now you can see we have another
flower, a flower 0.002, but we have the same
mesh here on data, we have our same mesh. If I want to make
this mesh unique, I can go here and click to
make a single user copy. You can see that I have another, but let's go back Control Z. We have flower one. If I go here to my
origin flower and I go to Edit mode and I start
to move things around, you can see that this
is linked CIS one. So this is pretty useful. It's used in all game engines. You do this to reserve power
to increase performance. And it's really important for you to notice that early on, not because you need to
use instances for now, but just so you can differentiate between an
object and a mesh data. Now, before we get
into our last lesson, there's one last thing
I wanted to show you. If we go here right
below a top bar, we have a snap that we can snap basically anyway
that we want our grid, on our vertex, on our edges, on faces, whatever you
need at the moment. But let's start in
a smddler grid. If we move here at the top right corner and
click right here on overlays, you can see that we have guides, a grid, a floor, and our axis. If we select Z, you can see that our
axis is showing, y, you also have your floor
and you also have your scale. If I have this Nap activated, I select and I go G and move, you can see that it's
locked in this grid. One by one. Even if I
go freely, it's naps. Let's go here and let's reduce, for example, let's use 1.5. You can see that your
grid also reduces. Let's take a look at
the different views that you can have
on your viewpoard. If we go on overlay to geometry, you can activate your frame. I like to leave this on.
Then we have our X ray view. We have our iframe, our solid that it doesn't
show any material. Then we have material
preview and our render. Next lesson, we're going to get into objects and how
you can edit them. We will see how materials
work really briefly inside an object and see
how we can start modeling.
5. Understanding Objects, Vertices, Edges & Faces: Welcome. In this lesson, we're going to learn about what
constitutes an object. We're going to learn about
vertexes, edges, and faces. This is where we
stopped at last lesson. As much as I endure
these flowers, let's remove by
clicking and deleting. Just so we don't
delist the last one, let's move it to
another collection. Let's go here in
our top right side, we have our outliner. We can see we have
a scene collection and a collection inside it. If we go here and click with the right button on our mouse, a new collection, we'll
have a separate collection. Let's double click
and we can rename it or we can click F
two on our keyboard. Let's name it Flower. Now we can select our flower on our outliner
or on a viewport. Let's do it on viewport. We can click on our
keyboard to move. Let's go here to flower and our object will
be in this collection. Now we can control
what happens with it. We can deabilitate
the whole collection or hide in our viewport. Let's disable our
entire collection. Now, our object is hidden. Let's start with a simple
cube as all tutorials do. You can press Shift A, or you can go here right
below our top bar, go to Ed, match and
select our cube. Now we have a ue.
This is our object. Let's move it to
the correct folder. You can also go here
on the outliner, press your left
button on your mouse, move it to this collection. You can do let's hide our
light and our camera for now. Now, before we start moving this box around
and editing it, I want to add another
area on my workspace. Let's move this to Modeling. You can see that when
we move to Modeling, our mode already switches from
object mode to edit mode. Just switch Audit mode, switch between edit
mode and object mode. You simply just press
Tab on your keyboard. Tab really simple. I want to add another
area in this workspace. I'm going to edit on this side, so I'll click and drag
to d another area. I'll go here on the top
left side of every area. You can switch to any
area that you want. Here we have three
DVPortimage editor, shader. I'll change this
one to spreadsheet. I will also open the sidebar here and let's select our
cube. Why did I do this? Here on our spreadsheet, it shows all of the
positions of our vertex, our edges, and our face. Let's start with vertex. Just like our object
has an origin point that right now is 000,
as we can see this. If we go to edit
mode, pressing tab, you can see that
now we have control over all of the
vertex of our cube. Let's select our object and go to edit mode
by pressing Tab. We can see here on our transfer
that nothing is selected. Let's select this vertex here. Now we can see that
this vertex on X is one on Y is minus one and one on Z. If we look at the
views, this is correct. We have the position.
Each vertex of our mesh has a
origin on our world. Each point of our cube has an exact location
on our object. We can see here that
we have zero to seven all of the positions
of our vertexes. If we go to edges, you can see that right now
we are selecting vertex. If we press two on our keyboard, we switch to select our edges. As you can see, we
have 12 of them. If we press three, we
can select our faces. You can see that we have here
six faces, all sharp face. When you are in edit mode, sometimes you want to
select all of your object, so you can press A on your keyboard. It
selects everything. We can select A and press
one to select all vertex, two to select edges, and three to select
all of our faces. There is another type of
selection that we can do by pressing all I
select edge loops, so we can see this
constitutes a loop. As you can see, you
need two vertex to form an edge and
you need four edges. Or three to form a phase. Let's switch to ptographic view. All of your faces have a
front face and a back face. The front face is the direction that
your normal is facing. Let me show you the
concept of normal. Let's go to mesh edit mode
and we can go right here. It says normal. We have
our vertex normal. Custom normal and our face. Let's select our
face just so we can see and I will
increase its sight. You can see here that we have this just visual lines indicating our
normal the direction that our normal face is headed. This is our front face. If we go here, in overlays
and select face orientation, you can see that
nothing happened. But let's select all
of our faces with A and press Alt N. You can see that now I got a normal step open and
let's flip our faces. Here, we can see that this
is a back face because it's represented in red as we did
here on our orientation. This means that if we zone in on perspective
mold inside our cube, you can see that the
normal facing inward. So this is good to know
early on so you don't get confused by all of the match editing that
we're going to do later. Let's select all of them, in and flip again and
disable all norms. Another thing that I
want to show you on mesh edit mode is
our edge length, edge angle, face
area, phase angle. When you are working
with exact measurements, meters or foot, you want to know the size of the
edge of your object. If you select this, mine
is on middle right now. It shows really small, if you can see here the length of each edge
that we have here. This is very useful
when you're editing. Keep in mind, if you go to
object mode, it disappears. As you can see, this
cube has flat faces. So the edge are pretty sharp. Let's add another object. Let's add UVsphere. I will move it. As you can see, these
also have sharp faces, but this is not ideal. What you can do is click on the right button mouse
and select Shades move. You can see that now,
it looks like a ball. You can do the same
thing on this cube. It's not going to look correct, but you can see how the
light bounces in the cube. Then now you have a smooth edge, at least a fixed smooth edge. Let's go back to shade flat. And I'm just going to show
you an example of a modifier. If we go here on Modifier tab and add modifier
and search for Bevo. You can see that automatically
the modifier grabs all of our edges here and offset them and we can
control it right here, the size and the
amount of bevel. As you can see, this
is still shaded flat. But I want a mix
of both of them. I want it to be
flat in this area, but I also want to move depending on the
angle like this ball. We can click and use
shade all those move. You can see that right
now we have an angle to control or smoothness. As we go, you can see
the right around 50. I have an automatically smooth
that is smooth on sides, but still keep this flatness. As you can see, if it starts
changing these settings, we get a better result. Let's remove this ball. And let's just disable in real time in our
viewport, both of these. Let's remove this one and shade. Flat. Okay. Let's go
back to our Cubo. One last thing I
want to do before our next lesson when we start actually
editing our object, I want to add a texture
to it because we haven't talked too
much about textures. So right here, I'm
going to change from solid view to
material preview. You can see now that it's white. Right here on properties, let's go down to material. You can see that we
don't have any material here. Let's click New. You can click here to name it. Let's name it cube. Now you can see here
that we have a preview, it's white, and here we have
a few of the properties. But this is hard
to use right here. If we go to base color, we can actually click
here and add an input, but it's a little bit hard. It's fine to use
these first mall twix I want to change color. So let's move to our shading workspace
right here at the top. Here you can see that we have our material output surface. We already have a
physically based shader here plugged in, and we can click Base Color and drag to add an image texture. Right now, we don't
have nothing in it. If you want, you can go open image and search
on your browser. But I also have our
file selected here, and I can go to Blender course. That's for my textures and this is going
to be linked below. I'm going to click
and drag to my editor here and go and click and
I can delete this one. Nice. As you can see, this is not correct right now because of the
UV of this cube. Let's go to the UV workspace. If we go here to UV Workspace, we see our flattened
layout of our cube. If we go here to UVMPs, you can see that
this is one UVMP we can add multiple if you want. But for now, I want each of these pass that is
represented here. If we click phases, you can see that it matches
the one in our UV layout. But I want this one to be the
size of this texture here. What we can do is select with A and press U and we
can add projection. Now each phase is all over
to the borders here, map. Let's go back to shading note. This is a simple
way that you can map out a simple object. Next lesson, when we
start to model it, we will also see
what happens with our textures when we start
to change these spaces. I'll also show you
another way that you can map into your model
procedurally.
6. Texture Mapping & Basic Modeling Tools: Welcome. In the last lesson, we learned how to map
our cube using UVs. In this lesson, I'm going
to show you how you can do a procedural texture mapping and what is the
difference between them. We are also going to be
modeling two objects, a pathway and a lantern. So this is the cube that
we mapped less lesson. Let's start editing
it and see what happens to the texture.
So let's select it. Press step to Entered
Edit mode here on top and I already have
phases selected here. To move, you can move your face exactly as
you move your object. Just pressing G on your
keyboard and moving your mouse. Same thing. If you want to
log on Z, you can press Z. Here you can see that I have
my snap activated here. That's why it's moving this way. So you can see that
when we UV unwrap, this happens when you move your faces because your
texture is stretching. So if I click here and I
go to my UV workspace, let's just change
this real quick. You can see that my UV
doesn't change here. That's why it's stretching depending what I do
with my textures, because it is connected
to all of these edges. All of these bounds
are these bonds here. So you can see what
happens to your texture. So let's go back to the
way that it was before. Now, I want you to see what happens when we
strew this phase. So having your face selected, just press E on your
keyboard. And go up. You can also see
here that we lost the texture here on both sides because
it's not on our UV, it's not mapped yet. This is some of the
problems that you face when you are modeling and
texturing at the same time. At first, we're not going
to worry about this. Usually you model
and then texture, but I wanted to show
you a way that we can do this at the same time. Usually, when we are modeling, we do not worry about this
and just texture later. But I wanted to show you
this early on to see a way that you can model
and also see your texture. Without having all
these problems. It's really interesting
to know early on. Let's go back to the
way that it was again. Let's focus our attention here
to the bottom editor area. Here, you can see
that we have a node on our texture that
is called vector. If we drag and just let go over your click
and type UV map, this is the node that is
default by the shader. You don't need to do this
to use your first UV map. It's already automatically. But this means that we can use
another type of Texturing. We can type mapping
and on vector, we can go to texture coordinate. I'm going to select this
first one that is generated. Now, this type of
mapping is procedural. It doesn't depend on our UV map. You can see here that
we only have the top. To change that,
we can go here on our texture image where we have linear and flat
here you can see, image is projected flat using the X and the Y coordinates
of the texture vector. So let's change this to make it projectable into all of the
directions, so X, Y, and Z. So we can go here
and select box. So you can imagine this as
a triplanar projection. Triplanar is a term that we use in unity and game software. So you can see it right here. It's projected on all of our
axes from plus Z to minus Z, X minus X, and so forth. You can see that it's mapped
on all directions because it's based on a texture space
that is a bounding box. You can imagine a box and it's being mapped
on all directions. What does this mean
when we are modeling? Let's go to edit mode and
just move our faces on Z. You can see that the
texture is being repeated. Even if I true, if I go here, if
I move this way, because it's considering the
texture space of our object. Even if I move freely, you can see that the
texture stays good. So if you are working with a white level
box, for example, for a game or you're doing level art,
this is pretty useful. You don't have to worry
about losing your grid. So one last thing before
we move to our modeling. Let's get this back to the
way that it was before removing or mapping and flat. There's a way that we can
avoid these distortions. It's on the top bar here,
you can see options. We have our options
here on transform that says correct
phase attributes. If we activate this and
then move our faces, we can automatically
correct our UV map. You can see right
here at the bottom, our UV map starts to expand
depending what we do. We can see here
that this image is being repeated here and here. Right here on image, you can see that this is saying repeat. Let's change this. If we go to extend or
if you go to clip, it's not being repeated. Usually, use this first one. Now, let's copy
to our box shape. And this is going to be
our base shader for now. So let's go back. Let's go
to our Modeling workspace. The first thing that we're
going to do is model a couple Stone path object. So the first thing that I
usually do is grab references. I have here a couple
stone that I grabbed, so I'm going to click
and drag to my viewport. This doesn't work if
you are in edit mode, so let's press step and
then click and drag. Okay, we can drag
things as images. I'm just grabbing a hit
for reference view, then I'm going to delete it. But you can see here on our outliner that we
have an image here. It's just an image. So the first thing
that I do after grabbing my reference is
analyzing the overall shape. So here is simple shapes. We just have boxes here. There are aligned,
some of them aren't. So you can see that
it's pretty simple. Then after we do
the simple shapes, then we can start adding
details and then the texture. I always start by
the simple approach. So I'm going to
delete this for now, let's talk a little
bit about units. So here we can see that
we have our boxes. Here we are already activated our measurement,
the edge length, and we can see that we
have two by 2 meters size. So let's go to our front view, pressing one on the numpad. And let's grab our
bottom vertices. To do that, you need to grab the front
vertices and the back. So if you do just
a box selection like this, selecting vertices. So there's a couple
ways you can do that. You can go here on the top
and activate Toggle X ray, or you can go in WiFi mode. I prefer to go here because
we can still see our texture. So let's go ahead and
press G. Right now, you can see that
we have our SNAP activated and it's
following the grid. Let's move it until I
reach zero and select. Now if I press A, I can see that we have 1 meter high here under edge
lane. Let's reduce that. I'll select the top one. Now
we have 20 centimeters high, still a little bit high,
so let's make it ten. Now, there's a couple ways that you can approach
doing couple stones. I'm going to do
my preferred one. This is basically our area
delimitated two by two, that I want to make all
of my little stones. What I'm going to do
right now is go to Edit mode and create a loop. Let's go to our solid tag
so you can see it better. To do a loop, we
can do Control R, and you can see here
that another set of vertex and edges are created just at the
middle of my face. You can see that another loop of vertexes and its edges
are created here on face. If I click and drag, I can choose the location. If I press ask, it stays right at the middle. You can see here that we
have 1 meter and 1 meter. We can do this for both sides. Here we divide our cube into four different faces on top and on bottom
and two on side. So this is called subdivision. So if you go here and select just this edge and you press right mouse and go to subdivide, you will subdivide this
edge in two edges. You can see that we got a
vertex here in the middle. So that goes for
edges and faces. So let's go back. Okay. The next lesson, we're going
to use modifiers to do this. But let's keep to manual
Modeling for now. There's another
concept that I want to talk with you is
the quad Modeling. So every time that
you're modeling, you always try to leave faces
with four different edges. So like we have here. This is called. So if you want to know more
about this right now, you can search for topology. So this is the term that
we call it. Is the right? Perfect topology
is when you have all quads in all
of your modeling. Of course, this is pretty
easy to do this right now, but when you work with
pretty complex models, you will see how hard it is
to keep up perfect topology. But we will work on that on our next lessons when we
build a little cabin. So right now, let's
select all of match, A, and click the right muscle. Let's do some quick subdivision. Let's press A, right click of the mouse
and click subdivide. If we go here at
the bottom left, you can see an arrow
saying subdivide. Click here, and then we will
open this little window. You can see here a
number of codes. You can increase
this and decrease. I'm going to add just one more. Yeah, I think this is good. You have a couple
of options here. You can do it fractal, it creates a little
bit of noise, but let's keep it
straight for now. Now you can click outside. You can see that we got these extra loops here on the
side. So let's remove them. Let's click two to
select our edges, click Alt and Shift to select loops edge
loops here and here. Now to delete, you can press X, and this little
window will pop up. You can choose what
you want to delete. Vertices, edges. Let's just click vertices just so you can
see what happens. So when you delete vertices, you lose all of it. You edges and your faces. If you delete edges, you can see that
these edges that I selected were deleted are faces, but we were left with
these edges here. We have the option of faces, but that won't happen
anything because we don't have face selected. Only edges and faces
the same thing. And we have only phases
that won't happen anything. We have these options here of dissolve vertices
and dissolve edges. If you go to dissolve edges, you can see that we delete
the edges that we had selected and everything
else, it's perfect. There's a shortcut for
that, so let's go back. You can press Control X, and we'll do that automatically. So that's how you can delete your vertices without
messing your overall model. Okay, now let's go to viewport overlays and
activate our wireframe. Here we can see what
we just created. Right now, I want to use this as a base to create
our other stones. So what I'm going to do
is duplicate this not as an instance using just shift and D. If I use Shift
N D and press ask, it's going to be duplicated at the same position as I
have my original one. But you can see here that
we have both of them. So I'll rename this by double clicking and saying
this is just my grid. And for this one,
I will say stops. Let's select our grid. Let's first hide our stones and select our grid. I'll press Tab. What I want to do here is select all the pass that
have the same normal. I can do that by
pressing Shift and G, and this window of select
similar will pop up. You can select
bisimilar by material, by area, and by normal. If I click here, all of the pass that have the same
normal will be selected. So you can see it right here. So what I can do
right now press X, and they will open this window, and we can select vertices. If you select vertices, it will automatically delete this edge and its face because it doesn't support if
it doesn't have a vertices. So as you can see, our normals are
flipped because we have here the face
orientation activated. So let's select all of them, ON and flip. So now
we have our grid. Let's unhide our stones. Now what I want to
do is just scale this stone to organic size. Let's create a few
variation of the stones. As we can see here
on references, we have some long ones, some shorter ones, and
different placement, but also following a grid. So I don't want to
scale my object itself. I want to scale just the mesh. Let's go into edit
mode, select all. I'll deactivate my edge length for now because we already
have our base with our grid. Now, I want to scale the
stones, not scaling Z. If we pass S and scale it down, we're going to lose the Z
property and we are scaling in the medium point we are losing
also this part right here. So let's go back and let's choose here
on transform pivot, as we saw before,
three D cursor. So let's scale without
changing anything else. You can see here that now we scale the three directions
right here at the bottom. But now our pivot point is
right at zero, zero, zero, so we have more of a uniform scale without
losing our height. But I want to scale
just on X and one Z. What I can do is
press S and press Y. Without clicking on anything
else, we can go here, reside step and copy the same scale to X
and press the Enter. Here we have an uniform scale, but keeping Z one. Now, there's one thing
that got updated in Blender 5.1 is the
Snap by face center. So if you go here or press
Shift Deb to activate Snap, you can go here to face center. So one thing that got
edited in Blender 5.1 is the Snap to face center. So let's select our object, Activate Snap and
select Face Center. If you move, you
can see that now we can snap to the
face of our grid. But I want it to be snapped by the center
of what I just created. So I can go here and snap base. I can select center. So now I can snap to
all of these phases. Now, what I'm going to be doing
is create various objects of the stones with different
sizings using our grid. So what I'm going to do is also activate edge center
and face center. So if I go here and click Shift, I can add multiple of snaps. I just want these two. So this is my first stone. Let's create it a
little bit smaller. I'll click shifty and
add another right here. Shifty, I'll add this to
the center of my edge, and I'll leave it a
little bit bigger. A I'm also going to add a vertex. So because I want to reach
this middle point here. So now we have a lot of
different stones and you can see here that as you
scale and move your object, the proportion of quads of our
polygons or faces changes. So keep in mind, ideally you want to
keep the same length. For example, this one, we have 0.04 by 0.09. Idally you want to
always have a square. But for what we are doing, you don't need to worry
about this right now. Now what I want to do is
join everything that we did into 1 stone,
so we can do this. I think the easier way is
to do by the outliner. Let's select the bottom
one and pressing Shift. Let's go all the
way up to the one. You can see now that we have
a lot of objects selected. This one is our selected objects and the one that is a little bit lighter is our act object. If we join, all of
these objects into one, it will join into stone 0.0
23, but I don't want that. I want to join this
original stone here, I can click Control.
And select stones. Now, if you want to join a lot of objects into the active one, you can press Control G, and that will automatically join into one object, so
you can see here. Let's check our sidebar
and you can see that our orange point changed because the stone
was right here. Let's apply. My orange point is at 000. Let's go Control A
and select location. Now our orange point in 000. Okay, so right now, this looks very boring. But in the next lesson, I'm going to show you how we can transform this by
just using modifiers. Modifiers is a way that we can model our object in
an undestructible way. So let's move on to our lantern.
7. Hard Surface Modeling: Lantern: In this lesson, we're
going to learn more about hard surface modeling
by modeling a lantern. Let's start by
grabbing a reference. I have this one right here. I'm going to dragon
drop on my viewport. So before I start modeling, I always try to think about the composition of
what I'm building. So let's go here
and disable grid. So just like drawing, you need to think about
shapes of what you're doing. So we can see here that
right at the bottom, you have a square base. And you have a
square at the top. You see that it's tapered in. Don't judge me, I'm using
my mouth to draw this. You can see that is basically
a square tapered in. For this, start with a plane
on the bottom and move up. Then you see that we tapered
again here at the top, it seems like we have
a round shape here. So maybe we have a square and
then it starts going round. You need to think about how
you will construct this. This will be one object,
and this is another. You will move from
square to sphere, which is something
that we can do. Then you can see here that
we have a round edge. Ignore these details for now. Let's think about overall shape. Then after we construct
the overall shape, we'll start to think
about how we can do different material here. We need to separate. We will do another object. Before you start
modeling, always think about how you will manage this, this is a hard surface,
if it's organic, if you're going to sculpt. For example, we have a vase. Let's think about this
object right here. You can grab from the bottom up. That is the way that we're going to construct this letter. But let's just have
this top part. You're going to
extrude all the way up to this and
adjusting the side. Maybe that's not
the best approach. In the future, you will
learn how to do profiles. You can do a profile and sweep this curve right
here to do a vase. I like a sweep like this. You only have to
model this curve. The things that you're
going to learn over time. But always try to think
about these things before going ahead and start
moving your vertex around. I'm going to hide this and we'll start with
model R lantern. Let's create a new collection. I'll add a plane. I will press F two to name it. Right now, I'm not going to
worry about measurements, so I deactivated it. I would just worry about
the right proportions. So let's activate
again our grid. From Edit mode,
select your face to leave one contention line
here and extrude again. More or less like this, if
you want to keep it at, you can always select and use this transform
tab here on the side. It's pretty useful sometimes. Activating our raview I
can select everything. Going to scale. More
or less the proportion that we have. Right here. Let's forget about
the glass part. Let's do this top part here. That it looks kind
of like a head, maybe it's two separate pieces, but let's do everything
as one object here. All vertex will be connected. So all strud again. You can also use when
you're extruding if you are working with
measurements or if you're not, while you're at this
stage right here, you can go ahead and press the amount that
you want to write. So I just wrote 0.2, and you can see that it rolls 20 centimeters and press Enter. So I use this a lot too. There's two ways that
you can go about doing this, little detail. You can select this loop. You do this by pressing out. And clicking right here. You can select this
loop right here. If I select here in the middle, it'll grab another selection. Let me deactivate this. We grab this here. If you want this loop, you can see this is a fun thing
that you're going to use. After. This is a fun
thing that will be using. After. Not right now because we have
learned about scenes. But we learned about sharp
let me show you something. If you click this
edge here with edge, and we click right mouse, you have an option
here to mark sharp. So if we mark sharp here, let's mark sharp here
too, Mark Sharp. If you try to select your loop, with tree selected, click here, you can see that I'm
selecting everything. Blender 5.1 implemented this where you have a phase
loop constraint. So you can constraint
by sin and by sharp. Here you can see that limits. When you have a big object, then you're doing
big and you're doing a big topology and you
have a lot of things. If you're doing Qaraor, this is extremely useful and it was very good to have
this implementation. Okay, close Synode. Let's clear sharp and
go back to selection. We can do this both ways. You can just press E
and press as you have an strewed pace here and you can scale and limit this to one. But this seems like a lot
of steps. Let's go back. Let me make sure that I
go back into the loop. Let's select our loop,
and we can click. We can go here on
the top bar to face. Or we can do F and
below, strewed faces. Strewed faces along normal. Do remember we have a
normal pointing outwards. If we do this and we drag
our mouths up and down, it strewed along
each face normal. If you can see, we have
everything right on our X ray. Now, while I have this selected, I will just drop down a bit and select this
and let's see. It seems like a
straight line upper, just a little bit,
but way smaller, so can scale thinks about it. Okay. Now, this top part here, it seems like it goes from a straight square
to around here. I'll do this first one
as a square and then we'll move from
square to a circle. Let's go here. So as we do this, it seems like
everything is wrong. But if I strew it
again and go outwards, top, it starts to
recognize what I did. So let's go to X ray. You can see that we have this edge going down and
then going up again. Let's select this edge. I just want to make
it so it doesn't show that it's a
joined object here. It seems like it's
a little top part. Let's move this image here. As you can see, if I am in
orthographic mode, this image, the way that I have
it right here without embedded as a material
in an object, it only shows when we are
in orthographic mode. So don't panic if you lose it. So let's rotate it. In X, I want to see
here as a float view. If you have a face or a vertex selected and
you want to select more, you can press Control and
the plus on your numpad. If you keep going, it'll start to select everything
that's connected to it. So I'm doing like this, so I can adjust this. And if you want to go
back, Control, less. I want to scale everything, so I'll scale this and
just go adjusting. I'll adjust one more here and
now comes the tricky part. I want to transform this
square into a circle. We need to do this by adding more vertex so we can control. Let me go back to this view. And we need to add
more vertex here. So what I'm going to do
is add more edge loops. So if I press Control
R and then use my mouse wheel to
move up or down, I can control the amount
of segments that I add. So I'll add just
two for each side. Remember what I
said about quads. The reason that I'm doing
edge loops is that if I just create a subdivision on my top face where I want
to modify and do a circle, I'm going to end up
with polygons that have more than four vertex
on the rest of my model. It's not optimal because when you go to
grab another loop, for example, to do
some alteration, you won't be able to do that. Your model will be wrong, the shading light
won't be right. So as much as it seems better or or sometimes
it will be easier. Always try to think about
the model that you have, the mesh that you
have as a whole. While I have this selected, I'll press ControPlus and
extrude just one more time. Okay. Total transform
this to a circle. You can go to select and
select all of the borders. I'm pressing,
selecting this border, and then shift to select
all of the other borders. What I like to do is
to press Shift O. Now if you move your mouse, you can see a value 0-1, you can create a
sphere, a circle. Let's press one and
you have your circle. I can just adjust here. Won't do anything,
something like this. Now let's select this
phase and let's scale it. Let's see it that we
have it right here. I'll do the same
thing as before. Pink What I want to do right here is to snap
to this vertex right here. This is one of the reasons
you can use Snap activate it. I have a lot of snaps here. Vertex is one of them. G, Z. Right now, I can press B. If I press B and I go to
my vertex, I can press it, and now I'm controlling
this vertex to snap so I can snap to
any vertex that I want. G, Z, B, click on your vertex
and the destinated vertex. And this G, C and this. I'm going to extrude and start making this little
shape right here. Let's do it manually. And you can always adjust see different views
if it makes sense. For example, pink. This will be shorter,
a little bit bigger. Always keep aware if you're in what direction
you're scaling. I can go past this point. You need to explain this. I think I already explained it. It's just an inspiration.
You get the point. Now, I'll do this
tapered part right here. So let's do this
taper part here. What I like to do is to add my smaller diameter and go directly to my larger diameter,
more or less like this. I do the simple shape first. Let's calculate this distance. For example, it's a
little bit bigger, it goes more or less like this, and then I go to this part
right here, right here. It's a little bit bigger
than this lower part here. And then we go to a
taper really small. And then it just more or less. So with this middle part here, I can increase a
little bit more, and then I can do a bevo. I can divide my loop
edge into two or more. I think I increase too much. Okay. I'll add one more separate loop here. I think that's good. I'm going to just increase
a little bit more here. So right now, I'm going to
use proportional editing. This is one of the cases
that we could use that. Here, right after snap, I have this proportional editing here that is shortcut, it's O. You can click here or
press O on your keyboard. As you can see here, every
time you move a vertex, let me disable Snap, everything that is inside the circle here will
get move accordingly. You have different ways
that you can move. For example, you have smooth, you have in a sphere If you go with your mouse
wheel and scroll up and down, this circle is going to
grab more vertex around it. Let's leave it too smooth. What I want to do here
is scale and scale just these vertex here they are closer,
just a little bit. I have it right here, a
little bit really small. That way, I don't
need to go into each loop or each
vertex to modify it. Small twigs like this. Let's do the same
thing with this one. Way to lower this bit. Okay, so this is our overall
shape of our lantern. You have only quads, you have going from
square to a circle. And we mostly just
used edge loops, extrude, extrude along normals and just a little bit of
proportional editing. So you can see, let's disable my wireframe
that we have all flat. So Blender, we can
simple right click, as we saw before and go
to shade Autos booth. Let's go here at our properties, and we can increase or decrease. Let's just increase
a little bit. You can see that when we
increase it from above 30, this top part here got
smooth and didn't one didn't so let's
go back to maybe. I want to go back to the part that this
goods move it so 34. I'm going to leave it at 32, and I want to move this part, so I'll go back here, and I just going to do
another small bevel here. And also right here. Okay, so we more or
less have our object, but this is just the base. Let me show you the word frame. Okay, so now we need to add the glass part
of our lantern. Let's go to the front view, pressing one, Edit mode, and let's add a few loops. Right here, you can
click and drag. You can adjust by pressing G, and if you see it keeps,
it's proportional. If you press G again, you can move on
your bounded edges. Now, we also need
to add loops here on the edges so we can
create a constraint. This I want that the
same measurement, this side will be
at the other side. So here we can see
at the bottom that we have a factor going 0-1. So if I click here, actually
to minus one to one. Let's set, for example, that we will do 0.8 or -0.75. So if I go to add this
loop here, I'll use 0.75. I will keep the same
proportion this way. Okay, so this part right here
is going to be the glass. So what we can do right
now is do an inset. If you go ahead and click I, you can see that we create
kind of in the same phase, you create a border. I'm going to do a
tiny inset select. I want to do kind of a detail here so we can push this back. I think I'm going just scale. No, I'm going to push
this back a little bit on the y axis just to
do one small detail. And we have als move on. So I think I'm going to use shade flat so we can see
better what we have. Don't worry about
this right now. When we add modifiers, you will see how this
model will change. I'll do this on all sides. You can do it at the same time,
so I'm going to show you. I'm also going to add
another loop here. Let's do it again so we can do exactly the
same measurements. I have this tree selected. Let's select all
sides and press I. Just a little bit point. Now to push in, I'm going to use scale because now we have our pivot in our median point between
all of these faces. If I scale right now, it's going to push to
center right here. I'm just going to
scale a little bit, and we'll have this detail. Let me shade flat again. Because you use Control Z. It also affects your modifiers, your settings, everything, not only what you're modeling.
So keep in mind that. Let me just adjust a little
bit here, just a detail. So now I want to do two things. I want to do my glass and separate it in
a different object, but I also want to
finish my anther. So let me show you
what I'm going to do. So with the right butto, it is true the long
normals and drag it down. You can see if I drag
all the way down, it starts to collapse, the faces starts to collapse. So I want to do just right here. You'll see. Right now, before
you do anything, let's separate all of these
that we have selected. Pres and separate. This is going to be my glass. I'll rename it. Let's hide it. You
can hide by pressing H and to unhide, you press dH, or you can also click
the object that you want to alter and press.com
on your keyboard. When you do this,
everything that you have around
you will be hided. So you can press again
to go back like this, or if you want just
to hide this object, you can hide right
here and you can see that we have the
eyes closed here. Okay, so now you can see that
we have backface showing. And if you're going to apply
a material on top of this, this is going to be transparent. There's ways that you
can do double face, but it's not the idea. So we want to close this off. I'm going to show you
just real quickly how you can do this
by using solidify, but it's not the way that
we're going to do right here. If you want to use a quick qua, you are doing a quick render
and you just don't want any backface to show and it's going to be far away or
something like this, you can use solidify
and adjust this. Okay, so you will
close your mesh off. But let's model it. So now we'll get a
little bit into vertex, how you can alter your
vertex individually. So I will select
this one and I'll press your comma on
your numpD to frame it. Now what I want to do is
join both of these vertex. I can select one, shift,
and select the other one. Now we'll press M to merge, and we have a few options here. You can merge at center, at
cursor, collapse at first, or at less at first, like this or you can alast. Let me show you the
difference in center. But I want this to
be kind of straight. So what I want to
do is press G on my Z axis and enable
my Snap on vertex. So we can kind of make
this more aligned. Now I'll go like this, shift, and merge at less. I'm going to do this for
all sits just a minute. A Okay. Now I'll add a couple more
loops here like I did before. Let's close this topper off. What you can do is go to
edge, and then with your out, you select one of them, and now if you've
done everything right and you joined
all of this vertex, you'll select at once. So to close faces off, you can press F.
But as I did this, you can see that we don't have we lost this edge loop here. The correct way to do this and if you have
everything right, you can go to control F. And you have right here, we have the field that we
just used. We have the grid. Field grid from two loops. If you press this, we'll
create your correct grid. Now, we didn't lost
any of the loops. Let's do the same thing
for the top part. F grid field. Okay. Now I'll add simple
extrude inwards. Just to do a little detail. Now we close the object. Let's see if we have all quads, selecting one phase,
Shift G, polygon sites. No problem, all quads are mesh. Now let's hide the glass part. I'll activate X ray
just so you can see, with glass selected. Now is a good
opportunity for us to use the solidify modifier. Here on modifiers, you can go to Ed and search for solidify. You can see that we
created extrude, but it's destructible extrude. If I go here and disable, I have my original mesh. If I go here to edit mode, I just have the front face. We can add thickness to
the back or to the front. So I'm going to add thickness
a little bit to the front. I think this is okay. And that's it. You don't
need to do anything else. Let's go inside our lantern. Also going to offset, I need to activate X ray, so we can see the inside. I'm going to use this
tool called shrink. If I click this and move, I can offset a
little bit based on my pivot point that right
now is the median point. I'm going to bring my glass a little bit to the center here. This is the way you can
use a simple modifier. Right now, what I'm going to do it's not join glass on
enter because if I do this, I'm going to lose this modifier
right here, keep in mind. Right now, I can't join both of these objects because I have a modifier right here. So if I go here and
press Control J, I will lose my modifier
and what I did. So let's go back. So what I can do to make both of these
objects kind of one, I can parent this. So my glass, you
can see right here. If I move inside this, I can press Shift to parent or control to link,
but I want to parent. I want to parent
this to my lantern. Now this is parent of this one. So if I move my lantern, my glass will be together. If I move this, it won't. Okay. So we can see here
that we have our mesh on a lantern named plane because we started with a
plane, so we can rename it. Lantern. I'll name it low poly. Low poly is when you model something with a low
count of polygons. So you can think of
minecraft and mobile games, yeah, early games, they
are really low poly. With modifiers, we will create a high poly version
for our renderings. But we're still going
to change this object. I'm just going
into Nmiglas Okay. Now I'm going to
add a simple post. I already added loops here and I don't want to
loose from my post, so I will do a separate object, and then I will join this
loop. Let me show you. So now I will mimic the looks
that I did on the top part. So this tulips here
and tulips here. For this one using the same
metrics that I did 75, Now I'm going to
basically connect them. I'll delete these phases first. I think I have another one here, so I can X ray now what we can do to join
these phases, it's pretty fun. You can select all of these. And here at the top. Now, if you have the same amount of vertex on the
top and the bottom, you can press Control E. Let me just Control E, and you go here to
bridge edge loops, and this is going to
connect all of the vertex. So now I can move this.
It will be connected. I'll add another loop
here just to make this we have here. Something went wrong. Okay. Let's go back before bridge loops and see
what went wrong. Let's hide this mesh
here, all of this. You can see that my mesh
was closed right here. That's why I had that problem. Showing you in real
time what could happen. Let's select top of this and delete this face because if not, you see that I had
faces facing inward and outward and it was just a mess. You need to delete this
one and the same thing of g to show everything. Now we can do the prett
loop here and here. You see that I selected and
it didn't select the loop. That was because
I had faces here. Now, you can just press the right button
if you have edge there. Depending on what
you had selected, if you have vertex selected, it would open the vertex
tab and so forth. Get loops. Now I can play around here. So now I have all of these loops going from
top to bottom to here, but I can select this one and this one
where I can select this, that is the most important one. So there's one more thing
that I'm going to do Volenr before we move
on to use modifiers. I'll add a few more loops
here just to keep everything proportional and doing
some constraints that I'm going to explain later. We don't have to worry
about the glass right now, but you can see
that my edge loop is going all the way
to the top here. And since this is
a round object, this is going to
interfere when we use subdivirs because as
you're going to see, this will act as constraints
for a subdivision. Let's go here. I think we
had a sharp face, maybe not. I'll select the
base for this one, and I'll mark it as sharp. Then I'm going to
select this loop and sharp and select this. This loops right here. I'm going to limit
dissolve them. It's just press controversy. Now, what this is going
to do is not the ideal because right now we will have a connection here that
will have more polygons. As you can see if I go here
and select polygon sites. I'll have these polygons
that have sites than a quad. Here. What I'm going
to do is detach this. I'll like here, I can do
Ship G and select Zip, not in sharp sharpness I'll
have this one selected. It's another way they
ship and select stuff. And I'll press the
right belt mouse and go here to Ed split. So with Ed split, you select these edges and
divide it into two. So now I have. One, this object
separated from this one. Now I won't have
any quad problems. Actually, I will because
let me hide this part here. We still have those
verdicts when we split. I'm just going to
leave everything here you can see
that you have to pay attention what you do and discover what was the
problem and get around it. We don't have. So O H. Okay, full object here. We have our top parts separated,
and we have our glass. Now, one last thing, let's adjust the scale of everything and also
of the cobblestone. So the first thing
you're going to do, and this has saved me a bunch of times is create a
backup collection. So I'll go here to Lantern new and create just Lantern, backup. Do something while
your mother is this. I think I didn't do it enough. I should have made a
backup of this part. So you can select what you have. Let's duplicate without
instance for the love of God and do a backup period and you can disable it.
And also the glass. You need to add both of them, even though they
are aud and parent. Now let's scale and
adjust our origin point. Let's see how our
cbstone is doing. Yeah, 2 meters, 2 meters to big Let's select
lantern and glass. Let's first adjust
the origin point. I'll press G, B, like my bottom vertex, then I'll use the cobblestone
vertex to adjust. Now, if I scale, this is in the median
point so I want scale to the t d coarser. I think the stones are too big. Right now, you can
see on item, 59. I think I'm grabbing the less. That's why it's too small. Yeah, this is 2 meters. Let's grab the active
object here so we can have a view of the size. I want to do a small lantern. So maybe something like this. A person would be
like, right here. Okay. I think 2 meters okay. I want to do a small lantern. Now you can see here or scale. We need to apply what we did. Select the glass, Control
scale, Lantern, control, scale. Also think these
tones are too big. If we have 2 meters here, almost This is too big. Let's reduce all
of this by half. Makes more sense. We'll add more variations
of this and let's apply. Okay, so I think this
is it for this lesson. The next lesson, you're going to see how we can
transform this into a real cobblestone
using modifiers and also adding more
details to our lantern.
8. Using Modifiers (Non-destructive Modeling): Welcome. In this lesson, we're going to start
applying modifiers to our models and learn about
non destructible modeling. So here let's hide our
lantern and move the two. And hide our grid. Let's focus on our
pathway, our stones. This is where we left off. We did all of these
subdivisions manually. But there's a way that
you can do this without modifying your origin model. Let's remove these loops by pressing X and limited dissolve. This will delete
every edge and vertex that is not necessary
for the overall shape. Here we are left
with just squares. Now we can use a modifier
to add those loops. We can go here to add
modifier. You can search. Subdivision surface. This type of subdivision
also rounds your object. But if you do simple and
disable optimal display, you can see that the line starts to form just like
you're subdividing. The cool thing about modifiers is that if you disable them, or if you go to edit
mode and disable this, you can see that your
mesh stays the same. This is pretty useful
when you want to use displacement to create
different shapes, but without hinder
your original model. Now let's increase the
amount of subdivisions. And you can see here that we almost have the same
result that we did before. What we can do this
and what is fun about subdivision
is that I can enter and add a loop and this will alter the
way that we subdivide. This we have one phase and
this we have two phases. Instead of having
a lot of loops, I can just add a few
that are necessary, and I don't need to
worry about the rest. Here, we can add
one here, one here. Okay, so now let's go back to this type where it
creates a smooth surface. You can see that it's nice. If you are doing a stylized, you already can
use like this and use Otomoth and you already
have little stones. But I want to add
displacement and also bevel. Let's learn about bevel. I'll disable, so the division, and let's add bevel. The order of modifiers
import a lot. The first one is
going to be applied first and then the
second and so forth. We want to move
bevel to the top. Okay, now you can see
the amount of bevel. We can reduce. It's a slider. You can reduce the amount
that you want like 01, for example, and you
have one segment. Now you can see that
every edge that we have are being bevelled and you can control the amount
of segments here. You also have a limit. Right now, I have a limit that every angle above
this will get bevel, or you can limit by
weight or vertex group. You can select a few vertex. Here, for example, I want just
this part to have a bevel. I can assign and use this
as a limit here group. Only this vertex
will have a limit. We will use this on our
enter. Let's go back. Right now I want every edge
you have to have a bevel. You can also combine these two. For example, if I want, use this and a subdiversion, you can see what changes. Let me hide this one. And apply. What is happening here is that these two edges are creating a constraint to the subdivision. When you apply the subdivision, it takes the bebles in
considered. What does this mean? Let's disable this and add
ourselves a constraint. If I go here and edge
loop here and disable, you can see that this
starts to be sharp. You start to limit
your subdivision. Let me change to median point. You can see how this
limits your subdivision. We're going to use these
properties more on the lantern. You can also increase the
amount of subdivision. If you go too far here, it starts getting a
little bit crazy. You can set a limit to the viewport and increase
for the render if you want. When you render it, you will
consider this amount of segments and you can also
activate your optimal display. You are not seeing the
subdivisions, but they are here. I like to leave them on. So now let's add one more modifier to displace. This is a deform. It's height. You can see that's right below
Bev and subdivision, then we have display
we need a texture. So let's add the texture. This can be a little
bit confusing, but if you go down, you can see that we have
texture properties here, and now we can see our
texture on display. So let's rename this
I'll use noise for this. This is crazy. Don't panic. Let's go to our image and
choose distorted noise. You can see here that we have a black and white textures
and we can control the amount of randomness
of this texture. So let's go to modifiers again. And here you can see that we
have our strength into one. This is too much, so let's reduce it
to 0.1 or 0.02. I think this is too much 0.01. So what you can see here is that our modifiers is
using these texture, back and white texture
to apply a display in our vertex related to our
direction that here is normal. So we can use mid level, but the two controls that you
need to adjust is strength, and you can go here
and adjust the amount. So you can see, as
I'm doing this, vertex are getting
offsetted here. So if I go like this, and you can also
adjust his size. It's just pretty cool to see. Here you see how you can add variations to your model
without destructing it. That is the concept
of non destructible. If I go here and disable all of my arbeq with your
original model with just simple squares. So just play around with your different textures,
bevel and subdivision. You'll see how you can control this without modifying
your object. So what I like to do is
also create a backup. Let's click Shift D and
move to a new collection. I'll leave this inside
Cable Stone and height. Now, let's go back to our lantern that is a
little bit more complex. Let's apply the bevel
and the subdivision. I'll hide this one. Okay, so now you
can see here what we can apply with what we
learned on the other modifiers. So let's add a bedroom. Here you can see
that it is applied here on all of my corners, even here in my top part that
we separated let's lesson. So here, I only want to
apply Bevo in a few places. I could do that manually, but I want to use Bevo. Let's use our limit. Here, we can see that
it's limited by an angle. But if you quickly down, we can use weight
painting or Vertex group. I'm going to use Vertex group. If you go here down
here to DataMsh, you can see that we have a
tab called vertex group. Let's add one and name it Bevo. Okay. Now let's go into Edit mode and you can see
here that this show up. Assign, remove select and dis select and you
have your weight. What this means, if
you click Select, nothing happens
because I don't have any vertex on my group. But you can see here
that everything is represented by a bevel. This could be confusing. Let's select here. Now we can see that we
don't have any bevels. Any vertex group,
assign actually. Where I want to add Bebo is any sharp edges that we have here because
this is not realistic. You don't see this
in real objects. So let's add one here and here. Assign. Let's go back here
and adjust the amount. Now this is interesting. As you can see,
let's go to vertex. This vertex and this
vertex are in the group. So my modifier is understanding that we need
to do a bevel right here, but we don't want a
bevel right here. This is one of the
cases where we use an edge loop
to constrain this. And this will be useful when
we use our subdivision two. Let's add one here and
you can see that it automatically is assigned
to vertex group. You can see that now all of these are assigned
to my vertex group. Now what we can do
is select all of these vertexes and
deselect just this one. You can do that by pressing C, and you automatically have
the circle selection. And with your middle
bottom scroll mouse, you can press it and
select this one. So now right click to
select and you can go here. Let me press coma to center
and do the same thing. See. This is one of the things
that you can do to select. Now let's remove these ones from my vertex review and can see that now the
bevel is perfect. Let's increase the
amount of segments. So now we don't have
a sharp edge anymore. Let's add a few more. Ben s here. And also all
on all of these edges. Here on this. I think I'm going to delete
this one and assign this. Now, here is a tricky
part. Let's add one. Sometimes you can go here and disable just so you
can see what's happening. Here we also need a constraint. Let's apply. I think I'm going to apply two. Let me just remove
this one first. Let's apply and also this. Let's apply two and
scale it because this is going to constrain also the subdivision
that we're going to add. Now we need to go back here. Same thing here. So every sharp edge that you see is a good
candidate for a bevo. Even here. We will need
another constraint here. Let's add a bevo here. That will give the same
impression that we have a smooth. Let me apply shade smooth real
quick, shade auto smooth. You see here that we can have
this nice gradient here. You will give me
the same result. It's better than just a flat. Can you compare both sides? Just a flat cut here. It's way easier than
just go back to flat. Let's apply a bevo. All of this Okay, so now let's analyze this. I'm going to remove
a wire frame. And now we have flat shading. I'm going to add autos
move and increase. Right now, right
here on the edges, even with autos move
it's not looking good. I think I need to add
a Bevo here maybe. So I can increase one more. Yeah, that looks better. Now we have a smooth here, here, and all the way down. I don't think we need to add a subdivision
because with bevels, we already achieved
that smooth surface. So I think we only need
to use on the top part. I'll need to separate
this object, so I'll select P. Now we
have a different object. We didn't use bevel on it, but let's see if you need to. Let's set some divide surface, and you can see, let's
activate wireframe. You can also just do this. I like to use
wireframe and solid. Now let me shade flat
so you can see better. So now we have a
smoother surface. We can shape odds move. But as you can see, I lost a lot of discord so at
another contention here. This looks better. Let's
see what happened here. We have two separate
objects for now. We can join them, but I
don't think it's necessary. If we see here because this top part
is covering this one. Yeah, I don't think
I would join. Okay. Now, this is the part where I
create another backup, especially if I were to join
these two objects here. If I were to join them, I will need to apply the subdivision. So let me show you
how you apply. You click here at the
bottom and apply. Now, if you go to Edit mode, you have X to all of the vertex. That's what I said
about non destructible. What I did here, I basically justtrut my original
geometry and I can go back. I mean, I can, but it
will be pretty hard. Let's keep Control C until I
have my subdivision again. Let's create a copy
of all of this. I think I'm going to add
a bevel to this too. Maybe with the glass we
will get a nice effect. Really small po. Not that small. Not that big. Not that big. Perfect. Okay. Let me see what happened. If you select your object here, you can also press coma, we press Comma to Zooming. If you press comma here, it finds your object
in the outliner. So here you can
see we duplicate, so this sits outside,
it's parent. I'm going to rename this Lantern top and I'm going
to drag on Lantern again. I can and I'm going to drag on top of Lantern again,
clicking Shift parent. Now everything is connected. I'm going to select all of this, duplicate, and move
to my lantern backup. I need to move this one
too and this one, too. Now every one is here, even our huge model
that we did back there. Let's add a subdivision
surface to this part. This looks cute too. Now that we have
our top part here, I miss some subdivision here on my lower part and I have my
backup something backfires. What we're going to do
is select both of them. Leave this one active, I believe, click Control
and copy modifiers. But now this one got disabled. It's okay. We can adjust. Now you can see that I have my subdivision
applied to this one. Since we have our vertex, the same settings on both, I can join them again. Selecting both of
them, Control G. This looks better. Now we don't have any
bevels applied here, but we have the subdivision. I think we need to adjust this
again. Just a little bit. We have our lantern and
we have this nice effect here of the subdivision that we need to add
more polygons too, so that's a two. This is cute. It wasn't in the plans, but I think this fits the style. I can add a loop here and a loop here. Let's see how it looks. Like this. One will be two. Let's do it correctly. I decided I'm going to use a
subdivision in my lantern. But this is the nice thing
about non destructible. You can create a copy, you don't need to apply
what you did. You can always go back to your original model
to change anything. Let's add some
constraint loops here. I think I'm going to
use now 0.75 0.70. Let's see. 65. -0.65. So here we have a
different factor, so I'll have to eyeball
it a little bit. No problem. I think
I showed you this. You can press one and then
Control one to do front, Y, and Back view. Five. This will create extra
loops here, but no problem. Now let's try to
match the other side, I'm not going to be
too strict about this. I can always go back
and move a little bit with nondestructible
modeling. I'm crazy. Hey, now
let's activate again. I I lost some of the
properties, the cuteness. I'll change it
again. I increase. Praise little bit more. It's okay. It's okay moving while
you have subsurface on, but sometimes it can
get a little slow. Now this is better.
I'll use this sample. I need to use orthographic view, but not this one, not
this one, this one. Right now is what they call your artistic view. I forgot it. So freaking cute. Oh, I love it. Now you can see if I
disable subdivision, the lighting hits different here is because I
have only one bevel. If I disables
disable right here. No bevels, subsurface
also looks cute. You can see that
now we have a more smooth it goes like move here, we don't have a crease. It's just also cute. Doesn't look bad at all. But if you want a little
bit more definition on the edges, you can use bevel. It will serve as a constraint
to the subdivision. This is awesome. One more modifier before
we go on to Texturing. Let's add an array. Here you can see that
it duplicates as an instance on line
and I can increase the amount of
duplications that it can have even though it's
only the original object. This is pretty useful and we're going to use
this a bunch of times. I'm going to move
this up because this order of modifiers matter. So let me put this
above displace. Now you can see that
my displays changed. It's considering
all of my objects. Before it was just considering this one and then duplicating. You can see that
we have the same displaced here, then here. If I do this, you
see that it changed. I also adds a little bit more variation to
our displacement. I'll move this up one more. I think I'll let
this to the top. Now I'm going to disable
these other ones just so because of
performance issues. That's at five and
I'll also randomize. This is a Q feature
that we have. I don't know if it was
implemented in 5.1, I'm not sure, but we can offset a little
bit. I is pretty cool. You can also rotate for us it's not going to serve right now. But I'm going to randomize, just on this direction, you can randomize on all exils
maybe a little bit here. Okay. This is one of the
reasons that we do backups because right now, if I apply array on this one, it's not going to grab my glass. So I could apply
an array to glass, but the only thing that I'm using here is the
solidify and a Bev and I already have a copy of that on my lantern backup collection. So what I'm going to
do is apply and merge. I'm going to apply my solidify
and then I'm going to apply Bfilm even though I
didn't want to do that, and I'll join with my top. First, since this is a parent, I need to press Alt P to assign a parent
to click Control P. You can see set parent two and
to remove to clear parent, you click Alt P. I'm going to clear parent
and keep transformation. Now I can go here. And join. Now we have our subdivision applied to the glass
two, which is okay. We are doing a render, but you can see that we
have a lot of vertex, maybe I'll leave it like this. I think we just need one. Render, can use as
much as we want. But I think one I already
looks great from here. You can see without Bevo with Bevo without subsurfac
is subsurface. Now we can go here and
let's apply R first or not. Mm hm. Same thing. I'm going to
disable this performance. So now we have our
pathway and our lantern. This is our models. Next lesson, we
will start adding the materials and
assembling a sin.
9. Project Lesson: 3D Model: Now is the perfect time for you to create your own tridy object. You can follow along or
less lesson of our lantern, or you can create anything that you like for
our external scene. It could be something like a picket fence or maybe a
well, anything that you like. Try to focus only on
modeling for now. Observe how the light reflects on the
surface of your model, observe the topology of it, and how you can use modifiers
to change your object and have fun. Oh,
10. Creating the Cabin, Doors and Windows: Welcome. In this chapter, we will model our focal
point of our treat scene. We're going to model a
little fantasy cabin, and then we are going to
assemble everything that we already did into 13d
environment scene. So here you can see that I
opened a new Blender file just so I can add the
different references that I have for my scene. So here I have a cute
scene on a hill. I have some gibly houses to see more or less the palette that I want my sin to have. I also grabbed here
a references for another cobblestone that are
more this style that I want. I have game references here, the tiny glade that
are really cute. And I also grab some
mood references. So, for example, I want
to build a date scene, but I also want to have
this moody nighttime. So you can references to see the palette and the
values that you want in your scene just to get an over idea and also some
drawings inspiration. So if you want, you can also start
to see how you can translate from drawing to
a three D. So for example, here I just quickly sketch the way that I want
to build the little cabin, and then I thought about
how I can construct this in three D. So
I can come here. So for the roof, I
can use an array with different objects here and I can do use curves and an array. So you can start to think
about how you're going to construct your model and know which direction
you want to go. So let's go to our project. This is where we left
off in Chapter two. So let's hide our
cobblestone and our lantern and create a new collection
called Fantasy Cabin. Okay, so now I'm
going to go back and forth between my
reference project here, and I want to start
with this shape. On the lantern, we did a bottom up modeling
from the square. But now I want to tackle the overall shape here
that's going to define my little cabin first and
then do the depth of it. I'm going to add a plan, and I'm already going to rotate this I'm going to
activate edge length, but I'm going to be
following the grids. So one from this side,
one from this side. Usually you have
3 meters high in a regular house to
50 to 3 meters. After this, I'm going to
do the little kind of chapel chapel top part. Now I'm going to manually
divide in three parts, just following the 1 meter. I'm going to activate this middle vertex and activate
our proportional editing. Here we already have a root
proportional editing tool, so I can go here. I'm grabbing the bottom a
vertex which I don't want. What we can do is select the
Marg with and press Control E. What this is going to do is select everything
that I have inverse. ConroE and we select this one. I want to select the other
vertex and I'm going to hide with H. Don't forget that
you hide the messages. Now I'm going to grab this middle one and
do the same thing. I'm going to raise
it I think 2 meters. Now when I unhide
everything is the same. Okay, so the tricky part about this is keeping everything quad. I don't want to come here
and join this because this is going to leave
me with triangles, and we don't want that. So we are going to do a
little bit of topology here, so we can keep everything quad. I'm going to add a loop here, a loop here, and
also a loop here. Now you can see we have
different distance here. So without clicking
anything else, let's go here to our
tab and select even. But now it's even on the
butter side. So let's flip. So now we can fix our factor, something more or
less like this. Let's try to keep the same
distance here as this one, because what we are going
to do here is a loop going all around
here on our arc. So what we're going
to do here on this bottom on this left side, is to connect this
vertex to this one, and we are going to delete
this one, pressing Control X. So now you can see this
kind of going around here. So for topology, you just
have to see what you prefer. You have a bunch of amazing people that focus
only on topology that you can follow its work
and it's going to be it's not going to have the
same solution all the time, but you figure out the best way that you can approach
for each object. Right here, you can
see we have all quads. You still have all quads, but we have a loop
going all around arc. I'm going to do just a
few adjustments to make everything more or
less the same size. I'm going to use a
mirror modifier. Everything that I
do for one side will be mirrored on
the other. Let's see. I like to activate this one. If I select this, we'll select
the other side of the X. So if I do one adjustment here, it's actually
grabbing this side, so you can press Shift to make it a little
bit slower, you're dragging. You see here and here. I'll be more precise. More or less slide this. And you can see that
this is messed up. It's because I
didn't click bisect. I'm just going to dig this one. Don't worry too much about
the shape here because we're going to apply
sub divider later. But I want to keep this
trade as much as I can. I have this activated. Now I also want to keep this shape a little
bit rounded too. This part here. But, I want to actually
drag everything here. Let me deactivate this one. It's just this one. Now, I want to keep this square because I'm going to use
this to create a door later. Now we have a loop here. We have this loop and
we have this loop, and also this and this. This is a little weird
because I'm using mirrors. Now I'm going to do
a backup as I always do before I apply mirror in case I want to change
this shape later. I'm going to do
this front shape. Backup. I always create a back. Now going to apply. Let's see if everything is
right. Everything connected. Perfect. Can add subdivision, but I'm going to add a
solidify before that. I'm going to add some
constraints manually. But I can't because I need
to apply my solidify. I'm going to copy again, backup, and I'm going to apply solidify. Everything is right? I think so. Now I can add my loops. Here, maybe, I don't think
I'm going to apply one above, maybe just one below. I think it will be enough. I can increase one more and fl shade. As move. Really? This is nice. Here is a simple shape. Now what I want to do, let's
rename this to cabin shape, and I'll add one to
the backup as always. Now, this is the overall
shape of our cabin, and I want to do a
door and a window. I'm going to use the same shape. Let me just disable this. Now I want to do the door and I'm going to use the
same shape to create it. Here I'm going to edit mode. I just disable subdivision. I'm going to use this part
here to create a door. So let's detach this. Let's just select RSP and
separate by selection. Let's hide this and see
what happens to our cabin. So now we have a cute shape like this when we apply the
subdivision. So let's go back. I'm going to select both
of these objects at once and we can press edit and
change them together. So I'll just go and
select these verdicts. And rise a little bit
up if you go back, we can see that we changed
both of these objects. Now you can see we
have our detached door and our cabin separated. I'm going to add
some loops here. Just to contain this part here. Okay, let's work on
both of these at once. I'm going to drag my cabin 5 meters to the side and we're going to work a
little bit on the door. Inside fantasy cabin move to a new collection called door. I'll leave this inside. Now, now we can use
this as a base. Now, I'm going to inset. We used inset before. Just a little barrier to
do how is that called? A door frame, I think. Okay, so let's use this
to do the door frame. I'm going to separate it again just so we
don't get confused. This is the door
and the door frame. In the door frame, we need
to delete this bottom part, lead vertex, and I'm going
to drag this using B. This would be our door frame. The door needs to
come a little bit. And like this. Okay? So now we need to do is
decide the depth of it and it's going to be a
little bit bigger than the depth that
we add to the cabin. Maybe I'm a little too addictive
to solidify. That's it. Usually, we do 0.15 in our fantasy cabin
is going to be larger, that's 0.25, so this
is going to be 0.28. In our tar. I so I'm going to drag this a little bit
forward. You can see here. I'm going to keep
the same origin, so I'm going to
edit in edit mode and I want to drag a
little bit forward. Three I'm going to drag the
door a little bit further. Like this. Solidify needs
to be before some division. That we would not
get this moved pace. Now, same thing. Let
me see if this works. Do we have a loop?
Yeah, we have a loop, so we can do this. A one here. Another one here, snapping another one here called trope. I'm going to another
subdivision to this arc. We have three here,
three here, two. This looks better. Pretty smooth. Same thing here. So for chrome string here, I'm going to use another inset. I don't know if this is going to be enough. I'm going to press. I think this is okay. So we
can have all modifiers here. I'm going to add
another loop here. I want all rounded
edges pretty cute. Start with the cute
the cute again. Okay, so now I'm going to add
the solidify to the cabin. Or cent division. I want to add 0.25. Now you can see we have
this front part lower than the depth that
we want for a wall. I'm going to solidify
this outward. We also have some
problems if you can see out here if we
solidify inward. What I'm going to do
is add this to the outward and offset thickness, so we don't have this moving
here if you want to keep, it's okay, but it's going
to be easier to edit later. Okay, so now we have this. Let me see. Want to adjust a
little bit this part here. I think when I was editing it, it's not very smooth. Just a little bit. Yeah. It's okay, baby. You need to drag this
a little bit here. Then rise just a little bit. Yeah, I think it's okay.
Whatever it is doing? Oh, solidify. So now I have solidify outward. Let's disable this. And I'm going to do a backup
copy because I will need to alter this or there's two
ways I can approach this. I can adjust this to fit this. I mean, it already fits, but not so good. Or I'm going to adjust this
to this new size here. So I'm going to do a copy and shape and send
it to my backup. I see. Okay, this is the
backup of the fantasy. Okay, let's save it. Now I'm going to
apply it slid five. And I'm going to
adjust a little bit. I want to waste. I don't want
this part to be too big. I want to be exactly on zero. So let's move this top
let's hide this one, and I'm going to leave son. And I want to match. I want to see if I'm matching my vertex
here on the same line. I can do like this and have Snap on my Z 2 meters
steals 2 meters, I'm comparing it right
here on stuns form. Yeah, exactly the same
height and same Z. Now I can grab both of
these and bring it forward. I need to just this height here. I need to do this and lower. I'm going to need to
lower my a little bit more and then this one
until the bottom here. So now we have a thickness a little bit smaller
here than here. Actually, I mean, this
is a fantasy cabinet, but if this was a construction, we'll have more structure
here at the bottom. I think I'm going to
raise everything. 0.50, not too much, 20. I'm going to lower
this part here. If you look like this, it's a cub cabin. But the magic comes when
you start at the subdivisi. Now we need some more contain
loops for this part here. I also think you're
going to need one here. O here. Oh, the bras comma. So on the top here, why did I edit this loop? Did I edit right now? I think it was just to contain the top loops can
delete this one. Yeah, yeah. I don't mind this
kind of so you can see here if you're going
to render it cycles, maybe we'll have
some problems with this tiny, tiny part here. When I added one at
the bottom here, I added the one here.
That's what happened. Oh, great. So I guess we
don't need one at the bottom. Just this one will
contain. Okay. This is looking cute and
this is looking pretty. This is our main geometry, subdivided, main
geometry is subdivided. I want to open this door here. But if I do this rotation, it'll be like here, like this. I can move this to the side and then go here to treat cursor
and then rotate like this. But you can see that my
origin point is still here. What I'm going to do, there's two ways that you can do this. Let me this remove solidify, remove subdivision,
so we don't fuse. The most practical approach will be just grab all of this. So if we have 1.9, we will move this to 0.5. So we have here 1.38, so it will be 70 69, of course. We have 0.69 here, and we have our object
and we move here to the active element. And now we are moving here. To move this origin, you can also select the vertex. I want my vertex to
be right here and shift and cursor to active. Now my three D cursor
is right here, I can go to object mode, sent orange to two D cursor, and now my origin
is exactly here. I'll go back to Shift J, cursor to word origin, and we have our door. You can do this two ways. And I can go here, activate everything
again and I'm going to leave sliding ajar. Before that, let's
add a doorknob. Really simple really quickly. I want to do kind of the door knob that
you knock like this. I can do this way. 18. It's a great feel just this
like this and let's not. Actually, let's not use solidified for once because
this is really quickly, so I'm just going to extrude extrude the containment here, and then going to grab
top face, bottom face, inside Control E,
reach edge loops. Add solidify. No, I'm literally addicted to solidify subdivision surface. Oh, my God. Autos move. Sometimes I can't see. Move,
autos move, autos move. That's enough. I
also add on top, one little circle
on top, a circle. G here. Face tr down, contro plus, about N, flip. This is not the idea. Let me see if I can change that. Oh strew. Don't strew. X phases. What I can do here
is selecting and go to Control F and Grid field. This move again. Okay, this
is going to be Darden, Darn uppOkp no Durnop. I'll just the origin point. Again, this part here. So if cheese course to active, this is way quicker. No, not get course. Go back. Okay. Let's do. Backup. Why not? Then you open the
backup miles long. T g more or less material right now and scale. Usually it's at
the middle, right? Hm. Maybe this is
not a turn off. I don't know if I
like this. It's okay. Make this little
bit cuter. Okay. Now I want to make this a child of this because if
I go here and do this, I'm not going to
be able to rotate. So just like before, let's rename this door print. Doorknob, pressing Shift click, and this is a parent, and we need to have it
in the same collection. Okay. That's the door knob,
it's a parent of this. You can see the
relationship line here. So instead of using this origin
point, we have this one. And now let's go open again. Okay. So now the last thing before we move on
to model or roof, save everything, and
let's do a cute window. So I'm going to do
the same weight that I did the dark four. I'm going to disable this
so I don't get confused. And I'm going to
use both of these. Let's see what
happens because I'm not sure the size that is going to be when I think this
is going to be pretty big. Let's see how big this will be. Yeah, this is not a cute. This is too big,
not a cute shape, so let's add relationships. I want to add a
window right here. I'm going to add
one more line here. I need to do a round shape here. I'm going to add one here, I'm going to use mirror to do the other side
at the same time. Mirror bisect. Let's flip. This is good. Now, what this is going to do is alter the shape
of this that we have hip let's reset this rotation because we
will need to adjust this. What I'm going to do is
create another loop here here and here on the door. Now we have another
shape that I don't want. I'm going to adjust
all three at once. What I'm going to do is activate wireframe and select this one. Here I have mirron
but here I don't, so I'm going to select
this one and select the one that I select
here at behind. Now if I go like this,
I can adjust my, my arc the way that I want. Okay. We still have the arc
and I can come here. So we had this arc here
that I didn't want to use. But now I can select
select these ones. And I can press G and G. Oh, I split it. I pressed the wrong keyboard. I think I split the geometry. That's crazy. Let's go back. Yeah. Thank rest. G we can come here and
raise this up a little bit. Okay. So now we're going to bevel this one.
We're going to bevel. Here. And I'm going to use
this part right here. I mean, after I apply mirror, these two parts here
to create my circle. So let's do a backup. Let me rename this
because I'm going to forget mirror, window. Okay, so now I'm going
to apply mirror. I want to use these two shapes. If you want to go back and do a bevel with three
edges because I think I'm going to
use this one as the middle part and this is
the lower part of my circle. Okay, so now I want to do this. So this is the middle part, and I want to mirror
this part here. Let me see. If I go here, I can see that I move down. This value I'm going to copy, go back and now I have what? We have a problem here. Let me just do this first and then I'll press control fee, and I'm going to go down the
same link that I have here. Now I can. Let me adjust this
part here. What happened? This vertex and this vertex and this vertex and this
vertex. What are you? Okay. And also this one and this one and this
one and this one. Probably when I was
editing something. You can cut this if you want. Like, I'm going to pretend
that I didn't mess this up. Let's just make all this in the same direction
and all of this. Probably when it
was solidifying. We can do this to just
these minor errors. That errors just Okay. So let's see if this
will work, actual. Okay. So we have a little round
object here separated. I want to change the shape. So before we do that, I need to do this a
little bit bigger. And also, let's see
if we can use sphere. Yeah, we will need
another loop there, not in the mood to do this. So I'm going to remove this loop here so we can add to sphere. Let's see if this works better. Yeah. I somehow have the feeling that this
part is longer than this. Let's see. 0.5 0.55 0.43, so I guess Okay. Do we have everything? What? Not the best shape, but everything is white. Let's see. Let's remove the
overlay. Kind of like this. We'll say at the roof, maybe I think it needs to
be a little bit higher. Going to select this, this. This is not going to work. Yeah, I'll just
move this higher. Then these two edges, these two. You can also do your
windows first and then use Boolean to cut
your little cabin. But I like to do it this way because even though it seems a little bit
complicated at first, you have more control of
where your vertex are. When you boolean, okay, you can get a nice effect
if you're doing a render. But if you're not
paying attention where you're cutting and how many vertex you have from one object to another,
come really complicated. So you can use other modifiers to correct them,
the phase angle, the phase normal, so it gets
a little bit more complex, but it's definitely
something that you can use and can play around. If you want. Okay, now I have the cutout
for the top window. I'm going to add one more here. Let me see if this will work. Let's just separate
this part here. So we have kind of
round shape here. I'm going to just
adjust this face here. I'm going to do I'm going
to add another loop here. This won't affect
Arter even the window. And just like before something like this.
Let's do mirror. Let me see. I another loop here. I think this one, I
don't know, let's see. Yeah, won't alter the shape. Now we separate this one. Let's see. We have a top here, a top window here,
and two like this. Y. Do I make them like this or not? Let's add one to the side here. Yeah, we can use
mirror or not the set. What the hell? That was crazy. I'm going to add Hmm maybe
we could add one here. Well this is not going to show. Okay. So we have here,
another mirror here. Let's jump off this. That way we have two side. Now I have the base
for the windows, but I already apply the
solidified to my cabin. Let's pretend this was actually a setup for me to teach
how to use Bullion. Let's add here on
our cabin selected. Let's rename this windows. Let's apply and add bullion. You add bullion to the object
that you want to be cut. Here on the eyedropper, you select your windows. Let me just also this one, just so we don't get confused. Now, your windows need to
cut the inner part of this. We're just outside so let's
add a solidifier Okay. So now you can see that
it's passing through the inside of this
model with X ray. See if we have okay. Now, you need to select. If we click Intersect, only the parts that
are intersected with our Boolean will show. If you click Union, you have what's been cut
joined with this object. What do we want right
now is the difference. Now before we apply, let's hide this to
see how it looks. Or we can hide it. Now, Okay. So now let's just dipt here. Well, let's not do that
because what I'm going to do, I'm going to duplicate
this one and use this one as a balloon just so I don't mess up this object here. So let me hide this one. This is going to be the balloon because I was getting a
little bit confused there. So with this one, I can
go ahead and drag them a little bit further so we don't have an intersection
with the faces. I'm going to do the same
thing for this one. It's a little bit further. Okay, so now I can
apply the solidify. Okay. So now let's use this one. You can also select right
here and let's see. We have this problem
here with this top on. I'm not sure why, but you can see that the other
ones have got perfectly. But you can see here
on the inner part, the way that I show you, we don't have anything connected. So I'm going to
connect manually. Now I'm going to create
a copy to the backup. This one to move the
backup and I'll apply the bullet Now let's see the window subdivided
and this subdivided. Now before, I'm just going
to adjust everything on the inside and this will be it. Now we need to add
on the inside. So this is going to be
a little bit annoying. But I don't need to
add one up here. I'm going to do one mirror again. Okay. Let me see going the other round so I can
fix both of these at once. I'm doing the other side. So what I need to do is a tulips here tulips down
here to connect. Just like the outside. I wouldn't be able
to do these loops here because I
have two vertices. I'm going to connect
this to the top one. Let's flip it. Okay. Merge
to last, merge to last. Now we can connect this
one by pressing J. Let me see if we have
a shortcut here. The edge. I'm not sure if we have J and K. Now we fix the polygon
size of this one. We need to add two
more loops here too. You can see that we can add one here or I can divide this
one. I need to add one here. Like this and like this
and another one here. This is why Ividus Let's merge. You can also use a modifier
to merge your vertex. We can go here and use weld. If we weld, this I'm going to leave this
pretty low because if you go, you start to merge everything. Let's apply. Let's see if this.
This got applied, this one, this didn't because it was bigger, use cautiously. This we need three, I guess, we need to
drink Let me see here. Yeah. We need to drink
this to this one. Oh, we only need to
do this side and this to this one and the
scrap and this to this, and this to this, and
this one doesn't exist. Let's see. Okay. And let's apply our mirror, and we are all set. I just need to bridge this
loop together. And let's see. Perfect. Let's go to the
outside and add the loops here. I'm going to hide
it at our loops. I don't know why I
have sharp base faces here. Let's clear sharp. Okay, so we have a problem here. Okay, so I need to pitch this. Now let's see here. Let's remove sharp. Okay, so I can't add
a loop here because I not connected this
one to the outside. Actually, I don't
have this loop there, but I can remove it. I can't remove it. Let's see. And this part, yeah, I can't remove this loop. I already applied
mirrors, let me see. And I can remove this one here. Put your X. This part
doesn't met so much. Okay, now add tps here. Already pie me. I
shouldn't Okay. Now add another loop here. Another one here. Contro B. Can you do something like this? No. Trough R. Scale and ControRT scale. Mess up here. That's why I deactivate
some division first. As you can see,
sometimes Blon when you try to keep a quad modifier, if you don't have
the correct loops, it could be a little bit
more time consuming. So use carefully. Okay, so for the last part,
let's do the windows. I'm going to do them
just like I did with the tar of them at
once really quickly. Okay, so now let's
add some constraints. Let's see how it's
looking right here. And also here. Okay. Now this one. Let's apply solid phi. And now I just need one p here. Up here and here. Now, I want to add a
cross here on this. I think I'm going
to add all of them. We're going to
duplicate this one, I'm going to use as a base. So I'm going to use this as
a base to create a cross. I select four of them of B. I'll separate this one
and now do like this. Then we copy to all of them. Oh, I selected in another one. Okay. And flip and flip and loops we must forget to have two
separate objects here. Lip I don't know if
we need subdivision. Of course, we're in this stuff. This. Let's join them. Just subdivide ones and
make this a little bit. Okay. So now I can
copy Window cross. And this Okay, let's see if we can
join both the tree. We can join because there
are separate objects. So we have window glass,
windows, cabin shape, and door frame and door, and inside of door,
we have knob. Let's do these tune, let's move to a new
collection called windows windows and cabin shape. So yeah, this is the
overall shape of our cabin. Can see right here. Movers, comes soon comes
the bold right now. So let's open this door
a little bit. Cute. Okay, so this is
our cabin shape. Let me just see what we can
do to fix this part here. Let's add another loop
here, another loop here. Also this top loop is
kind of constraining, making this a little bit. You can see here how the light comes and then it has a little
cut here and here, too. Let's see what we can do
to to make this better. So we can press GG
and move this up, and we can wrap this. We have a separate on no. And we can bring it down
so you can see this is waste mover just by
adjusting a few edges. So this is it for a cabin. Next lesson, going
to be quicker. We're going to add the roofs
using curse modifiers, and then we'll start
assembling sin.
11. Modeling the Roof (Curves and Array): Welcome. In this lesson, we're going to model the roof for our little fantasy cabin. We're going to use only curves and the array modifier to do it. Let's go and create a new
collection named roof. I'm going to disable
the other ones for now. So first, I'm going to do
this little part here, the ridge of this little house, more or less like this. But I want to do a variation so it doesn't look
this straight, and I'm going to use a new feature of the
array that we have. So it's going to look a
little bit different. I'm going to start with
the cylinder shape. I'm going to use a 24 or more going to use the fault 32 because I don't think I'm going to use
subdivision for this. Now will rotate by 90 degrees. The only tip about the amount of vertices is that you
keep one vertices on the X and one on Y because we're going to
delete this bottom part here. Now I'm going to close this off. I'm also going to then
I'm going to select this one and this like the
bottom face and I'm going to duplicate this and scale a little bit just to
create a separation, and then I'm going to
extrude along nerves. I want to grab this bottom
part here and scale Z I'm thinking this
bottom part could be some structure for
this part of the roof. I'm going to use just a bevo. Just two segments. Let's see how it looks. I'm going to reduce
this part here. I don't want to change
this proportions. I want this to incur
in this direction. O Okay, so before I adjust
the scale for this one, I'm going to activate
my cabin shape and grab just the line
of the stock part here. I need to duplicate it and
separate by selection. And I'm going to use this one will be the base for my reach. Now I'm going to go here
and use a simple array, and I'm going to do the
array after the BEFOO Y. Actually, let's see. We
have a rotation here. That's why you need to
apply your rotation. Since we're going to
use in this direction, I'm going to apply the rotation
and now we can use one Y. What I'm going to do right now, even though this isn't a curve, I'm going to go here
and convert to a curve, and I'm going to use here. Online, I'm going
to go with curve. Now we need to
select this curve. Okay, now you can see that our object is
being fit on the curve. Here I have a line rotation. We are aligning the
rotation for X and up. If we don't align, we
will follow the direction of our object. For
now, I don't need. The reason that
I'm doing this in this case is that I want to use this count method because here we are just counting
by the distance, we have one and then
1.1 and you can do like this or rotation
but it's limited. So I want to use
curve and with this, we can adjust by distance. Here you can see if
I want the distance between one instance and the other to be 4 meters,
it looks like this. If I want it to be less, you keep adding based on the
change that you do on this. But first, let me
adjust the size. Okay. I'll just scale it down. Let me see 28. Let's compare to
the cabin shape. And scale it more
or less like this. Okay. So now I can come
here and reduce the amount. Now we need to come here
since we don't have the subdivision applied
and kind of fit on the. Yeah, I think this looks okay. And now is the fun part.
We can come here to LA array and randomize it. So depending what
we change here, you can see that slowly
it starts to turn. Here, I'm changing on the Y. You have a little
variation on the Y. I'm going to adjust a
little bit of variation. Maybe ten at most, and here on X, just a little bit
two, maybe five. Maybe this could
be more. And see. Just so we don't have
a straight line here. Let's make it so it shows a little bit of the
distance between them. And this will be the ridge
of the roof really quick. Okay. Now, let me
just move this. It's the curve for
the ridge here. I'm going to grab this part. One loop here to do
the slope of the roof. I'm going to use this here, maybe one more and
delete these vertices. Now I'm going to transform
this into a curve again. Now you need to enter
and set to nerves, actually, and set to Bessie. Now you have all
of these points. I'm going to remove
some of them. Maybe just this one. I think this ones
will be enough. Now I can drag it and
modify this curve. I want to do a slope here. Acute detail. The nice thing about
this is that you can go back to this and
adjust the way that you need. So let's move on
to the next step. The first thing you're
going to do is to create the object
that will go here. For this, I want to
add a simple cube. And I'm going to
do a simple tile. I think a square tile. I'm just going to round
the edges with a pet fo just to keep on
the same language. So the size is going to
be let me just this. 46 going to add the bevo here. This is going to be our tile. I'm going to rename
this tile roof. One thing I can do is I
can select both of them, Control L and link
in copy modifiers. Now we can see that it's
applied to this curve. All I have to do is remove
and select the cabin shape. Let's rename it. So now in this case, you need to align the rotation. So now you select your
curve and go to edit, and here you can
tilt your curve. With this, you also tilt the
position of your object. Instead of rotating the way
that we have it right here, we can change this curve. So now we have the correct
direction. Let's reduce. So it kind of overlaps
a little bit. And now let's adjust different rotation that
we have from before. So I'm going to exaggerate
this a little bit more. I want it to feel
to look crooked, even if it overlaps a lot. You can play around
with the settings here. Now what I'm going to do
is move my curve here at the edge and I'm going to
lower this part here a bit. Now I'm going to apply
an array on this curve. So it'll be inception of rays. I'm going to array this curve on the line on the Y and zero on no more and your roof takes shape. You can see that this is nice because light hits different
between all of them. Of course, if you want
a more straight look, can even just deactivate. It will be a simple tile. But I want something like this. Now I want to add some supports here at the
front and here at the bottom. I'm going to do this
without using array curves. Let me grab this curve here. I'm going to duplicate
and separate. Now I'm going to
add a curve right here and I'm going to
do some support loops. Here is slope, maybe one here. One more here. And I also
want to add one here. So let's grab this one. This one as a reference. I'm going to copy
it and separate. I'm also going, I'm
going to leave on, but I'm going to reduce
this by I think just four, five, I have the
other one selected. So just actually
reduce this one, go back. Okay, this one. Just going to use a few of
them and sparse it out. So yeah, I think this
is it's a good number. I'm going to move it here. So this is going
to be the support. I'm going to hide
this one for now. This one and this one. Yeah, let's focus only on
the structure right now. So I'm going to apply this way. Yeah, I'm going to apply. Oh, okay, I need to
cover to mesh before, and it's already applied. I'm going to convert to a curve again because
this is a curve, yeah. I'm going to convert to a
curve. And the same thing. Uh Blind type. What is your nerves. This year. Now I'm going to join this one.
It's a little short. Let me see why. I don't know why this one
is falling short, but I'm going to grab
this This is better. So this is a nerves curve. Let's just convert
to the same one. Let me just this real quick. Let's just make all easier. Now we have our structure, this below, and this on top. Now instead of doing arrays
and adding a dit object, I can go here to curves and
you can go here to geometry. Here you can offset. Actually, you can
intrude and you can offset and basically create a geometry just
from your curves. I'm going to go here down
here in Bevo and I'm going to increase depth,
something like this. And I'm going to go to profile. Here I have some options. So if I move here, you can
see that the shape changes. And you can also
adjust the resolution, how many basically
edge loops you want. Maybe if we do a little star
like this, kind of cute. If I set like We'll see. Give some nice dimension
to the object. Let's increase resolution,
and we can also come here and shades move. So here we need
to fill our caps. And also, if this cut
is still too sharp, you can increase the resolution here to increase the
edge loops here. So this part here?
I think we need to. Let's see what we could do here. So let's lower everything. Okay, so this is the structure. Let's see our tile again. So now we can see that we
have a little bit of overlap, but I think it's okay. Maybe we should rise this up a little bit or bring this down. Maybe a little bit. Maybe we add another one. Okay. So this is kind of fun. Okay, so now we have our roof, and I'm going to actually
increase the size a little bit. So it's more evidential evidential pronounced on
top of this maybe out. Just increase the size here and not the
size, the other size. So just so it shows
a little bit more, and I'm also going to bring this down from the shape here. But this down a little
bit. Maybe too much. Maybe, so go back a little bit. And I also want to not
overlap this part. But we need a little
bit more distance here, a little bit less. Okay. Good. I think
this is good. Now let's see if we can
mirror this other side. Perfect. This we can mirror. Let's mirror the other side. Now we have this on all sides. This is cute. Let's see how everything looks together
windows and door. I like how cute and
messy this looks. So we're going to add variations for this material
here on our roof, and also we're going to
add some slabs here. Let's add one more thing before we go to
assemble our scene. I'm going to add also
a few steps here, so it does a smooth
transition to your pathway. I'm going to do
something different, since we are working
with curves. I'm going to add a curve. It doesn't matter where it is. Let's just go to edit. I'm going to actually select
and delete this one and I'm going to go here under
draw or curve pen. Let's draw. I just want
to see how this looks. Not very great. Let's do it again. Okay. This
and this and this and this. Maybe the other around. Okay, it's okay. So now I can go here and play
around with the result. Through this. So this is the parting treaty
that you can have fun. I mean, you can
have fun anytime, but times like this
are pretty fun. I want to make it pretty
round like it's made of maybe maybe a dope. Okay. I'm going to go here to curves and
adjust the resolution. I just don't want
too many vertex when I convert to a mesh. I could use this as a profile, but this is okay. Let's shift ten and
recalculate outside. Still have too much vertex here, let me go back and
reduce this a little more before I convert to a mesh. Just one more. Okay.
Okay we play outside. And let's just add
here a pebble. Try not to overlap
anything and allos move. Okay, we have a cute step. If this is hnterd Okay, so this is our little
fantasy cabin house. We used a lot of modifiers and properties that we learned
on the previous lessons. In the next lesson, we're going to join everything we did, like the lantern and
the Cumbosto and we're going to do a terrain
to assemble our scene.
12. Environment and Scene Structure: M Mm hm Welcome. In this lesson,
we're going to join everything that we model
into a three D scene. We're going to
start with modeling the terrain and
then learning about some composition guideline in your camera so you can better
set up your environment. So the first thing I'm going to do is to set my camera view. So I'm going to go
here to collection. If I already have this selected, I can press zero on my Numpad to see the
view of my camera. So let's increase the size here by doing control
and space bar. You can do this to enter
each viewport, like this. Now you can press Shift
and the boots I guess, and you can move
this around up and down with key E
just like a game. I want to set up the distance, the view that I want
for this image. So maybe like this, maybe this side here, and more or less the view that I want of this
just to get an idea. I want that my camera, if you press ask you count. Oops, I press
cancel, so go back. So here I want my little
cabin to be the focal point, but I also want to create
some depth in the scene. So maybe something
like this where I can see the path
coming down this way, and then I want something
on my foreground so I can have a better look on the
lanterns that I model. So this is more or less the viel that I will have from
my little cabin. So now you can see
that my camera is set lower than the zero. And I'm going to use
a sky texture here. I need to raise
this so I'm going to select everything
with A. Let me go back. Actually, what I'm going to do is select everything that
I have here. Let's see. All the objects, I'll click
here and set select objects, and I'm going to add here
and empty with plain xs. Now I can go here,
select objects, and I'm going to click and drag pressing shift
to parent this. Now I have everything
under here. So if I select just
empty and I move around, everything comes
with me, everything that I have inside
the fantasy cabinet. So I'm going to rename this as fantasy cabinet
because I'm not going to change anything right now. I don't want to move this, for example, then I get lost. I'm going to move
everything at once, so I can just select here. I can even reduce this and
just select this part here. For the lanterns, we
can live separate. So I'm going to like this one. I'm going to select our stones and our lantern and our camera. I'm going to move
this everything up. I'm not going to be able to notice because I was
in the camera fiel. Okay, so we bros 15 meters. Let's delete this slide here. Okay, so now let's
add our terrain. I'm going to add a plane. Don't be afraid to
add a big terrain. Now I'm going to
subdivide it by a lot. I think this is okay,
and now I can use a modifier to add more details. Now for this, I'm going to
use proportional editing. I'm going to grab this tube here and I'm going to see how
much I need to drag here. I want to have this little
effect of a house on a hill. I'm going to grab this too. Let's do move. Let's
see how it looks. Okay, so I'm going to
use more or less try to touch without
overlapping too much. Yeah, I think this is okay. Let's see how it looks subdivided one more
time. This is better. I'll shade flat for
now just so I can have a better understanding of how
my geometry because here, I'm going to use this curve
here to add my pathway. I want my pathway to
curve down like this. It feels like you're
really climbing up that hill to reach this little
house. So let's do that. I'm going to duplicate because
I don't want to apply. Apply just so I can reach this exactly the medium perfect. Now I can delete these edges. Now I have this
perfect line here. I can go here and select the
one that I'm going to keep. I think this is enough
and delete the vertices. Now you know what
we're going to do. Add an array using this. Curve. Now for this one, I already have an array and
we're going to use the curve. This curve right here, curve pathway. Curve pathway. Nice. The same problem solution
that we did before. Let's go to items
go to our curve and silt it 90 degrees. Okay. Now we can do a little offset so it
doesn't fall flat on. Actually, let's see
how it looks before. My computer is struggling a
little bit with all of this. I'm going to disable my subdivision and my bevel
and my displays for now. This is perfect, right on frame. And I don't think we will need to actually, let's adjust this. Oh, I have 42. That's why maybe my computer
rolls lagging a little bit. I think we can do 13 14. I think 14 works well. We already have a little
bit of variation. I'm just going to go in
my curve. Let me see. Yeah. This one, and I'm
going to press N G. Oh, I'm going to just remove this. Let's see if nothing else. Let's try not to bit. Let's try not to ring
this curve too much. Let me see. Let me
activate bevo subdivision. And this box. So what we can do to not
tweak find twigs like this, I can go here let's first
disable this subdivision. Let me see how much I
have here at three. Let's leave a one, and then in the render,
we'll still have three. So I can go here
to curve pathway. Let's move this. And I can add a modifier called shrink
wrap shrink wrap. So I will select my object. I lost everything. I'm going
to go to project on surface. Let's see. Negative
and positive. And now I will apply. I think when I
applied it choked. Okay. Now let's see. So I'm going to add a new
hill in this foreground here, maybe coming like this
because I want to make another pathway where it comes towards the my camera. So let's save this and let's save a backup
too of this plane. So the rain I don't want to lose this part here, I don't want to change it. Going to duplicate.
Going to move this to collection,
call the ring. I'll just backup I
have this terrain. I don't think I created a
collection for terrain. Yeah, I'm going to
add another hill. I'm going to actually
copy this. Let's see. I'm going to optimize
this a little bit. I'm going to delete this
thing that we won't use. See? And I'm going to basically copy this and we'll have
another hell here. Okay. And I'm going to make
this a little bit Sharp? Sharper. This and this will move this way. But I kind of want to create. I'm going to use these
lines as my beth. So let me just analyze
the direction. So maybe this from here to here. And so I'm going to activate a few camera
lines to help me with this. So if you go to the
properties of your camera, you can go here at safe Area
center Code let me see. Here is your basically
the margins, but you also have another
it's not this one. You put display
composition guides here. You have your thirds, you have center,
diagonal, and triangles. I'm going to use the center
and the diagonal for now. And I'm going to basically this will help me to composite. So I want my door to
be here at the center. This is kind of following
this part here, and I want to create
another line here. Okay. Maybe I want this to feel that I'm a
little bit lower. Yeah, so This is the
show that part there. This is a little large. Yeah, and this is
a little closer here. So I'm on my camera. Let me see. This lower. Once you adjust this 90,
this doesn't matter. I also silt instead of here under shift I can shift up and down instead of moving my angle. You can move a little
bit, your angle. But you will get some distortion
so you can do like this. I'm going to do this a
little bit more. Like this. Okay, so I'll use
this line for now. And we'll adjust as it goes. One, two more just
in case we change. Actually, let's just add. I already transform.
Let's just add. And now we just need
to adjust the tilt. Okay, so now this terrain
is a little bit sloped. Let me think about
it. If I slope this. I don't know if I like this. Kind of feels like
everything is tilted. Maybe it is too much,
but maybe if I can reach an 85, it will be okay. So I'm actually going to
try to adjust this part of the terrain just so I don't
have a little bit of ankle, it's good. Not too much. It's even nice if you have
some during overlapping. Not so much, though. Okay, so now we
have our pathway. We are only missing the flower that we're going
to add and the lantern. So let's go to the lantern. So I want to do in one side, on another side maybe. When I'm offsetting like this, I need to offset more. Maybe I'll have just
two here. Okay. Let me see if I can get
away with doing this. Maybe just for the first one. No. Make this and let's
move. This one a little bit. Yeah. Also bring this
one a little bit closer. Yeah, this is going to
show just a little bit. No, we don't know what's
happening down here. Maybe we have a curve. If you want, so let's go there. If you want to come here and
move this from side to side, maybe you want to connect this. The way that we
have it right now, little squares is going
to be a little hard. It's going to look
a little bit weird. If you do really small, maybe you can get away with it. But yeah, if you have a curve, this inner part will need to be smaller than the outer part. So this is best when you are
working with geometry nodes, you can have a better control. Or if you have a
different origin object. Let me adjust this.
It's a little bit overcrowded,
overcrowded, right here. Yes, because we have different
let's say per curve. Maybe if we have some
let's go by distance. If we go by distance, we
have exactly 1 meter. We're not going to
change this 1.05. Just a little bit.
01. This is better. Our other lantern. Let's see. This first one. I can play around a little
bit with this height. I want my third one right here. Let's this one. Remove the array from this one because my
origin point is weird. I'm copying as an instance. Maybe I have too
many lanterns here. I have this bottom
room right here, I have this one here. Let me see. I think this one I think this one is kind of in
a way more than this one. This one even makes sense. It could be a little bit lower here, so it
doesn't collide. This one is kind of
getting under my skin. Yeah, let me disable, but I'll live I'll
leave it to do it. I try to I'm satisfied
with this for now. So now I'm going to
add our flowers. So this is really simple. Going to add a circle mash. Right here and into face. Now, we have a system
that is called particles. If you go here
under particles and Ed you have a particle system. You have an e meter
that will depend on your timeline. Or your hair. You can see that you
have a lot of ir. So you can go under Brander and instead of path,
you choose object. And now you can select an object that you
want to instance. So here we have the flower. So we can go here and
select this object. Now, you can see that we
have a bunch of flowers. So let's reduce this by a lot. Reduce the number, and now
we need to adjust the scale. But first, we need our global
coordinates. So let's see. We need to go under
here and sell advanced and now you have the rotation
control. Let me see. Maybe I need to do objectZ
or Global C. Yeah, I think both of these are fine. Let me just reduce the
scale a little bit. Now, they are crack. They are still tilted. Let me see what I
can do about it. Let's leave them tilted. But now we have a phase and
we have randomized phase. This is crucial for you to mimic because we only
have one flower, so we need to randomize
them the most. Let's reduce the amount. Still have too much.
Just a little bit. With phase randomize and
also our rotation scale, actually, our scale randomness. You can get away with
just one flower. I so now I want to add
them on the first plane. So I'm going to take this
so this doesn't show. I'm going to add
a depth of field. So this is not going to
be in focus too much. Maybe we have too much flowers. So I'm going to add one here. Let's add flowers. Yeah, let's keep it.
Let's keep it here. I'll add I'll add first here and let's see
where it looks good. We can change this
as we render too. But another one. Actually, let's duplicate this for
this one here. I'm going to adjust the amount. I'm going to use the same one. Cute. Let me just can see. And then in the future
oranges tate like this and I'll go here and
add a mirror by your mirror. Oh, yeah. So let's just
a orange into t coarser. And also the
rotation. An swarms. Set arching, de coarser and X apply and adjust the number. Okay. Even though we are looking from a bottom
up perspective, I'm going to add a
few more mountains here just to composite
with the sky. Let me just drag here. So what I'm going to do right now is going to be crucial when we start to render or
see the materials. I'm going to add
another viewboard here, just so I can have one here at my camera and the
other I can move around. So I'm going to do
this in this one. I should have done this earlier, actually. I'm sorry about that. So yeah, I want to
add not higher than my little house because
I want it to be focused, but, you know, just a
little composition here. So you can see that something
is happening out here. This is very important. Your camera in a viewport has a limit and I think
I showed you before. If we go here to view, we have 1,000 meters and you can see that it's starting
to clip right here. Let's increase here
and see what happens. Nothing. Let's go here. Nothing because
this is our camera. This was a test,
you need to go here and just clip start and you
clip end on your camera. Now let's go. Let's go. Wow, I placed this very
far away or it's not ogle. That's it. You need to keep in mind
and this is your report, and this is your camera. Your camera also has a limit. If you can't see it, maybe you should adjust
on both of these. Already doing a quiz. From the front, everything nice, from the top, everything crazy. But that's how it works. So you can see here,
dictvate this. This is looking pretty cute. Actually, I'll name this
flower instance. It's better. I'm going to this deactivate
it and I'm going to add a flower flower flowers. I'm going to drop this here. Now for terrain, it's
already in terrain. Perfect. Let's leave the
flower instas here. Everything organized. Okay, so this concludes our
scene composition. So next lesson, we'll start
working on materials.
13. Creating Simple Materials and Colors: Welcome to Chapter four. In this chapter, we're going
to be rendering our scene in two different moods in the daytime and one more
moody in the nighttime. We're going to start by
making our materials. So here is where we
left off last lesson. So if you go here to the top
part and go to material, you can see that we only have the flowers here with a texture. The rest is gray, and we
don't have any depth in it. So let's go one
more to the render. You see that we have shadows
and we have default light. If you go here under shading, you can see that we have a HDRI that you can choose here from
your defaults in Blender. You have a studio version
and you can change this. And you can even control
the rotation and strength. But this is your defaults
for the viewport, and we want to use our own. Here on the top, you can
see sN lights and SN world. If you activate this, this means that we are going
to use this part here, world properties as
our main setting for the viewport and render. If you go ahead and press
F 12, this is our render. If we go here under
color and we change, you can see that it's
also being changed there. Let's also activate in lines. This is going to activate any lights that we have
here on our outliner. Now this looks pretty bad. Let's go here to render. In Blender, we have two
main render engines, that is IV and cycles. IV's real time more fast way that you can see and make your renders and cycles, if you see, it has
the rate racing, but it takes a little
bit longer to render. You can see that it's pixelated and you need to
add a denise here. If I activate a denoise
here on the viewport, you can see that it
gives you a preview, but it takes a little
bit more to render. For this one, I want to use
IV because it's faster and also we received huge updates in 5.1, so we want to test that. So under IV, if we go here, we have the ray tracing, which is the cool feature that we have on
Blender right now. So that's nap I didn't even see. You can see that just
activating ray racing, you get the same
properties of shadow and ambient occlusion
that we had on cycles. So this is pretty cool. For now, we will leave the
settings this way. When we go to the lesson
that we have on render, we will get more into it. So let's go back to
the world properties. The first thing that
I want to adjust before we start making our materials is to show you how we can change
this background here. So let's go to the shading tab. Okay, so from here, let's go to material again and I'm going to
deactivate the overlay. So now you can see
here that we have the shader editor view,
and we have objects. If you click here
and go to world, we have the same settings
that we have here, but we have all of our nodes so we can
play around with it. If I go here and change, you can even change colors. I will reflect into everything
that we have on our scene. So this here is our
background shader, and this is our color input and the strength of
this color input. If you hover your mouse above any settings and
you press backspace, you will reset to
the default setting. So what I want to do here is use only textures that we
have default on Blender. Noise texture, wave texture, and so on to delect
procedural materials without using any external
materials or textures. The first thing I'm
going to do is press eFT and search for
a noise texture. Here on the output nodes, we have factor and color. If we connect color, you can see that we
have a nice overall. If you connect factor, we have a black and white. Now what I want to do here
is pass this factor to a color ram and we are going to use this a lot
to give some variations. Now we have a black and white and we can control the distance between them to control the intensity of
this noise texture. Right now I want to play
around with the values. Right here, what I want to do here is for the
white part to be a cloud. If I go here and
increase detail, you can see that I
have this definition that looks like a fog, but we will make this a cloud. Play around with these
settings and with this, you find something
that you like. What I want is this back black. Let's go to this black part
and add a color for our sky. What I'm going to do here is
go to my inspiration board, and I'm going to
grab a blue color. Let's want this kind
of blue pretty bright. I'm going to actually
pick this color, and I'm going to copy
over above Control C, and I can go to my other
project and press Control B. This is too bright. Really bright, and this
will be the cloud. You can add more color to
this ramp papers in control, and I want to add some
depth to the cloud. Maybe we could write there too much. Yeah. Now I can also come here at my shader and adjust
the intensity. You can go over. Now if you look, we have this
fake noise in everything, but it's missing some depth. I'm going to show you
another texture that we can use and it's
called sky texture. And this is really cool because
it actually mimics a sky. So let's disable Sundisc
because it's only functional in a cycles grander and let reduce
strings a little bit. Actually, let's
duplicate this so we don't lose the shader here. Shift Okay, so now
I can reduce this. Let's reduce by 0.20. So you can see that
the sun are more or less in this direction here. The cool thing about sky texture is that you have this kind
of horizontal line here. So you have this kind of blur this gradient that gives
the sky a nice effect. It's the thing that is missing
from my noise texture. So I will just do some rotation here to be a little
more front face. You can see that what I need
here is this gradient here. You can see that goes from
white to a little bit of blue. I'm going to increase
this a little bit more. We have a nice cast here. What you can do here,
I can also mix shader. If you drag here and
go to mix shader, you can mix the two together
or connect this way. So now you can see that
I have a little bit of my clouds and a little bit
of this gradient here, which makes a lot of difference. So if I move my factor
and go to zero, you can see that I have
my original texture. And if I move here,
I have the sky. I can play with this and search for a nice
in between factor. I like this, but I
also want to maybe push this to make the clouds a little bit smaller and
see if we can do that. I also want to add if I can variation on the sky here. You can see grading a
little bit of gradient. Maybe I can reduce
the strength of this. Okay. So this we have
kind of a handmade sky. We're not going to be able to sit below this
horizontal light, so I'm not going to
worry about that. We can just go here and
push this a little bit. Here. Perfect. So let's
press F 12. Let's see. This is it for our
sky right now. Then we're going to edit a
sun and artificial light, but this is going to
be in the next lesson. Let's focus on the
materials for now. What I'm going to do is
just increase a little bit more of this intensity just so we have a better
view of our materials. 0.5. And now the first material that I want to add
it the lantern one. We're going to add
two materials here. Let's focus on this one. We'll go to New and you can see here that we
still have our words, so let's go to object. This is our principled BSDF which is physically
based rendering shader. What this means is
that the shader controls the way that lights
will bounce on the surface. This is realistic rendering. So here you have your
shader for surface. You also have volume
displacement and thickness. We're going to be using
surface and displacement. But let's focus on
our shader for now. Here you have base color, metallic, roughness,
Alpha normal. And for this project, we're only going to
use three nodes here, which is going to
be the base color, the metallic, and the roughness. So let's check metallic. If metallic is one, you
can see that we have this shen here on our object. Let's change to this default
first so you can see yeah. So here we have let's go to
study, maybe studio left. Let's bump roughness to the top. If we bump roughness, you can see that we
have a more not shared, but we have more
rough in your object. If you go under, you can see that we have
the reflection here. It's really smooth
when we hit zero. If you leave roughness
to zero and metallic, you have this really reflective, you can see that it's reflecting the world that we have here. If we select another one, you can see that it's
reflecting everything, even the flowers here. Here on top, you can see really well this environment here. If we go to our scene world, you can see that it's reflecting
everything from around. A so for this leter we're just going to
adjust the base color, let's not use absolute values. Let's use some variation. Less like this and a rough. Now, let's add the glass. To do that, I'm
going to press tab, Enter, and select
this part here. Then we will add
another material. Let's name this to metal. And this one will be our glass. Now you can see
here that under ED, we have different
kinds of shaders. Let's search for the glass
and connect to the surface. You can see this is
not transparent yet. It's because we need
to adjust the racing. If we go here under
glass and activate trace transmission and
also change this to slab, you have a better results. Now you can see a
glass effect here. But I also want to add
some properties here. I'm going to mix this and I'm going to add
other noise texture. I'm going to map out just
the way that we did before, Control T. This way I can adjust the scale to adjust the amount of
noise that I want. I'm going to use this
for roughness too. I want to make this feel like
it's foggy from the inside. Actually, I'm going to
leave this white and then we'll see the effect that we
get once we add the light. I can go here and
made it completely glass or I can make it
completely this shady here. You can play around with
this just like before. I'm going to leave it
just like this for now. Now you can see that we don't
have an instance of this. You can see that
we have Lanter P. Let's rename it to enter. Let's go here and select
the original one. This way, our materials are
applied to all of them. Now let's do our terrain. For this terrain, I want
to use displacement, but not like the way that
we did before vertex. I'm going to use just a bump only that is going to be
applied by the material. Let's go here, create a new
terrain terrain material. And I'm going to
use and for this, I'm going to use a different
texture called Voronoi. Let's see how it looks before. We can control the size here. So you can see that we have these different
policons here can adjust even more subdivision,
roughness and randomness. If you go to zero, you get this checker mesh one. I want to use this to create
the effect of a grass. So the first we're going
to do is add color to it, add the color rim and
connect to the base color. So I'm going to add
my two green colors. I'm going to go here under
my reference that I'm going to choose two more
colors that I want. Maybe this one right here. I will go to my this green. I think the main green, and let's select another one. Lighter one here. I think I copied this
a little bit lighter. Let's just If we add this car here, you can see that I have
a bunch of dots which we can fake like
infect for the grass. Let's not stop here. Let's add another variation. I want to add one
variation bigger to fake different hills in my terrain. I'm going to add another im. And I'm going to reduce. I'm going to go to the default
again and see what I can do to make some big variations.
More or less like this. If I go here and I
mix these two nodes, let's mix this and control here. Now you can see that we mix 0-1. Zero is the black and white. Let's change this.
That's changed. This Okay. So now I want to mix not
everything, but just the value. So if I go to one, I have really black hair. I want to just make it
a little bit darker. So you can see that from here. We have some variation. Okay,
you can even go here and make this more defined. Now let's add another
variation black and white, just to fake a little
bit of shadow right below this lighter parts
that we have here. Let's copy this one, and let's copy
another color ramp, let's test this out. Okay. So let's multiply this again by using
this shader here. Okay, so now we can see that we have the black right there. I believe we need
to invert this. Yeah. Okay, so let's test by multiplying this first
and then multiplying this. It's test. I'm just playing
around with values here. I see from here, I have this part. Now I'm adding the
other value here. If we mix it Okay, so let's live like this for now. This is more the idea. We're going to change
once we start rendering, we're going to adjust different
colors and everything. But I think, maybe
we got too much. So if you look like
this, let's see. Maybe I need to adjust a
little bit the scale of. This one is fine, but maybe this can use the
same scale here, add a little bit more
variation to 200. So let's compare if you use just this or if we use
the black and white, you already give some
depth to the material. So let's apply
this to the other. First, let's also
add a displacement. If you go here on the
material output, and drag, you can search for displacement, and I'm going to use the
vector displacement here. We have this node here
that is called height. Height inner texture,
just like this one. It's represented by
if you have a black, it's lower and whites higher, you can think of zero and one. If I go here with this material and connect
this to the height, let's look closely and increase. You can see that it
fakes this bump here. It's not a vector displacement because it's not
altering the mesh, but it's altering the way that the light bounces
on the surface. We can increase. Maybe with this texture, it's a little too bumpy. 2.5. 4.1. But it gives
you this stylized defect. Let's do actually, maybe if I do the inverse,
it will look better. You need to test and render. This is it for my terrain. I'm going to select
the other ones, leaving this active, Control
L, and linking materials. I don't like the way
that the texture is kind of stretched. I feel like in this area. So I'm going to add with Control I'll add another
mapping that I'm going to apply to each one of these and I'm going
to alter the skill. So you can see that
it's more rounded here. If I have 12, so. Okay. M five maybe. And one. Yeah, I
think this is better. The lower I go, the
bigger the texture is. Okay, so this is it
for art for now. We're going to supply
to the results later. So let's go to our pathway. I feel like we
already have a lot of nodes here. So let's copy. Actually, the name this okay. And let's add another
one for the pathway. So I'm going to delete this. I'm going to use the same one
here. Connect to display. I don't think we're going to use displacement for this one,
so I'm going to delete. I'm I'm applying the
same material here. I'm going to use a
different texture for this. I'm going to use a noise again as the factor
and change colors. I'll use my inspiration
part again. Is connect directly. Okay, so we need to
add the vector here. Let's set back to one on one. Okay, so we need to change this. You can see that this
is being repeated. So let's go here under array and let's remove
realized instances. Now you can see that each object is being considered
as their one. Okay, so now this is stretch because we have a
conflict in the texture space. Let's see how the texture
space is here in my mesh. We can even see. So we have texture space only
on our origin object here. So that's why our
texture is warping. You can see here that
here it looks good. Let me see if I can
make this more visible. And as we go down, it starts to stretch because our box it's only
in this position. So you can see here that I have my texture space is
considering the first object. As I go down, it's generating
based on that space there. What I can do is go here to
texture coordinate and use object instead and this
will fix the noise. Now I'm just going to add
a few variations again. Let's see how this looks. Maybe we could add color here. We're moving values,
so let's multiply. Yeah, so I'm just going to play around with
these values here. I'm going to show
you once I'm done. Let's delete this one. Let's see this here. I can change. Scrub. Maybe this darker multiply. Maybe I want to add
one more colon here. And I want to change
this to constant. If I change this to constant, I have a better control. This line becomes pretty sharp. And I can go here and mixes two. Okay. I like this look. It gives a more stylized look. Feels a little gray
area between the grass, terrain, and the rocks. It looks like they are growing, maybe
something like this. This is cute. Let me seeing some
saturation here. This is it for the pathway. This is it for this
part of the lesson. In the next lesson,
we're going to make the adjustments
on the material of the little cabin and start editing the lights that is going to make all
the difference.
14. Basic Lighting Setup: Welcome. In this lesson, we're going to finish
the materials of our little cabin and
start to add lights. So for our little cabin, I'm going to just copy the material that we
have on our lantern. Let's see if I have the
correct name, glass. So I'm going to go here
and search for glass. And in this one, I'm
going to use the metal. So now let's apply the material. Let's do this wood part first. So I'm going to add
material called wood. And for this one, I'm
going to use the wave. So we have a wave texture here. Let's go to factor and
connect to base color. Actually, let's do in this part here so
you can see better. So let's do the main cabin. So you can see here that
we have these waves here, this kind of stripes, actually. So let's press Control three. I forgot to activate this again. Okay, so let's at this part, texture coordinate, and I'm going to rotate this 90 degrees. So now we have waves
on this cabin. I want to do in a siding
in feel like wood panels. So to do this, I can go here under waveffle and
I can choose so. This kind of looks that we have different borders and
planks of wood up and down. Okay, so from this point, they can adjust the scale. And I'm going to add
a color ramp again. And let's go to our
inspiration board. Maybe this brown here. So far darker color or lighter. Maybe. I need something more brown niche. This is beautiful, actually. I feel like our project
is a little bit dull. Maybe too saturated. Okay, something like this. Okay, so besides this, I also want to add a
displacement, like we did before. And I'm going to use
exactly this vector. You can see that it darkens. Let's connect this to
the roughness too. Let's see if you can have some. Okay, so now we can see
a little bit better. This part is more smooth
than the top part. So this doesn't work too well. I'm going to add
another wave texture. I think this is going to work better and connects
the base color. Let's connect the
vector to here again. And in this case, I think I'm going to use sine. Maybe so I'm going to go here under that phase
of set the distortion. I can see that I
have this kind of crazy looking
distortion that I'm going to fake as a wood
texture. Let's see. I think this works
better on sine, on salt. I'm going to reduce the scale. What I'm going to
do is multiply. Before this ramp, I'm going to multiply
these two factors. I got a mix. Let's bring this mix. A let's connect this. Now I want to make maybe we can use
multiply or maybe add. I think this could
be too intense. I'm going to go with overlay. This way I have my
zero is my board, and I can add just a little
bit of texture here. If I go too far, it can
be a little bit crazy. I can add another
noise on top of this one to create some parts
where it's not showing, but I'm going to
leave it this way. Maybe something like
this, pretty simple. So you can see when
I add my variation, it looks pretty subtle,
even too subtle. I can adjust. I can add even a third color
here to do some highlights. Now maybe I can use this mixed part here
to create the height. Just to fake a little bit, and let's see what happens
with a connective roughness. This wave here makes a little bit more sense
to have it on roughness. You can see here,
and this one makes more sense by adding
the displacement. So here you can see
the difference. This is too much. Five, this with the roughness, maybe it's a little
bit between tense, I'm going to multiply
to a math here. If I multiply, it's
going to be more rough. Maybe something like this. We have a cute shin
in these textures. I think we need to bump the
saturation a little more. Let's see what color
management I have here. So let's change this color
management from AjX to filmic. We have various here. We have standard, filmic log. Let's change this to filmic, and let's bump the context. I'm missing this, so I
want to go very high. So this gives more
stylized look. You can see the difference. So from now, let's
move on to the frame. In the frame, we
can have this kind of slabs that we have here. I think it's too much. Let's reduce this. Maybe
this overlay here. I think this is
good. Let's create another one for the frame and the frame here
on the windows. Also this part
here. We need one. Let's do another wood, let's remove the
first wave here. I'm also going to e. Change
the rotation here, maybe. I think? It's okay. I'm going to change the scale. Just to match the
one on the outside because this would be
the same kind of wood. Let's rotate it 90 degrees on X. I also think this
is too discoloring. It's a bit too much here. So let's see if I can. Yeah, this is better. Let's do this on this one too. A little bit more subtle. I don't think I'm going to use the displacement here
because we don't need to. I'm going to select this.
I'm going to apply on this and also on the windows
and also on this part. Control L link material. Actually, this one,
Control L. Link materials. Let's do a slight different
tint in this part here. Going to just multiply a more. I want this to be more rough. Let me see the way that
I have the texture here. Maybe if I change this to sign. So it's better, but also, I think I'm going
to do a color ramp. A color ramp for this. Let's see if I can
control this better. So I'm going to reduce
if I go less black, you can see that it
starts to become light, which means if I connect
this to my roughness again, it's going to be more rough. If I go here and slide down, you can see that it
starts, the shin starts to show there. Instead of multiplying,
I'm going to do this and I have a better
control of my roughness. I can even go here and
make this not so rough. I'm going to copy this and
see if this look better. No, I connecting the row. Alpha. Okay. What a
small difference. You can see right
here on the side. This is better. I
have less shin. Okay, let's add the
same wood here. I think I'm going
to add or let's test the material that
we have on the pathway. I like this. I maybe prefer this, than
the wood. Let's see. Wood too. I think I prefer
the pathway material. Maybe Let's see.
I'm not sure yet. Maybe this is too red. Okay, so the last thing
that I'm going to do is the roof material. So I'm going to
create a new one. And for this, I want to do
just a simple mix of colors. I like this color
here of the roof. This one. You also select. Okay, more or less like this. Now for the factor,
if I go to zero, I have the first color, and if I go to one, I
have the second color. So I want to multiply
this with the factor that each of these
tiles is going to receive or the first color
or the second color. I can go here by selecting object info and
going under random. Now you can see that
nothing happened because each of these
is an instance. If I go here to
array and disable, now I have each tile
being different. The problem is that I will need to copy this one
to the other side. Let me do that real quick. I will need to copy
this tile roof and the cabin curve root. Instead of mirroring it, I'm going to rotate and
moving both of them together. Okay, so now I have this
nice variation here. I like this color. Let's apply this to
this main roof here. Let's see how it looks. We need to realize this them Al this is it for all
of the materials. Now we need to add
some life to the sin. It's very dull and
dark right now. Let's start by adding a new sun. We have the world environment, which is giving us some
scattering with the light, but it's overall light. It's an indirect light. I need some direct
light in my sin. Let's go here under
our outliner. Under collection. Let's add a new collection called light. Now I'll go to add and add the sun here under
light and sun. Here we go to the
properties and we have the temperature or
if you want to add color, strength and exposure. The sun is a direct light, so it doesn't matter where
the object is in the sin. Right now it's pointing
directly down this. It's under cobblestone, Okay. No problem. The only thing that matters here
is the rotation. This is going to control
the inclination and then on Z, your rotation. Let's go back to the scene. You can see here
from the shadow. I want to a more or
less a light like this. And I want it to
be pretty strong. This is too soft. So I'll go here to strength and increase Tree maybe too much
and increase the exposure. And I also want to add a more orange in tint to it,
so I can lower this. 5,000, maybe 4,000. Yeah, this is pretty strong with what but I want it
to be this way. We can adjust this later. I think this is good for now. We have a nice orange tint
on the sin, a direct light. Now I want to add one
light in the cabin, so it looks a little bit cozy like there's
some life inside. Let's go to our top of you and I'm going to add a point light. So let's rise this
honestly because it's right at the origin point.
Now we can see anything. Let's go close, see if
something happens, nothing. Let's increase its
power so you can see that it starts to light up. I want to make
this showing here. I like the way. Okay. So let's fake this light a little bit. And right here on our glass, I needed to add this part to Opha so the light
shines through better. So let's reduce this awesome going to add really
warm temperature. Yeah, 3,000. I have my son height. Um, and also add on
to the top part here. Rise the center. I want to show that it's bright, even though we have the sun, so going to increase by a lot. Let me increase disposure too. But the shadows here
are bit too much. I have the soft foul out here
so I can adjust the radius. So if I have a
bigger light radius, my shadow starts to have a gradient, more
subtle gradient. You can see the area here. I don't want it to be too
sharp, something like this. I'm going to adjust
one point that I see that I have cute
shadows on the ground. I think this is good. Reduce this it, it is too much. Now I have this light here
that I'm going to also adjust the radius and with the light maybe sun is a little
bit too bright right now. We go to one. Okay. When I do the nighttime scene, this is going to
be the main focus and everything else in the
world is going to be darker, so you have more of
this moody effect. Now for light. I want to
add the lantern line, so I'm going to create new
keeping everything organized. I'll move to the collection. I'm going to duplicate
this slide here. Now I'm going to open a
new viewport just so I can see here from above and
also see the result here. I'm going to first do this one that we have on
the first plane here. So as I add, you can see that we already have
a nice light there. I'm going to make the
radius a little bit small, and you can see the result
from the Alpha glass. Let's render it just so I
can see how this looks. I think this could be
a little bit warmer. I'm missing this from the sun. I want more intensity and also still missing
some contrast. So what I'm going
to do is go here and increase the direct
light intensity. In volume, we are not using it. Yeah, I don't see
any difference. Doesn't matter. And the surface, here you can see how it
affects this render here. So from direct light, you can see that it's
smoother than zero if you affect indirect. I'm going to copy the lights the other lanterns. H. Okay. Now let's see the difference without
lights and with lights. What am I going to do here? I'm going to reduce
the string by a lot. I have this light here. I think this could be one and I'm going to change
this value here. Going to increase this by a lot. Yet, use a more
saturated and also more increasing this sort of think Is this too much. I like the effect this gives the sin. Going to increase this.
And also reduce this. I I mess this up here. Okay. This is our render. I can see a few
things that I need to adjust here. Let's
see if I can draw. Let's analyze what
we have so far. First, we need to adjust the overall resolution right now. I see that I need to adjust this terrain here if I can make it a little bit closer
here, and maybe overlap. We have some floating
geometry here. I also need to adjust this part here that is showing the circle. Maybe a just a little bit
more of these flowers. Also, I want to play around
with the settings of the composition to
see what I can do to improve the occlusion
that we have. I want to desaturate a
little bit more the cabin. And also just here. You can see that we
have some shadows. It's not correct. The shadow here is
not looking good. I also want to add some vignette maybe to give some
atmospheric feel. Yes, so I think that's it. In the next lesson,
we are going to work with the
compositioning workspace, and we'll play around
with using glare and bloom and also some vignette and see what we can do to
fix these problems here.
15. Camera Composition & Final Render: Welcome to our final lesson in the blenders
beginners course. In this lesson,
we're going to go over some camera and
render settings. I'm also going to show
you how we can use render passes to composite our scene and do some post processing. I'm also going to be showing a different version
of the scene in the nighttime. This is my scene. I change some materials and also adjust the scale
of the lanterns and move the terrain
around and play around with different
perspectives. This is what I have so far, and I'm going to
adjust the camera. I'm going to do two
things. We go to camera. If I go down here, you can see on Velpar display, we can't control how much you want to see of
the background, so I'm going to close
this off so I can have a better feel of my image. I'm also going to increase this. Now this is all about following your guidelines and seeing the best compositions
that you can get. I'm going to go into fly move, and I want to show my
Papay closer like this. I have a better look
of the cobblestone. I'm also going to go to the focal length and I want to show more on my environment. Maybe this is too much. So let's keep the 90 degrees, and let's use the shift to control how much
you want to look up. You're gonna I think right now I have on my
first lane lantern, pathway, and we go straight
to the little house. Let me show you what
I did for this glass because I was having some
problems with the I. Turns out that I forgot to
increase the transmission. For I, you need
to adjust this to one and it will work way
better. You can see. You don't need to use the glass
shader. I'm not using it. Here. Let me show
you the lights. We have our lantern
lights in our cabin. Let's remove the sun
and the lantern. I have two lights
inside my cabin here, pretty high on power. I also edit this one.
So let me delete. So I have this roof filler. This is not a realistic light. I don't have anything here
that would emit light, but I'm using it to fill. That's why I'm saying a filler. It gives this reflection here on the roof that
it was kind of dull. It wasn't reflecting that much. As I'm analyzing it, I see that my light is feeling
too much here on the ring. So what I want to
do is go here to custom distance, every distance. So we only grab the roof so you can see that if I
go all the way down, lemons or something like this. One thing that I added
here is a volume. You can see here on the side
that I have a huge cube right before the house and going to the mountains
on the back. This doesn't have any
surface, so it's transparent. I'm using a shader to
create a volume scatter. You can see the effect here. If I disable and
enable you see a fog. I'm going to use this more on the night scene to create a
volume scatter for the light. But for now, I just want to differentiate my foreground
to the background. On camera, we also have the
option to use depth of field. If I activate depth field, you can see that my front
light here is blurred. What I can do is
focus on an object. I can focus on fantasy cabin. I can see this because of the focus and if
I increase this, the rest starts
becoming more focus. You can see if I go really low. You can adjust this
depending on what you like. I'm going to leave
this a default. Let's go over some
render settings. Here we are using EV. This is the setting
for viewport. I'm using 64, seeing
jitter shadows on my viewport because it's
increased performance it's bad. We're using shadows,
volume shadows. I also adjust here the
intensity of my life path, which is settings
for the rate trace. I increase the direct
light and decrease the indirect light to give a
more contrast to my image. And like I did before, I adjusted to filming
and very high contrast. You can change here. Now I want to go here to film layer and I wanted
to show you the passes. Here on their light,
we have a way to add to our render
in a different image, a pass of this image. We can do a pass on diffuse
that is your base color, your light of your
fuse or the color, your specter, only your volume. Let's do volume and I'm going
to use ambient occlusion. Which is not the shadow, but it's the depth of each object of your
scene, you'll see. Let's activate the s and render. This is our render window. I think I'm going to reduce a
little bit, the focus here. If you go here to the top part, you can go to view layer
and you have combined. Here you have volume direct
and abient occlusion, which are the passes that
I add on a render setting. If we go to volume direct, you can see that volume that I added being
represented here. Even see some of the light rays from the light that I have inside the cabin,
but really small. If you go to Image Occlusion, you can see what I meant. It's not the direct
shadows from the lights. This is not shadows, but it's the depth of each
object that we have here. We can use this to composite
with our final image. So let's go to the
compositing tab. Here we have our render
image in this editor area. We have our properties and
here we have our compositor. Let's go to New and it will automatically
create the setup. You have render layers and
the output and the viewer. Here I have my image connected
directly to the output. Now let's see if we go volume direct and botclusion
you can change that. So let's add some
post processing. I want to add more
glare so I can go here, drag and use fog glow. You can see that
all of my lights, if you pay attention to your
lanterns, gain more shine. You can also adjust
the size of the shine. You can see this. I like this, quality and even the tint. There's a ton of both process that you can add
from saturation. You can even add color ramp. For example, if I want to
drag them to occlusion here, control the amount of
imbue into occlusion. I can do that to
make this darker. You can even use this. If you want to desaturate,
let's see filter. You can even play with
textures right here, do masks. There's a ton of
effects that can this like So have fun with this, play around, and see
what you want to do. So I'm going to
add just a glare, and I'm going to add a vignette. I'm going to do, like,
a sharp vignette. Can I just factor. So let's add this emit
occlusion to our image. Make everything a
little more defined. We can do the same
way that we do with shaders, which is mix. I'm going to use I'm going to use Multiply. You can see here that even our environment
back here turns darker. So just a little bit. It's because I have the
color no if I go here, You can do this with everything. If I go here, connect
volume direct, I can multiply this
to the volume. After you render, this
is not a set render. You can play around
with your image with different passes and do a composition that
you really like. I'm going to remove this. I want to use Actually, I'm going to change a little bit just the position of my camera. I'm going to just change
the position because I think I have a smaller
margin here than here. More to I think this is better. Okay, so I'm going
to render again. I'm going to adjust a little
bit of the deck to field. I don't want it to be too much. One last thing is the output. Here on output, you
have the format. So here is the resolution. So here I have full HD. I want to do at least a quad HD. 215 60. You can adjust the
Proportion also. Want to do at least you can
go above and do four K, and you can adjust here in a
path that you want to save, or you can just
save automatically. So here I did a new render. This is our image. So we can go here and save as. I have here final renders, and I'm going to say
that fantasy cab and D. Here you have some
settings if you want to. You have Alpha. We
don't need Alpha. And you can even change the
color management right here, so we can overwrite. Just pretty cool. Let's follow. Let's say image S. Okay, so now I'm
going to show you the other render
scene that I have. So I duplicated this project
and did a new scene. You can see there
right here I use, let's go to the shading tab. You can see here that I use a ton down shader for the sky, kind of an after
noon night fiel. I added a few fireflies here. Let me show you. Using geometry nodes, which
is a pretty cool feature. Let me show you real quick. Geometry node dor. Something real simple. I
don't really need this. Something like this, you
can create a curve that you have different objects
instance on this curve. So yeah, it's pretty cool. I also exaggerated
a lot of light and the volume shade
the volume scatter just to get this effect. So you can play around
with your scene, set up different lighting, try different styles,
have fun with it. Let me save this one, too, and I'll show
you the final result. Okay, so I added my
final renders here in another Blender file where
I have my inspiration, and this is the result. Cute fantasy cabin style. This is really fun
because as you can see, we didn't use any
external texture for the sky, for the grass. We used only built in
textures from Blender. So if you combine everything that you learn
here and then start to use another realistic
textures and play around with cycles that
is even more realistic, you'll see the
possibilities are endless. So I'm pretty
excited to see what you come up with and have fun.
16. Project: Create Your Own Stylized 3D Scene: Now is the time for you to create your own stylized T sine. For this class project, you will build a simple fantasy inspired cabin in Blender, using the techniques that you learned throughout
the course. You can follow along
our lessons or create your own variation of it using your preferred shapes,
colors, and materials. Start by modeling the
main structure of your scene, keeping
everything organized. But don't forget to add details. This stylized details will
bring personality to your sin. Then add the
materials and adjust the lighting according to
the mood of the scene. Finally, set up your camera
and do a final render. This project is all about practicing the full
beginner workflow, don't worry about perfection. Try and focus on learning, experimenting, and having
fun with the process.
17. What's Next?: Congratulations on
finishing the course. Now you learn the
foundations of Blender, from interface to
building your own models, applying materials, lights,
and render your final scene. That's a huge step for
the world of three D art. The most important thing right now is to keep on practicing. Try building small scenes with different styles and experiment. This way, you can always improve your skills.
Happy creating.
 Skillademia Academy, Creative Skills for the Future