Transcripts
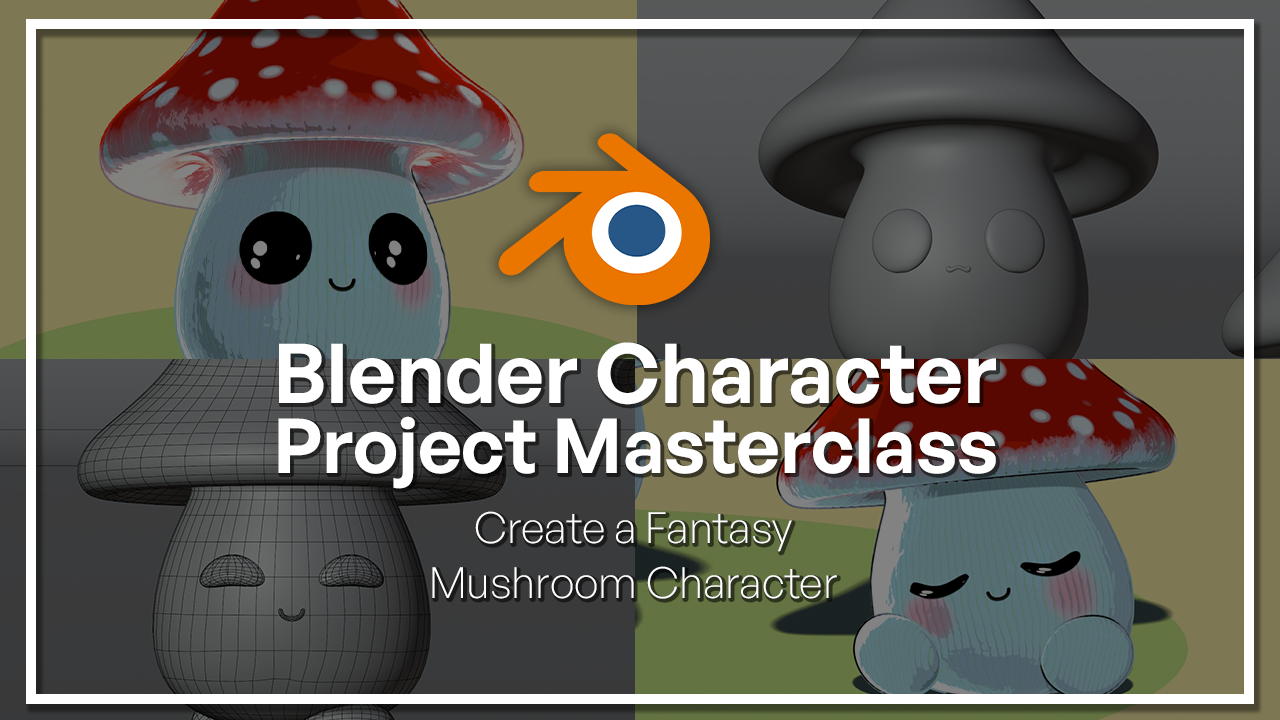
1. Welcome to the Blender Fantasy Mushroom Character Masterclass!: Welcome to the Blender fantasy Mushroom Character Master Class. If you ever wanted to create your own three D
stylized characters but felt overwhelmed
by complex workflows, this class is the
perfect place to start. My name is Caroline Condi. I'm a three D artist
with over seven years of experience creating
three D environments, characters, and illustration. Throughout my work,
I've realized that the best way
to learn TD art is by creating small
and fun projects that teach you multiple
skills at once. And this is exactly what
we will do in this class. Together, we will build a
fantasy mushroom character from scratch while learning
the core steps of a simple character
creation workflow. We'll start by gathering references and creating the
concept of the character. Then you'll learn
how to transform these two the ideas
into three D art by modeling your character and adding facial features
to give it personality. As we progress, you will learn how to use shape keys to create expressions like blinking and smiling to make your
character feel more alive. We will also explore procedural materials
where you create stylized textures only using Blender without any
external image files. After that, we will create
a simple rig so that your character can be animated and posed in a
simple environment. Then you learn how to create your own art style by setting
up the lighting camera and render properties to
create a render that best showcases your artistic w.
By the end of the class, you have a fully modeled, textured pose and rendered fantasy mushroom character while gaining experience on some of Blender's most important
tools and workflows. Let's start creating.
2. Gathering References: Welcome in our second lesson on creating a fantasy mushroom
character in Blender. In this lesson, we're
going to be gathering references for our project and creating the
character concept. Here I have on Blender, a few images that will serve me as an inspiration
for my character. It's nice to search for
different styles, for example, I have here a more realistic one of what
a mushroom looks like. I have this iconic
toad of Nintendo. I have this beautiful art here, and I also have a few
three D inspiration. When you are modeling
a character, different shapes can convey different personalities and different emotions
for your character, not only the expression, but also the shape of it. This is a huge part of
character modeling. As you can see here, a more
rounded shape can give you a more cute and
more soft look. A triangular shape could be a little bit more
out of the box, a little more weird, a little more quirky. It depends on what you want to transmit in your character. So the goal here is that
you grab images that will inspire you into create the project that you
want of your character, not by imitating,
but by grabbing a few references that could guide you to
the right direction. So in my case, I'm going into a more huge
style of a character, more rounded one,
so I grab this one. So the next thing that
I'm going to do is to sketch the concept
of my character. And you can do this by
any medium that you like. It could be digitally in
your preferred software, it could be even on Blender, but I like to sketch
my concept by hand.
3. Character Concept: So let's start with the
concept of the character. I like to sketch out
in a piece of paper, but you can use Blender or
software of your choice. The idea here is that you can start by creating the
concept of your character into D and creating a plan that you can translate
into the TD software. Even though you have references, it's nice to draw so
you can translate your own artistic
view to the model. So, for example, for
my mushroom character, I want to design this character
kind of happy and bubbly. And as we know, different shapes can
convey different emotions. So a triangle, going to convey something really sturdy
and maybe quirky. Around shape is pretty
bubbly square shape you think of well
structure character. So from a mushroom, I want
to use the round shape, but I also going to use the triangular shape
because of the top part. So this top part is going to be between coats a
head for my character, and the round part is
going to be the body. Let me fix that. So if we were to structure this characters only
on a triangular shape, let's see how this looks. Maybe we have little part here. And if I was going to have a triangular shaped mushroom
and kind of imagine him this he'll be kind of
hiding behind his head. He would be a little, you know, maybe a little shy or
maybe a little bit scared. So he looks pretty distressed. I'm hiding me high in my head. No, I'm not that
great with drawing, but you can see what I'm
trying to convey here. So if I were to create the happy bubbly version
using round shape, I more imagine and
more outgoing. I don't know why I'm drawing
this kind of puffing here. But as you can see, when you choose a shape, it kind of dictates everything that you're
going to create. So his little legs is
going to be rounded. Be a little bit more happy, kind of a jig leap of vibe,
have little freckles. So you can play around
with your character. See what divide that you want. So this part is pretty fun. You can play around.
As you can see, you don't need to
drop perfectly. You just need to have
an idea of the shape, what you want your
character to be. So what I'm going to do now
is combine these two shapes. I'm going to be doing
something in between. And at the same time, I'm going to start
to think about I'm going to model in T D. So my character is going to have
this triangular shape for the head and kind of a
round shape for the body. So this is the overall shape. And as you can see, what I need to
figure it out is how I'm going to combine
these two part here. So if I was going to model it, it's already going to be a thing that I would have
to think about. So let's see how we
can create this shape. I'm going to start
by just sketching. So for the base
of this triangle, it's going to be around shape. Kind of feels like a party hat. Now I'm going to add
some details to the top. Now I can already see how I'm going to construct this
in a three D model with a rounded base going into a tapered point from a
bottom up perspective. But also we have this
nice profile here. There's both ways that we can construct this in
three D. You can do a bottom up with circles, or you can use this profile and do a spin that is
called in Blender, so you can create this shape. Now I want to tackle the body. So I'm going to use this bottom part here and I'm going to be doing it slightly
flattened at the bottom, just so I can add little legs. I want to add, like, make it feel like it's
sitting down for now. And I need to resolve
this top part here. I need to do slightly flattened at the bottom here just so I can rig everything. I want to rig his little legs, and we're going to
see this later. But basically, the mushroom
is going to be a cute face. To resolve this encounter here, I'm going just to draw out the profile just so I can have an idea and
I go here to the front, I want to continue
this curve down. I'm going to do
something like this. And from this taper. I want to basically continue this shape here a little
bit inward and outward. This is going to *** part. This is going to be shaded. I'm going to add
this little ice. Just like the bubbly one, I'm going to add the freckles. And I'm just going to do, like, black eye with a little
shimmer in my treat. Kind of looks like an
onion, what I just row. So I think I'm going to just
a little bit of the shape. So maybe this top part
is not as rounded. So maybe if I taper
a little bit more, it still looks like an
onion, it's because. Okay, so I'm going to
sea in it a little bit So right now, I basically have the base of what I want for my character. From this, I can see that I
want this top shape here, like a head like this
and it's coming in like this and doing this kind
of shape right here, not exactly like this,
but more or less. We have this profile, this round part right here. We have the taper in at the top, and we have the body going in a more rounded curve right here and to a flat more
or less like this. From this, we can already
start to see how we can create this inTD and the more details that you add to your
drawing and plan out, the easier it's
going to be for you to finish your project in three D. So let's get back into
our three D software. Okay, so now, as you can see, I took a photo of my sketch
and I added to Blender, and I also did a
lin art version, because I'm going to
use this one to convert to a gris pen so that
we can edit here. I also have here
a color palette. What I like to do is to
take a screenshot of my references and send it over
to Adobe. Let me show you. So here on Adobe, I like to bring over
any references that I have and extract the color
palette of it and you can move around and
choose the color that you want and you can download
and export into Blender. Now to transform my
image into Gris pencil, I need to select
it, go to Object, convert, and trace the
image to Gris pencil. You can adjust the settings
here and see what looks best. Now you can see that I have a different object
called Gus pencil. Let me select, press G, and move over to the side. So now you have a three D
version of your drawing. If you go to Edit
Mode, pressing tab, you can see that we have lines here that you can even alter. So what I'm going to do just to refine this a
little bit more. I'll go to edit mode, go to stroke, and simplify
my stroke a little bit. Right now, I'm not doing
the Tree D model itself, but this is a way that you
can use Blender to create your character concept and
test out different lightings, different poses, different
colors, and see what you like. That way, when it comes to create the Tre D model
and your materials, you have a clear direction
of what you want to do. Right now, I'm going
to select my object and I'll go here on the top
part and go to draw mode. Here on the bottom, you have different pencils
that you can use. I'm going to go over fill
and select my material. Here at the bottom, I
have this black material. I'm going to create a
new one and here you can see that we have
the line and fill. Let's select this color here, the red color, and I can fill
my object as you can see. I'm going to play around
a little bit with different options and
different colors. A Now I'm going to choose my preferred color and I'm just going to
add a few details. Let me move this to the side. Right now, if you
have a drawing tablet or something that
you can draw on, it will be better, but
you can do this by mouse. It's just a way that we can think of the concept
of the character, but also thinking about how
well model and texture it. So for my character, I would like to add freckles and a blush to it to
make it look cute. I'm going to go over
here, create a material. Let me chooe this as a base. And to copy a color, you can just hove
to copy a color, you can just hover it, press
Control C and Control V. So right now, I'm going to
my object, go to dro Mode, and I can use this
marker here and I can go here and create this.
Why am I doing this? This is not going to be
the Tree D model itself. I'm going to add a texture
here to the bottom, and I'm going to
create I'm going to texture paint this part
right here onto the mesh. It's going to be black. And this is also going
to be painted on And the cool thing about this is that you can go over
to the material that you created and
adjust the color. Right now, I'm going to
think about what I'm going to model and what I'm
going to texture. This is important
for your workflow. I already know that
I want to make the eyes and the
mouth interactive. I want to do an animation of blinking and moving the mouth. I'm going to model the
eyes and the mouth. Eyes is going to be modeled. The little freckles here are
going to be hand painted. This detail here that
I want to do top down. I want to use a
procedural texture, and I'm also going to
map in a cylinder shape. I'm thinking I will need
to test this later, but we need a map with waves
like this to map this. So for this is going to
be the wave texture. As you can see, here we have two different ways that
are going to map out. I'm going to use the wave
and I also need hand paint. As I'm seeing here, I'm
going to need two UVs. For this one, I'm thinking that I can use the simple mapping, the generate mapping
that's going to generate a mapping in
the cylinder shape, and I'm going to need one UV for the hand painted
on top of this one. And this is all going to be
constructed in the material. For the eyes and
mouth is going to be a regular separate material
and for the stop head. I could model little dots here. I think my reference here, as we can see, this one, it looks like it's painted, but this one it's
little models on top. You can approach
these both ways. But I want to do this by texture
too because if possible, I don't want to have
this separation here. So this looks like a Voronoid
texture that I can use, and it's going to
be in two colors. I think I'm going to use a
color ram between the red and the white or the beige and it's going to have
a nice gradient here. I want to have this gradient. And another test that I'm going
to do in this model is to see if I can have all of
these in one texture. So basically, the stress part is going to be this part here,
but I'm going to connect. So what I'm thinking is
that maybe I can create the procedural texture
that would only select this normal facing up
here and apply my color. For this part, I'm going
to think as my model. This is my UV map, and I have the head here
and the bottom part. I can add a mess gradient
between black and white, or I can use the real colors. This gradient is going to paint everything
on top one color. At the bottom another color. That way I can have this
gradient effect right here. This is a way that I can
tackle this part here. But this is all ideas. I will see at the end
if they work or not, you can always go
back and change what you thought and strategize
other workflows. But this is the co part about creating your concept character. Right here, I only
have one pose, but if you are experienced
in creating characters, you will have different
poses and different colors. I suggest that you
take a look at the blog posts from Tatiana. It has a lot of guidelines for you to
create your characters, and she's really a professional when it comes
to create characters, the colors and everything,
really amazing concept. Yeah, I recommend you to
sketch out different ideas, test out different
color palettes, expressions, and research
your favorite artists. That way you can create a nice plan for you to
construct your character. In the next lesson, we're going to actually start
three D modeling.
4. Modeling the Mushroom Character : Welcome. In this lesson, we're going to start modeling
the base of our character. Right now, I'm going to
duplicate this final object that I have here by pressing Shift D and moving to the side. I'm going to rename
it by pressing F two, and I'm going to move
it to a new collection, by pressing M, new collection, and I'm going to
disable everything else that I have
here on reference. I'm also going to disable
this annotation right here. Let me just adjust this. I'm also going to enable my grid and my exis
that I disabled. Okay. Now I have
here my little guy. There's a couple
ways that you can approach modeling
this, for example, you could start with a circle here at the
bottom and move up extruding this
circle and adjusting the size here up
until the top here, or you can add a sphere
and scope on top of it, or you can do the way that I'm going to show
you right here, which is using the profile and spin use the tool spin of
Blender to create the model. Let me show you how this looks. The first thing I'm going
to do is to add a curve. You can go here under Ed curve, or you can press ship a curve, and add a base here. I'm going to go to Edit mode and delete and I'm going
to draw my curves. To help with this, I'm also going to
add a modifier. I'm going to add a mirror. That way, everything that I
do on one side is going to be repeated on the other just to help me visualize the shape. If you have a drawing pad, this will help you draw or you can also do it
manually the curve. I'm not going to
follow this drawing. I'm just going to think about how I want my silhouette
and use this as a base. Okay, so this is just a base. And the fun thing about this is that you can draw the shape, but you can go here and
select your curve and adjust. I'm actually going to
delete these verdict. I Okay, so now I have this flat. You can see that I have
on the floor here. This is my silhouette, and what I'm going to
do is go to enter mood and rotate under X, and I'm actually going to use
my three D courser as base. Going to adjust a
little bit more. I'm going to save a backup. I'm going to name this. I'm going to create another
collection called backup. I'm going to do a copy. I need to convert
this to a math. That's why I did a BCA. Before I do that, I
need to remove this. What I'm going to do is make
sure these points here are on zero on zero Y because
they need to be aligned. Going to disable this. Now I can go ahead
and cover to mesh, and you can see that
we have a lot of dots. I can control this
amount of dots before. Let's go back and I can adjust the resolution
preview here under shape and I'm going to reduce this
just because I don't want a lot of vertex for now because I'm going to apply a
subdivision later. Maybe something like
this, maybe four. Now I can go ahead
and convert to mesh. I'm going to select
everything and I'm going to use the spin
tools right here. Now, I can extrude all the way around and you can see here on the top bottom. I can do 360 and I can
control the amount of steps, the amount of subdivision. Let see. I believe
this is enough. Now we already have our shape
based on the silhouette. Okay, so now this is the
main shape of the character. I'm also going to do a backup. And now, instead of
adding subdivisions, I'm going to add a
multi resolution just because we have a
control under scope. Let's click subdivide
Shade Atosmoof and it's starting to take shape. Now let's compare I'm going to live this right
here. As an inspiration. Okay, so I think I need
another subdivision here. It's too taper at the top and
I can do tiny adjustments. And I also want to add
some variation here. Even though I'm going to
rig this and it's going to follow along my rig
once I animate, I want to make this
top part of the face, like the head is a
little bit backwards. So if this is the front, I'm going to activate
proportional editing. And in the median point, I'm going to move everything. E Okay, so now this is the base
body of the character. I'm going to tweak
it a little bit. I'm going to add the mirror
again just to be safe. Okay. Now we have our mirror. And I'm going to do little
twigs here on the body. It could use sculpt, but I'm just going to
do this manually. I don't want to grab
the part there. I'm also going to
join this part here. You can see that I had
problems when I spin. I'm going to select everything
here and I'm going to merge at one and
actually delete. Let me see how is it going here. Yeah. Also here at the top, I have to merge
all of the vertex. You can do it manually
or you can add a modifier called weld. Okay. I think it was too much. Okay, so this is the model base. Now, for the little legs, I'm going to do a
separate object. I'm going to add a cylinder. I'm going to isolate this
by pressing dot comma. Y. Going to be her little feet. I'm going to move
this to the side. Item. This too small. Okay? This looks okay for now. This is just one object. I just a little
bit shorter here. I like this, but it looks like
it's closer to the ground. Now I have a base
for this model. The last thing that
I'm going to do is to add the eyes and the mouth. This is also going to
be a separate object. I'm going to add
a UVspere and it doesn't need to be that
detail it bit less. Same thing. He looks
pretty scared. And his little mouth. For this, I'm not
going to use a mirror, but I'm going to copy this. This is going to
make my life easier. We're going to do the.
So for the mouth, I'm just to use
half of the circle. Is not centered. Centered, but this is not so I can press B and
select the center. So, to make this better, I'm just going to
use half a circle. So what I'm going to do here is press Shift G and
select by normal. And if I increase this, it starts to select more
the back face here. A little more. Select
this one, actually. Okay. And select this. Going to remove these
pass here and I'm going to select these edges here
and add to a vertex group. And I'm going to assign. Now I'm going to
adjust the best that I can to this part here. Now, so I don't have
these gaps here, I'm going to add a shrink wrap. Now, all the vertex
are glued here. But if I go to
select my perimeter, just the vertex that I
select are on the surface. I'm going to activate
the wireframe. Okay, so I can go here and
adjust a little bit more. And I'm going to need to maybe
add another. This is okay. I'm going to actually
change the mouth. I'm going to add another curve. And I'm going to
add not enough set. I'm going to add an extrude. Going to add an extrude, and I'm going to apply the
same modifier, a shrink wrap. Stages. Apply a
mirror to be safe. Mirror and another shrink wrap. Instead of on surface, instead of nearest
surface point, we're going to do
target normal project. This way is going to target
the normal of that one. Let me replace. Didn't
make a lot of difference. For this one, I'm going to add just a tiny offset so we
don't have the glued face. And bust. I'm using this one. Really cute. Okay, so I just want the little black part and
I can do animation later. I'm going to just rename this. So this is the body. We have mouth. We have Feet. And the eyes. I'm just going to adjust
the orange in here. I'm going to select all of them, and I'm going to move up. I can't select the
mouth so this one. Okay, so this is the overall
shape of the mushroom. In the next lesson, we're going to do a little bit of animation. We're going to make
those eyes blink and the mouth move
by using shape keys. Y.
5. Shape Keys & Character Expressions : Welcome. In this lesson, we're going to do
shape key animation. Let's open the timeline
window here at the bottom. So this is a timeline. It goes 1-250, and we can use this to alter
our mesh and control. So let's select the eyes and
move over here to the data. Right here under vertex group, you have shape keys. If I go ahead and
press add a shape key, this is going to set
the basis of my mesh. If I have another
one, I have a key, and you can see that I
have a value going 0-1. This is the default
position of my mesh. Let's change it. With this key selected, I'll go to edit and I'm going to select this bottom vertex here and I'm going
to move my mesh. More or less like this
think a little bit. Let me see if this looks better. No. I think smooth it's better. Okay, and go to object mode. So now you can see if
I go to zero again, it goes back to that default
position of my vertex. So this is shape keys. You can basically displace your vertex and control from
a value from a slider 0-1. And this is cool because you
can do a lot of animation. So let me go back here and
adjust a little bit more. Okay, so now we can use this
lighter on my time night. So if I press Space Bar, you can see that the
frames are rolling here. So if you press Shift and left
arrow, I go to frame one. And I can send my value to zero, and I can make a keyframe. While hovering value, I press I and I have
a keyframe here. If I move my slider a little
bit to the front and move, I can insert another key frame. Now when I press space bar, it slowly changes the match. Pretty simple. We can go
here and do this fester. And you can do this repeatedly. If we go to the graph editor, you can see the curve that
is setting this animation. I can go here and
select the vector, it will be a sharper. Animation, I can move here
to make it this faster. And I can do this cycle. For example, I can make a
blink and then open his eyes. But I want to do
an animation where it blinks and it smiles
at the same time. So for this one, it's
going to be a little bit different because
I have a curve here. And this is going to be my one. So this is going
to be my default. I'm going to insert a key, and this is going to be my zero. Now you can see that we go from straight face to a cute
smile. Really quick. Okay. Now, as you can see, I have the animation on my timeline and I want
to control actions. So I'm going to delete
my key frames and I'm going to go to dopest and
to my shape key editor. Now I'm going to key
frame zero to one again. I'm going to rename
my action to smile, zero to one, and I'm going to do the same thing for the mouth. Actually 1-0. A and I'm going to rename it Sima Now, I have both my animations here. And if I go to non
linear animation, you can see that I have
both my animations here. If I go ahead and click
Cover to NLA strips, I can control this easier. Okay, so now you
can see that I have this my animation and
continuing to the end. So I want to smile and then go back to
another expression. So I can go here and
create a new one under Chapeki I'm going
to name it Parker face. And I'm going to go
from one to zero. And I'm going to
create right now. You can see that I lost my I'm smiling and
then going back. But since I'm not holding this, I need to add this
to the same strip. You see that I smile
and goes back. So I can do the same thing
from this mile hell. Two. Then it goes back and I can also
make him look mad. Let's go to the eye. For this, I'm going
to add another shaky. Let's make him sat and not going to make him
mad. Let's make him sad. I'm going to do the
other way around. Like Make him sleepy, tired. Let me try this again. I think this actually
looks better. I'm going to have a
little bit of overlap, but I think it's okay. So for this, I'll need to have my key at zero and this at zero. Then I'll move my key to two. And then it comes down. For my mouth. I can just
live the way that it is. Just going to adjust
so this is smiling, poker face and set. So this is just really quickly how you can
add expressions. And here I'm adding it
into separate objects, so it's easier to move around. And humanoid characters,
usually have in your body mesh, you have your eyes and your mouth that is going
to move in the same mesh. But this is fun way
that you can test out shape keys really easily and see how they
behave in your mesh, and then you can
continue to improve and feel secure to do
other forms of animation. So just play around, and in the next lesson, we will start adding materials.
6. Creating Stylized Procedural Materials : Welcome to our next lesson. In this lesson, we're
going to add and create different materials
for our mushroom. So this is where we left
off in the timeline. So let's go to the shading tab. I'm just going to add a simple black
material for the eyes. I'm going to bump down the roughness and apply the
same one for the mouth. You can select the control
L and link materials. Going to increase the
resolution a little bit. Since I'm going to use IV, I'm going to set
up a few lights. So I'm going to add a sun. 6,000 for now. I'm also going to
add a point light just so we can see the
reflection on its eye. If I increase radio, you can see the
reflection better. I'm also going to go under
EV and activate tracing. Can leave FS GI approsmison off. I'm going to leave
it off for now. Here I have AGX I'm going
to use standard because you have better
control of the colors. Okay, so now what
I'm going to do is combine my feet to the body. I'm going to apply
this one just so I can have more or less
the same resolution on my body then here. And then I'm going to
join both of them. Well, this says mirror
mirror and bisect. I have mirror on the other side. So let's apply. And then I'm going to join ControG Okay, so now I can add another
Wood resolution on top of this one and it's going to
subdivide all of these. Since I'm not going
to do sculpting, I could use just a
simple subdivider but I'm going to leave it
like this just in case. Okay, so now, if possible, I want to create one
texture for all of this. So the first thing
I want to do is to create a base material. And let's see what we can
do about the division of colors at first because
this is going to be crucial. So what I'm going
to do is to add a gradient and apply
it to the base colors. So now you can see that
goes from black to white. I want to invert this. I can select and press
Control If you have the node wrangler add on, you can go here and
search for node. If you have this, you
can just press Control T on any texture that will
add a texture coordinate. So now you can control the
direction of the texture. So if it goes, it
starts to rotate on Z. So now we go from
top bottom to top. So let me see what's
happening, okay? To the material. Going to sable. Blur here. It's kind of confusing. Okay, so now I can control my and I can control
the amount of black. So this sits already in the
right direction what I want. What I want right now is to make this white and the black
part closer together. I can do that by adding a color ram that I will
control of these values. If I go and bring this together, I can actually control exactly where the grading
is going to land. With this, you can see since this part of the mesh
is going inward. I have a little bit
more of white here, which is okay by me. I think it will
have a nice effect. So maybe if I leave
it like this, it could look like the top part is kind of reflecting
the red light here at the bottom.
So I don't mind. It could look good. I also
have this nice gradient. Here, I will need to rotate
this a little bit less. Let me see if we
can not this value. I rotate on the g two. Kind of cute. Let me see. I also want to add a little
bit of variation here. I'm going to add a noise. Let me see what happens here. See if I can
multiply both these. It's kind of confusing the sun. I actually just going to leave the world on because I want
to see what's happening here. Okay? This is better. And I'm going to
hide this for now. Okay, so now if I multiply this, I have that little gradient
here, which I really like. And I can adjust the
amount of roughness. Anything that's bothering me is that this is pretty white. Maybe I want to
have this kind of variation here. I like this. Okay, so right now, I have a procedural mask, and I can even take
this further because I added the gradient here. Maybe I can add those wave textures going
down in character's body. So see. I want to
add a wave texture. If I connected to
here, you can see. How it's mapped. Here
you can play around. I saw the roughness. And I can even
make a little bit. Okay, so now I'm going to
map according to an UV, and I don't have any
UVs here, I believe. Only UV I have are
the cylinder here. So let's add a simple UV. I'm going to press
U, and I'm going to do a cylinder projection. I already like this. If you remember when we were
strategizing a workflow, I thought of mapping
this as a cylinder. And I believe this is a
quick way to do this. You can see that it goes
from the sides here. It's not exactly the same, but I can go here and let's see. Yeah, I do maybe a
scale like this. Yeah, I still think
this is better, and we are going to mix
with the other one. So let me see I want to, and this is happening because
I'm mirroring my object. So actually, let's
leave it like this. We don't have to
mirror it because, yeah, this is already good. Okay. Let me adjust the scale. Okay, so now I need to
join both of these MAX. Okay, so now I need to join both of these
textures that I did here. So let's mix them. Okay, now I can control
this vector here. I'm going to grab
my gradient and add another colom. I'm
going to invert. I know that I can
already invert, but I want to
control the amount. So I like this variation here, but it's looking a
little bit too straight. So maybe I'll grab the modply
This is more realistic. Really like this and this is cool because this
is all procedural. No hand painted, we already have a nice base for the mushroom. The only one last thing
that I'm going to adjust, this is feeling too sharp. I'm going to leave it like this. Let's move on. Now, basically we have a mesh for all
of the body right here. And now I can use
this to add color. So let's see. If I mix this with
the red color, what happens and add
this to the factor. So now I have a mix
between red and white. Okay, so the first mix of
color that I want to do, let's see our references again. And where is my drawing? Okay, red and purple pink. I'm going to play with this. Let's see. There's my
color palette here. Weird. We Can I grab
this? Let's see. Now, the mess that I want to
use is this one for this. So let's connect this. Maybe I do something
like this, let's see. Okay, so now I
have a base color. Now for the ripples here, I can mix again
and maybe I could do just maybe an
ending occlusion. But this factor, I'm
grabbing the white here. So maybe I need to
invert this too. No, not this. I'm just
going to invert this. Maybe I prefer this. Yeah, but I will need to
grab just this vector here. But I need to multiply
it. Not sure. Wait, I can simply just
change to overlay. And this looks even better. Yeah. You can even change this to
constant to be really sharp. Yes, so it's better. We'll change the direction. Distortion. Yeah,
I don't like this. Okay. Mm. System.
This is better. I can also use this factor to create a little bit of normal. A little bit of
material displacement. Let me see if I can. Yeah, I like, also
using the normal. Okay, the only thing is that
I don't have my factor here, so This is getting a
little bit confusing. So let me organize
this real quick. So this is wave texture. This part here, gradient. Noise color. Basically, these are masks that we are using to multiply
our color and our normal. We can also adjust the
roughness one and zero. I B, just leave a
little bit of shine. Okay, so the last thing that I'm going to add is
the little dots on top. Let's see what we are missing if we are
missing something. Oh, the little checks. So cute. Let's do the top
part dots first. Okay, so we need to add
another mas to this, which is the Voronoi. This is the color of our night and we can
also do distance. Let's go to randomness
and reduce. Scale. Raf nothing. Also nothing. Scale. Okay. T D. Smooth. I think smooth will
work better. Let's see. And let's add a color and see
if we can create to invert. Little dots. They
are irregular dots. But I like this way. Okay. It's because the way that
they are being met also maybe if I can use the same
one from the wave, we are using a cylinder V. Yeah, it's a lot more
regular this way, but too much, maybe
if you can apply. Yeah, I prefer the way
that it was before. I think this is a lot better. Now I have another mask, but I want to multiply just
on this red part here. I need to do this before
before this overlay here. I need to do this right here. If I do this, you can
see the mask right here. What I think I will do I still have a little
bit of the normal here. I think it's the displacement. Yeah, it's the displacement
here as you can see, I need to add a
mask for these two. Let's see this first. What I can do here really
quickly is just copy this. I'm going to use the black as the red, and this is the white. Simple as that. If I
want to change the dots, I can go here really simple. I can make them pretty sharp
or I can make it soft. I want to make kind
of in between. And instead of white, let's see how it looks
with the darker color. It's kind of I'm still going to adjust
this. But I think I won. Still not sure about the colors, but this is a nice thing. I can change anytime I want. I want to darken this, but I want to control the a yeah, I think this is better. This way I have control over the darkness
here and the color. So if I want to
change this color, I can go here change to
some nice combination here. Really indecisive
about the color here. But also red and green are nice. Okay. So now this
white color here, I can also change a little
bit of green. And the cheeks. Now I have this cute
procedural texture. I'm going to add a little
bit of texture pink. To do that, I'm going to go to the body and I'm going
to add a second UV. Because right now, let me
see how this is working. I have this cylinder
projection here. I'm going to do a front face because I think it
will be enough. Let's see. Project from view. So now I'm going
to press F three, and this is all
the same material. I'm going to set
the image texture. I'm going to create
a new one, 1024. Let's just do 248
just to be safe. Face. We need alpha, new image. Now, if we go here
we go to face, we have a black texture. Let's apply this and also we
need to adjust our new UV. Go here to UV Map
and the second one. Let's rename this. Pace. I'll go to texture paint. Phase, right? Let me see. I need to add Alpha. I need to add Alpha
to all of this. Let me see if I can
bucket paint Alpha. I don't believe that I
can D I said to Alpha? That's why not enough Iteris. Now we can go to paint. I can't see anything. Okay, this is enough. Now I can go over
and select a shade. I really love to
see what I'm doing. And select Mix. Okay, I can't see right here. Do I have it connected? Oh. Okay. Texture paint. I just want to. I don't
want to paint hard. I want to paint soft. Do. D. Done. It's okay. Is it okay. I'll go back to select. Yeah, I don't want to
repeat this texture. So I'm going to change this in my shading tab. I have a repeat. I'll go to clip just so I
don't have checks there. What I'm going to do is to add. Mix Ed. Okay, I'm
going to do more pink. Oh. No, I'm going to fix this. Okay, I'm going to
change the back part. I'm going to do contras in normal. I'm just going to scale. And then, yeah Since I'm
adding it, let's say mix. I will need a different factor. The factor could be
the Opha, I believe. Yeah. But now this
is too strong. I kind of prefer Ed. Let's see multiply and the factor B off.
Yeah, it's too dark. Yeah, this is cute. My to change this a little bit. I'm just going to I
can see this better. G to actually copy
this color here. I Now I'm going to use the pink heart. This was supposed to be black. I actually kind of
love it this way. I love this material. I can even go here changed. But I like this. I can even do an
animation of him gaining. I'm definitely going to do that. The top part. Getting
shy or something. So before I move on into
the rigging process, I'm going to do a little bit of adjustments on the
material and on my mesh. The first thing that
I want to change is the mapping of the
little x because I want to do a sitting animation.
This is going to show. I'm going to go
here under UV map. I'm going to do a
projection from bottom up, Cultro seven. I could do unwrap, but I think this is faster and it's going
to solve the problem. So I can go here and
go project from ville. I like the way that it goes all the way around
here on the side, we have this, but
still really good. I'm going to just just A little bit. Okay, I noticed that
here I have an artifact from applying my mood
resolution before. I'm going to adjust this
by selecting the verdict. Since this is not going to show, I'm just going to merge at less. I think it helps a little bit. Okay. The next thing
that I want to adjust is the normal map here
under the material yeah, this normal map is not
working very well. I noticed this artifact here. Actually, what I need to use, it's a bump because the input of my texture
is black and white, so. Let's add this to the normal and let's add this
directly to height. As I can delete. So this worked a
little bit better. Going to increase the distance and I can see that we
have more noise here. I'm actually going to reduce a little bit
of the distortion. Okay. I'm also going to
change this color. Going to do the
more bluish tint to make it look like this
red is showing up later. You can even do, like, an animation like
like this at the end. Where is it? I actually think I will reduce just a
little bit. It's nice, yes. And since I added the
little check blush, I was missing some
shine on your eyes. It looks a little bit
flat from this black. So what I want to do is
to add little shines, but I want to do this
procedurally as well. It's okay to go here. I'm going to add radio texture. I think it's a gradient texture. Actually, spherical. Now you can see we go
from black to white and we have a sphere here. I'm going to add my
texture coordinate and I'm going to
use MUV for that. Yeah, I have one UV for this and I have a
mirror, which is okay. So I'm going to adjust so it
fits more or less like here. And the center of this
is here under zero. So in my X, I believe it needs to
have 0.5 or -0.5 and 0.5. Yeah. I think this works. So it's exactly at the
center of my mapping. And I also want to control
the black and white, another color M and I
can leave it like this, just a little
dimension to the eyes. I just want to add a shine. It's going to be aesthetic
shine, but it's okay. So I'm going to use constant. Shine. Now I can control
where I want this. I can press shift to
make this light go a little bit slower
here in 5.1, great. I don't want him to be looking cross eyed
because of this, so I'm going to go
here on their mirror and we can change UV. Here now we have
the same direction. Let me just the shine. I'm also going to
add a second one. I'm going to duplicate this. Now I just need to
change the direction. I kind of like the way that this one kind of warps to the side. It makes it look even better. Okay. Let's see how it
looks with the keys. I mean, it's static, but
just a little effect. Do Okay. I can adjust this later. I also having that
little artifact here. So let's see how I can fix this. The displacement is
causing this issue here, even though I tried to fix
this. I'm using the wave. Since I'm doing your
cylinder procession, I already assumed that I was
going to have problems at the top part because the cylinder kind of warps all
of the textures right here. Maybe I won't use the
displacement on my wave texture. Let's see if I can
use another one. We can use on this one,
still have a little bit of material scle
placement, not vertex. That fix the stop part
because I'm mapping. I'm using the wave texture, only the wave texture that is coming all
the way to the top, from the bottom to the top. When I'm mixing this with the other ones with
the stop part, it's actually removing the
wave from this part here. That solves the issue. I'm still using the wave here. Okay. Now the mesh looks good. For now, one more thing. I'm going to duplicate
this material here, this black material for the mouth just because
I don't want any shine. I'm going to remove this and actually bump out the roughness. I just remember one
more thing that I want to do is to
play a little bit more with the roughness of this because I'm just using
base color and Alpha. Although it looks good, I just want to test
how this will work. Okay, so now I have more shine here on the ridges,
which I kind of like. It could be the
other way around. So this red, let's
see, the base color. Okay, so the black
is really shiny and the white is rougher. And this became a
little too shiny, so I'm going to reduce
just a little bit. Okay, now we have a little bit more shine
here, and this is it. Okay, so this is it
for this lesson. In the next lesson, we're
going to start rigging the body and doing some
tweaking on the animations.
7. Simple Character Rigging : Welcome. In this lesson, we are going to learn
to rig our characters. We are going to be doing
three different animations using A strips and then combining it with the blend shapes that we already have for the
facial features. So here we have our character. To make it move, we can just do like this
and rotate them. We need to move this
vertex separately. For example, if you
want to move this leg, we will need to select
a certain amount of vertex right here
and then rotating. That's why we use rig. When we rig our character, we are basically adding internally bones in
our mesh and saying, Okay, I want this leg bones here to move this
amount of vertex. And in a smooth way, this is going to move strong
and then we're going to have a smooth fade out here that will be controlled by
the movement of this wig. So that's what we need to do. So I'll go under modeling. Let's go under not a sculpting. Animation. Yeah, let's
go under animation. We go to this front view. Here we have the
timeline that we use. We can see that we have the
animation for the face. We can't see here because it's under these animations
right here. But let's forget the
face animations for now, let's focus on our bone first. Okay, so the first
thing that we need to do is to add an armature, and these are the bones. You can see here that
I have under light. I'm going to move here to
the mushroom collection. And here we have armature
pals and an armature. Okay, so now I'll add the bones where I want
my character to move. I want this to be
the center spine. I'm going to rename this. I'm
going to add one more here. I can extrude. I'm going to rename this. Top. He doesn't have any arms, so I don't need to add
any movement here. I want to do a hip motion here. This is the left. He doesn't have any knees, so I'm just going to
add another bone here. And from here, it
is actually hip, but Okay, so this is basically
everything I need for ***** character,
really simple. And if I move, happens. Here, I'm going to parent the eyes and my
mouth into the body. In 5.1, I can just
select both of them and press Shift and hover over the object that
I want to parent. This is pretty useful and
it was updated in 5.1. If I move the body here, you can see that actually
if I move the armature, it doesn't do
anything because we need to parent the
body to the armature. Control and I'm going to
use with automatic weights. Now, if I go here and
go under weight paint, I have my right foot selected. You can see that the
ik of my left foot is grabbing vertex seal this
part here, which is too much. I basically want to move just this part and
a little bit more. But this is useful
because it already did initial weight
on the vertex. So right now, I'm
going to adjust the vertex that I want
to use for each rig. Okay, so here, if I paint, red is going to be one and
zero is going to be black. So what I can do here to just reduce a little bit of the
influence of this bone, I can go here under levels, and I can adjust the
offset a little bit less. But, yeah, I lost the
red so I can gain Okay, so only these bones here this vertex here is going to be influenced by the top part. Looks okay. I'm just going to
adjust all of these. For this one, I also need to add weight to this part here. I'm going to paint
it a little bit. For this part,
it's going to be a little bit more difficult. I will have to test out the
animation because I just want the hip movement to
be really subtle. So let's see. Yeah, for this part, I'm only going to
lift the foot on, so I'm going to go
actual edit mode and select all of this, and I'm going to
remove from this. The same thing for this one. Actually, the right leg didn't
Okay, it's the right foot. The same thing for this. I so right foot, left foot, right leg, left leg, top and spine. This looks good for now. Now let's test out the armature. Let's use this one. Here I'm under edit mode. If I rotate this, this is not going to do
anything with my mesh, so I need to go
under pulse mode. Now, if I've moved my leg, I'm only moving the little foot. This movement is only going
to be on this is right here. Here I can already
tell that I'll need to adjust a lot of the weight. Let's see. Yeah, maybe I'll just
do a little bit of hip rotation in the
walking animation. Just a little bit instead
of rotating on the X. Maybe this can work, but I
will need to influence more. The idea here you just a little
bit of this hip movement, so the legs doesn't stay in the same position
when it walks. But here, Oh, little wobbly. The goal here is to
do three animations. I want to do a little
walk animation. I want to do a jump
animation which would be interesting
in a sitting position. Doing jump, something
really small. I need to increase a
lot of the weights for the movement.
Let's see here. I also need to adjust to include the eyes include the eyes
so this bite movement here. The top part is the easiest one. No problem at all.
Okay, so let's just for the sitting position, I'll need this to be a little bit longer. This better. I think this was an automatically map to
the armature as well. So I will need to do this
individually with empty groups. I won't need all of this, so I'm just going to remove
so I don't get confused. Now it is attached. So I'll need to do the
same thing for the mouth. Let's see if we have probles
because it's a curve. I hope not. Okay, so now from the mouth, I can appoint the vertex weight. So I'm going to create a copy of this duplicate collection
just to have a backup. I'm actually going
to have to apply, which means I'm going to lose the shape keys that I'm going
to have to make this later. But I think this is the
fastest way that I can do. I will cover this to mesh. So yeah, I lost the shape keys. And the animations,
let's clear them. Now I can hook just like
I did with the eyes. And Now, it's moving your courtly. Front part, step. I adjusted all of
the weight paint, here we have the movement of the spine, just a little bit. The top part, we have both hips and we need to rotate
this there there at once. It's just a little bit
of movement because I don't have any joints
on this character, so it's just the
impression of movement. Also we can rotate the legs. I'm having problem with
the normal here, believe. I'll see what is happening here. Mm. Just notice a
problem with the weight. Left foot. Okay. Assign one. Maybe I have this is
connected to another exactly. I'll go to edit mode again
and remove from the left leg. I think maybe I painted it. Now the next part is
to start animating, I have my eyes and mouth
attached to the armature and the body with automatic weights and I have all of
the bones named. I'll start with the
most complex one. I believe that is
the walk animation. So I create a new
action called walk. And I'm going to, just walk. And for this, I want
to set this position, and I want to rotate
them both at once, and I'll look a little bit. First. You remember
the notations that I have. Okay. Okay, so just grab the rotation of the right
leg and not the left leg. 12. Okay, so now I'm going to remove the zero. Let's see from the top to. So to this and back,
copy and paste. Here, and here. Let's see. Really quick. Really subtle. No control F. Now I'll go to the graph editor. I'm going to select this. No cycles. Shift contra Now the little
animation that I created, now it's cycle through
all of the movement. Now let's add more movement
to the little legs because now it's too subtle to notice. Tulsa infin I will go
back to the timeline. So in this first point here, he's throwing his leg forward. So like this. So cute. And in this movement, this is going to be positive. And for the other, like, the other way around. Now, same thing.
So both of these, go to the graph editor, contro Shift M. I think shift F. There
was a way that I could. Anyway, I forgot to copy it. The first positions. Okay, now, cycles. Now we have both of these. It's pretty notice about. The first one, let's see. Yeah, but it's moving, it's moving the texture. I'm satisfied with this
walking in place. Okay. Now, when my
character is walking, I want to move my spine
a little bit too. If I go here and move or
let's see and move my spine, let's see what happens. Just a little bit. I could feel like he's
bouncing a little bit. That's what I'm trying
to say. He's bouncing. I have a snap to target. Yeah, I think it could
be a nice effect here. So I'm going to
adjust a bounce to this and also a movement here. He's moving forward,
just like this. Actually, I'm going to make
it seem like he's hopping. So when he's at the center, it's going to actually be
lower. So let's change this. We'll go to invert. So lower higher. Lower. And higher. So in one loop, he has more bounces. So in this first loop, I'm also going to
move this on six, it will be pointed backwards. The rotation on six is going to be straight.
That's why I set. And on this, it's
going to go backwards. I'm just going to copy this really subtle movements, but it makes a difference. As for the cycles.
Now let's see. Pretty cute with
the eye animation. I think the head is
too much wobbling for the rest of the body. I'll just adjust the top part, but I think maybe the
weight of the top part, it could be a little
bit more influential. Like, for this part here,
maybe they should move as one. So let me adjust the levels. I want them to gain. That's not working. Yeah. So this should be
affected maybe as one and affect a little
bit more of the stop part. Maybe I exaggerate
it, but let's see. Yeah. Okay, so I think this is
good for the walk animation. Now, I will go to the
non linear animation, and I'm going to transform this into an action of my armature. And you can see that now I can walk and smile
at the same time. So I can go here and
make the set animation. Oh, this one is Well, it doesn't feel set
right now because I need to add the movement
of the mouth here. Let's see if Okay, I'm having some problem
there with the shape keys. So yeah, I'm going to
adjust the shape keys. Well, let's do smile. Okay. I also need
to just demuth. So I'm going to make it. I'm going to apply
a solidify because honey moth here
disappeared. So let's see. So for this one, I'm
going to add a solidify. Mm. This will solve the issue. Okay. Now I'm going to
add a second animation, which is going to be
the jumping part, and then I will combine with the book that
we already have. Now I'll do the
jumping animation and it's going to
be a separate one. So let's create let me save. Create another armature
action called jump, and I don't know how
he's going to jump. Let me disable the
I'm going to open another one here and leave
it non linear animation. Let me just disable
this disabled. Now, let's go to the pause mode. And from here, I'm going
to set these positions, and he's going to reset. And this little leg going
to go even further. In this position wait again. I'm going to exaggerate
this movement. Just this. Jump really high. And the rotation, I didn't
snap the rotation at first, right. Can just go here. What? Hi. And backwards. Jump. And for the stop part. Jump. And this go back? And then goes back. This also comes back. This, like go forward. Then well to the side. Mm let's see. He is walking, he jumps
and professional lands. Let's send this to 36. Not this. Jumps lands and this needs to go
backwards once again. Then he stands straight. We jump leging needs to be way faster. Okay. So now what I want to do is combine both
of these animations. So now I have the
jump and the walk. So let's convert this
to another strip. And I want my character
to jump after they walk. So right now, this is disabled. I'm going to enable
the walk animation, and it's not working well
because this is influencing. So let's set this to nothing because it does
nothing before start. This is going to replace.
This is holding. I want this to hold to
continue to cycle through. Let's go down here and we
can set frame start and end. We can also combine these two. Let's see. No, I don't
want to combine. I want to blend
in and blend out, and this will help
the transition. So you can see that now, even though I set, see, we have that jump between
these two animations. If I go ahead and set here, even though you have a little
bit of We don't want that. So the cool thing about
NLS strips is that you can combine different
animations and we'll do a smooth
transition between them. So let's do a plant
out and a plant in. You can see that he
prepares himself to jump, but it's not cut. So it's a little bit better
and you can't be co arm of these settings until
you find a good result. I'm going to add one more
idle animation jumps, sets in his position, just like he did with
his little head, I want to add an idle animation when he goes from side to side. I'm going to do that. The Ido animation is going to be
with him, sitting. Just grab this final here. Need to be the same position. Maybe I'll make him move his
little legs a little bit. No, actually, not
from side to side. He can rotate this direction. Oh, that's so cute. Hmm. Just like me
can stand still. Move his legs all the time. Yeah, but here I need a cut. Okay, so I just did the
rotation and I'm going to set the handler
type to vector. Let's see. Kartik maybe. No. Circle. To robotic. Almost there. To leave it like this for now. Going to add the movement
from side to side. It's like here. Here. And just a little bit later. This is heavy so
really to the side. Of press the rookies. So he starts a little bit later. So he's turning to the side and it gets too
heavy and it falls. Now, this again he starts
to go to the other side. And this one hold this
position a little bit here. And when it reaches this point, it falls to the other side. Maybe this was a
little bit fast. Falls. It goes and it falls more or less
the same distance. So let's see. Falls? He
turns this feels heavy. Okay. Really cute. I just need to make him Okay, let's go back to the
default position. Now we have him bouncing,
moving his legs. Okay. I'll send this as an
shape and send this here. Hold, we don't want to hold. Let's enable the
walk and the jump. Okay, so this hold forward. This is holding forward. Perfect. I cycle once more to the end. Let's see. I'm going to press tab and go to the graph editor
in the pulse mode. I'll just select everything
and then going to cycle. I and now I'm going to increase again. And now he's repeating. Okay. Now I need to
see while I work. It's holding his left leg. Why? Let's see if it's Looks
like I lost the movement. It's weird. I Somehow lost his movement. Okay. Yeah. That was my bed. I changed the way
that I rotated it. And let's see how this
messed up the idle. Yeah, I lost the
rotation on the legal. That was stupid of me. Let me see if I can.
This little rotation. Why did I invented this? Hm, I need to adjust
this pink stuff. To remove pins. Lips. Let's rotate it again. Let's just rotate like he's balancing himself to this side. It'll make more sense. And then it goes back. Yeah, this even
makes more sense. So the other side, his other leg is like this. And he balance himself Okay. So now let's add another
blend out and blend in. Let's check the animation
walk, jump, and idle. Got a little bit of
an artifact here. I don't think I'm
going to add a blend out because they start at the same position.
So let's see. Mm. His spine is lower. I'm going to adjust this jump. Let's see how his spine ends. Let me set back Actually, go to adjust
spine height in the atom. Mm hmm. He falls to zero, which is actually
the default for him. So let's set zero all from the beginning and finish the
jump with 02. And I think. And when he fall,
I didn't adjust. When he falls, yeah, I actually missed that. Right here, he needs
to be zero again. Zero. Yeah. This
is it. Say again. Really cute. Really cute. Okay. Now I want to combine the movement of the eyes
and the mouth with this. So let's see. He's smiling. And then he jumps
and he's focused. And I had a little problem
here again. With the mouth. I'm going to hold. Hold forward. A And is it just enough? Oh, that's so cute. That's so you Turku. Okay, so this is
the final animation of our character. He can walk. He's jumping and have
little cute idol. In the next lesson, we are going to be adding camera and a little environment.
8. Art Style: Welcome. In this lesson, we're going to define an art
style for our character. Then we will render it in different poses and even export
a video animation of it. Here I have 23d view ports. One is under solid
view of my character, and this one is the render view. If I go here, I can
see that I'm using the scene lines of my
project and the scene world. Since I'm using IV rendering,
which is real time, this is really close of what
we have in the final render. If I go here under
my render settings, I have my ray tracing on I can activate fast global
illumination approximation, and you can see that I
have more shadows here. And if you go down, we have color management, which is different ways that
you can view your render. So here I'm under standard, which is more true
to the RGB colors. But we also have this one. You can see which
one you prefer. I prefer to use standard because I'm going to do a
more stylized look. You can also use this to view the exposure
of our character. If you go under false color, you can see that the green is less exposed and the
yellow is most exposed. What does this mean?
If I go here under sun and if I increase
the strength, you'll see that we will
have some red areas. This is showing that this part is super exposed to the light. Let's go back to standard, and you can see that this
area is light and we don't have a lot of
contracts in this image. Even here, I can see that
I need more shadows here. Everything is too overexposed. Now, let's go back
to our references. So here I have examples of
a few different art styles. This one is more treaty look. This is kind of a
tomb shader drawing. And we have also this really
treaty looking character. So if I wanted to go this route, I could activate
PSGI approximation. I could go here under light path and decrease
the intensity of my indirect lighting to create more depth to my character,
increase this one. So you can play around with these settings to achieve
your final result, of course, also
adjust the sunlight. But I'm going to
go back Control Z. What I want to do is create a more stylized look like the tomb shaders that we
see on these characters. A few ways that you
can approach this is by modifying your shader. The way that I'm
going to do this is by modifying my shader. I'll go here under
shading again. I'm going to select
my character, and here we have our
shader for the body. Going to organize
this real quick. And to organize, this I can drag here and
search for reroot. And this will create another
point that does nothing. So I can go here and just try to keep
this more organized. A This looks slightly better. I can see the overall
of my shader. So this. What I'm going to do is
to add a shader to RGB. This is useful to create
stylized environment. I'm going to connect
the color ramp. E. And I'm going to connect and
we will see what happens. Here we have our gradient
because of the color ramp that is controlled by the
light that I have on my scene. If I go here and reduce, you can see that it starts
become gray or overexposed. This is cool because
I can go here. I can go under my
character and use a constant and I can really define the shadows
of my character. I'm going to disable
this point light for now because as you can see, it's also interfering
on my character. White is going to be the
parts that is over exposed. I'm going to add a gradient. Here on the outline, I have a little gray here
because of my world setting. I'm using a gray and
I have one string. I'm going to disable it. I have better control
of my shadows. Okay, so now, this is going to add the shades of my character. I'm going to convert this point
light into an area light. I need to open a
new type here just so I can control
them both at once. And what I want to do is to add a ring light coming from
behind my character. And I'm really going
to have to expose this and really scale the light. You can see that I start
to have little rim here. A a I have a really intense light coming from behind on
all of my character. So here we have a nice constant
shade on our character. Now, if I go here under my base color and connect
it directly to the surface, you can see that I don't have
any shade on my character. I'm going to combine this
with the shape that we made. I'm going to drag
my base color and search for a mixed note. And connect. Let's see what's happened. Now we are mixing both factors and we have the color
and the shadow. But as you can see, this
is too overexposed. Instead of mixing,
I'm going to try out darken because I want to
keep the white as it is, and I just want to add
the darker shades. If I go all the way up, you can see that my white are still true to the
color that I have. So I can lift this at 0.6. I'm going to reduce
the sunlight to one Maybe. A little bit less. We don't need to use only
black and white colors. I can go here under my gray color and I
can apply some tint. You can see that under my gray, I can apply different colors. I'm going to use a bluish tint. To So I'm going to grab a second one, and I'm going to add mix
add another color rip. And from here, I want
to use a pink shade. So what you said to
me more my colors. Nor is my Okay here. Okay. I'm going to lower this a little bit more. This is too overexposed. Let's see. Let's this. A Okay, so you can adjust all of these settings and play
around with what you want. If you want a more
violet kind of glow, you can use shader to RGB to achieve the style
that you want. Once I have my camera setup, I will adjust this better
bit because as you can see, the way that I have
my point light and the sun will interfere
with my character. I'm going to go ahead
and create a group. I'm going to name it to shader. Now I'm going to add
this to the eyes. I'm going to copy. I'm not going to use a tint. And you can see that the
little shine here disappeared. I'm going to leave
a black and white. And instead of darken,
I'm going to add. This way, I can add
the little dot. If I go here, it goes
bigger or smaller. And this dot is going to
move according to the light. But you can live without
it if you want. Okay. Now, let's set our camera. I'll add my camera
under collection. To go in the camera, you can pass zero in the NN PED. And if you press
Shift and quotes, you can navigate by pressing ASD W. I'm going to
frame my character. And then I like to go here on my rotation and set this to 90, zero to a more rounded value. And instead of doing this, I like to go here under shift and move here
because this way, we don't have distortions
of our character. Right now I want to have a real true
representation of it. Let's press F 12. You open this window. Here we have our character
in a black background. If you want to explore this
with an Alpha channel, you can go under here, film
and select transparent. This way, if you render, you have a transparent
background. You can go here and save. Render and make sure that you
have your color under RGBA, because if you have under here, it's not going to have the
transparent background. My character is floating
and I want to ground it. I want to create some shadows. I'm going to create
a simple plane. I'm going to add a
plane and scale it. I'm just going to make sure. I'm going to create a studio. This is sharp. I'm going to do a bevel and shade autos move. Here you can see that I have a problem with my area light. I edit my point light, actually, my area light just to create
this rim on my character, but I don't want it to add any light to the
plane that I have. The way that I can do this is to move this plane to
another collection. Environment. I'll go under my area light and go here under shading and light linking. Here, I can select MV. If I disable, you can see that is now
removed from my plane. Now I'll add a material. You can do a
transparent reflection. Let's see how this looks. Now I have a ground
for my character. But since I'm doing
a stylized look, I don't want this
kind of reflection. I just want the shadow and I
want it to be pretty sharp. I'm going to use
the same shader RGB that we use for the character. The first thing I'm
going to do is to replace this by a
diffuse shader, because to use the shader
to RGB, we need a color. Same thing, color ramp. Now I can drag this. And really closely, you can see that now I
have a constant. If I selected just my diffuse and now we've shader to RGB. So from here, I have my
character with a shadow, but you can see here
that my character is lost in this
white background. One cool thing about this
is that you start to notice the way that affects the different
backgrounds on your character. If I go under here,
select different colors. You can start to test out the
colors that you have from your character to fix this problem if I have a
really bright background, even if it's just like this, I'm going to add an
outline to my character. To do this, I'm going
to use geometry nodes. I'm going to select
my character and go under modifier and
add a geometry node. I'm going to add a new one, and I'm going to
name this outline. I'll go here under
geometry notes. So a quick way that we can do
this is by extruding all of our character outwards
and then applying another material on top of
it and flipping the faces. And we also need to activate
the backface cooling, so the backface of our
shader doesn't show. So let me show you. We need to grab the
normal of our character. Normal and true normal. Now we're going to
set a new position. So if I connect
this, you can see that we can change the
position of the character. So what we want is to set the
position based on normal. But to do this,
we need to scale. Actually the offset. Now we can extrude the
character or make them thinner. Here I'm going to connect
under this input, so we have it right here. And it's just going to
be a small extrude. Here, nothing happens because
you need now to flip faces. Now you can see, but
the faces are inverted, as you can see,
I'm going to leave this this way and I'm
going to set a material. I'm also going to connect
this to the output. I'm going to duplicate
this body material here. You can just leave black or any other
color that you like. But I'm going to use
the same body material and I'm going to modify
it a little bit. Actually, let's just
leave this body outline. And the reason that
I'm duplicating it is because I'm going
to change some settings. Like I said, to make this work, we will need to activate
the B face cooling. So as you can see, our
material is inverted. So this creates the new border This creates a new
border of our character. So we need to combine what we did with the original geometry. So I'm going to drag and I'm
going to join the geometry. Okay, let me dsp shadow too. You need to design both because we don't want the camera to vis it or even to create
shadows in our geometry. So if you have your
settings like this, we can go ahead their shading, select the body outline and
modify it a little bit. So I can darken a little bit. Let's increase the size
just so you can see better. So we can darken it. We can just leave it black. I like this option
because it gives you an outline without
showing too much. If we have a color
just this color, let's remove the displacement. It gives a more cartoony look, which is cool too. You can play around
with what you want. But if you have a
darker background, this cannot show that much, or we can use white. But I'm going to use
the same shader. So you can see that
we have a few tints. And I'm going to remove this. Okay, so now let's
disable it and render. Now let's compare with
this new version. So we kind of got this separation here
from the character. Now we have our character with the shadow in
the background, but I want to test different
colors of my background. So what I'm going to
do is to use this as a mask. Pressing F. I'm going to name
this shadow mask. Because if you move the sun
shadow will move accordingly. Now I'm going to use a
mixed node in the factor. This one. And I'm
going to connect. So if I change this color here, I can control the
color of the shadow. And this is cool because I
can grab this little color here and make the shadow tinted, just like my character to keep everything in the
same color palette. And this I can control
the background. So I can see that the characters more ground than that before. Now what I can do is to play
around with my background. I'm going to add a gradient and a color ramp and connect
to the white color. Here I need to map. You
can press Control T if you have no wanglar activated,
and this will pop up. So now I will need to
rotate this and I can create a gradient
effect if you want. But I want to add
just a circle here. I'm going to change
this to spherical. I'm also going to change the texture coordinate
because right now it's generated and I
want it to be static. Connected to window, I'm going to change
this to constant, and now I have a sphere here. I'm just going to reposition it And you could do a cool
effect for a character, for example, a little circle. It's a little hard to
get something like this. But I want to create a base. Reduce to 80, I'm going
to make this 0.40. This is mimicking a
stand for my character. The cool thing about this is that I connected to the window. If I go here and move,
this is aesthetic. It's always at the bottom part. Now I can use this to play
around with the colors. This is mimicking
a dark background. This I don't need RGBA. So I'm going to
name this dark ink. I'm going to add one more and duplicate and
name this light. I'm going to apply assign this. And I'm going to
create a colored one. And in here, I'm
going to test some of the environment colors that I would use with this character. So I'm going to use
my reference board. So let's test this color here. I'm going to try to
catch a yellow color. I'm going to invert
these colors. I can go under here and flip
Color Ramp and adjust this. Let me just check the way where Okay, so now I'm going to
do a few renderings showing different sides of my character
and also different poses.
9. Character Poses : I'm going to copy this
camera and I'm going to name this Oto and change
because for this one, I'm going to use an
orthographic view. I want to have a front
view of my character. I'm going to backup
and I'm going to create a copy of my character. Okay. So this one
is at the center. I'm going to move the sun. So the shadow doesn't interfere with the other characters that
I'm going to add. I So I'm going to duplicate this collection. I'm going to name this
collection mushroom scent. Mushroom left. I'm going to select all of the objects and move 5 meters. As I said, left, I move
and changes to the right. So right and left. Okay, so now I have three
poses of my character. I'm going to select
the left one. Let's move to the animation. Okay, so for the
first character, I'm going to do a front view. So I'm going to go
over the armature and move from the pose position to the rest position.
This is the default. This will be the T
pose of my character, but it doesn't have arms, so it's an eye pose, I believe. For the second one, the centered one, I'm also going to move in
the rest position. But I'm going to rotate it so
we can view from the side. And the last one, I'm going
to leave this animation on. I'm going to rotate it slightly. Now I'm going to render it with all the
different backgrounds. The pose point. Now I'm going to
use the same ones. I'm going to go back and do a setup of the different poses that we have in the animation. Remove from the pose position. And the first character, he's going to be walking. I'm going to activate
the only show selected, and I want his eyes to be mine. Just like this. For this one, he's
going to jump. On top of this, I'm going to
key frame a location higher. Oh, I also want his eyes to be wide open
and his mouth on the front. Like, he's concentrated. And this one he's in
the idle animation. I think this side
and he's going to have Uh and for this one, and I'm also going to
low him to the ground. Pretty cute. Animation color. Now I'm going to duplicate
again the center one and I'm going to do
the animation render. I'm going to disable these ones. Okay. So for this, his animation. I'm going to use
the default camera here, respective camera. I'm going to change
his location. The first thing that
I'm going to do is to attach this area light to my character because I want this ring to
kind of follow him. So if I move him to the side, we lose that ring. I'm going to attach
this to my character. I'm going to move
this pressing shift and insert it into the ometer and also moving
to the same collection. So now if I move my character, the ring glide kind of follows. A I'm going to increase the size of this plane here just because of the shadow. Think a little too fast. That's why I wasn't seen. And also, I will snap the
height just a little bit. Going to change just to. I'm going to move this
frame to a vector because I want him to stay
like this and jump. I'm going to lure this
just a little bit right here like this. No. And let's see. I'm losing the part where his spine goes a
little bit down. So let me just Maybe this is a little bit too early. A little bit too fast. Right here, I'm going to add another qui frame
into a little bounce. Just a little bounce here. I think it's okay. Okay. Then I can just
leave it like this. Just going to select this one. Not this. Just a little bit. He's still going out
of the frame here. I don't want to
move out his frame, so move the camera. Here. And now I need an object
for him to sit on. So I'm going under environment. Add a simple UVspere. Now I'm going to move to the
highest point right here. I'm going to use
proportional editing. I'm going to use shape key. Let's shade this to autos move. I'm going to close this off and just create a
little bevel here. What's a sub division. To duplicate this
material, use this. I'm going to do a lighter color, and this is affected by
the plane of my character. So I'll go for the area lights. There's shading and
disabled sphere. For this one, I think I'm going to reduce a
little bit of the exposure. It's a little bit too
intense right now. Okay. I need to add the tune
shader for this one. Let me this. Actually. That's it. A car. I think this is okay. Now I'm going to add shape keys. So my default is
going to be this one. Let's move to the animation. Let's close this off. Okay. So my character jumps really high and he lands. So I'm going to adjust the base the basis.
Let's move this. So let's make this bigger because he's
jumping pretty high. He's here. I Okay,
this is the base. Now to one, we're going to
move right here and I'm going to move back to
move and move this down. So this is going to be the one. This is zero, one. Okay. So now let's key frame.
This is going to be one. And when he's right
here, let's add zero. And let's see when he
starts to push down. So his little leg is there, so I need this to be
lower on the basis again. Let's change the key. This is too much. It's going to be one. Let me do this again. This is the basis Kiwa. Let's lower this part together. Okay, so I'm going to
hide up until here, so this won't get
affected by the movement. Now what I need to do is
just to connect this again. Just move this
down a little bit. Okay. When he goes up, it's going to ease up
a little bit less, and then it goes back
a little bit less. So let's see. Cute. I'll move this a little
bit more to the side, just so I can see jumping. Let's see if we don't
have any overlap of meshes, like here. Two is this. Okay. Okay. The dark environment
for this one. I'm going to use the dark one. Okay. Now I'm going to do just a
render test of an image. There's two ways that you can
export a video animation. You can export by frame, so you need to select a
folder on your computer. For example, here,
I'll have 250 images, and then you can combine it in another software
and create a video. Or we can just go under
here and select video. And render animation. This is going to take
a little bit longer, but it's pretty fast, as you can see here, we're
already at frame eight. Now I render all of my
images and videos and I add it to Blender and you can play your videos inside Blender. Here we have our character. Here I created a little
environment for my character, and we have all of the
poses, different lightings. So this is it for our lesson. I'm sure by now you
have all of the tools to create your first
character in Blender.
10. Class Project: Design Your Own Fantasy Character: Now it's time for you to create your own fantasy
mushroom character. For this class project, you will take the
character that we've created and apply your
own artistic view to it. You can experiment with different colors, materials,
facial expressions, lighting, and render to bring your own personality and
art style to the project. Maybe your character is
cheerful and friendly like mine or it's a serious garden inspired by a fantasy
world that you like. This is an opportunity for you
to create your own design. Once you've customized
your character, past using the rig
that we created and upload your final render
to the Project Gallery. Feel free to add a
short description of your character and any creative
decisions that you made. The goal here isn't to copy
what we made in class, but to use the techniques
that you learn to make a character that
feels like your own. I'd love to see the
characters that you create.
11. Final Thoughts and Next Steps: Congratulations on
completing the course. You've now taken your character from an idea to a final render, a workflow that includes a lot
of planning from modeling, texturing, posing,
lighting, and final render. That's an incredible
achievement and a great introduction to
character creation in Blender. As you continue your
Blender journey, try creating new projects, experimenting with
different art styles, and using the techniques that
you learn from this class. Every new project
that you create will strengthen your modeling
and artistic skills. You haven't already,
please make sure to upload your character
to the Project Gallery. I would love to see the creative ideas that you brought to life. If you have any questions, feel free to ask them in the
course discussion forum. And if you enjoy the class, please consider
leaving a review. It helps us improve
future projects and rich more students. Thank you for joining me, and I'll see you in the
next Dunder course.
 Skillademia Academy, Creative Skills for the Future