Transcripts
1. Introduction Video: Product advertising is
evolving every day. The BOD entry is incredibly low. And RBD is it has provided me with amazing opportunities to creatively visualize and sell brands from all
corners of the world. Hey everyone, My name is Smith. I'm a 3D artists with Arbor, five years of experience
creating in the industry. And as a freelancer, I've produced this class or
that there is a sense of incremental improvement in each lesson with
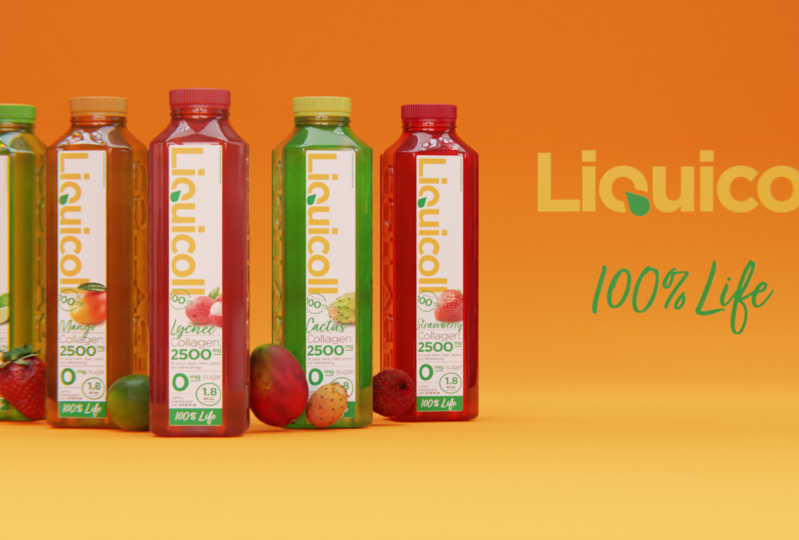
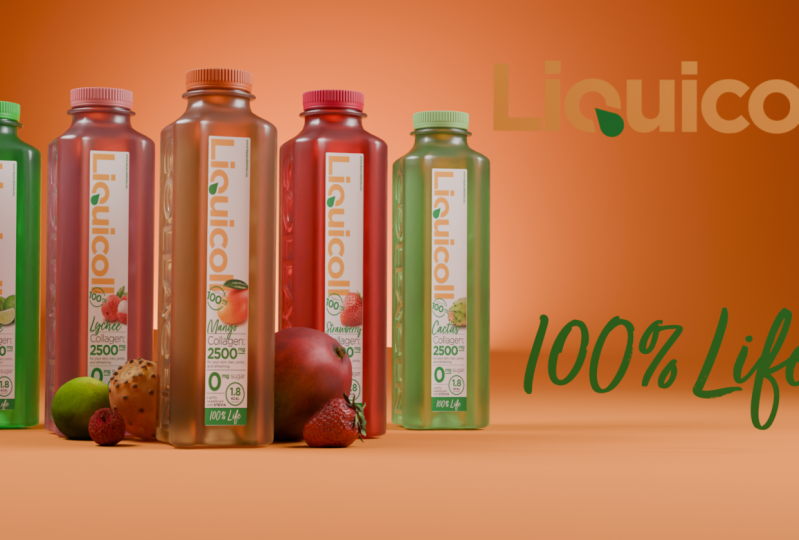
a class project, we are going to
recreate this, in fact, advertisement from
start to finish. We'll start from the
default blank blender scene and events through
each lesson to an increasingly more
complex shot design while following industry
standard 3D workplace. But reference will be covering
the following topics and concepts in detail progressively
through each lesson. The entire goal of
this class is to empower anyone
that's interested in product animation to take the dive into this
wonderful world of 3D and start building out their portfolio of
wax for this class, ideally, you'll have a basic
understanding of blenders, UI, and Viewport navigation. However, if you are
complete noob to Blender or 3D in
general, don't worry, I'll be holding
your hand through each step of the process all the way to the very end to follow along in this course, well, you'll need as blender
and Da Vinci results. I've also provided a zip file with fold the class resources, the projects and resources tab. By the end of this
class, you should have a greater understanding of
the 3D Wexler as a whole. And an amazing
product advertisement to show to potential employees. There's so much to
cover in this class. So with all that said,
let's get started.
2. Download & Install Blender: Alright, welcome to the class. I'm glad you could join me. Firstly, we're going
to download Blender three-point one,
the latest version. If you haven't yet
already downloaded this, you can access this on
the blender.org webpage. You'll have this graphic here. You can click the
download Blender button. Once you've come
through to the screen, just click the download
Blender button. This will start a
download and then you can run through the
installation process. And once that's done, I'll see you in the software blender.
3. 3D Modelling - Creating the Bottles: So here we are
inside of blender. You should be met with
this splash screen. Now, where does going to create a new file here in
general new file. So just click that button and we're just going to
immediately delete everything. If you press a and then X to delete everything
and accept that, we're going to
have a blank scene here in the viewport
to get started, I settled in the insurer. We're going to assume that you have a very basic
understanding of Blender and how to navigate and move around your
scene like this. However, I will still be
explaining everything in detail so that there
won't be any confusion. Let's just start out by
first modelling the bottle. We're gonna be using
the resources provided. So we'll be going up of more of a box modelling concept here. Let's just start out by creating a collection or renaming
this collection, I should say, the
period of the outliner, press F2, double-click
to rename, will just name this something, will just name this
reference images. Now let's just add in the
actual reference images. If we press Shift a,
come down here to image, and we'll click on this
reference is it'll open up a navigation
window here. So just navigate
through to where you've saved the class resources. And we're going to be importing the bottle reference images. I've been up this and
just grab all of these. And then click Load reference. So we'll actually
have to do this one by one, but it looks at it. But as you can see, the reference image has come
through on an angle that's basically it loaded in at the angle that we're
viewing the viewport. If you want to fix that, we can just click on the
reference image, press Alt R, and that's
going to reset the rotation. Then we can continue with importing the rest
of the images. So shift a image reference. And I'm just going to input the top side, front and bottom. Once they're all loaded in here, we can start by just
selecting all the reference, pressing Alt R and
resetting their rotation. Now we can start
positioning them. So I'll just click on this first empty
here and move it up. So G and Z, this is the
top view of the bottle. I'll just move this up like Sir grabbed the next image
here and see where that is. So that's the bottom
of the bottle. So I'll just push
that down a bit. Crap, the next image,
bring that up. That's just one of the sides. I'm just going to bring that back to its original
position here. So Alt G to reset its location. And I'm just going
to rotate that on the x-axis by 90 degrees. You can press R and then constraint to the
x-axis by pressing X. And then you can
literally just type in 9290 degrees of rotation on it. Now let's just move
this out like so. Then lastly, let's do the
same thing here are X9. Then we're going to need to
rotate it 90 degrees again on the z-axis, that 90 degrees. Now I'll just line this
up so that they're all sort of in a box shape. There we go. This is a pretty common
practice, box modeling. So I'm just going to select these two top and bottom images. I'm just going to
scale them down a little bit because
as you can see, the top image here
was a little bit larger than the top of
the bottle on this image. That shouldn't do well there. So I'll just move them
into place again. Now we can start setting
this up so that it's not so much in our faces and
sort of in the way. What I mean by that is
currently where I'm perspective mode
in the viewport. And we're going to be modeling
on an orthographic view. If you just click on any one
of these reference images, come down here to this
object data properties tab. You can see we've got Show in orthographic and perspective
currently enabled. If I uncheck that
perspective box, we're going to get
rid of that and that's gonna make it a lot more easier for us to view the
bottle in perspective mode. So let's do the same for all
of these images quickly. So I'll just click them.
Uncheck the perspective bucks. We go. Now when we go into
orthographic view, you can do that up here
on the little gizmo. You can click the
X and Y buttons, or you can do it on your number pad just by
going through the numbers. One will take you
to the front view, three will take you
to the right view, and seven will take you to top. If you do want to
quickly alternate from top to bottom
or left to rot, and just press Control and
click the Save button. So for example there you
can press Control seven, and that'll flip
you to the bottom where you can press three for the right view and then control three on your number
pad for the left view. So now with all of
that out of the way, let's actually add in the cube and stopped and
modeling the bottom. Now let's just create
a new collection. This will make it a lot
more easier for us to keep clean and not get confused
with all these random objects. So let's go up here, click this little button
for a new collection. And we're going to
rename this to bottle. From now. Let's just make sure
this is selected. And now we can add in a cube. So Shift a, go to Mesh cube. And like I said before, we are going to be modeling
this in both the graphic. So let's press one on our number pad to get to the
front orthographic view. And let's just
scale this down to about the outline
sides of the bottle. From here, you can see that
we now have a scale of 0.557 and basically
need to apply this. Let's press Control a will go into apply
old transformations. This is now set at
scale back to one. So now everything is going
to work correctly and we're not going to have any
weird scaling artifacts. We've got our cube here. So let's just jump into
edit mode by pressing tab. And you'll see straightaway,
we've got a bit of an issue. We can't actually see the
reference behind the cube. To fix this, well,
you have to do is press the toggle
x-ray button here. And that'll talk with that
on and off. If you click it. If you want a hotkey for that, you can press Alt Z and that
will just cycle through. Let's just press a, select
everything and scale this on the z-axis to about the
size of the bottle. You'll notice again that this picture was taken with
a bit of a field of view. So the bottle isn't
exactly orthographic, so it's not going
to line up exactly. But this sort of framing
should work just fine. From here, we're going
to want to sub-divide our bottle with
everything selected. Right-click and press sub-divide before clicking anywhere else, we're going to give
the number of cuts, three down here in
the sub-divide menu. Now we can clip, click
off and accept that. Moving on, we actually want
to create this sort of square extrusion shape
for each of the corners. To do that from the front view, we're basically just going to select these side panels here. So Alt, left-click to
select the whole row. And then we'll go
into Shift Alt, left-click each of the
remaining sides here. And now we're just going
to do a basic Bevel controlled BY to bubble. If you have a bunch
of cuts here, you can change that just by scrolling up and down
on your mouse wheel. We're just gonna
go with one cut. And you'll see my
babble is clamping. So if yours isn't and it's doing some weird
things like this, just press C on your keyboard and that will clamp
the selection flight. So we're just going to
go to about this size. Now we want to
create that sort of extrusion for each
of these sides. With everything still selected, we're going to press S to scale. You can see it's also scaling upwards,
which we don't want. If we now press Shift Z, that will constrain
it to just scale on the x and the y-axis. So we'll scale it out
to something like this. And from there we can
move on to the next step. Now we want to make the angled
top part of this bottle. So we want to sort of
transitioned from this sort of square shape into a more
circular shape up here. To do that, what
we're going to do is select each of
the faces up here. If you're not on
theta select married, you can alternate between the different birds up
here by clicking them. So that is vertex,
edge and face. Or you can just cycle
through them by pressing 123 on your keyboard with
the face selection here, we're just going to
select each face up on the top of the bottle here. Like so. Now we're just going to extrude this up back to
our orthographic view. I'll press Alt Z to go
back to x-ray mode. And we're going to extrude
and then scale this in IE to extrude. Then we'll go on to
constrain it to the z-axis, would take it to
somewhere back here. And then we're just going
to scale that in until it roughly matches the
profile of the bottle. Wonderful. So now we have this pretty nice-looking top of the bottle. But you can see it's
not very circular. We can definitely make
it circular manually, by manually moving all
of these vertices. But that would take quite
awhile and we want to be more efficient with
our modeling practices. So there's actually an add-on called loop tools that comes
pre-installed with Linda. You just have to enable it. What we can do is come up
here to the Edit menu. Click on Preferences. Then just head over to Add-ons and we'll make sure to
specify search for it. So just FOR loop tools in
the top, search by here. And just ensure that this
mesh loop tools is enabled. Once you've got that
enabled exit out of that. And now with all of these
same faces selected, it was going to right-click, come through here to loop tools. And there's an option
here for a circle. If you click on circle, you'll see that's just changed the telegraph bottle to
more of a circular shape. Now we can continue
extruding upwards. Back to orthographic view. I'm just going to press
E, extrude that up on the z-axis again until it
roughly matches the profile. You'll see we've
got this sort of extruded lip right here
basically on the bottle. Sorry, what we need to
do is replicate that by extruding up again
just a slight amount. Then one more. Just a bit like that. We're basically going
to use this loop right here to extrude AdWords and create that sort of
extroverted CAP. Going to head over to
Face Selection Mode. And I'm just going to Alt, left-click this ring
here, this edge loop. Now I'm going to
extrude it on the normalised to create
that little lip. To do so, you can press Alt and E. This will bring up
an extrusion menu. So you have to do is click extrude face along the normals. Then you can just slowly bring
that out to a back here. That's going to give
us a pretty quick and easy bottle cap lip
for us to work with. Moving on from here, we haven't touched on the
bottom of the bottle. Let's just jump down there. So I'm going to press seven and then Control seven
to go to the bottom view, Alt Z to go into X-Ray mode. Basically, we just want to
create this indentation here. Then we want to create
this little notch in the bottom of the bottle. Alt Z. I'm going to jump out of orthographic view for this actually and just work from IT. Perspective view here. Basically, we want to
grab these four faces, scale them up just a tad. And then we're going to eat
to extrude and S to scale. Just scale it in until it's, It's fairly small there. Then we'll right-click
Loop tools again and we're just
going to create a circle. Now with this, what we can
do basically is create that notch and it actually is pushed up to
about here in the bottle. That's hard to see
what these references, but you'll see what
I mean in a moment. So let's just press G and
move that up on the z-axis. We'll just bring it up to about here with the actual
bottle itself. That's where the
plastic is indented to. We'll leave it as that for now. And that is basically the
bottom of the bottle complete. If you do want to, you can select the
edge loop here. Just do that, scale that
in further if you need to. Whatever you would like. This pop can't be stylistic if you want, because honestly, you're not going to see this at the bottom of the bottle
very often, if at all. But yeah, if you do want to
stay true to the reference, you can scale it to about there. There we go. It may look very basic
and low poly right now. But once we put a
few pebbles into the right areas and add on
some subdivision surface, it'll look quite nice. Let's just jump into
doing that right now. We're going to jump back into the front
orthographic view. I'm just going to, it
jumped back to x-ray mode. We're going to bevel basically this edge loop and all of the edge loops on the sides
of the bottle as well. So let's just Alt Shift
left-click each side of the bottle here, like sir. And will also hold Shift left-click the top of
the bottle here as well. With that done, we're
just going to do another simple bevel
Control V to bevel. We'll bring that down like
sir, because it's clamped. It's actually specially at the farthest I can
push the bevel. So if we jump back to
orthographic view, press Alt Z to check the profile that is looking pretty accurate to the
bottle representation. So I'll leave it
as that for now. The only place where
we didn't bevel is the bottom of the bottle. So I'll just run through
that quickly now. Just gone to edge
select by pressing too. Then I'll Alt left-click. I'll shift left-click each of these edge loops here, like sir. And then we'll do one final
bevel here. So I can try. I'll give this one to cuts just so it's a little bit more
of a smoother transition. Wonderful. Now with all of that
out of the way, That's basically the base
of the bottle completed. Now we're just going
to finish this up by adding a subdivision
surface modifier. So over here on the wrench icon, you can click this Add Modifier and regarding to the generate
drop-down menu here. And we're just going to click
the subdivision surface. Currently you'll see everything's
smoothed out a little bit just with a
viewport level of one. If we were to increase this
to something like two, you'll see it gets
more resolution, becomes a little
bit more high reds. But what we want to
do is tighten up some of these corners and
also change the shading. Because currently it's
using shade flat and it's giving it all of
these weird cavities. And it looks a
little bit strange. If we just click on Object, press, right-click, and
then go Shade Smooth. You'll see it looks
a little bit nicer. But we can also
come down here to the object data properties,
this little triangle. And we can also click on the normal strap down here
and press auto smooth, just in case you have any shading artifacts that
needs to be cleaned up. Alright, so now that's
out of the way. We can give this model here a
little bit more resolution. You'll see it's currently
at the top here, sort of going from
a flat surface and then caving into the
bevel that we created. To fix this, we just have
to tighten up the edges. So what you can do
is press Control I, while we're on edge mode. And you'll see as
I bring this up to closer to the
top of the bottle, it makes the transition
a bit more sharp. That is more of a correct
look for the bottle, so we'll do that for the top. And I might also do it
for the bottom as well. So back to Edit Mode. I'll add an another loop cut
here by pressing Control R. And then I'll just
drag this down, tightened up to the
bottom there too. All right, moving on. The other thing that we might do is fix the lip of
the bottle here. You'll see it's sort of just a weird round shape and we want to make
it more defined. Again, was added another loop
cut the rim of this bottle. And that just basically tightens up the
outside of the bottle. But we want to do this
for the inside as well. Instead of manually
adding the loop cut, what we can do is actually
bevel the edges here. It's a little hard to see
the edges currently with the subdivision surface
being applied to everything. So with the Modify here, you can actually turn it off completely in the viewport by clicking this
little TV button. With that now off, we can see what we're doing
and where all the edges are. What I'll do is I'll Alt, left-click this loop here. And I'll Alt left-click to
the same loop on the bottom. And then I'll just bevel this. So Control B. I'll
Bevel that too about. Just give it one cut for now. With all this still selected, I'll click the TV icon again just to see if that
helps with the transition. And it definitely
looks like it has. So I'll just leave
that as is for now. The final thing I
think we'll do here for the base bottle mesh, I'll just select
the top loop here. So I'll shift left-click
all the way around. And again we'll just bevel this. So Control B, Give
that a small bevel, and that is basically
the base mesh completed. Now, the next part of the base mesh is to
add the bottle cap. And then lastly we'll
be imprinting or embossing the collagen letters onto the side of the bottle. Let's now create the bottle cap. To do this, we're just going
to use a basic circle mesh. Let's go shift a mesh
and grab a circle. For the bottle cap,
we're gonna need a fairly decent amount
of vertices, sir. You also probably be something
like 32 currently here. We'll just increase that to 128. And click off anywhere
to accept that. Now in edit married
tab into edit mode, we're just going to bring
it up to the top of the cap here and scale it in
until it's roughly the same size as the top of the bottle. Something like that. Wonderful. And now we can just start extruding the basic
shape of the bottle cap. Back to orthographic view. With one, I've just went
over two vertices, married. So one on your keyboard to
go to bed as he married. And now we're just going
to make this basic shape. We've got an extrusion and then a small indent,
another extrusion. And then we have
some check-in sort of extruded faces,
which we will do. And then the top is basically
just go to the top view, small indent here, and then
just filled in for the rest. Let's begin by
festival to extrude. And we'll just bring that up
a tad here to about there. Now here we have
this little indent, which is fairly
simple to create. So all we need to do is press E and then S
to scale inwards. You see I've scaled
slightly inwards. Now from here we'll
extrude again z, and then we'll go
up just a tiny bit. And then we'll just
extrude out once more. So E and S, and we will scale that
roughly back to where it was. We go. Now we'll create this
sort of gap here, sorry, E, Z, make that small gap. And then we have this lodge face where there's going to be
all of these extruded faces. Sorry, let's just festival, extrude up again, just to
create that sort of face. And will basically select every odd face here and
extrude it outwards. So we'll do that
just an amendment. Once we've done the
top of the cap, I've just jumped into
perspective mode here. Basically we wanted to create
this little extrusion n, and then the indentation
to extrude S to scale. We'll scale in just a bit. We'll stop just about there. And we'll extrude and scale
one more time slightly. And basically it will
select this edge loop here and extrude it inwards to
make that indentation. For the rest of the
bottle, just again extrude and scale inwards. The final face,
you can just press F on your keyboard
and that will fill in the face. Wonderful. So now we can start
the process of indenting the top of
the bottle cap here. I'm just going to jump
to Face Selection Mode. I'm going to Alt
left-click this ring. If you are struggling
to select the ring, just make sure
you're clicking on the actual edge
inside of the ring. If I select that entering, now we're going to extrude
on the normal inwards. So Alt E to bring up
the extrusion menu. And then we'll click on
extrude faces along normals. From here, just indent
that just a tiny bit. Like so. Now we'll
move on to creating those sort of rigid checkers on the side of the bottle cap. To do this, it's
actually fairly simple. Let's open, let's go
to x-ray marriage. So Alt Z. And I'll deselect those faces. Face select mode. We'll just select all of these faces here. And actually I may
also just add in another edge loop
here at the very top. So Control, I'm sorry. I'll push this up to about here. The cat. That way we will only have
to check is here and we can have a nice transition
up to the top of the bottom. Now with that out of the way, with the selection mode enabled, will select all of
these phases here. We basically want to
de-select every other face. A very simple way
to do that fits in the selection menu. Up here. On the Select menu,
you can come down and do checkout, de-select. And as it states, it's going to de-select
every other face, sort of like a checkerboard. So now you can see instead of manually de-selecting each one, we've just very simply
changed the selection here. Now we can very easily
extrude these app. So what we'll do is press E and then we'll just scale
it out to roughly here. That's basically created the
pattern that we're looking for without having to do any
extra steps along the way. That's looking fairly
good for the bottle cap. You can see it's very
low poly or very blocky. Currently. What we
can do is add in a subdivision surface modifier with your bottle cap selected. Just come over to the
wrench icon here. We'll click on the Add
Modifier tab and just come through to the generate and add the subdivision surface. So now that that's added on, you can see it's looking okay, but we want to tighten up
these edges so that we don't have these weird sort
of triangle follow-ups. Back into edit mode.
We're just going to add two loop cuts to this
ring here. So Control R. We'll left-click there. Depending on your computer, this might take a
while because this is a fairly dense mesh for
the top of the bottle, will just tighten that up
at the top here like so. We'll add another
one to the bottom. So control our
left-click to select. And then we'll just drag that down and tighten
up the bottom. Awesome. That's basically the
bottle cap complete. You will notice
that the bottom of the bottle cap is
completely empty. So we will want to fill it in. So to do so, we'll jump into edit mode again. With edge selects enabled, we'll just select
this bottom edge. We'll extrude that and
scale it in words. And then we'll press F
to fill the final face. In x-ray mode, we can press E and then S to scale inwards. We'll just scale that
into about here. Then press F to fill in
that final face. Wonderful. That is basically the
bottle cap completed. You will notice that
it's got a lot of cavities and it
looks a bit strange. We can shade this smooth now. So right-click and shade smooth. If you do have any sort of weird shading artifacts
like I do here, you can come down to the
Object Properties tab. Again. Just enable the normals
auto smooth, like so. That'll fix that up for
you. Okay, brilliant. So now we have the
base bottle mesh and the base bottle cap mesh. And the final thing that
we need to do now is add the embossed letters onto
the side of the bottom. Before we do that,
I'm just going to rename these two objects. So circle, I'll press F2 and
I'll rename that bottle cap. And for the cube,
double-click there and I'll rename this to bottle base mesh. Awesome. Now with this out of the way, we can now create a text object and we'll go through the process of
embossing that onto the bottle. Alright, so now we're on the final stage of the modeling
process for the bottle. We're just going to be
creating some text objects and applying a Boolean
modifier to the bottle. Basically emboss them on
the side of the bottle. To do so, let's just first off, go Shift a and add in
a text object here. I'm just going to
bring this out side so we can see what
we're working with. Now instead of it saying texts, we want to edit this
to say collagen. So we'll just go
tab into edit mode. And now you can
literally just type in the words collagen. So I'm gonna go collagen with all caps and then
tap to accept that. Now I'm just going to realign
the origin of the geometry. So you can see currently, the origin is here, this little orange dot. So I'll just right-click this object and set
origin to geometry. Now it is in the center of the
geometry and it makes it a lot more easier to rotate
and manipulate them. So moving on from here, we actually need to turn on the wireframe just so
we can see a little bit more of what's happening down here in the
object properties. I'll just click on this, come through to the
viewport display dropdown. And I'll just ensure that
the wireframe is turned on. That way we can
actually see what's happening without
text object here. Speaking of we were all
done with the text now, so we need to convert
this through to an actual object or mesh. So what we can do is with it
selected, we can press F3, will just search for and move to mesh object
kind that mesh. Click on that, and
now you'll see it as an actual mesh object. Now that we've got this as
an object that we can edit, you can see the topology is all out of whack and
there's a lot of triangles and it's
going to be a little bit tedious to
manually retaught, apologizes until it's
going to cause a bit of an issue when we try and Boolean
with this much geometry, what we'll do is add in
a decimate modifier. So over here in the modifier, properties will open up
the Add Modifier out. And underneath generate,
we'll head over to the decimate modifier. And now all we need to do is change this from
collapse to planar. You'll see straightaway that's immediately helped
with the topology. Before and after. What we want to do is actually
apply this. Over here. You can click this little
drop-down and press Apply. Now we have a more
manageable piece of mesh. But if we do jump
into Edit marriage, you'll see there is still
quite a few vertices. So what we can do now is
select all of the vertices. Then we're going to do
emerge by distance. If you'd press F3 to search, you can search for
marriage by distance. And what I generally do
is match by a distance. Basically, there's a
little slider here. And we can slide this until
it starts destroying itself. Like say, once it does that, I'll just scroll
back up just a tad until it looks feasible. About 0.0681 works for me. I will accept that. The last thing that
I generally do is I'll select all
the vertices again, press X to delete and will
perform a limited dissolve. What this will do is it'll create a max angle here
for me to select from. And it'll basically delete any vertices that are really
packed in tightly together. Sir. I'll just start
scrolling this forward with Shift while holding down Shift to make it a
more precise movement. I'll just wait until
it starts really looking quite deformed like so. And then I'll just back
it up a bit until it looks just about right.
Something like that. Now we've basically taken
a very high all the mesh at dense mesh and decimated it and made it a
lot more workable. And this is going to be. A very helpful once we stopped to Boolean this into
the side of the bottle. Great. So now all we need
to do is align this up and add a solidify modifier. What I'll do is I'll rotate this on the x-axis by 90 degrees. And then I'll rotate that the y-axis by 90 degrees as well. I'll just move this over and
line it up with the bottle. About there looks good. And then of course we'll
just scale that inwards until it roughly matches the dimensions of
the bottleneck. So wonderful. And now we basically just need to bring this to the
side of the bottle. And I'm actually going
to jump into edit mode. And I'm going to duplicate this across to the
other side as well. So Shift D to duplicate. Just move that along
the y-axis until it roughly reaches the other
side of the bottle. And obviously it's backwards, so we'll need to rotate this
the z axis by 190 degrees. Then I'll just make sure
it's lined up in the middle. Likes are awesome. Now with that, there's
obviously a bit of an issue as there's
no thickness to this. So we'll have to apply
a solidify modifier. In the modifier
properties we can come through and create a solidify underneath the generate tab. So solidify, and this is
basically going to do at it states it will solidify the object down here
with the thickness. We can just move this up. So I'll go with
something like 0.10.1. Looks good. And now we just need to basically move
this into position. So I'll move this
side across like so. Then I'll select this side and move it on the y-axis
until it's about the same. There we go. We just want the letters to basically
be intersecting just a tad. And if you feel like they
aren't intersecting enough, you can always add more
thickness, like so. That should be fine to as
back into object mode. We now need to create a Boolean operation
on the bottle itself, so it makes sure that you've
selected your bottle object. And then what we'll do is with the bottle objects selected, we'll come back to the
modifier properties, and we'll add another modifier
under the Generate tab. It again, it'll be
the Boolean modifier. Click that. Now what we want to do is
select the object that will be Booleans.
With the object area. You can click on this and choose it manually
from the drop-down. Or you can click on
this Eyedropper Tool and literally click
it in the viewport. We're gonna be using
the object text. What we've done in
essence is created a D boss currently because we're using
the difference method. If I was to turn off
the text icon here, you can see that currently
let's cutting into the object. But we want it to be sort of
cutting out of the object. What we'll do is
just change this from different to union. Now you'll see with the text
object that we have here, It's basically creating
that M boss effect that we would like to. Now what we want to
do is actually apply the subdivision and
also the Boolean. What we'll do is we'll just
save our project vest. If you haven't already
just come through to File, Save As and make sure that
you've saved your project. We go. So just ensure
that you've saved your project just in case
your program crashes. Now, what we can do is go
through the process of applying all of these modifiers. But before we do that, it's
generally a good practice to save your current
state of objects. So just in case something
goes wrong down the line, you can come back to a
previous version of it. So what we'll do is
we'll come through to the scene collection here and just create a
new collection. With all of our base
meshes here selected. We'll press shift D
to duplicate them. Like so. Then what we'll do is move them
to that new collection. You can press M to bring up the move to
Collection option. And we can just select
collection three. Just so that we have
a clean outline here, we can actually name
this collection. So let's name this
as backup. Like so. Now we have some backup models just in case something
goes awry down the line. Let's just click this little
checkbox so that they don't appear in our scene and we can come back
to them when needed. Great. So now let's go
through and apply all of these modifiers with
your bottle selected. Come over through to
the subdivision and select this drop-down
and press Apply. And then again for the Boolean, come through to the drop-down
and press apply as well. Now you'll see it does
look a little bit weird. And that's because we still have the text objects in the scene. So if I was to move this, you can see we now have the collagen embossed onto
the side of the bottle. We don't necessarily need
this object anymore. So you can either delete it
by pressing X and delete, or you can just turn it off from the viewport and the render by using these two buttons here. As we have a backup, I'm
just going to delete this, so I'll select this
as x and delete. And now we have our
base mesh to start UV unwrapping and
texturing. I'll save this. And I highly recommend before we continue
on with the course. Run through this
video one more time. Take the time to actually
model out this bubble yourself so that you can
follow along with the process. Once you're happy
with your model, we can move on and start
the UV unwrapping process. So I'll see you in
the next lesson.
4. Texturing & UV Unwrapping: Welcome to the UV unwrapping and texturing part
of this course. We're going to start
off by first doing a, an overall texture for the plastic bottle
will have the whole of this bottom
plastic bubble plot here with one specific
procedural shader. So it'll cover the
entirety of the bottle. And then we'll add
certain layers so that we can place the stickers exactly
where we need them to be. So it's a fairly simple process. And to do so, we're going to jump into the shading workspace
up the top here, click on the shading workspace
and this port you over to the shading workspace
where we have these new layouts to work with. Straightaway, I'm
just going to close these two windows as I don't find them particularly useful. To do so you can come to this
little cross-section here. And once you get a crosshair, can basically click and drag and push it
across to the side. Now we have more space to work in and it'll become a
lot more easier for us. Okay, So now without base measurement
model here selected, we can click this new material so we can create a new material. We're going to start
off by creating that procedural plastic look. We can now rename this
from material to bottle. And essentially what we're
gonna be doing is mixing a few shader notes together to create that
sort of plasticky look. Let's just start off by
adding in a glass shader. So I'm just going to shift
to a such gloss be SDF. So I'll grab that,
place that down here. We're actually just going to mix these it together
into the surface. So currently we're
using material preview. And this is basically
the EV shader. So it's sort of a
real-time shader. But for this to actually look good and to actually
see what we're doing, we need to change this
over from AB to cycles. So up here, you can click
on this render properties. You'll see where it using
the Render Engine API. Like I said before,
we want to just click this and change it
up at his cycles. Now if you do have a GPU, it's best to change the device
from CPU to GPU, like so. But if not, that's totally fine. You can use your CPU to render. Now once we've done
that, you'll see we're still looking at the
material preview. What we actually need to do
is either come up here to the top right and change it
to the viewport shading. Or you can press Z to open
up this little pie menu. And you can drag your mass to the selected render or
that you would like. So we'd go to Solid View. And we can come up here
and go to rendered view. You'll see straightaway.
It's completely dark and that's
because we don't have any form of lighting in our scene apart from
the world lighting, which is a completely
gray light source. So what we're gonna
do is add an HDRI. And this is basically
a form of lighting. So we'll come over here and
switch from object to weld. Will basically add in an
environment texture and then load in the HDRI in
the class resources. So shift a, I'm just going to search for environment texture. Then we'll plug the color
into the color here. Straightaway. It's going
to tend completely purple. That's because there's no
texture loaded in here. If we click on Open and navigate
to the class resources, we can learn in that HDRI. Just click on Open and just locate under the
HDRI folder here, we'll have this latent
whole market for k. Hdri learned that one up. You'll see straightaway. We
now have some ample lighting to see what we're actually doing and what would texturing here. The background does
become a bit distracting. What we can do is come through back to the
render properties here. And underneath the film tab, you can open this and
we can click on the transparent just checkbox
out to be enabled. And now we're not going to have that background distracting
us from our luck. Alright, so back to
the objects here. We're going to stop
mixing this together. Shift a, and let's
search for a mix shader. And essentially we're going
to mix the gloss here. The principle of
BSD f. So I like so then the shader we'll plug
into the material output. So straightaway you
can see this has become highly reflective now. But what we want
to do is actually change the settings on
this principle be SDF, because currently it's a
completely white module and we can't actually
see through it. What we can do is just scroll
down to the transmission. Transmission basically
does what it says. It makes it transmissive,
almost see-through. So what we'll do is grab this and make this
ladder up to one. Then for the roughness, we can drag this to 0, like source, and that's
completely see-through. And then lastly, we can increase the speculum to
something like one. There we go. So that's the base of the
plastic shader completed. If we'd like to, we can
also add in factor. So currently, where mixing
half and half between the glass and the
transmissive material here. If I push this down to 0, you'll see it now it's completely
just the glass shader. If I was to push it to one. You'll see now it's just the principle of BSD F.
I'll just change this back to 0.5 for the fact that let's actually just add in
another node here. It, let's just go Shift a
and search for the node. What we'll do is we'll
pluck the factor here into the factor
for the mix shader. Like so. For the material that
I used on the advent, actually had the for now
down to something like 0.25. This is more of a
stylistic thing, but at the end of the day, this is now a plastic bottle. But we'll need to do is
actually create a duplicate of this base mesh to be the
liquid inside of the bottle. Let's just go ahead and
create the stickers. Now, this will introduce the UV unwrapping
section of this lesson. Let's go ahead and save this. And I'm actually going
to jump back into material preview quickly
back into material preview, gonna go to this side, right? Orthographic view by pressing
three on my number pad. Going ahead into edit mode. Basically what we're
going to do is select these front-facing
faces, like so. And we're going to use these to unwrap and put the
sticky texture onto. For this, Let's just scroll
this down just a tad. So we have more of
a view of faces. Basically, I'm going
to go Alt Z to get the X-ray mode here
so I can select both the front and
the back faces. Let's just select
these top faces. Like so. We'll just box select to
the bottom that we are. So you'll see we've selected this front face and
also this back face, as well as some faces
inside of the bottle. What I'll do is I'll
just press Control and box select these
two, de-select them. Now what we can do is create a new material slot for each of these back in front
stick of faces. In this slop drop-down, what we can do is actually
assign faces to a selection. I'll click this one here. And basically it will
create two more slots. In this top slot here will
be for the front sticker. This bottom slot will be
for the back sticker. I'll just select
this one for now. Click Assign. You'll see is as soon
as I've done this, it's made this whole
material whites because it doesn't currently have
anything assigned to it. Now what I'll do
is I'll de-select this side with the
back faces selected. Come through, click on
this bottom texture here, and click Assign as well. Now we have clearly distinctive the bottle
texture if we select, you'll see it's selected all of the procedural plastic material. Now if I come through, click on this material
here and click Select, you'll see it's only selected the front portion of the bottle for the
front of the sticker. And then also with
the back face here, we can click Select and it's only selected the
back of the bottle. So with this in mind, we can jump out of edit mode. And what we can do now is start applying the
sticky material. So I'll make sure I've got this slot here
selected slept too. We'll create a new
material and call this front stick a manga. Now we just need to
find out nodes here. If you are struggling
to find them, like if it was way off in the distance and you
didn't know where it was. You can just press a to select all of your
nodes and then press the period key on your number pad and that will zoom you back into
view of your nodes. For the sticky material,
that's quite simple, we'll need to do is add
in a image texture. Go shift a search
for image texture. We can pluck the color
into the base color. You'll see that's gone gray. So we just need to select
the mango image here. So let's click this open button and find our Mango texture. Through to the bottle textures. We'll just go through two omega. We can select mango
front, click Open Image. Now you'll see the image is completely stretched and
looks really warped. And that's basically
because we haven't UV unwrapped this set
of faces just yet. So what we can do to
rectify this is actually jump into the UV
Editing Workspace. So let's go through
to EV editing. What we'll do is in edit mode, basically start
unwrapping these faces. Now it will be a
little bit tricky to select all the faces
just for this sticker. What we might do
actually is just quickly jump back to
the shading workspace. And in edit mode, we'll make sure that we've got our fronts to come
and go here selected. And we'll click
the Select button. That way we have all
the faces needed to be unwrapped already
selected for us. Let's now go back to
the UV Editing and you'll see everything
selected for us to UV unwrap. Basically, what's
happening currently is all these faces
are being shown here. If I just quickly change
this to material preview, was to move this around. You'll see it's sort of
stretching all the faces into just a small
packed content size. And we want to stretch
these out so that it fits this whole box here. It's actually fairly simple. With all of these selected, what we can do is press U and
then we can click on Wrap. Now you'll see it's
unwrapped them, but they're still quite small. Ulcer rotated themselves. What I find is beneficial is
in this screen on the left. So you can actually switch
from vertices to edge to face. Select. What I generally do is select a face
in the middle here, press you, unwrap that, and then I'll just select
everything else here. Right-click and do a
follow active quads. And what that does is it basically, I'm not
sure if you saw it. That's all just control Z. You can see we have this
sort of curvature to the UVs and that's going to actually skew the texture
onto our objects, which we do not want with this spot here that
we've unwrapped, it's completely
straight on each edge. And we want all of the other
quads here to follow that. With this selected, we
can just right-click, Right-click fully active quads. And you'll see
when I click this, all the other quotes here
I've straightened up and are now much more
nicely unwrapped. Now it's just a process
of orienting all of these to be in the upright position and scaled into this sticker. What we need to do is just
scale this so S to scale. Now we can rotate this onto
the correct axis flexor. I'll just rotate
that by 90 degrees. And then I'll just move it
so G to move, G to grab. And now it's just a basic
method of lining this up so that it matches
this rectangle here. I'm just scaling
it into position. Like Sir. That's almost correct. We just need to stretch
it on the y-axis. So our S to scale
constraint that to y. And then I'll just
push this out. Like so. You can see it's actually gone
out of the bounds. And it's actually gone
out of the bounds here. And you can see it on
the texture itself here. It's just repeating
itself in showing more of the bottom of the
liquid will stick up. What we want to do is
just ensure that this is completely in
the bounds here. If you need to, you
can scale it on the y-axis down just a tad. That is a fairly decent unwrap. Just move it down
slightly so the life isn't being chopped off
at the bottom that we go. Awesome. So that's basically
the sticker completed. But you'll notice it's
pretty harsh on the edge. It's, it's basically a square. So what I find we
can do is actually just go into Vertex
selection here. And if you select each
of these corners, you can actually just
babble it so that it's more of a rounded edge
and more of a sticker. Just Shift-click to
each one of these. And now we can bevel this, so controlled BY to bevel. You'll notice straightaway,
nothing is happening. So we actually have to do
is press V for the vertex. Now you'll see we've got
some beveling occurring. I'll just run through that
again, Control B and then press V. And then you can see we've got more of a
rounded edge happening here. If you need to, you can
scroll up on your mass will, as per usual, and make
more of a rounded edge. Like Sir. Before you click
off the selection, what we can do is you'll
see we've created more UVs for the unwrap here.
We don't want this. So what we can do is with
these weird cold is selected. We can jump back to the shading workspace tab into edit mode. And we can actually
change them from slop to back to the bottle. So just make sure you've got
the bottle here selected. And then we can click
Assign, like Sir. So now all the vertex is here. I've been assigned to back to the procedural plastic material. And you'll see it
creates a much nicer, sort of smoothed out a stick a look here, which is awesome. Now it's just a matter of
doing that process again. But for the back sticker, let's click up bottle again and just run through that
process one more time. With this, Let's go through
and make sure we have the bottom slop three selected. Let's just tab into edit mode. It will make sure
that we've clicked Select so that all of
the faces are selected. Just so that it's a
little bit easier for us to unwrap this. And you'll see, we've still got all these vertex is selected. I'll just left-click
off to de-select that. Come back to slot three. Click Select. And now that's
highlighted all of the faces that we
need to unwrap. With this in mind. We actually haven't created the
material for this yet. Let's click new material. We'll name this
Mexica manga lexer. And then again, all we
need to do is add in the sticker for the
back of the bottle. Let's go Shift a and stretch
for a image texture. Place that down wherever. Just ensure that
you've loved the color into the base color, like Sir. Lastly, let's open
up that sticker. Go through to your
class resources, come through to
bottled textures. And then in the
mango screen here we can click the Vanguard back, double-click that to load it in. Now it's just a
matter of unwrapping this with all of these faces selected will
come through to UV Editing, and we'll run through that
process one final time. All of these quads here
with Face Selection here, what we'll do is come through
and select any one of these phases with
left-click flexor. Now what we want to
do is press U on our keyboard to
unwrap that face. So click the unwrapped button. You'll see it's unwrapped. Just this quote here, but we want to make sure that
all of the other quotes are following the same unwrap method that we just done for this one. We'll just press a to
select all the quads. Now we can right-click and
press fuller active quads. There we go. So that's now straightened all
of that quad dapp. And now it's just a matter of fitting this to the sticker. Let's scale this up. We'll rotate this 90
degrees, like sir. And now we can just
bring this up on the y-axis using g. Again, we need to scale this so
it fits the boundaries. So S to scale until it
matches the boundaries. And finally, we just
need to ensure that it's filling up to the
top, to the bottom. And then going to
scale this on the y-axis for up and down. Just until it reaches
the boundaries here. It doesn't have to be
completely perfect. So you can see this still a little bit of spice
up the top here. So I'll just do my
best to match this, so I'll grab it again. We showed up at tiny
bit on the y-axis. And then I'll scale it one
more time on the y-axis. So SY, just slightly
scale that just like sir. Awesome. So again, this is more of a square
stick a currently, as you'll see on
the object here, what we want to do is again, just bevel the bed
is on the edges. So Shift left-click to select
each corner of the sticker. Now we're just going
to bevel the vertices. So control B to bevel and then press V for
Nevada, see Bevel. And then we're just
going to bring this app slightly until it makes them
more rounded edge for us. Again, before we click
off of this selection, what we'll do is jump back
to the shading workspace. Now we'll tab into edit mode
and just central that these Betsy's that we
have selected are actually assigned to
the bottle texture. So click on your slug menu
here, come through to bottle. Then we'll just click Assign. Wonderful. So now we have the base mesh here,
completely textured. And all we have left to do now
is texture the bottle cap, and then create the liquid
texture in side of the bottom, which is fairly simple to do. Let's just start off by
texturing the bundle cap. Let's click on New. With the bottle cap selected. We can rename this to model
cat manga for this shedder, it's actually quite simple. We're going to basically
change the base color to something more of a
mango desk color. Just click on your base color here and through
the color wheel, we can drag this down
tomorrow of a mango color. Something like this
looks quite nice. Zoom in, so we have bit more
of a viewing angle here. Wonderful. This color
will suit just fine. Now for the actual plastic, it's just a matter of playing
with the roughness factor. Generally, plastic, hot plastic
has been in particular, has a bit of a sheen to it. What we'll do is just
bring this roughness slightly down to
something like 0.3. So let's just try 0.3. If you're struggling to see how your materials looking
in the material preview, you can just quickly change. I would have cycles
or rent it by pressing Z and then pushing up. Quite good, so I'll just jump
back to material preview. Sorry, now to actually finish
off the material here, the final detail
that we can add is some fake detail with a bump
node or some normal value. Basically, what this
does is it creates fake distortion to the material. You'll see what I
mean in a moment. So let's just add in a
festival a bump node. Let's shift a search for bump will just
place that down here. And we can plug the normal here into the normal straightaway. Nothing's going to happen. But what we can do
now is actually apply a texture to create the
distortion to the bottle. Let's go Shift a and we'll search for the voronoi texture. Vor, Voronoi texture will
just place this down here. We'll pluck the distance into the height value straightaway because this scale
here is quite small. You can see it
looks pretty ugly. But what we'll do is we'll bump this scale up to
something like 300. You'll see it's going
to give us a lot of granular detail here that you tend to see on the tops of plastic bottles.
Material preview. This is obviously pretty harsh. And one of the main
reasons why is because a bump node is currently set to a
strength of one. So it's using all of
the detail of this bar, no texture and it's pumping
it up to a strength of one. If we just grab this
slider and bring it down to something like 0.3. You'll see straightaway
it's breaking up the patent off the bottle and giving it that sort
of plastic texture. But I'll just bring
this strength down to something pretty small. Maybe even just 0.1. We'll do we go. That's basically the entire bottle cap material
completed now. So the very last thing
that we need to do to complete the
entirety of the bottle is basically duplicate
this mesh here and shrink it down so that
it's on the inside of the bottle and it'll
act as the liquid. Sorry, let's just do that now. With this selected, I'll go Shift D to create a duplicate. What I'll do is just press S and scale in the x and y-axis. So I'll press Shift N, Z. So that'll just constrain
it to the x and y. And then I'll just scale
this in slightly like so. Now with this bubble
is still selected, you'll see it's currently got the bottle material
attached to it, as well as the front
and back sticker. What we want to do is
actually remove all of these. What we'll do is
we'll just press this minus button on
each of these and create a completely
new material to act as the mango liquid will
click this New button. We'll rename this
to liquid finger. And honestly it's quite
a simple material. It's basically just a color
with some transmission. So it will just go through
and select the Base Color. Bring this down to
something like Sir, you'll see we can't actually see what we're working
with currently. So I will just inches across
to rendered view, sorry, press Z and then scroll up to
the wrench view that we go. And you'll see
straightaway, It's not looking physically accurate. So what I'll do is just
change the base color again. We'll try with this
color for status. And then what we'll
do is just create the transmission and change
this to a value of one. We can actually see through as almost as if
it's like a liquid. You'll see we've got
this Doc liquid and it's currently not
looking very accurate. So what we'll do is we'll change the color until we find
something that actually works. All right, I've just gone
with a hex code here. If you want to copy this
directly, it's FFD 100. You'll see the liquid is
actually looking a little dull. So if we want to sort of cheat and make this value
a little bit higher, what we can do is actually input some notes to
make that happen. If we just go Shift a
and search for RGB, what we can do is copy
this color across. Sorry, if you just hover
your mouse over the color, press control C will
actually copy the color. And then you can
just have your mask wherever this and
press control V, and that'll paste it in for you. If I just plug this color
into the base color, nothing's going to change. But there is a special node which will actually
allow us to change the value input into something
like two instead of one. Let's go Shift a and
such for hue saturation. Now what we can do is
just plug the color here to the color of the
hue saturation value. And then we'll plug the color of the node here into
the base color. This node allows us to
do is change the hue, saturation and value
as the node states. What I tend to do is just change the value here to
something like 1.5. There we go. That's looking
more like a mango color. I think I might even just play with the color
a tiny bit more. There we go. So if
you want to cut, copy this color exactly as mine, you didn't just come through
and click on the color here. You can come through and
change over to the hex value. You can just type in this
card here, it's FFC, d, 0, f. But in this part
is kind of up to you. So I'm just gonna
go with this color as it looks physically
accurate to me. And that is basically
the entire UV unwrapping and texturing
process completed. What we can do now is I'll just change this back to
material preview. And what we can do is
because we're going to have a few of these
bottles in our scene. We're basically gonna
be duplicating or reusing the same textures
and slightly altering them. It's generally a good idea to, instead of move
everything one by one, to actually add everything into a collection under an empty. What I mean by this
is we can place an empty objects if
all of the atoms here, so the bottle cap, the bottle
itself and also the liquid. Be constrained to
one simple empty. Let's go Shift a and let's
search for the empty here. We're just going to
use a simple cube. Now with the cube,
what we can do is select the bottled base mesh. Base mesh 02. We can actually rename that. So let's scratch F2. Rename this to liquid. Now let's just select
model-based mesh, bottle, cap and liquid. And then lastly we'll
select this empty. So Shift left-click. We're going to want to parents, everything is empty. Let's go. Control P will set
parents to object. Now instead of having to
animate everything manually, we can actually
just click this box here and everything will
move along with it, which is very handy and
it'll create with it'll make the whole process
much more easy. So with that in mind, what we can do is now start
creating the other bottles. So it's a fairly simple process. We just need to select
everything here, including the empty press, Shift and D to duplicate. To keep our scene vulcanized will move this to us
are in collection. So let's go to move to
collection and will create a new collection to
house each individual bottle. A new collection. Let's call
this the modal collection. Then click Okay. Now, just quickly, I'll move
this empty here, which the, which is the original
empty we just created to hash
the mango objects. I'll just move this to the, I'll click and drag this into
the bottle collection. Let's just rename
these empties as well so we don't lose
what we're doing. So F2 will call this
mango controller. And I'll ulcer
rename this one f2, but we'll call
this LacI control. Now to read texture
the lacI bottle, Let's just click this
bundle collection here and click this little checkbox that will disable
it from all views. So we can now just focus
on the lacI bottle. If we were to move
this lunch, you control that everything's
connected to it. But it still has
the mango stickers, the mango colored bottle top, and the mango colored liquid. What we want to do is
first of all change the stickers in the slots here. Let's go to front
sticker, mango. What we'll do is
you'll see there's a number two icon here
that's displaying that number because
it's currently linked to the lacI bottle here
and also the mango bottle. If we click that button, it'll create a secondary
one here it'll say 001. And now we can just
rename this to LacI. Like Sir will need to do from
here is just change this, stick a texture from
the mango to the lacI. What we can do is
come through to this little file explorer. Then we'll just navigate
to the lychee folder here and click LacI
front and RP an image. Because we've already
unwrapped this. You'll see it's already
correctly applied to the bottle, which is super awesome. Now let's go through
the process of 3D texturing the backstory here. Click up into your
slots here and just go through the slop three
back stick manga. And we'll just run through
that process again. Click on the tool icon here to create another instance
of this texture. And then we'll just
rename this from backstage omega two
back stick a lychee. Finally again, let's just come through to this
image texture here. Click the File Explorer, navigate through to
the lychee folder and click the lacI back dot JPEG. Just open that image. There we go. So the bottle
is not correctly textured. But now we need to
change the coloring of this bottle cap and also the
liquid inside of the bottle. The bottle cap, it's
fairly straightforward. Need to do is create
another instance of this bottle cap
mango texture. Click the icon here to
create another texture. Then we'll just rename this from photo cat bingo
chip on cap LacI. And lastly, we'll just choose a color that red
symbols the lacI color, which is basically just a red. I'll click open this color here. What we can do is just move this along through to
the red, like Sir. That's basically the
texture completed. Lastly, for the actual
liquid inside of the bottle, if you can't actually
select it in the viewport, you can come through
to the outline here and just scroll down
to liquid or one. And again, super simple, we just need to first of all, create another instance
of this texture. So I'll click the
tool icon once again. Then we'll just rename
this from liquid mango. Liquid LacI. Obviously now we can actually see the
color of the liquid, so we'll jump into
rendered view. And now it's just a matter of updating the color
here on the RGB. We'll, we'll just move this across to a bit more
of a red color. Awesome. So now that we've
got this color here, again, if you want to copy
my color directly, you can use the hex
value SF-36, 100. And now it's just a process of repeating this for
each other bottle. I'm just going to go
through a quick time-lapse of me creating all
of these bottles. If you do get stuck, I recommend just re-watching this section, but I'll see you
on the other side. All right, so now that
process is completed, now have basically
one of each bottle. I'll just activate full of
the bottle collections again. There we go. We now
have a version of each bottle that we can start creating routes animations for. The final thing that
we can do is just ensure that everything
is named correctly so that we don't have any sort of confusion while
we're going through all about animation process. I'll just quickly run
through renaming everything. All right, so now that we
have a complete scene here, all of our bottles circuit correctly textured
as you can see. All of them are also connected to there
aren't empty objects. So now we're basically
ready to start our animation process
and begin with that opening shot
of all the bottles sliding into frame and
revealing themselves. Again, I'd highly recommend
that you either re-watch this lesson or run through it in real-time with me to
create all of your bottles. Once you're ready,
we can move on to the animation process.
5. Animating The Opening Shot: All right, So welcome to the animation part of this course. Garnet first start
off by creating that opening sequence of the
bottles sliding into frame, as you can see on screen. What I'd highly recommend it, it's actually saving
up blend files for each different shot. So what I'll do is just kind of appear to File
and click Save as. What we'll do is just
name this two shot, one shot underscore one. As we progress through,
each shot will just save a file for each
individual shot. That way we keep asking nice
and clean and we don't get bogged down with any
clutter in our outliner. Let's just start off
here by jumping into the layout section up
at the top left here. What we're going to do
is create a basic scene for all that bottles
to be showcased in. So to start off, what I'll
do is add in a plane. So shipped a mesh plane. I'm just going to scale
this up by a factor of ten. So I press S on your keyboard, and then I'll just type in
ten and enter to accept that. Now what we're going to do is create an infinite backdrop. For the infinite backdrop,
It's quite simple. All we do is jump into edit
mode on those plain view. What we'll do is
go to edge select mode with the width number two. Or you can just click up here. We'll select this
edge at the back and extrude it up on the Z-axis. Ie to extrude, press
Z to constrain it. And what you'll see
now is we can create an infinite backdrop by clicking this middle edge,
sort of the Cloner. We'll just bevel this. So Control B will pull this out and just
give it a few. Luke cuts. I'm just scrolling up
on my mouse wheel. I've just given mine about
seven loop cuts here. As long as there's
a gradual sort of full off between the top
plane and the bottom plane. It'll do just fine. I'm going to tap back into object
mode to accept that. And you can see straightaway, It's client faceted and it doesn't look
quite nice just yet. So what we need to do
is shade this Smith. I'll right-click Shade Smooth. And now, once we've put in
our camera to the scene, you'll see this is basically
an infinite backdrop. Let's just start off now
by aligning our bottles. I'm just selecting these
empties and moving them out of the shot. Like so. What we're gonna do
is add in a camera. Let's go shift a,
come down here to camera will just select
the camera there. And it's going to
get a little bit tricky to look at
what the cameras viewing and also edit
everything at the same time. Now is about a good
time to create another view for us to
work out how to do so, you can come up here to the top left until you hit
this little crosshair. You can just drag that across a new screen for us to
look at that we go. Now what we'll do is we'll work out of this workspace here. And we'll have the
camera's view. Will have the camera's
perspective in this screen so that we can
always see what's happening. So it actually view what
the camera's looking at. What we can do is press
0 on our number pad. What you'll see is now we're looking through
the camera's lens. These little pop-ups here,
I sort of in the way. So what I'll do is
just press N to remove that or we can click
this little arrow here. And we've also got a menu here, so I'll just press T to
get rid of that as well. Now we simply just have
the camera's perspective. What I'm seeing is the camera
looks to be on an angle. What we can do is actually move this camera by pressing
Shift F to frame it. Shift F will basically
allow you to frame the camera in any
way that you'd like. Another alternative if
you find it easier, is to press Enter again to open up this transform menu here. And over on the View tab here. You can come through
to this view section. You can actually click
Lock camera to view. If you do this, whatever it's
sort of change you make. Now, I'm just scrolling up and
down through the viewport. The camera is going to follow. This is also a great way to
quickly line up your shot. So I'll just do
something like so. It's always good to remember
that whatever you do in this view will also
affect the camera. So once you have your
shot lined up like sorry, you can't actually
come back through and press N on your keyboard
and de-select the lock to. That way you don't
accidentally zoom in or out when you're trying
to get a closer view. So I'm just going
to save this now. And now we're just going
to lay out the shot. For starters, we have three bottles that are
coming from the left, on the left side, and tuples are coming
from the rat to create that sort of triangle effect. What we'll do is I'm just going to jump into
material preview. I can see which bottle is which. And another thing that I'll
do is actually change some of the camera's settings
because I wanted to have a different focal
length on this camera. So you come over here to
this camera's settings. You'll see currently we've
got the type perspective, which is fine, but the focal
length is 50 millimeters. So actually want to increase
this to something like 100. I'll place 100 there. That's basically going
to give it more of a flatter look through
the camera's lens. Another thing I'll
just quickly do is I'll actually
increase the range of this floor here with the plane selected AP going to
tap into edit mode. I'll just select this edge here and press G to grab
it and bring it out. Quite a fair bit. Like Sir. That's a tab
back into object mode. And I'm actually going
to grab the camera and also bring that back
just a little bit here. Lastly, I'm just
going to bring all of the bottles up to flow level. So I'll grab all of their empty objects by
shift clicking them. And I'll just bring them up on the z-axis until they
get to the floors level. So G and Z bring them up there. There we go. Now they're
on the floor level so there won't be a slightly
hovering above the ground. And from what I can see, the mango bottle will slide
on first from the left. So I'll just grab this, bring it across here. I'll also bring it back as well. So a cool thing you
can do is actually snap your movements to
the full grid here. I'll press G to grab
this empty objects. And while holding control, you can actually move
it along the grid here. Let me get back to blocks
on the grid, like so. And I'll also grab this model
here, the cactus bottle. I'll just move this along
two blocks as well. I'll move it along three
blocks here so that it's even. There we go. Now I'll just grab
this bottle here, the line bottle and
just move that across. And lastly, I'll
frame this one up. Like so. Awesome. Now what we're going to do
is actually animate these sliding onto the screen. And then multiple govern that. I'm actually going to bring
this view just across a bit because we don't need that much space to
look at the camera. And actually I
just want to frame one of these bottles into the camera's perspective
so I can actually see if the cameras
lined up correctly, which it looks like it is not. Again, what we can do
is grab the camera. I'm just going to slide
this up until it's framed correctly like sir, wonderful. I think what we can
do to start with is actually animate
the camera first because the motion
is the camera will start as a fairly close-up shot. And it's going to slowly zoom out to reveal all the bottles. Isolate slide on screen. Let's just start by animating this with your cameras selected. We're going to bring
this in close to this bottle. Like so. Mostly going to bring
it down just a touch. There we go. So currently there's
no key frames attached to this camera. So what have we do it, it's not going to bake
that into the animation. What we can do now is actually manually in set a
keyframe to the camera. What I'll do is actually now that I'm
looking at the camera, looks to be on a downward angle. I may even just rotate this up slightly. I'm
going to press R. And then the constraint
that to the y-axis. And just slightly
rotate this upwards. So it's more of a looking
upward sharp, brilliant. Now let's actually start
Keyframing the camera. To manually insert a
keyframe, it's quite easy. All you need to do is press I on your keyboard and you can choose what keyframe
you want to enter. So that could be location, rotation or scale, or you can
do any combination of them. You could do location rotation, location rotation and scale, or you could do everything
that's available. But what we're going to do is
just the location for now. We're going to press I.
Then click on the location. And you'll see down
here in this timeline, we now have a small yellow
dot which indicates that the keyframe is
being inserted on the timeline on frame one. A quick tip as well because we will be using this
hotkey quite a lot. If you are trying to cycle
through your keyframes, say you're on frame 40 and you want to get back to
this specific frame. What you can do is
with your keyboard, you can press the up and down arrow keys to
cycle between them. Down will take you to
the most recent keyframe on the left-hand side
of the timeline. And up will take you to the most right side
keyframe on the timeline. And you'll see as I pressed it, there's no more keyframes
to jump to yet. So it's not going
to do anything. That is a definitely a very
handy hotkey to remember. Moving on, What we'll do is
we'll just come through. This is going to be a
24 frames. A second. Animation will say that this animation will go
for around three seconds. So what we can do
is just put that into the timelines
actual frame allocation. So we've got a
starting frame of one. So the animation will
start on frame one. And currently it's going
to end at frame 250. We actually want this to be
three seconds of animation, so we'll just change
this from 250 to 72. Now we have three seconds of animation to complete this shot. So now with that out of the way, let's actually
animate this camera zooming out and
revealing the bottles. Let's say it's going to
take two seconds to reveal. We'll go to frame 48. We'll just bring
this camera back. Just press G and I'm
constraining it to the x-axis. We'll just bring the camera back to somewhere around here. You'll see no keyframe
has yet been created. So what we can do
is again press i. Then we can press, we can either click this button for
location or you'll see there's actually on
the location option here, the L is underlined, which means what you
could do is press I and l. That'll quickly put into
location keyframe for you, which is really handy and it makes the animation
process a little quicker. All right, so the camera animation looks
pretty good here. So now we can start animating all the bottles
rolling onto screen. And we're actually going to
introduce a new concept now, which is the auto keying. What you can do is click this little circular icon
here, the oder keine. What that's going to do is basically whatever
movement we input, it's going to
automatically insert a key frame for the location, rotation, and scale
that we've just done. So I'll actually Control Z that. But as we move,
you can see up at the top here it says auto keying on this just a way for you to know that whatever
operation you do now, it's going to automatically be key framed onto the timeline. Let's just start off
by keyframing all of the bottles rolling
on the screen. So I'll move this back to
its original position. You'll see it's credit
a keyframe on frame 17, which we don't necessarily want. So I'll scroll
back to frame one. Push this back to frame one
as well on the timeline. Sorry to do that. I'm just pressing G and then moving it across
the frame one. And now let's just start
timing out our animation. For the mango bottle. It's going to push
this out to frame 40. I'll just bring this
across into the middle of the cameras frame here. Like sir. And currently we
start scrolling through, you'll see it's just
coming onto screen. There's not really any
rotation or easing in our app. We can, we can fix
the interpolation of this later on in
the bullets here. But let's just first
off start by creating the rotation of
this on frame one. What we'll do is
we'll rotate this on the z axis by 90 degrees. So we'll rotate around the
z-axis again by 90 degrees. So it'll do a slow
rotation in to the frame. You'll see as we
push this through, it's going to already have the rotation information on
this keyframe on frame 40. That's basically the animation
complete for the bottle, it says rolling into frame 40. Now what we'll do is we'll
have the live bottle here, do the same, similar movement. So let's say frame three,
we'll set a key frame. So let's rotate this on the z
axis by 90 degrees as well. That's set a keyframe for
its location and rotation. Then let's just go
through the frame. Let's say frame 40
ulcer will bring this across to a bat here. And we'll actually rotate
that by negative 90 degrees. We can just scrub
through the timeline here and see how the
animation will look. Not too bad. And
you'll see as well that stopping quite abruptly. Again. That's just because
of the interpolation method, so we'll fix that up later on. But what we now want
to do is also have the lacI bottle
sort of following the same motion and timing
as this line bottle. So let's just move
this on frame 40. I push this across till it's roughly at
the same position. Like so. If you need
to update this again, we've got all the king
on, so that's fine. So let's just go G on the y-axis until it matches
the same amount of spacing. Has the line bottle has. That looks pretty good. But
now you'll see we don't actually have any
animation keyframe for when it starts off. We'll see what time the lion
bottles taught smoothing, which seems to be frame three. So we can click on
our LacI bottle. As we have already keen on. We'll just drag this back to its position at the beginning. Ink, and now you'll see it
starting its animation. Awesome. So obviously the first
thing we need to do is change its rotation. Let's go, let's
actually just go out Z and we'll just do 180. Now as it rolls on,
it'll be coming in clockwise
counterclockwise motion. And that's looking quite nice. The only thing that we need
to fix here is the clipping. So you'll see both the bottles are actually intersecting
with one another. We'll actually just need to
move this slightly backwards. So I'll just press
G, constrain that to the x-axis and slightly
move that backwards. I'll do the same for the
line bottle as well. So I'll grab the land
bottles controller. Bring that forward just a tad. And now you'll see
that birth no longer intersecting and it's much
more smoother transition. Wonderful. Now for the
final two models here, going to go back to
frame three and we'll actually move forward
a frame five. So there's a little bit more
of spacing in between them. And we'll click on the
cactus model here. Let's again rotate that on
the z-axis by 180 degrees. That's inside of
that keyframe here. Let's just move forward to, let's say frame 40. Again. We will push this onto the scene here until it's roughly
the same spacing. We go. Again, we need to rotate this. So let's rotate it by
negative 180 degrees. And I'm actually going
to push this forward slightly as well on this x-axis. That way we have room for the strawberry bottle
to slide in as well. Again, frame 40, let's
just push this into the scene till it's got the roughly the same spacing
between bottles like sir. Now we have the keyframe
there and let's just push this back
to frame five. Push it back to its
starting position. And we'll change the rotation
to be negative 180 degrees. Now, we'll see it's coming
onto the scene here. Like so. There is a tiny bit
of clipping here. We'll just update
that in a moment. We'll just make sure that
that's not actually happening. So we can push this back
slightly on the x-axis and we'll push the cactus bottle slightly forward on
the x-axis as well. There we go. There is still a small
amount of clipping. But to be honest, if we
change over to rendered view, you can't actually
see it happening. So we don't need to
worry about that. Back to Solid View there. The next step in this animation processes is actually make
that zooming in effect. What I'll do is I'll push the mango bottle
forward on frame 72. So let's push this
forward here to about the same length of distance
as the cactus bottle. We're going to do the opposite
for all the other bottoms. So these two bottles we're
going to push backwards. And these two bottles we're
going to push forward. In this case, we can
actually just line them up so they're actually
perpendicular to one another. Because there won't
be any intersection. Let's actually just play this, scrub through the
timeline and see how this looks brilliant. The first thing I'm noticing
is the timing needs to be changed because
currently the sort of zoom in effect
is way too slow, will crunch that timing in. I can actually see some form of clipping here as well
with some of the bottles. I believe the strawberry
bottle here on Frame 72. I'll just push this
out slightly further. Also to do with the
framing as well. So you can see we need to have the same amount of spacing
in-between each bottle. I'll do the same for the line. I'll push this out
slightly, like so. In fact, I might grab the
strawberry and the cactus here and I'll just
bring them in close up because currently they
are quite spaced out. Let's just push these
two top as well. We basically just
wanted to frame this final composition a little bit better
than it currently is. I'll push them
back a little bit. As the camera's going
to be zoomed at, at frame 72, we're actually going to have more space
in this frame here. What I'll do is just And move all of
these bottles out slightly so they're
not so close together. We go. What I'll do is I'll
actually slightly rotate each of these
bottles, Atwood's. For these two here, I can shift click
each of their MTS and I'm gonna rotate
them both on the z axis. And I'll do the same for
the latching cactus. So Bertha that
controller selected, rotate them both on the z-axis. And now just for a little
bit more of a final touch, I'll grab the strawberry
and the cactus. I'll grab the strawberry
control here. Rotate that slightly
more on the z-axis. I'll grab the cactus. I'll rotate that
again, slightly, a little bit more on
the z-axis outwards. So it's creating that line of attention directly to
the middle bottle here, which is the magnetic bottle. Now with all of that
out of the way, we've basically blocked
our entire animation here. That we're going to move on to the part where we
actually play with the graph editor and fix the timing and spacing for
all of this animation. So let's come through to
the timeline section here, and we're going to
change the layout. If you come through
to the top-left, there's little clock icon here. What we can do is click it, come through to the
animation section and click on the Graph Editor. This is a new layout that
you haven't yet seen. And what we're gonna do is basically change all of
the interpolation methods from a linear interpolation
to a Bezier interpolation, which is going to introduce
easing in and easing out, which we're gonna
be using for all of the shots in this course. What I'll do to start
with is I'm just going to grab each empty object. I'm going to Shift
click each one of these with the
graph editor here. It's basically the same
controls as the viewport. I middle mouse click. You can move the graph editor, scroll in and out
to zoom in and out. What we're gonna do is
box select all of these. Or we can also press a
to select everything. Then we're going to zoom in
on all of our keyframes. So Presley period key
on the number pad. And that'll zoom in and normalize all of
the curves for us. Now you can see basically all
of these lines are linear, so it's gone from
point a to point B. There's no easing
in or easing at. What we can do is press
a to select everything. Then we're going to change
the interpolation mode. If you press T on your keyboard. This will bring up the
interpolation menu. And we're going to change
it from linear In Bezier. Like Sir, you'll
see straightaway everything has now
got this slope, this slope to the curve and then easing out to
the end of the curve. This is what we
wanted if we play the animation now as
the little most Meta. You'll see here at the very end, takes quite a while for the
zooming in effect to happen. In fact, we haven't
animated the camera either. What we'll do is
just quickly animate the camera zoom out
effect as well. So we'll go through to frame 72. We're actually going to
animate the camera moving backwards and tilting
slightly to the left. Let's just quickly do this now. We're going to grab it on
the x-axis, push it back. And then lastly,
we're going to rotate this on the x-axis as well. I think we want to rotate
this on the the rat. So we'll write this like about
negative 12 degrees here. Now we can see how
this looks in friend. It appears we don't
have any rotation data on either of these keyframes. So what I'll do is
just come through to frame 48 by square, cycling through the keyframes on the up and down arrow keys. So I frame 48. We're just
going to rotate this back on the x-axis
by 12 degrees. There we go. Now as we scrub through, you can see it pulls out
to reveal everything. Then it slowly pulls out and
rotates the frame as well. One thing I'm noticing
is that we don't have all the bottles in
the cameras framing. So let's just quickly fix this. What I'll do is unframed 72, going to bring this
down on the z-axis. This is going to alter the
framing quite drastically. In fact, we may even need to pull it back a tiny bit long. So I'll pull this
back just a bit more. Bring it down on the z-axis, a tiny bit that we
go back to frame 48. We basically just need to
replicate the location. Let's just bring this down
on the z-axis. Again. We want everything
to be in frame. Let's pull this back
again slightly. Like so. Everything is now in frame. As we pull back, you'll see we get everything was slowly in
frame and then we zoom out. Again. All of this is
currently set to linear. So what we can do is press a with the cameras selected and all of the
keyframes selected. And then we'll
press T and change the interpolation from linear
to Bezier. Like sorry. Now we're going to
see a lot more easing in and easing apt. So if we play this now, a
little bit more smooth up. Awesome. What I'm going to do
actually is bring this forward to say frame 50. Just as the bottle
starts to push inwards and zoom
forward like this. What we're going to do now is actually play with
the curves here. So again, all these keyframes are a
little bit hard to read now, I'll select them all across
the period key to zoom in. What we can do now
is actually alter the curves here by
using these handles. A quick trick that I've
found is you can actually scale the curves in
and crunch the curve. I'll show you what
I mean by this. Currently, if you come up here
to this little drop-down, you're going to have the
bounding box center selected. What this means is if we select these keyframes and I
started to scale them, it's going to select
the center of this selection and start
scaling basically everything. So it's going to scale
on the x, y, and z. But a quick trick that I've found is if you come
through here to the drop-down and changes
to individual centers, what we can do is select
all the keyframes. And if we press S, you'll
notice that they're scaling, but they're not scaling
on the x, y, or z axis. It's just scaling the
individual origin, which is each keyframe. You'll see as I've
been scaling this, you can see the curve
really crunching in the Zoom in furlough. So you can see
that's what we want. We want to have a more
harsh transition. So if I was to play
this back down, you'll see especially here, the camera doesn't more harsh transition or ease in and ease out right here
in the center of it. Now what we need
to do is basically just match the camera movement. What the bottles are doing. Let's play with the
bottles curves down. So I'm going to select each
of these bottles. Like so. Again, we're just going
to scale their cubs in algorithm a to
select everything. And then I'll just
press the period key on my notepad to zoom in
so I can see them all. And I'm going to scale on the curves here to
really crunch them in. So you can see as I start to
scale farther and farther, it does hit a point where it
just becomes a pure S curve. But we want to find
a happy medium. I'm going to try
something like this. And let's just see
how this looks. Okay, awesome. Actually want all
of these bottles to sort of come on the screen, but you can see they're all ending at the exact same time. Actually once the bottles
here at the front and lost for these two sort
of slowly transition on. So what I'm gonna do is
select the mango bottle here. I'll select all of the
keyframes on frame 40. And I'll actually push them
forward to about frame 50. For the strawberry, sorry, for the LacI and
the lion bottle, select both of
their controllers. And I'm going to push
these two frame 55. And you'll see what
I'm doing is I'm just staggering the movement. So again, I'll click the strawberry bottle controller and the cactus
public controller. And then I'll just lock select all of their key
frames and I'll push these to frame 60 here. And now if we scrub
through this, you'll see the mango comes on and then the
rest slowly follow. To finish off the
animation, you'll see it's a pretty harsh transition here. And that's because if we zoom in to select all
of these bottles, you'll see this curve here. It's quite harsh. Only need to do to
fix this curve here is select these keyframes. And we just need to
scale it inwards. Like so. It's less of
a harsh transition. More of a smoother transition. Looks pretty nice to me. What I'll do is I'll
just run through this back to myself. And basically what
we're trying to do is replicate that final
shot that I created. So if i chapter
material preview here. Just to help with how
I'm viewing this, I'm going to click
on the camera. And I'll actually just
change the viewport display. If you click Viewport display, we can currently see
everything outside of cameras frame and it's a
little bit distracting. So what I'll do is I'll
alter this spot out, which basically means fits at 0, you'll see everything
and if it's at one, you'll only see
what's in the frame. We can just now watch this back in real time and see
how this is looking. Brilliant. You'll see the camera motion when it zooms out and rotates, actually is a little
bit too early. What we want to do
is basically match that movement to how the
bottles are doing it as well. Currently, all of its movement. If I just select these
and zoom in on them. Bowl of the movement
is really with this S-curve right here. And it's happening
way too quickly. So what I'll do is just
grab these keyframes here. I'll scale them down slightly
so it's less of an intense. We want the app, we want the
motion to be happening as these are about at their
transition point here. Let's just play this now
and see how this looks. Again, it's still a
little bit too early. So what I'll do is
I'll actually just grab these keyframes here
and crunch them forward. Then I'll grab this again
and I'll scale it down. Like Sir, you could see the S curve now
is sort of matching. Awesome. It does
end quite abruptly. What will actually
want to do is have a few lingering
frames afterwards, so that we can have
this composition here of the final frame
lasting a bit longer. What I'll do quickly is
deltas changed the layout here from the graph
editor to the timeline. Instead of it
ending on frame 72, I'll just push this
forward ten frames, so it'll go to frame Eddie two. Now let's just see how this
looks in its entirety. That's about
shuttling completed. I think the final touches that
I'll do is I'll just Ultor the rotation slightly so that when these bottles
slide onto screen, they're not looking
directly at the camera. What I've done here is I'll just click on the cactus model. I'll go to its
keyframe on frame 16, and I'll actually just right
hand it slightly upwards. What I'll do is I'll do the
same for each of these. Against strawberry. I'll push this up slightly. Now for the lime,
I'll make sure I'm on the keyframe where it stops. I'll push this out
slightly as well. Now for the latchkey,
make sure that I'm on the keyframe where it
comes to a rest here. Again from just write
heading on the z-axis and rotating it out
slightly. Lack sir. Now instead of them rolling onto screen and looking
directly at the camera, it's more of a
natural look here. And then it just pushes
out to its final position. If you're happy with
this, we can now move on to the
process of lighting the shot and changing the background color
to that darker orange. Then we can move onto
animating shot to moving into rigid body physics
or at, for the lining. It's called a simple setup. We've currently got
the world shader. So if we jump into
rendered view, they say We currently have an HDRI shading the
environment for us. It's up to you if
you wanted to create a custom lighting setup, like a three-point
lighting setup, or if you just want to use the HDRI that we
previously learned, Lynn, I think taster eye
looks quite nice, but I'll do the
three-point lighting setup just in case you want
to use either all. So I'll jump back into
material preview. Let's jump through to the shading workspace
up the top here. In the shading workspace, what are we going
to do is give the back the infinity backdrop
here and material. And it's basically going
to be a deep orange. If we just click New here, we can change the material
and aim to backdrop. And literally all we need to
do is change the base color. So basically here, click this
arpanet, the color wheel, and we'll just drop
this down to orange. And we'll bring the orange. We'll just make sure
there's just like a deep orange,
something like this. Looking through the camera. I'll just quickly jump
into a rendered view here and you'll see what
we actually wanted to do here is change the
roughness because currently it's quite glossy
and you can see a lot of reflections
coming up with a backdrop. If we just change the
roughness to one, you'll see that immediately changes the whole
composition of the shot. I'll also just change
the base color now till something
that suits it. Awesome. There we go. I've gone
with the hex code of FF for c zeros, zeros. If you do want a copy
of the exact column. The final touch is we'll just pull this
specular all the way down to 0. There we go. We now have this orange
vibrant backdrop here. And now let's just
move on to the process of creating the three-point
lighting setup. I'll just quickly jump
into material preview. What we can do now
is just add in some lights to keep out saying
a little bit more clean. What I'll do is I'll
create a new collection. I've seen collection with
this new collection button. For collection a, we're
just going to rename this. So double-click
this to rename it and we're going
to call this LCA. That just stands for
lights camera action. And basically we're
gonna put the camera and the lighting objects
into this collection. Right now, for some reason
the camera isn't there. Laci puddle collection, which we definitely don't
need it to be in. So I'll just grab this, drag and drop it into
the LCA collection. And now we can start
adding in lots for the lighting to work here and not have the environment
lighting interfere. We're just going
gonna come down to the object here and
change this to weld. What we can do is
get the background here and press M to mute it. Now if we were to jump
into rendered view, you'll see the entire
scene is dark and we can have a blank canvas to
start lighting as seen. I've just jumped back to
the objects shading here. What we're going to do now
is just add in a few lights. Shift a, we're gonna go
light and we're going to highlight it a little
bit hard to see now. So I'm just going to depress the period key to zoom
in on the light. I'm just going to bring
this up above the bottles. I'm going to scale
this up just slightly. Obviously this lactose
is a little bit dim. If we come down to the
object data properties here, we can actually
change the power. Let's go from ten to
something like 252 bad. What I'll do is I'll
actually bring this up. I'll bring this up above
the bottles feather and I'll increase it to 500. Brilliant. Moving on from here, we actually want to make
this a softbox light. To do this, all we need to
do is add in a plane that's roughly the same size as this light and create a transmissive material
for the plane. So I'll just jump into
solid view quickly. And now what we can do
is just add in a plane. So Shift a, go to Mesh plane. I'll bring this up in
front of the light here. Scale this up to be
roughly the same size. We're going to create a new
material called softbox. I press New. We'll call this softbox. And what we want to do here
is delete the base shadow. So I'll click on
the principle of BSD F, press X to delete it. So what we'll do here is we'll add in a translucent shadow, just such translucent be SDF. Play sat down and plug-in
this to this, the office. And now what you'll see
is in the rendered view, you'll see this object is now acting as a softbox
for the light. This is essential when lighting. It basically makes
it so it's less of a harsh light source
and it gives it more of a soft reflection or rat to the final thing
that we can do here is we can actually parent this plane to the light
so that whatever we, whenever we write
out this light, the plane will follow. To do this, let's just
click on the plane, shift, click the light, and we can go Control P, set parent to object. Now when we rotate this light, the softbox is also
going to rotate with it. Now it's just a matter of
setting up some more lights to completely light up a scene and make it look professional. If we select both of these, this area light and the plane, we can go Shift D. This
is create a cradle, a secondary latch holes for us. Now with the light selected, we can press Shift plus T. And what this will allow us to do is wherever I'm mass pointer is, the light is going
to follow it and point towards whatever
we're pointing. I've just got my mouse pointer on the main manga object here. And now the lightness followed. We can jump into render view now and see how this is looking. Not too bad. What
I'll do is I'll scale up this light source
and increase its pal. Awesome. So I've just scaled
up this light source just a tad and I've
increased the power to 100. What I'll do now is I'll create another light source to
the left of the objects. Awesome. Again, I've just pointed
the light source with shift and t. Now if we just
press a 0 on our keyboard, we can look through the
camera's perspective and see how the composition is. Balsam, That's
looking quite nice. I think all that's
left to do is alter the power levels of each lot. Because currently
the whole scene is looking a little bit dull. I'll just quickly run
through that app. Brilliant. So I've just increased
the Powell level of the top light to 800. I've increased the
other two lots as well to a power
level of 1500. That's looking quite nice. I'm just going to
leave that as is. If we now scroll
through the timeline. And we can see how the overall
composition is looking like as the animation
plays through. Bolster just noticed because
we have auto keying on, you can see that
there's some keyframes on the lat sources. What we can do quickly
is select all of these just by Shift. Selecting them. And we can get all
of their keyframes here and delete them so that they all stay
in their position. And it's probably a
good time now to turn off order king as we
no longer needed. Now if we were to
just scrub through the animation in render view, we can have a closer look at
how the lighting setup is. Awesome, So that's
looking quite nice. So moving on from here, but it's basically now just up to rendering out the sequence. And what I suggest you do
is Festival ensure that your render settings
correctly set up underneath the
render properties we
6. Animating Shot 2: All right, so now
we can move on to starting the second
shot animation. Before we do this, we should say another blend file as shot T2. So we can just compute a file. You can click Save As, and we can just click this
little plus icon here. And that'll just rename
it to show up to. And we can save that as
I'm moving on from here, we're going to start picking
up the pace a little bit now that we have all of our
assets ready to animate. For shot too, it's
actually quite as simple shot as you
can see on screen. It's just two bottles coming across the screen
and transitioning into the rigid body physics that we'll be setting
up in the next lesson. Let's just start off by
recalibrating as seen here, and resetting all
the animation data. I'm going to go straight
back to frame one here. I'm just going to
press a to select everything in the scene in the, in the graph editor
here I'm just going to select all these keyframes, press X and then delete them. So we have a fresh scene
to start off with. And once again, I'll
just save the scene. So what I'll do is I'll
change this layout down here from the graph
editor back to the timeline. Again, I'll just
enabled or a king so quickly animate our scene. I'm just going to grab
the camera and pull it back, just a touch. And what I'm gonna
do is I'm just going to grab the cactus bottle here and bring this into frame. I'm going to push
this back as this is going to be behind
the strawberry, but also I'll just put it
frightfully into frame like so. And I'll find the
strawberry bottle, which I believe this this one. Yeah. I'm just going to rotate that a 180 degrees on the z-axis. Then I've got a frame that up in the camera's view as well. Just quickly in material
preview for the cameras so I can see the materials. Again, this shot
is quite simple. It's basically this story, but all will be
going from frame, from the left of the frame
to the right of the frame, as well as the cactus bottle. It'll be going
from the bottom of the frame to the
left of the frame. And it's going to create that small transition in the middle where we can mask out the
rigid body physics shot. So what I'll do is
I'll just rotate this. Like Sir, it's on
a bit of an angle. And what you can do
is press R twice. So RR and it'll give you this
sort of gimbal rotation. I'm going to rotate it
to something like this. We go for the cactus but
I'll, I'll do the same. So RR suppress our twice to
get the gimbal rotation. And I'm just going to
bring it back legs, sir. Again, I'll just
move it slightly to the right of the frame. Only reduce credit
transition animation. So I'm just going to go to
something like frames 60, which this across out of frame. And also push the strawberry
out of frame as well. Now just scrubbing through
the animation as long as they're both
intersecting each other. Roughly the same
time like they are. That's basically the
animation complete. The only thing that I will do is give it a bit of rotation. On frame 16, I'll make sure that the strawberry
bottle has rotated. Just a touch like so. It's more of a natural
movement instead of it just slowly dragging
across the screen. And I'll also do the same
for other cactus bottle. I'll press R twice and
I'll just rotate it. It's slightly moving while
going across the screen. It's very subtle,
but it makes it less static while going
across the screen and it looks a lot more natural.
To finish up this shot. It's basically just
playing with the curves in the graph editor
will just come through here to the timeline
view and switch this to the graph that lie at
the top left here, come through the graph editor. Again, we'll change
the interpolation. Select everything, press T on our keyboard and change
this to better yet. Now what we can do is with
individual origins on, so just click this Drop-down, make sure individual
centers is active. We can just scale this to
make more of a S-curve here. Now just scrubbing
through the timeline, I can see I've only actually edited the cactus
bottles keyframes. So what I'll do is I'll describe the strawberry bottle here
and I'll do the same thing. Select all the keyframes, press T, change it to Bezier. Again, I'll just press the period key to zoom
in on these frames. And I'll press S to scale and
create more of an S curve. Now that birth transitioning
at the same time. And that has been shot
in its completion. So after everything
is rented out, we'll actually go into DaVinci Resolve and
composite this. But for now because we don't
have all the shots ready to start compositing
will keep it as is, and we can actually just
render out this animation. Again. The render
properties should have been saved from our previous
scene and shot one. You shouldn't need to
change anything here. The only thing that
we will need to change is the output settings. Just come through to
the app settings, make sure that your
output folder is updated. So click this little icon here that makes sure instead
of it saying shot one. We'll change this to shop
on a score to underscore. That way when we start
rendering out a sequence, it's not going to write all of these frames that
we currently had. This except that the very
last thing that we can do is we don't need all of these extra frames at
the end of our scene. So what we can do is
in the frame range, we can change the
end frame from 80 to just click this and let's
change this to like 44. Now you'll see will be rendering out this short sequence here. Awesome. So once you're
ready to render this, just come up again to the render tab here and
click Render Animation. Or you can press Control F12. Once you're happy with that, we'll move on to
shot three and start introducing some
rigid body physics.
7. Creating The Rigid Body Physics Simulation: All right, welcome
to sharp three, where we're going
to be animating the rigid body physics shots. First thing we're going to do, as always, is reset our scene. So let's just festival
save the blend file. Let's come back up
here to File Save As. And we'll just name this shot three by clicking
this plus icon. And we'll save that.
Now let's just reconfigure it a shot here
and just reset it basically. So I'll select
everything in the same, select all these keyframes
and delete them. Then for these two bottles here, I'm just going to move
them out of the scene. So the strawberry and
unmute the cactus out. We're going to focus on
the manga bottle here. So I'll bring this to
the center of frame. Rotate this on the
z-axis, want 90 degrees. And we're actually going to have the camera B from a
bird's eye perspective. So what we'll do is we'll
just grab the camera here. Gun press Alt G to
reset its location. It's gone straight back
to the world origin. And I'll just bring this
outcome the z-axis. Then I'm just going
to rotate it on the y-axis by
negative 90 degrees. So it's looking straight
down onto the bottle. You'll see currently
this light sources sort of in the way of the
camera's perspective. So what we can do
is we can click on the light soils
here and just come over here to this
little orange box. And this is for the
object properties. And what we will do is
basically just turn off its visibility to the
camera invisibility. The camera checkbox here
should be disabled. And I'm also just
going to change the viewport display
from textured to wire. Will do the same for the
plane here the softbox. Select the softbox, make the writer's ability
invisible to the camera. And I'll come down here
to the viewport display. We'll just display this
as wireframe or y-axis. Now the camera can
clearly see what's happening through
this light source. Again, just on frame 0. I'm gonna bring this
camera up just a bit more. We have a little bit more
real estate here in the shop. And now I'm just going to
quickly block at the animation. So just for reference, the animation is on screen now you can see
what's happening. Basically, the bottle is slowly floating upwards
towards the camera with the mangers acting as rigid bodies using a physics
simulation below it. So first of all, let's click on our
empty here and I'm just going to rotate it on the y-axis and bring it
into frame a bit more. Just looking at
the framing here, I might actually even
bring the camera farther up. I'll just
click on the camera. Mess up just a bit more. Now with the bottle here, what I'll do is I'll bring it up off the floor just a bit more. And basically it's gonna be a very slow animation
from random zeros. At say, frame 40. I'm just
going to rotate this. It's tilted on an
angle and I'll scroll, scrub it here to frame 40. And I'll just press G Z, bring it up in the z-axis, and then I'll just use
my gimbal rotation. So press R twice. I'll just rotate it like so. Now you can see in the, you can see in the
graph editor here, we select all of our keyframes and press appear
to get a zoom in. We can just change
the interpolation from linear to bezier. Now, I'll just scale
the keyframes here. So it's got more of an
S curve in the middle. Now if we play this, you'll see a very smooth and bottle
nice-looking transition. We basically have everything done for the animation
of the bottom, but now we need to move on
to the rigid body physics. So let's just start
off by actually inputting the mango object. What I'm gonna do is create
a new collection here, I'll click on the Scene
Collection in the outliner. Then I'll just click this little new collection button here. This will create collection nine at the very
bottom of the outline. So I'll just rename this
to mango rigid bodies. With this election selected, I'll start to input
the manga object. So up here in the file, just click here and
come through to input. The file type is going to
be wavefronts dot OBJ. So just click on that. This will open up your browser
window here. So you can just come up
to your class resources. In the 3D assets, you should see the
manga folder here. So just open that one up. Click
on your Vanguard dot OBJ, click on this input object. That'll import into
the scene and you can see it's way out of
proportion to the bottle. So let's first of all scale this down to something a
little more manageable. I'm just going to quickly
turn off auto keying. I'll change this viewport
here to timeline. And I'll click the
little or looking button here to turn it off. And I'll delete
this keyframe here. Awesome. Now with the mango selected, I'm just going to scale
it up a little bit more. You can see the point of origin
is a little bit OK, good. So at the very
base of the mango. So what I'm going to
do is right-click set origin to center
of mass surface. That's going to basically
put it right in the middle of this mango object. Moving forward from here, we're basically going to
create a whole bunch of these mangoes and just give them different perspectives
to the camera. So we will rotate them and
scale them all slightly. The way I like to do
this is festival, just create a base mango here. What we're gonna
do before we start duplicating this mango object is actually apply the textures over here in the
shading workspace. I'll change this from
world to object. And what we can do is with
Node Wrangler enabled, we can basically import all of the textures in one fell swoop. If you don't have
Node Wrangler yet enabled, we'll just
do that quickly. So come up here to the Edit tab and just click on Preferences. Then in the add-ons, you can come up
to the search bar and search for Node Wrangler. Just make sure that is ticked on and then close
out of this window. Now with Node Wrangler enabled, we can use a hotkey to automatically set up the
PBR texture for the manga. Just click on the
principle of BSD F. Then what we're
gonna do is press Control Shift and teeth. And what this will do is open up a window for us to
select some textures. Let's just move up to the
class resources here. Come through to 3D assets. And for the manga folder, we've got a few maps
you that we can use for the principle
of texture setup. So just control-click each
of these PNGs and JPEGs. And then once they're
all selected, just click this
principle texture setup. What this is going
to do is you can see is it'll just automatically plug-in those textures to the correct place
in the shader here. And it basically just saves
you a whole lot of work. Now if we jump into
rendered view, you'll see on manga is
textured correctly. And now we can start duplicating this and creating
a bunch of mangroves behind the bottle that we'll use as a rigid body
physics simulation. So let's just jump back to
the layout section now. Just quickly I can see
for the light here, It's a little too
close to the bottle. So what I'll do is I'll
just bring this up on the z-axis slightly so it's not such a harsh
light on the bottle. Now let's just start duplicating this mango in the mango
rigid bodies collection. With a mango selected. Press shift D. From the
camera's perspective, we can stop rotating
and scaling them. So there's slight
variations to each mango. And it just doesn't
look like it's being copy-pasted a bunch of times. What I find to speed
up my workflow here is once you've
duplicated one manga, you can select both
of the mangoes, Shift D to duplicate it. And then you can do a rotation. And it basically it
speeds up the Webflow. So each time you're
doubling the amount of mangoes that you're duplicating. It's important to note, we don't want to have any
mangoes intersecting. If they're visibly
intersecting with one another, that's going to break
the simulation. And when you start to simulate the intersecting objects that
are gonna fly off screen, and it's going to look
really unnatural. So this makes sure that
there's a little bit of space in-between each
object while you can. Now it's just a process of making a compelling
composition. Here. I find once you have a fair
amount of mangoes setup, like so, it's good to just come through to some
random mangoes and scale them up or down depending on your scenes composition. Because obviously
each one is going to be entirely different
to one another. I can see over here we're
lacking some mangoes, so I'll just shift
D, X and more. And again, this is a part of the process whereby
basically just set dressing. Then we're going to simulate
all of these mangoes. Alright, so we
don't want to have too many mangoes in the scene. But something like this
looks pretty good for now. If you see any major
gaps like over here, mr. Your best to fill them
up. Like I am now. The last two gaps here, I'm just going to
quickly fill in as well. Now I'm just quickly
checking to see if anything is intersecting, which I believe it was. So again, it's just good to double-check that you're not
intersecting any meshes. Wonderful. Now with all of my mango set up, what we're going
to do is create a, an active rigid body
for each mango. Generally the process
for this would be you'd select your object. Then you'd come through
to the Physics tab. Over here on the right,
down to this button here. This is the physics
properties tab. And what you would
generally do is click this button
here, which anybody. And that would add an active
rigid body to that object. The base settings here
are absolutely fine. But to do that process
for each object would be pretty tedious and
would take quite a while. So the quicker way to do this is to actually come
through the outliner, select your first manga
and then scroll to the bottom and Shift-click
your final mango. So that'll select
all of your objects. The moving on from there, what you can do is come up to this object Instructions
button here. This will open up
a tab and you can scroll down to the
rigid body section. And all we need to do is
click this Add active button. Once that's done, each
migrate will now have the same rigid bodies settings. And again, as I said, the base settings here are fine. So essentially what we've done is each mango
here now it has a mass of a kilogram,
which isn't realistic. But honestly it's not too important because we're
going to be playing with the gravity settings and the speed and velocity of
the physics simulation. It will all even out once we
start baking the simulation. But now if we would
have come back to frame 0 and just play, you should be able
to see this sort of yellowish bar at the bottom. What's happening is Blender is updating the physics
simulation on the fly. So it's basically it's baking the simulation while we're scrolling through the timeline. That can be pretty
taxing on your computer. So a better thing to do is
actually bake the simulation. What we can do is just select
all about mango Sierra. And I can see that I placed
all of these on frame 22. I'll just come back to frame one and actually just bring them down below the bottle so
that's framed correctly. I'll just quickly save
the project as well. Now we have a functioning
rigid body physics simulation, but older mangoes are
basically falling downwards. And they also aren't going to be interacting
with the environment, so they'll just be
falling down forever. Basically, what we
need to do is add in some passive rigid bodies that the microbes have
something to bounce off of. This is quite simple to do. So. For example, the
liquid bottle here, we're gonna need to add
a rigid body to this. So just select your bottle and then come through
to the Physics tab. Check the rigid body, and then it will change the
type from active to passive. And all this means is
that this isn't going to actively conform to the
physics of the weld. It's just going to be
a collision object. Now we have on S passive. And what we can do is
change the settings to animated because the
object is animated, so we're going to need it to
update as it's animating. Now with that out of the way, we can once again
save the project. And we're going
to want to create an object that pushes
the mangroves upwards. This is pretty easy to do. We're just going to
use a simple cube. So let's go Shift
a go to Mesh cube. Just going to make
a flat surface for the cube to push
the mangroves up. I'm going to scale this to
something like this big. And I'll scale it down on the z-axis best we can to
make it about this big. So now what we want to do is animate this to push
the omega is up. Let's first of
all, give this up. New object, a rigid
body. It can, I'm here. Click rigid body. And as this is gonna be an animated object, will change the type to passive so that everything
can interact with it. And we'll click this
animated checkbox. Now let's just create a
very simple animation. We're going to let the
mangoes full down and land on the plane. Then at around frame
ten will push it up. Let's enable auto keying again. What we'll do is
we'll just press G, left-click and they'll create
a keyframe on frame one. Now moving forward, let's
head to bat frame eight. Press G again to make
another keyframe. Then on frame ten. I'll push this up slightly
to just about there. Now what's going to
happen is this is going to push the
mangoes straight up. We'll do an initial bake of the simulation just
to see how it looks. Then we can sort of
refine it from there. Just before we bake this
physics simulation, I can see the object is
actually visible in the camera. So we want to turn it off from the cameras visibility again
with the cube selected here, just come down to this little orange cube,
the uptake properties. And we're going to scroll
down to re visibility. And we'll just turn it off
from the camera's view. Last thing that we'll do
as well is we'll change the viewport display
so that it's not showing in material preview. It come down to
viewport display. And we'll change
it from display as textured to display as wire. Awesome. Let's just quickly save
this and then we'll bake out the physics simulation. Actually bake this. We need to come through to the
scene properties. So just click on
this little uptrend here, steam properties. We've got a few dropdowns here that we can
start playing with. The first thing that
we want to do is open up this drop-down
for a rigid body weld. And we can come down to
the cage settings here. The cache setting is
basically instead of having to manually bake
this every time we play, it'll create one instance of the physics
simulation that we can repeat constantly
without having to bake the animation every time that we scrub through
the timeline. And it just increases our performance in the
blender seen overall. You can see we've got
simulation start on frame one and end on frame 250. We obviously don't
need 250 frames, so let's just change this to 44. Awesome. And now
only need to do is click the back button here. All right, Wonderful. So once the bake is completed, you can see that we now have this orange line at the
bottom of our timeline. And that's basically stating
that everything is being baked into the scene
and we don't need to constantly update
this manually. As I scrub through
the timeline now, it'll be able to see
what's happening. Straightaway. You can see obviously that push up from
the cube is a little bit too intense and it's launching
all the mangoes way off into the distance and
added a camera's perspective. So we want this to be
a little less intense. Let's just with our cube
selected on frame ten, Let's bring it down. Actually. It's less
of a bump here. May even break down
a little fellow. Cool. Again. It may even
still be too harsh, so I might just push
it from frame ten to maybe frame 12 and see if that
helps with the simulation. Now what we can do
is delete out, bake, and remake this
physics simulation to see if this is updated. And help the scene look a
little bit more natural. Let's just click this delete
fake button and bake again. Alright, So the
bank has completed. Let's just review the simulation again and see how it looks. You can see that time
it wasn't as intense. So we may need to just alter
the keyframe position again. You can see for even
some of these mangoes, I just completely stopped still. Let's just move this
keyframe back to frame ten. We'll delete the bank. I'm just going to head back to frame one. What I might do is
actually change the height position for
some of these mangoes. I'm just going to select
some random mangoes here and bring them
up on the z-axis. So there's a bit of a difference in timing of the mangoes. Just remember to
be careful to not intersect any
mangoes if you can, because that'll dog at
your physics simulation. Something like that
should be good. Just started saying
that when I was baking the simulation, it looked very flat, almost like they're
all on the same level. So now with that out of the way and the cube has been
altered slightly. Let's just make this one more time and see how it's looking. All right, so the
bank is completed, so let's just review this. A simulation bank and
see how it's looking. That one is actually
looking quite nice. I'm just noticing that a
lot of the mangroves aren't actually being launched forward. I think what we need
to do is just tinker with the timing of the push. Basically, I'm going to pull the stagnant frame
here back into, let's say frame five. That way, the actual motion of the push will happen sooner, but I'll push this forward
a little bit. So let's go. Let's say frame 13. I might even just
push it up a further. So it's touching those mangoes that don't actually get pushed. With that done, let's just
delete the bake. Bake again. All right, So the
bank has finished. So let's just review this one. It is looking quite good, but you can see
there's not a lot of velocity on the push. So now we're going to
jump into actually playing with the gravity
settings of the scene. And this will help us refine this physics
simulation as a whole. So to do this, let's actually come over here to the same menu. Will come up here to gravity
and open up this drop-down. You can see currently
the gravity for the z, which is up and
down, is negative 9.8 meters per second squared. That's basically
real-life gravity, but where working in a 3D software so we
can alter that too. What if we would like? I feel like for
this shot we need the mangoes to be floating
a little bit more. So to counteract that, we basically just need to change this Z to something less
intense of a pull down. So let's just go
with something like a negative five to start with. And again, it's just a
process of iteration. So now we can come back down
here to delete the bake. And then we can remake
this and see how it looks. Alright, so with those changes, Let's see how we're
looking so far. That's actually looking
quite a bit better. I think we could just push it a little feather by changing
the gravity to maybe 2.5. And I think that should
finish off this scene. Let's just bake that in. Now. Delete the bake, and then we'll go bake again. Right? So let's see
how that's looking. Wonderful. So that's a lot nicer. You can see the
mangroves are being pushed up in the
direction of the bottle. And they're slowly
levitating upwards, which is exactly what
we were looking for. Again, the physics simulation is a little bit of an
iteration process, Sir. Even though you may
have the same settings as my scene here, you might get an entirely
different scenario in your splendid scene. So just keep that
in mind as you're working through this
part of the course. But for now I'm going to
call this shot completed. And all we really need to do now is check the lining of the same. So I'm just going to go to
rendered view straightaway. I can see an issue. And the issue is that the
box here that we've created, Let's pushing all the magnet up. It's actually creating
quite a harsh shadow on the rest of the scene. We need to do is come through to this object properties
option here. We can come down to
the rabies ability and just turn off all
of these checkboxes. Wonderful. So now we have the
background layer view for the camera and
we're still getting all of the cool
physics simulations. Alright, so that's
shot three completed. All we need to do now is
update the output properties like we did for shot to come through the output
properties here. Just scroll down to the output. We're going to click
this folder button and update the name from shot to. And we'll rename
that to sharp three. Except once you're ready
to render this again, come up to the render tab here, or just press Control F12, and that'll start rendering
out your sequence as there is a rigid body physics
simulation for each bottle. I'm not going to run
through that process as that'll take quite some time. But if you do get
stuck while you're doing your own version
for each bottle, just come back to this video
and re-watch it if you need any assistance or
you are finding something that isn't
working as it should be. And once you're done,
I'll see you in the next lesson
where we'll start on new liquid simulations.
8. Creating The Liquid Simulations: All right, So welcome to the liquid simulation
part of this course. We're going to first of
all start off by running through a quick liquid
simulation setup. To start with, let's just
create a duplicate of this scene and save out
another plant file. So let's come up to the
file here and go save as. And we'll just call
this shot for. Then. Save that as awesome. Now let's just do a
quick recalibration of as seen as we're
going to need to remove quite a
few of these mangoes and we no longer need this
object to push them and goods. I'm just going to quickly
delete this cube that we made previously.
For the mangoes. I'm going to just
make sure we've got only two available
in the outliner. I'll just select them
all. Press X and delete. Now I've just got these two. And we've also got the
mango bottle here. Just while we're
cleaning up the scene, I'm going to select
these two mangoes here. I'm going to remove the rigid body that's applied to them. So up here in object, I'll just come down to rigid body and I'll
click the Remove button. Now both of these mangoes are just regular objects
again and again, I'll do the same for the bottle. I'll click on the Macro button. This time I'll just come
through and I'll just remove the rigid body by
clicking this button here. Okay, so now let's
quickly run through liquids simulations and
what exactly they are. What I'll quickly
do is just turn off the LCA collection here so we can actually view what's
happening in our scene. I'll give you just
a quick rundown of a liquid simulation
by adding in a cube. So let's just go shift a cube. I'll just bring it
into frame here. Basically, what I'm gonna do is apply a quick
simulation to this, just that you cannot understand how this is going to work. So I'll just hit F3 and such. Like liquid object quick
effects, quick liquid. Now to select that,
you'll see straightaway, it's made out entire viewport
here into the wireframe. People that said
that we can more easily see what's happening
with the liquid simulation. For the screen here,
I'm just going to change it back to solid. What it's essentially
done is it's created a domain which will host
the liquid simulation. And it's created a fluid object in the middle,
which is this cube. This fluid object is going to actually be the fluid
inside of the simulation. You'll see over the side here, as I've clicked on the cube, you'll see it's in the
physics properties tab, and it has a fluid
modify here, enabled. The fluid is a flow type. There's a few types
here. We've got the domain flow and effective. So we're gonna be using
each one of these. This cube is the liquid and
it's going to be the flow. The settings here says
the flight type is a liquid and the float
behavior is geometric. So when it says geometry, what that means is this cube
is going to be the liquid. If I instead change it
from geometry to inflow, it would then mean that
this cube will have a constant flow of
liquid coming out of it. If I change the flow
behavior to outflow, it would do the opposite
and it would actually take liquid out of the domain. So speaking of the domain,
by just click on this. Now, this is actually
where we will set up all the bacon
simulation settings. Over here in the Physics tab, you'll see we've got
fluid type domain. The domain type is
liquid, which is correct. And there's a lot of
settings down here that we'll jump
into in a moment. But just that you can kind of
see what's going to happen, I'll do a very quick bake. You can understand what's
occurring in the scene. I'll scroll down to the
bottom of the page here. This is just important for when we actually start baking things. We've currently got
a frame start of one and a frame end of 250. So we're only really need
to bake up to frame 44. I'll just change this
end frame to 44. And then for the type, we've currently got
it set to replay. What this means is like the rigid body physics
that we were doing before. That's going to manually, it's going to update on the fly as we play
through the timeline. So we don't
necessarily want this. So I'll change this
from replay to Modula. Modula just basically
means that we can bake each section of the simulation
at any given moment. We can, instead of baking
everything at once, we can come up to
the very top and we can bake the liquid particles. Then we could scroll
down and make the mesh, and then we can make the
whiteboard particles. So it's a very
modular process and that's how we'll be
doing it moving forward. Just for reference, I'll
change this to all and I'll click Baikal so you
can see what happens once this liquid simulation
here has completed. So I'll just click Bake all now. As we're baking this on
a pretty low resolution of 32, fairly quick. You can see already
we've already got some thoughtful here. So if I do start scrubbing
through the timeline, you'll see basically
what's carrying. We've got this cube here. The cubes currently set
to an inflow object, so it's not going to be
moving at all and it's going to be constantly
creating liquid. You'll see it's just
a constant stream of liquid coming out of it. But what we're going to be doing in this shot as actually having one large cube at the bottom acting as
a reservoir of water. For that will change it from the flow behavior
inflow to geometry. We see nothing is updated yet and that's because
everything here is banked. Two occasions. If we want to see any updates, we will have to click
on the domain again, come through to the
bottom of the Physics tab and free the bake. So I'll just click
this free All button just for your reference. I'll bake it again so you can see what the geometry will do. All right, so that bake
was not completed. You'll see it's basically
just created a cube of water and it falls to the bottom of the domain than
just splashes. Alright, I think with that quick introduction
to the liquid simulation, we can actually
just stop locking up the simulation and putting in all the parameters and also creating the effector objects, which will be the
mangoes and the bottom. Let's just begin by actually scaling all of these objects. And I might even just begin from this dot so you can
follow along with me. So I'll grab these objects
here, X to delete them. I will make another collection as well while we're here to hassle of the domain
and liquid settings. Up here. I'll click new collection. It's made it in the manga
rigid bodies collection. So I'll just pull this
out to the bottom here and I'll rename this
to liquid simulation. And again, we're gonna
be using these mangoes, so I'll just pull them into
the liquid simulation. Just so it's a little
bit more tidy. Let's just create another
quick liquid simulation. Let's go Shift a,
go to Mesh cube. What we'll do is
press F3 to such, again, just such cool. Quick liquid object, quick
effects, quick liquid. Click that. And you'll see your
viewport has now changed. And it should have spawned them in the liquid simulation
collection as well. So just quickly, let's do
some housekeeping here. The cube is actually the liquid. Let's just press
F2 to rename this and we'll call this liquid. And then we have the
liquid domain as well. This is obviously too small to house the
liquid simulation because the bankers and
the bottle of currently bigger than the
whole domain here. What we're gonna do is
scale both of these up. Just make sure you've
got the liquid and the liquid domain selected. I'm going to quickly
turn off auto king so that we don't have
any weird things happening to add domain. I'll just bring this
up on the z-axis until it's basically on the floor
of infinity backdrop. And what I'll do is just
scale this to proportion. So S to scale, scale this basically
to this size almost as big as the profile
of the infinitely backdrop. Now what we want to do is actually move this so
that it makes more sense. Right now the liquid is going to be inside of the
infinity backdrop. So I'll push this back to here. And I'll also push back the infinitely
backdrop, just a touch. Now let's just grab that domain. Bring this up on the z-axis
so it's on the floor. If you need to align
this up properly, you can press one on
your number pad to go to orthographic and just
line it up like so. And again, we'll grab
this liquid object here. Line this up with
the floor as well. Now what we want
to do is scale it. So it basically fits the
bounds of the domain. Almost like a
reservoir of water. I'm going to go S to scale, Shift Z to constraint
into the x and y-axis. And then let's just scale this up until it meets the
bounds of the box here. And that's basically
the domain and liquid object that complete. All we need to do now
is apply the scale. Make sure you've got
both of these objects selected liquid
and liquid domain. Then press Control a
and apply the scale. This is going to
do is ensure that the liquid simulation will
actually simulate correctly. Because if the scale is
all out of proportion, it'll do some funny things
without objects and assist a very good practice to make sure that your scale is always set correctly and apply it. So moving on, we
can now actually create the collision objects, which will be the
bottle and the mangoes. Let's come through and select
this first micro here. We're going to manually
apply a collision or effect modifier
to this object. Again, in the physics
property tab here, come through to this fluid
button and just click it. This will create
a fluid modifier. And we want to change the
type from none to effect. Once you've done that,
all of these settings down below should be fine. So basically what it's saying is affected type is
collision, which is correct. So it's gonna be
colliding with the water. The rest of these here
you can leave as it's basically what these
other settings will do is the sampling subsets. This will basically
refine the simulation, but it'll also make it
take longer to simulate. The surface thickness is
pretty self-explanatory. So we can keep
this at 0 for now. Obviously we want
to use the effector so that can be a checkbox. So you can just leave
that checkbox selected. Is planar, is not needed as
this is a round surface. So we wouldn't even need to be using this for any
of our objects. That's basically all we
need to do to set up the collision effect
for the manga. So let's just run
through that again. On the other menu,
I'll select this one, come through to
physics properties. Click on the fluid button again, and we'll change the type
from none to effector. Then again, we can keep
all of this as is. So effective type
collision sampling subsets is 0 surface thickness Sarah. And we can keep these
two checkboxes as is. One final time.
Let's click on L, mango bottle here and we'll run through
that process again. Physics tab, come
through to the fluid. Click on that, and
then we'll change the fluid type from
none to effector. That is all completed. Now, what we're
gonna do is create a very simple animation of the bottle and the mangoes
folding into the liquid. Let's grab our bottle here. You can see there's already
some keyframes on this. So what I'll do is
just delete them. So a and then X to delete them. And I'll also just
change the rotation. So I'll press Alt to reset that. And I'll come back
to frame 0 here. Bringing this up on the z-axis, you can see as I've
moved the mango object, the timeline, we've got some liquid particles
here on the cube. The reason for this is the domain is currently
set to replay. So I'll click on the domain. I'll scroll down to
the bottom here. You can see type
is set to replay. This is going to really
slow down our scene. Sorry, we're gonna just quickly change this from
replay to Modula. At again, we don't need 250
frames to be simulated. So what I'll do is click this
and change it to frame 44, which is seen frames. I'll also click the
is resumable button. This basically just allows
us to post the bank at any given frame just
to see how it's going. And if it's not up to standard, you can either reset it or you can resume the bake from
what you've paused it. Alright, so with all
that out of the way, let's continue animating our objects falling
into the water. I'm gonna go to frame one here. Again, I'll make sure that
the king is turned on. I'll just enable that with the
mango controller selected. I'll just create a
appealing pose for it. So I think we can start with
a simple rotation lexer. Then we can rotate it
backwards a little bit. And we're basically just going
to have this full straight down from frame one to
frame about frame 40. Let's go to frame 40 here. We'll go down on the z-axis until it's about midway
suspended in the liquid. We go, I can see it's sort of in the back half
of the liquid, so I might even just
bring it forward. And I'll go back to frame one
and bring this one forward to describing through that. I've got a very simple animation
up in ten on frame 40, I want to give it some
rotation data as well. So I'll just do twice to
get the gimbal rotation. And I'll rotate up
more on its side almost as if it's folding into the water and then sort of settling in the water surface. So that looks pretty good. I'll not grab these
two mangroves as well. Come back to frame one. You can see they've already
got a keyframe here, so I'll just delete that. I just want it to be
perpendicular to the bottle. Bring it close like so. Then I'll bring it
up on the z-axis. I'll grab this one, the
secondary magnet here, and pushed across
to the other side. Just so we can have a
bit of a composition and once they land in the water. Alright, so with both of
them, mangoes select it. I'll go back to frame 40. I'll just bring them down
on the z-axis like so. We're going to introduce
some composition. Now. I want this mango to be a little higher than the one
on the right-hand side. This one can be sort
of lower like this. And I want some
rotation data as well. So I'll press twice
for the gimbal. And I'll just do a
little bit of a rotation on both of them like that. Wonderful. Now it's just a matter of adding some appeal with
the curves here. So what I'll do is jump
into the graph editor. So over here in the
viewport and just click this little clock icon
counter to the graph editor. And obviously all
of these objects, if we just select them all, they're all on a
linear animation path. Let's press a and then t to get the keyframe interpolation menu. And we can just change this to Bezier straightaway that keeps it a little bit more
appeal to the animation. But what I want
to do is actually crunch the S-curve
in as per usual. So make sure you have the individual
centers here enabled. If you are unbounded box
just click this drop-down, click on individual centers. It with everything selected, just press S to scale. And then we'll just push it in to make more of an S-curve here. Now when we play, we've got a much smoother and
nicer animation up the bottle and
macros falling in. So I'm gonna go to frame
40 quickly and just play with the mango bottle
a tiny bit more. I'm basically just going
to rotate it more. Are on the gimballed twice. Something like that. That's
looking pretty good. Moving on from here, we now just need to set up the camera angle
and the lighting. Let's just quickly do that. Now. Again, we turned
off the LCA collection. So just come up to the outliner and click the
checkbox for the LCA. We go. So now we have all about lighting and camera
angles back here. I'll click on the camera.
Currently it's at bedtime view, and it's also going to keyframe. So I'll just delete
the keyframe. What I'll do is bring
this down somewhere here. We're going to point
it directly there. I'll rotate this on the
y-axis by 90 degrees. So it's looking directly
straightforward. That's just a matter
of framing a shot. You can see over here,
I'm just framing this up. This looks quite nice. Just from the
camera's perspective. I think the only problem is that the mangroves are a bit out
of proportion to the bottle. I'll actually just scale
these two mangroves up with both of them selected. I'm just going to make
sure that I'm on frame 40. And with the scale here, you can just press S to scale. But you'll see as I scale them, it pushes it away from
the center of the scene. This is much like the
bounding box issue. So you can actually change
where it's going to scale by coming up to this
little drop-down here. You can see currently we've got the median points selected. We actually want to use
individual origins. Click this individual origins, and then you can press S to scale this up and you'll
see that there are scaling, but they're not going away
from the scenes composition. Alright, so I'll just
scale this up to 0.06, as you can see here. Notice copy that on
frame one. To frame one. I'll scale this up
to 0.6. There we go. Now we have a pretty
nicely composed seen here to start baking
are liquid simulation. Let's select our domain here. What we're going to do now
is with the domain selected, come through to the
Physics tab here. We're just going to
quickly run through all of these settings and actually start baking
this out down the bottom. Again just to ensure that you've got the correct frames here. So our frames dot is one
and frame end is 44. Will be using the type Modula
as well as the resumable. So just to ensure that your
settings are matching here, it back at the top of the
physics settings here. We're going to do a very low
resolution bake to start off with just so that we can see that it's coming
together correctly. Once we're happy with the bank, we can we can
delete the cash and restart and have a
higher resolution for a more realistic
looking simulation. Currently the resolution is 32, so this is the base resolution. You'll should look almost
identical to this. So we've got the timescale. Timescale, that
basically just means how fast the simulation
will simulate. One is the default CFL number we don't need to worry about. And we can keep the use
adaptive timesteps checked. So timesteps are
pretty important and the base settings here
are actually quite good. Essentially what it means
is these are the steps that the simulation is going to take before it moves to
the next frame. So it'll have a maximum of
four and a minimum of one. We can keep that as is. And essentially now we just
hit the bank data button. Once your settings are
all set out like this, come through and click the
bake data button here. Awesome. Again, depending on your system, it might take a bit of
time to bake this out. But as we're doing it
with a low resolution, it shouldn't take too long. And that is essentially
why we're doing it just to get a feel for how
the simulation looks. If you start to scrub
through your timeline, you should see as your
objects hit the water, it's starting to disrupt
the fluid particles, which is exactly what
we're looking for. So moving on from here, this looks quite nice. We now just need to head
over to the mesh settings. Scroll down here on this, on the physics properties tab, all the way down to
the mesh button here. Just to ensure that the
mesh button is ticked. Then we can drop
this little arrow here to get the whole drop-down. So all of these settings here
are basically good to go. The defaults are honestly
quite good to work with. But we can quickly run
through what these mean. The opera is factor is
basically going to, as, as quick tip suggests, it's going to, the mesh
simulation will be scaled up by this factor compared to the base resolution
of the domain. What that's saying is the
base resolution of 32, which is the resolution
of the domain. It'll be up-scaled by
a factor of two to 64. So we can keep that as is
for the particle radius. This is absolutely
fine as we're going to be having a lot of particles
in this simulation anyway. So we can just keep that at two or mesh generator
just keep that at final. For the rest of these
we can keep as is, and click on the
bake mesh button. All right, Wonderful. So that's completed for me now. You can see we actually have a mesh here that we
can stop working with. Let's just scroll through
the timeline now and see how the objects are
affecting the warm-up. Brilliant. So obviously, you can see there's quite a
low resolution mesh. And if I just come
through to solid view, you can see this
sort of halls where the objects have
indented into the water. Once we start to
bake the simulation at a higher resolution, however, this will look a lot
nicer and I won't look so low poly back to wireframe. We can leave that as is, as the meshing side
of this is completed. And the final thing that
we need to do now is add in some bubble particles. Just above the mesh dropdown. There's a particle's drop-down. Click on that little
arrow to drop it down. And you'll see we've
got three options here. We've got the Spray, we have the farm
checkbox as well. Then lastly we have the bubbles. So obviously as this is
sort of an enclosed, almost like a fish
tank simulation here, this is not really going
to be any spray or farm, those sort of particles. And most are found at the
beach or if there's a lot of water splashing around
on a thin surface, for this one, we're going
to be inside of the water. So it makes more sense for
it to just be bubbles. So let's click the
bubble icon here. And there are quite
a few settings here that we can play with. To be quite honest, the base settings
here, more than okay. It's quite a nice simulation. And each one of these
settings here are only really changes slide details
to the simulation. Where it's going to stick
with the base settings here. And all we need to do now is
click the bank particles. Brilliant. Once that's done, you'll see a few more particles have
shown up in the scene now. But what we need to
do is actually create an object that'll be rendered
as the particle itself. So currently if we
were to render that it wouldn't look quite nice. I think it would
actually be invisible. So we need to give it an object to render
out as the bubble. This is pretty easy to do. We're just going to be using
a very low poly hydrosphere. So let's just quickly
add that into the scene. Let's go shift a mesh. We'll click on Ico sphere
down here in the subdivision. So I'm just gonna
change this to one as there's gonna be quite a
few of them at the scene. So we don't want to bog
down APA formats here. Radius, we can keep at
one meter and accept that and I'll just move it
across out of frame. What we're gonna do is scale
this down fairly small. I'll just scale it down just a touch so it's
almost invisible now, but you can see I've
scaled it to 0.05. If you want to copy that, you
can just press S is 0.05. Now, what we need to do is apply this Ico sphere as the render object for
the particle simulation. To do this, let's just
click on the mesh here. Domain mesh. What
we'll do is come through to this particle
properties tab here. Just underneath the wrench icon, you'll see we have two
particles simulations. So the liquid simulation, which is the overall liquid. And then we have the bubbles. So click on the bubbles. And you'll see this
two options here. Let's click on the
render drop-down and also the viewport
display dropdown. Before we start applying the oncosphere as the
particle renderer. Actually going to change
the viewport display a map. Because I've found
that if it's at 100%, it can sometimes slow down. You've seen to a stop and
almost crashed your scene. Let's just change this to
something like 10% for status. Now let's actually
apply the ICU SFIA. So currently the renderer is rendering these bubble
particles as a halo. And we will actually want
to change this to object. Just click on this, come
through and select object. What we can do is you can again, either use the
eyedropper tool and select the object like this. Or you can click this
blank space here and just search for the
ecosphere lexer. We go. You'll see straightaway
it has updated slightly. But as I stated before, the viewport displays
are only showing 10% of the particles right now. If I was to slowly
increase this, That's the 100% of the atmosphere particles
they are showing. And what we need to do now
is give it some random scale so it doesn't look like a uniform bubble
on each particle. So just to do that, came through to the
render properties again. And we'll change the scale
randomness from 0 to one. There we go. Once we actually apply
some materials to the oncosphere and the
liquid and adjust all of the lighting will
actually be able to scale the ecosphere to more accurately
resembled the bubbles. So let's actually just go through that
process now as we're basically complete with
this test simulation. To start with,
let's jump over to the shading workspace and
apply some materials. Up here. Click on shading
and you'll be met with this liquid
domain material. And this is basically
the base material that the quick liquid simulation
will create for you. And it's a very simple material. It's got the glass
shader for the volume. That's got a volume
absorption night. We don't actually really need any volume absorption as this is a stacked in reservoir
of water basically. So let's just print x
on that to delete it. We'll just use this glass BSD F. It's actually
fairly accurate. Well, it's doing is applying
a color of white color. There's no roughness on it, so it's completely see-through. And the IOR, or the index
of refraction is 1.330, which is actually correct. That is what the water is. Elr is this nerd in itself is more than capable of
simulating the water's surface. So what I'll do quickly
is just jump into rendered mode z
for the pie menu. Then I'll scroll up
to render. So you'll see there's a few
things we need to do. Festival, the actual liquid
cube that we created. We don't actually need
to render this at anymore as it's already
been simulated. So what I'll do is
come over here. I'll actually just
disable it from render. From the viewport. I'll click the eyeball itself. Just click the eyeball and
the camera button here. That's just made it a lot more easier for us to work
in the viewport. Now, from the
camera's perspective, this is currently what the
scene is looking like. You can see we
still have the HDRI enabled and it's reflecting
a lot of its detail. You can actually see
the leading, the whole bucket reflecting and we don't really
want that or neat that. I'm actually just going to
disable that HDRI overall. So come through here to
the shadow workspace. And let's just go to
the world option here. And what we can do is actually
just mute the background. I'll click on the
background node and press it him to mute. Now what that has done is
just muted the node entirely, so it's no longer showing in
our scene or in the render. And now we can move on
to lighting the scene and then shading the
particles as well. Come through here
back to Object. And what we're going to do is light the box from the side. You'll see a lot in real life
with fish tank photography, it's a very common practice
to have to soft boxes, eliminating the water
from the sides, from the left and the rat. What is going to
replicate this now? Grab both of these lats. I'll reset that
rotation and I'll just place them on this
side of the fish tank. You brilliant. So now those two
lots have been set up on the sides
of the fish tank. You can see just from the
camera's perspective, it's creating quite
a nice highlight on both of the sides of the
bottle and also the manga. But you'll notice the
backdrop is quite dull. So what we're gonna
do is just place another light directly on the backdrop just
to fix that issue. I'll come through and we do
have this top light here, so I might just select this one. I'll just go Shift D
to duplicate that. And I'll line it up on the back. I'm just going to reach
it out on the y-axis. Now from the camera's
perspective, let's see how this is looking. Alright, wonderful. It looks really quite nice. The only issue is the softbox is creating a pretty harsh shadow. I'll actually just get rid
of the softbox entirely and I'll just have the
light illuminating the backdrop directly. I'll just delete that softbox. Now let's see how
that's looking. Wonderful. That
looks really nice. It's got a very smooth gradient from the center to the edges. And it just looks really good. From here, I'll jump
back into solid view. What I'll want to
do is actually just push this softbox
stand on the top view. So it actually captures
more light on the bottles. I'll move it into position. I can see the indents of
the bottle and the mango. So I'll just push
it down to here. And one final time, I'll just jump into my
camera's perspective and see how that looks. All right, lovely. You can see it's really highlighting all sides of
the bottle and the mega. I'm going to just creating
wide a nice composition. So from here we now need to add a material to the
bubbles or the ecosphere. So let's just quickly
jump into solid view. And I'll select the sphere
from the outlining here. And to be quite
honest, it doesn't need any special material. It's literally the same
material as the liquid. What you can do is with
the atmosphere selected, you can just come through here. You can search for the
liquid domain material that was created and just
apply that to it. Now if I go back to the camera's view and
jump into rendered view, you'll see we don't really see many bubbles here because
they're quite small. I'll just make sure I've
got the liquid domain selected and I'll
come through to its particle properties here with the bubbles come
through to render, and I'll just start
scaling this here. So let's go to scale
of 0.05 currently. I'm just going to increase
this. There we go. So you can see now quite
clearly all of these bubbles. So as I said, there's
quite a few of them. And at this stage
it's a little bit up to yourself as to how
large you'd like the bubbles. I find that having them fairly small gives it a little
bit more realism. I'm just going to quickly define house large.
I'm gonna have these. Alright, awesome. Sorry, I've just gone with a scale of 0.4. If you do want to copy that. And you can see they look pretty realistic as they're
coming through the water. Again, this is gonna
be an animation. Once it's all rented out, it'll look quite nice. So moving on from Pierre, it's not just a matter of baking the simulation at a
higher resolution. And it is important
to note that with the more resolution
you add to your bake, it's going to take quite
a while longer to finish. And not only that, but it will also create mole particles. This also includes
the bubbles here. Again, I highly
recommend that you save your scene as much as
you can before you bake. And also with the viewport
display of the bubbles. I'd highly recommend
keeping it quiet layer. So something like
10% because once you start baking the simulation
out at a higher detail, gonna have quite a
few bubble particles. So you may even need to change your scale
once it's completed. Let's now just actually
set up the settings for a higher resolution bank and go through the motions
of banking that app. I'll click on my liquid domain and we're just going to
clear all the banks, come through to the
physics properties again, unless just free the data. So I come down to fluid and
we'll just click free data. This is going to
reset everything. As you can see, we'll
come down here. Mesh is being reset and ulcer the particles
have been reset. We're just going to go
through that process from top to bottom,
come through here. And for the resolution, generally speaking, a
resolution of 250 is ideal. But depending on your system, this could take anywhere
from an hour to 2.5 hours. But for me, I'm just going to
go for a resolution of 200. That's our find that this is an optimal resolution and it's sort of the media ground between low resolution
and high resolution. Let's just go with
200. And again, all of these
settings below here, we don't really need
to worry about them. So we can just now go ahead and click the bake data button here. Alright, so the bank
is now complete. What we can do is
come through to the wireframe mode to actually
see what's happening. You'll see straightaway. It's got a lot more resolution
and it looks a lot nicer. You can actually see. Let's just go back
to the layout here to see the timeline. Let's scrub through this
to see how it looks. Lovely. So you can see again, all of this detail
is going to be looking quite nice with
the mesh once it's banked. Also with the particles, we're going to have quite
a few more particles once it's finished baking. Leaped to reiterate the scale of the ACA sphere particles, which is totally fine. But let's just now move on
to the meshing data bake. Over here, let's scroll down to the Physics tab and we'll scroll down to the mesh,
drop-down here. Mesh, make sure it's enabled. Again, we'll just leave that
all the details here as is. And we'll click Bake mesh and I'll see you
on the other side. All right, so the mesh
has completed now, as you can see, it's
quite a dense mesh here. And as we go through
the same here you'll see how detailed some
of these are now. Again, even inside here you can see we've got
these small bubbles coming off of the geometry
once they land in the water. This is going to look quite nice once we actually
render this out. Moving on from here. Lastly, all we really need to do now is bake the particles. Again. Let's just save. This is our progress. Over here in the
physics properties. Let's come up to the
particles drop-down menu and show that the
bubbles icon is selected. And let's scroll down and
click on the bake particles. All right, Wonderful. Now
at the bait, complete, again, you can see there's quite a few particles
in this region here. What I'm going to quickly
do is just change the viewport display
so that there's not so many showing on screen and we can actually
use the viewport. So once again over here in the particle's properties and show you got the
bubbles here selected. And even with an amount of ten, it's still quite laggy
in the viewport. Instead of changing
the amount here, I might change the
display as from rendered. Instead of rendered,
we can go point. What this allows the software
to do is basically showing the particles as a
point cloud instead of the actual final result. Now let's just increase
this to a 100% to see how many particles
has actually going to be. You can see up to the top
here it'll actually tell you how many particles are going
to be on any given frame. Currently at frame 42, as apparently going
to be 2.5 million particles of Ico spheres
essentially being rendered. So we're definitely going to
want to change the scale so that they're not just a big
cloud of black bubbles. Let's grab this
scale and I'm going to bring it down to 0.05. Alright, so you can see
it is still overwhelming. The objects in the mangoes. Again, I'm going to
bring it down even further. Let's get 0.01. And to be honest, we're not
really going to know how this will look until we
actually render this out. What I'm going to do quickly
is just jump to frame 44. Alright, so frame 44. And what I'm gonna do is just
have a quick test render. To perform the test render out, Let's just press F12 and this will render
out the image for us. Alright, so you
can see just with a quick test render you, we can't really see
any of the bubbles. Very faint pieces of them here, but they're too small Currently. I'm just going to come back
and change their settings. I did change them to 0.001. Sorry, let's just try 0.005 to see how that
looks in the render. And again, we'll just
do a test render here, sorry, F12 to test render. All right, So once again, the, I guess we're starting
to appear to be showing up very much here. They're very small, so
I'm just gonna keep tinkering with this until I find the scale
that works for me. Then I'll check back in. All right, So I've gone
with a scale of 0.08. And that seems to
be a decent size for the ecosphere bubbles. Now all we need to do
is render the sequence. Once you're happy with all of your settings for
your particles here, you can come up to the
render properties again, jus
9. Animating The Outro Shot: Alright, welcome to the
final shot of this course. This one is quite simple
and won't take us too long. We're just essentially
going to be going through the motions
of setting up a simple composition
and camera animation. Let's begin by clearing, as seen in getting rid of the liquids simulations
that we've just created. I'm going to just
Festival say that another copy of this
up the top here, come through to File, Save As. And I'll just call
this shot five. I'll save that. Now in
the collections here, we no longer need this
liquid simulation. So what I'm gonna do is select everything that
I no longer need. If we go and I'll just
press X to delete that. We're going to keep a
mango here in the Seine, and we're also going
to import all of the other fruits for
the other bottles. And then we'll set
up the composition. Let's start out by first resetting the location
for the mango bundle. So I'll describe Alt G to reset that are as well to
reset the rotation. A little bit hard to see
what's going on here as well. So I'm just going to jump
into material preview. All right, lovely. And I've
also got auto King enabled. As you can see, a keyframe
has been created here. So let's just fix that quickly by removing all of
these keyframes. I'm just deleting them. Now come through here to the timeline. And I'll turn off
or a king as well. Let's just go through
the emotion of creating the
composition shutdown. So to start, I'm
going to just set up the bottles in that
triangle formation, just like the beginning shop. I can see that these soft
boxes are kind of in my way. I'm just going to
quickly hide these. So I'll just grab the light and the softbox and press
H to hide that. And I'll do the
same for this side. So I'll select the softbox and the light object and
press H to hide that. And now we can have a more clear review if what we're doing. And also for the camera, I'm just going to reorient that. So it's actually framing the final composition here.
I'll delete this keyframe. Looking through the
camera's perspective on the right-hand side here, I'll just bring it down a
touch to look and see flow. Let's just start making this
composition for the bottles. The mega will be at
the front like so. I can see the rotation
for this is off, so I'll just reset
that by pressing Alt. I'll also do the same for
the rest of the bottle. So I'm just selecting
their empty objects, pressing Alt an auto reset that. There we go. I'm going to have the
mango objects followed by the two strawberry
and lychee bottles. And then I'll have the lime
and the cactus behind that. I'll grab this lacI one here. Again, it's going to be in
sort of a formation here. I'll put this just
behind it, like so. Great. Now grab the strawberry here. Bringing this across. Make sure it's actually sitting
on the floor. Analysis quickly set up
the line and the cactus. All right, brilliant.
I think for the actual final composition, there's not gonna be as
much of a space here. So I'll actually just grab
these two and bring them in a little bit
closer so there's not so much of a gap
between the bottles. And I'll just replicate that on the right-hand
side as well quickly. So I'm just pressing G and
then moving it on the y-axis. Let's finish this up
with the cactus puddle. Alright, so now that we have them sort of lined up
in the competition, actually going to change
the camera's perspective here so that there's a
little bit of space on the right-hand side for the logo and the tagline to
be underneath it. So I'll just move this
across. Back here. You can see with the focal
length of the camera, It's actually
skewing the objects. So you can still see the
parallax of the bottles. And we don't really want that. We want it to be straight on. So what I'll quickly do
is I'll just rotate. I'll select all of these objects here the empty control is, and I'll just rotate that
slightly on the z-axis. Now you can see we're still
using individual origins, so it's not working as intended. I'll come up here to this
little drop-down and just change this
to median point. Now, I'll rotate it
like so that they are actually facing the camera instead of being
slightly skewed. Awesome. Now it's
just a matter of set dressing all of the objects onto the scene and also
importing the images. So let's just
start, please start by importing the images fast. And then we can set, dress
all the fruits into the same. Importing the images is
actually really simple. You just press Shift a and
then come through to image. Then we're just going
to click this image. Images as Planes option. This will open up
the file browser here and we'll just come
up to our class resources. Class resources,
textures, and 30 assets. And we'll come through here to the bottle Textures folder. In here will have brand
images to choose from. So just click on this,
select both of these, and I'll just click import
images as planes. There we go. Now we have these two
images that we can stop placing in the scene. You'll notice just
now the bottles of actually moved back to
their original positions. And that's because they actually
had a keyframe on them. So what I'll have to
do now is just delete that keyframe and reset them quickly. So I'll
just do that now. Rats and now that's
out of the way. Let's just quickly set
up these images here. You'll see what's happened
is we've inputted this image and it's basically got an
alpha transparency background. So I will only be able to see the actual letters
and everything behind it will actually
come through in the Render, which makes placing
it in the scene just a lot easier for us. Let's just line this up
with the camera here. In fact, we might need to
shrink it down just a touch. Just scale this like so. I'll put 100% life
just underneath it. Let's just grab this down. These are essentially
just floating in space and we don't need to do
anything else with these. Just for reference, I'm going
to go into rendered view and see how this is looking from the camera's point of view. All right, great. So
that's looking good. Obviously we've turned
off the lights. So if we press Alt and H to unhide the lights,
we'll see how it's looking. They're wonderful. Again. We'll have the
HDRI on and we'll also move these lights
into a better position. But for now this
is looking great. The only thing that
I can see that needs updating is I need to move these two bottles across just a touch. So I'll
just do this now. Awesome. Now let's go through the process of importing
all of the fruit objects. Then we can set dress
them up here in file. Just come down to input, will go through
to wavefront OBJ. And again, it's just a
matter of coming through, took the class resources
compared to 3D assets, and then just start inputting
all of these objects. So let's do the strawberry
blink bought that. You'll see most of these will come through with no textures, will have to read texture
them as they imported. Let's just continue
this process. So again up here, file input, and we'll go
through two wavefront dot OBJ. Now let's come through, let's
input the cactus object. There's actually three
cactus objects in this one. So we'll, once you've
imported them, we'll go through the process of separating them and
making them workable. Again, we'll just finish
in putting these up here to file input,
wavefront dot OBJ. Now let's import
the lime object. Just click on the dot
OBJ and input tab. There we go. And lastly, let's
input the lacI File, Import, wavefront dot OBJ. Let's open up this LacI object. We go. Now let's just
make this a little bit more easier for us to read. So I'll turn off
these lights again. Just left clicking them and
I'll press H to hide them. For the cactus tree, I'm just going to move
them across here. Basically just make all
the objects to size. And I'll also move
them out of the scene. We can start texturing them. I've got the lacI here. The line here, the line
is actually quite small. And I've got the strawberry
as well. All right, awesome. I'm just going to
quickly do a scale of each of these so that
they're at the correct size. I'll grab the line here.
Just scale that up. It's correctly sized. Go after the strawberry. I'll scale that
down just a touch. The cactus tree or I'll scale
that down to about here. Wonderful. Lastly, I'll grab this manga object up here that we've
already got textured. And I'll just put it here. What I'm gonna do is just remove these keyframes
on the manga as well. Select all of them
here, X to delete. Now let's jump over to the shading workspace and actually give all
of these texture. In the shading workspace here. We've got all of these objects that we now need to texture. And you'll see as
you click on them, they do already have
a texture on them. For example, the lacI here. It's currently got a sort
of popular shade to it. And that essentially
means that the image It's sourcing is incorrect
or isn't available. What we're gonna
do here is in slot one on this IZ to material. I'm just going to open up
the file browser by clicking this little file icon and
re-import that texture. Click on that, and
then we'll come through back to the
class resources. Double-click into here
and we'll come through to the 3D assets, lychee. And I'll just make sure that this IZ to dot JPEG is selected. Open the image and now
you'll see the texture is correctly applied,
which is awesome. Moving on from there,
we have the lime here. So let's start off by
checking the texture. Obviously there's nothing here. We're gonna do a quick PBR
texture setup for this one. Again, just click on the
principle of BSD F here. With it selected, you can
press Control Shift T to open up this file browser. Then just come through
the class resources, come through to 3D assets. Then finally lime here. What we'll do is just select
all of these textures. So control-click each one. Then we'll click on the
principle of textured setup. All right, so once
that's done, you'll see everything has been plugged into its
correct or tear. So essentially what
we've done is we've just put the base color
into the base color. We've got the speculum map of feeding into the speculum map, roughness map into
the roughness and the normal map into the normal. Again, it's just a
very quick way for you to set up the
texture without having to manually import each image and plug them into each socket. Awesome. So now we've got
the lime here all setup. So let's move on to
the strawberry now. With the strawberry
selected, again, will come through to the
principle of BSD f. Make sure you've clicked it and we'll go through that process
while I'm on tap. I control shift T, come up to
the strawberry option here. Again. Just select each of
these textures here. Control. Left-click all of them so
they're all highlighted. And then click the
principle of texture setup. Now for the cactus one here, we're actually going to delete these two top cactus pears. And we'll just be using
this bottom one here. With that in mind that
it's actually quite easy to separate them
and delete them. Let's just quickly
jump into edit mode. And we'll left-click off of the mesh that we
can actually see it. Left-click off the mesh. And what we're gonna do is
hover over this cactus here. And we're going to
press the L key. What that'll do is it'll select
all of the linked faces. Let's just run through
that again for this top actors here, press L while hovering over it. You'll see that it's now
selected that cactus. And all we're doing
now from here it's just deleting these faces. So let's just go x
and delete faces. And now we're just
left with this one, cactus to texture,
tap out of edit mode. Now, what we can do now is actually delete some of the
slots that we don't need. We're gonna be using
this lab bit three SG. Just remove this one up the top by clicking
this minus button. We no longer need
this limit full. So just remove that. Now we're just left with
this lab at three SG. Oh, we're gonna do is again, the quick principle
be SDF setup, sorry, just select
this node here, will go Control Shift and tea. And we're gonna be using
the yellow texture here. So just come down. Make sure you've got all of these
bottom texture is selected. And then we'll click on the
principal textures setup. Wonderful. So now we have the cactus textured and all
the other fruits completed. Now it's just a matter
of putting these in a, in an interesting composition
with their parent bottles. Let's just do that now.
I'll grab the mega. I'm going to bring it across. I might just quickly
jump back to the layout section
here so we can see what the cameras viewing
over into layout. We're going to just
basically set up the scene so it looks appealing. With the mega. I'm going to have this sitting
behind the mega bundle. So I'll just rotate that. I think I want to have it with the green pot on the
side here. Like this. Awesome. So we'll
have it like that. Then I want to have a
strawberry sort of sitting, resting on the bank of battle here. I'll grab the strawberry. Move this across. We go. So something like this
looks pretty good. Just make sure it's
not intersecting with the floor too much. So it's keeping that realism. And moving on from here, I can see the bottom of this
bottle of soda parking out. I'm going to just cover that. Domingo. Moving on from there, I'm going to grab
the line object and put it just behind
the mango bottle as well. Grab the line,
bringing it across. Just put it here. Awesome. There's something
like this looks pretty good. Now we can just put it down till like cheese and the cactus. I've got the light
sheath and I'll move it across onto
the right side. Just going to have
it basically sitting behind the line here. You can see as I'm
trying to rotate this, the origin is set by OFF here and the distance right here, I'm just going to quickly
reset the origin. So right-click set origin
to center of mass. Now it's more easily rotatable. I'll put it to
somewhere like here. Again, this is technically
intersecting with the bottle. But because of the point
of view of the camera, it's not really much of an issue and we
can't really see it. I'll just keep it there for now. And I'll actually just
duplicate this and make a copy. So there's two of them
sitting here on the side. Shift D. Let's move it
out a bit. Scale it down. So that's a little
bit of variance here. And I'll also rotate it. It's not looking very
artificial and non hand placed. So that just makes it look
a lot more natural if it's got a different rotation. Very last thing here is now just to place the cactus down. I'll put the cactus around here. Bringing across like this. There we go. That should do
for the composition there. I think the only other thing
I might do is just scale the line down just a touch. And also Birth of these latches
will scale up just a bit. Again, make sure that they're actually sitting on the floor. Lastly, I might just rotate
this strawberry here. And what I'll do is
I'm actually going to stretch this strawberry, just attach find which accesses
the up and down for it. I believe it's the
y-axis on this object. Press S, and then I'll
press y two times. Now you'll see that's changed to the local axis of the object. And I'm just going to stretch
this up. Just a touch. There we go. That's the composition
can complete. If we just quickly
check it out from the camera's point of
view in rendered mode. This is currently how
it's looking with minimal lighting so loud, Let's just quickly go through the camera setup and then we'll finish off with a
lighting setup. Back to Solid mode here. We're really going
to do is to, uh, Whip Pan from basically looking
down and then looking up. With the cameras selected. Let's come to frame one. I'll click this auto
keying option here. Basically what
we're going to set this keyframe here
at around frame 20. So just come to frame 20, just press G and then left-click to enter
in a keyframe here. We're going to transition
from frame one to frame 20. As sort of a lookup whip pan. To do this, Let's just bring the camera across a little bit. Also bring it down. And I'm going to rotate
it on the y-axis. So it's looking down at the
floor to something like this. What we'll do now
is sort of zoom up and the final
composition, awesome. That's essentially the
entire shot completed. So we need to do now is add a subtle camera shake
for this lingering shop, because currently it's very static and it looks a
little bit artificial. Let's come through to
the graph editor here. The clock icon. Open up the graph
editor and we'll go through the basic process
of putting the S-curves in. Select all the keyframes. Press T to change the interpolation will come
through to the Bezier. And again, I'll just press the period key to
zoom in on these. I'm just going to scale this for more of a S curve
in the middle here. That looks pretty good. From what I can see. Awesome.
Moving on from here. You can see obviously there's no keyframes
happening right here. But what we're
gonna do is add in some procedural camera shake. So over on the left-hand side here there's a little
bit of an outline. If you click this Drop-down, you'll see we have
all of these options here to play with the keyframes. So what we want to do
is actually just apply noise modifier to some
of these to add in some procedural camera
shake very quickly. On the X location. With explanation selected. You can press N window and
it'll open up this Modify tab. Just come through, change it
from F curve to modify as. And we're going to add
the modifier noise. Just select that. You'll see very,
very faint here. But you can see there's
some procedural noise being applied to this now. Essentially we want to make it so it's not
incredibly strong. If I was to play this. You'll see in the
camera's point of view, it's kind of shaking. If I increase the strength, you'll see on the
graph out of it here. It's very much adding some procedural noise and
that's an incredibly intense. So we're going to just minimize the strength
to something like 0.15. And the scale we can keep
us one, it's totally fine. We basically want to copy
this noise texture and alter it slightly for each
of these options here. So for the y and the z and
all these other options. To copy this, we can come up here to these little
clipboard icon. You can press Copy F modifies, click that button, and come
over here to your y location. Again, what you need to do
is come back to the clip, clipboard here and just
click this second one, paste F modifiers, like so. Now if we play this, you'll see this a very slight bit of
camera shake happening. It's obviously still pretty
strong and not very subtle. So we want to make it
a bit more subtle. For the scale. I'm going to bring this
up to something like 12. The strength we
can keep at 0.15. But for the offset
and the phase, I'm just going to play
with these because we copy this across
from the X location. These are gonna be identical and that's going to
cause it to look kind of artificial
and not very natural. If you just drag this across to an arbitrary number like this, you just literally
grab it and scroll your mouse wheel
or move your mass. It'll give each axis its own sort of individual
noise modifier. And it'll look a
lot more natural. So what I'll do now
is just copy this. And I'm going to place this onto the z location that we go. For this one, all
I'm gonna do is grab the offset and I'm gonna change it to
something arbitrary. So negative 360. I'll grab the phase and
I'll just drag it as well. So I've just put the phase
onto a four-inch from full. And so if we look at
this in its entirety, you'll see that there's
a lot of camera shake. It's actually a little bit
too strong in my opinion, but you can kind of see it's
actually quite unnatural. Camera shake. Let's just make this
strength a little less. So on the x location, I'll get a festival,
increase the scale to 12th. I'll change the offset as well. So I'll just scroll the
offset and the phase to something, some random number. And again, the strength is
just a little too strong. So I'm just going to go through each of these and
change the strength to something like
4.05 on each of them. 0.05 and then lastly
z location 0.05. Now if we watch this back, you'll see we have a pretty subtle and
natural camera shake as the clip comes to its
stagnant and awesome. That's all complete. Now,
the last thing we need to do is set up the lighting and then we can render this out. Let's come through to shading. What we'll do is I'm
just going to enable the HDRI in the shadow
workspace here. Just click this and
change it to weld. I'm just going to
unmute the background. I'll click on the
background node. Let's press M to unmute that. What I'll do now is I'll
just press Alt and H to unhide all of the area, lots of the audio
in this viewport, Alt and H, that'll
unhide the lights. And now I'm just going
to quickly look at the rendered view and see how it is looking from the camera. Awesome. It's actually
looking quite nice. The only thing I
think is that we need to change the
area lights from a direct side view to more of a three-point
lighting setup. Jump back to Solid View. And I'm just going to
grab this light here. I'll bring it across
and up a bit. Again with shift and t, we can aim this at the bottles. So I'll press Shift T and I'll just aim that
just at the mango. And I'll replicate that
on this slide as well. So bringing across Shift T, and I'll just make that
here. Instead the bottles. Now let's just see how this is looking from the
camera's point of view. Awesome, that's
looking pretty good. The only thing really now
is I might actually just re-frame the shot because you can see this quite a lot of empty space up the top here. What I'll do is
I'll just come back to solid. Come
through to layout. And I'll just update
the cameras ending position starts off
at frame one here. Come through to the frame 20. I'll just bring this down to
sort of close the gap here. On the z-axis, bring
this down just a touch. That framing is
looking a lot nicer. Awesome. Once you're
happy with that, you can just save your project. I can, I can see these lots of switched
back to their keyframes. So I'll just, It's like birth, the light's not delete old key frames and I'll quickly put them
back into position. All right, with that done, It's not just a
matter of setting the output to a different
naming convention. And then rendering this out. Again in output properties here, come down to the output folder. Just click on this, and we'll just rename this to shot five. Shot underscore. Five underscore. Accept that. And for the final time, we can render out our sequence. At the top you come through
to render and click Render Animation or
press Control F12. Once your render is complete, we'll jump into
DaVinci Resolve to do some simple compositing
and finish off this entire
advertising sequence. So once you're ready, I'll see you in the next lesson.
10. Download and Install Davinci Resolve: Okay, so now let's
quickly and download and install DaVinci Resolve. Just open up your
Internet browser and come through just Google. Davinci Resolve. And you should get this first option
to Vinci Resolve 18. Just click on that.
You should be met with this screen here. We just want to
scroll to the bottom and actually download this. So just come through
tabs at the bottom here. And there should be this
option to great versions. We just want to click
this one DaVinci Resolve as it is a free download. Let's click on this
and let's just download the DaVinci
Resolve 17 here. If you're using a
Mac, click on that, but if you're using Windows, just click this Windows button. It will ask you to fill
out this quick form. You can just pop in
all your details here. You don't need to worry
about your accompany the reasons why you're
downloading it. You can just throwing
your details here, register and download. And once you've
done that, just run through the
installation process. And I'll see you in
DaVinci Resolve.
11. Compositing In Davinci Resolve: All right, So welcome
to DaVinci Resolve. You should be met with a
similar screen to this here. To actually stop working
in the workspace here, we just need to
create a new project. So come through to this
New Project button here. Click on that and
we'll just rename our project to product
advertisement. And then we can just
click this Create button. Wonderful. So now we're
actually inside of DaVinci Resolve and we can
just jump straight into it. This screen here, this
tab on the bottom left, this is the Media tab. This is where it will
be importing all of our image sequences. What we can do from here is
on this side panel here, you can scroll up and
down and you can choose where you've actually saved
all of your image sequences. So I've saved mine just
in this folder here. In renders at, for example, if I just double-click
this folder, you'll see that it's
just one option here. And it's basically as image
sequence from 00320096. If yours doesn't look
like this and it looks most like this, don't worry, all you
need to do is click this three icons tab
up the top here. Just makes sure that show
individual frames is unchecked. Just uncheck that. Now what we can do
is we can actually drag and drop these
into media pool. This is our master
media pool and this is what will hold
all of our media. Let's just grab
this, drag and drop. And you'll see here, I can scrub through the thumbnail and it'll show me what the shutters. Or I can actually select
it and I can play it. Awesome. So moving on from here, It's not just a matter
of finding all of your sequences and dragging and dropping them here
into immediate pool. I'll just quickly run
through that myself. All right, So once all of your media clips
are important view, we can move on to
actually editing this together and then doing
some simple compositing. Down here in these tabs, we're going to head
over to this third tab along the Edit tab.
Just click on that. This will open up
a new workspace for you to get familiar with. Just keep in mind that
your workspace may look a tiny bit
different from mine. I'll quickly run through
each screen here. This screen up the top
here is the media pool. If you don't see it yet, you
can click this button here. That'll turn on the
media portfolio. It down here is the
effects library. If you don't see this,
don't worry because we're not really going to be
using it that much. But again, you can click this button here Effects
library to enable that. Across here on the
right-hand side, we've got the inspector. This is a pretty important
window. Up here. You can click this
little icon inspector. This is where we'll
be able to edit things and crop things. So it's a good
window to have open. With that goal in mind, let's actually start blocking
at the sequence here. In your media pool. Just
look at your starting shot. Again. If you can't really
see what's happening, you can actually double-click this and it'll open it
up here for you to mute. This is shot on to me, so I'll just grab this. You can literally just drag and drop it onto the timeline. Like so. Now that we have
this timeline here, you can see it's a
layer based workflow. We've currently got
one video track here and one audio track. Move things, you can just
left-click and move them. To add extra trachs, a video, you can right-click here
and just go Add Track, and that'll add a
secondary video layer. Let's just quickly
block out this scene. We've got the opening sequence. Then we'll have the two bottles crossing over each
other like so. So I'll just drag
and drop that here. Awesome. Maybe not from now we'll have the
rigid body physics. So I'll just grab all of these. Alright, so if you do actually want to scrub through
the timeline, you can just grab your cursor and move along this
timeline option here. If you want to zoom in and out, you can use this option here. Zoom out and zoom in. Or alternatively, you can press Alt and then scroll
on your mouse wheel. That's quite a
handy one to know. So I'll just finish up these rigid bodies simulations that we go moving on from here. Then we just add in the liquid, since I'll start
adding those in now. Awesome. Then lastly we have the attributes shop,
sorry, this one here. Okay, great. So we've got the whole
scene here blocked up. I'll just come back
to the start of the sequence for this shot
here we're going to create a mask and animated
mask that will show once it falls through
here much they transition. This will open up to the
manga, rigid bodies. What we'll do is
this clip selected, come down here to this
little magic wand button. This is going to introduce
another workspace. And basically all we're
going to do is create a simple animated mask to move around this
nodes section here, you can press in your middle mouse button and
that'll allow you to move. But just for this
course is sake, we're not going to go to
end up with this screen, so we'll just quickly run
through making the mask now. Median one, this is the clip that we're gonna
be putting a mask onto. So just make sure that you've
actually clicked this. And up here there's
a lot of icons that we can start adding
effects to the clip. We just want to create a mosque. Come through here to this
polygonal mosque option polygon mask. And
just left-click that. You'll see straightaway
in this view here, it's actually gone completely. Lost, meaning that there's
nothing going to be showing. What we want to do is
with the Inspector open. Just make sure you
have this open. We can come down here and we can actually invert the mosque. So just make sure that
this option is ticked on. Now with the polygon
node down here selected, we can actually start
drawing the mosque on each frame. For example. On this frame here, you can actually scroll
through the timeline, but this here, or
would this here. But on this frame, as soon as they pass each other, we want to draw a mask
out as square mask. With this cursor here, you can literally just
left-click to create a point. I'll left-click down here again, and I'm just drawing a square. To close the gap, you can simply click on the
first you created. And now you'll see we have this mask that's going
to show anything that's behind the media
layer inside of here. So what I'm going
to do is just grab these full corners and do
my best to line them up. Then I'm going to move to the
next frame in the screen. You can just press right
the right arrow key, and that'll go to
the next frame. Now it's just a process of moving the mask
and animating it. I'll drag all four corners
here to enlarge in the mask. Then again, go to
the next frame with the right arrow key and
just continue the process. I'm just going to quickly
speed through this later and have to
watch me do this. But if you do get stuck, just come back to
this section of the video and re-watch
how we set this up. All right, so once
that's completed, we can actually soften
the mosque up a bit. So that's not such a harsh line. What you can do is with the polygon mosques
still selected. Over here, you can see there's a couple of slides to play with. So we've got a soft edge here. We actually just increase this
just a touch by dragging. You'll see it creates
a nicer transition from the mask to the image. I'm just going to put is 0.006. That's essentially the
animated mask completed. Now we can jump back to
the editing workspace and continue on with the
compositing workflow. Come through here. Let's come to the edit tab. You'll see now as we play this, we've got the mosque
here working for us. But there's actually
an issue with the mosque being on display
for the entire clip. Let's just quickly fix that by jumping back to the Fusion page, this magic icon down here. So just click this and we'll just quickly fix
up the polygon mosque. It makes sure that the
polygon one here is selected. We're just going to go back
in the time frame here. So you can see the keyframes are these little white
lines just here. Each one of these white
lines is a keyframe. We need to go back
one frame here. We essentially just
need to close the mask. On this screen here you can, again middle mouse button to
move and actually zoom in. You can press Control and
scroll on your mouse wheel. What I'm going to do is
just quickly push these together until they close up. We go. So again, I'm just
zooming in as close as I can. I'm just closing the
gap between these. There are essentially
are overlapping and there's no mosque there. I'll scroll to the bottom here. I'll do the same for
these two. Push that in. There we go. Now there's essentially no
mask effect on this frame. And the next frame
or comes up like so, and then just completes
the animation. Back to Edit mode. Let's
come through here. Click this little edit icon. We can now just
preview our work. Play this awesome. We've got a very smooth and
seamless transition there. And you might be
wondering, okay, how do I put the rigid body
physics in this black screen? But all you need to do is grab your manga rigid bodies simulation clip and just drag and drop it
below this clip here. Let's again, if you haven't
credited track yet, just right-click Add Track, or you can click and
drag this above. We'll put this mango
simulation below it. Grab this, drag it and
palpate the lymph. Will just want to line it up to the frame where it
actually happens. You can do this with the the
timeline scrubbing here, or you can actually use your
arrow keys left and right. I'll just go right
until it opens. On this frame, I'll
place it in like so. Now we have a very nice
and seamless transition to the manga, rigid body. And now what we're gonna
do is basically layer these other rigid
bodies simulations on top of the mega one
and crop the image. Grab your next simulation, just pop it above. Here where the
secondary clip ends. In the inspector, you'll see
there's a cropping section. Just click this open and you can actually click
on these numbers here and slide them across lexer
to actually crop the image. I'm just going to crop
it so it only shows the bottles and a
little bit of cactus. Sorry, I'm just dropping
the left and right. Then you can actually
scrub through To see if it stays within
the bounds of your crop. Sorry, this one looks
like it hasn't, so I'll just pull
it up just a bit. There we go. Again, you can increase
the softness as well. Sorry, I'm just going to
increase the softness by maybe, let's say one. So it's not such a harsh line. Now we can just start layering all of these on
top of each other. I'll grab this lacI one here and I'm just
pulling it below. And I'm just gonna do the same. I'm going to crop
left like that, and I'll crop the rat
like that as well. And basically what it's
going to want to have a, all four of these rigid
bodies simulations and align with crop this now, but it's currently being ever run by this cactus one on top. So it actually move it. You can use this position here. You can move it with the
position x or the position y. Just grab this position
x and move it across. We go again, we want all four of these to fit
on screen at once. So it may be just a matter
of Festival layering them. They're all going to
be on screen at once. So what I'll do is actually just pull these up another layer. Let's just start
cropping the strawberry. I'll crop left. I'll crop the right. I'll move it across to this side already. And then lastly for the
line crop on the left, I'll crop on the rabbit as well. Essentially, we just want
to make sure that these all fit on the same frame here. I'll just make sure that
they're all at least pumping on screen
at the same time. This looks good here. And obviously we need
the lime as well. So I'll just pull this across, going to add another track
here and just pull it up. Now I just need to
position all of these in the same scene. I'm just going to make
sure that they're all times the same. They're all stacked
on top of each other at the same time. Like so, I'm just left clicking and dragging to select
them all at once. And now what I'll do is pull
this up to the second frame, like sir, and just drag it in. That's just a matter
of aligning these. Let's just offset them
oldest, just a bit. Like this. We get the Nanga. Then I want the
cactus to shot first. So I'll just pull this back. We get the mango and
then the cactus. And what I'll do is I'll
actually push the cactus across. Just push this cross slightly. Wholesome, and
then actually want this robbery to be here. So I'll grab the strawberry one, push that across like so. And then lastly I'll grab the line and I'll also
push that across. You can see the line
is cutting over the strawberry and that's because it's sitting
on top of it. So what I'll do is I'll
actually just crop, move the strawberry across
a bit more and crop it to the right here. Then I'll prop it left
just a touch. Like this. I'll just move the line bottled
across just a bit more. Awesome. That's the basic gist of the composited in there. And then we're just layering some clips on top of each other. Obviously, this is a pretty, pretty quick lettering job, so I'm just going
to go through and refine this until
it looks correct. Also, essentially a
loved one is just lay at these and then I've just
played with the softness. I've given them Ola
softness of five. Then I've just cropped
them so that they all fit on the screen
at the same time. The only other
slackening I've done is I've made sure that
they are open. But they pop up on screen
at different times. Because mango and
then the two in the middle pop-up and
then the two on the side. Cool. Moving on from here, we
don't actually need all of this extra clip at the end here. You can actually just cut
it off and delete it. Up here there's a blade icon. You can click that
or you can press B. And you can literally
just click here. For each of the clips. I left-click. Then I'll press a to go back
to selection mode. And I'll select
all of these clips and press backspace
to delete them. Now be viewing them from
there, I'll just scroll out rabble of these
clips and bring them closer to the other clips and Nas just a matter of
compositing in some text. So currently, this scene
is a little bit messy. We've got a credit pretty big
stack of media clips here. So what I'll do is I'll just
select all of these and I'll turn them into
a compound clip because we're no longer
need to edit these. What you can do is select them, right-click and go
new compound clip. I'll just call
this rigid bodies. And I'll click Create. You'll see that's
just shrunk it down into its own
individual clip here. If you do actually
need to edit this, you can right-click, jump through to sharpen and timeline. And that'll basically open it up to Edit in another window. You'll see we've got
these breadcrumbs here. We've got timeline one
and then rigid bodies. So once you've finished editing
all your stuff in here, you can double-click
timeline one. That'll take you back to
the overall timeline. Moving on from here, let's
just start adding in some text objects in
the effects library. If you don't yet have
it, just click on this little magic icon at
the top. We'll open it up. And what we're gonna do is
just search in the titles. We want to use text plus. Just grab this left-click and drag and drop
it into your scene. You'll see it's currently
got custom title. What I'm going to do
is I'm actually going to select all of these. I'm going to bring them
up just one layer. I'm going to is added
some text here on the text object
in the Inspector. You can just put in
whatever you'd like. We can just type in what
was on the actual ad. So 25 MG Milligan. And so we're going to
want to have three of them on the screen at once. You could either make three
of these objects or you can just copy and paste this
three times like this. Now in this text
Inspector layout, It's basically just setting
up all the options for it. So for example, we've got
font here, Open Sans. You can choose from a litany
of different fonts here. Just for example, we'll
just keep with Open Sans. You can also change
the size here. Let's go with
something like this. You can also change it
from regular to bold. I think I'll keep mine on bold. Let's just finish
creating this text now. You'll see some of the
letters are sort of fading off into the background and
it's kind of hard to read. What I've done to
counteract that is just add in a drop shadow. If you come over here,
just click on Filters. You can come up to this
little magnifying icon and search for drop shadow. Just stop typing and drop
and you'll get it here. You can just drag interrupt
this onto the text object. Now you can see that's a
distinctive drop shadow and it helps the text out of the
image a little bit easier. A lot nicer. Awesome. So now with this
selected we can come up to, we can change the inspector
from titled to settings. And we're just going to
enable a Dynamic Zoom. So you can see here there's a little option
for dynamic same. So just click this and
make sure this is enabled. For the Dynamic Zoom is
just drop this down and we'll do ease in and
at ease in and out. Now when we actually play this, you'll see it's currently Zooming and it's actually
zooming backwards. Sir. What we'll do
is we'll just click this Swap button and that'll reverse the
direction of the Zoom. Now it's zooming up just like
all the rigid bodies off. And that's essentially
the compositing of the texts complete. If you didn't want
these other layers here to have different
kind of text fonts. Or maybe you wanted
an outline text. You can just create
another text icon. Another text object here. If you want to
copy the same one, you can just press Alt and
then left-click and drag. That'll create a
duplicate of it. Then for this one, we can just change the title of settings. Maybe we want the top
and the bottom to have a holler text. We could just get rid
of this middle of text here. Like SAR. For these two, we can come
through to you just scroll up. You can see there's a
shading icon, shading tab. You can click on the shading. Instead of it being a
completely filled xt, it can change it to this
appearance here, text outline. What that will do is
basically give it the outline of the text object. Because we have them still
in this bottom layer here. We can just delete the
top and the bottom. So just select them backspace. And now you'll see we have
this sort of hollow text, which is really cool
but nice effect. If you don't think
the thickness of the line is thick enough, just make sure you click on
that secondary texts object. In the shading tab, you can come to thickness. You can just increase
this alike, sir. Awesome. First thing to do is create a compound clip.
Just select them. All right-click and
do new compound clip. We'll just call this text. Now we're just going to
add a very simple effect to the text object here. You can see as it comes through, it basically just pops on the
screen or you up rapidly. But we can actually just
add in a cross dissolve. So it's a lot more of
a smoother transition. With your text object here. Over on the Effects menu. Again, effects library. You can come through to the
video transitions here. We've got a cross
dissolve option. So just click on
this and drag this. I wrote your text
object like this. Now you'll see
when we play this, it's a lot more of
a nicer transition. Awesome. That is
essentially completed. The very last step is basically with these
liquids simulations here. There is some texts that
pops up on the screen and it is essentially the same
as this text object here. What we can do is actually just copy and paste
it. Basically. Click on this objects
and we'll just go Alt, left-click and drag. What we can do is
if we actually edit the timeline because
it's a compound clip. It'll also change
this clip as well. So we actually just
want to decompose it in the timeline and then
edit the text objects. Let's just right-click
this and come up to decompose in place. What that will do
is it'll just put the two text icons
back onto the scene. For the bottom texts icon here, let's just change
this middle section and we'll make it just say. We'll just type
in 100 milligrams vitamin C. Let's just copy that text and we'll
do the same for the top Texas object
here as well. We'll just change these
two to say the same thing. Now all we really
need to do is add another cross dissolve to
the top text object as well. So again, in the
Effects Library, just drag and drop this cross
dissolve onto the top text. And it'll see now we have this very basic texts
animation on screen. The very last thing
that we need to do is add in one more text object. So I'll just grab these
two and shrink it down. Just a touch. Then
I'll copy them. So I'll box select them, alt, left-click and
drag a copy of them. I'll just push it back to
the end of the clip as well. We're gonna make this
one say sugar-free. Just click the top text. Type in sugar free
and we'll just copy that and paste it on the
other lines as well. There we go. You'll see the cross dissolve is basically encompassing the
whole of this clip. So I'll just push this back. It's very abrupt,
just like this. There we go. Awesome. With that. That is essentially the entirety of the compositing completed. Now, the clip, if
you're happy with it, is ready to be exported
and published online. What you can do is come
through to this rocket Icon, the Deliver tab. So just click this
and we'll just quickly run through
naming your file, saving it somewhere,
and then exporting it. To start off with, let's just
call this product advent. Scotia. Will want to
save it somewhere. So just choose a location on
your computer to save this to that we go and then moving on
from here as we only have video in this, generally speaking, the YouTube. If you just click this
YouTube icon here, all of these settings
are absolutely fine. You don't need a tinker
with anything here. So again, if you are on
the custom tab here, just change over to this
YouTube tenant API. You may need to rename your
file. So just to rename it. And once you're ready
to render this, you can click Add to
Render Queue here. Click on that, and it'll be put into the Render Queue here. And then the last step is to click this render old button. Awesome, sorry, it shouldn't
take too long to render. But once it is complete, you'll now have an awesome
product advertisement to add to your
portfolio of works.
12. Outro: Alright guys, so thank you
so much for completing this product animation
masterclass costs. I'm glad you could
join me and follow through all the way
to the very end. Hopefully now you have
a greater understanding of the 30 workflow and more comfortable inside of Blender 3D and Da Vinci Resolve. If you want to, I'd love
to see what you create. So please send me your creations on Instagram
at Smith's sculpts. And please leave a review on this class if you enjoyed it. I'll see you in the next one.
 Smeaf, 3D Generalist and Tutorials