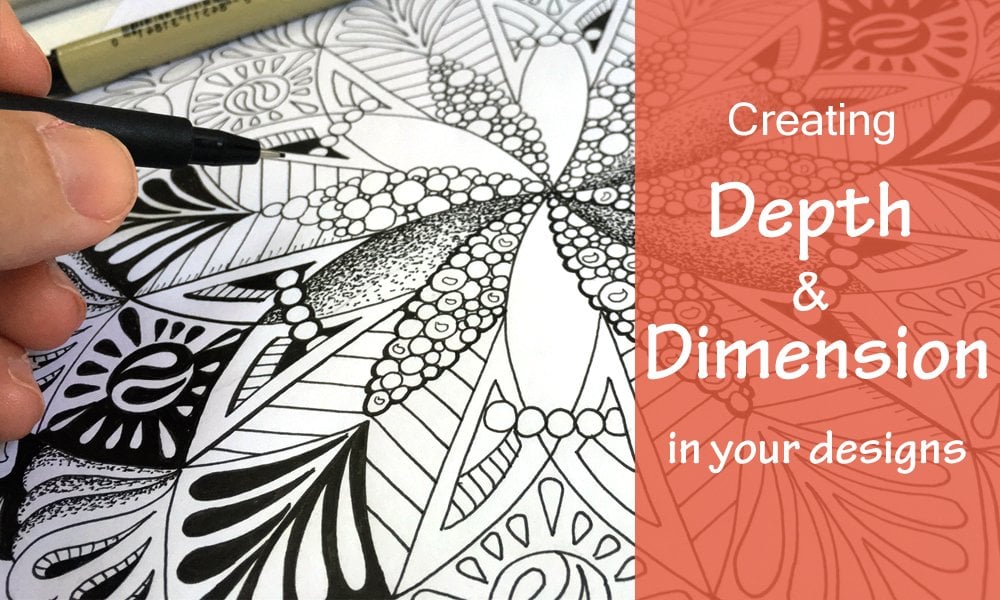
Transcripts
1. Intro: My name is Jane Snedden Peever and I'm an illustrator and designer. The popularity of adult coloring books has really brought back an interest in drawing and doodling. I often get asked how I draw my mandalas. In my new class beginning steps to beautiful hand-drawn mandalas, I will walk you through the steps from beginning to end of my techniques to drawing my detailed mandala drawings. Drawing is such a great way to relax and it's one of the best creative hobbies because you can do it anywhere. You can take it wherever you go. All you really need is a paper and pencil. You don't need any drawing experience to take this class. Just an interest in learning how to do it. You learn things as you do them. I'm really looking forward to you joining me in this course.
2. Project and Materials: The project for this class is going to be an eight inch Mandala. First, I'm going to show you with a pencil and a compass how to create your framework and then I'm going to show you step-by-step how to add the detail in using unique hand-drawn elements and using your own creative style. Then we're going to finish up by inking our design using pen and ink and exploring the different thicknesses of lines. We don't need very much to get started. First thing you're going to need is a piece of paper. I use 8.5 by 11 inch copy paper.It's easy to come by. You can buy it in large quantities and it's inexpensive, and I always have it on a hand with my printer. The next items will need are our pencil eraser, compass and our ruler. I like to use a 12 inch clear ruler. You'll also need a compass which come in a variety of styles. Any compass will do. I use a mechanical pencil because I like the point never needs to be sharpened. You can use a regular pencil. I often have lots of these on hand. You'll also need erasers. A white eraser is really great for erasing hard lines. The putty eraser is really good for getting into small spaces because you can shape it the way you want it. When we get to the inking process, you're going to need a felt tip pen. I always have a wide variety of these on hand because every time I find a new one, I need to pick it up and try it. Any felt-tip pen will work. You have to find your own preference. The sharpies work great. They're easy to find, they're affordable and you can buy them a multi-packs. There's also such a variety of pens out there in different styles. Another great tip to try is a brush pen. They have a nice brush end on them that is really great for filling in large spaces. A popular technical pen is the microns, because they come in such small sizes, you can get right down to 0.2 millimeter tip on that. It's really great for doing detail. Another option is the rapid graphs. I use these when I'm doing drawings for clients. They are in ink filled, so you have to refill them regularly yet, which means you also have to clean them regularly. But they really give beautiful straight technical line if that's what you're looking for. For our purposes here, the sharpies are perfect and that's what I'll be using today. I have them in three different thicknesses and they work great. Join me now as we get started on our framework, see you in the next lesson.
3. Creating The Framework: So to start with, to do our framework, we need a pencil, a ruler, a compass and a sheet of paper. My paper is 8.5 by 11 inches, so I know that I can make my Mandala eight-inches to fit on the paper. So I need my compass to measure the radius of that, which is four inches. So I measure four inches from the center point of the campus to the pencil point. You can measure across, find your center. I often just estimate because I'll know that it fits. As long as my circle fits, I check both sides, she's going to fit good there and we draw our eight-inch circle. Now we're going to start our framework and I'm going to start by drawing some arcs. Put your point of your compass anywhere on the circle and make sure it's right on the line. Then you're going to draw an arc that crosses both edges of the circle, right around, there's your half arc. It's automatically going to go through your center point. Put your compass point on place that you just intersected with the outer circle and create another arc. Move along and create another arc by putting your point on that circle. You're going to go all the way around the circle like this, you're going to start to create these petals. Putting your point, using my finger to guide it right onto that spot, that intersects between the two lines, draw my arc. Again, intersecting, draw another arc and we got one more arc to draw, right at the intersection point and draw your last arc. I'm going to draw some lines and cut my petals in half to add to my frameworks. You're going to take the point that it intersects, you're going to draw it through the center and right to the other side of the circle where it intersects and you're going to draw your line, and your going to do the same on the next petal, line it up where it intersects, right through the center and to the other side where it intersects, draw your line. Your last one, you're going to line them up where they intersect with the circle, go through the center, draw your line. Now your petals are all cut in half, so one of these lines, I'm going to put some measuring points on because I want to draw in some more circles. So on this line, which is a four-inch line to the center, the radius, I'm just going to mark the one inch, the two inch, and the three inch, just little dots and that's going to guide me to where to put my compass. With that one-inch mark, now I'm going to draw my first circle. Then I'm going to line it up with that two-inch mark and I'm going to draw my second circle, and I'm going to line up with that three-inch mark and I'm going to draw my last circle. I'm going to add another circle just above the three-inch. I'm just going to smudge it up just a little, so that it's a little bit bigger than the three-inch and I'm going to draw myself another circle. It creates like a little band, I think I'm going to do the same with my two-inch circle. I'm going to make my compass just slightly bigger than this two-inch you can tell, just slightly bigger and draw another one, and I think that's good. This is the framework that I'm going to start with. Now that we have our framework, we can start adding in some free form hand-drawn details. In the next lesson, I'm going to show you how to get started with adding some simple designs. Grab a coffee and meet me there.
4. Adding Detail Part 1: Now from this framework, we can produce all kinds of designs. It all depends on what you put on it from here and everybody has their own unique style of doodling in the way that they draw shapes. I'm going to start by, picking a shape that I want to draw and I'm going to draw it within one of these frameworks. Each sets of lines borders a section, and it makes it easier to fill it in because now you're not dealing with this whole round mandalas shape. You're actually just dealing with each one of these little sections and the way that I make my mandala's symmetrical imbalanced, even though I'm using free-form drawing, is that what I do in one of these sections, I repeat in each of the sections around. I have to divide it basically in six, because there's six sections and each of these sections is going to be repeated all the way around, but we do it one at a time. I'm going to start with just these rings because they're the easiest ones to fill. The first ring, I'm just going to draw lines in. You're just going to draw straight lines, following around the circle and then I'm going to skip over the petal part because for me I'm going to put that a design in there that's different. For this section, I'm going to repeat it over here. Just drawing in the lines and again here. You can see that I've done three sections that are the same. Now here's the fourth, the fifth, and then the last one, which is the sixth one. Now I have six sections all repeated all the way around, identical. On our artwork on this ring, and pick another shape that I loved to do and of course, I love circles. So we're going to do circles. You're just can fill them in so they touch the top and the bottom of that line and it doesn't matter if they're the same size, it doesn't matter necessarily if they match up. That's the beauty of the free form part of this drawing is you'd actually don't want it to be perfect. It actually is a very pretty, if you just let it be a little messy. I'm going to go around again repeating each of these sections, skipping over the petals. You don't have to, skip over your petals but that's what I want to do. I want to create each of these sections in their own unique pattern. The lines provide a guide for you as you place your shapes in the mandala. They keep you focused on one small section at a time. It can be really daunting to try to tackle a whole mandala when you look at it, so this allows you to break it down into manageable pieces. Make sure you complete one section all the way round before you start another one. Because you may find you forget where you are, and you start putting a different design into a place that you've already chosen what the design will be, and then it throws off your design. I'm going to show something different I'm going to do inside the petals because I want my petals to stand out, so I think in the top section because it's the smallest. We're going to start with just drawing these little free form flower petals, and these just come with practice and literally just putting a petal on top of a petal, on top of a petal. Now I did it in that middle section. Again, I'm going to repeat that all the way around. You can do the same number in each, but it's okay if you can only fit three in one of them,or five in another one, it makes your drawing unique. I like to rotate my paper as I go so that I'm drawing each shape from the same angle, and as you do more of these drawings, you will develop your own unique shapes and the way that you like to work with it. You can fill an entire mandala just with a few shapes, as long as they're all in different locations, it makes it look different. I now have those six spots all the way round filled, and I am going to fill the other section. It feels a little awkward because now you're drawing opposite to the way you were, but you just filled them in, petal on top of petal. You can angle your paper however it's easiest for you to draw the shape. You'll end up with this really cool little unique flower shape, that's at the tip of this little framework shape, and it makes it look symmetrical without anyone knowing that you actually had guidelines to do it. When you draw in the shapes, you don't have to draw them very dark, I'm pressing level harder with my pencil, so that you can see it. But often I do it lighter because some of these lines I may decide I don't want, once we start doing my my pen and ink. When I go to ink this I probably won't ink in this portion here, because then it just looks like I drew this nice little free-form petal without any help, when really I had a guide to do it. It turns out a lot nicer in the end sometimes if you leave some of these guides out. Now I'm going to do some work inside these, so really just to keep it simple, it doesn't have to be complicated. I'm just going to draw some straight lines, inside this one. Then I'm just going to keep going around, filling in these lines in the same spots, and then this section next to it, I'm going to do horizontal lines instead. Don't worry if they're straight, does it really matter, that's part of the design. Now you're starting to understand how we add the detail into the framework that we've created, and in the next lesson we're going to explore some more ideas as we continue to add more detail into our mandala's. I'll see you there.
5. Adding Detail Part 2: Welcome back to part 2, and let's get going on some more detail on your mandala. Let's get started on these sections down here. I'm going to add more pedals that echo what I drew in this above section and I have a larger space to fill this time. This phase, because it's a little larger, will hold a few more petals. You just keep stacking them in there until you filled up that whole little section and you can continue to repeat that all the way around your mandala until you've done all six sections. I've gone ahead on this second section here. Again, I mirrored the pedals and mirror them backwards on each one. So you end up with this beautiful little fern like look so I'll finish this last one. Again, I'm just doing the petals mirrored to the way that I did them on the other side. Again, I did six, squish six one in there and now I have all those done. I have this little band in here I haven't done yet, I'm going to do something all the way across it. So I'm going to do a little wavy pattern. It's just touched to the bottom, touched the top, touches the bottom wave all the way across that little section. Again, all the way around, you're just using the lines that you've drawn with your basic framework to help you just do little sections at a time and you stay within those lines and in the end, it makes it look like you have an amazing freehand. Before I hit these big sections, I'm going to add a little bit more detail around the circles. I like circles. So I added a little circles just around the inner and outer portion of this ring. I'm going to do it at the top and at the bottom and just little ones and if they don't all fit, just do a little half-circle there. You're giving the illusion that everything is overlapping each other. So when you get to an edge and you don't have enough for another full circle is drawn as if it's going behind that and that gives you that illusion of depth. I've gone ahead and I put the small circles all the way around this ring, missing where the pedal is. Again, I've added little circles around each of these edges of the ring as well. Now we have to pick another spot, and I have this little spot in here that I haven't done yet. I think I'm just going to do the reverse of what I've done here. So these lines go across, I'm just going to draw lines down. We'll do that all the way around and I find that you really have to do the one that you're focused on or you'll end up putting the wrong shape in the wrong section. Because I've thinking what I want to do here is do crossways lines. But if I go ahead and put those in as I go, I find that I get mixed up and I put the cross ways in the wrong side. Now I'm going to do some horizontal lines above these vertical lines. So not many will fit in there the small space. We'll just go all the way around I'm going to do this little section next, just this little one here, keeping that line in place, you can add whatever you want here. But I'm going to do a pattern that involves all different shapes of circles and I just put them in wherever they fit and then just fill them with circular type shapes that fit and you end up with a cobblestone look. You put the big ones, little ones, they're going to intersect with this line of circles as well and that gives you a cobblestone walkway. So you put big ones, little ones, and whatever will fit an even if it's not a perfect circle that's okay too. Because there are no perfect rocks in this world. You can just keep adding and you just do this all the way around. As you start to fill them up, the other sections pop because they're empty. But sometimes you can lose track of where you are because there's a lot going on on the paper, it keeps you focused. You can do this all in one sitting or you can just go at it a little each day, fill in another section, it's go on at the pace that you're comfortable with. I'm going to fill in one of these now. So I'm just going to pick a half, I'm going to pick the right half of this petal and I'm going to create a little petal inside of it, it's going to give me the effect of a little flower coming out from the center. Because I have these nice guides that are keeping each of these equal distant apart. Again, even though they're just a free form, we really get in there with the detail. In part 3, we're going to finish off this mandala with a few more ideas of the detail before we go into the inking process. So looking forward to seeing it in the next part.
6. Adding Detail Part 3 : Welcome back to part three of adding detail. Let's get started. We'll start by working in the left side of our petal and just adding some diagonal lines, keeping it simple. It's okay if they're not perfect or straight, but the beauty of this is, is there's so much going on, on this paper that your eye doesn't have a chance to judge whether one individual thing is perfect or not, because it all works together. I'm going to leave these little spaces empty. You don't have to fill every single space. In this section here, we're starting to get into bigger sections. You can divide them up yourself, you can just draw a line down the center, and now you've got two spaces. But I think I'm just going to do a preform flower dropping here. Literally, I'm just going to draw a little flower and maybe draw a stem and a leaf, and then I'm going to draw another flower in here, it's going to be six and a leaf and maybe we'll put leaf over here. Maybe leaf over here and maybe draw just a little flower pick to the side here so that we look like we're lying these petals on top of a background. I'm going to do that all the way round. I'm just going to flop them in and absolutely no rhyme or reason to these, they're not going to look like each other. That's the fun of it, is that everything is going to look different. You can be as creative as you like everyone has their own way of drawing a flower. Each section can have a different number of placement of flowers, just as long as each section has flowers. Consistency is the secret to making it appears symmetrical. We're on the home stretch now with the last section and that's the outer ring. It's looking pretty good, lots of detail in there. Now, on this outer ring, I'm going to mimic this pattern right here, this wavy pattern. Well, I'm going to make it obviously much bigger, so I'm going to touch the top, then down, go to the bottom, and I'm going to do that. You're going to work a little bit with the curve. You're going to be making sure that not too much of an angle there but you're going to touch the top, touch the bottom, and wherever you come back down again. If you have big spaces, you can divide them up or you can put really large elements in them. That fills them up quickly, which is good. It depends on what you're looking to use it for. If you want to use it for coloring and you love coloring small spaces, then put in as much detail as you can. If you like coloring big spaces, you can even leave some of these sections blank and just color them as a block of color. Really the ideas are endless. The more you break down each section, the more you can put even more detail into it. It's really up to you how much detail you want in your mandala. Now we've got all the way around. We've field that last section. I can leave it as is and say I'm done. I always like to add a little bit more. I'm going to create an extra outline, see me doing this here. Another technique is to just outline the work that you've already done takes me a little beyond my eight inch mark, but that's why I have that extra space there. I tend to do that with mine, but your outline, when you've already done and it creates a nice little effect. It gives you another little extra space to color if that's what you want and you literally just eyeball that space between them. Again, it doesn't have to be perfect. You're just outlining what you've already done and you can do that anywhere in the design, and if it takes you outside of framework, that's okay, let it overlap into the next section. You can get more artistic with it if you want. Like each of your petals, you can put a little vein into each one to give you a little more realistic look to your petals. Be consistent with what you've done. Now I've put the veins in there. That's probably what I'll do in every one of them. But I could try a little outline in here and I could do that inside every single one of those little petals, and it would give me that extra little space to color and it would give me a totally different look than this vein gives you. Now, we've added all our detail in pencil and our next step is to ink our design. See you in the next lesson.
7. Inking Your Design: Welcome back. Now that we have added all of our detail in pencil, we're going to use our pens and our fine tip markers to ink our design. Let's get started. I usually have an assortment of markers and pens handy so that I can choose which one I want to use as I ink the design. I'm going to use a median tip to start and I'm going to work in the center of my design with these petals and just trace over my pencil marks. I find it easiest to work from the center out and since I'm right-handed, I also like to move clockwise around the paper. The reason for this is to be careful not to smudge my ink. I don't want to drag my hand across anything I have just inked. Some pens will smudge, some will not, but it's something you always need to be aware of. You'll also going to want to decide which framework lines you're going to want to keep and which will not be part of your final design. You're going to ink in the ones that you still want to remain in the design and leave the ones that you don't because they'll get erased out at the very end. These lines, for example, I'm going to leave out so that my petals have a smooth transition into the cobblestones section that's next to it. When I go to ink my petals, I'll just disregard this line. Your technique will get better with practice and your hand movements will become smoother with time. It's good to try out a variety of pens to find the one that works best for you. It's all about personal preference and the look that you're trying to achieve in your design. Continue working around your design, tracing over the lines you want to keep in your design and disregarding any lines you've chosen to leave out. Now we have all of our pencil inked with our marker. I've been using a fine tip pen. But for this area here with detail, I would find an even finer tip or just use a lighter touch and put in just these little veins that I wanted in my leaves. I don't want them as dark as the rest. I just want them like an accent. Now, then I'm happy with all of my inking and I have everything in there that I want, I'm going to erase out the pencil lines. I have two erasers that I use. A putty eraser, which I find is great for small spaces and I also have a white eraser, which is good for getting rid of the darker marks. Just go at it gently and slowly you want to make sure that you get rid of all the pencil lines that were behind the ink. My lines were a little darker so they show up on camera so I'm definitely going to have to use my white eraser to get those ones out. But you don't want to rip the paper, you don't want to wreck the design. Just take it slow and make sure you get all of the lines. At this point, all of our lines are inked and we could use our design as a coloring page the way that it is. I like to add a little bit more detail in a little bit more black ink in there. I'm going to show you how I do that. What I'd like to add in some black in some of the sections to make my design have a little more depth in a little more interest. We're going to start on this ring and just fill in some of these little spaces all the way around and it'll really make the white circles stand out just on that specific ring. The next section I'm going to put some black into is around the petals and into the cobblestone section. This brings them together even though they're different design elements, it unifies them as one. At this point, I'm going to add some thicker lines into my drawing. This petal, I want to stand out a little bit more from the rest of the drawing. I'm going to use a thicker marker and go over the lines that I've already inked. It's going to make just the outline pop-out. Even though the design has separate elements and you drew them all as separate elements in the end you want to unify them all as one part of the design so if you need to fill in little sections to make one section blend into the next section. But this is when you do it. I'm also going to outline the edge of this petal because I want it to stand out from the rest of the design. This section that's down here that I was going to leave blank, I think I'm going to fill that in with black and continue the cobblestones section right down to the center. This will make the petal also stand out as well the way that I wanted to. I'm liking the way this is looking, I think there's only one more thing I really want to do and that is add some thickness to this outline. I'm going to take one of my thicker markers and I'm just going to trace over the line that I've already drawn so that I get a nice thick edge that goes all the way around the design that I've made. I like to work in layers, so I like to have the whole design inked before I start adding my thick lines and my black background. But you can do it whichever way you prefer. If you see it as you go, then you can do the lines thick and thin as you do them the first time. It's really up to you. There you have it. Our design is complete. Now, you can use these techniques and the possibilities are endless of the designs that you can create.
8. Final Thoughts: So have fun with these techniques and exploring your creative side. The more that you draw these, the more natural the designs will flow and your own style will start to emerge over time. Remember that hand-drawn is not about perfection and in fact, the beauty comes from the imperfect. Be sure to post your progress as you go, it's great to see just how many different designs you can get out of one form of framework and how different everyone's style is. We are here to inspire each other. I'm so glad that you joined me in this class and I'm really looking forward to seeing everyone's hand drawn, beautiful Mandala's.
 Jane Snedden Peever, Living the Creative Life