Transcripts
1. Intro: Thank you so much for checking out this Skillshare course on how to make, espresso and latte art at home. I'm Charlie and I run a YouTube channel called home cafe by Charlie and I'm super into coffee. So in this Skillshare course, I'm going to show you everything that you need to know to make beautiful espresso at home. I don't wanna waste any of your time. So this rundown is going to be as concise as I can possibly be without missing anything important on the way. So let's get straight into it with the equipment that you'll need to do this at home.
2. Equipment: In order to make amazing espresso home, of course, you're going to need an espresso machine. Now I'm not one of the coffee snobs who thinks that an espresso machine isn't real coffee or something. But to get the best possible espresso and especially to do latae out, you're going to need a real espresso machine. That's why I'm going to focus entirely on semi-automatic machines. For example, you might be using a flat or a rock manual express Omega. You might be using an entry level machine like a gotcha classic, eventually your Sylvia or a prevail burst Express. He might even have something more advanced like a linear or a rocket machine. Whichever machine you're using. This course, we'll show you how to get great espresso out of whatever your sets up is. What's much more important than the espresso machine itself is using a really good quality espresso grinder. Now I know what you're thinking. You want to spend more money on the espresso machine because it looks prettier and you think you're getting a lot of extra features. Really, the grinder is the most important part. You can get a really great espresso from a crappy espresso machine if you've got a great grinder, but the other way round, if you've got a bad grind, it doesn't matter how expensive your espresso machine is. You're not going to be able to get great coffee. So don't skimp out on the grinder. Make sure you're spending as much money as you possibly can afford on the grinder. I'm going to be using a WPA am Grindr for this one, which I've got over here. And that's kind of a mid-range grinder, but it's definitely made with Espresso in mind. Other grinders you might use for espresso, it could be something like a wrench, Ilia rocky, a Eureka mean your insulin CEO or a brush, set a 217. There are a ton of great espresso grind us on the market and there are always more being added. So make sure that you spend as much as you can and get a good espresso grind out. You'll also at least need a tampa to tamp down the coffee and compress that box so you can get enough pressure. Now, this has to be the same size as the Porto filter that you're using. So double-check the manufacturer of your machine to make sure that you have a tamper that fits your Porto filter properly. If you wanna do milk based drinks, you'll also need latte art pitch. These can go from very cheap Amazon basics ones to very expensive ones that are especially designed for competition level. Latae out, you can use a 20 ounce jug, which I do for lattes, and a 12 ounce jog for something smaller like a cappuccino. I'll talk more about milk based drinks in a later video. There are also a few optional tools, like a dissertation tool, which helps you to lay out your coffee properly so that it's flat and you get a good extraction and also a knock box to get rid of the puck afterwards. Now onto you and the first project, upload a photo of your espresso setup to the projects page. Don't worry. I'm not going to judge you. You might have a better setup the me or you might have an entry level setup. I started out on a dummy espresso machine that was probably around a 100 pounds. And that I just learned more and more and got more into especially from there. I'm just here to encourage you to get the best espresso you possibly can from the setup that you have.
3. Selecting Coffee Beans: Next I want to talk about the kinds of beans that you can use for espresso. And it's a big warning here. One of the things that a lot of people think is that you need to use an espresso bean to make espresso. Espresso is an extraction method. It's not a type of coffee bean, so you can use any coffee beans you'd like. And I encourage you to try different types of coffee bean so you can see what you prefer. You don't need to use an espresso roast or something dark and oily as well. You can try and lights a ROS. Most people generally prefer medium roasts, but it's really up to you. You can go for light roast if you prefer more acidity in your coffee and darker rose, if you want something that's really rich and full bodied, very important step, ditch, pre ground coffee. You should be grinding fresh for every espresso that you make. The reason for this is that once you grind the coffee, oxygen gets to the coffee and pulls out a lot of the aromas and flavors of the coffee before you get to drink it. If you leave that on a shelf or in a bag somewhere for two months, that's going to be completely terrible. Espresso, espresso beans on best use within five days and about five weeks of the roasting date. So when you're looking for coffee beans, look for a roasted on dates, not a best before date or a sell-by date, you probably won't be able to find coffee like this at a supermarket because they really want something that's going to stay on the shelf for a while. So my recommendation is go to a cafe where you really like their coffee and buy beans directly from them. It might be a little bit more expensive, but you get to support a local cafe by doing so. So go out and try a whole bunch of different coffee beans. You're going to learn so much about how coffee should taste and don't be afraid to spend a little bit more on coffee than you I previously, you'll taste buds will. Thank you.
4. How to Dial in Espresso Shots: So this is the complicated pod dialing in an espresso. I can't promise that just after watching this video, all of your espresso is going to be perfect from now on. It's a constant game of balancing variables so that you can get the best possible extraction from your coffee. You've just got so many variables with Espresso. For example, you have the dose, the grind size, you've got the tamp, you've got the yield, the temperature of the machine, the pressure of the machine. There's just so many things to keep track off. So I'm going to simplify this and tell you about the three most important ones that you can control easily. These are the grind, the dose, and the temple pressure. First is the dose. Now, most Porter filters will be rated by the manufacturer for a certain amount of coffee. So standard commercial sites one is 18 grams. So check on your machines manufacturer page what the standard dose is. If you can't find this information upfront, try dosing up to the top of your Porto filter so that it's flat like you can level off with your finger and just push off all of the coffee and then tap it down. If when you pull your shot, you see an imprint of the shower screen on the top of the pack. When you're done, then you may have dose a little bit too much pulley down until you don't really see much of an imprint of the Shah screen. Next is the tamping pressure. This is just really important to keep consistent. A lot of people think that you need to do a certain amount of pressure. There are some places that people, I see baristas putting their elbow way into it, putting their whole body weight into it, which I think is a little bit too much. But there are also calibrated tampers that you can use that give 30 pounds of pressure. And then there's a little click at the bottom so that you can tamp the same way each time. I've gotten used to the way the item, but you just need to make sure that it's consistent. Now, the main thing that you're going to be adjusting frequently in order to get the best possible espresso is the grind size. This is where the grinder comes in and why it's so important to have a very good grinder. Now the super basic way of looking at it is that you are looking for a one to two ratio of ground coffee and the Porto filter to yield of espresso in the end. So if you're putting 18 grams in your board development, you want 36 grams coming out when you have your espresso. That's why you're going to need to have a scale, because you can't really figure out whether you're getting a good extraction yield if you don't have a scale. I mean, without a scale, I have very little idea of what 18 grams of powdered espresso looks like at all. Now, I use a Harrier scale that can measure 0.1 of a gram. And I use this to both way my coffee going in and why the espresso coming out. So here's where the adjustment comes. Once you've ground out your espresso and you've put your auto filter and see how long it takes for your coffee to come out. Now, you should be looking for that one to two ratio, 18 grams into 36 grams out in around 25 seconds plus or minus five seconds. If the coffee is coming out a little bit too fast and you're getting to that 36 grams a lot quicker than 25 seconds, then you may need to grind a little bit finer so that there's a little bit more pressure and it's harder for the liquid to get through the coffee puck. If the liquid is coming out to slowly, you might need to grind a little bit coarser so there's less resistance and the water can get through the coffee in a quick way and it doesn't become over extracted and really bitter. As a general rule, the more time the water spends with the coffee, the more it's going to extract. If your coffee is coming out really slowly, it's gonna extract too much and you'll get a lot of bitter flavors. If the coffee is coming out too quickly, it hasn't extracted enough and you'll get a lot of sour flavors. So this is how you tell you really just have to taste the espresso and go, hmm, is this acidic and sour, or is this bitter an unpalatable? One caveat on this is channeling. This can really throw off a lot of people, especially if you don't have a bottomless Porto filter. So channeling is where the water finds a low resistance area to push through. And then all of the water is going to go through that part of the coffee. So you might reach your desired weight in the right amount of time. You might get that 36 grams in 25 seconds, but it tastes really sour. And acidic might be because there's some channeling. The way to deal with this is to have really good distribution of the coffee and to make sure that the pressure is going at an even rate, you can do this in a bunch of ways. I used to use my finger and just level off the coffee a little bit inside the pocket before I timed down to make sure that it's evenly spaced out. I also have a distribution tool, which I talked about in the equipment lesson, which is a tool that you put on top of the pole filter. You twist it and it layers the coffee in a sort of circular way, which makes it a lot more even. And I found that that really helps me with better extractions. So practice law and teach your tongue how to taste the different flavors that are coming out of the coffee. If it's overly sour or overly bits, you need to teach yourself and your palette how to figure that out. Bear in mind that you'll also have to readjust your grinder for every new coffee that you get, even if it's the same brand by the same company, every coffee is going to have a slightly different density. They might been roasted on a different dates. And so even as one coffee ages, you might need to adjust a little bit finer overtime because the coffee is still aging. So basically every time you have a new coffee, you're going to need to adjust. And that's what we call dialing in. Hope is less than helped you and don't worry about the other variables. Those are things you can get into more and more later. But for now, just focus on getting the grind, the dose and the temp, right.
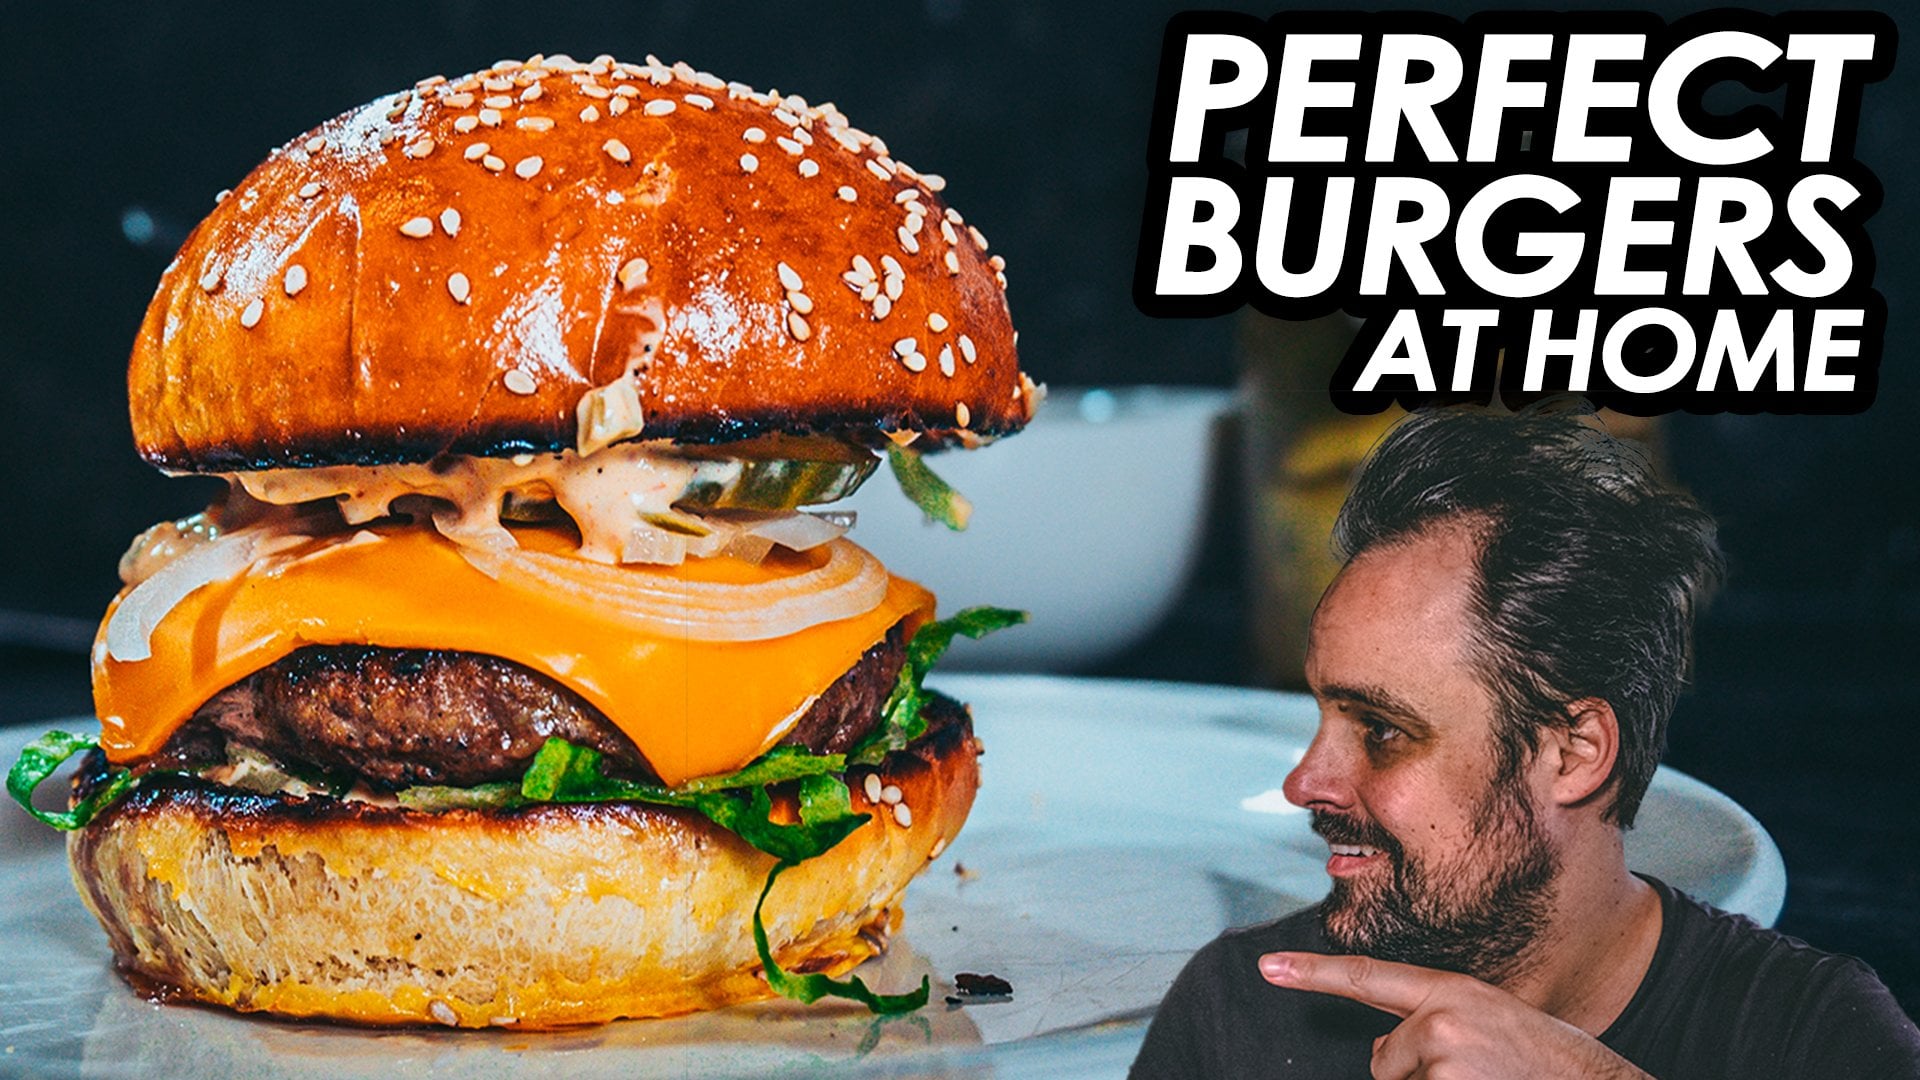
5. Espresso Drinks (Latte, Cappuccino, Fat White, Cortado, Macchiato, Mocha): So here's some definitions of espresso based drinks. First, you have a espresso, which is a one-to-two ratio of coffee in two espresso out, like in the previous lesson, this is around 36 grams of espresso. Next we have a cappuccino, which is a 25 milliliter single espresso shot with a 125 million just affirmed milk mix. We have a cafe latte, which doesn't really have a strong definition. But usually my recipe is an eight ounce or 300 milliliter cup with a double espresso and milk all the way up to the top of the cup. Next we have a flat white, which is a favour off my Australian friends and they haven't in the same cup as a cappuccinos. It's a 150 milliliters a cup, but you do a double shot of espresso and the milk is a lot less than you would for a cappuccino. Next we have a CTO, which is a one-to-one ratio of Espresso to lightly steamed milk, then that's a macchiato, which is an espresso with a little bit of foam milk drizzled on top. Usually I use a spoon and take some of the milk foam off some steamed milk and I might be doing for another drink. Then that's Amaka, which is an espresso with some chocolate sauce or maybe chocolate itself with a little bit of steamed milk on top. This recipe can be basically anything you want it to be depending on how strong you want the chocolate flavor to be. There are a whole bunch of other espresso based drinks. But for this one, I'm just gonna do the basic ones. There are tons more being invented all the time. So try and find your favorite drink and see if he can replicate at home.
6. Milk Steaming: I know this is where a lot of you have been waiting for. And if you can do lots of our home, your friends and family will be mightily impressed. First step is to get your milk ready. You can use a 20 ounce or 600 millimeter pitcher and POJO milk up to just below the spout on most pitchers. Now, I know it sucks, but you will have to put a little bit more Milken than you'll use. Because if you use every single drop of the milk, you'll end up with a little bit of extra thick foam at the bottom and that's going to ruin whatever design you're doing. So I know it's socks, You have to waste a little bit of milk every time, but do overfill your pitch of i just a tiny little bit so that you can get a good pull through and a nice design. I mean, don't have to throw it out. You can just drink it all like make a baby geno. Make sure that your machine is fully heated up to steam temperature before you start and purge the ones. That means putting the steam wand either into the drip tray or into a jaw to get rid of some of that water before you start steaming. So the best advice I can give you on where to put the steam wand in the jug is to put it directly into the middle so that the one itself is nestled in the spouts of the picture. Then tilt your jug a little bit to the left or the right so that the one is pointing directly between the middle and the side. This is the perfect position to get a good role going so that the milk is being incorporated together. So you don't end up with a heavy layer of milk and a light layer of milk that don't mix together properly when you're ready, open the steam valve. So I've seen some people open it just a little bit because it can be a little bit powerful and it can be hard to control. But this is going to make inconsistent milks extra. So make sure that you always open the steam valve to fold. You want to start with a 1D in the milk and then you want to lower your jug just a little bit until you stop it here. I guess this should be a light HIS only if you hear a kind of gurgling sound. You've lowered your picture too much and you're gonna end up with big bubbles, which is not very pretty for Lottie up. Hold it there for a second or two to get enough air in. Usually for a latte, this is around ten to 20 percent volume, but it's very hard to tell while you're steaming if you've gotten 10% volume increase. So this is something that you're going to have to practice over and over until you see exactly how much it is. And then you'll get used to how much air you need to introduce. You should try to introduce the start of your steaming because that gives you more time to incorporate the milk together when you're ready to do this and just raise your picture a little bit until you stop hearing a hiss and then wait in that position. Don't move it and don't jiggle it around. Wait until the milk is fully incorporated. At this time, you are looking for the temperature. So you can use a temperature thermometer, which is another optional extra. Or you can put your hand on the bottom of the junk and when it's a little bit too hot to touch for more than about 2.5th or so. That's the temperature that is, That's it stopped. This temperature is around 65 degrees centigrade. Now, if you go a little bit above this temperature, the milk is going to lose a lot of its flavor because it's too hot and you'll have scolded for lactose, which is milk sugar. And that's going to make it a little bit less flavorful. And you'll probably be harder to do Latino as well because the proteins in the milk was thought to become denatured and its temperature. So try and keep it under 65 degrees C. You've reached the right temperature and you incorporated your milk properly. You want to take your jug out, but don't do it until you've turned off the steam. You don't want to have big bubbles flying everywhere. Make sure after you've done this that you purge the one again and clean it off with a cloth quickly, milk dry ice to the CMB one pretty quickly and that's pretty hard to get off and it's kinda gross. Make sure you also get because the milk can get pulled back up into the steam boiler if you leave it for too long and it cools down. So please don't do that. Make sure that you push the one to every time. So now you milks ready and you've got your suppressor to pour it into. If you pulled in any big bubbles, you can see some big bubbles on the surface. You can swell and tap your pitcher on the side and that will break up some of those big bubbles. I usually do this before pouring my latte. So that's it for milk steaming. I don't wanna go into too much more. There is a lot more to learn about this, but I'd only give you too much to think about because it can't just be overwhelming. So focus on those few things that fast. And now I'm going to talk about how to do some basic pouring techniques for Latino.
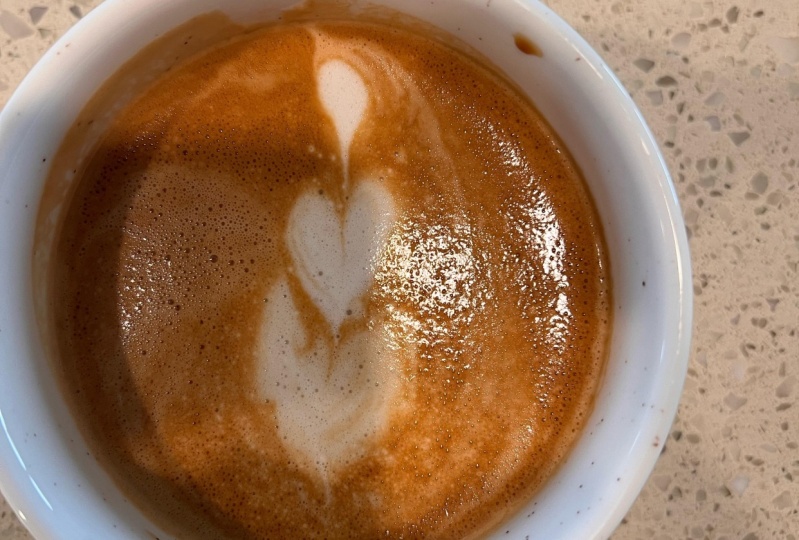
7. Latte Art Basics: Paul, great latte art. You need a handle on a few basics. The two most important of these are speed and height. The fonts that you pour, the more than milk will spread in the cup, and the wider designs you'll get, this is also affected by height. So if you Paul very close to the surface of the espresso, you'll see the white designs coming out. But if you pour from a higher height, you'll see the milk go under the surface of the espresso and you won't get very much of a design, if any at all. You've gotta use the right speeds and heights to get a beautiful Lothian design. A great way to practice getting the right speeds and heights without having to use milk is to get water and a tiny drop of dish soap. You can steam this as you would normally with milk, but you don't have to use milk. It's a lot cheaper and you can just practice, practice pouring from different heights and maintaining the same speed as your junk empties, you're going to need to tilt it a little bit more to get the same consistent rate. So practice that control is everything in latte art and a lot of it just comes down to muscle memory. So you need to practice these movements. So you're not overthinking things when you're actually pouring latte up. Now let's go on to some basic designs and how to support them.
8. Latte Art: Monk's Head: Amongst head is this shape. Learning how to pour amongst head is super important even for the most basic of Latte, I'll pause like a hot or a tissue that simply put your well seemed milk into the center of your espresso. And when the cop is around half-full, you're going to lower the spout of the pitcher until it's almost touching the espresso right in the middle. When you start to see the white of the design come out, push your junk forward just a little bit and pull up. That's the first step. That's your monks had. An important part of doing this is that you need to tilt your cup as you're pouring. It's really hard to get your pitcher close to the center of the espresso when the cup is level. So you want to stop at around 45 degrees. And as you're pouring, you're going to tilt your cup back to level. This is important for two reasons, because first you're going to pull from a higher height and you need to have something underneath for the milk to go under the espresso. If it's really level, then it's not going to have very much to do. And you'll end up with this marbling look, whether milk has kind of come up to the surface, but not really, that doesn't look all that great in a final Latino design. So practices design a lot because we're gonna be using it next lesson for hots and tulips.
9. Latte Art: Heart and Tulip: So let's start with a hot take your car and you're lightly steamed milk and start pouring, Pour from a higher height like three inches or more above the surface of the espresso so that it goes underneath. When the cup is around 50 percent full, stop pouring your monk's head. That means pulling your pitch or very close to the surface of the espresso and pushing out your monk's head with speed. So when you've poured your monk's head and your copies around 90 percent full, you're going to lift up your pitcher little bit around three inches or so. And you're going to quickly pull through the hot design. Don't worry If a little bit of milk spills over the edge. Because what you want to do is you want to pinch together those parts so that they come through into a little point at the end. During this can be pretty tough. So don't be disheartened. If you can't do this on the first, oh God, I can't even do doing this design can be pretty tough, so don't be disheartened if you can't do this on the first try, just keep trying, practicing and getting that muscle memory go up with your picture down, poem monks head, and then up and pull through again. Once you have the hot right, you can try a chew it. This is a very similar design to the heart, but you're just pouring multiple monks heads and then pulling through the whole lot of them. So the same as you would do for a hot, you start by pouring from a high point. The Milken go under the surface of the espresso. Then when the cup is around 50 percent full polio first monks had into the center of your cup, then pull up and then push another monks head into the first one. As with any latte are the earlier you pour when the milk meats the Espresso, the earlier you pour, the more dramatic the design is going to be. So if you pull when the copies around 50 percent full, it will be a little bit smaller than if you poured when the cup is 30 percent full. You should do at least three hots in your chocolate, but you can do as many as you'd like, as many as you can fit into the cup. I think the record that I have is around seven or eight. So see if you can be my record. Next, we'll talk about rippled designs like the Rosetta and the swan.
10. Latte Art: Rosetta and Swan: To start learning how to do a ripple, you're going to need to learn how to move the jug back and forth properly. I've seen people moving that thing around like they're at a rave. But I found that there are two really good methods that work properly. So the first technique is to use the weight of the drug and swing it back and forth like a pendulum. For this one, you're going to use your wrist and just allow it to kind of wiggle like this. The other method is using your whole arm. I've seen a lot of people do this with a grip, the handle a lot more strongly, and they do this kind of motion. Try both movements and see which one you're more comfortable with. So now let's try pouring a Rosetta with milk. So the same as you would do for amongst head, you pour until the cop is around 50 percent full from a higher heights of the Milken go under the surface. Then as you go to the center of the cup with your steamed milk touching the surface, you start your wiggle. You can do this slowly if you want to get big thick lines or you can do it very, very quickly. If you want to get smaller, fine lines. When your cup is around three courses full, you can push forward a little bit and then quickly move towards the back of your cup, continuing the wiggle the hallway. Once you get to the back of the cup, you can pull your picture up and do the pull through. This one takes a lot of practice. So you're not gonna get it right the first time unless you're an absolute genius. But once you've got a good Rosetta, then you can try a swan. It's not that much more difficult. So this one, you're basically doing a Rosetta, but when you get to about three-quarters of a cup full, you're going to start the wiggle began to move back slightly to one side. Then once you've gotten to the back of the cup, you're going to pull up and you're going to use the milk to kind of pull and pinch together to one side of the Rosetta, not a pull through the center, but to one side. Once you've pulled through on one side of the ripples that kinda make the bone of the wing. You're going to leave a little bit down near the surface of the milk to get a bit of a body there and then pull it up and round to create the neck. Then you're going to kind of let a monk's head form at the end of the neck and pull through off to one side. Again, like I said previously, don't worry if you don't get it perfect the first time. It will take a lot of practice. And I recommend that you follow a lot of people on Instagram and YouTube and see how other people are pouring latte art designs.
11. Final Thoughts: Thank you so much for going through my espresso and Latina out costs. I really hope that this helps you to make better espresso and Lafayette. Now, for the projects, please post your espresso or Latino pictures. Often you've done the course and compare them to the ones that you posted when you started the course. I really want to see how much you've improved. So please post those pictures in the project page. I do have a whole bunch of other videos about different techniques, about recipes and other things you can do for home espresso lavas on my YouTube channel, home cafe by Charlie. If you have any questions, please feel free to ask them and I'll do my best to answer them. If there's anything really important that I missed, I will come back and make extra lessons if necessary. That's it. Thank you so much for watching. Bye.
 Charlie Moritz, Content Creator