Transcripts
1. Introduction: Hi, I am Simran and I run a brand called the
Calligraphy Raven. I teach calligraphy and paint wall murals
for a side hustle. Also, I like to write calligraphy blogs and
make YouTube videos. Today, I'm going
to share with you the first step towards
starting to learn calligraphy, and that is faux calligraphy or calligraphy with a
normal pen or pencil. I'll tell you a secret, a pencil is a
calligrapher's best friend. Yes, that's true. It's the best tool
for calligraphy and hand lettering. Trust me. You don't need expensive
supplies to get started with
calligraphy, rather, start with a normal
pen or pencil, and this is what I suggest
to all my students. Now, you must think, why should you start with
learning faux calligraphy? That's because it
helps you develop a deep understanding of
the structure of letters. This comes in handy
when you decide to pick up an actual
calligraphy pen. Also, it takes off
that pressure of buying expensive
calligraphy supplies. Guess what? This is
how I accidentally got started in calligraphy
when I was 15 years old. I saw this book which had a
lot of gothic script on it, and I started copying them
with my pen and pencil. I had no idea that I needed special calligraphy
tools to write those. With regular practice,
I got good at it, and today I've made
a career out of it, which also helped me quit my full-time job and
pursue my passion. So yes, this method works
and is tried and tested. For this class, you only need some basic supplies
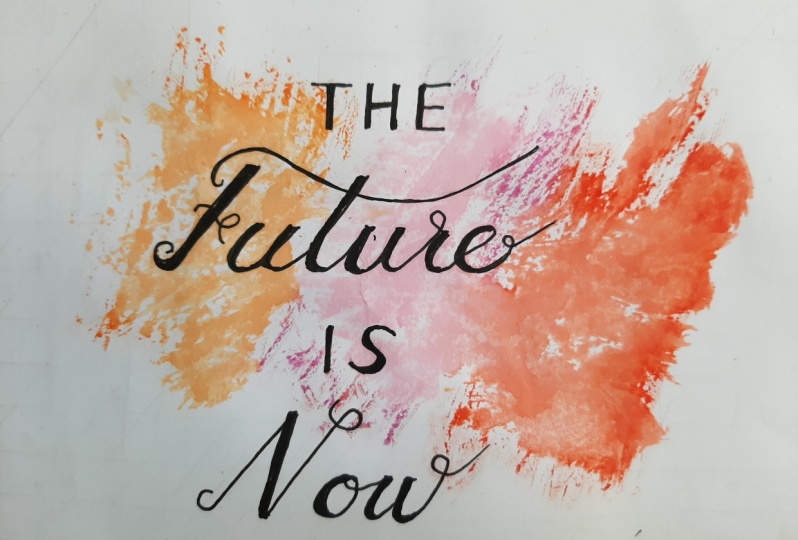
like a pencil and pen. Yes, any regular pen. With these simple tools, we learn to create beautiful
quotes in faux calligraphy. In this class, I'll
walk you through my entire process from the rough sketch to
the finished piece, which I have broken down
into four simple steps. You can use this
framework to create any calligraphy or hand
lettering piece of your choice. I'll also share a list of all the materials that
I use and recommend. We'll also learn
about the basics of calligraphy and the best
practices to follow. If you take good of
these simple practices, your calligraphy will
get better in no time. Moreover, you'll learn
about these techniques via carefully structured
practice sheets at each step of your journey. Once, we have an
understanding of the basics, I'll also share some cool techniques through which you can enhance the visual appeal of
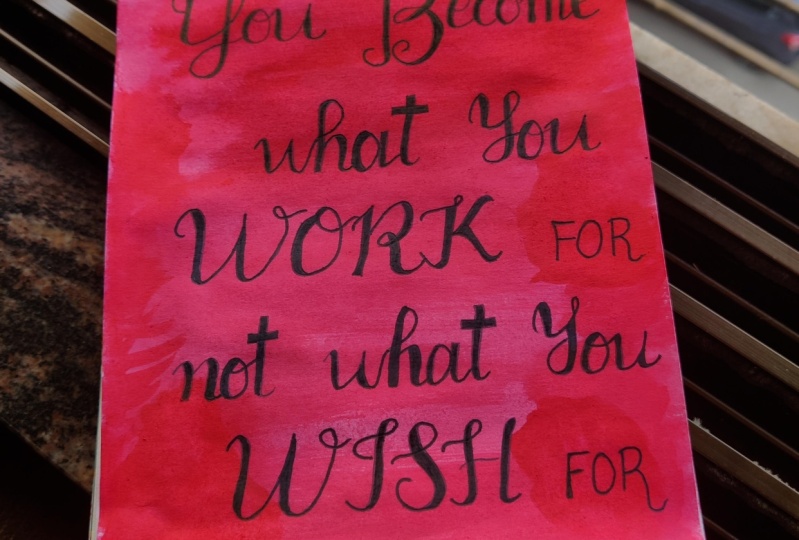
your calligraphy art piece. In the end, we will
put together all of our learning to create beautiful
quotes in calligraphy. You can use these to
decorate your house, office space, gift
it to friends, or even sell online. This class is the best fit for people who wanted to start
learning calligraphy. If you are a beginner with
zero experience in this art, you've come to the right place. Also, don't hold back if your
handwriting is not good. Calligraphy and handwriting
are not related and it will have no bearing on how your
calligraphy will come out. [NOISE] Shut that inner critic down and get your pens
and pencils in order, I really hope to see
you in the next class. If you have any questions, feel free to ask it to the discussion
section of the class. Do connect with me on Instagram
and YouTube and tag me in your stories as you learn
from this class so that I can see your progress
and connect with you. Let's do this. [MUSIC]
2. Project: For this class, we learn how to draw a quote for calligraphy
using a regular pen. Then we learn how to add these extra elements to
enhance your overall project. Like adding patterns
or florals and even these beautiful
colors flashes. By the end, you'll
be surprised to see how easy it is to do
full calligraphy. I'll be drawing the
quote, trust the process. You can pick any other
quote that you like. I recommend you pick something that you really vibe
with as it is going to give you that
added motivation to push your project
the extra mile. In case you are
looking for ideas, I've added some of
my favorite quotes in the resources below. Please feel free to use them. Also, no matter which
quote you pick, you'll be able to follow
along very easily trust me. That's because I've broken down the entire process of drawing a quote into four
super simple steps. If you follow the process or should I say trust the process, you will be able to draw any code that you
like in calligraphy. Don't worry about picking
the same one as mine. Just follow your heart. Moreover, I've added
practice sheets in the resources section that will help you draw all the letters. I would recommend
that you download these to quickly get started. Also, to get the most
out of this class, I'd really encourage
you to draw along with me and keep sharing
your progress in the project gallery
so that all of us can see your calligraphy
quote come to life. I've divided the final project
into three broad sections. The first is understanding
for calligraphy, where we learn about its
basics and how it is used. The second is an introduction to the four-step
process where we'll see how a pencil drawing transforms into a beautiful
calligraphy quote. The third is enhancing your full calligraphy
where we'll learn multiple techniques that'll take your calligraphy a notch up. Gear up to get started
and once you are done, don't forget to post it
in the project gallery. I'd love to see
your final projects and share my feedback. I recommend that you keep an open mind and go
along with the flow. In the end, you'll have a beautiful calligraphy quote that you can hang
up on the wall, gift it to your friends,
or sell online. Isn't that great? See you in class.
3. Introduction to Faux Calligraphy: You might wonder, is it possible to do
calligraphy with a regular pen? Yes, it absolutely is. You can learn calligraphy
with a normal pen. This technique is called
faux calligraphy. In this lesson, we'll
understand more about it. First of all, faux means made to look like
something else. Therefore, faux calligraphy is a technique to imitate
the strokes of a calligraphy style with simple tools like
a pen or pencil. It is a fun and simple way
to practice calligraphy. Once you have
finished the artwork, it looks like it
has been created using specialized
calligraphy tools. But in fact, it has been
created with a normal pen. Let me give you a bit
of context so that you have a better
understanding of the topic. Calligraphy is the art
of beautiful writing. Depending on the
scripter's style, it requires specific tools. Faux calligraphy is
simply a fun and easy way of imitating the
look of these specific tools. For example, if you decide to imitate a brush
calligraphy script, your downstrokes will be heavier or thicker than your upstrokes. The best part is that you can use any writing
tool that you have, whether it's a pencil,
marker, fine liner, pen, chalk, you can use it
to create faux calligraphy. Not only is faux calligraphy a great technique for beginners
to learn calligraphy, but it's also a widely
popular technique to write on large-sized canvases
like walls for murals, and write on surfaces where you can't use regular
calligraphy tools. As a matter of fact, you can use faux calligraphy
on surfaces such as glass, acrylic sheets, chalk boards, ceramics, wood, and many more. In fact, I strongly
recommend learning faux calligraphy
as the first step on the roadmap to
learning calligraphy. That's because it
helps you develop a deep understanding of
the structure of letters. This comes in handy
when you decide to pick up an actual
calligraphy pen. That's how I got
started in calligraphy, and I've been doing it
since I was 15 years old. Later when I picked
up calligraphy tools, it was easy for me to
understand the scripts. Faux calligraphy
quickly gets you started on the path to
learning calligraphy. Now, get your pens
and pencils in place. In the next lesson, we'll see
what are the supplies you can use to create beautiful
calligraphy art pieces. See you in the next lesson.
4. Tools Needed: [MUSIC] For this class, we'll be doing full
calligraphy on paper. You'll need some regular
pens, any paper, some basic stationery
like a pencil, ruler, and eraser. Yes, literally any
paper and pen. For pens, you can use a
regular gel pen, a sketch pen. Here's a Sharpie, basically anything that's
just lying around. When I started, I used to use these 5-10 rupee gel pens and they work really well for
full calligraphy. Trust me. Same for paper, you can use regular copy paper or printer paper for practicing. These are economical and
very easily available. As far as this class goes, you don't need
expensive supplies. But in case you're looking for some professional supplies, you can use fine liners. I'd recommend the
Sakura micron pens. These are my favorite
fine liner pens and I'll be using
these for this class. First of all, they come in
a variety of nib sizes so you can get really fine lines and thick lines with these pens. Apart from that,
they're waterproof. This means that you can play
around with these pens. For example, you can lay over
a watercolor splash effect. Once you are done with
your full calligraphy with these pens and the
ink will not bleed. But don't worry, by
the end of this class, I'll teach you a way to get this effect with
regular pens too. For good quality paper, you can use any paper
that is above 200 GSM. For example, you can use watercolor paper
or bristol paper. Watercolor paper
is a bit textured, whereas bristol paper
is extremely smooth. Anyways, for this class, when it comes to supplies, you can use just a regular
gel pen or any pen that's lying around on your
desk and you're good to go. Same for paper. Use whatever paper you
already have on your hands. I'm sure you must have some empty notebooks that
you haven't used in a while. That's because this
class does not require any expensive tools, like I said, any paper and pen that you have is good enough
for full calligraphy. Now you must be wondering
why I've included the pencil and
ruler on the list. That's because we
are going to use these for two very
important tasks, drawing guidelines
and sketching. I will discuss these in
detail as we move along, but for now, add
them to your kit. By the way, this is
a rolling ruler. It has a roller attached to move the scale
easily on paper. However, you can use
your regular scale too. Also, I prefer using a black eraser over
the regular white one. That's because it
doesn't eat away the paper when you erase lines. Now that you have your
basic supplies in place, we'll move to the next part. In the next lesson, we learned about how
to draw guidelines. These will form the
building blocks of our full calligraphy. See you in the next lesson.
5. Guidelines: [MUSIC] In this lesson, we are going to learn about guidelines and how to draw them. These are the pencil
lines that you make underneath to draw your
final calligraphy. But first of all, let me explain why do you
need these guidelines? Guidelines as the name suggests, guide you when you
do calligraphy. They help you form
consistent letters. Wait, let me elaborate. As I said earlier, calligraphy and
cursive are different. In cursive, you write freehand, but calligraphy is the
art of drawing letters. Because we are
drawing letters here, we need guides that will help us draw our letters beautifully. For example, let's say
you're about to construct a building and lay bricks
on top of each other. To make sure that the building is straight and well-supported, you will put
scaffolding around it. Once the construction is over, you'll remove the scaffolding
and reveal the building. Similarly, your bricks here are the basic strokes
of calligraphy, which we learn in
the next lesson. To put them together
to form letters, we'll put scaffolding
or guidelines around. This will make sure
that our letters look consistent in terms of height, spacing, and overall
visual appeal. That's why these guidelines
are very important. Just imagine if you
were to construct a building without any
blueprint or scaffolding, you'd have no idea of what your building is going
to look like in the end. Not only that, it will be impossible to construct
it the right way. Similarly, if you draw four calligraphy freehand
without any guidelines, your letters will be
all over the place. In the end, you will
feel frustrated because you'd have no idea
about what's going wrong. But if your draw guidelines, you'll be able to construct beautiful letters very easily. Trust me. Let me show you
this with an example. If as a beginner,
you write freehand, your letters might
look like this. [MUSIC] The height of the letters is inconsistent, the spacing is odd, and all the letters are
inclining at different angles. But as soon as you
draw guidelines, you know how high your
letters should be, how much spacing you
should keep in-between, and what slant to follow. Even though I've been
practicing calligraphy professionally for
over four years now, I still make sure
to draw guidelines. Instantly they uplift the
look of the entire artwork. Of course, you can
erase them later on, I use a black eraser to
erase the guidelines. This is a better choice than a white eraser as it doesn't
eat away your paper. Now, let's learn how to
draw these guidelines. First of all, you start
by drawing a baseline. It means that the base of your letters will
lie on this line. For example, here the base of the letter a lies on this line. Now, each letter has
a certain height. Like this a is extending
up to this height. This height is
called the x-height, and this line that
is extending up to is called the waist. You don't need to
remember these terms. What's more important here is to understand the meaning
of these lines. Now, there are certain
letters that extend beyond the waistline and
certain letters that extend beyond baseline. For example, letters like b. The base of b lies
on the baseline, same as that of letter a and
it has the same x-height. However, it has this extra
height and goes up till here. This line is called
the ascender line, and this height is called
the ascender height. Similarly, let us
write g. The baseline is the same and the
x-height is also the same. This extra height
that it extends below is called the
descender height, and this line is called
the descender line. Now, one interesting thing
to note here is that you can change the ratio of
these guidelines and in turn, it'll give you
different results. Let me show you how. This one guideline that we've
created has a 1:1:1 ratio. It means that the x-height, ascender height, and descender
height are the same. Now, you can change this
ratio, for example, you can keep it as 1:2:1. This means that the
x-height is now double the height of the
ascender and descender. Now when you write your letters, they look like this. Further, you can change
the ratio to 2:1:2. Now the x-height is half of the ascender and
descender height. This is what your
letters will look like. Did you notice one thing? Just by changing the guidelines, you can create multiple
styles of calligraphy. Similarly, you can keep
coming up with new ratios to experiment with the look
and feel of your letters. Also, you might be wondering how much distance you should
keep in-between these lines. Well, you decide. It's completely up
to you how big or small you want to
draw your letters. Say if you are
writing an envelope, you'd want to write
small letters. Similarly, if you're writing
on a big canvas or a wall, you'd want to keep the height of your letters accordingly. For our project, I'll be sharing the dimensions
of the guidelines in the upcoming lessons
so that it will be easy for you to
draw along with me. Now, apart from these
horizontal lines, I also like to draw
vertical guides. These help in guiding the space and the
angle four letters. Say if I want to write
straight letters, I draw vertical
guides at 90 degrees. This makes sure that all my letters follow the
angle and look consistent. When I want to write in italics, I draw guides at an angle. Now again, you can
pick the angle depending on the way you
want to write your letters. In general, I pick an angle
between 60 to 75 degrees. Here, I'm taking the
angle to be 75 degrees. I hope with this lesson, you've understood the
importance of guidelines. Basically, if you use these
guides to draw your letters, your calligraphy will
come out absolutely beautiful and that too,
without any frustration. Now, it's time to move
on to the next lesson. There we learn about the basic strokes of
brush calligraphy. These will help us draw all
the letters and calligraphy. Se you in the next class. [MUSIC]
6. Basic Strokes of Brush Calligraphy: [MUSIC] For this class, we've picked up the
brush calligraphy style to create faux calligraphy. In this lesson,
we'll have a look at the basic strokes in
brush calligraphy. This in turn will help us create consistent and beautiful
letters in faux calligraphy. Now, you might wonder, what are these basic
strokes? Let me explain. Each calligraphy script from A-Z is made up of some
common basic shapes. It means that if you combine
these few basic shapes, you'll be able to draw all
the letters in that script. Likewise, brush calligraphy
has eight basic strokes. If you just master these eight basic brush
calligraphy strokes, which are a combination of
simple lines and curves, you will be able to draw any
letter in brush calligraphy. For example, the letter A can be written as a
combination of an oval, a downstroke, and an upstroke. Moreover, these shapes
make your letters look consistent and as if they
belong to the same family. Now that you know why you
should learn basic strokes, let's see how to draw them. I've also added the
practice sheets for basic strokes in the
resources section. Writing faux calligraphy, at
least this particular style is a combination of upstrokes
and downstrokes motions. Basically, when your hand
movement is from bottom to top, it's called an upstroke. Likewise, when you move the
pen from top to bottom, it results in a downstroke. In other words, upstroke is
thin and downstroke is thick. If you were drawing
these with a brush pen, you would've used the tip of the pen to create an upstroke and applied pressure to the flexible tip to create
a thick downstroke. But here, as we are
using a regular pen, will create an extra thick line with our pen and fill it in. Now, it looks like it has
been made with a brush pen, but in fact, we've made this downstroke
with a regular pen. Similarly, we'll draw
all the other strokes of brush calligraphy
with a regular pen. Simply by filling in
the thick downstroke, you'll be able to create beautiful calligraphy without
having to buy a brush pen. Now, the third basic stroke
is called an overturn. It starts with a thin upstroke, which gradually transforms
into a thick downstroke. Also, you'll see this basic brush
calligraphy stroke often used in letters like m and n. To check if you've made
the basic stroke right, see if both the strokes are
parallel to each other. If they're crossing
over each other, it means that the basic
shape is not right. One particular thing I
see beginners struggling with faux calligraphy is
adding the downstrokes. You have to be mindful about which side you add
your downstrokes, otherwise, you will end up with inconsistent spacing when
you start writing letters. Don't worry, it's not that
difficult to figure it out. What I do and
recommend is always add the thickness to the
inside part of your strokes. For example, here
in the overturn, I have added the downstroke to the inside part of the curve. Similarly, you can follow this for other strokes
and letters too. However, if you wish to
add them on the outside, that's totally fine as well. The important thing
here is that you, then add all the
downstrokes on the outside. This in turn will keep
the spacing consistent. The fourth basic stroke
is, the underturn. It's the exact opposite
of an overturn. You will see this basic brush calligraphy stroke often used in letters like u and w. [MUSIC] Again, make sure that both the strokes are
parallel to each other. The next basic stroke
is the compound curve. It is the combination of an
underturn and then overturn. [MUSIC] It's important to remember that all three strokes should
be parallel to each other. [MUSIC] Also, make sure the hollow
space between the underturn and
overturn is equal. If the spaces are not equal, your letters will not
look as beautiful. For example, this basic
stroke is used in the letter h. If the spacing in the compound curve is not equal your letter
h will look like this but as soon as you
adjust the spacing, the letter looks like this. Now, this looks much better
than the previous one. Additionally, this also makes sure that the spacing
in-between letters is equal. Unlike this one where
the next letter is too close to
the previous one. The sixth basic
shape is an oval. To draw this shape, you can start from anywhere. For example, you can
start right from the top and come
down while creating a thick downstroke and complete the shape
with a thin upstroke. Or you can begin from
anywhere in the middle. This is the most commonly
used basic stroke in brush calligraphy. For example, you
will be using the oval to draw letters like a, c, d, g, and many more. The second last basic shape
is the ascending loop. It starts with a
thin upstroke from the middle and comes down
with a thick downstroke. [MUSIC] You'll see this basic
brush calligraphy stroke often used in letters like b, d, and h. The last basic
shape is the descending loop. It's the mirror image
of the ascending loop. You will see this basic brush
calligraphy stroke often used in letters like g and y. When I started
doing calligraphy, I had no idea about these basic strokes and that's why my calligraphy
looked like this. The spacing was inconsistent or the letters were at
different angles. In conclusion, my
calligraphy looked like it was all over the place. I knew that I was a beginner
and I needed more practice. But I strongly felt that
something else was wrong. As soon as I started following these basic shapes to draw my letters along
with guidelines, it instantly uplifted the
entire look of my calligraphy. From there on, I always
make sure to get my basic strokes right rather than obsessing over
single letters. Also, I make sure that
I draw guidelines. I hope you now know that these basic strokes are the
building block of letters, and they'll help you draw
beautiful calligraphy. If you followed the class till here and drawn your
basic strokes, I'd like to encourage you to share it in the project section. I'd love to see them
and share my feedback. In the next lesson,
we'll learn how to draw alphabets using
basic strokes, so see you in the next lesson. [MUSIC]
7. Alphabets: [MUSIC] Now that you know how to draw basic
strokes and full calligraphy, we learn how to combine these
strokes to form letters. This approach is very
interesting as it helps you see the difference between
handwriting and calligraphy. Now you might think, what calligraphy and
handwriting are different? Yes, of course they
are. Let me explain. The purpose of cursive
or handwriting is to write legibly for
day-to-day communication. Also, you don't
lift your pen off the page as much
while doing cursive. Whereas calligraphy is the
art of drawing letters by combining some basic brush
calligraphy strokes. Note that the emphasis
here is on drawing and not writing letters,
unlike cursive. Interesting. Now let's look at the combination of
these basic strokes. For this, I've created a
set of practice sheets. Here, I've broken down
all the letters into their basic shapes and I've
also drawn these guidelines. No matter which quote you decide to write for
your final project, you can refer to these
sheets for drawing letters. I've added them in the
resources section below. Let's understand these
combinations now. Like I had shown you earlier, a is a combination of an oval, a downstroke, and an upstroke. B starts with an upstroke, followed by an ascending loop, an upstroke, and
then a downstroke. You can also end it with an
upstroke that waves outside. [MUSIC]. Similarly, you can see all these other combinations
here in these sheets. For example, if you notice the ascending loop is being
used in letters like b, d, f, h, k, and l. This means that if you learn to
draw an ascending loop, you can easily draw six letters. Likewise, if you see the
oval is being used in a, c, d, g, o, p, and q. Now, this doesn't
mean that you have to memorize all these letters. Not at all. You
just have to treat them as one way of
writing letters. That's because brush calligraphy is the modern style
of calligraphy. It means that you can draw your own letters in
any way that you like, only if you take
care of some basics. In brush calligraphy,
these basics are, up is thin and down
is thick. That's it. As long as you're making thin upstrokes and
thick downstrokes, you can draw any
shape for any letter. For example, rather than drawing a d that I've
shown in the sheets, you can draw it in your own way. Say, let's draw it like this. To draw it like this, I'll first draw it with a pencil and break it into up and
down hand movements. I'm doing this to understand the placement of thick
and thin strokes. Here is an oval [NOISE]
and its downstroke, then there is an upstroke
that goes all the way up to form a loop
and comes down, so it'll be thick, and then
finally, a small upstroke. Now that I have all
the hand movements, I'll sketch it again
with a pencil first. Then I'll ink it. Finally, I'll add an
extra thick stroke to the down hand movements
and then fill it in. [MUSIC] If you see, we now have a new letter
altogether by just following some basic principles
of brush calligraphy. For your convenience, I've added some variations for
all the alphabets. You can find them in
the resources section. Also, you can use some
references from here in your final project to give that extra oomph to
your calligraphy. When you try it out, don't forget to share
it in the Projects tab. I'd love to see your
favorite variations. In case you're confused about where to add the downstrokes, remember I had told
you that you can add them to the
inside of the stroke. By always adding the thick part on the inside of the letters, we ensure consistent spacing
between the letters. On some letters, you
may want to leave a slight gap like the letter p, but this isn't a must. [MUSIC] Also, one last thing to take
care of is consistency. When it comes to
full calligraphy, it is important to keep your downstrokes with
the same thickness. Of course, you don't need to go crazy with mathematical
precision. Still, at the same time, you want to avoid a noticeable difference in the thickness of
your downstrokes. For example, here, the downstrokes of
the letter a have different thicknesses
whereas here the thickness is consistent. You need to take care of that while drawing your downstrokes. I hope that with
all this knowledge, you are now feeling confident
about drawing letters. Just remember that up is
thin and down is thick. In the next lesson, we learn about connecting
these letters. This is the last step before we begin working on our project. I'm so excited to see your
progress in the Projects tab. So see you in the next class. [MUSIC]
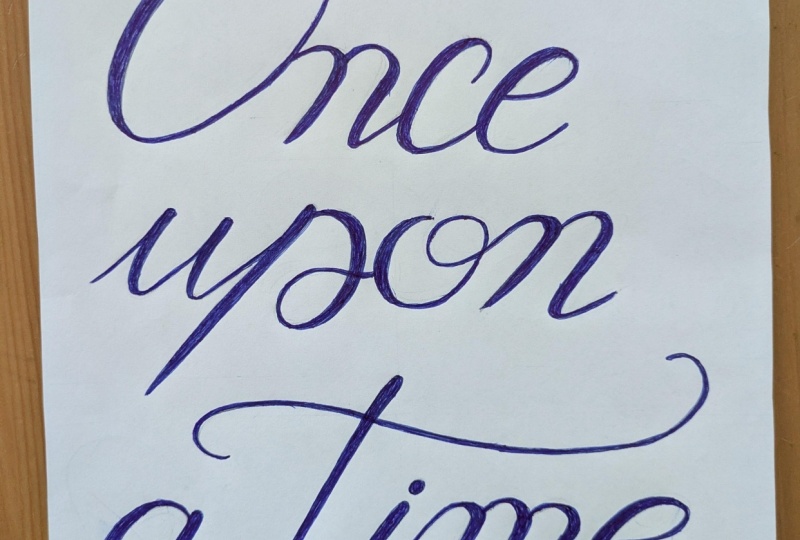
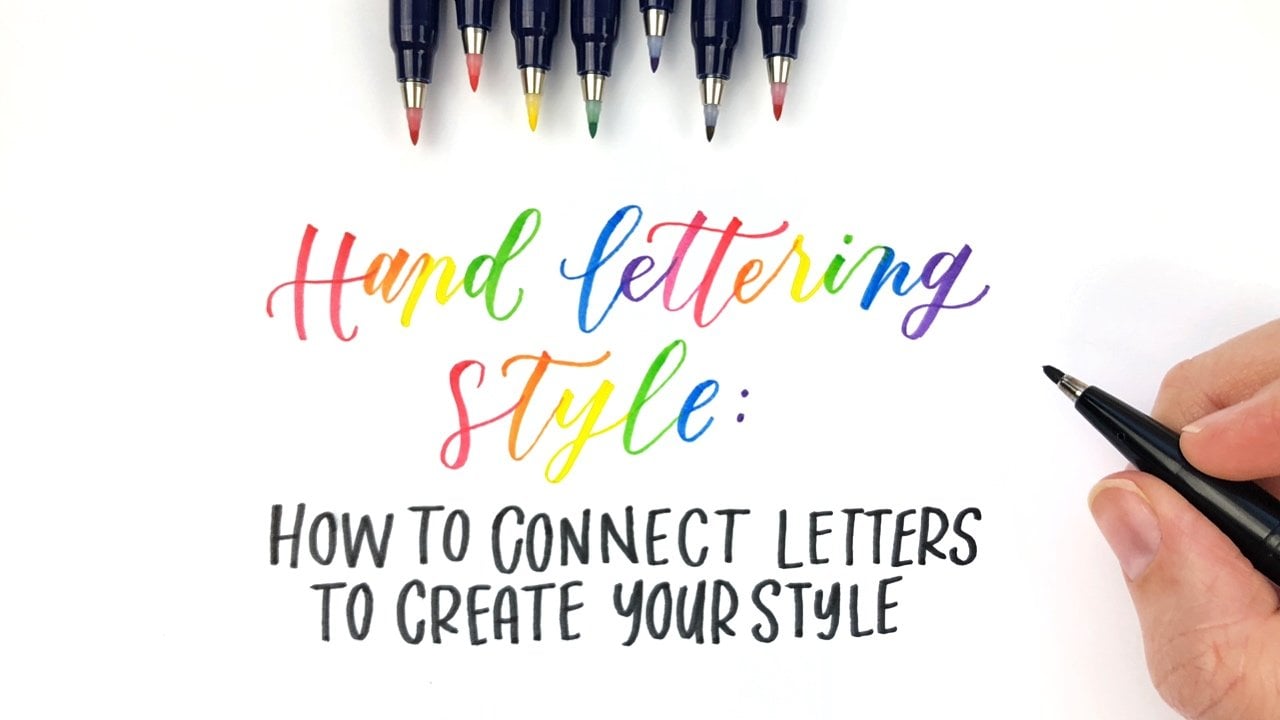
8. Connecting Alphabets: [MUSIC] In this lesson, we learn how to connect
alphabets to form words. This is the last step
before we begin with our project where we'll draw beautiful quotes
and calligraphy. If you want to brush up on the things we have
discussed before, now is the time. Now connecting letters
is very simple. Let me explain. Let's say we have to write the word
hello in calligraphy. If you were writing
this in cursive, you'd have probably
written it like this, but here in calligraphy,
we draw letters. The emphasis here is on
draw and not write letters. Let's have a look at how to draw the connections
between two letters. For this, I'll first write the words separately
at some distance. Now, to form a connection, you always take the last part of the letter and join it
with the next letter. This last part here is
called an exit stroke. It means that it is the
last stroke that you make while exiting the letter. Now, your job is to extend the exit stroke and make it
fall on the next letter. That's it. They
are connected now. Similarly, to join all the
other letters we'll extend the exit strokes and make
them fall on the next letter. [MUSIC] For your convenience, I've added some examples of common letter connections
that you can refer to. You can find it in the
resources section. You might want to
have a look at it in case you have picked
up a different quote. I'm sure it'll really help you draw along with the rest of us. Now, you can get creative
with your connections. For example, let's say you
have to write the word peace. First, let's write all
the letters separately. Now, the exit stroke
of the letter p is pointing in the opposite
direction of the next letter. How do you connect it then? Again, we follow what
we've just learned. We extend the exit stroke in a way that it falls
on the next letter. Now the connection is formed. Similarly, let's say you
have to write the word sun. Again, you can extend the
exit stroke of the letter s and make it fall
on the next letter. You can decide if you want to keep the loop of
the letters small, like this or as big as this. Just get creative
and drawing it with a pencil first really gives you the freedom to
explore the shapes. I told you it was
easy, isn't it? Now you might be wondering, what if there is
a capital letter. How do you connect that to the
other letters in the word? In this case, I like
to keep it subjective. It means that sometimes I
connect the capital letter to the rest of the small letters in the word and sometimes I don't. For example, let's write the
word dear with a capital D. Now to connect, we can use the same principle. That is, you can extend the exit stroke of the
capital D and connect it with the letter e or you can
leave the letter D as is, and connect the rest
of the small letters. To me, this also looks fine. In this example,
it was possible to connect the capital letter
to the rest of the word, but there might be cases where you'll not be able
to form a connection. For example, let's take
the word peace again, but with a capital P this time. Here in this case, if I extend the exit stroke
of P to connect with e, it looks weird and forced, so in this case, I'd rather not connect
P with the rest of the word and it
still looks fine. As long as you keep the spacing in between
the letters the same as it would have been
if they were connected, your word will look
fine and not weird. In the end to connect
the capital letter or not comes down to your
personal preference. All you have to do is follow
the simple principle, which is extend the exit stroke and make it fall on
the next letter. If you've written some words, please share them in
the projects section. I'd love to see your
creative connections. Now, it's time to get
started with our project. In the next lesson, we'll start with Step 1 of
the four-step procedure of drawing for calligraphy and
that is drawing guidelines. I request you to grab your supplies and
draw along with me. That's because you'll
be able to make the most of this class
when you follow along rather than simply
watching and in the end, you'll have a beautiful
quote in calligraphy. See you in the next class. [MUSIC]
9. Step 1: Drawing Guidelines: [MUSIC] From this
lesson onwards, we are going to start
working on our project. I'm so excited. Get your pens and
pencils in order. First of all, I'll
request you to decide on the quote
you want to write. If you haven't till now. That's because
it'll help you plan the layout and draw
guidelines accordingly. If you're feeling out of
ideas right now, don't worry. I've added a lot of prompts
in the resources section. Feel free to pick any to get started and draw along with me. Additionally, I've
added practice sheets with layouts of these quotes. Hit the resources section right now and let's draw
this project together. Or you can draw the
same quote as mine. Like I said, for this class, I've picked the quote
trust the process. I absolutely believe in
this quote and would love to hang it on my wall
right in front of my desk. If you like this one, that would work too. I'm guessing you already
are filled with ideas as to how you're going to
use your final project, so without any delay,
let's get started. The quote that I have picked
is a three-word quote. Here, I want to lay emphasis on these two words,
'trust and process'. I'll make sure that I write
them big and bold enough. I'll squeeze the word 'the', in-between these two
words like this. I can write it in
small block letters or maybe in small
for calligraphy. Let's decide this later on. If you see, I've drawn these boxes around the
words I want to write. The words that I want to
lay emphasis on are in bigger blocks and the
rest are in smaller ones. By placing my
elements in blocks, I'm judging how the overall
layout will look like. By stacking these
boxes together, I get an idea of the symmetry. Similarly, if you have
picked up another quote, you can first
highlight the words you want to lay emphasis on. Then you can arrange them
in boxes, big and small, depending on the priority to get an idea of the overall
layout and symmetry. If you are referring
to the sheets that I have shared in the
resources tab, you can take ideas for
layouts from there. Also, one interesting thing
that I'd like to share here is that you can change
the shape of your boxes. For example, you
can curve them like this to change the
look of your layout, and then draw guidelines, insight to write letters. Or you can make them
in waves like this. Basically, you can get as creative as you'd like
with your layout. For this class, will
follow straight boxes, but you are free to draw
any layout and if you do, please share it in the
projects tab so that all of us can see
your experiments. Now, let's start
drawing guidelines. Depending on the
size of your paper, you can adjust the height of
your guidelines accordingly. Here I'm drawing on
an A4 size paper. Before drawing the
final guideline, I like to write my
dimensions roughly. I start with marking the
center of this page. Here, I'll place the word 'the'. Now, since I have a
large area to cover, I'll make my letters big. Here. I'm thinking of
taking the x-height to be two centimeters and the ascender and descender height
to be one centimeter. I've taken the one is to two
is to one ratio guideline. That's because this guideline
makes the whole quote look compact and this is
what I'm going for here. But as I said, you're free to pick
your own set of guides and draw along with me. For the smaller word, I'm thinking of writing
it in all capitals. This would complement the brush calligraphy
above and below. I think a total height of one centimeter would
be good enough. Also, I'm thinking of
keeping the distance between two blocks to
be one centimeter. One last thing, I'm thinking of taking the angle
to be 75 degrees. If you are wondering
at what angle your slant lines
should be, you decide. What matters is
that your letters, actually, follow these guides. Now, let's start drawing these guidelines
and if required, we can raise them and
make adjustments. That's how I usually prefer
to make these judgments. If you're wondering
what this is, well, it's a rolling ruler. It has this roller
that helps the ruler glide on the paper and it
makes it easier to draw lines. But if you have a regular ruler, that will pretty
much do the job too. Here are our guidelines and
I think they look fine. They are covering most of
the area while also leaving enough whitespace for the
calligraphy to pop out. I'm sure you would have drawn
your guidelines by now. If yes, then please share your progress with all of
us in the project section. Don't worry about these
lines showing up. Once we have drawn our
quote and inked it with the pen will erase all of these. Now it's time to move on
to the second step and that is sketching our
quote on these guides. See you in the next class. [MUSIC]
10. Step 2: Sketch the Quote: Now, let's start sketching
our coat with a pencil. You can use the basic
brush calligraphy strokes to sketch your letters. For now, the words will
be in a monoline format. Just make sure that you leave enough space for
your downstrokes. Don't rush it. It's not a race. I suggest that you
draw very slowly. It's better to take your
time and get it right. You might want to draw
it directly with a pen, but I strongly
recommend against that, especially when you
are a beginner. Rather, use a pencil to
sketch your initial idea. This gives you a preview of how your final calligraphy
is going to look like. This is not possible when you directly go in with the pen. Try to be mindful
about your guidelines. Maintain the same
heights and angles. If you make a mistake,
it's all good. That's why we use
the pencil first so we can fix these mistakes
and get it right. Also, I have seen beginners feel confused about the space
in-between letters. Then they try to fit in letters in-between the gaps
of the guidelines. Well, you can use that, but it just causes
more confusion. Remember that the angled
guides here are to help you make sure that your letters are following the designated angle. For spacing, you have
to remember that each letter occupies
a different space. You first draw a rough sketch
and then take a step back, look at your pencil
sketch and then make a judgment if you need
to adjust the spacing. That's how I do it and
that's why I recommend drawing your letters with
a pencil first, always. Once you do it a few times, you'll develop an eye
for the right spacing. It gets better with practice. Here we are with our sketch. I hope you've drawn
along with me and I can't wait to see
your final projects. Now, in the next step
we'll add downstrokes to these letters to make them
look like brush calligraphy. See you in the next class.
11. Step 3: Identify and Outline the Thick Downstrokes: In this lesson, we'll add the thick
downstrokes to our drawing here to make it look
like brush calligraphy. As the name suggests, downstrokes are the thick
strokes you create when you're hand movements are
from top to bottom. This is the same as
we had discussed while we were learning
basic strokes. Up is thin and down thick. In this code, wherever I
am pulling the pen down, I'll add a thick stroke. Let's identify the
thick strokes here. These are all the hand
movements where I'm drawing from top to bottom. We will now draw lines
parallel to the downstroke. Basically, we will add weight to the down-stroke
to make it thick, just like in brush calligraphy. As we had discussed, I'll add these downstroke to the inside of the
letter for consistency. You're free to add downstrokes
anywhere as long as you're making sure that the spacing in-between letters
look consistent. This is what our code looks like after adding all
the down strokes. I'm sure you are also
at this stage and excited to move to
the last step now. In the last step, we'll ink our full
calligraphy with this regular pen to have
our final piece ready. See you in the next lesson.
12. Step 4 Ink it with a Regular Pen: Now that you have created
all the downstrokes, it's time to fill them in with
your normal pen or marker. Let's get going. I first like to outline
the whole drawing. That's because it gives me clean boundaries when I go
in to fill the strokes. Now let's start filling it up. This is where you are full
calligraphy comes to life. Make sure that you fill
it in one direction. This makes the
whole drawing look clean when the ink dries out. Also be slow, especially in the small corners where you
have to be extra careful. This helps you stay
within the line and keep your drawing neat. Now give a few minutes for the
ink to completely dry off. This way you avoid getting those pesky ink smudges
all over your fresh piece. Once it's dry, you can erase all the pencil marks
and guidelines. Then if you want, you can add some extra
elements like lines, borders, and tools around to fill in any extra wide space. It looks exactly like it has
been done with a brush pen. The best part is that nobody can make out that you did
it with a regular pen. If it didn't come out as you had expected it to be,
it's all right. Don't be too hard on yourself. Even though you are learning calligraphy with a normal pen, it's important to
remember that it takes time and practice
to get better at it. Enjoy what you've
created and give yourself a pat on the
back for coming this far. Congratulations on completing
your first project with me. I'm so excited to
see your creations. Go click a picture and
upload it right away, and then come back
for the next class, where we learn
various techniques to make your full calligraphy
artwork pop out. See you in the next lesson.
13. Fun with Faux Calligraphy: [MUSIC] Now that you've
completed your first project, you have a good idea of the
basics of full calligraphy. Now it's time to enhance
those basics to make your artwork look a lot
more than just basic. For this, I'll be sharing five quick and easy
techniques in this class. These will help you
make calligraphy that stands out and
is eye-catching. Later, you can mix
and match these to create your style of
full calligraphy. If you do, make
sure you share it with all of us in the community. Now for some of
these techniques, you can use your regular pen, colorful sketch pens or crayons, simply whatever you
find lying around. For a few, you might need
some basic watercolors. Don't worry if you don't have
a palette handy right now, even if you have some
brush pens lying around, you'll be able to follow along. Let's get started with
the first technique, which is filling patterns. For this, you need
your regular pen. You can use the
same one that you used for creating your project. Now, rather than
completely filling in your full calligraphy
with a pen like we did here, you can add some cool
patterns inside it. For example, you can
fill it with lines. You can make an
inclined line pattern inside your full calligraphy. This will make your
artwork look like this. [MUSIC] Now instantly it looks so different and unique. Moreover, it takes less time than completely
filling it over. Let's try another
one, leopard pattern. I'm adding an image
for your reference in the resources so that you
can also follow along. This is something
that I had tried when I was in school
for a project. Since then, I'm really
fond of this pattern. You can leave it as a black
and white pattern like this, or if you have colors with you, you can add mustard in-between these dots to give it
that leopard effect. Also, please don't
mind this pen smudges. Similarly, you can experiment
with multiple patterns and add that extra hoof
to your full calligraphy. [MUSIC] Now if you've tried this out, you already know what I'm
going to ask you to do next. Yes, click a picture and
share it with all of us. The second technique that
you can use is stippling. First of all, what is stippling? Let me explain. Stippling is a drawing
technique in which areas of light and shadow are created
using nothing but dots. The basic idea is simple. For lighter areas,
you start with fewer dots and space
them farther apart. Then for progressively
darker areas, apply a greater number of dots and keep them
close together. It's very commonly used by
hand lettering artists. For this, you can use
your regular pen. Here, we'll move
from dark to light. Try to maintain the
same pressure for each dot and don't
press too hard. Darkness will be created
by how many dots are there and how close
they are together. We'll start placing dots
closer to each other, and as we move up, we'll decrease the density. This way you'll get a
nice gradient effect. It's important to remember here that using different pressure to create darker or larger dots is not useful for
this technique. Also to get an idea of where
I'm headed with stippling, I usually step back
from my work oftenly. It can be easy to get
lost in small sections. You can also take a picture with your phone to see how the
composition is coming together and evaluate
where you can adjust or correct any mistakes. Once you are done
with stippling, you are full calligraphy
will look like this. Interesting. Now, the third way to add beauty to your full calligraphy
is by adding florals. Flowers make everything
look elegant automatically, and that's true for letters too, plus, I'm a sucker for florals. I had to share this
with you guys. For adding florals. You need to plan
them while you are at the pencil drawing stage. Once you have your full
calligraphy pencil drawing, you can start adding small flowers and petals
around your letters. Don't worry, you don't have
to draw perfect flowers, just to some simple flowers
and petals, that's it. Make sure that you
don't add too many, otherwise it'll look cluttered. Also it'll affect the
legibility of your calligraphy. Add just enough so
that it looks elegant. One way that I make sure of
this is by replacing some of the upstrokes with wines
of small leaves and curls. If you're feeling confused, you can try this too. Once you've added
your floral elements, you can then follow
the regular procedure. First outline the full
calligraphy and then fill it in. [MUSIC] You can also outline the flowers and leaves
with the same pen. If you're going for
a monochrome look. But if you have colors
around weird sketch pens, brush pens or watercolors, you can add colors
to your florals. See how beautiful they
make your letters look. [MUSIC] Now, the fourth technique that I'm
going to share with you is to add a colorful
gradient to your letters. For this, you'll need either
brush pens or watercolors. Also, it'll be great if you can use watercolor paper as it is thick and can hold
water without tearing up. You can keep a tissue paper
handy for cleaning your pens. Again, for this, you need to plan at the pencil
sketching stage. Once you have your
pencil sketch ready, select the colors you want
to add to your gradient. Here, I'm picking three colors. I'll be using brush pens
to add the gradient, but you can use watercolors too. Now simply add the colors in the order of the
gradient you want. Make sure that you
leave some white space in-between the colors. This white space will
be useful when you blend the top and
bottom colors together. [MUSIC] Now, once you have
added your colors, take a blending brush pen, it is a colorless pen
used for blending. If you don't have this, you can use a water brush pen. It's a simple brush with some space to hold
water in its barrel. Now start blending the
colors out and use that white space to pull the colors from the
top and bottom. Also use the tissue
paper to clean the colorless blender regularly before moving into
the next color. Also, please don't judge me
for my poor blending skills. I know I need a
lot more practice, and if you have any suggestions,
please let me know. Now, do this for all
the other letters. [MUSIC] Once you are done with blending, you can now add an
outline to your letters. [MUSIC] This is how your full
calligraphy will look like with a gradient. Don't worry if you're not
satisfied with your blending. I recommend that you
practice blending colors on a rough sheet first before directly doing it
on your letters. This will give you confidence, and if you need
feedback from me, please share it in
the project section. I'll get back to you there. Now, the last but most
fun thing that you can do is to add a watercolor
splash effect. The most obvious way to do it, is with your watercolors. But here I'm going
to show you how to add the splash with
your brush pens. For this, apart from brush pens, you need a plastic bag, a paint brush, and some water. Also, you may use
watercolor paper. If you don't have one right now I recommend that you
use a thick sheet of paper that can hold
water like ivory sheets. Now, there are two ways
of adding this splash. Either you can first add
the watercolor splash on your drawing sheet and then
ink for your calligraphy, or you can first ink your full calligraphy and
then add this splash over it. The second way is
possible only if you have waterproof pens like
the Sakura Micron ones. It means that even if I add water over these pens,
they'll not bleed. But if you're using
regular pens, I recommend that you first add the watercolor splash and then ink your
calligraphy over it. Here, in this case, as I already have
waterproof pens, I'll show you how to
add this splash effect. For this, first, take the plastic
bag and make sure that it rests flat on the paper. Now pick your colors. You can just pick one or as
many colors as you like. As usual, I'll be
picking three colors. Now, very gently start adding colors to
the plastic sheet. I'm asking you to do
it gently so that you don't spoil the tip
of your brush pen. Once you've added one one, it's time to add the next one, but make sure that you leave some gap in-between
the two colors. Similarly, add the third color. Now, take your brush
and dip it in water, and then start dabbing
it in one color. Your purpose here is
to dissolve the ink in water to form small puddles. Also keep a clean boundary
from the next color. Once you are done,
thoroughly clean your brush before
moving to the next one. Now, repeat the same thing. [MUSIC] Once you see all
these puddles of ink, take your sheet and place
it over the plastic bag. Now invert it and spread the
color with your fingers. [MUSIC] Now remove
the plastic bag and you'll see your
watercolor splash that you made with just brush pens. Once it's dry, it
will look like this. Doesn't it look cool? In case you are doing it
with regular pens, first, make this splash effect, and later, you can ink
your calligraphy over it. [MUSIC] These are some quick
techniques that you can use to highlight your
basic full calligraphy. You can add patterns, stippling, florals, gradients, and
watercolor splash backgrounds. Remember that these are
not the only techniques. This is just me nudging you to get creative
and come up with your own beautiful ways to highlight your
full calligraphy. I hope you found this helpful. If you've tried them out, please share it in
the Project tab so that I can also
see your work. Thank you so much for watching. [MUSIC]
14. Final Thoughts: Congrats on
completing this class on calligraphy with
a regular pen. I hope you're feeling more confident now to do calligraphy. Thank you so much for
doing this with me. I had the best time
creating this class. I hope you had just as much fun doing those class
exercises and projects. I want to see all
the beautiful work that you create
even in the future. Please tag me in your Instagram posts so
that I can see them. Like I said, this was the first step towards
learning calligraphy. I aspire to create more advanced classes
in the near future. Make sure that you follow me on Skillshare so that you are notified right away as soon
as I publish a new class. Meanwhile, I leave you with a calligraphy learning roadmap
in the resources section. By the end, you'll have a step-by-step approach to learning calligraphy
for beginners. If you enjoyed this class, please leave a review and share it with your
friends and family. Thank you so much again
and see you soon. Bye.
 Simran Sahni, Calligraphy and Hand Lettering