Transcripts
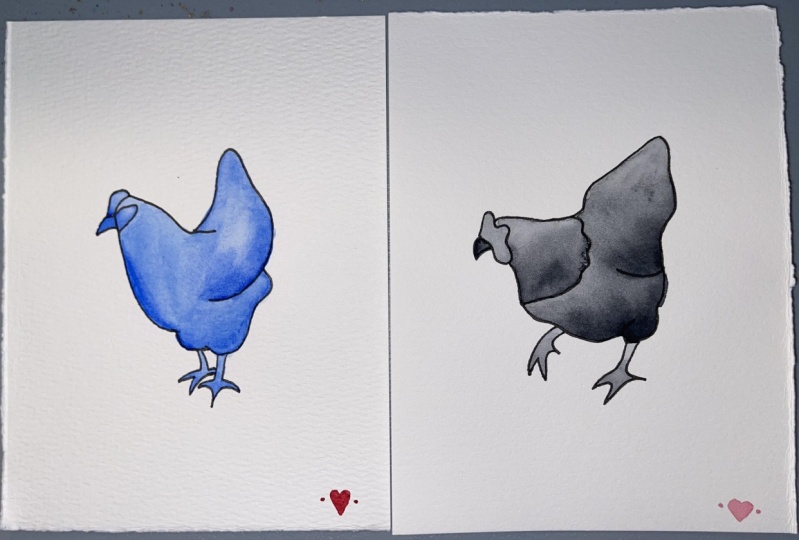
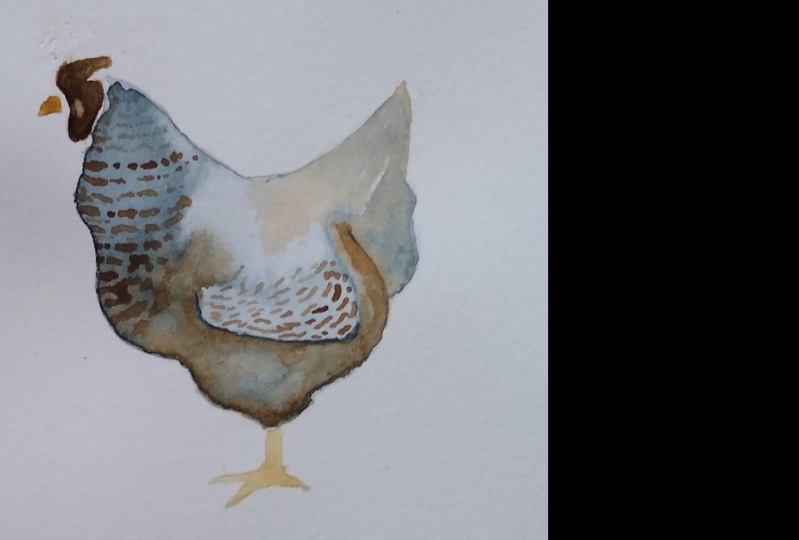
1. Intro: everybody. I'm Mary Scare. I am an artist and a teacher. I actually specialize in ceramic arts, but in the last year I've picked up watercolor painting and have really, really enjoyed it. So I wanted to show you a few of the things that I've learned about watercolor in the past year, because when I first started, I was incredibly intimidated, and I found it so difficult and so frustrating. And if you're there right now, I feel you. But it didn't take me too long to get past that. And the reason is there's some secrets that I didn't know about watercolor painting. And once you get those, it's so much easier. It's really not a problem anymore. There's just some things about this medium that are tricky. Once you can get past those tricky bits, you can paint like a pro. So I'm gonna be showing you today. Some water color basics, some basic tools, basic supplies you need, um, some wet on wet watercolor techniques, which are really fun and really interesting, because it's kind of a mystery how they're gonna turnout, which is fun, and I'm going to show you a little project on how to paint a watercolor chicken. I actually have a printable available for you and it looks like this and it has a lot of different kinds of chickens on it. You compete all of them. You can pick your favorite one, whatever you like, but this is a free printable I'll have available in The resource is and you can download and print it. And you can trace this onto your watercolor paper to your project today. So this is what I'm gonna be showing you how to paint a little chicken like this. It's very basic, but you're gonna be learning a lot of different skills with just this one little painting. So I'm gonna be showing you about value and shading. I'm gonna be showing about whitespace how to transfer images onto your watercolor paper and a lot of the basic stuff you just need to know. And then once you're able to do this, you could pretty easily take this to this and do the whole flock, or you could take your skills and take them to do any sort of watercolor painting. You can really use a lot of these skills in any sort of painting that you like? So as the beginner's course for sure. And I'm really not too far ahead of you. I was just beginning a year ago, so you can learn a lot in a year. I'm gonna teach you everything that I know, and we're gonna have a lot of fun together.
2. About paper: all right, so let's talk a little bit about paper. Watercolor paper is incredibly important. It matters more than anything else with your watercolor paintings. Believe it or not, like that's the bus choice that you can make is getting good watercolor paper. Ah, lot of people find watercolors really frustrating, and I think that's because they're not using the right kind of paper. If you try to use watercolors on copy paper or just regular old paper that you have lying around, it's just not going to work. It's not gonna look nice. It's gonna pool up. It's gonna drench the paper, make it all wrinkly. It's just gonna be a mess. So you really have to use watercolor paper. You have to. It's a rule so you can find it pretty cheap online. I'm gonna show you some of my favorite brands, but the nice thing about watercolor paper as it's made for soaking up water so it's really ideal for getting beautiful paintings you really can't go without. It's the number one thing that you need. You can go with cheap brushes. You can go with cheap paint. Those things don't matter nearly as much as the paper does go good on the paper and you'll be golden
3. Recommended Paper: All right. So the first supply that we're going to cover is your watercolor paper. I have only one brand to suggest you today. If you're a beginner, this is absolutely the way to go. And this is what I'm gonna be using for the sample project today for a little chicken that we're gonna make. So it is cancelled. Brand. There's a little image of it. Um, this is cold press watercolor paper, which means it has kind of a bumpy surface. It's really ideal for watercolor. Most people use cold press hot press. It's smooth. You don't generally need to use that. Especially if you're a beginner. So this is cancer in watercolor. It comes in pads. This is a nine by 12 pat 30 sheets. This pad exactly was, I think, $9 on Amazon. It's very inexpensive, and it's actually really good quality. So this is what we're gonna be using today. I will link it down below so you can grab it If you would like what I do with this, Actually, to save even more money is cut it into little pieces like this. So I just used my paper cutter. I cut it up, and I used these little pieces for my paintings and also for little samples to see what color ones look like to see what my values air looking like before I put them on my actual painting. So if you want to cut it down into little pieces, it saves even more money. But if you want to go full on your big piece, you could do that, too. So that's paper.
4. Brushes: on two brushes. Now your brushes do not matter as much as you think they dio. The brush is just a tool to get the paint onto the paper. It's very simple. I tend to use cheaper brushes. I use whatever I have lying around. But lately I've been feeling really drawn to this brand. This is black velvet. They are a little bit more expensive, but they're really nice, and they last forever. I've had this set for a long time, and there they still look brand new. So this is a number six, and this is a number two. This is generally the size I use for practically everything. You don't need a whole array of brushes for simple projects. It's nice to have eventually, but if you're just starting off a number six and a number to brush our ideal so you can get the zone. Amazon. You could get really any brand paintbrush on Amazon. But what really matters is that they are water color specific brushes. You don't want oil brushes. You don't want acrylic brushes, those air stiff and bristly. You don't want that for watercolor. You need something that's really gonna stop up the water and hold it in the belly of the brush here. So watercolor specific brushes is all you have to remember. You don't want big hunk and brushes for thus something six or smaller would be ideal.
5. Paint: Now we are on to paint, so I want to show you my favorite paints up. But that does not mean that you have to use us for this project or ever. But this is Ah, Windsor. Newton paints that these air paint pans watercolor comes in a lot of different options. There's pans, liquids and tubes. So it's up to you what you want to get, what you want to play with. I think pans air really nice and easy for beginners, But everybody's different. Everyone has their own preferences. But this guy opens up like this and you can see it. But using this a lot, there are pellets tumble side, says Appellate. Over here, appellate! Over there. And then we have our little pans right in the middle here. So I like to scoop these out of here and mix them together in the pallets to make different colors. And I honestly just usually leave the paint there to dry and then reuse it later. It never really goes bad on the pellets. It's just like, kind of cool to have those colors already next. So this is the one that I really like. It is expensive it's gonna get it. It's an investment put. If you're really gonna be in the water color, you can't go wrong with it. If you don't want to invest in Windsor, Noten's at the moment and I don't blame you. It took me a whole year to get to that point. There are more economical choices and budget friendly choices. This koi koi brand watercolor is relatively inexpensive and also less forever, and it's pretty good quality when you open it up. This is like a little travel kit. When you open it up, you have all the colors here. This is for washing your brush and you have little pallets that you can mixed colors and so coy is a good, more economical choice. And even if you want to really save a lot of money, you can even go with Crayolas. I mean, the's Air Kid brand watercolors, but they're actually pretty good, especially if you're just playing around. If this is your first time ever using watercolors, go with something cheap. I think this whole pellet was like $3. It's so inexpensive. It's crazy and the colors are really vibrant. They're easy to mix. They come out looking beautiful. It's definitely not artists grade hemming and $3 but might be a good choice if you're just starting off to play with something a little more expensive.
6. Other supplies: Another thing that's really essential to have is a water cup. I just use a mason jar. You can use anything that you have lying around. You can use empty bottles. It doesn't matter what you use for your water can or water cup. A song is that holds water, and you don't plan to use it ever again for food. That's all that matters. So water cup is essential, and these are things that are nice to have. Q tips and paper towel Really nice to have. If you make a mistake, it's really easy to lift them off with paper towel and Q tips. Q Tips are really great cause you can get into tiny little areas to dab off paint or to rub paint or mix paint whatever you need. So these air really handy to have not absolutely essential. But I actually use them all the time. So might be something you want to keep around to
7. How to trace your chicken flock: using a light box is one of the bust ways that you can transfer your image onto your paper . Um, light boxes can be bought for about $20. There really inexpensive, and they're great because you just layer your outline first and then your watercolor paper . You just start tracing away. You can very clearly see that image through the bottom, same as you can on a window. Except this is way more comfortable to use because it's on a flat surface so your arms don't get all tired. It's also great because you can have a really light touch. You don't have to do much of racing when you're all finished. You could just lightly trace it. You can see every little detail while you work. It's really the ideal way to go, so you'll see here. I got all my chickens traced really quickly and easily. The light box really helped to give me that light touch and see all those Chinese little details was comfortable the whole time. I can now turn it off and unti ape and put my light box away until next time. Pretty easy
8. Practice: Wet on Wet Technique: So the first technique I'm gonna show you today is called the wet. On what technique? One really fun and equally frustrating aspect of this technique is that it's totally unpredictable. The paint kind of spreads onto the page, however it wants, and you just after let it do its thing. It makes for really interesting and lively designs. But if you're the type who really needs to control where the paint goes, it might not really be for you. So what I'm doing here is water. First, I laid down some clean water onto the paper, and now I am dropping different colors of paint down into the water. You want to use pretty saturated pigment for this, which means you don't really want a ton of water in your color, just a tiny little bit to get it running. And you can use all the different colors. Sometimes different pigments react differently on the page than others. Do you conceive This pink is spreading a lot more than the blue did. That's just just how water color paint at. So it really suggest you get a little piece of paper and practice with us first before attempting to dio big painting with us. Another way to do is see what I'm What technique was what I'm gonna show you right now that is painting. Ah, wash off watercolor on your paper first, getting it nice and even flowing on the page. And then what you could do is drop clean water into the paint. So this is kind of the opposite what we did previously. This is paint first, then water. The other one was water first and then people. This makes what's called watercolor blooms, and some artists really, really hate thes Summer's really love them. It just depends on your personal style. But dropping clean water into the paint makes little white firework spots on your paper. Come, you can experiment with different colors again. Sometimes different pigments do different things with wet on what techniques, So try it out before you use it on a grill painting. Another really fun thing to do with the what are what technique is to lay down paint first on your paper. You can put down on a wash of paint, a flat wash, or you could do a radiant of paint, and then you take your brush and dip it into another color may come about to do here after washing it, of course, and usually you want to use, like almost straight pigment just a little bit of water in it, and you drop that into the wet page, and that makes really, really cool designs. It mixes the two colors together a little bit and makes thes beautiful fireworks spots on your page. So this is a really fun technique to do for things like backgrounds. Or if you're doing florals, it looks really beautiful. Toe wet on what? But really anything. It's a fun thing to play around with, and I definitely suggest using a little scrap of watercolor paper to practice first and see which colors go good together cause kind of Sometimes pigments blend unexpectedly and make weird color. So always practice first. When you're mixing colors with what on what? What I'm doing here is making little stripes of color, different stripes of pigment and letting them mix right on the edge Really interesting. And as you can see, different amounts of water really make a big difference when you're mixing different pigments. But this is just a great technique to play around with. It's really fun, really beautiful. Like I said, though, it is unpredictable. So if you like to have more control over your painting, this is probably not the technique for you, but have fun play around with it.
9. Practice: Gradient: this next technique, I'm going to show us how to make a greedy int with watercolor paint. A greedy int as where you're paint goes from dark to light or light to dark. So what I'm doing here is water. First I'm wedding my paper with nice clean water. And then I'm adding a little stripe of dark pigment right up at the top. That's pigment that hardly has any water in it. And now I'm gonna encourage that pigment to flow down the paper by wedding my brush a little bit and pushing that paint down into the water. That's already there. So that's one way to make a quick radiant. Another way is to start on dry paper, which I'm going to do here and again. You start with heavy pigment, hardly any water in it, but a nice little stripe up at the top. Then I'm going to get some water on my brush. I didn't really clean out my brush and just grab some water out of my cup, and I'm going to start encouraging that to float down. I met in quite a bit of water here and now I'm gonna take my paper and I'm gonna tip it up a little bit so that gravity will help me to make this Grady in by pulling that water down the page. So it's pulling it down, down, down, making it lighter and lighter as it goes. So, you see, the two Grady ants are quite different in the way that they were created and in the way that they look. The third Grady and I'm gonna show you is a two color Grady it so you can blend two colors together. So what I'm doing here, I'm starting with my blue first up with the top of my paper heavy pigment up at the top, adding more water down towards the metal to make it later and later. Now I'm gonna grab some think and put that down at the bottom and encourage that to float up into the blue by adding some water to it and swishing my brush back and forth until they meet in the middle and where they meet in the middle will make a little bit of purple color . He's looked really beautiful when they blend together and again. Water Co is kind of unpredictable, so you don't really know how it's going to blend. You kind of have to just let it do its thing
10. Practice: Lifting: So what I'm gonna show you here is a very handy technique called lifting. Lifting is used when you make a mistake usually, or if you want a lighten up your paint after you lay it down. This really works best when the paint is super well, just freshly applied. Um, you take a little dab of paper towel pressed, own really hard on the wet paint, and it lifts it right off the paper. No, it's pretty essential to do this right after you lay it down. So if you lay down pain and you realize who we made a mistake, it's pretty easy to just grab a paper towel and lift it right back off. You can also do this if you accidentally mix two colors together and it turns out looking gross prone or just a color that you don't like. Like I mixing this pink into the blue and maybe I don't want it there. You can also lift off just that one color pretty easily again by using paper total, pressing down pretty hard on the paper, pulling it right off. You might have to do it a couple times to really get it off there and then I want to get the majority of it off. You can just paint right back over the top, so this is an easy way to fix mistakes, kind of as they happen. If you can't get all the water off with just a dry paper towel, you can dab it in some water like I just did, and that gets off most of it. As you can see, if you use a lot of pigment in your paint, it does tend to sink into the paper. It's pretty hard to get out, but you can cover it up pretty easy. Not too bad. You can also erase or lift off entire parts of your painting if you get to it right away. So I just showed you lifting off like pieces of a painting. If I put a line on there and I really don't like it, if you wipe it off right away, get your paper towel wet again. Wipe again, Gently sea or not ripping the paper. You can left off entire lines pretty quickly, so that's lifting easy way to fix mistakes
11. Painting a chicken, step-by-step: Okay, so now we are ready to actually start painting our chicken. But first, I want to show you how to mix some different values with your paint on how to experiment with those a little bit. It's important to get all different values, which is still uses the light in the dark of the paint, um, in your chicken portrait so that it looks kind of three dimensional. So what I'm doing here is playing around with mixing waters with the the straight pigment out of the pan. Just playing with it on my little scrap paper, trying to see what different colors I can get. And I'm going to do my whole chicken monochromatic. It's all gonna be this Peyton's gray color. You canoe your chicken, any colors that you want. But if you're a very beginner, probably using one color is bust just so that you can get a feel for how the paint responds and how to do different values using just one color. But you could use red. You could use purple orange doesn't matter. I'm using great cause I really like this color, So I'm mixing right now. My, I'm getting a very, very light gray color going by, mixing a lot of water with just a tiny bit of pigment. I'm going to start filling in the chicken filling in this one small area of the neck. First. It's kind of like coloring in a coloring book. You go nice and slow, stay inside the lines. It's really important not to go over the lines in this, because if you dio when you start painting the next section, it's going to bleed. So definitely stay inside. The lines go slow and easy filling in this whole section with light gray making sure I don't miss any little white spots. And now I'm going to go in my pellets already. Next, I'm gonna grab some darker grey. But this isn't the darkest gray. It's kind of Ah, medium grey. So I'm going to do a zigzag sort of ah, motion with my paintbrush to mix that into the light grey that's already there. So this is creating a value in my chicken. So its latest on the top and it's gonna be darkest on the bottom. No, I'm grabbing some really dark gray. I'm going to start dabbing that in this Is that wet on wet technique that we already learned. And hopefully you've practiced a little bit, just dabbing that dark grey rate into the bottom there. And really with watercolor, less is more You don't want to put too much, especially with really dark values. Is they? A little bit goes a long way with the's pigments. You want to still be able to see your light and your medium values. And I actually think I added too much dark here. So I'm gonna lift off some of that pain, which we also learned Lift off. That was a little corner off paper towel. Go nice and slow on your left ing. Just take off a little bit. Just so it's not quite so overwhelming. No, I'm not gonna start painting the body or the face next because they are touching the neck and I don't want my watercolors to bleed into each other. So I'm going to skip around the painting a bit doing the feet now because I know that the feet aren't touching anything that's already been painted doing my super light gray first and in really small spaces like this, you definitely want to use little brush. I'm using my number two. You could use a 10 something like that for little spots. Music just the very tip of the brush. No, I'm gonna grab my medium again and mix that and in such a small space, you need to be really careful to not to overwhelm the space with dark color. So I'm just stabbing it really into the little toes and letting that paint sort of travel up into the wet spots on the chicken Looking good. Make sure you wash off your brush frequently, get it nice and clean before you getting a new color, getting my super light gray going again. And now I'm going to start filling in the body, being careful not to put my hand and that what paint on the neck. So if you could really, really slow like I'm doing on the edges, you can get really nice clean minds. No, but I'm getting closer to the neck. I have to be especially careful because if this wet paint touches the wet paint of the neck , it's all gonna bleed together, which sometimes you want. But in this painting, we don't. So I'm actually gonna leave a very very thin white line in between these two sections. So gonna almost touch that pencil line, but not quite. I'm just going to get really close to it. But I'm gonna leave a little white gap there. White space is really important. And watercolor painting. You actually want to utilize white space as much as possible because you don't have white water color paint that you can really use, so leaving the white of the paper sometimes makes for interesting sort of values and dimensions. So I'm feeling all of this in with my super light gray going nice and slow again over here . I don't want to touch that wine. Just get close to it. So I don't blend in my feet with my body appear by the wing. I'm going to do the same thing. Even though this is all part of the body, I am gonna add some values in there some darker values. So I'm gonna leave that our little a little white space there. Okay. When I grabbed my dark again my medium grey start dabbing that into the wet thing on the paper. Remember, it's kind of tricky with watercolor, cause you want to go slow and take your time. But you also can't go too slow or your paint will dry water color paint does drive pretty fast, so you don't wanna wait too long to do your wet on wet technique will make sure your moving at a good clip, filling all this in with my medium. Nice and easy, not adding too much of the dark value. Yet I can always add more dark later, going very slow, slow and careful. Remember that zigzagging sort of ah line you can dio to Deb things in. It's all still what? So it's blending and really nice. You can kind of push the pain around to where you want it to go while it's still what? Grab my paper total again. Lighten up a couple of these spots just by dabbing up. Now it's time to add a dark value. Remember, we're acting kind of like in this painting, like the sun is shining from above on the chicken, so it's going to be the lightest up on the top of the chicken. It's gonna be darkest stone on the bottom, so I'm adding in my super dark gray right along the belly and along the bottom leg. Just dabbing it into their Don't go too crazy. Black or dark grey can be very overwhelming. If you had too much of it a little bit on the wing. Not much. I didn't even get any new paint on my brush here. I'm just using with authority on there in a little bit on the tail. Now, remember, your painting is not gonna look exactly like mine. Your painting is gonna look like your painting. Watercolor is so strange because it reacts differently according to who is using it. So go easy on yourself. If yours doesn't look exactly like mine, it's really not supposed to. It's supposed to look like yours. So as long as you're kind of following along and doing your bust, that's really all that matters on this certain of fill in the Komen the Wattles. Now the face. I jumped right into using a medium gray on this part. I didn't even bother with a light gray, and I'm kind of breaking my own rule here because it's the top part of the chicken. But I'm not making it super light. That's just kind of fun, A fun thing you can do with painting and what art. You can have your own artistic touch, even if it doesn't follow the rules jumping right into my dark gray on the beach here because they really want that to pop and that's it. All set. Make sure you wash out your brush when you're done, get it nice and clean and leave your chicken flat to dry.
12. Whole Chicken Flock & Final Steps: so no, I'm onto the step where I'm going to paint my whole flock. I have a few different size brushes here to use. They're all very teeny. I'm using a triple zero, A zero and a two. Germany is the two, mostly for the bigger spaces, like the body and then these little ones for the details. The color I'm using as Payne's gray. And I'm gonna be using all different shades of it. So I'm gonna be mixing different shades in here. So some of these will have more water. Some will have more pigment. When I'm painting this, I'm gonna do with the exact same way I did that. Single chicken. I'm gonna be doing it later on the top and darker on the bottom. So I'm going to be adding more pigment down on the bottom. More water up on the top. Okay, so I'm going to get started. One more thing I did before I started painting, I used a kneaded eraser to lighten up all of my pencil lines. You want to do that? First, you Monty prints lines to be a slightest possible before you start painting. OK, I'm not gonna explain what I'm doing every step of the way. I'm actually going to speed up this video while I paint so you can see it in entirety without wasting hours and hours of your life. But if you have questions about any of thes chickens, if you're having trouble with, um, please reach out to me. I am here to help. Okay, We'll get started right now. - Okay ? I'm all done with my chicken flock. Here are a few last minute tips. First of all, if yours doesn't look exactly like mine, don't worry about that. It's actually one of the weird features of watercolor is it kind of does what it wants, and yours is not going to be identical to mine. Even mine is not identical to the one I did before. I'll show you that right now. I did another one a few days ago in this does not look exactly identical to the one I did today. That's how watercolor is. It's OK if yours is not like mine. OK, Also, one last step that you need to dio is erase all of your little pencil lines in here. But wait until your painting is completely dry before you do that? If there's even a little bit of moisture on there, it can smear your paint, so make sure it's totally dry first. Okay. And one last little tip. Before you start painting, make sure you're working from top to bottom so that you're not putting your arm in your wet paint while you work. And also, if you're right handed, you want to start on the left hand side of your paper for the same reason. If you're left handed, you want to start on the right side of your paper. Okay, so you're you're working in a way that your arm is always out of your work space. Okay? I hope you have fun doing your chicken painting.
 Meredith Skyer