Transcripts
1. Intro: My name is Masha Marksll and I'm a multi disciplinary artist passionate about working
on different media, whether it's illustration,
creating murals, painting, or creating
short animations. With a background
in product design and educational digital games, my work is driven by
personal style and experimentation rather
than formal art education. A significant portion of my work consists of illustration because
one of my favorite thing about them is having the
silence conversation between viewer conveying a story by evoking emotions through colors, compositions, style,
characters and items. I have always been
interested in simplifying the creative process and finding different techniques to
overcome the artistic blocks. Therefore, I created this
class, beginner Illustration, from play to visual
storytelling, where I share step by step process how to get
started on illustration. This class is designed
for two type of learners. One, total beginners who are eager to learn
creative ways, how to get started
on illustration. And second, experienced
creatives who are eager to learn new
ways and new techniques, how to overcome their
creative obstacles. I believe each illustration
tells two different stories. One, a narrative
behind an image, and two, the story of a person
behind the illustration. At the end of this class,
you will find a bonus video, adding a new layer to
your creative toolkit, how to create stickers out of your freshly made illustrations. In this class, you will discover that you don't actually need to be an expert to
visually tell a story. Now, get ready,
and let's dive in.
2. Your Class Project: Before we begin, let's talk about how to prepare
for this class. I'll be using the
Procreate app on my iPad, and if you have graphic
tablet or digital software, feel free to use them because they will help you
progress as well. But if you don't have
any graphic tablet, don't worry about it
because you can use simple materials
such as a pencil, eraser, also pen and paper, and the paints of your choice. Throughout the class, we'll
use a few templates that you can find at the project
and resources page, feel free to download
them and print them out or work on top of them in
your digital software. We'll start by playing with
geometric shapes and then we'll come up with
the stories to combine those shapes
with each other. Later we'll go through the
basics of composition, colors, storytelling, and we'll create a cohesive storyline
for your illustration. During this class, you'll
create your first illustration. And you will choose a specific
style to upscale it later. As a bonus, you'll
also learn how to use your sketches and drawings to prepare them to
become stickers. If you are an
experienced illustrator who finds some steps too basic, feel free to keep some
videos to the later lessons. And if I speak too
slow or too fast, you can always change
the pace of the video, as well as that, if you want
me to repeat something, you can also rewind the
video for 15 seconds. Now that we covered
all the details, let's get into this class.
3. “From Zero to Hero" - Starting from Scratch: In this video, we'll
start from scratch. At first, let's open the first template that you
can find at project and resources page
where you will see very simple ten
geometric shapes. I opened the file in
the Procreate app and let's go through
the shapes together. The first, we have a star
shape, then triangle, square, pentagon,
hexagon, rectangle. As a seventh, we have trapez then circle, semicircle,
and ellipse. If you're working
on a printout form, you can draw on top of the
shapes right away, but if not, if you don't have
a printer and if you don't have any
digital software, feel free to draw out
those shapes separately on the paper with pencil and
use eraser to make changes. I will delete the numbers
and the names of the shapes. And if I want, I can always readjust those
shapes on the paper. This exercise, what we're
going to do is to take each shape and to draw
inside or outside the shape, and whatever inspiration
comes in our mind, we're going to
draw those things. For instance, if
you have a circle, you can draw a sun, you
can draw googly eyes. If you have a square, feel free to use it as a box, as a house, whatever
it reminds you of. Let's start from the star shape. For me, this star shape
reminds me of pinata, and I will try to draw pinata. If you make any mistakes, if the object that
you were aiming for doesn't look the same,
don't worry about it. It's just an exercise and you don't have to stress
about little things. I'll draw a thread and some details on
pinata in the corners. Then I'll create more lines. Just a quick note, we are not
using any colors right now. We are just drawing using the simple and the
simplest materials. Let's continue with
the triangle shape. Feel free to readjust the shapes according
to your inspiration. You can make the edges softer. You can make it even sharper. You can change the entire
shape if you are willing to. So for me, this triangle shape reminds me of a
character's head, triangular shaped head,
and I really would like to make a face
inside. So let's continue. I will delete the corners. And I'll make the
corners softer. Then I'll add ears and
nose, eyes and mouth. I'm going to think about if I want this character
to be male or female, maybe it's going to be
a female character. It will have a longer hair
or maybe a curly hair. We'll see how it looks. The next shape that we
have is a rectangle, and I don't know why, but the simplest thing comes
to my mind, which is a box. I'm going to create
a cardboard box, just a very simple
one. Let's continue. Maybe I'll give it
more three shape, so it's easier for an eye
to perceive what I'm doing. I'll delete the angles. I'll add the wings and maybe a note with a scotch tape saying
that it's breakable. I can add additional
details if I'm willing, like a thickness of
a wing and I'll add some darker color inside hinting that the box
is partially open. As you see, none of my
creations are top level. I'm doing anything
according to my intuition, wherever the process takes me, and feel free to do the same. You don't have to
stress about it, just go with the flow. If your drawing
doesn't look the way you're willing, it's
alright as well. You will have enough
chances to redraw them and recreate
them as you want. This pentagon shape reminds
me of a diamond and maybe I'll create a diamond ring
for my female character. Let's get it started. The next, I have hexagon shape and I'm going to
create a beehive. I'm going to multiply
the shapes a few times and I'm going to add some
honey and bees around it. If you're working in
the procreate app, feel free to multiply the layer or some details to achieve
the result faster. If you're drawing
by hand on paper, feel free to draw next to the shapes or we draw
them on a separate paper. Five more shapes are left. If you're finding it difficult
to find inspiration, look around you, see
the objects around you. Do they have any
geometric shapes? Do any of them remind you of
those shapes that you have? If yes, feel free to draw them. If not, you can also find inspiration in the
books on the Internet. You write those specific
geometric shapes in the search bar and try to find what those shapes
can be transformed into. Now, let's continue with
the rest of the shapes. This rectangle shape
reminds me of a dog, even though it has
drastically different shape. I'd like to add ears. I'd like to add a funny
tail and cute nose. I'll delete the angles, as well, so the shape is more
rounded than rectangular. The tropez shape
reminds me of a skirt. The circle shape reminds me of circular windows that you can find in the summer houses
on the last floor. Sometimes if you feel like your items need more hints
to understand what it is, for instance, in my case, my circular window doesn't
look like window, per se, so that's why I'm going to add wooden textures or maybe
I'll add some lines on the window to make
viewers understand that there is a glass window
rather than anything else. We have only two shapes left. Semicircle reminds me
of a shape of a house, something like from the Lord
of the Rings Hobbit House. I'll add some moss
on top of the house. Then I'll add
chimney chimney top, smoke coming out of
it, wooden door, circular window on top that I just drew,
additional windows. And if I want to
make any changes in the current illustrations, I can always resize
them, readjust them. And if you are working on a
paper with pencil and eraser, you can do the same by
erasing the parts that you don't like and add the parts
that you are willing to see. I will multiply the ellipse
shape to get another eye, and then I will add some details to add some intrigue into story. And if I want these
eyes to be a happy eye, it will be brighter and bigger. It can actually
express many emotions. And in my case, I
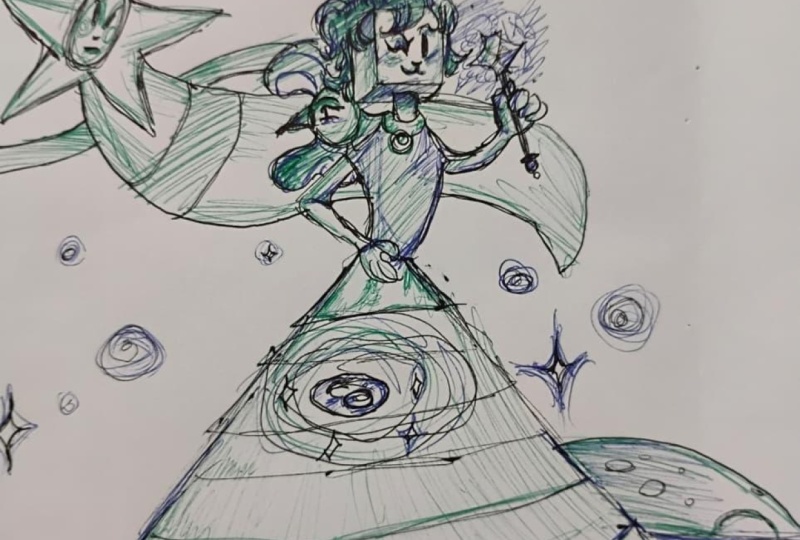
want it to be more mysterious, a bit scary. So I'll draw accordingly. As you see, this
exercise was super fun. It's kind of a way how to learn through play and
without stressing too much. And I hope that you
really enjoyed it and you already got ten results, ten different objects, characters or items that
you can use in the future. In the next video, we'll talk about the basics
of storytelling, and we're going to combine our creations to get a cohesive storyline for
our future illustration.
4. Storytelling - Theory and Practice: Whether you're aiming
to evoke emotions, spark curiosity or entertain, storytelling is your gateway
to engaging your audience. First, let's explore what
kind of stories you can tell. It can be a story about
love, about friendship, about a story filled with different challenges.
It can be scary. It can be a fairy tale. Each type of story
has their own charm, and you have to consider
what kind of results you are trying to achieve and what kind of audience you
are trying to engage. Start by asking yourself what kind of message
I'm trying to convey. Then consider how these themes influence the environment and the characters of the story. For instance, a story
about friendship can feature two
different characters who somehow end up together and
find their friendships, and they overcome
challenges together. Think about the stories, famous fairy tales or
movies that you like. What kind of stories
they feature? What kind of
characters they have? Also, the characters are
not necessarily human. They can be animals, aliens of different planets, insects, they can be
even objects sometimes. Also, the environment
where your characters live shape the entire
mood of the story. For instance, is it
happening in the forest? Is it happening on
a different planet? Is it happening in the city? What kind of weather there are? Is it snowy, rainy? Is it sunny? Usually,
in the horror stories, they use darker settings, and it's happening in the forest where
there are many eyes. There are some screams. All the characters are scared. Also, more positive
stories feature more sunny environment
where everything is green. The scenery is beautiful. The friendship stories
can be very different. It can be happening at the
party or a family gathering. It can be happening
in the village. Just think about your story, what kind of story
you want to tell. And then we're going to start by combining the illustrations
that you already drew and come up with a cohesive story that you
can tell your audience. Now, remember those shapes that we drew in the
previous video? Now, let's bring them to life. Now, open the file that
you used before or bring those papers back and
look at your creations. And if you find any similarities or any storyline in
between of them, just make sure that you write
them down or you can also add notes or arrows to combine those characters
and objects together. My story, I have binata. I have the female character, the box, the diamond ring, bees, a dog or a wolf, a skirt, circular shaped window. I have a house, and I have googly eyes. Do they have anything in
common? Let's think about it. For instance, if I think that my female
character has a dog, she's wearing a skirt. She's wearing a new diamond ring and she's moving somewhere, maybe the story has a future. So let's think where
is she moving? She's moving to a
new house that has a circular windows and maybe beehive somewhere
next to the house. Also, the spinata is
in front of the house, and to add the
mystery to the story, maybe there's some
mysterious googly eyes hiding on the last floor when
you look inside the window. There are just so
many variations you can make with ten
different objects, and I will try to
brainstorm what comes in my mind and feel free to
do the same with your object. The second narrative
I can come up with is that maybe this dog is
living in the house. Suddenly, he hears the
knock on the door, and there is this girl
who has a googly eye, and she brings the dog
some honey and the boxes. Maybe the dog has binata
inside the house, and the dog is the
one wearing a skirt. She really likes this girl
and she invites her in where she discovers this diamond ring that is placed on the window. There are actually so many
variations we can use, but I prefer the
first story better, so I'm going to stick with this. In your process,
if you get stuck, feel free to ask
any questions in the discussion page below because I'm really curious
about your process, and I want to know
if anything is difficult for you so I can
improve in the next classes. The first story that I came
up with stays with me, and I don't need to
write them down. But if you're new to this and if you think that you
might forget the story, Feel free to write notes or write the story itself from
the beginning till the end. And this story later will
become an illustration. Don't worry if any of the items in your list
doesn't come together, you can always add more
items or you can erase or replace the items to
fit the narrative better. Remember that great
stories often include the wild twists that keep
the audience on their toes. Allow your characters
to evolve and react to the situation to add some
depth to their narrative. In the next video,
we'll get into more helpful tips of creating more successful
illustrations and breathe life into
your narrative. I'm really curious how your
stories are going to unfold. Share your work at
the project and resources page where not only me but other students
will have a chance to get inspired through
your illustration. See you in the next video.
5. Basics of Composition: Let's talk about the basics of composition that can break
or make your artwork. So what exactly is composition? To put it very simply, composition is the arrangement of the elements
within your artwork. Every decision that you make, starting from the
color choice to the arrangement of
different objects, affect how your
message is perceived. Color plays a vital role
in setting the mood. For example, warmer
tones like red and orange can evoke more
passion and warmth, while the cooler
tones like blues and greens can film colmor. Think about how you
want the viewers to feel when they look
at your illustration. One of my friends
gave me this book, Powered by Design
by Rene Stevens. That is really helpful sometimes
when I want to look at the colors and think about different
moods. Let's dive in. Here are the list of
emotions and meanings. For example, the
good understanding of red is love,
passion, energy, power, strength, et cetera, while
in a negative connotation, it's warning, danger, and anger. And each color, as you
see, has different moods. Purple is a color of
royalty, spirituality, luxury, wisdom, brown
friendliness, Earth, et cetera. I know that not everybody
has different books where they can dive
into this information. But on the Internet, you can find plenty of sources where you can see
different color meanings. As well as that, let's look at the color wheels and see how we can play with different schemes and color values to
convey message better. Some primary colors, secondary colors and
tertiary colors. And usually illustrators
use combination of primary secondary
tertiary colors to add different
values of a color. This is just basic
information about colors. I don't want to
confuse you too much. If you want to dive deeper
into this information, you can find plenty
of sources on the Internet and think about
different color schemes. But let's and talk more about composition so you have a better understanding
what we are doing next. A balanced composition guides your side and creates harmony. You can achieve balance
through symmetry or by adjusting different
visual weights on different part
of illustrations. For instance, if you
have a large object on one side of an illustration, you can balance it out by using smaller objects but
multiple objects on another side of
the illustration. Experimenting with placement can create harmony or tension, depending on what kind of
results you want to achieve. Let's see a few examples, and I will explain
deeply what I mean. For instance, I have this
illustration book that is showing different
sorts of composition, and let's see what
the artist does here. These two illustrations
are somehow similar because the girl is looking
at the right direction. But the compositions
are pretty different. For instance, if you
draw lines in between, you see that there
is a horizon and these main characters are placed on the left side of the image, while the right side is empty, which can hint the loneliness, hint how this character feels. Those two characters don't
even look at her while she is looking somewhere
in the emptiness, creating more sentimental mood. In this instance, if I draw lines in between of
the illustrations, we will see that
those two figures are the central figures that almost cross the illustration itself, and while the horizon
here is way lower, we have a bigger space on top. While here, the horizontal line is upper closer to the center. So in this instance, our eye looks at two
characters at first, and then we see the
third characters. This is also pretty sentimental, but these two characters
are more closely related in this illustration rather than in
this illustration. And finally, let's look at
our third illustration, which is pretty different. It adds drama through
this lightning and the horizon is
exactly in the center, while the parts of it
is in the upper part. We have this character that is climbing on the left side
of the illustration, while on the right side, this lightning balances
this character out. If this lightning was
on the writer side, I would actually prefer it. But still, when I look at this illustration and compare
it with this illustration, I see how darker the colors are, how tense the mood is, while here it's calmer,
it's more quiet. So when we talk
about composition, by readjusting the
elements in our drawing, we can achieve
different results. And when we move
to the next steps, you can always readjust
your characters, your items and experiment, see which fits the mood better
and which looks better. Without experimentation,
it's very difficult to achieve
results from the beginning. But if you are already
an experienced artist, I'm sure you can find the best way that
works for drawing. In the next video, we'll put all these concepts into
practice by creating the first illustration with
the shapes and forms that we created and the storyline that we came up with in
the previous videos. Remember to keep your
message and mood in mind while creating
your next piece.
6. Your First Illustration: First, let's choose a
composition direction for our illustration. You have to decide if you
want a balanced composition, dynamic or perhaps
a bit chaotic. Once you decide which
one you prefer, draw the lines to indicate where your figures
are going to go. Those lines will serve as a framework for
your illustration, framework or a guide
for your illustration. Remember that these
guidelines are going to help you maintain cohesive
looks for your scene. If you're working
on Ado B software, you can use guides to create horizontal
and vertical lines. But if you're working
on the procreative, you can go to settings Canvas, then to drawing guide, you can adjust the guide, and then you can draw on top of the guides to make sure that
those lines are straight. In case you are
working on a paper, feel free to use a ruler or something straight
like a book. To make straight lines as well. Let's start pencil
or chalk paint. I'll add a layer. I'll use a different color
to draw a guide to make sure that I can differentiate figures
from the guides. I have decided on
balanced composition, but with a bit of drama. For that, I'm going to use a very thin margins
on each side, and then I'm going to draw horizontal and vertical lines
that cross in the center. Once you draw your lines, feel free to erase the guides, or you can also turn off the drawing guide on
the Procreate app. Now, let's combine
the geometric shapes with the story line
that we developed. Start placing the shapes
inside the lines that you drew and let your
imagination guide you. Whenever something falls off, you can always readjust them. You can erase with
an eraser or you can delete in these
digital softwares. If you don't remember
the small items and characters that
you drew before, feel free to copy and page
them on the same page, or you can also put
them in front of you to make sure that you don't miss any of the characters
on the way. I copied my characters. They are here. Just to
repeat what I have. I had a pinata, a female character, cardboard
box, a diamond ring. A beehive, a dog, a skirt, the circular window, a
house, and googly eyes. While drawing, if something
feels really off, you can just replace them, but make sure that all the
characters come together and they play a part together with the storyline
that you came up with. I have these guides. I'm
going to create a new layer. I'll block this guide, and then I'll roughly sketch a figure, it's
going to be here. Then I have a dog
that is shorter. I'll have a house
maybe on another side. Maybe there is a path coming
towards my characters. Because, as you remember, my entire story is that a female character is moving into a new
house with her dog. She's wearing a skirt. She's having this
new engagement ring. And this house looks like a hobbithouse from the
Lord of the Rings. And there are some boxes
waiting outside to make sure that she has a swift
moving into the house. And there is a twist
in this story, which is this say googly
eye hiding somewhere. That's why I want the look to
be very balanced in a way, but this twist should be a
bit dynamic, a bit dramatic. That's why I'm going
to draw a big tree and the googly eyes will have more dramatic look
somewhere inside the tree. Once you have a rough
sketch of the illustration, look at it and decide if
you want to erase anything, if you want to enhance any
part of the illustration. In my case, as you
see, I have a very, very rough sketch, but I don't actually enjoy how this line, the horizontal line goes. Maybe I'm going to
adjust it somehow. And make sure that the house
has more hobbit like look, and also I will try to balance out different
figures on each side. As well as that, as you see, my beehive is hanging
from the tree. But if I have gata as well, then it actually doesn't
have a place to go. Maybe I'll consider for my story sake that the
pinata is hanging inside, waiting for her when she
moves to the new house. But right now I'm going to
stick with the beehive only. It's not a final sketch. Nothing is going to happen
if you make mistakes. Use different kind
of pen or pencil or even a different
color to make the main shapes sharper and to make sure that you see the
main elements really clearly. You can add additional
layer and you can delete the previous
layer once you're ready. I'm going to add transparency
to this layer and I'm going to use another layer to draw on top of it to have
a clearer picture. As you see, I'm not adding
too many details just yet, because this is just
the first illustration. Afterwards, we're
going to work on many small details,
work on a style. But for now, it's on
the sketch level. Okay, this is what I had, and this is what I have now.
7. Finding the Right Colors: Next, let's talk about color. If you have any colors
in mind, that's great. If not, you can take
inspiration from color wheel. Try combining
primary, secondary, and tertiary colors together. To repeat what
we've said before, the warm colors like
red and oranges can make your illustration
look warmer, and the cool colors
like blues and greens can make your
illustration look calmer. Think about the mood you are trying to convey,
and as well as that, think about the weather and the time of the day that
the action is happening. I want my scene to
be happening in the evening when the sun just went down because I think that these googly eyes will work
better during this time. This female character
should be more joyful while my dog is going to be more worrisome to have this kind of intuition that something is
going to happen. The colors that I
want to use for my illustrations
are like purple, blues, maybe some yellows, but just the hint of yellows. The rest will be more
cooler to feel calmer, as well as a bit scary. Let's see. I roughly some colors because I want to
talk about the color value. Of course, these colors are not going to be my final colors. I just want to explain
something to you. So these are my colors. Now. Now, if you're working
on the digital software, you can turn your illustration
into grayscale mode. In the Procreate app, you can go to the settings, then go to Hue saturation and brightness and then tune down the saturation
till the end. If you're working on a paper, you can always take
black and white photo of your illustration and
see how it looks. Usually, the closes the things
are to the light source, brighter they are and further the items are from the light
source, the darker they get. In my case, as you
see, the girls head, legs, dog, and the beehive is the
brightest. What does it tell me? In this case, it tells
me that they are the closest to the light source, but is it true actually? Even the clouds are the
brighter than any other colors. But in truth, they are pretty
far from the main scene. The tree should be brighter. The girl's body should
be brighter and everything that is
behind should be darker. I can make the color correction, based on the color wheel
and based on the primary, secondary, and tertiary colors. Or I can write quick notes
and make some points, which I will consider
later when we upscale our illustration and
when we make the final look. In this case, I'll
add a note layer. The cloud should be, darker, clouds brighter,
tree, et cetera. As well as that, if composition wise,
something disturbs you, you can always write
notes or you can add arrows to guide them or adjust the items
according to your wish. In my example, I think that the clouds and the net are
too close to each other. Either there should be the beehive or clouds
in this place. Maybe I'll remove the smoke. Or maybe I'll
remove the beehive, but I think that
the beehive is more important than smoke
itself right now. And maybe there should be
more air in my illustration. And the composition wise, what I can do is that
I can lower down the layer of grass
and the house itself. Finally, don't forget that this is not your final drawing. Embrace the process. Once you finish your
initial illustration, take time to experiment. You can adjust horizontal
and vertical lines of your composition and see what works best
for your drawing. Maybe the horizon should
be higher or lower, maybe the vertical lines
should be adjusted. Adjusting the composition
can really help you find what composition works for your story and for
your illustration. And when you are ready, jump to the next video where
we are going to find illustration style that
works best for your drawing.
8. Finding Your Style: In this video, let's
talk about how you can find your unique
illustration style. This is a very exciting
journey because the style can connect your audience
to your illustration. If you are already an
experienced illustrator, you can skip this
video and you can start redrawing your
illustration in your own style. But if you are not, we can explore different
artistic influences, different illustration styles to define how we can continue
with the further steps. Let's start. Start by looking at the theme
of your drawing. Does it remind you of anything? Any other artist's work, any other theme or
movie or cartoon? If the answer is yes, you can gather different
references from that movie or illustration or the idea that
you have in mind. If not, we can continue. If nothing comes to your
mind, don't worry about it. We can gather
different references from different sources, and we can start by
exploring the books. If you have any books
at home, that's great. If not, you can visit different libraries
or maybe bookstores, book a face, or maybe some of your friends have artistic
books that you can use. If not, the Internet
is always your. Look for the books that showcase different styles,
different artists. You can also use tarot cards or posters or anything that comes to your mind.
You can look around. You can visit a
gallery around you, where you can see how
different artists express their ideas. As you find the pieces that
you really love, make notes. You can screenshot or you
can save different images. Write down what is
exactly that you like and gather those
references because later you can look
at them and you can copy or you can draw
something similar. In case of Ya coono, she has her poetry and
next to the poetry, there are illustrations
that express her ideas. It's very surreal. You can't pinpoint the
items or the characters, but it's very expressive
at the same time. Character wise, I
really enjoy looking at Mattias Adolson's works because he's very
detail oriented and he's drawing his characters
with a bit of humor. He uses watercolor and ink pen to illustrate his works
and illustrate his ideas. This book is my last
purchase. I really like it. It's called witchcraft, and it shows
different artists and illustrators drawing events happening in
different centuries, expressing how witches were treated or behaving
in that century. If I like anything, I will write them
down. Or take a photo. Sometimes there are
just some parts of artwork that we really enjoy. It might be colors, it might be small details. But whatever it is, if it draws your attention, just capture it and save
it for the further use. In case of the website, you can Google what
you want to see, or you can also visit websites like Pinterest or Nunness
or Jax stepos Magazine, where they showcase
contemporary artists or some new discoveries, and they might be new
discoveries for you as well. When you see something
that you like, make sure to screenshot
or save them. When you have your
collection ready, just take some time to analyze everything
that you gathered? Do they have anything in common? Is there anything
specific that you like about those illustrations
or references? How do line colors
work together? What materials the artists use? Just analyze them for yourself. And don't worry if
your skill level is not there just yet. We are learning as we go. You're going to
develop your style and you're going
to grow over time. A good exercise
would be to imagine how specific artists would
draw your storyline. Now, feel free to pose
the video, take 20, 30 minutes to
analyze everything, and to re imagine
your current drawing. In a new style. Would you use pencil or pen
or marker or acrylic paints? What is going to be a
definition of your new style? Always remember that finding your style is an entire journey. It doesn't happen just like
that most of the time. So don't worry if you
are not there yet, this is just an exercise. The next video is
going to be really exciting because we
will take all the notes and references that we
gathered and we're going to recreate and upscale your previous illustration
with a new style.
9. Upscaling Your Illustration: In this video, we're
going to upscale your illustration by using the references and notes that we gathered in
the previous session. Before we dive in,
it's important to take a deep breath
because it's much easier to illustrate
with less stress. Just remember that this
is just an exercise, and the main goal is to
explore and experiment. Again, if you are an
experienced illustrator, feel free to use your style. And also, while
using your style, you can reconsider the
entire illustration and thinking what
changes you could make. Now, let's bring some life
into your illustration. Grab the notes and the
references that you gather. And compare them to
your illustration. Is there something that you
can use from the references? Maybe some colors,
maybe some lines? Anything that you
liked before can be used and applied in your
illustration. Let's get started. I opened my previous
illustration and I'm looking at it and
considering what I can change. Actually, it doesn't resonate with my current style that much. It looks more childish
that I'm willing to look, and I'm going to take
just a few ideas from this illustration and I'm going to recreate entirely new image. For instance, I am going to combine my female character and the dog character and create
entirely new character. So this is a combination. I'm going to use the
element of a beehive, maybe a hexagon shape. I'm going to use the box
because I think that the unbreakable or breakable box can offer many
interesting things. Maybe I'll open this box
and then I'm going to use ugly eyes to express
something completely different. Let's start sketching it out. Again, I'm going to use the drawing guide for
a new composition. I'm going to adjust
the grid size because this is too small. I want to use the emergence. I'll draw one line
in the center. And then, actually, I think that I'm going to focus
more on the left side. So on the left side
of my illustration, there's going to be more drama. While on the right side will be a lighter illustration
which will balance it out. Let's see where the
horizon is, the center. So this is a center. Then I'm going to hide
the drawing guide, and I'm going to
start sketching out. As you now see, I'm using the tree shape and I'm
creating something completely different
that doesn't look like the previous
illustration. But this is what
happens when you apply your style into a theme. The previous illustration was just a tool to get us inspired, but now it's time for
the magic to happen. When it comes to the colors, apply your colors thoughtfully. Start with the bigger areas, and then finish up with
a smaller details. And also, don't be afraid to experiment with
different combinations. Sometimes what we
have in mind doesn't look great on paper
and the vice versa. I'm planning to use the minimal colors
in my illustrations, not to lose the drama
that I have right now. So I'm going to use
blacks, whites, but most of the illustrations will have maximum five
different colors. Make sure to outline
the main characters. Add some texture, some details, maybe some grass or the textile or the
frames on the walls. Anything that comes to
your mind that is missing, make sure to add them. Also, a tip is that if you're drawing in
the digital software, make sure that everything
is on different layers, so you can easily erase
them or edit them? Great job, everyone.
You did really well at upscaling
your illustration. In the next video, we're going to finalize it and
we're going to add some touches
and we're going to combine them to your
newly found style. So see you in the next video.
10. Final Touches : In this video, we're going to focus on wrapping up
your illustration and making these
final touches that bring your entire
illustration to life. First, take a look at
your final picture. Is there anything
that stands out? Does anything feel a bit off? Just trust your intuition and remember that it's a
very powerful tool. If something feels like
it needs retouching, this is the time to readjust it. One technique that
I really like, and I'm not sure if this is something that I came
up with or I learned somewhere is to take your illustration and look in the mirror with
this illustration. Sometimes changing
the perspective shows the weaker
spots of the drawing. In case you are drawing
on the digital softwares, you can flip the page and
see if anything looks odd. As you see, my illustration
has some weaknesses, so I'm going to tweak those
little parts and improve it. Now, let's consider if your illustration fits
the style that you chose. Did you discover anything new? Did you discover
perhaps your own style? I would be really interested to know your new discoveries. As a beginner, we
often don't feel when it's time to quit. And that's why this
mirroring technique really helps you to see what is
extra or what is necessary. Remember, you can always redraw your illustration
and improve it. And once you feel
satisfied with your work, make sure to share it in the project gallery to showcase your hard work
and your progress. Along the way, if you have
any questions at all, feel free to ask them
at the discussion page. After all, we are all here
to support each other. Congratulations on
reaching this final point. Can't wait to see
your creations and see how big of a difference you made
throughout this class. As a bonus, make
sure to check out my next video where we'll
be adding a new layer to your creative
toolkit by creating stickers from the illustrations that we made. See you
in the next video.
11. Bonus Video: Welcome to my bonus lesson. Now we are going to create digital stickers out
of your illustrations. I'm really, really
excited to teach you these skills because
this is something that I've been making over a decade, and the stickers
are a great way of communication and sometimes
even promoting yourself. You know, when I was
starting as an illustrator, I didn't have too many works,
but the ones that I had, I turned them into stickers
and then I printed them out. And whenever I would go, even if it was social
gathering or a word gathering, I would give my
stickers to everyone. And this is how my
visual brand called Masholand came to life and how other people got
to know my brand. So do you remember those
geometric shapes that we use for our first
sketches? So we need those. If you were drawing on paper, make sure to photograph
what you created. And here, these digital software would be really, really helpful. When you photograph
it, you can bring them to the software and start. In my case, as I was drawing
on the Procreate app, I'm going to open my creations. I have ten objects,
probably you do two. And I'm going to
split them apart. At first, I'm going to take Lasso tool going here
with a free hand. I'm going to outline my gotta and I'm going to
push copy and paste. I'm going to go back to the previous layer and I'm
going to repeat those steps. Once I have all my shapes
on different layers, I'm going to delete
the basic layer where all the shapes
are together. Feel free to rename layers,
not to mix them up. Now we're going to add some colors because
we had only drawings and colorful stickers attract more attention than
grayscale. Let's start. Just if you are working
on the Procreate app, you can hide the
background color to see if anything has a
transparent background. While printing the stickers, sometimes transparent backgrounds
don't work really well. That's why we need to hide it and we need to make sure that everything has
proper coloring. A Alright. Now, when you have all
your drawings colored, it's time to add outlines because usually when you go to the printing house, they ask your stickers to have some outlines because it's
easier for them to trim. You can create a separate
layer for outlines. So what you actually
need to do is take white pen or pencil, and then you're going to add
outlines around the sticker. Make sure that they don't
touch the drawing outlines. Once you're done
outlining your stickers, you can choose a
background color. And when you print
out the entire sheet, this background
color can work as an attractive piece and it can enhance your
entire sticker pack. I'm going to use darker
color for my background. I'm going to take
a separate layer. Then you can readjust all
these shapes on the paper. You already know how to readjust according
to the composition, so you can apply
those skills here. Make sure that you have
some spaces left on each edge because during
the printing process, those parts can be cut, so you don't want to lose any of the pieces
in the process. Additionally, don't forget
to add your name tag to this illustration pack because it's going to be kind
of your signature. As artists write their
signature on the painting, you can write your signature
to the sticker pack. It's going to be
good for marketing, as well as for your future
creative business to grow. When you're finished, make
sure to convert your file to PDF file and you can save it or send it
to the printing office. If you have a printer at
home, you can try it out. Usually, the printing
offices will add additional thin outline to your already existing outline for the cutter to
understand where to cut. Otherwise, I think
you're good to go. Of course, there are
more techniques, how to create stickers, and there are so
many creators on this platform explaining
everything step by step. But I think that now
you have a bit of an idea how to take
your process to the next level and what
you can create with the illustrations that we already made
throughout this class. If you like my stickers, you can also purchase them at
the digital products page. In case you have any questions, I'm always here for you. Don't hesitate to ask
me at discussion page, or you can also write
me on my social media. In the next video,
we're going to wrap up the class, so
I'll see you there.
12. Wrap-Up: Congratulations on
completing this class. You did so well. Could you imagine
at the beginning that you would go so far? I'm really curious to
see what you created, and please share your process and the results in
the project gallery. It would really encourage me to see that you really
enjoyed the class. And if you would
leave me a review, it would be a really, really huge thing for me. It would show me
that I'm doing well, you're enjoying my classes, and it would give me a push
to create more classes. Thank you. Thank you so much for watching this
class. You made my day. And I wish you a
fantastic day as well, and hope to hear from you, to see your work, and see
you in my next class. Bye.
 Masho Marg, Multidisciplinary Artist & Designer