Transcripts
1. Introduction: Welcome to beginner's
Stage two crochet. After stage one, you're ready
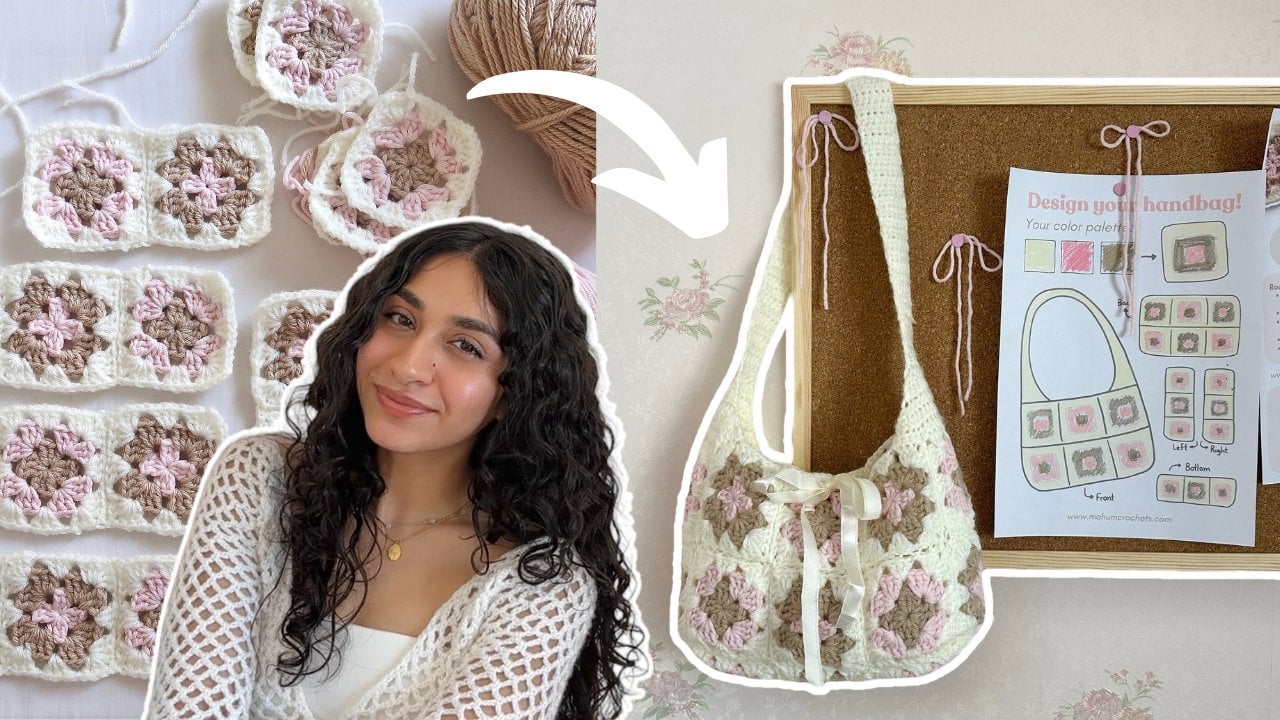
to make something real, something you'll actually wear. This is my cross body bag. I made this bright version so that you can see
every stitch on screen. But this multiclored one is the one that I grab every
time I leave the house. I put my phone, my keys, my lip arm in it, and all the essentials. And people ask
where I brought it. Here's what we'll
be making together. A mini granny square bag with
a strap size that you want. It's the perfect next
project because it builds on what you already
know from stage one. But now you'll
work in the round, you'll change colors and finish something that
feels properly made. You'll learn treble crochet that is in the UK and
Australian terminology, working in the round, how
to make granny squares, how to change colors
easily without stressing. Crab stitch edging, crochet
cording for the strap, whip stitch to sew
your bag together. And if you want how
to line your bag, so it's looking beautiful
and professional. The last bit is a bonus lesson, so that's just totally optional. You don't have to do that one
at all if you don't want. Now, a little about me. I have been teaching in person
for the last few years, and I've seen exactly
where beginners get stuck. So I've built this class to fix those tricky spots
before you hit them. I've been crocheing
since I was a girl, and it's still one of my
favorite things to do. Because it's so relaxing. And I just love you to be
hooked on crochet like me. If you haven't taken
stage one yet, go watch that first,
because you'll need those foundation skills to
build on for this class. So let's go make this bag. Grab your materials list, and I'll see you in Lesson one.
2. The Project: Are going to be making a mini granny square
cross body bag. You can also see one
behind on the model, and this is the one I have made while showing
you how to make them. It is lined, although you
don't have to make it lined, but it does have a lot
of benefits actually. By lining your cross body bag, it does stop things from falling out in the
middle of your bag. When you have little things like glosses or
things like that, they can slip through the stitches because they
are a granny stitch. It also stops little
things catching and pulling stitches
on your crochet. It stops wear and tear
with things in your bag, and it shields the
crochet from being worn. So it will last a little longer. It also makes it look
professional and aesthetic. And also, because
I have the white, the white actually accentuates
the colors of the bag. So it all works in your favor. But as I said, you don't need to do it if
you don't want to. What you will need you will need a four millimeter
crochet hook. You will need a ya needle. So a yarn needle has
this big eye on it, so you can thread
the yarn and you can thread it through so that your ends won't pull out and you not lose your bag
because it won't full done. You will also need
a sewing needle, just a normal needle that's
small enough to fit through your fabric without causing holes and without being
too hard to pull through. So you're just going to
need some cotton, as well, and some scissors to cut out the fabric and to cut
your yarn threads. You will need an iron
and an ironing board. And some pins if you'd like
to pin your fabric together. I actually didn't even use
pins, so that's egretib. So, let's get to it. I'm excited to show you
how to make this bag.
3. Treble Stitch: Hello, crochet friends. This lesson is about learning to make a
treble crochet stitch. In the UK and Australia, that is what it is called. However, if you are in the US, the terminology for it would
be called a double crochet. Just in case that gets confusing because it can be
quite confusing with the different
terminologies. I will use a 5.5 millimeter
so that it's a bit clearer and I will go nice and slow so you can see
what my stitches are. But you can use a
four millimeter, which is also equal
to a G in the US. Let's go over to the other camera so you
can see what I'm doing. Make your slipknot,
as we learned in the first class
of the series. Then we're going to
do some chain now, this is just so that we can get the hang of doing a trouble. We're going to work
it in the row first. Because in the row will be easier to learn than
doing it in the round. We'll learn the row first. Okay. Even if we just do ten, one, two, three, four, five, six, seven,
eight, nine, ten. We'll do 11. Actually,
we need 12 because we do two chain. You have two chain
turning chain. First of all, we go over. Then we are going to go into into the chain
and pull back through. You now have three on
your hook, three loops. You go yarn over, pull through
two and pull through two. I will show you this again. Um and nice and slow so
that you can follow along. We're going yarn over the
hook or hook under yarn over. You always want the yarn
to come towards you. It's also anticlockwise. Whatever helps you to remember which way to bring the yarn, then we go back through
your chain and once again, yarn over, hook under or
yarn over and back through. That will then give you
three loops on the hook. Yarn over again, pull through
two, pull through two. Alright, I'm just going
to keep doing this slowly so that you can
get the hang of it. If you want to fast
forward through, you are most welcome. Okay, we've come to the end, the last stitch in the row. And we are just going
to do yarn over as usual into the last
stitch yarn over, hook under yarn over, hook under, pull through two, and pull through two. We are then going
to turn our work. We just simply
turn our work like this and work back
across the other side. I would like you to
do for homework, a small swatch of perhaps five rows just so
that you get the hang of it. On the end, we're
going to do two chain. This will be our turning chain. So you can see where that
chain has originated. We're going to go into
the next stitch here. Hook under yarn over, and then we're going to
go into the next stitch. You'll see you've got your
little V on the top here. Hook under yarn over,
pull back through. You now have once again
or three stitches. Then keep going. The hardest part is don't miss your turning chain at the end, which looks like this, you will need to crochet
into that one. The best way is when
you get to the end, just check that you've still
got your ten stitches. If you've still got
your ten stitches, you haven't missed any. How did you go? I hope
you've learned how to do your treble stitch well now. So now, you'll notice that I
do a turning chain of two. It should actually be three. I guess that's because I
have fairly loose crochet. Now, if you have a tighter
tension on your crochet, you probably will want to
do three turning chain. But I will leave that up to you. My preference is two because I just feel like it
gets too loosey goosey. So totally up to you. Two or three turning chain. Three is the recommended. I use two, and I shall see
you in the next lesson.
4. Making the Granny: Ho. First of all, we want to make our slip knot. If we just make a little loop, the yard's underneath that loop, you put in the middle
and you pull it through. That's an easy way to
make your slip knot. Now we are going to
make five chain, one, two, three, four, five. We are going to slip back
into the first ditch of the chain to make a loop. Next, we will do three
chain, one, two, three. That is going to count
as our first treble. Then we do two more treble. That's two treble. Then two chain in
between the treble. It's like a treble cluster. We're doing four
treble clusters. This is our first
treble cluster. We do one treble cluster,
then we do two chain. Now we are onto the
second treble cluster. We do three more treble. I'm just going to go really
slowly and if you need to, you can forward
through the video. I just want you to be able to follow along if you need to. We've got now two
treble clusters. We want to do two chain. Then once again another
treble cluster. It you'll see that I'm
actually working over the long tail so I don't have
to have as much to sew in, I will still double back on it. Back to our treble cluster, we're up to two. This is our second treble. To count our treble, you can see by the
stem says one, two, three, and at the top, one, two, three, you're
counting your Bs at the top. But it's easier to
count by the stem. Just a kid. That will be my third treble
in that treble clusters. I've got three treble clusters. We're going to do two
chain and then we're going to do again one more
treble cluster, which is a lot of three trebles. That's two and
that's three treble. Then we do two chain. Now we join in one, two, three to the top
of the third chain. With a slip stitch,
we're then going to do another slip stitch across. Now when we get to this,
this is our corner. Two chain space is our corner. We're going to go in there. Then we are going to
introduce our next color and I have a nice bright orange here so you'll be able to see. Introduce our next color. Basically, you discard that one. This is the other tail. This is the one I was using. We are going to use this one. We just bring this one
through and through. Then we do three chain,
one, two, three. Once again, I crochet over
the top of this yarn. It just makes it a
bit neater and I like it to be a bit
neater. There we go. That's one because our three
chain replaces one treble. This is our corner. Our corner will
have three treble, including that one
of three chains. That counts as three. Then we do two chain, then we do another
three treble cluster. Then we do two chain. All of these are
corners on each corner we will have two clusters
with two chain in between. Three treble, two
chain, three treble. Then two chain in
between the clusters. Off we go again to
the second corner. Once again, we want
to do three treble. And then two chain and
then three triple. Can you see how it's
starting to make a square? We want two chain in here. Then off to make our
next treble cluster. Once again, two chain
and three triple. We do three chain when we
are replacing a treble, but two chain in between
each to make our gap. There we go. Now we're
up to the two chain. Next is our three
treble cluster. Two chain, then our last
three triple cluster for this row. Then we'll change
to the next color. That's our three triple
cluster. We do two chain. Then we're going to come
here and go to the third, slip into the third chain, one, two, three chain. And do a slip stitch. We then slip stitch across
those two stitches. Then we're going to go into our next two chain space and we will add in
our next color. We go through, we
add the next color, and we pull right through. Now, these ones at the back, if they're really annoying you, you can just cut them off. This one here from the white. We're just going to cut that off because it does get
a bit annoying, but leave some length so that we can actually
sew in the ends. Otherwise, you're going to have grani squares falling apart. Next, I just ali tight
and off we go again. Once again, we do three chain. Then we do two treble. Then another two chain, and then three treble. Once again, you can see we've
got our three treble here. This is our three chain. It makes the first
treble, one, two, three, one, two, three, with our
two chain in the middle. You can see now this
time we're going to have one in the middle
of our two corners. We have all these are
corners obviously, and they will have three treble, two chain, three treble. But in our middle gap, we are just going to
do the three treble. We still have our two
chain to separate them and we have our
three treble in between. Two chain again, then we go
into our corner once again. That makes our third treble. Then we do two chain again. We're just repeating the
same thing over and over. Feel free to forward along if you've got
this under control. If you still want to follow
along, that's totally fine. I'll just keep going slowly. So that you can just watch as I work through the rest
of this granny square. Okay, so to chain, and then we are
just going to slip stitch back into the
top of the third chain. We will then pull that through and cut off the thread so that you have enough
thread to sew in the end. There we have our
granny square finished. Next, I'll go through
how we sew in the end in the next lesson and we'll
start making up our bag. Now that you have your granny square making under control, we are going to need
12 granny squares. So once you've completed
your 12 granny squares, move along to the next
class so we can sew in the ends and sew
your bag together.
5. The First Side: Right. First of all, when sewing in this end
one, it's really nice. Now, this is probably not
a beginner technique. If it's too difficult, just ignore this and just
sew it in as normal. But what we can do is
on the front here, see where we've got our stitch, our little stitch is here. We go in across like
this, two stitches away, and then we go back in our
stitch and it blends right in. It just looks like
another stitch. Then we turn around to the ba. I like to just go down a few of these stitches.
Pull my needle out. Then we are just going to go in here and backwards
and forwards a couple of times just to
secure our stitch and that's all we need to
do to sew in our ends. A lot of people
really hate these. I actually don't go back in the same hole obviously
because then you're going to just do it undone. We go back through yeah, a lot of people
really hate doing these I did when
I first started, but I think it's it's quite a nice
relaxing thing to do as long as you don't do
it when you're in a hurry. Just something when you're
relaxed and just want to maybe watch TV and
sewing your ends. I think you don't need to think about doing because
it's quite easy to do. Then I just snip that off. Then try and I do save a
lot of my ends and things. I will just put them into a bag or something that or a tin. I've got a tin that I collect all the
different things in, and I make up little beds for my guinea
pigs or for my cats. You can always use
them for stuffing. If you make them groomi
and things like that, they come in handy and it's less stuffing
that you need to use. That is the one that
I crochet over. I just go back through
a couple of times just to make sure it's well
and truly secured there. So we're just going to do the same thing with
all these little ends, and then I will come
back and show you how to stitch the two
squares together. All right. Now, what
we're going to do is grab two of your
little squares. This is the front side,
this is the back. You can tell just by the look
of them by the stitches. See how the backs go. I guess lumpier stitches. Anyway, we're going to put
these right sides together. We're going to
thread our needle. And we're going to
start at the corner. What I do is I leave
a little tail and I come back and sew
that in afterwards. We just leave our
little tail there, and then we just
stitch through the vs. Whip stitch just
over and over again. Just matching the
stitches together. You'll see that
that just creates a nice little seam
there all blends in. As long as you use the color, that is the outside color and keep sewing that right along and then you'll
have your two joined up, and then you'll have another
two lots for each side. You'll want three lots of two. I'll just get through
this and show you how it look once you have
sewn those together. Now that's done, we just open it out. This is how it will look. Then once you have
sewn, actually, you might just take it over
into the corner a bit further because We want it sewn
right to the edge. There we go. That's better
right into the corner there. I'll do that one as well. We'll just bring
that over further into the corner because
we want it to look tidy and when we actually come to sewing the
two sides together, we want them to
match up as well. There we go. That makes
it better. Excellent. Now we have our
six granny squares and we have them sewn
together in pairs. We then turn this pair over, sew it together as we
did with the others, and then this one
and sew it together. You will then have a half
a bag, side of a bag. Then we need to
block it. I'll come back with this sewn and demonstrate how we block it. And
6. Blocking: Now that we have a full side, we're going to pin it down
on the ironing board. And with our tape measure, we are just going
to measure it's the right size that we want. So mine is 15 centimeters, 15.5, actually, by 23. Yeah. So see how
this little bit is not quite as far out
as the other side. We're just going to even it up and see how you've
got little wonky bits. It's quite normal. It
will look like that. Because this is acrylic, it is a little harder to tame, so it does need the
steam to tame it. If you're using cotton or wool, you can just give it
a spray of water, pin it out, spray it with water. And once it's dry,
it will be fine. It all depends on the
medium that you're using. And because mine is acrylic, it is a little
harder. All right. So we have our iron on and we don't put it
right on our fabric, but we just press the steam. We give it a good couple
of steams and then Yeah. You'll feel it to be damp. Then, let it dry, and then you can do that with the other side so that you
have two sides of a bag. Then we are going to do some double crochet
around the edge, and I'll be back and
show you that shortly.
7. Edging: Now the final step is to double crochet around the full edge, and that will also
settle it down. I haven't allowed it
to just sit very long, so it is a little out of shape, but once we sew it together or crochet it together
to the other side, it will look fine. Now, generally, I will
double crochet around the edge just in the same color as I've
done the outside row, but I am big on desashing and I have
run out of that color. I'm just going to
use this orange, but feel free to use
whichever color you want. Now, grab the yarn. Don't forget to hold it around your little
finger and over. Then in the corner, we are going to pull
through and slip stitch. From there, we are going to
do three double crochet. In American terminology,
they'd call it single crochet. But we call it double crochet. So we're going to do three
double crochet there. And then we're going to
go into each stitch. Well, actually, I
do two stitches, then I do one in the middle. We don't want it to bobble. If it's starting to bobble
or cool up too much, you want to just skip a stitch. You want it to stay
nice and flat. Because mine's doing fine here, I'm just going to do
three, three in here, then one in the middle. So let's try that. Go into each treble stitch
and then one in. Then when we come to this one, the join, I will just do a double crochet
in there as well. Basically, it's just looking to see how your crochet is
going to look the neatest. Either two or three across here depending how
your crochet is look. A so continue on with that
and continue on right around. This is how we are looking. Now, I've been right
around the edge. We're back to the start here, and we are just going
to slip stitch into the first double crochet at
the front and finish off. That is it. And once we have done the other
side of the bag, we will then come back and
crab stitch them together. I'll see you in the next liston.
8. Cording: Welcome back. We
are almost there. We have now got two
sides of our bag. We are going to start the
cording to make the handle, and then grab stitch it
together and you are done. So close to the finish line. Let's get to it. Let's get started
on making our cord. First of all, start
in about 2 meters, about 2 meters from the end
and make your slip knot. I'm using the 5.5
millimeter hook this time. I find that the bigger
hook is better, the yarn with the
end at the front. Now we're going to move
over the needle and then we're going to put this
over the needle this way, and then we're going
to pull through both and just tighten that up. So then that is it. That is all there is to it. The yarn from the front
goes to the back, the yarn from the back
comes to the front, then just hold on to your little cord that you're
making and pull through. That is it. Then we just keep
doing that until we have made a cord big enough. I think I made about a meter, but just measure exactly
how long you want your bag to be and how
long your cord should be, but take off probably
about About that much, I would say a couple of inches
because it will stretch. But it is just trial and error, see how you go if you want to hang it up
for a day or two, see if that's the right
length that you would like. If it doesn't stretch any
further, then so be it. I guess pin it together. Pin it together, hang it up, make sure that's the
length you want. See if it's going to stay at that length and then sew it on. That is it. We just
keep doing that until we have the length
about a meter or 1.5 meters. Keep going with that and
then I'll come and show you next how to crab stitch
your bag together.
9. Crab Stitch and Finish up: So now we are going
to crab stitch together out two
sides of the bag. Starting in the middle here, We are just going
to pull through. Another thing is, I'm choosing
to use the 5.5, again, just to give it that bit of
definition around the edge, but you are welcome
to use the four. It's still going to work fine. In fact, the 5.5 is a
little hard to get through. If you've got tight crochet, you might need to
use the four point. It's just a little hard
to get through some of the stitches. Just
play it by ear. We're going to slip
stitch into this stitch. We are then going
to come backwards. This crab stitch is
actually worked backwards. We are going into
the next stitch. We're going to pull the yarn through then it's just
a double crochet. It's just a double
crochet bit backwards. Hence, crab stitch. Take it slow and being careful to make your little
stitches definitive. So we want to see those little
stitches there like that. We're going into the fabric, pull through, like a
normal double crochet, making sure these two are
overlapped like that, pulling your yarn through, and that will give you
that nice little twist. Now, you may have a
couple of stitches that are different on the side. I just mean time to
go into one stitch a couple of times to
make sure it's even. That's it. We're just going
to do that around the edges. All edges actually. I go down here, down here and down here and you're crab
stitching both together. Then when you get
back up to the top, just crab stitch
around the front, crab stitch around the back. But we are going
to sew our handle in before we do the
crab stitch around the front because we
want it to be sewn in there and then we'll do crab stitch along the front and
crab stitch along the back. I will come back when I'm up to that part and leave
you to continue going. Okay, we are coming up
to the home run here. So I'm almost up to
the last corner. All right, so I just want to do probably one more
stitch here, I think. Then what we need to do
is sew in the handle. I'll use this end first just because it has this huge
long piece of yarn. I can use that yarn
for the other side. All right. Thread up
your your yarn needle. And we are just going
to place Actually, I'll just pull this
out from now because we are going to continue
around that in a minute. We place our handle in here
and we are just going to do a few little stitches into the yarn nearby and back
into the yarn handle. Making sure I'm still
on the screen there. Just a few little stitches in. I'm just going to
leave that one out. That one I'm just going
to sew in and I'm just using this one to sew
the handle into the bag. Actually, if I just go across this way, it might be better. Grabbing some on
each side and back through Then once again, we are just sewing in
the ends as we have done many times before with all of you should be a genius on sewing ends in by now with all our granny
squares we've sewn. Okay. Just sewing that through. And I'll sew in this end here. Then I'll show you.
We're just going to work around the handle and keep
our crab stitch going. I'll just cut those
ends off there. Don't forget to sew
in the other end. At this stage, you sew the
other end in over here, and then we are going to keep going with
our crab stitch here. I'll come back in a second
when I've sewn the ends in. I have now got both, my handles sewn in and we are going to come back to this side here where
we were working. Just going into the one
layer now instead of both. Yeah, this one's definitely
harder to get through. I might just go back to my four millimeter hook just
to get through on the top. Because my stitches
are a little smaller. I'll go into here.
That's much easier. It will mean that my pattern is a little smaller
along the top, which is fine for me because the sides are where it's joining
the two together. I don't mind that. It's a
matter of what you prefer, but it is much easier
with the smaller hook. There we go. But it's still Yep. There we go, we've
still got our pattern. It's just a little smaller, but it still looks nice. I'm just going to continue
going around the top edge. When I get to the
end where this is, I'm just going to skip
across to this one, come straight back down
and do the same here, skip across and
then join my yarn, cut off my yarn and join it all in and then
that will be finished. I will just keep the video running so you can
follow along if you need to. So I'm just going to sew in the last weave in the last end, and there we have our
beautiful little bag.
10. Penultimate: Welcome to our bonus section. I'm so proud of you
for getting this far and actually
making your bag. This lesson is about making
a lining for your bag, and we are making it by hand. This is a little completed bag. We just need some fabric. I'm using a white
cotton to go in the middle to
accentuate the colors. I'm using some white
thread, any thread. I using polyester actually, polyester thread, but
it doesn't matter. You can use whatever
thread you like, and I'm using a sewing needle. It's just a normal
sewing needle with a reasonably small eye so
that you can pull it through the fabric okay as long as
you can get your cotton in, obviously, and it's a size
that you are comfortable with. There's no particular
need to have a certain size or
anything like that. So now we are going
to dive right in, and I'm going to change over to my other camera so that you can see exactly what I'm doing. First of all, let's
just iron our fabric. We really do want the wrinkles
out as much as possible. Doesn't have to be perfect, just so that we can cut the
piece of fabric that we need. Accurately, reasonably
accurately. It's actually fairly forgiving. I'm just owning the
piece of fabric and we are just going to
see how much we need. We will need about a centimeter on each side hoocm allowance. If we bring the bag over, going to need your
fabric doubled so that you can do both sides obviously. What I'm going to do is
I'm going to cut this out just around the fabrics
not going to be hard to do. I might even just
leave that there because that way I've
only got to sew this side and this side and hem the top. You can cut it so that you have a seam
each side if you want. I'm just going to
roughly cut it out. We have the right
amount of fabric here. That's our fabric cut out. Next, we are going to the
right sides together. We want the right sides showing
in the bottom of our bag. When we open our bag, we want to see the right sides. So we are going to sew it with
the right sides together, and this will be the wrong sides and it will be hidden
within our bag. We'll cloth we'll just do
a rolled hem at the top. If we just iron it and
then iron it again. You have a nice rolled
hem at the top. We're just going to do a
little hemming stitch. Around the top. You hide, you're not underneath, you pick up a little
bit from here. You just go into the fabric, slide through when you get here. We are going to pick up
another little bit of fabric, just a little tiny stitch. Then we're going across again. Pick up our next little stitch. And we're going to do that
across the whole top. That will give us a
nice hidden stitch and you can press it again after you have finished
it if you want to. Then we will start the
bottom and the sides. Now that we have the top zone, we're going to do the bottom. Well, if you've cut this side, we're going to sew round,
sewing right round, we're just going to
thread the needle and do a backstitch. Don't forget to put the
notch on the bottom. So we just go into our fabric like this and
take your first stitch. We then go into the middle of
where we've made that first stitch and come back out. Then we're going to
go back to where the last stitch ended
and continue on past where the other
one comes out. That is all there is to it. As far as I know, it's
called backstitch, but there could be a modern
name for it. I'm not sure. It is easier if you do it
over the top of your finger like this just so that you are able to easily go
through and continue on and we are just going
to continue that right up to the top. I'll come back and we
shall sew it into our bag. I will just show you how
we finish off so that we don't so that we don't lose your work
and it comes undone. Don't want to be
fixing it again. All right. We're just going
to sew up to the end. Going through the last
few little stitches, it's a little harder. As we get to the top, we will just do a couple
of little stitches, just to make sure
it's well secured. Then just wind cotton around your needle and pull through, making
a little knot. Trim it off. We will then just give the fabric a
quick trim around the edge. Now that we have popped
it into the bag, we're just going to go
round the top of it and just do a little
whip stitch to keep it level with the top of the crochet so it
stays nice and neat. Once again, you want your knot, you hide your knot
behind the fabric. We're just doing a little
stitch through and then we're going to stitch into
the crochet and back. I'm just doing a little
whip stitch right round. That's it. We just
complete that all the way around and then you'll
have your completed bag. Thank you for hanging out
with me on this journey, and I hope you are
enjoying your new bag. This is how my new
bag is looking. It feels lovely with
the lining inside. I can't wait to see your bag. Please post it and I'll see you in the
next class. Bye bye.
 Benita Tatters, Designer