Transcripts
1. 1. Intro: Hey guys, I am digitally and I'm a music producer
and sound engineer. In this course, I'm going to
show you how you can master your truck with only
Logic Pro plugins. You are going to
learn how to prepare your project for a better
mustard and workflow. In addition, how you can use
equalizers, compressors, multiprocessors, also what the
parallel compression is and the Match EQ techniques. These are like really gems guys, without further ado, let's
go and have a listen. Hold the truck sounds before the mastering and how it
sounds after the mastering. All right. Hi. All right.
2. 2. Course Requirements & Free Presets: A cookie disclaimer guys, in case you don't
know, for example, what they call as it does, or what the compressor
does, or for example, what the limiter is, then this course might be a bit difficult
for you to follow. This course was made
a little bit for more intermediate
to advanced users. After finishing
this course, guys, I am 100% sure
that you are going to have your tracks on
much better than before. In addition, I'm
going to include some presets so that you can download and
use them for free. Don't lose any more time, guys, and let's go start this course.
3. 3. Preparing The Project: Hi guys. In this chapter, we are going to talk about
how you should prepare your project to have a
better mastering workflow. So I'm just going to import the tracks that we
are going to matter here. Sometimes logic
as if you want to import the audio file
information with the tempo. For example, in this case, I'm not going to
import this because I want to show you how you
can make it to myself. And also some markers. We're going to do the same. We're not going to import them. So this is our truck right now. And let's go and
find the beeping. Okay, ignore that. For example, here I've got the info 89 BPM. Let's say that we don't
have these two information. Let's go on a truck here
and choose metering. And let's go on the
course and lead play. Okay, in this case we've got 89. We will live on 89. And just to double-check here, Let's go and put the metronome. Okay, Now we are 100% that the tempo is correct
here, the PPM. The next week that
we're going to do, we're going to put
markers on the truck. For example, we want to
know where's the intro was the Corps was the
verse, and so on. So in this case, I'm
going to start here. This is the intro. And I see here this
one is the chorus. I believe here it's
a small bridge. We're going to use
also the course again. Okay. Okay, cool. Now we got
this section here. We go, Share and we would
put another marker. Then it would just go
and on the left here, on the market age and delete
this one and we are ready. So here, let's go
and make it better. Make it a bit easier
to work on here. Okay. No. I'm just a little bit obsessed with
this things because if my view on my project
is good for me, It's better to work
and easier to work. Here we are going
to write intro. This one is the chorus. This one we can
name it, reverse. This one, we can emit bridge. Then it would go here. It's the course again, we'll just copy paste
and make it longer. Here again, the bridge, here again the cars. And here's the outro. We take the intro, we put here, let's say outro. The other thing is that
I really like to do is coloring our sections here, the intro in the
algebra example, I like to put them on yellow. The course, I like to put
them on read the verse. I like to put it on blue. And the bridge. I
like to put it, for example, this pinky
thing. Okay, Cool. Now after that, we see here
that we got our sections. Let's close this one. And for me it's easier
to work right now. And the other thing
that I'm going to do is now I'm going to
import a reference track. Because I want to compare my original track to
the reference track. My goal here is to
make my truck come as close as possible to the reference track
from mixing purpose. Okay, here you can see right
away that this waveform, it's much bigger than this one, because this one has a
limiter and it's much louder. While we can do, we can go
here and put it on metering, and then we're going to meet
her the loudness of a truck. So let's start with our original track.
Choose the course. Okay, I chose the course
because the course most of the times is the loudest
part of the track. In this case, we're
hitting like minus 22 UFS. So we're going to go here on our reference track
and we're going to try to hit again
here minus 2012 UFS. Let's go and do the only bits. And I know that this
one is a chorus. And let's try it. So that's a little
bit louder, I think, like here minus 12 GBs. Okay, we all almost the same. Let's go and compare
these two tracks. Okay, Now we see that
we're pretty close. The other thing that I
really like to do is go on my tracks here and choose, for example, this
one, the original. And choose this one and
right reference chunk. And make them both n-region
by trucks and both. Again, color-coding. For example, I want my original
track to have this color. Let's make it darker
and the reference track to have this color here. Okay, Now after this, I'm going to delete this part. We are just going to use the course of the
reference track. Now that we've finished
the acetabulum is going on in our next chapter
where we're going to talk about why use
reference tracks and how to choose a reference track that works well with
your original track.
4. 4. Using Reference Track: In this video, I'm
going to explain you why you need to use a reference track for
your mastering and how to choose the ideal one. For me, there are
two major things, but I'm always think before
I choose the reference drug, it is really important that
the reference track is also in the same general
like the original track, because you cannot take
your reference track. For example, if it
is a drill track and your music isn't RMB. So these two things don't
work well together because the Army has some other
musical elements. And the GI tract, for example, or the heart drop, is much more low
frequency there. So it's not a good idea to take this truck
as a reference. The second thing is that
I am also thinking before I choose a reference track is if the truck is the
reference tracks has the same vibe like my own truck. For example, here on my original track,
we have this white. We hear some vocal chops there. And these high hats are the, they are always playing. And if you hear the
reference truck, it's a little bit
slower, a little bit PM, but hats are already there. Also, the vocal source
are already there. So for me, these different
strike was really well, if I want to master my original truck to
the reference track.
5. 5. Quick Overview Of The Mastering Chain: In this video, we
are going to have a quick overview of
my master chain. In what order I use
every plugin and why I use this
plug-ins, that order, I'm going to start with a linear phase equalizer to find some 30 spots
from my truck. And I'm going to
attenuate these pots. After that, I'm going
to use a compressor, but I'm going to tell you a
little bit of transients. My truck. After that, I'm going
to add some flavor. For example, I'm going to put an analog type
equalizer and click to add a saturation and
an exciter after that, because we have pushed
some frequencies, I'm going to equalize it again. So that means I'm going to attenuate some
frequencies again. After that, we're
going to talk about imaging and sterile
field of the track. After that comes a really great technique
with the Match EQ. As we finished with a molecule, we are going to deliver track altogether with the
compressor again, then comes the soft limiting. And then there are
two extra things that you might want
to use or not. But I'm just going to show you the first one is a
parallel compression. The second one is
the multiprocessor. After these two things, we are going to also add
the adaptive limiter. And then we're going
to compare the tracks. And then we're done. The order of the
plug-ins that we are going to use is
really important because every plugin affects the final sound of the track. And depending on the position
of the chain, of course, you will find the
mastering chain on the download for free.
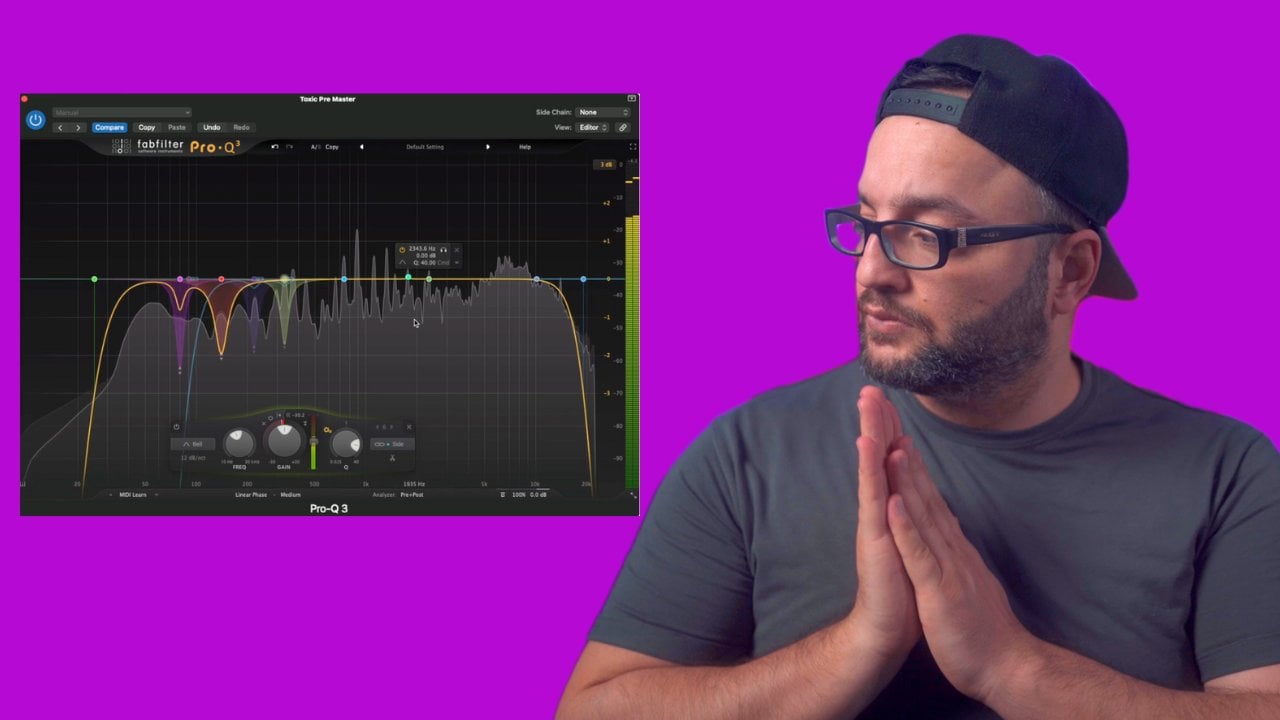
6. 6. EQ: In this video, we
are going to talk about equalizing on
our master track, we are going to use a linear
phase equalizer here. Let's kill the EQ and
choose the linear phase. And we're going to find this dirty spots that we
don't want on our truck. For example, here
we're going to hear either way that it
doesn't sound so good. Like minus three dB.
And open the QI. Again the same
here on 380 Hertz. We found another one here. Let's go and choose this one. This one is really
nasty here. One k. What I really also
want you to do is do a low cut here on 30 hertz. Because these frequencies, we don't hear them and
we don't feel them, so we don't want
them want to watch. I also hear the same
thing on a high cut. I'm going to choose
18 thousand hertz. Again, 2448. Pull. Now let's go
on and see if we find also other dirty spots. Okay, Now let's go here. Okay, This one's really hard. Okay. I think I think
we are good to hear. Another one because I
think I hear something different. Frequencies. Now that we found
the dirty spots, we're going to use another
one, linear phase. But this time we are going to choose from the processing here. We're going to choose its side only because we want to take out all the stereo frequencies
that we have below 150 hertz. So you go here. And as we already said, site only, it's
really important. And let's go just to
demonstrate how it works. This way. The truck
sounds all in mono. But I think in this truck,
140 hertz is a sweet spot. Most of the times I want the low frequencies from
a hundred thirty, one hundred fifty
hertz to be only mono, because there we will find
our kick and our baseline. So we want these elements
to be dead center. Now let's go on the next video
where we're going to talk about compressing the
transients of our track.
7. 7. Compressing Transients: Now we're going to use a
compressor to compress only the transients from our
track just a little bit. So for that reason
we're going to choose this compressor.
Where is it? The VCA? Because I really
like how it sounds. As we already mentioned, we
want only the transients for, so for that purpose
we are going to do a quick release and
a quick attack. We are going to take
off the outer gain. The two-to-one ratio
is really good. But we want a really
hard knee here. And our aim here is to
achieve a two dB reduction, not more than three dB. So let's go and start. Okay, I think we have
here what we wanted. We are not compressing so much, but we are taking out this
big peaks that you have. For example, when you have a
kick or a snare or a club. Now let's go to
the next video and add some color to the track.
8. 8. Adding Character To The Track: Now we're going to add some tunnel character to our track. How we are going
to achieve this? We are going to use
an analogy equalizer, also some saturation
and an exciter. So let's start with our
equalizer and choose or is it the graphic AQ? Not this one, sorry. Linda, GQ and the tube. And let's find some
frequencies that we like. I'm just going to boost
a little bit here. And then I'm going to search
for the frequency that I want to boost. Okay? I like the frequencies
that I got here near four kilohertz. And I'm just going to take back the boosted because
it is too much right now. We are making the track a
little bit brighter right now, but not so much in the
higher frequencies. I really like how it
sounds right now, we are boosting at 4 thousand hertz and the bandwidth
is not so bright, so that means we are boosting only there
near 4 thousand hertz. If I go here. Now I want to cut some
high frequencies here. And I would go on the thin case. They're not doing so much. But the things that
we are boosting here for k I already mentioned sounds really good in my opinion. And we're just cutting some
frequencies from the ten K because there we
have the high hats that are a little bit louder. Now let's go and put
some saturation here. I'm not going to choose where
is it from the distortion. I'm not going to
choose this one, but I'm going to visit manipulation or is it due
from the factor effects? I really liked this one. I'm going to deactivate
the band, pass everything. Bass enhancer, compressor, and we're just going to leave the
distortion here. And I'm going to use the
soft saturated here. It's good bug the
output dot to 0 dB because right now
it's a bit quieter. Now we're going to
add the exciter here, whereas it on specialized. And let's play with it and let's find which are the harmonics
that we want to add. Let's check out what we
have done until now. Going to bypass all the plugins and check out how it
sounds with my plugins. And without definitely the drug now is much brighter and
it takes much more space.
9. 9. Match EQ Technique: Now let's go and apply
the Match EQ technique. What I'm going to do, I'm going to on my
master channel here. And I'm going to
choose the Match EQ. Here, for example, we got, we're going to capture the
spectrum from our track, the EQ spectrum
from the reference. So first I will just let
play that our track. Okay, Now that I sold my
truck was on minus 22, I'm going to do also the
same on my reference track, but it's really pull out
to be again on minus 22. Okay, now I'm going
to capture also the IQ spectrum from
my reference track. Okay, now we've got this
and then we are going to match it. Right now. We see here what
molecules suggested. So let's have a
listen how it sounds. Definitely big difference,
but for me I'm not going to use so
much logic you here. I'm just going to
stay 20 per cent. Okay, after another, we take
our much Q and we put it back on our channel where
our original track is. Of course, you can
apply more if you want. But for me, the sweet spot, most of the times with this
much q is between 20, 30%
10. 10. Extra Processing: Now we're going to add
some extra processing. I'm going to use a DSLR here. So let's go and
find this, the SO2. And no, I'm not going
to do us any vocals. I'm just going to use the
d'Azur because in this case the DSR works like a dynamic equalizer.
What does this mean? That the ester, Let's
say for example, that we have our truck here. It plays the hallway here. And here we've got the threshold
from 7 thousand hertz. Every time that our truck
goes about 7 thousand hertz, it's getting compressed, but
only the 7 thousand hertz. So that means we play our
truck here the whole time. Every time this compressor goes up, it's being compressed. Every other frequencies
are not being pressed. So I'm going to use this
one because unfortunately, the Logic Pro doesn't have
any dynamic equalizer. Let's jump in and try it out and you will understand
what I mean. We don't want so much
reduction in here because we are not
discussing vocals. We're just taking out
some frequencies that we don't like as a
dynamic equalizer. Let's put it on filter
solo so that we can hear what we're doing. In this case, I just want
to compress a little bit to the high hat because in my opinion they are a
little bit too harsh. Let's listen how it is
width and without the DSR. So this was a bit too
much. Let's pull back. Okay, perfectly.
Now we're going to add stereo spread here. Let's go and find it. Or is it imagining instead of spread? We're going to use the stairs, but because we want to make
the mix a little bit wider, but not on the
whole frequencies. So in this case, I'm
going to take this one down and put it on 0, 0%. And we are going to make little bit wider the
frequencies that are above a 170 hertz and
not so much wide, just a little bit.
Let's have a listen. Now you may think that okay, doesn't make such
a big difference, but I can tell you at the end, I'm going to play the track with my whole processing and
without my whole processing. And you hear right away that
there's a big difference.
11. 11. Compression And Soft Clipping: Now our next step is
to add the compression to glue the trochlear be
together and soft limiting. So let's start with
the compressor here. We're going to choose, whereas it's not mix compressor. And again for me, this one
is one of my favorite. We don't want the
outer radius here. And we're going to do the
attack bit later because we want to glue the
whole truck and not only the transits
as we already did. So two-to-one ratio,
It's really good. Out again, Let's take
it out and the knee, Let's put it on 0.8. And let's start
here for me also. Like 200 MS. like 300 MS. It's a really good on
to build a whole track. And let's have a listen. Our goal here is to not have more than
three dB reduction. If you look carefully right now, you're going to hear that
the truck is more glued. It sounds like one
and sounds much better right now without the compressor, it's
a little bit soft. Now it's going to add
some soft limiting. We are going to use again, where is its relation,
specialized? Know FX. Again, we are going to
deactivate these things. But in Hatzor, we don't
the best distortion. We're just going to use
only the soft limiting. Again, the output put it on 0. And I'm just going to
boost a little bit the input and listen
how it sounds. Okay, I think right
now it's really good because here we're acting like minus four, which means we have a
lot of headroom right now also to use
our limited later.
12. 12. Final Reductive EQ: Next step is to use
again an equalizer. Let's go and choose
the linear phase because we want to
take out against some dirty frequencies
that we may have added with our processing.
13. 13. Parallel Compression Technique: Now guys, I'm going to
show you a technique which is called
parallel compression. This is not so easy because
it's a bit complicated. So the truth, but I have seen that a lot of big
engineers have used this one for the
mastery and purpose and the results were
really amazing. So let's go ahead and dive
in how you make this one. We're going to sense and
we're going to create 4123 For since here. Okay. Let's put them all on 0. This way we are, we are
sending our truck on. Ok, so let's mute this one
here and go on our Ox1. And here we are going
to write low, mid, low, mid, high, end, high. Now here we are going to choose again a linear phase equalizer. This is really important guys, because the other equalizer
may introduce some phasing. So We go here and
we choose on 48, and let's go the first one
that we're going to create. So how this technique works, we are going to send four different bus channels
because we are going to separate our truck in four different
frequency spectrums. This one is going to be the low, the mid low, the
mid high end high. That's why we went
here for buses. And here we're going to choose the linear phase equalizer. It's really important to use the linear phase equalizer
because the other one, it's going to introduce some phasing and we
don't want this one. So let's go here and choose, for example, 100 hertz. We made a filter here, and now we hear only
the frequencies that are below 100 hertz. Okay, let's go onto
the next one and choose again the linear IQ. But this time we are going
to do a little cut on 100 hertz until 1
thousand hertz. Now, let's go and choose the
mid-high frequencies here. We are going to
choose the low cut at 1 thousand hertz until
8 thousand hertz. Now the next one is
below 8 thousand hertz. So we take this one
here out and we'd go and choose here
8 thousand hertz. Now what we're going to do
is we're going to compress separately every frequency
spectrum from our buses. So let's go and
start with our low. We're going to use a compressor. I really loved this
compressor here. You're going to see me to
use this compressor like really a lot to make things
a little bit quicker. I got the percent
here that I use Always when I want to
do this technique. Of course, you will
find this present on your download and you're going to download it for free. So let's go and
listen on the lows. We don't have so much
a big reduction here. We are going near
minus three dB. It's going to base this one again to the mid
low frequencies. Okay, let's go on to mid high. Okay, Let's go also not on our highs. Cool. Now that we have
everything compressed, know how the parallel
compressor works. We're going to take
down the volume from our buses and let the
original track play. And then we're going
to add, for example, the low to mid low and mid high, and to hear how
it sounds better. Okay, right now I think it
sounds like really good. But I'm going to mute
and unmute the buses because I want to hear if the difference is
really big or not. I think that these
frequencies will be too loud. The truth guys, this tactic might seem a little
bit advanced, but if you master these, you are going to
seem like really great results on your mastering. And also you can use this
technique for vocals, drums, and everything else.
14. 14. Multiband Compression Technique: Now we're going to add a
multi-band compression on our master channel. But to search with guys, I'm not such a big fan of the multi-band compression
from logic, because for me, it's a bit too much
complicated in comparison with our
multiband compressors, but I will show you how to use the multi-band
compression effectively or your master channel. So let's go here
and close this one. And goings on Dynamics
multiprocessor. Let's make the view
a little bit bigger. Here I've got a preset that I got for the general mustering. Of course, you will
find this presets for free to download. How I like to start with the multiband compressor is I'm going to put
a threshold like really up from every band
and then I will just go and saw that every
bounded to compress it. If you look carefully, we
have the same ratio here on every band and also
the same attack here, and also the same release. Let's listen how it sounds with a compressor and without
the multiband compressor. I find the low frequencies
little bit louder here. So what we did here, we had some compression here. So that's going to
follow everything. We're not going
above minus five dB. Also here. It's almost
like minus two dB. Minus two minus three more because I wanted to compress the higher frequencies
and you'd bit more. Cool. So now let's
go into the limiter.
15. 15. Adaptive Limiter: To add a limiter, we're
going on our master chain here and we're going to put it after the multiband compressor. Whereas it deleting know
dynamics, adaptive limiter. And also I'm going to add again loudest meter because I want to see here
what we are doing. And of course, our
goal here with our adaptive limiter is
to reach and minus eight, minus ten as UFS. So let's go and start. It's really important
to see here also the reduction that we are
not going above minus six. Because if we go
above minus six, because the final
track would sound a little bit too
much compressed. Okay, I see Now we are clipping. You can avoid this one by
going here to minus 0.1. We don't have any
digital clipping. So guys, I think
here at 0.68.5 dB on the gain is the sweet spot because we are hitting
like minus nine a UFS. And reduction on the
adaptive limiter is not more than minus six,
minus seven degrees. Okay, to test it out, I'm just going to play
a little bit more. I'm going to play
from the intro until the bridge to see how it sounds now with
all my processing. All right. Okay. I think the truck right
now sounds really good.
16. 16. Outro: I hope this course was easy to follow and easy to
understand for you guys. I am 100% sure that if
you use these techniques, your final sound
will sound much, much better than previously. See you on the
next course, guys. Bye-bye.
 Beats By Dj Legion, Everything About Music!