Transcripts
1. Introduction: Hello. My name is Zcaalcot, and I am a tread artist. Are you ready to upgrade your shading and lighting
skills in blender? In this class, you will
learn how to tan the render of your scene before
even opening blender. We'll create a color
palette and use it to guide the colors we'll
use to shade our model. Then we'll create materials in blender to match our vision. We'll also work on the lighting, so at the end of this class, you can have a
professional render of your character or Sina. Come with me and let's explore the amazing world of
three D art together.
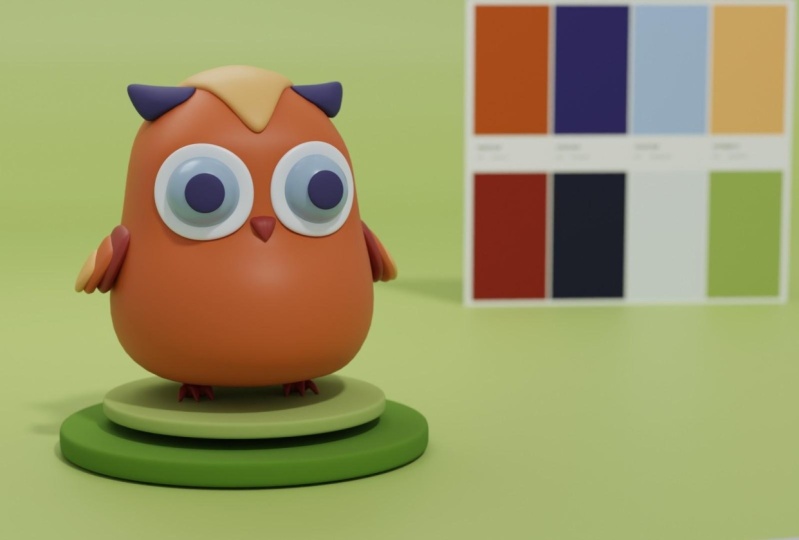
2. Color Palette: So first of all, we're going to pick
a color palette. We're going to use a Dub color. It's a free tool
on the Internet. In here, we're going to use
the ton ton color palettes. Sorry, mine is in French, but you can have
the same thing in English or in another language. So I'm going to pick
very saturated colors. I want something that's
very joyful and that pops. So I think I'm going
to pick a yellow, almost orange for the eyes. This kind of pinch. Then more saturated king. Almost Almost magenta. It's good to have variation
variations of the same tone. Okay, T this color. It should be nice. Now I'm going to pick
the last 12 blue. I think this could work fine. I'm going to make a
print of this screen, and we're going
to import this in blender to do shading. Oh.
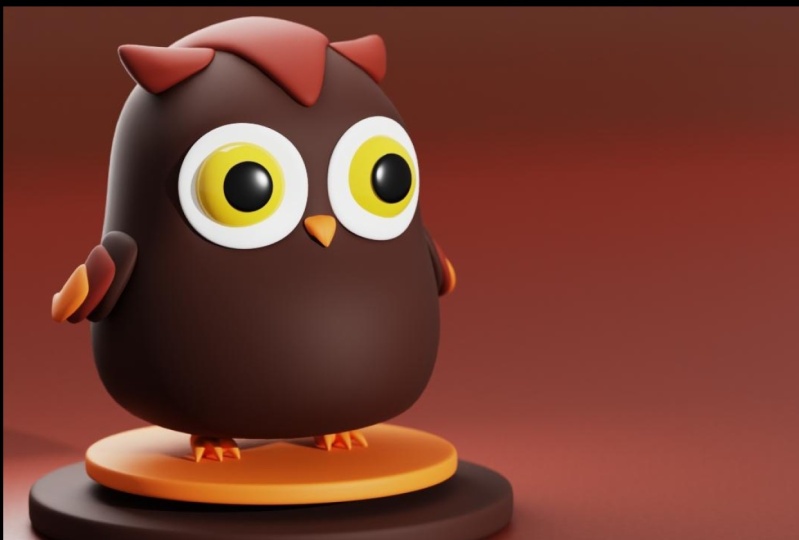
3. Lighting: So before doing the shading, I like to light my
scene with gray shader. So if the light is
working on a gray shader, it would be easier to
work when I'm going to put materials and
textures and colors. So be sure to have your
blender set on cycles, your device on GPU
compute if you can. Up per your samples and
lower your noise threshold. So we shift A, I'm going to create a sun. So the sun is a
very simple light. We just have to give
it a good rotation. So I'm going to put it here
to be easier to see it. Right now it's above
the character. The shadows are 90
degrees of the ground. I'm going to rotate it
a bit with r and x, I can rotate the
light on the x axis. T. I think I'm going to use the strength on the strength and give it a bit of an angle. So the shadows are
not 100% sharp. So this is the main light. The sun will be our main light, the stronger light in the scene. We shift A, I'm going to
look for a dar light. I'm going to create a top light coming from
behind the character. The goal is to detach the
character from the background. So I'm going to put it here. Right now, it's
not very visible. I'm going to put the
power. Now we're seeing. This is working nice. Fin telling a bit the rotation. G is for move the objects
and r to rotate the objects. L et's add a rim light to give a strong impact on the right side
of the character, our left side, screen left side. Let's organize a bit
or scene collection, put the lights on the light
collection. Rename them. It's always a good
idea to be organized. You can find the
things easily later. Another light shift A
to create new objects. I'm going to increase the size 5 meters
like the top light. This will be almost the same
thing as the top light. But it to come from behind from the
side of the character. I will the power
also so you can see it a bit behind the character. Now
you can see it. We have a s more problem
that we will fix later. The light is too strong on
the ground on the background, and we don't want that. It's just this small
edge lit by this light. It's detaching the character
from the background. So let's finish it here and we're going to do some light
lining on the next lesson.
4. Light Linking: Just a quick detour to show
you the light linking tool. It's really useful.
Here, my ring light are having a very strong impact
on the ground on the BG. So I'm going to exclude
this light from the BG. The BG will not be
affected by this light. So I can, I create a new
light linking in the light, and I put my object in here. So right now it's
doing the opposite. It's light early this object. If I click here, now this light is not
affecting the BG anymore.
5. Basic Shading: Okay Let's start the
main part of this curse. Let's bring our color palette. Shift A to create a new object. I create a card, g z to move
the card on the z axis, r x to rotate on the x axis. I'll apply a material. You can name it as you want. I can name it cool pilet. And I'm going to look
for our emage textures. I'll bring my texture. So it's a bit stretched. Let's just scale it S x to
scale it on the x axis. Let's roughly move it behind
the character. And rotate. It's really
experimental process, so you can use it as a basis and build from here using
your own own creativity. Be shading and lighting
should be a creative process. We have our colors
here so we can use this card display to
pick the colors quickly. But we can change the colors. We are not bound to use
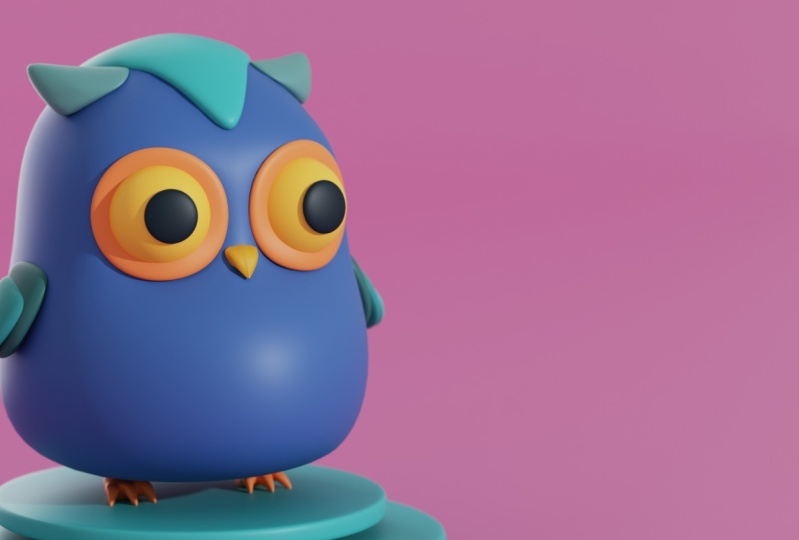
exactly these colors on our final blod Let's start with the eyes. So I select the eyes. I will create a new material, so I delete the gray shader. I create a new material. I will name the
materials as we go, but just to have them named. No very special. So the eyes I want
them to be yellow. This part, I'm going
to make them black with a hint of blue
of a dark blue. So we're going to
we can work with the specular with the
roughness parameter. So can be more or less plastic, more or less reflective. The edge of the eyes, I'm going to make them white. The body, it's the main part, this one will be blue. I I can test this dark blue, but I prefer the light one. It will be very complementary if the pink and magenta colors. I I use a metallic shader, but not the case on the t.
We're not going to do that. We're going to have
something very small and nothing too reflective. I think the bots were too nice. I change and beat the hue on the yes to have
more of an orange. A beat the black, at some value, so we can
have a hint of blue. You can use these lighters
or the color pallets and work out as you
want your shoe barrel. I use the same material of the y on the pals and the nose. We can recycle this material. Working n for the eyes and going to to create a white material,
not completely white. Because with the
lighting too white will be will attract too
much attention. So it's not the main
area we're going to to attract the eye. Let's just work on this part. Now I'm going to create
a bit because I don't know which order
I'm going to use these three colors close
to the pink and violet. So I I like very much
this light pink. I think this could
work in this order. The light pink for the hair. The magenta. I really
like this magenta too. For the wings, let's test a bit. If I select two objects
and in the keyboard, I do control L. I can
link the material. So the first selected object, we pick the material from
the second selected object. So you select the first one and then you select
the second one and you and you press control. The keyboard. Well, K. Let's
speak this dark qui. Hear. And Maybe the light pink for the first part of the wings. Yeah. This is working nice. I just invert the order. The dark w will be
close to to the body and the light pink I will
be the part of the wing. Okay. This is working nice. I can just just
fine tune a bit of the colors to have them
more close one to another. You can do the same thing on your side with different colors. I will put this model
on the resources page. You can use it and
play as you want. Do wherever you want with it. It's really basic shading, but it's more an exercise to see and test colors and see
what is working or not. You can play a lot
with adopt color too. You have several kinds of
color palette in adopt color, so play with them and
you will learn a lot. So I'm going to for the base, this object where it is
what they always on. I'm going to give
it a light pink also to stay on the the
same terms of color. And for the background, white is work, but I think
I will stay with pink. A bit more saturated. Pink with blue are two colors that really work well together.
6. Conclusion: Thank you for finishing
this blender class. You now have the skills
to enhance the render of your characters with beautiful
materials and lighting. If you can leave a review
and share your project, it will mean the world to me. And don't forget. Keep learning and having fun with
blender. Bye bye.
 Jean Cavalcante, Compositing Supervisor, Teacher