Transcripts
1. Introduction: [MUSIC] One thing that fascinated me about baking
and still continues to do so, is the fact that I can pick off the most basic
ingredients off my shelf, mix them together, and then transform them into something
magical in the oven. [MUSIC] Hi, I'm Shivesh Bhatia, a baker and food blogger. The process of baking it
very meditative for me, that's probably the only
time of the day when I'm not on my phone or have 100
things going on in my head. Baking could be that
one time for you, where you completely stress free and focused on what's
happening in the kitchen. Baking is a science, but what a lot of
people don't tell you, is that once you have
your basics in place, it actually opens up
a field for you to have a lot of fun
in and be creative. In this class, we will start by making a basic vanilla cake, and then use that
as a base to level up and make a chocolate
[inaudible] cake, an upside down
pineapple cake and some rolls and
pistachio cupcakes. The idea of doing this class, is to have all our
basics in place, so that we have a strong
foundation to build upon. I'm a self-taught baker and I can't wait to share with you all the little tips and
tricks that I've been able to teach myself
over the years. This class will
not just be about following a recipe blindly, but I'll also share the
right technique with you, so that you can use it, and make your own
different versions. I hope you enjoy making these
recipes as much as I do. I can't wait to teach you this class and welcome you
to the world of baking.
2. Finding Your Approach: [MUSIC] My love for baking comes
from my nanny and my mom, who I've always seen
making cakes for special occasions and birthdays. I remember, I would always
sit on the counter and watch them bake and once in a
while just taste the batter. Beyond that, my involvement in the kitchen wasn't
a lot actually. I studied political science for my undergrad in the plan was to probably become a
lawyer or an IAS officer. But while I was
still in college, I fell in love with baking, I started posting pictures of my desserts on Instagram and I realized that those
posts were getting a response beyond my
immediate friends' circle. A lot of people
reached out to me asking for recipes
such as via thought that I should probably
make website or a blog where I can compile
all my recipes in one place. That was the unexpected way that I actually got into baking and started taking it
more seriously and looking at it as a
full-time profession. If you're just starting out, I know baking can
be intimidating. When I started baking on my own, it was followed by
a lot of failures, a lot of disasters, you will make mistakes, lots of them, but
trust me that's the only way to learn
and get better. I remember I was baking a batch of chocolate
cupcakes with my cousins, and although we ended up
burning the entire batch, I just had so much fun
being in the kitchen, putting together the batter
and frosting those cupcakes, I started reading up on
the science of baking, understand what each of the ingredients is
doing to my cake. That is how with a lot of
practice and experimentation, I was able to get
slightly better. Seven years later, baking
continues to excite me. I still remember the first
recipe on my blog is this three layer orange cake
with the meringue frosting, which is super elaborate. My style of baking at that
time was super aspirational, intimidating, and very influenced by what I
saw internationally. But over the years, I've
tried to simplify my recipe. Now it's about
constantly reminding myself about why I started
in the first place, my love for baking
and how it was for me as a 16-year-old
self-taught baker. The idea is to get a lot of other people to do just
that in their kitchens. Even if you decided to not
make baking your profession, just following it as
a hobby could bring you a lot of little
moments of joy. I completely understand the joy of pulling out that
fast perfect cake out of the oven and how a very simple recipe could
help you do just that. I feel that it's very
important to have those go-to recipes that you
can trust blindly. For me, this vanilla cake
has been one such recipe that I've actually
been using since the beginning of
my baking journey, and I always keep
going back to it and working on different
versions using that recipe. Even the three recipe that
I shared with you can work more like blueprints
that you can alter, basis the flavors that you like, or what you have
available to you. Your student project for
this class will be to follow my recipe and
upload a picture of your dessert on the
project section. Don't worry, even if it
doesn't turn out perfect, do share a picture, I'd love to see your progress. You'll also find the
full list of ingredients and the recipe in the
resources section below. Now let's get started. [MUSIC]
3. The Base Vanilla Cake: [MUSIC] We're ready to get
started with our base recipe. Our base recipe is a
foundation or a simple recipe that you can build
upon and level up to create a lot of
different desserts. The reason why I wanted to
bake this vanilla cake for this course is because it's this base recipe that you can
actually play around with, experiment with and build on. It's one of the
first cakes that I baked when I started out. It's a super simple recipe using just the staple
ingredients which you probably already have
in your kitchen. The equipment that I'm using
today includes spoons, pastry brush, measuring
cups, sieves, spatula, parchment paper,
round pan, wooden skewer, glass bowl, measuring spoons, and hand mixer, and an OTG. The ingredients that we need for this recipe include some dahi, which is homemade, curd, or you could use
yogurt if you want. I have some vegetable oil
here, super fine sugar, vanilla extract, baking soda, some all-purpose flour,
and baking powder. Starting out, honestly, when I was working
on this recipe, there were multiple
times when I failed. Sometimes the cake was too dry, sometimes it was too dense. I also ended up burning
it a few times. But the recipe that I have
now is tried and tested and has worked for me over several years that
I've been using it, and I can't wait to
share it with you. Let's start making the cake. I'll start by adding
the yogurt or the dahi that I have here
into my mixing bowl. Into this, I'm going to
add the baking soda. Now, using my spoon, I am just going to mix both of these
ingredients together, and then we let it
sit on the counter for about 5-10 minutes. The reason why I like
to start with combining curd and baking soda is because there are no eggs
going in this recipe. You'll add the alkaline. Baking soda reacts
with the acidic curd, and makes my cake super
light and fluffy. Now my curd is becomes
super formy and voluminous. Into this, I'm going to
add some super fine sugar, which is also called
breakfast sugar, or castor sugar, along with some vegetable oil. Whenever you're baking, make
sure the oil that you're using is neutral in
taste and smell. Don't choose anything which has a very distinctive taste, because that's going
to come through when you actually
bite into your cake. Now, into this, I'm also going to add some vanilla extract, which is very important. Make sure you're using the best vanilla extract that
you can get your hands on. Now, using my hand mixer, I'm going to combine
everything together. [NOISE] When my wet ingredients
are in this bowl, I am now going to
sift in the dry ones. I'm using some maida, which is all-purpose flour, and some baking powder. Now, using a spatula, I'm going to gently
fold my dry mix in. It is extremely important to probably digital electric mixer or keep it on
extremely low speed, because you don't want to over
mix your batter right now. Doing that would knock
out all the air that we've incorporated
so far and result in a very dense and heavy
cake. There you go. Our basic vanilla
cake batter is ready. I am now going to transfer
it into an 18 circular pan, which I have greased
with vegetable oil, using a pastry brush and also
lined with parchment paper. Now, the reason why I like
to do this in advance is so that my batter
doesn't have to sit on the counter after it's ready. The baking powder that we've added into it already
start reacting. My butter is ready for the oven. I'll bake this in a
pre-heated oven at 180 degrees celsius for
about 30-35 minutes, or until a skewer inserted into the center comes out clean. Now, preheating your oven
is extremely important because it's like a warm-up
before a good workout. Two things to keep in mind here whenever you're
following a recipe, always remember that
the time mentioned in that recipe is
always indicative. It could take slightly
longer or slightly shorter depending on how your hot
you oven is or how it works. Make sure you keep an eye on your cake and don't let it burn. The other thing to keep
in mind here is to not keep opening your
window again and again, because that would disrupt your baking process and could
lead your cake to collapse. I know it's extremely
difficult to be patient when your
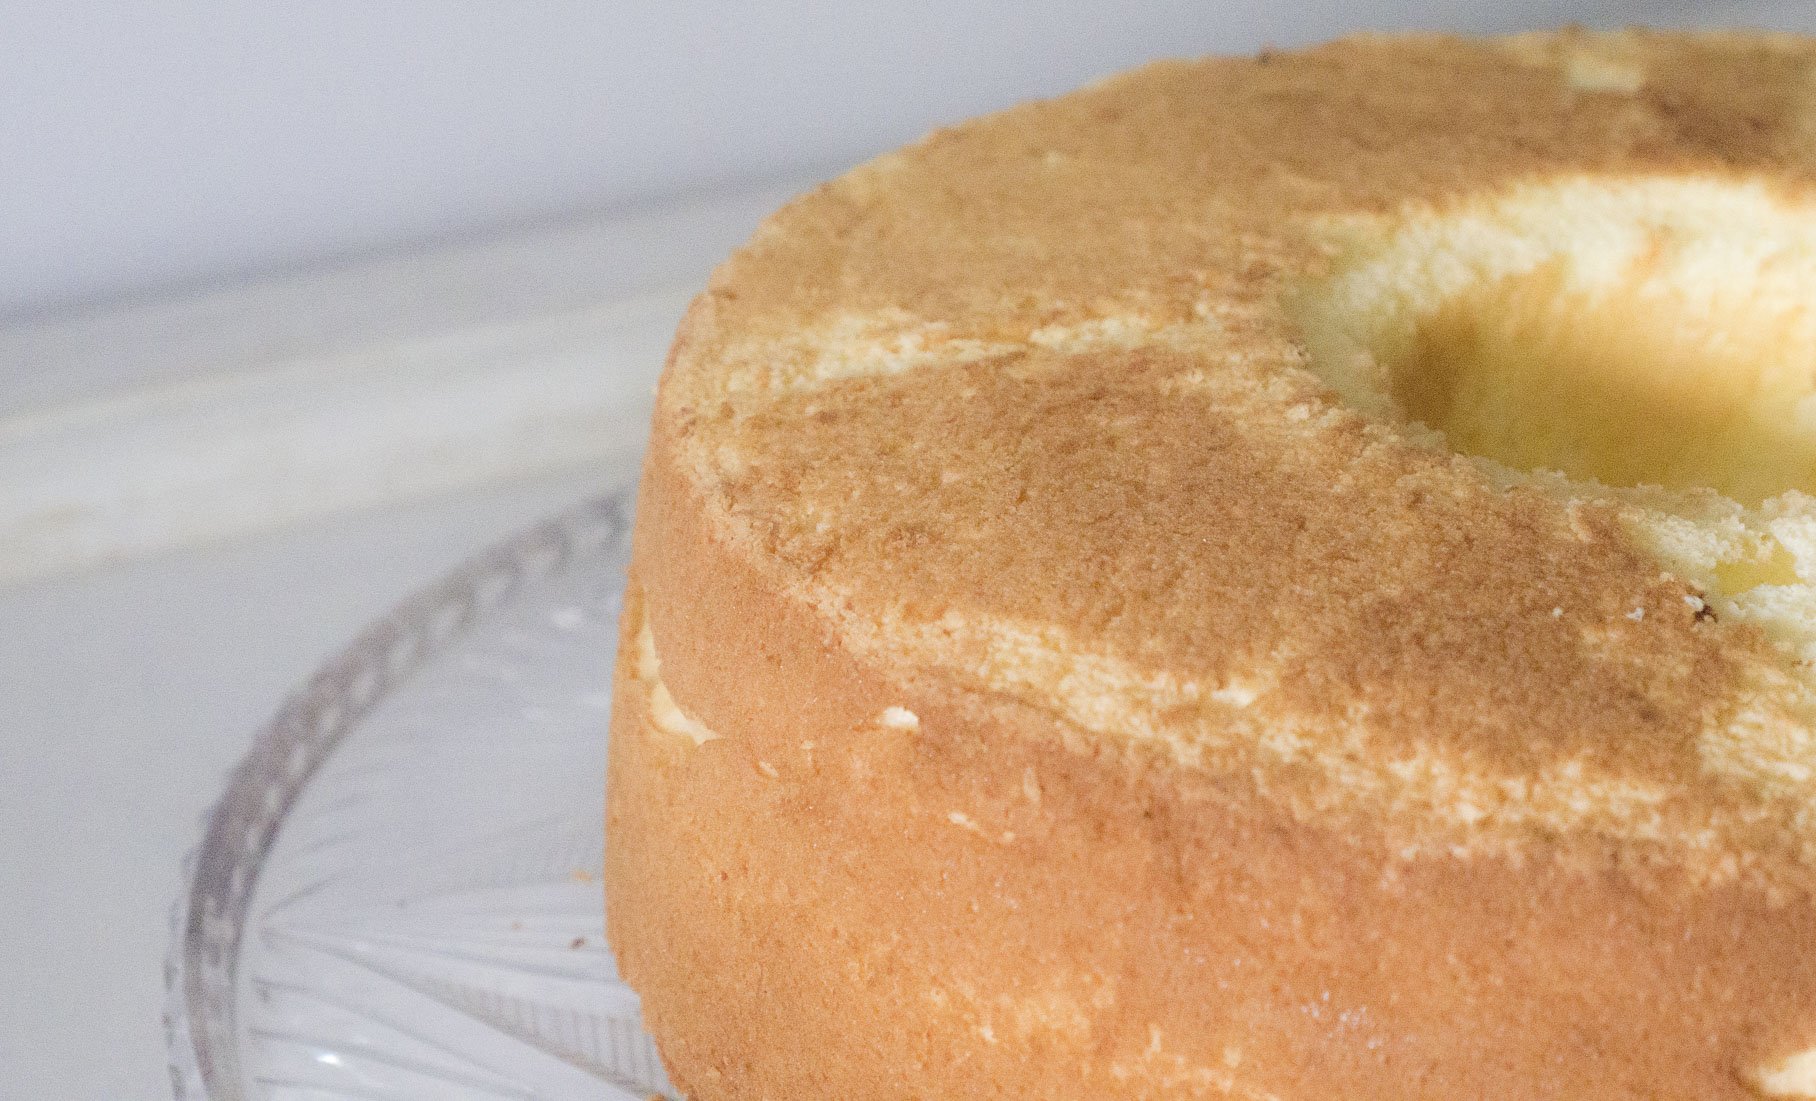
cake is in the oven, but I trust you to do your best. [NOISE] My cake is
out of the oven, and I've let it cool completely, which is very important
because when your cake is hot, it's very delicate and
could break easily. Make sure you let it cool down completely before you
try to de-mold it. Now, I love my tea
cake just as it is, but the easiest and
quickest way to elevate the look would be to give it a generous dusting
of icing sugar. There you go. Our basic
vanilla is ready. Now, we're going to
use this recipe, and see what other different fun ways that we can
use to level it up. [MUSIC]
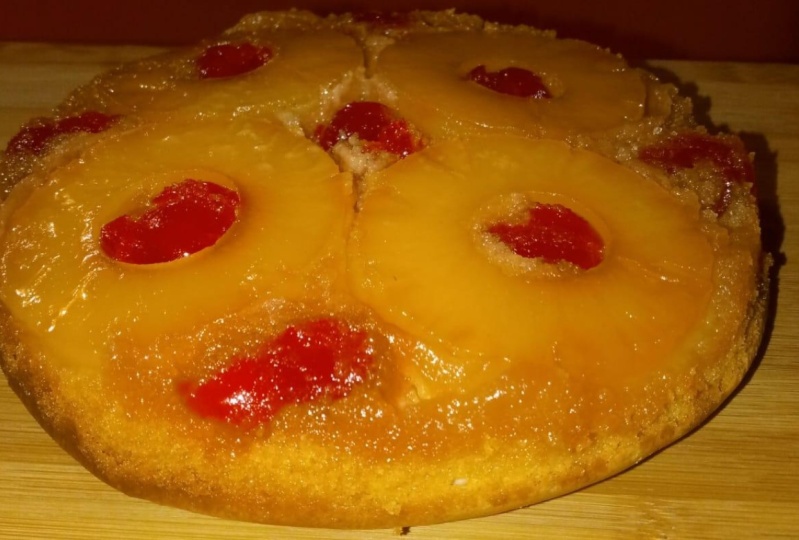
4. Upside Down Pineapple Cake: [MUSIC] An upside down pineapple cake is the easiest and simplest way of using this basic backup. It's a classic and I love how
just by adding a layer of fruit can add so much freshness
and flavor to this cake. In addition to the basic
vanilla cake butter, the ingredients that you need
for this recipe include, some vegetable oil
to grease your pan, a few slices of
canned pineapple, and some golden syrup. The first thing that I'm
doing is basically greasing the sides of my pan using
some oil and a pastry brush. Now in the bottom of my pan, I am going to spread an even
layer of the golden syrup. In case you want, you can avoid the golden syrup and use some melted butter
and some brown sugar. The reason why I like using golden syrup is because
it gives a really nice, an even golden color to my
upside down pineapple cake. Next step, I am going to place my canned pineapples slices
on the golden syrup. If you want, you can also use thinly sliced fresh
pineapples for this recipe. [NOISE] Now all that is left to do is to pour our vanilla cake butter
onto the pineapples slices. If you like, you could add
in a pinch of cinnamon or some grated [inaudible] for
your butter for more flavor. [NOISE] Now, lets just spread our
butter into an even layer, [NOISE] and it's now
ready for the oven. [NOISE] The pineapple cake
is ready and cooled down. Now the fun and the
slightly stressful part of flipping it upside
down and demolding it. [NOISE] This looks so pretty. I'm still happy with
how it's turned out and I'm so glad
it didn't break. Honestly, in a
worst-case scenario, even if a slice of pineapple or some part of the cake
remains stuck to the pan, you can always pull it out
and do some patchwork. Nobody needs to know. I had so much fun playing
around with the fruit, and now for the next recipe, let's bring out the chocolate. [MUSIC]
5. Chocolate Tres Leches Cake: [MUSIC] Tres Leches cake is
the perfect way to level up, and use this basic recipe to make a slightly fancier cake. I've used this recipe to make Tres Leches cakes of several
flavors like Ross Malay, and even rows of vanilla, but today I'll be showing you a chocolate Tres Leches cake. For the ingredients,
I have half of the vanilla cake butter
that we made earlier, along with cocoa
powder, some milk, condensed milk, fresh cream,
and some whipped cream. I start by making sludgy with hard cocoa powder and some milk. I bombed this milk slightly
before adding it in, and now I'm going to
give this a quick mix. [NOISE] This looks good. I'm now going to
pour this sludgy of cocoa powder and warm milk
into our vanilla butter. Using my spatula, I
just pour this in. [NOISE] There we go. We have successfully turned our vanilla butter
into a chocolate one. I have an eight-inch
square pan here which I've greased with oil and lined
with parchment paper, leaving a little extra on
both sides which would function as handles once I want to lift my baked cake out. Now, let's just transfer the butter into
the prepared pan. [NOISE] Let's spread it out
into an even layer. [NOISE] This is ready for the oven, I'll be baking it in
a preheated oven at 180 degrees Celsius for
about 20-25 minutes. While the cake is baking, let's make the milk mixture. In a jug here, I'm
going to combine some whole milk with
some condensed milk, this is sweetened
condensed milk, and some fresh cream. Into this, I'm also
adding some cocoa powder. Using a wickes, let's mix
all of this together. [NOISE] This is not a
traditional Tres Leches recipe, and I've made a lot
of changes to it. I always feel that
whenever you are making a disorder
using a recipe, you should work with
the ingredients that you have and make a join. We can now pour it over our
cake which is big and ready. [NOISE] Before I
pour the liquid in, I am going to use
a fork and ***** the entire surface of my cake so that the milk mixture
can seep in easily. Now, let's start pouring the
milk mixture in batches, giving the cake enough time
to absorb the liquid easily. [NOISE] The reason why I'm
adding the liquid in batches, is to give this sponge enough
time to absorb the liquid. As soon as you can see
the liquid seeping in, you can go ahead
and add some more. I'm going to put this
in the fridge for at least one hour so that all the liquid can
get nicely absorbed. Here's my cake straight
out of the fridge, and I'm now going to top it
with some whipped cream. I'm just adding a
few dollops on top, and then we'll spread it
using an offset spatula. The offset spatula
basically has a band hood, and this is what
will really help me spread out my whip
cream very easily. [NOISE] You can serve it as Tres
Leches cake as it is but I like to dust it
with some cocoa powder, because I feel that
when you're serving your desired people consume
it with that ice fast, so it's important
for your desert to look as good as it tastes. Before even cutting
into your cake, you can already tell
that it's going to be a chocolaty dessert. There you go. The Tres
Leches cake is ready. But here's the tough part, before you dig in, you need to put it back in the
fridge for one hour. Let's cut ourselves a slice and serve with the milk mixture
that we made earlier. [MUSIC] Perfect. Now, I want to make
something decorative without vanilla cake butter, so let's make a batch of
notes Pistachio cupcakes. [MUSIC]
6. Rose and Pistachio Cupcakes: Cupcakes are my go-to
every time I want to make something cute
and Instagrammable. Now there's a million flavors that you can play around with. But I wanted to work with flavor that remind me of my childhood. We are making rose and
pistachio cupcakes today. These flavors remind me of all the Indian
sweets that I would eat whenever there
was a celebration or a festival at home. Besides our vanilla butter, the ingredients that you
need for this recipe include some unsalted
butter, icing sugar, some food color and kewra extract for
defrosting along with pistachio that we use to make of a pistachio paste and rose
petals for the garnish. Now the first thing
that I'll do is line in my cupcake tray with
this paper liners. I'm now going to use
an ice cream scoop to scoop my vanilla butter
into the cupcake liners. Using an ice cream scoop
helps me ensure that I'm adding the exact same
quantity into each mold. This looks good, I'll be
baking my cupcakes in a preheated oven at 180 degrees Celsius for about 20 minutes. While the cupcakes are baking, let's make a simple
pistachio paste they'd be used to
fill out cupcakes. For that, all you need to do is to blend some pistachios in a processor until it forms a nice and smooth
paste like this. Now let's make a
rose buttercream frosting for our cupcakes, for which the first thing that I need is some softened butter. Into this, I am going to
sift in the icing sugar. I'll be adding in the
sugar in two batches. Now let's give this
a good mix using my hand mixer [NOISE]. This looks nice and smooth, now let's add in the second
batch of our icing sugar. Let's mix this in as well [NOISE]. Now, using a spatula, I'm going to scrape the
sides and bottom of my board just to ensure that
all the icing sugar is nicely incorporated. The base of my
buttercream is ready. Now into this I'll be
adding in some kewra extract along with a few
drops of pink food color. The key to getting
the right texture for your frosting is to start
with softened butter. If your butter is
too cold or hard, you'll get a very
lumpy frosting. If you butter is
melted or to lose, your frosting will
be super sloppy. There you go, our rose
buttercream frosting is ready. I'm going to transfer this and the pistachio paste into piping bags and
then we can start assembling our cupcakes [NOISE]. My cupcakes are out of the oven. Now I'm going to use
a cupcake corer like this one to make a cavity in
the center of the cupcakes. In case you don't
have a cupcake corer, you could simply use
the wider end of a piping nozzle and will fill this cavity with the pistachio paste
that we made earlier. [NOISE] Now, I'll frost it using my
rose buttercream frosting. Let's decorate it with
some dried rose petals. I've gone ahead and frosted
a lot of more cupcakes. Cupcakes are always
hard to resist, so I can't help but take a bite. This tastes so good. As I said earlier,
there is a lot that you can do when it
comes to flavors. You could fill the center of your cupcake with
cardamom sauce or Nutella or biscoff and do a chocolate ganache
frosting on top. Or maybe you could
fill the center with a strawberry jam or jelly with the peanut
butter frosting. There's actually a
lot that you can do, so feel free to play around. I think now it's time for
you to leave me alone with my cupcakes and you can go
make a batch of your own. Happy baking. [MUSIC]
7. Final Thoughts: [MUSIC] Congratulations, you've
completed this class. Don't forget to share your student project in
the project section below. If you want to find
me, follow me on Instagram @chevy17 and on
Bake Chevy on YouTube, and I hope you have
a lot of fun in the kitchen trying
out these recipes.
 Shivesh Bhatia, Baker, Author, Blogger & YouTuber