Transcripts
1. Introduction and Supplies You Will Need: And Hi, friends. How are you? I hope you're having
a great day today. I'm excited about sharing
this project with you. This is a drawing and
watercolor painting project that I designed,
especially for kids. Students do not need to have any drawing or
painting experience at all to be successful
with this project. I will guide students step by step through all
the steps that they need to take so that they will feel comfortable
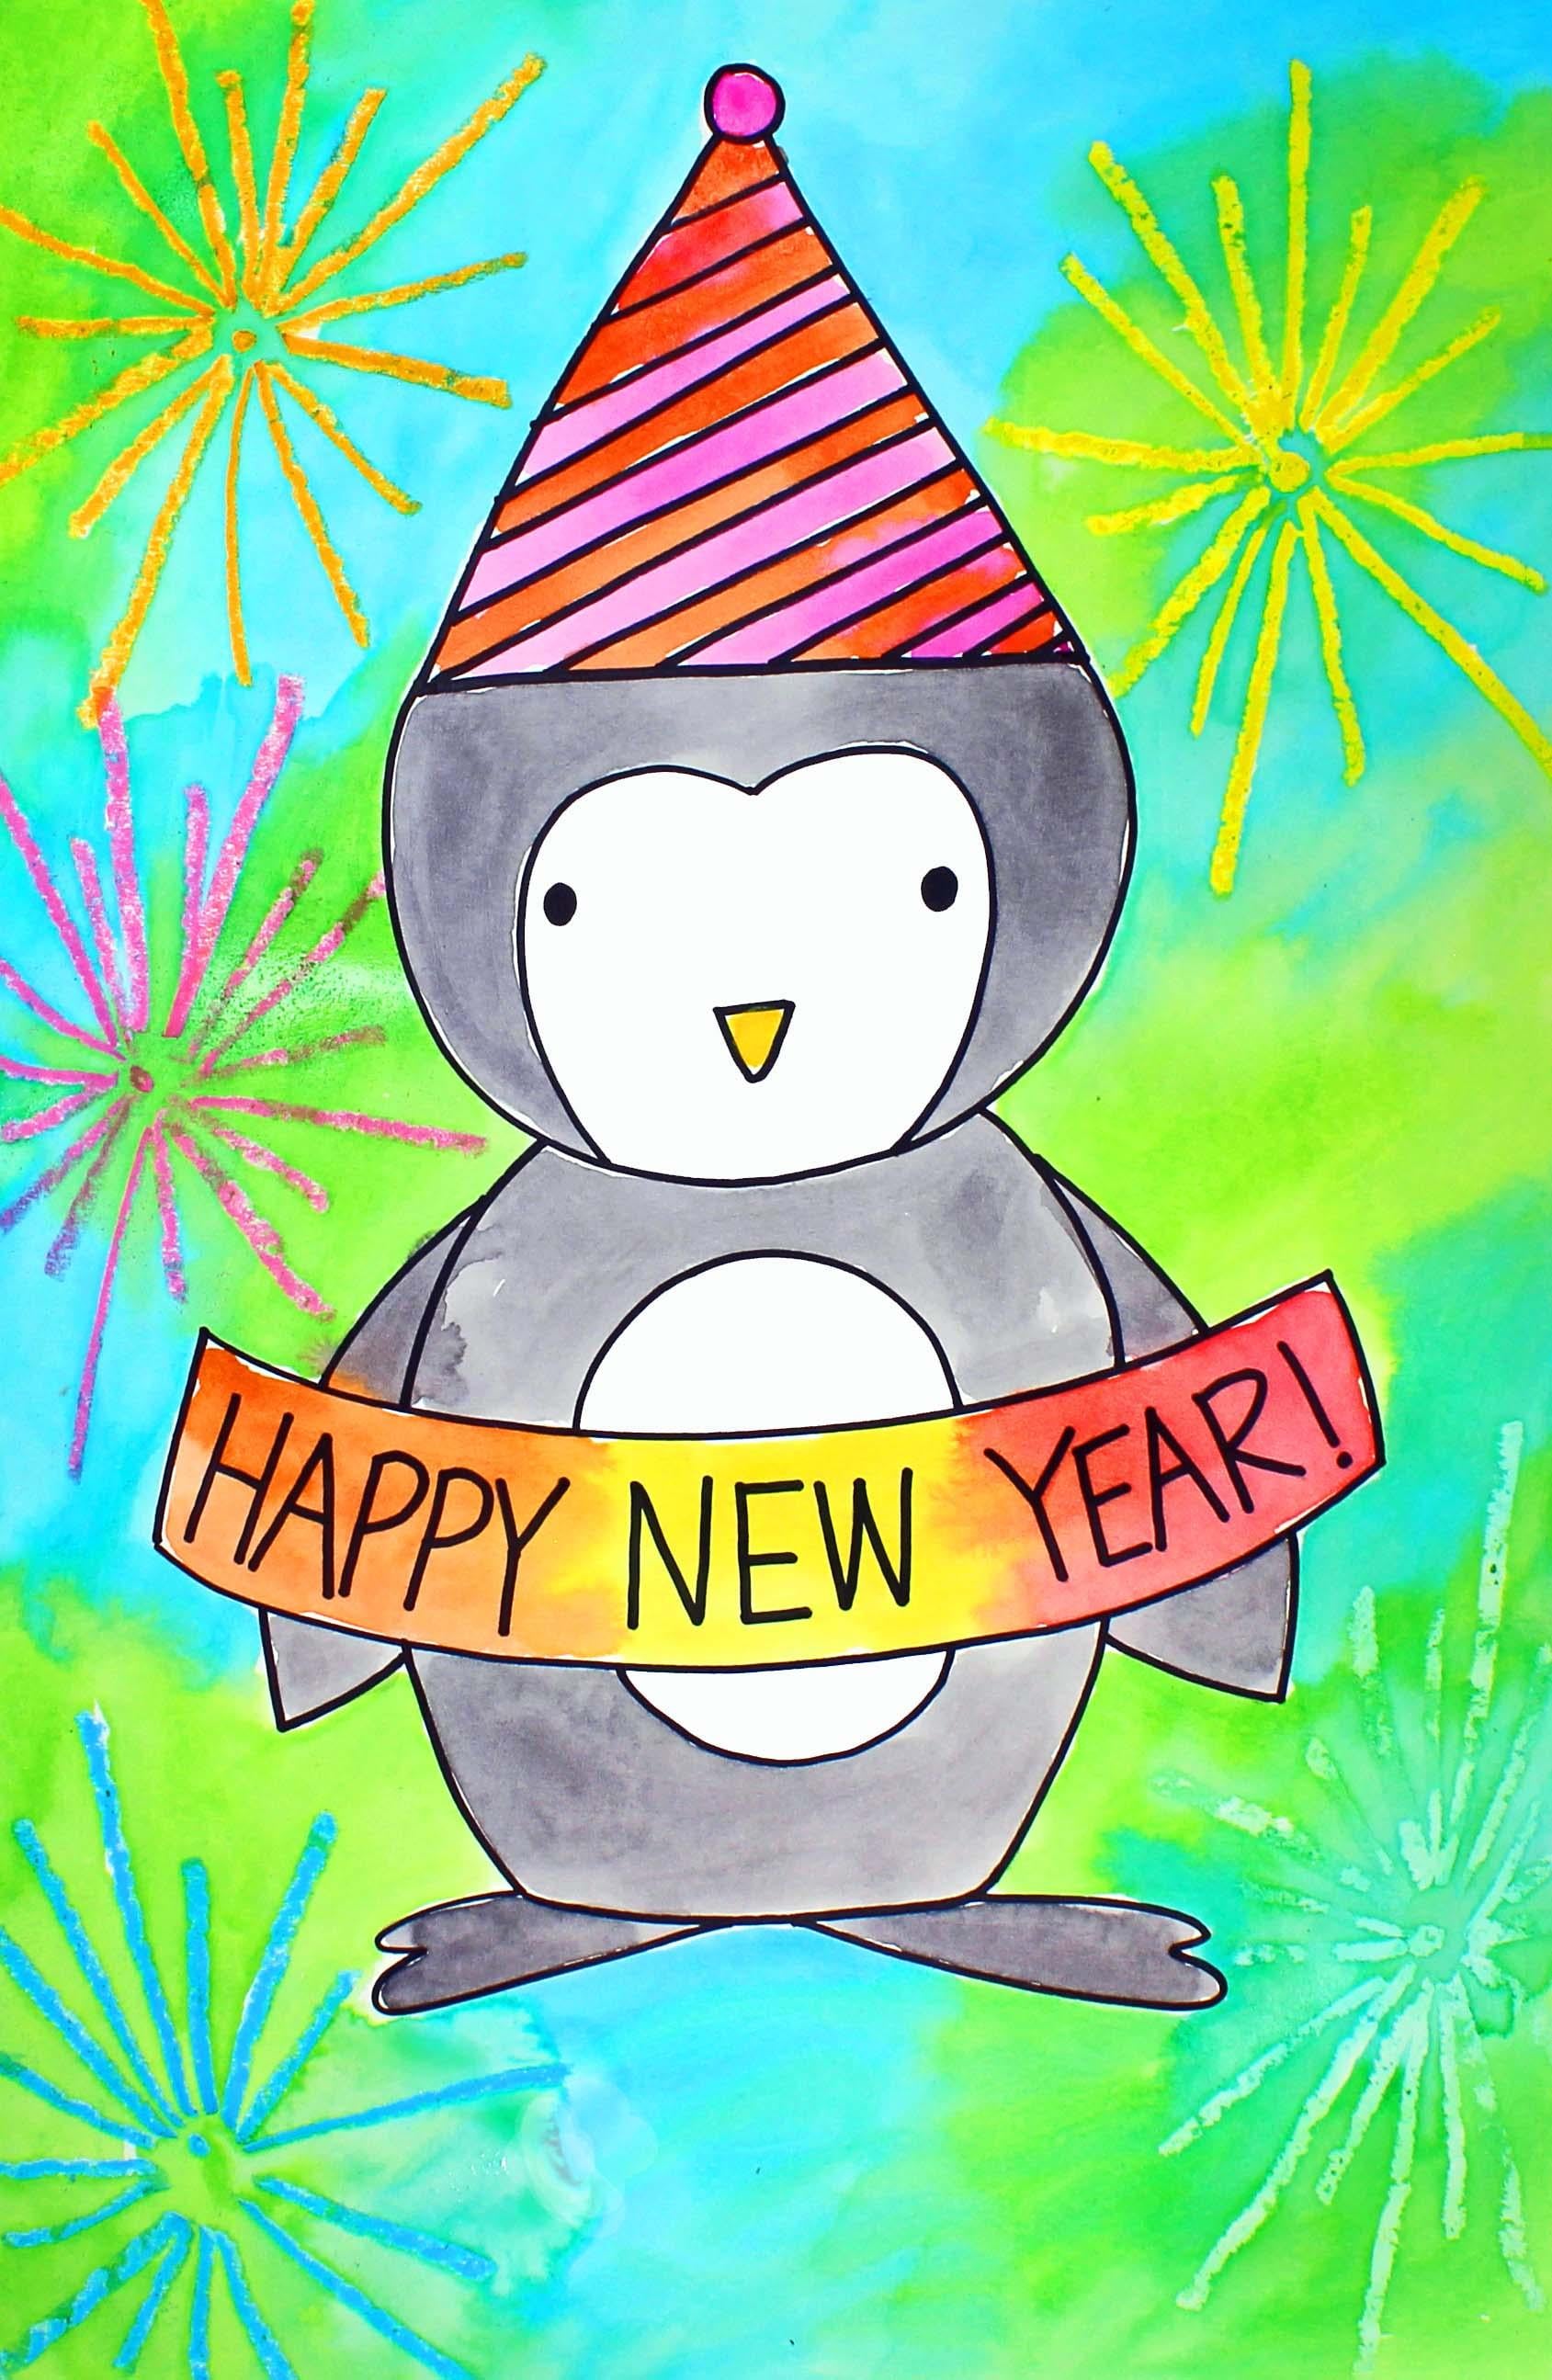
at all times. Today we are going to be creating this happy
New Year penguin. I hope that you have a lot
of fun with this project. Let's get started. Let's talk about
the supplies and the materials that you will
need for this project. The first thing
that you'll need is a sheet of watercolor paper. You will need a set of watercolor paints
and a paint brush. I'm going to be using
this size paintbrush, but just use what you
have available to you. You will need a capable with clean water and a
permanent marker. Permanent means that the ink in the marker will not run around
when you add water to it. You will also need a
pencil with an eraser, a paper towel, and a set
of oil pastels or crayons. So go ahead and gather all of those supplies
and materials, and I'll see you back
here in the next video.
2. Step 1: Draw a Penguin: In this step, we're
going to draw our happy New Year
penguin design. So let's get started. Alright, the first thing
that we're going to do is we're going to pick
up our permanent marker, take the cap off
of the marker and put it on the back so
it doesn't get lost. And what we're going
to do is we're going to come down from the top, I would say about seven or 8 ", maybe about ten or
11 centimeters. We want to leave enough space at the top of our piece of paper
so that we can make a hat, a happy New Year hat. So we're going to come
down to about right here, and we're going to make
a line about this long. So let's go ahead and do
that. A straight line. Right in the middle of
your piece of paper, this is going to be the
bottom of the hat. Alright? It doesn't have to be
perfectly straight. It's fine, just the
way that it is. Alright, so above this line,
we're going to make a hat, and below this line, we're going to make the rest of the penguin and the design. Alright? So let's do this. Let's go back up about to the middle of this line
and make a circle. And then we're going to connect the circle to each
side of the line. So I'm going to go from
the circle to the line. And then from this side of the circle to the
end of this line. And there's our hat.
So you might decide that you'd like to add some
designs into this hat, and we are going to
have time to do that in just a few minutes after we're finished creating the
rest of our drawing. Alright? So let's go back
up here to this point, and we're going to
draw a curve line from that point around and then back to this side
right here, right? And that's going to be
our penguin's head. So we're going to make
it nice and round. Like that. Alright,
so we have our hat, and we have our head and our face of our penguin
is going to go right inside here after we finished making the
rest of our design. Alright? So now what we're going to do is we're going
to come down a little bit, and we're going to make a sign that our penguin is
going to be holding. So we're going to start
about right here. We're going to come over, and
we're going to end up about the same distance
from the edge of our piece of paper. I'm
going to go like this. Come back up. And then we're going to move
down a little bit, and then we're going
to make another line going along that same
first line like this. Now we're going to close
that up. Close that up. This is going to be our sign, our happy new year sign. Alright, now that
we have our sign, we're going to go back
and we're going to create the body of our penguin. And then we're going to go to the bottom here on the left, make a curve line and do the
same thing on this side, make a curve line on the right. Now what we're going to do is we are going to follow these lines down and make a body the lower part of the
body of our penguin. So follow that down. Follow this one down. And then what we're
going to do is we're just going to close
up that bottom. Alright, now what we're
going to do is we're going to make some small
wings on the side here. So they're going to start here
at the shoulder, come out, jump over that sign, come down, and then come
in and touch the body. Do you see how that works? So it's like the wing
is behind the sign, and then we're going to do the same thing on
the other side. Jump over that sign.
And then come back in. Now, what we're
going to do is make some feet down here
at the bottom. I'm just going to make
this type of a foot. Okay, now what we're going
to do is we're going to go back up to the top
part of our design, and we're going to create
a little bit of detail. Let's start with the face. So we're going to make a
very small dot about right here in the middle,
very, very small. And then what we're going
to do is we're going to go from this dot, curve around, and then
end up about right here. And that's going to
be a little bit of detail for the face. Then we're going to do the
same thing on the other side. Now we're going to
add some eyes here. I'm going to put my
eyes about right here. If there's a different type of an eye that
you'd like to make, maybe you'd like to
put some eyelashes or some shine marks, you can
go ahead and do that. I like to make mine
roughly the same size. Then I'm going to
make a small beak And then I think I'm
finished with that part of it because I want to
keep it pretty simple. If you'd like to add a
little bit more detail, you can go ahead and do that. Remember, this is your artwork, so you get to do what
you'd like to do. Alright? That's the neat
thing about artwork. Alright, now I'm going
to go up to the hat. Hm. So you can create anything that you'd like
in your hat for design. You can put some flowers
in there, some stars. I think I'm going to
add some slanted lines. Then I might add something else. We just start out with
the slanted lines here. They don't have to be
perfectly straight. Some of them might be closer together than others,
and that's okay. That makes it look more human. The human touch. There we go. Alright, I was going
to add some dots, but I think I like
it just like that. So anything that you'd
like to make any type of design that you'd like to
make is perfectly fine. So I'm taking a
look at my design, and I'm really happy with it. There is one more
thing that I'd like to add right here
in the Tommy area, and that's going
to be a curve line here that comes down and
it goes back up like this. So it looks like there's
a little white patch on the belly of my penguin. Alright, I'm really happy with the way that my penguin
design looks at this point. So what I'm going to
do is I'm going to take the cap off of
the back of my marker, put it back onto my marker so
my marker doesn't dry out. When we come back, we will write happy new year on Our sign. So I'll see you back
here in the next video.
3. Step 2: Write 'Happy New Year!': In this step, we are going
to write the phrase happy new year inside of the
sign that we created. So let's get started. So if we take a look at
this phrase Happy New Year, we see that there
are three words. This word in the middle
is the word new. Because we want to
space the words out evenly and we don't want them to be bunched up on one side, or if we maybe run out of room, that would be too bad if we had to leave off a letter
or two, right? We want to make sure
that those words all fit onto this small
space evenly. So we're going to do two things. We're going to use a pencil
in case we need to erase. And then we're also going to start out with this word new, and we're going to put
that right in the middle. So then we have
some more space for our words happy and year. Okay. Let me show you how
we're going to do that. All right, so we have the word new and we see this
letter here, this E. That's going to go
right in the center. So I'm going to
make the letter E, and it's going to be
a capital letter. So here I have my E, and so on this side of my E, I'm going to make my W
because I have this W here, and then on this side,
I'm going to make an So I have the word new. Now, I'm pressing fairly hard. Let me go over that
one more time. I'm pressing fairly
hard with my pencil, but that doesn't mean
that you have to because if you need to erase, you want your lettering to be a little bit lighter
with your pencil. I just want you to be
able to see that, okay. Alright, so we have the
word Nu here in the center. Now we can work on the
word happy over here. So I'm going to make capital
all the way to the end. A. And I'm kind of keeping an
eye out on this spacing right here because I want there to be a small space here
between these two words. So H a, P, P Y. Then a small space, Nu, and then another space here. Y E Hey, I'm trying my
best with my letters. They might not be
perfect, but that's okay. Now I want to have an
exclamation mark here, too, because that
shows excitement. So happy. New year.
See how that works. Alright, now what
I'm going to do is I'm going to take the
cap off of my marker, put it on the back so
it doesn't get lost. And I'm just going to
go over each letter. Now that I'm happy
with the spacing, I'm happy with the letters,
the way that I wrote them. I'm just going to carefully
go over that pencil line, each pencil line with
my permanent marker. Alright, there we go. Now, I do see a little bit of
pencil line poking through, like right here and
maybe on the W. So I'm going to go ahead and
erase those pencil lines, so it looks nice and clean. Alrighty friends. So now we have our Happy New Year
sign all ready to go. And we have our cute penguin. What we're going to do
in the next step is we are going to add some
fireworks to the background. So I will see you back
here in the next video.
4. Step 3: Add Fireworks: In this step, we are going to add some fireworks
into the background. So let's get started. So I'm going to choose some bright colors for
this part of the project. The reason why I'm
going to choose the bright colors
of oil pastels is because I really want that color to stand out
when we add paint to it. So I'm going to choose
the color orange first because I know that
that's really bright. I'm going to make
a very small dot. And I'm going to remember
to push pretty firmly, pretty hard with my oil pastel. And I'm just going to
make some lines that come out from that dot. They don't even need
to touch the dot. After I do that, then I'm going to go back and
I'm going to make some smaller lines between
each of those bigger lines. There we go. Now I think I'm going to use yellow over here. So I'm going to make A
small dot right here. I'm pushing pretty hard. Then I'm going to make some
straight lines coming out. I'm not going to
touch my penguin, but I'm going to
come pretty close. Now, between those larger lines, I'm going to make
some smaller lines. These are going to
be my fireworks. So I'm going to go ahead
and fill the background. Maybe I'll have one, two, maybe three or four more of my fireworks using
bright colors. Alrighty friends, I'm finished
drawing my fireworks. I like how it looks. I know that I have a few spaces right here that I could
put more fireworks, but I kind of like the way
that it looks right now. So I'm going to stop.
Sometimes, as you're working, you will think, Oh,
now's the time to stop. And if you feel that
way, then just stop. Remember this is your
artwork and you get to start or you get to
stop when you want to. So in the next step, we are
going to come back and we are going to add some watercolor
paints to our design.
5. Step 4: Paint the Background: In this step, we
are going to add some watercolor
paints to our design. So let's get started. The first thing that
we're going to do is we're going to add a drop or two of water into each
of our pans of paint. And what this will do is it we'll soften up
our paints a little bit so that the paints
are easier for us to use. So I do really encourage
my students to take that step because
it really does help. Now that our paints
are softening up, let's turn our attention
to our design. So here we have our cute penguin with the sign Happy New Year. And what we're going to
do is we're not going to focus on painting the
penguin at this point. We're just going to focus
on painting the background. So yes, we're going to
paint the background first. And then in the next step, we will come back and we
will paint the penguin. Okay? Alright, there's a reason for that. And this
is the reason. The penguin is going
to be a lot of black, and we want to make sure that our water stays as
clear as possible. And when you add
black to the mix, then the water gets real
muddy very, very quickly. Okay? So we're going to
start with the background. You get to choose the color or colors that you would like
to paint your background. I've been thinking about it, and I'm thinking about the
winter and how cold it is, and I think that I
would like to use the colors blue and
green for my background. So I'm going to start
with those two colors. I think I'm going to
start with the green, and I'm just going to start painting up here in the corner. Going to spread out that paint, so those fireworks
really stand out, and I'm just going to take my time in painting,
so I'm going to paint. Green, and then I'm going to
mix in a little bit of blue. And I would like
these two colors to mix and to blend together. So what I'm going to do is I'm going to speed up the video. You can watch me, and then I will see you
back here in just a minute. Alright, friends, I'm finished
painting the background, the combination of
blue and green, and I'm really happy
with my choice. I think it looks fantastic. In the next step, what we're
going to do is we are going to start painting
our penguin design.
6. Step 5: Paint the Penguin Design: In this step, we are going
to paint our penguin design. So we're going to paint the hat. We're going to
paint the penguin. And then if you'd like
to paint the sign, you can go ahead and do that. I think that I am
going to paint mine, but I might change
my mind, right? I'm going to start
by painting the hat, and I've decided that
I'm going to create a hat that is pink and orange because I like
those two colors together. So I'm going to put some
water into one of my wells, and I'm going to create
a light pink color. That's a little bit darker
than I was expecting. So I'm going to lighten that up. And then, you know
what I'm going to do? I'm going to show you a
trick that I sometimes use. If I feel that a color is too dark or there's too
much paint in an area, what I do is I take my
handy dandy paper towel. I hover over that area. I gently touch. I don't
rub and I don't push. I gently touch that area.
And look what happens. Some of that paint gets soaked up by the handy
dandy paper towel. So that's what I did on
that because it was a little bit darker
than I was expecting. So I'm going to lighten up this paint a little bit
with some more water. Remember, if you'd like a lighter color of paint,
you use more water. If you'd like a darker
color of paint, a more vivid and bright color, then you use more paint. Yeah, that's exactly the color that I'm looking
for right there, a little bit of a lighter pink. Alright. Now I'm finished
painting my hat, and I'm finished
painting the beak, and I decided to use
yellow for that. Now I'm going to move
down here to the sign, and I think I'm going
to use the colors maybe yellow and orange and red
for this sign right here. But pretty light colors not very strong because I want to
see those words, right? And I want the colors to
blend and mix together. So I'm going to make sure that they're
touching each other. So I want a little bit of red. Maybe a little bit more. Not too much. Red can
get very, very strong. Okay. Awesome. Now I'm going to choose a
little bit of orange. For this area, not
too much paint. I want it to not be too strong. And I'm looking for
more of a tie Dilo, so the colors are
blending together. And now what we're going to do is we're going to
paint our penguin, and we're going to
use the color black to paint our penguin. So we're going to paint
this area right here. We're going to keep
this area white. We're going to paint the
body, but not the belly. We're going to paint the wings, and then we're going
to paint the feet. So I'm going to
show you how we're going to prepare
that black paint. We're going to put
a little bit of water into one of our wells, and my penguin's not going
to be a solid black. It's going to be more of a gray. So I'm going to
add some water and just a little bit
of black paint. You don't need much black paint because the color
is very strong. So you just need a
little bit of black. I think I'd like a
little bit more black, so I'm going to add
a little bit more. And then I'm just
going to go ahead and paint those areas
that I showed you. Alright, friends, I'm finished painting my penguin design, and I'm really happy with
the way that it turned out, it's fun and festive. I hope that you had a lot
of fun with this project. I will see you next time.
 Em Winn, Teacher, Art Instructor, Artist