Transcripts
1. Introduction and Supplies You Will Need: Hi, friends. How are you? I hope you're having
a great day today. I'm excited about sharing
this project with you. This is a drawing and
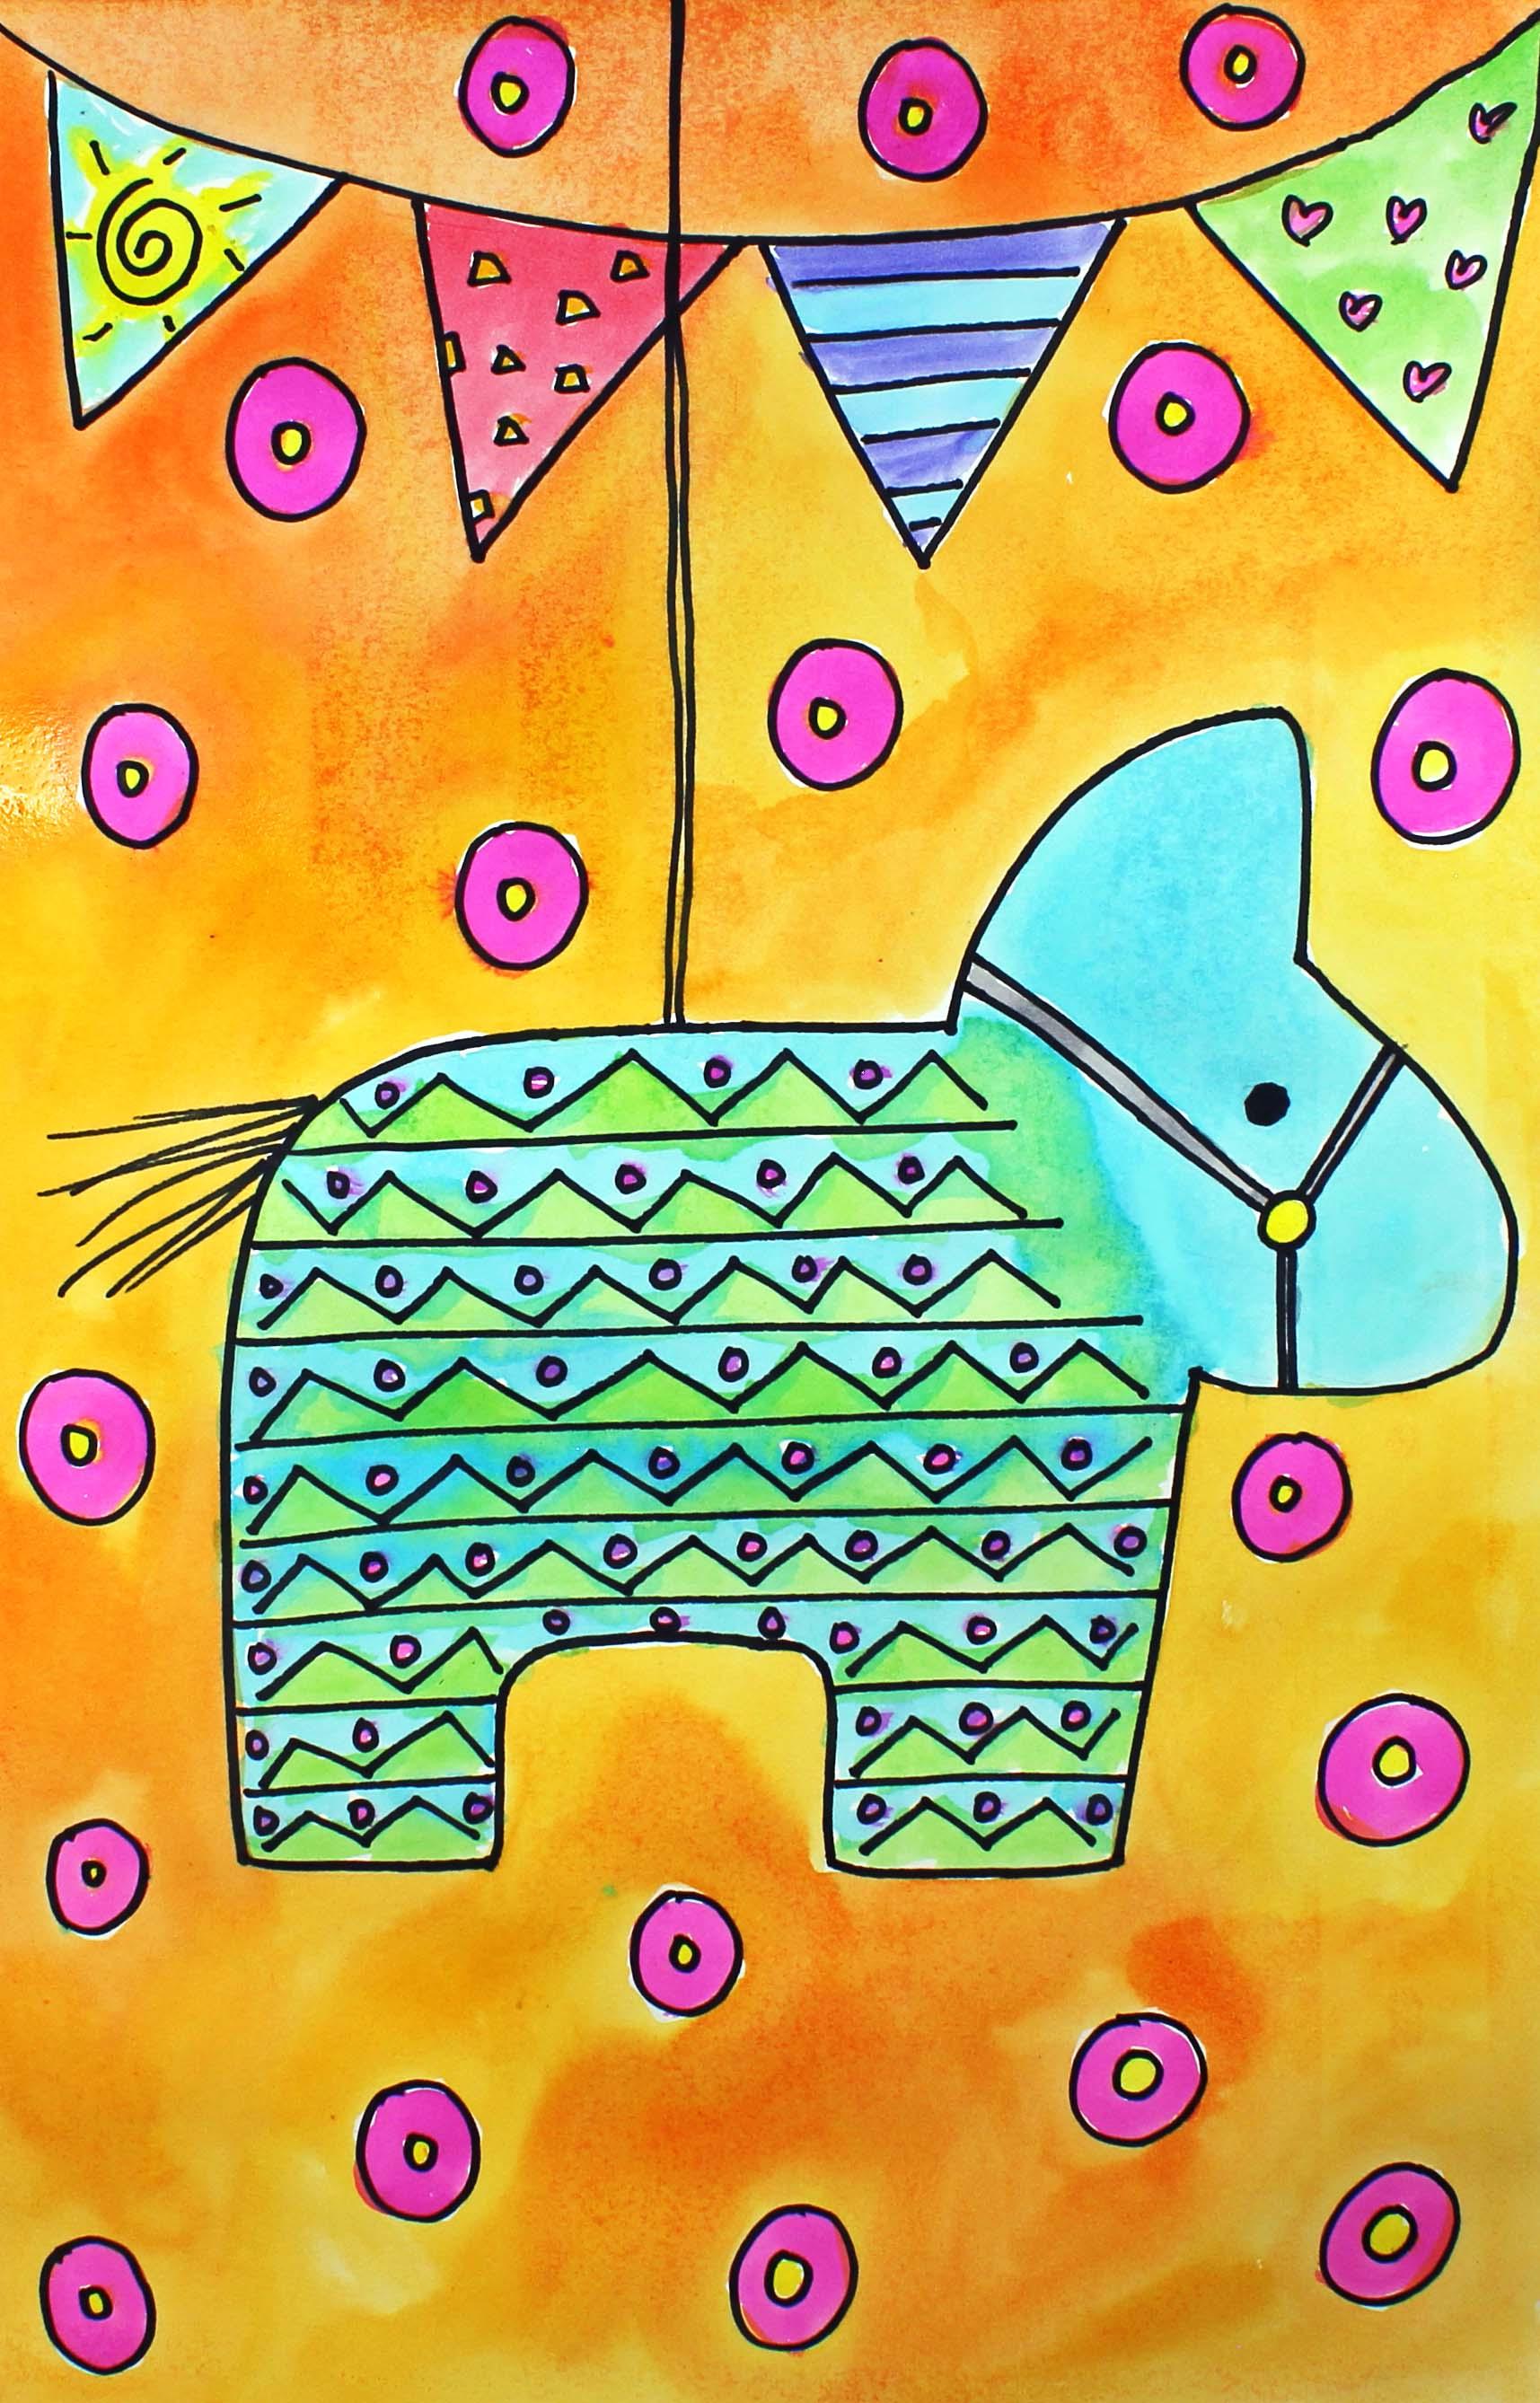
watercolor painting project. And today, we are going to be creating this pinata design. So I hope that you have a lot
of fun with this project. Let's get started. Let's talk about the supplies
and the materials that you will need
for this project. The first thing
that you'll need is a sheet of watercolor paper. You will need a set of watercolor paints and one
or two paint brushes. I'm going to use
two paint brushes, a larger one and a smaller
one because I have larger areas to
paint and smaller areas like these little
circles to paint, as well. Just use what you have
available to you. You will also need a bowl
or a cup with clean water. You will need a
permanent marker. Permanent means that the ink
in the marker will not run around on your piece of paper when you add water
or watercolor paints, and you will need a paper towel. So go ahead and gather all of those supplies
and materials, and I will see you back
here in the next video.
2. Step 1: Draw a Horse Pinata Design: In this step, we
are going to draw our festive pinata design. So let's get started. The first thing that
we'll want to do is take the cap off of our marker
and put it on the back. So that it doesn't get lost. Now what we're going
to do is we're going to find the middle of
our sheet of paper, and we're going to go
up just a little bit. So we're going to go up maybe
about five or so inches. That would be about
seven or 8 centimeters. And we're going to start here on the right side of
our piece of paper. We're not going to start really, really close to the edge of our piece of paper because this is where the pinata's
face is going to go. Okay? We want to make sure that
we have enough room. So let's start about right here. And what we're going to do
first is we are going to create a short curved
line like this. Now what we're going to
do is we are going to go back to the front
of the curve line. We're going to curve around a little tiny bit and then
come down just a bit. This is going to be
our pinata'sear. Alright, now that we
have our pinata's ear, what we're going to do down
here is we're going to make the head in the
face of our pinata. So it's going to be a donkey, and we're going to come
down from this line. We're going to
make a curve line, come around and close
up about right there. If your line does not look exactly like mine, that's okay. We want yours to look
different from mine. Remember, this is your artwork, and it looks much, much better if
everyone's artwork is a little bit different. Now that we have our ear
and our face of our donkey, we're going to come back
to this initial line, and we're going to make a
straight line for the back, and then we're going to curve around and come down
about that far. This is going to be the, the
bun buns and the back leg. Now we're going to come
back to this line right here and we're going to make a slightly slanted line down, and it's going to be roughly as long as this line right here. This is going to
be the front leg. Now we're going to curve
around just a little bit and come in and do the
same thing on this side. These are going to be the
two legs that we can see. We're not going to be able
to see the back legs. Now we're going to
make the tummy here, so we come up from this line. Curve around and do the
same thing right here. Come up and curve around. So it's a very simple
outline of a donkey. Alright, now that we
have the ear, the face, and the legs, let's make a little bit of
a tail right here. So I'm just going to
make some straight lines coming out. Like this. If you'd like to make
a little bit of a man coming out of the back of your donkey, you can
do that, as well. I'm not going to do that part, but you certainly can do it. Now what we're going
to do is come back to the face of our donkey. And about right here, we're going to make a circle. And then we're going to attach
two lines to this circle, two lines coming this way. And then two lines coming down. And these lines are
going to meet right here at the edge of our shape. So we have our circle, and then we have two lines
coming out to the edge of our top of our face and then to the edge of our
bottom of our face. And now we're going to
make two more lines, and they're going to
touch the ear back here. So I'm going to come along and they're going to be
pretty close together. There we go. Now, let's create an e for a donkey
and fill it in. If you'd like, if
there's a different type of an eye that you'd like to
make, go ahead and do that. Alright, if you'd like
to add some eyelashes, you can go ahead and
do that, as well. I'm not going to
add eyelashes to mine this time. Maybe
next time, though. Now that we have our basic
outline of our pinata, what we're going to
do is we're going to fill in this
space on the body. We're going to fill it in with some designs and some patterns,
some different lines. Think about Hispanic
Heritage Month. Think about Mexico. You can do anything that you'd
like as far as designs go. I think what I'm going to do
is I'm just going to make some lines and maybe some zig zag lines,
maybe some circles. I'm just going to start here at the top and work my way down. I'm not going to give
it a lot of thought. I'm just going to let the
designs flow out of me. Okay? If you'd like to think
about it for a minute, go ahead and do that, but I'm
just going to get started, and you can watch me. I'm going to stop my
design about right here, and I'm not going to go onto
my face with my design. If you would like to go onto your face with your design,
you can certainly do. Alright, so I'm going to start out by making some
straight lines. Alright, friends. So
I've made my lines in my circle designs on my pinata. And what we're going
to do next is we are going to make a
string that goes from about right here up all the way to the top
of our piece of paper. This is going to be
the string that holds our pinata onto the
beam above or a tree. Pinatas usually hang
from something. So I'm going to make a line. It doesn't have to be
perfectly straight. And then I'm going to
also double up that line. Really, really closely. Now that we have our string that is holding up our pinata, we're going to add some
decorations to the background. Let's add some colorful
paper flags called papel picado up here at the
top of our piece of paper. These are cut paper banners
that are popular in Mexico. So what we're going to do
is we are going to make a curve line going from one
corner to the other corner. And you can make any
shape that you'd like to make for your banners
coming down or your flags. You can make triangles. You can make squares. You can make hearts. It's completely up to you. I think I'm going
to make triangles. So I'm just going to
make some triangles. I'm going to make a triangle, put a little space between that triangle and this triangle, go right through that string,
make another triangle. Move over a little and make another triangle
just like that. They don't have to be perfect. Now, inside of your triangles or inside of your
squares or your hearts, whatever type of shape that
you made for your banner, let's make some
designs on the inside so you can make any type
of design that you'd like. I think I might make some swirly lines that
represent the sun. So I think I'm going to do
that for one of my banners, and then maybe I'll just
add some little shapes And then maybe I'll add
some stripes to this one. And then maybe I'll
add some hearts here. So I added a sun here
to this little flag. I added some shapes here. They're kind of a combination of a little square and
a little triangle. I added some stripes here, and then I added some hearts. So what we're going to do
next is we are going to fill in the background with
some more shapes. You get to choose
the shapes that you'd like to use
for your background. I'm going to use
probably some circles. What this will do is it will
add just a little bit of more fun and festive
decoration to your picture. So I'm going to just start
by making some circles. And then within that circle, I'm going to make
a smaller circle. And what this will do is it will just add a little bit
more detail to the background. So I'm going to go
ahead and do that. There we go. So I added some small circles within
some larger circles, and I think that that adds a
lot of detail to my design. So I'm really happy with this. Now, if there's anything
else that you would like to add to your
design at this time, go ahead and do
that at this time, because in the next step, we are going to be adding some watercolor
paints to our design. So take your cap off of
the back of the marker, put it back on the front, make sure it's on there pretty tight. And then in the next step, we will be adding our paint. But
3. Step 2: Paint the Background: In this step, we are going to add some paint to our design. So let's get started. The first thing that
you'll want to do is you'll want to drop one or two drops of water
into each pan of paint. And what this will do is it
will soften up the paints, and the paints will be much
easier for you to use. So I encourage students to take that step because it
really does help. While our paints
are softening up, let's turn our attention
to our pinata design. So the first thing that we're going to do is we are going to add watercolor paints
to the background. The background is going to be this area right here,
not the circles. Not the pinata, not the
little paper flags, just the background area. So I'd like you to think about
the color that you would like to use because these are going to
be different colors. These are going to
be different colors. These are going to
be different colors. You might want to choose just one or two colors
for your background. I'm only going to choose
one because I really want my pinata and the circles and the flags to
really stand out. So I'm going to
choose one color, and that color is
going to be orange. Whenever I am creating
Mexican folk art, I always think of orange, and it's such a beautiful
and vibrant color, I decided on this artwork that that's the color
I'm going to use. So I'm going to get started
with this orange right here because it's a really
strong color orange. I'm going to start at the
top of my piece of paper. And I'm going to be pretty careful as I'm painting
down my piece of paper. If I go over the
lines, that's okay. I'm not going to worry
too much about it. I'm just going to do
the best that I can. You will find that
watercolor paints, they love to run around. So that's a common thing. They like to spread. They like to run around. So if that happens to you, it's a very common thing, and you don't have to
worry about it too much. That's what makes them
very beautiful, right? So I'm going to paint the
background, and like I said, I'm not going to
paint the flags or the circles within a circle
or the pinata itself. I'm just going to paint so I'm going to speed
up this video, and I will see you back
here in just a minute. Alrighty friends, I'm finished with the background
of my design, and I really like the
way that it looks. I did change my mind
as I was painting. I mentioned before that I was just going to use
this orange color. I was only going
to use one color, and I decided to change my mind as I was
painting in this area. I thought that this
painting could benefit from another
shade of orange, as well. So I added this lighter orange, and I'm glad that I did. Sometimes that
will happen to you as well as you are creating. What happens is you might think, oh, I want to try
a different color. And if that happens to you, go ahead and try. That's
what art is about. It's about trying new
things and experimenting. So I'm happy with the
way that this looks. When we come back,
we will be painting our flags and our
background designs, me, the little circles
inside the circles, and then we'll also
paint our pinata. So I will see you back
here in the next video.
4. Step 3: Paint the Design: In this step, I'm going to paint my pinata design and my little circles in the
background and the paper flags. I haven't decided all the
colors that I'm going to use, so you get to be
surprised along with me. I'm going to be
surprised, as well, so I'm just going to go with what I'm feeling at that moment. So I'm going to start
with my circles. I know that I want
to paint them pink, and I think I might
put a little bit of yellow inside the smallest
part of the circle, that tiny circle in the center. I do have two different
sized paint brushes that I'll probably use for
this part of our project. If you only have one size
paint brush, that's okay. Just use that paint brush, and it will work out just fine. So what I'm going to do is I am going to speed up the video. You can watch me to get ideas on what the colors are that you might choose or the
different combinations. And I am excited to share this part of
the project with you. So let me go ahead
and get started, and I will speed up that video. Alrighty friends, I'm finished and well, I'm almost finished. I think that this looks amazing, and I'm really happy with it. It took me quite
a while to paint. I know it looked like I was
painting pretty fast to you, but it did take me a while. I wanted to try my best. As you can see, some of my
paints blended together, and that's exactly what I wanted because I wanted
to have that look, that watery type look. So I have a lot of
blending going on here. The colors have run into each other and other places, as well. The one thing that
I still need to do is the little
harness right here. So what I'm going to do is
I'm going to paint that gray. I'm going to make some
gray with my black paint, so I'll put a little bit
of water onto my palette, and then I'll add just
a tiny bit of black. That might be actually too much. So let me test that out on
my handy dandy paper towel. It's a little bit dark. I want to add a little bit more water. There we go. And I want
to be careful not to get too much paint
onto my paintbrush because I don't want
it to spread around. So I'm going to go very
slowly and carefully. There we go. Alrighty now, I feel like I am finished. I hope that you had a lot
of fun with this project. I will see you next time. Yes.
 Em Winn, Teacher, Art Instructor, Artist