Transcripts
1. Introduction and Supplies You Will Need: Hi, friends. How are you? I hope you're having
a great day today. I'm excited about sharing
this project with you. This is a drawing and
painting project, and I designed it,
especially for kids. Students do not need to have any drawing or
painting experience at all to be successful
with this project. I will guide students step by step through all the steps
that they need to take. Today, we are going to be
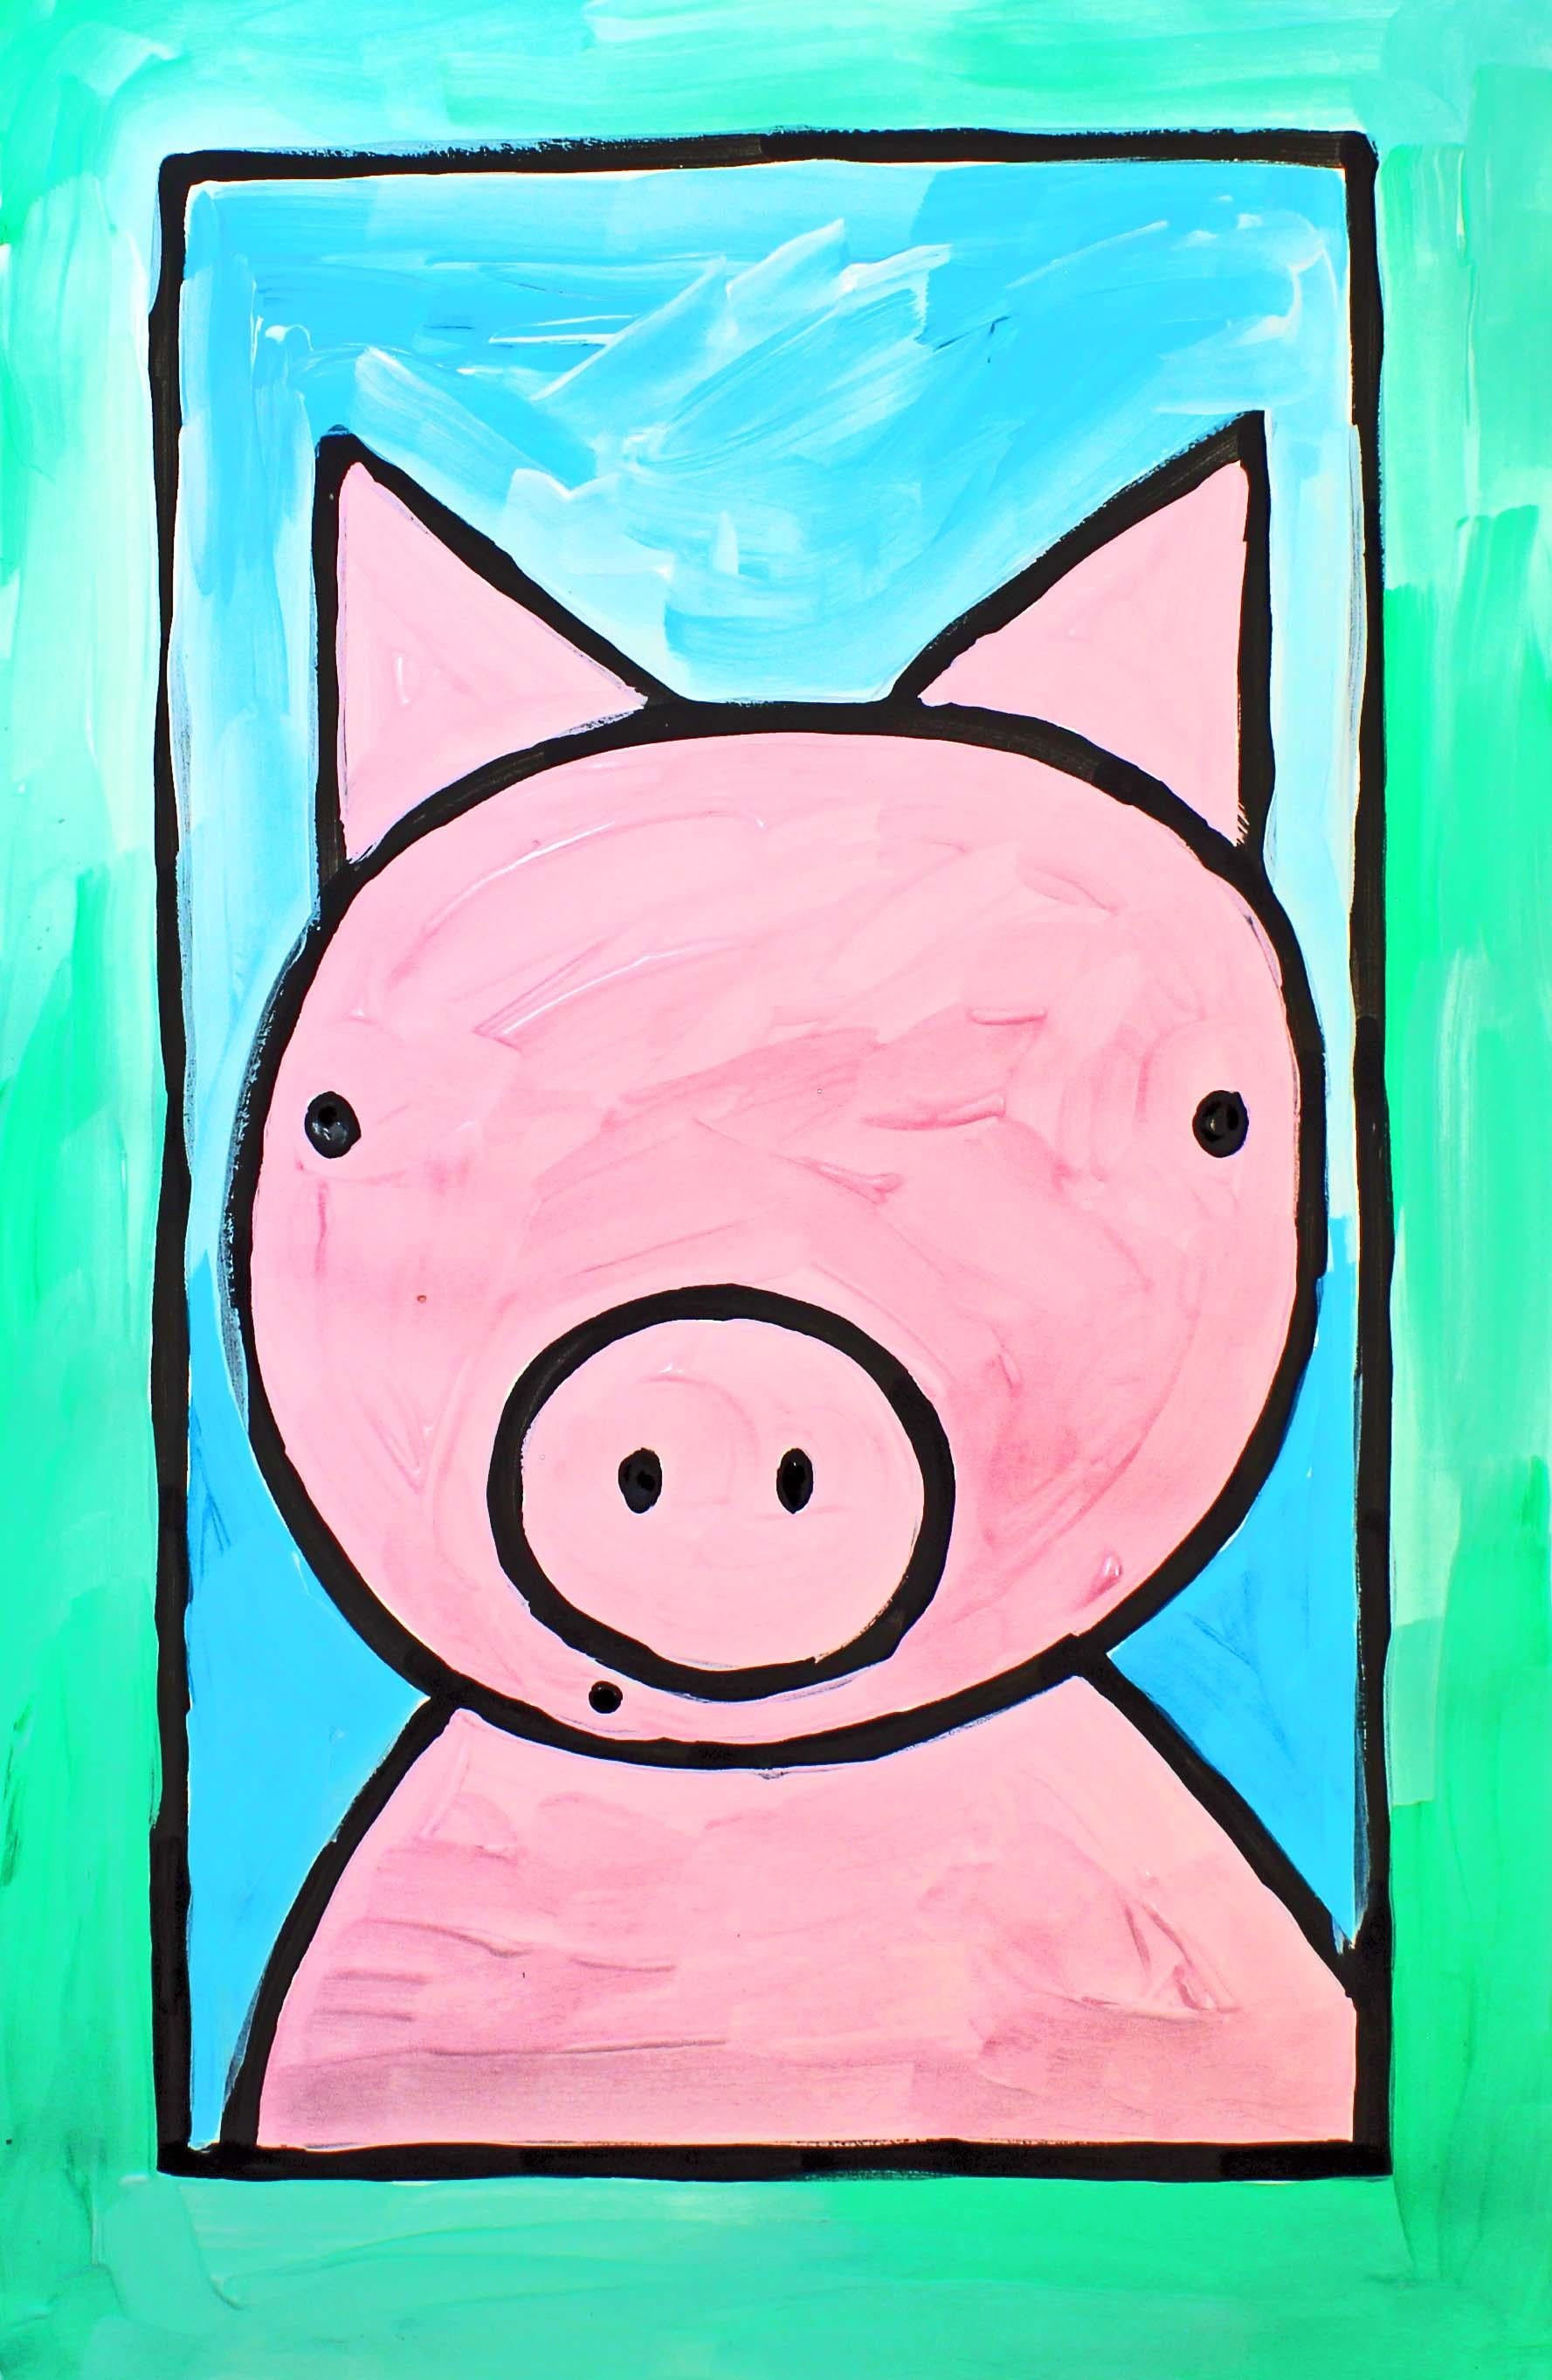
creating this cute pink pig. Oh let's talk about the supplies and the materials that you will need
for this project. The first thing
that you'll need is a sheet of heavy white paper. You will need some paints. I'm going to be using
some tempera paints, but you can also use poster paints or acrylic
paints, if you like. You will need the colors black for the outline and
white for mixing. And then I'm going to be using the colors blue, green and red. And I'm going to mix the
red and the white to make pink because I do
not have pink paint. If you do not have these
exact colors, that's okay. Just use what you have
available to you. You will also need some
clean water if you choose. Sometimes I use water
for this project, and sometimes I don't. So the water is optional. You will also need two
different size paintbrushes, a larger paintbrush. I'm going to be using
this flat one and a smaller flat paintbrush if you have it available to you. We're going to be using
the smaller brush for this outline, this black outline, and the larger paintbrush for
all of these big spaces. You will also need a
pencil with an eraser. You will need a paper towel. This is how I'm going to be getting my paint brushes clean. For this project,
I'm just going to wipe them off on
this paper towel, and you will need some
sort of a palette. I just like to use a
small paper plate. So go ahead and gather all of those supplies
and materials, and I'll see you back
here in the next video.
2. Step 1: Draw a Pig Portrait: In this step, we are going
to draw our pig design. So let's get started. The first thing that we're
going to do is we're going to pick up our pencil and we are going to draw a frame around the edge of our piece of paper. We're going to go
in about an inch and a half or 2 " from the edge. That would be about
two or 3 centimeters just to create a frame. It does not have to be perfect, so I'm going to start here, make a straight line down. Then I'm going to angle off, and then I'm going
to come back up. See how it's not perfect. That's okay. And then
I'm going to come back, and I'm going to
close up that frame. So it's all the way
around my piece of paper. The next step is
we're going to draw our pig right here in
the center of our frame. So we're going to start
about right here and we're going to make a circle
for our pig's face. And then we need to
make sure that we leave enough space for the pigs ears. Okay? So I'm going to
start about right here. And I'm going to come
around with my circle. It doesn't have to be perfect. And then I'm going to close
that circle up like that. Now I'm going to add
some ears on to the pig, and so those are just triangles, come up and then come down. Same thing on the other side, come up and then come down. And then I am going to
also come down into this space right here and
I'm going to add a snout. So this is going to
be an oval shape at the bottom of the pig's face. And then I'm going to make some nostrils right here
in the center. Feel those in. So that can
remind me that I need to fill in those spaces
with some black paint. I'm going to come up here and I'm going to make some ovals. You can make any type
of eye that you like. It's going to make
them pretty simple. Pigs don't have really
elaborate eyes. And then what we're going to do, if you have space down here, you can make a little
mouth if you'd like. Sometimes I just like to
make a circle mouth like this because I think that
looks cute for pigs. Alright? And then
I'm going to make some shoulders that
go down to the frame, but I'm not going all the way to the edge of my piece of paper. Like that. All right, so I'm seeing something that I'd
like to change, and it's okay to change something if you see something
you'd like to change. I'd like to change
this ear right here. I'd like this to come
more straight down. So I'm going to just
change that and erase this area right here. And just know whenever
you're creating art, it's always okay to
change something, right? I'm actually thinking I want to make this ear a
little bit bigger. So there's another
change right there. Alrighty now I'm going to erase this line because I
no longer need it. And then I'm going to make
sure that I don't have any of that eraser dust
anywhere. There we go. Alright, I'm really happy with the way that that pig looks. Now, remember,
we're going to make this a very simple design, meaning it doesn't
have a lot of detail because when we add our paint, we need to make sure
that it's simple. Otherwise, our paint
will just cover over the details. So a simple pig. And when we come
back, what we're going to do is we are going to start outlining
our pig drying.
3. Step 2: Outline the Design with Black Paint: In this step, we
are going to apply some black paint to our design. So let's get started. As I said before,
we're going to be using this liquid tempera paint. If you have acrylic paint,
that would work as well. So just use what you
have available to you. What we're going to do first
is we are going to put just a small amount of our
paint onto our palette. I'm using a small paper plate. You don't need much paint because a little paint
goes a long way. Remember, we always try
to do everything that we can not to be
wasteful. All right? So if you'd like
to add a couple of drops of water to your paint, that might help if
it's really thick, but if it's not thick, you
don't need to do this step. Going to add just a
little bit of water, not too much, just a
little bit of water, and then I'm going to mix
it really, really well. That way, my paint will flow a little bit more easily
onto my piece of paper. Alright? So what
I'm going to do is I'm just going to start at
the top of my piece of paper, and I'm going to go
along my pencil line. And I'm going to try to
stay on the pencil line. But if I go off the pencil line a little bit, that's okay. Just going to try my best. Remember, if you hold your paint brush
straight up and down, it creates a thinner line. So if you hold it
more vertically as opposed to like
this on the side. So try to hold it more
straight up and down. I'm going to come
about right to there. And then I am going
to move to my pig. And remember, if you
run out of paint, you have to reload
your paint brush. And you'll have to
do that several times because you will
run out of paint. And if you feel like you need to go over the same area again, feel free to do that, as well if the paint coverage
isn't really solid. Alright, what I'm going
to do now is I am going to speed up this video, and then I'll see you back
here in just a minute. Alright, friends, I'm back, and I still need to paint the nostrils and
the little mouth. So I'm going to take some
of this paint off of my paint brush with my
handy dandy paper towel. Squeeze that paint out
of that little brush, and then I'm going to use the back end of the paint brush, and I'm going to put
some paint on there. And this is a trick that I
learned from my art teacher. This is a way to paint
some nice round spaces. You might have to roll it around a little bit if you're
trying to paint an oval, but it makes it a lot easier
than using the brush. And then the little mouth, I'm just going to
make a small dot. I might have to go a little bit lower than the original spot, but I'll just erase that
a little bit later. Alright? So there we go. No, I'm going to wipe this off, wipe this paint off of the back. And then what I'm
going to do is I am going to put that down. And what I'm going
to do is I am going to wait for my paint to dry completely before
we start the next step, which is to paint
the pig design. So make sure that your
painting dries completely, and I will see you back
here in the next video.
4. Step 3: Paint the Pig: In this step, we are going
to paint our pig design. So let's get started. So your painting
should be completely dry before you start this step. So make sure that there's no wet black paint
because we don't want it to smear around into
our pink paint for our pig. So let's make some pink paint. The colors that I'm
going to use to make the pink paint are white. And red because I don't have any pink paint, so I
need to make some. Okay, so I'm going to use a little bit of red paint and
quite a bit of white paint. And I'm going to
mix them together, and that's going to
make the pink paint. Alright, so let's do that. I'm going to start
out with my white. Put it onto my palette. And then I'm going to add a little bit of red
and just a dot R. Maybe maybe two or three
dots. There we go. Let's move these aside. So we have a little bit of
space. Put that over here. All right. So I'm going to use my larger paint brush because
this is a larger space, and I'm going to mix these two colors
together to get pink. And it might take a little
bit of experimentation, but I'm just going to try
some different things out. So I'm going to start out
with my white and pull a little bit of that
red into my white. And then I'm just
going to keep mixing until I'm happy with the color. And I'd like my pink
to be pretty light. So I'm going to
add quite a bit of white and just a little
tiny bit of red. I think I'm happy with that
right there. We test it out. Yeah, that's nice. I might go a little bit
darker with the red. Add a little bit more. Sometimes, if you don't have the color exactly that you
need or that you want, you just have to mix a
couple of colors together. Alright, that looks great. Alright, so what I'm
going to do is I'm going to paint my pig only. I'm not going to paint the
background at this point. We'll do that in the next step. And I'm going to try to not
go onto the black lines. But if I do go onto the
black lines, that's okay. I'm not going to worry
about it too much. That happens to me all the time. I try and I try, but that still
happens, and that's okay. Makes it look a little bit more handmade if it's not perfect. Alright, I'm going to
speed up this video, and when I come back, I will be finished
painting the pig. Alrighty friends, I'm
finished painting the pig. Now, as you can see on the eyes and the
nostrils and the mouth, I did go over those a little
bit with my pink paint, so I'm going to add a
little bit more black, and I'm just a dot of
black onto my palette. And then I'm going to take
this end of my paint brush, and I'm going to just go over those areas so that I can
touch them up a little bit. And make them a little bit more round because it's really hard sometimes when you're
painting to keep the paint off of
every single spot, especially when you have a
larger paintbrush, like I do. I'm just going to go
over those spaces for those areas and make those black again.
See how that works? Alright. Now I'm going to use my handy dandy paper
towel to clean off that black paint and to
clean off my pink paint. If you like to use your
water, you can do that. I like to use just
my paper towel, but some people
like to use water. If you do use water, make
sure that you get all of the water off of your paint
brush with your paper towel. Otherwise, your paint
will get really, really wet and runny, okay? And that's not what we want
for this particular project. Alright? So when we come back, what we're going to
do is we are going to add some more paint to our
background into the frame. And I'm going to be using the
colors green for the frame. And this color blue for this area right
here, the background. And I'm going to
add a little bit of white to both of those colors. So I will see you back
here in the next video.
5. Step 4: Paint the Background: In this step, we are going
to paint the background. So let's get started. The first thing that
we're going to do is we're going to
add our colors. I've added green and
blue to our palette, and if there's different
colors that you'd like to use, you can go ahead and add
those colors to your palette. Remember, you don't
need a whole lot, maybe about a quarter size. And we're also going to mix these colors with
a little bit of white that I already
have on my palette. I'm going to use my
larger paint brush because this is a larger space, so I want to make sure that
I use a larger paintbrush. As I said before, I'm
going to be using blue for this area right here in the background with a
little bit of white, and then I'm also going to
use green for the frame. So I'm going to start
out with my white, load my white onto
my paintbrush, and there's my blue. And I want this to
be fairly light. Oh, that's really pretty. And the way that I like
to paint with this type of paint is I don't like to
mix up the paint too much. I like to see the white streaks and the blue streaks in there. So I like to have a variety
of different shades of blue. So that's why I'm not
mixing the colors really, really well because that's
the style that I like. So if you want to mix
your colors more, go ahead and do that. It's all about which you prefer. Alright, what I'm going to do is I'm going to
speed up this video, and I'm going to finish painting this background around the pig, blue, and then I'm going
to paint the frame green. Alrighty friends, I'm finished painting the background blue. And I just wanted to mention, I'm not going to
rinse my paint brush. I have a little bit of
blue and white on here, but it's okay with me if a little bit of blue
gets onto my frame. I am going to add,
at some point, a little bit more white onto my palette because
I'm about to run out. So you can just watch me. I'm going to speed
up this video, and I'll see you back
here in just a minute. Alrighty friends, I
think I'm finished, and I'm really happy with the way that my pig
portrait turned out. Remember, it's okay. If you go a little bit
on the black as I did, it's really tricky to try
to stay off the black, but you could try
as hard as you can, and sometimes your paint just goes on to the
black, and that's okay. I really had a lot of fun
teaching you this project, and I will see you next time.
 Em Winn, Teacher, Art Instructor, Artist