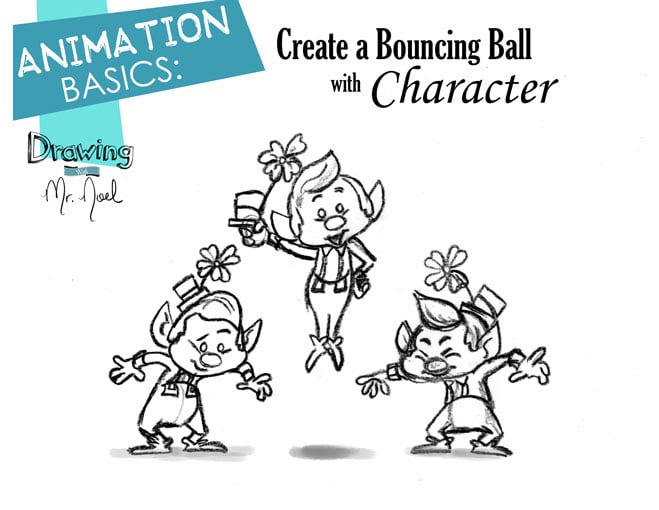
Transcripts
1. Intro: Hello, friends. Welcome Toe Art with Mr Noah. Let's take a look at what will be creating today. We're exercising our animation skills by going back to basics with the balancing ball. Have you ever wanted to make your drawings come to life through animation? But get overwhelmed by the complexity of the action? Will solve this problem by simplifying the process and breaking it down into easy to follow steps. We'll go over the fundamentals of the bouncing ball exercise and see how to apply it in our character animation. As part of this lesson, will designer character sideburns McGee create a plan for our animation and then clean up our drawings? We'll put everything together and photo shopped to create a looping animated shot that can be shared with all your friends. If you're ready and excited to learn, click and roll and let's get started
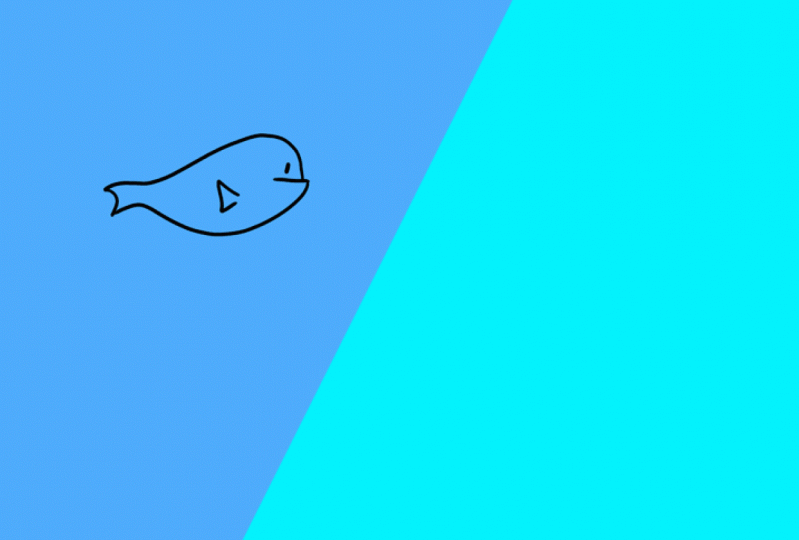
2. Bouncing Ball: Hello, friends. You may be wondering why a bouncing ball this classic exercises used because it covers so many important aspects of animation. Several key concepts for appealing animation include having the movement follow a clean arc understanding timing, which is when a key action happens on screen. In this case, it is when the ball makes contact with the ground during the specific duration. Spacing is incredibly important in animation, and it's basically how far apart you space your drawings from each other visually during the specified time duration. The spacing will make your drawings ease in and out from the key drawings. So let's take a look at the path of bouncing ball might typically make. It would follow a clean mark and have a sharp hit on the ground. The contact points on the ground and the very peak of the arcs are the key positions that we know the ball will hit. At the peak, the ball has slowed down in momentum due to gravity, forcing the ball back towards the earth. Visually, the spacing of each drawing will be close to one another, overlapping a bit. As the ball careens towards the ground, it picks up speed and the spacing becomes wider and wider until contact is made. The ball has some pent up energy after hitting the ground and plunges back up into the next mark and slows down as it hits the top of York. With each bounce more energy spent and the arcs become smaller and smaller, you can play around with the number of drawings included and the space to change. How the bounce feels in motion, making the ball very light, like a balloon or heavy, like a bowling ball. One idea from the Great Book Animator Survival Kit by Richard Williams, is to take a coin on, film it in stages under a camera, taking a picture at each frame and see what looks right or wrong, Mr William States, because you did it. A certain amount of personality will creep into the action whether the ball is deliberate, slow, Jonty, erratic, cautious, even optimistic or pessimistic. Looking at the animation of sideburns, McGee, you'll see that his actions are a series of bouncing balls following a clean mark during a specific time, with very spacing. Now that we understand the fundamentals off this exercise, let's get started on our own. Example. First, by designing our character sideburns, McGee
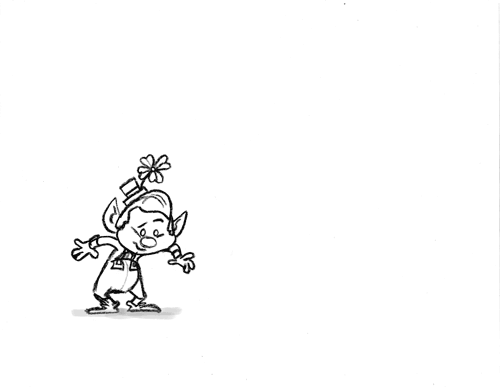
3. Character Design: to begin designing our character. Let's gather our supplies. You'll need the basics paper, pencil and one eraser. I'll be using a blue pencil for demonstration purposes and to better differentiate the construction lines from the main lines. We'll be using a lot of circles to build our character, but I like to begin with a simple line of action. This helps indicate the general pose and the approximate height of the character. Head is a large oval located at the top of the line of action. Build up your over by lightly pressing on the paper until you have a steady, clean line. The torso is built with two smaller circles. The chest area overlaps with the head on. The lower torso is larger than the chest. Together, the two circles create a bean shaped, indicate the legs with two simple short lines and balance him out with a flat line for his feet. We'll do a simple build for his arms and hands with curved lines and circles. When you're animating, you'll want to use this basic structure to create the action, and once everything moves correctly, then you can begin adding details. I like to include the nose in the basic build for tracking purposes. It's an oval located just under the dividing line of the face. Now that we have our basic structure, we can begin adding details sideburns. McGee has chubby cheeks, and we only want to indicate that there there were two small curved lines. The rest of the cheeks are implied. His beady little eyes rest above the nose and over the cheeks, the eyebrows fit within this cone around the eyes. This guide is helpful to keep the browse from wandering too far away on his face. His mouth looks like the letter D, and it fits within the two cheeks. The closer the mouth gets to the cheek, the more it interacts with the fold of the skin. The years are a major element when adding the details as it will inform where the sideburns air placed and where the hair parts for start from the center line and connect under the cheek. The sideburns will follow the curvature of the face. His hairstyle looks a bit like a leaf with offset curves that meet at a point. From here, you can connect the sideburns to the hair by following the curvature of the head when it comes to style sideburns. McGee likes to keep things simple but functional. His shirt collar is too simple. Try ing's. The top of his pants followed the curvature of the bottom circle. His little legs taper down and meet at the shoe, which are more like a slipper that wrap around the feet. Make sure to indicate the hell with a straight line. Keep the soul flat and use a curve for the upper part of the foot. The arms tapered down to meet at the hand. Uh, they're closed off with a cuff that is basically a slightly tapered square. His pants are held up by two suspenders that originally from the triangular caller and meet at the waist from the waist at two square buckles. Don't get nervous about the hands will keep them simple. With four short fingers, you can indicate their position with a line and then wrap around that line. No self respecting Labra Khan would leave the house without their hat. His hat sits on the side of his head and is basically a square on top of a rectangle. His four leaf clover shoots out from that and is built with stretched out hearts. Finally, you can add some dimension to the year and finish any missing details before moving on to the next lesson. I want to remind you of the basic structure you should be using when building up your animation. Remember, keep it simple. Thes circles are great for tracking the movement and ensuring nice arcs. Uh, in the next lesson will plan out our three main drawings for the animation.
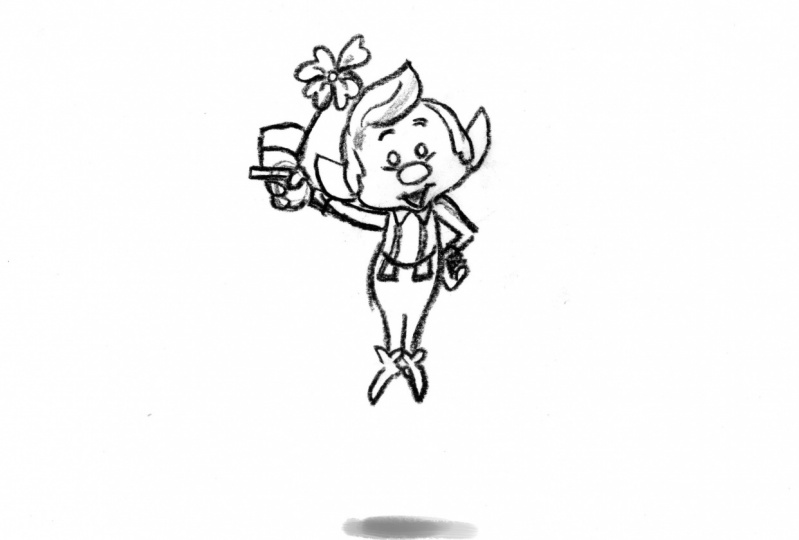
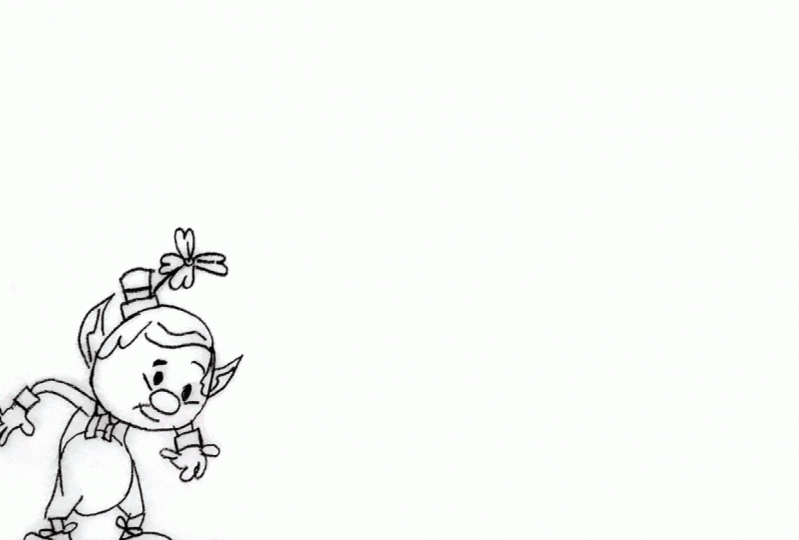
4. Rough Animation: and this lesson will plan out the action of our animation using the simplified character design if you had the character designed, but the style sheet nearby for reference, begin by indicating a ground plane and setting the ark or path that the character will follow. I've set some tracking guides for later in the process to help keep all of the papers aligned. This is not an absolutely necessary step, but I like to do it all right onto the drawing. We know that our character will start at the end, New York, leap to the middle and land on the other end so we can place three circles for the lower tours. The head will follow the torso so gently determined, approximately the size of a head. As he jumps, he'll need to build up momentum and also catch the momentum at the extremes of the action so we can indicate this shift in weight and energy with a bent line of action at the center Post will have our character stretch out, so his line of action will be more of a straight line, since he is both building momentum and absorbing the impact of the jump his knees will be bent and defeat will be flat on the floor As he floats in the air, his feet and legs stretched out to propel himself up his arms stretch out and eventually spring inward. Since we're limited to three drawings, I want to use the centre drawing to show a bit of personality. With oppose, I encourage you to experiment and come up with a unique pose here on the last drawing will once again indicate the shift and wait. With the arms up and the torso bent, go ahead and place the nose so we can begin building are cleaned up enemies.
5. Cleanup Animation: great work so far. With our animation roughly established, we can begin cleaning up our drawings and add details. Grab a fresh sheet of paper for the first key drawing, and if you find it helpful at the tracking marks at the top of the page, I enjoy starting at the face of the character, using the nose as an anchor point for the rest of the features. Since we already practice drawing our character together, I'll let you watch and usually drawings his inspiration and include the final drawings. For your reference in the project description, - you can see that I made an adjustment to the arm position to get the character a more casually playful attitude for the last post. I really wanted to sell the idea of an impact by closing his eyes and squishing the lower part of his face and spreading the fingers. Let's take a look and see if our action plays out in appealing men. If you're happy with your work, you can move on to scanning your drawings and prepare them for their final presentation.
6. Scan Images: with our drawings finalized will scan them, is J. Pegs and open the files and photo shop. We don't want any copyright infringement, so let's move that out of the way. Even though our looping animation will require four frames, we only need three drawings eventually will duplicate the centre drawing to keep the loop running smoothly. With your drawings now scanned, start Photoshopped and open your image files, which will then appear as three tabs at the top of the page. You may have to rotate your canvas, and to do so you'll unlock your image layer by double clicking on the lock and selecting OK on the pop up message to rotate the entire canvas. Goto image image Rotation 90 degrees clockwise or 90 degrees counterclockwise, depending on your scan drawing. Go ahead and do that with your other images. Now you can use the move tool to drag and drop your drawings into one tab. You'll see a new layer has been added. Lower the opacity to make sure the alignment marks are over each other. Great. Let's drag and drop our last image. Next, we want to put our drawings and layers in the correct sequential order to duplicate the middle drawing, select the layer and hit control or command J on the keyboard and dragged the layer to the variant toe. Haider Review Layers Click on the little eye on the left. I want to get rid of the alignment marks, and a quick way to do this is by using the spot healing brush tool. Just select the tool and brush over the area. You want to remove my skin or went too far, and as a result, the page is bigger than I need. So I'll crop the page by hitting control or command. See on the keyboard. I'll hit Enter once I've set the dimension that I want to crop. While the scan is pretty clean, there are still some smudges and artifacts that I can hide by making the whites more white and the black more dark. To do this, go to image adjustments levels, or you can hit control L or Command el on the keyboard. Select the white point. I drop with this eye dropper. Click over anything that's supposed to be white, including smudges on the paper. To make the pencil marks darker, select the black point eyedropper and click over the drawing. If you miss, this is what will happen. Don't worry, though. Just hit control or command. Zito, undo and try again. There we go. Now you can choose to do this for your other drawings. Ah, shadow on the floor would look nice. So if you want to add one, select your layer and the brush tool and begin making your additions. When you're painting, remember to have your actively or selected okay, with your drawings all cleaned up adjusted and put in the correct layer Order we can move on to creating are animated Jim.
7. Make GIF: Now it's time to show off our work, but creating a looping animation with your layers and order goto window timeline A box will appear at the bottom of the page. Click on the Create Video Timeline, but we want our layers to convert to frame animation. So to do this, click on the icon with three little squares on the lower left hand side, then click on make frames from layers. Now you will have the option to set the amount of time each frame will appear on screen. There are some presets, but I ended up using the other option to put my custom time. I encourage you to play around with this and see what feels best for you. But just in case, these are the numbers that I settled on. When you're happy with the playback speed, go to file Export Safer Web In the pop up window, change the file Type 2 June and the preset Jim 32. No dither. You can also adjust the image size here. This next up is important. Remember to set your animation to loop forever. You can preview the animation before saving when you're happy with the settings save it where you can find it. And now you'll have a fun Jim that you can share with the world.
8. Conclusion: great work. Everyone. Thank you for taking time to learn with me today. I hope you had fun and learned a skill or two. Remember to think about your arcs, timing and spacing. Use a simple design to rough out your animation before putting in the details. Have fun with your character and find learning opportunities and the mistakes that you may come across. Make sure to share your work in the student gallery and support each other so we can all grow together. If you're interested, check out my other tutorials, such as coloring with Photoshopped, from sketch to fully colored illustrations, Photoshopped characters and how to draw Rose, using the heart as a template. He sure has been fun teaching you today. Thank you again for your time and support and most importantly, remember, keep on creating. - But mankind won't be destroyed. You and I are working
 Art with Mr. Noel, Keep on Creating!