Transcripts
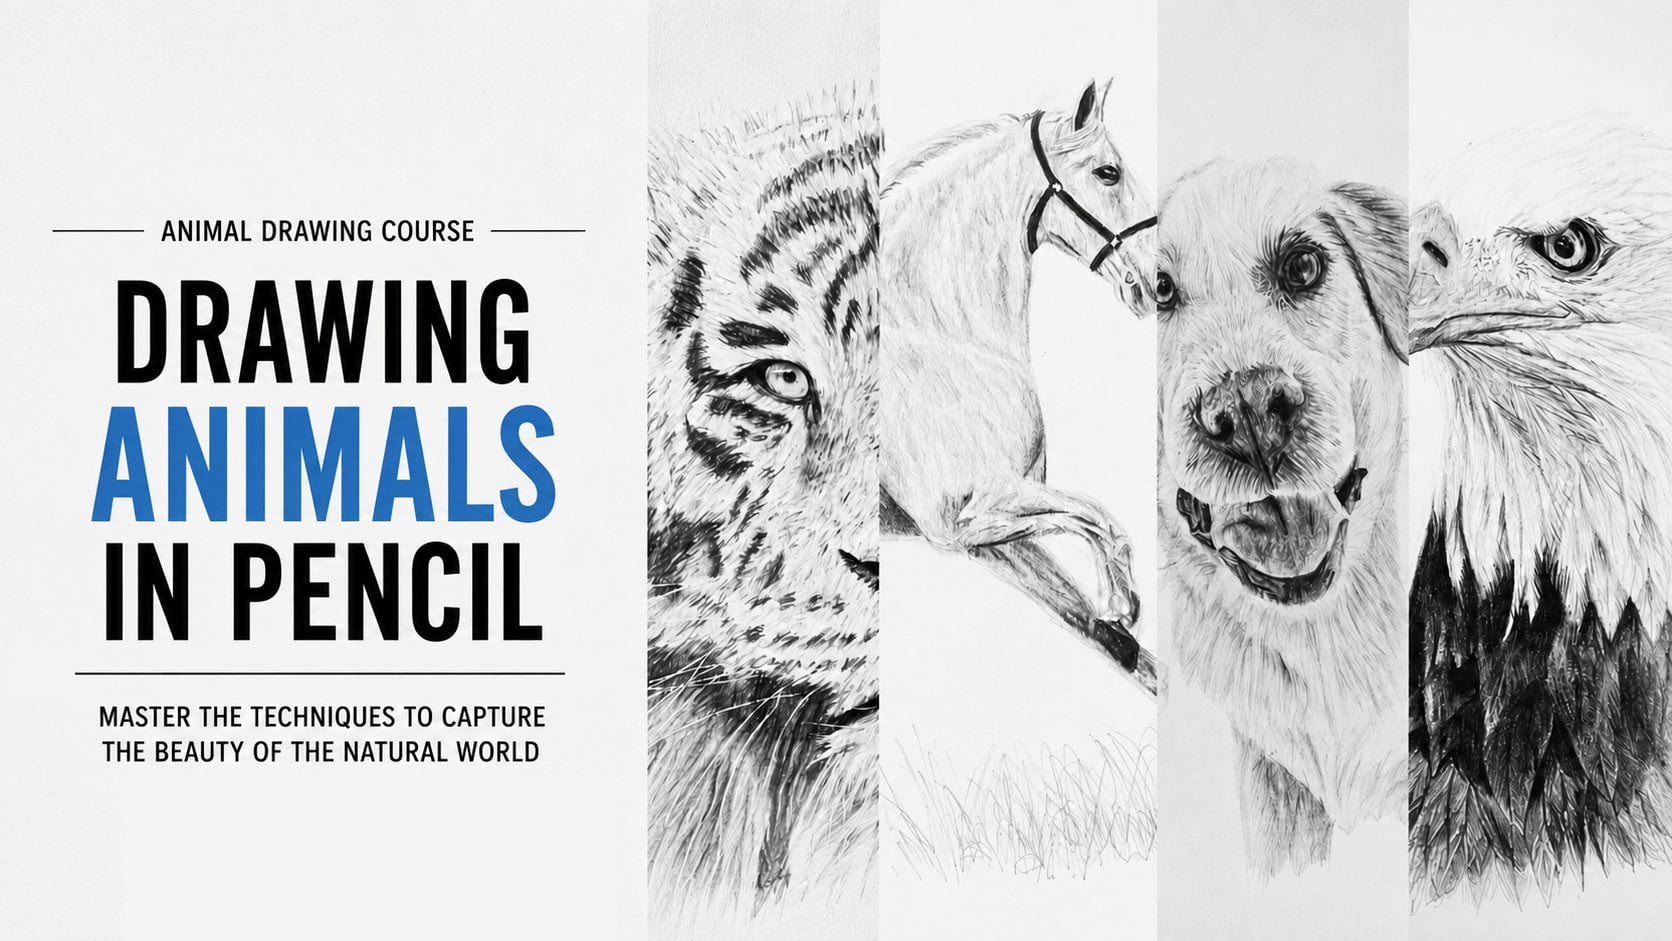
1. Introduction: Hello, and welcome
to this course. I'm truly happy
to have you here. One of the keys to creating realistic animal drawings is learning how to draw
different textures. Every surface reflects
light differently, and understanding
these differences will make your drawings
far more convincing. In this class, we will explore a wide variety of textures by drawing the
scales of a snake, the feathers of a rooster,
the fur of a cat, the rough skin of an elephant, the unique patterns
of a giraffe, and the soft wool of a sheep. Each exercise will teach
you new techniques that you can use in all of your
future animal drawings. By the end of the class, you will have a much
broader visual vocabulary and greater confidence
when tackling any texture. Let's get started right now.
2. Drawing textures - Patterns - The Giraffe part I: In this video, we are
going to work on giraffe, and the giraffe coat is an excellent subject to work
on the pattern texture. We have many spots
on the giraffe, and these ones are
really important because they help to make sure
that this is a giraffe. Obviously, they
make it beautiful. But it's also what will help to convey the
sense of volume. This pattern will adapt to the different places
there are on the animals, and they will help to create even more free
dimensionality to this. And you will see that the shape of this pattern
will also be very important because it won't be
only and it won't be some straight outlines for these different patterns
that we will have to draw. We'll have to adapt, and I will show you how to do
that with this video. Welcome to this
video where we will learn how to work on
the texture of spots. And is there any other
animal better than the giraffe to practice this technique with so many
spots? I don't think so. So let's see how to do it. As with every video
in the texture model, the outline is ready
to be printed, so you can focus entirely
on creating the texture. However, if you prefer, you can sketch the
outline yourself using the techniques and shapes
we've covered before. I will be working
on an A four paper. The size is 20 by
30 centimeters. Now, I take a look
at the neck area as the spots start forming
in this upper section. At this point, you
might be wondering where to begin
marking the spots. In my opinion,
it's best to start with the most important
areas where the spots play a crucial
volume in defining the different sections of
the body and created volume. I would say that the
central area of the torso, where the neck connects
to the rest of the body is where the spots are most essential for
creating volume. That's why I think it's
a good starting point. These spots will help define the volume of the
neck and torso, as well as create the
roundness leading toward the left leg.
The leg on the left. So I look at my reference photograph and decide that I can start by applying
the first spots in this area right here. Of course, I use a
light touch with my pencil when
marking these spots. Even though they will
be dark once shaded, I don't want them to stand
out too much at this stage. And even though I'm filming and I want to make sure you
can see what I'm doing, I still try to keep pencil
my pencil strokes light, ensuring that the spots remain subtle and blend well into
the shading later on. We can see that on
the edge of this lay, the spots are very dark, which proves that they help
in creating depth and volume. There is a strong shadow area here which enhance the contrast. When placing the spots, I do my best to position them
as accurately as possible. Of course, I try to put each
spot in the right place, but if some elements
are not exactly in the cret position,
it's not a big deal. I focus on doing my best
because these spots play a crucial role in
defining the volume and structure of each
section of the body. On this leg, there are some very small spots, but they are much
less pronounced compared to the
rest of the body. The spots I am adding now are very important in this
area because they help define the volume of the gira of the giraffe's belly
and also create a clear separation from
the leg on the left. So it's essential to
mark them properly. These spots are
fairly aligned along the line that separates
the leg from the belly. One important thing to note
about these spots is that their edges I'm not
perfectly straight. They have a slightly
jagged appearance. However, I will
focus on refining that later during
the shading process. At this stage, while
outlining the spots, there's no real need to work on those irregular edges just yet. I may have been a
little bit imprecise in my previous work because as I reached the end of
this belly area, I realized there isn't much space left to
the final spots. But that's not a big deal. If I want it to be 100% precise, I could erase and
redo the spots, but in reality, it won't make
a significant difference. The area will still
look realistic enough, so I have decided to
leave them as they are. As I mentioned earlier, it's not a big issue if everything isn't
perfectly precise. We are reaching a crucial
area, the neck section, where the spots play a major role in defining
the volume of the giraffe. It's important to place
them carefully since they help create the three
dimensional form of the neck. One technique that can
help me position the spots accurately is to use an
imaginary guidelines, sorry, where the neck begins. I also visualize
these guidelines in my reference photograph and use it as a reference point for placing the spots correctly. Often imagining
certain reference line and aligning elements based on angles created by the
contours can greatly assist in positioning different
details more precisely. So I do my best to place
these key spots because they are essential for creating
the illusion of volume, almost like shaping a cylinder. Now I continue moving upward, adding the rest of the spots on the upper part of the neck. However, these are less significant compared to those
at the base of the neck. Which way the most important
in maintaining the volume and correctly marking
the separation between the neck and the body. For the remaining spots, I place them carefully, but there's less
pressure to be exact. And ultimately, this
is just a drawing, so there's no need to
stress over perfection. And finally, the last
important spots are those on the left side where
the legs create a dip between this leg
and the other one. That's why it's crucial to position these
spots carefully to maintain the correct depth and separation between the legs. Additionally, we have the
spots on the hind leg. Here, we can notice
that the spots become smaller and smaller
as we move downward, and this pattern is especially
visible as we go down the lake where the spots
get progressively smaller. So I continue working, adding the remaining spots, and once this is done, we will move on to
the shading process to bring the giraffe to life. Et's start the
shading of the head. I like to begin
shading with the eye. In this case, the eye is very dark, almost
completely black. There aren't many
visible details since it's quite far and remains a small element in the drawing. I shade it entirely
using a 12 B pencil, applying heavy pressure
to make it deep and dark. Just below the eye, there's
a small lighter mark, so I shade that area more lightly to preserve
the contrast. For now, I'll leave it at that, and I'll refine
the details later. Even with just this
basic eye shape, we can already
recognize that it's a giraffe thanks to
its rounded form. It almost like it almost looks like a horizontally
placed diamond shape. Now I continue with
my four B pencil to shade the kind of horns
that this giraffe has. And as this area has a mid tone, the four B pencil
is not too dark, not too live so it's a soft
intermediate tone like this that seems to be a good
starting point for shading. And I apply the four B across the sign area and above the eye, creating a base layer before adding darker details
to the horns. Now, with a darker pencil, the eight B, I mark a few
details in this section. It doesn't take much to
achieve a realistic effect, as you can see, with just these simple
lines that I am adding. I'm going to add more detail to this entire area with
an eight B pencil. In this section, I notice
many small curve lines, so I carefully add
them here and there, sometimes applying
lighter pressure to create subtle highlights. I continuously observe
my reference photograph and ask myself the
following question. Does this area need
darker elements? Does this area, does it
already balance as it is. Are there enough details?
Are there too many? Do I need to remove
some of them? And I progress gradually adding all the necessary details to ensure a realistic result,
thanks to this question. And with the eight B, I kept refining the shading, and then I'm going to switch
to an even darker pencil, the 12 B to emphasize the
darkest areas of the horns. These very dark details, they stand out and they help define the form and
depth of this element. And with this, the area is
starting to look just right. Now I can continue working on the head by adding details
such as the nostrils. These giraffe's nose
look slightly flattened, which gives the nostrils
a strange shape, but it's important to include them and make them
as we see them. Giraffes have a nose and
mouth that appear quite flat, so shaping them this
way seems appropriate. Next, I shade the area
below around the mouth, which is moderately dark. However, there is a darker
edge at the bottom, which I will at later. At the bottom, I notice
a slightly dark strip, so I work delicately with my pencil to avoid making
the shading too heavy. As you can see, I'm just
marking a few subtle elements, creating a base layer before adding more details
in this area. We observe the
giraffe's head closely, we can see that this
section is very detailed containing many
small spots on the right, as well as several lines
that I will have later. Before incorporating
all these element, I first establish
my base shading. On the side, I create a lighter base with a four
B pencil just right now, just as I will do under the eye. Meanwhile, on the left side, I will go even lighter
using an HB pencil, since this area is very bright, so I leave it in HB to maintain the proper
light contrast. Now I can start working
in more detail. For example, near the ear, there is a very dark
line, so I add it. The same goes for the
area under the eye. My approach is simple. I look for small dark lines
or details that I can add with my pencil ensuring they
have all similar value. And as soon as I notice them, I add them immediately. For instance, the mouth
lines are quite dark, so I use my eight B pencil
applying firm pressure. Next, I see a few dark elements on the lower part of the head, so I will add them with my
eight B pencil as well. There are some well defined
lines in this area, so I draw them too. However, since they are
slightly less dark, I will adjust my pencil pressure so they will appear more subtly. Similarly, the eye area
contains many small lines, which I had gradually
as I spot them. This ensures, I don't
forget any details later. On the right side, I also notice a few additional
dark elements, similar to the ones that
I have just had it. So I include them as well. Now, around the eye, we start seeing small spots. This is where we really get
into the main texture work. I begin adding the first spots which are quite small
and not too dark. The more prominent
spots will come later. At this stage, I continue
this detailed work across the entire head carefully
observing the reference. And whenever I see an interesting detail or
something that should be added, I do it immediately. And this ensures that
the final result is as realistic as possible and very close to the reference and what I want with
my final result. Mm And finally, the last details I had are actually the ones I
remove and now use my eraser hand to lift some of the graphite and create lighter marks
throughout the area. This helps enhance
contrast and adds more depth and texture
to the drawing. Now, let's move on to the neck and really
focus on the spots. The first thing I'll do is shade the areas
between the spots, meaning the spaces where
there are no spots. I'll use a four B pencil because it seems like
a good mid tone, just like the overall shading
of the giraffe's neck. I carefully apply the four B, making sure to avoid
shading inside the spots. Since we spend a lot of time
carefully placing them, it will be a shame to
lose their definition. So I work around them, keeping their edges
sharp and clean. Another method, another approach I could have used
would be to shade the entire area first and then add the spots
on top afterward. However, I personally don't
prefer this technique. I like to separate my
process into clear steps. First, drawing the outline
and marking the shape. Second shading and
third heading details. That's just the approach I
prefer, but if you'd like, you can try the other method, and it's up to you to see
which one works best for you. So now that I have shading
everything with this four B, I'm going to enhance the texture with the
eight B. Additionally, after shading with the four B, I go over it with
an eight B pencil, and I had small and irregular marks on
top of the shading. It's almost like scribbling
randomly on the paper. These irregular
strokes help create more natural d
rough skin texture, making it feel realistic
and organic with all the subtle irregularities
that exist on the skin. Now we can work directly
on the spot themselves. These spots are quite dark. So I found an eight B pencil is the most suitable
for shading them. However, I avoid made them too dark since they
are not pure black. So that's why I also
think the eight B is the right pencil as it's not
too dark and not too light. So let's do a step by step
process for shading the spot. I apply a first layer. That is to say, I
begin by lightly shading the spot with
my eight B pencil. Without applying
too much pressure. This creates a soft
base layer which you can see in the second
spot I have shaded. Then I am building depth. After the base layer, I go over the spot again this time pressing harder
in certain areas. This allows me to achieve multiple values within a
single spot because if you look closely at
real giraffes spot and on the reference photograph, you will notice that
they are not uniform. They are not with the same
value in the entire spot. Some areas within
a single spot are slightly darker while
others are lighter. Also, the edges of the spots
are also very irregular. There are no perfectly
straight line. And so to replicate this effect, I scribble slightly along the
edges to create a jagged, uneven border, just as
we discussed earlier. You might notice that I hold my pencil in an un usual way. Sorry. I grip it
between my index and middle finger while pressing more on the edge of the
lead with my thumb. This allows me to apply
a firm pressure while still being able to use the
side of the lead for shading. Holding this pencil this way gives me more control and grip, which I found useful
for creating texture. It might look like
a strange grip, but it works well for me. And as I mentioned
in the basic course, there are many recommended
ways to hold a pencil, but ultimately, the best method is the one that works for you. I should feel comfortable and appropriate for
the specific task. In my case, this grip works perfectly for shading
the geograph spot. In many other cases, I won't hold my pencil this way, but in that case, I
think it is useful. So don't hesitate to experiment with different grips until you find the one that feels natural and gives you
the most control. It doesn't matter
what Has as long as it works for your technique
and drawing style. One way to work
pretty efficiently, and that I'm going to share
with you right now is to work on multiple
spots at once. That is to say, I am applying
this first layer with the eight B pencil on all
these different spots. And this way, I will work
in a quicker manner. And my first layer
will be applied with this eight B pencil and then still using
this eight B pencil, I can work on this and the fact that these spots have
some darker elements. And so I scribble with
the tip of my pencil to make them a little
bit darker in some area. So that's one way of doing that may be pretty good if
you want to speed up a little bit the process
because it can be a little bit boring
in the end with all these spots doing the
exact same thing all along. So I can understand
that sometimes you want to speed the process
a little bit up. Right there, I really wanted
to darken these spots. And so I thought I was taking the 12 B
pencil, but actually, this was the four
B. I still darken these spots because I pressed a little bit harder
on that pencil, but I made that mistake, and so I didn't
darken them enough, and so I will have to go
back to it right after. Right there, I am adding another spot because
it felt something was missing in here and
so I decided to had one. Sometimes, it just feels
natural, so I had one. I worked also on the
texture of the spots with the needed eraser because some areas of the spots
are a little bit lighter. And with this eraser pen, I also erase these
lines to create the separation between the
neck and the rest of the body. This line is very important, so I don't forget to it. Also with the erasu pen, I'm going to work on the texture within this area by
adding some well, by removing removing
some graphite and so making some
areas lighter. One thing I am also
adding right now is the giraffe's
main because, well, when you think
about the giraffes, you don't really
think about the main, but if you look at the
reference photograph, you can actually see it. So don't forget to add it. And also, you may notice
that it's much darker at the top in this
area right there. So I adjust my pencil to use something lighter
in here, the four B. And also with this main, there are different values. So with some hair, I press a little bit harder on my pencil to have something
a little bit darker. And finally, the last elements I had before finishing this neck. All the very dark elements
that I forgot before, remember, I thought it was
the TLB, but it wasn't. So I am working these spots
with some darker elements, and I think it will be good.
3. Drawing textures - Patterns - The Giraffe part II: Let's move on to this
area of the leg. As you can see, with the four B, I worked between these spots
just like we did previously. On the lower part of the leg, we can see that it
is slightly darker. So I press a little bit
harder with the four B. And as before, between
each of these small spots, I would had some slightly
darker elements here and there, working with something
fairly irregular. Let's focus now let's
focus now on the spot. The spots in this area
will be dark and very dark on the edge as they
help separate our two legs, the two long legs of this off. The edge will be very dark. However, as we move
towards the left side, it will become slightly lighter. This difference in value in our grid will be very important. Make sure to include it to
create depth in this area. Because if we always use the same value and have
something uniform, in the end, something will
fill off in our result. We will wonder, what's
wrong with my drawing, and this will likely
be the issue. So I continue shading
the area like this, and so the separation
is very dark. And yes, and as we
go on the sides, it gets a little bit lighter. Then still using
the 12 B pencil, I will keep shading the spots on this part of the
leg on the left. However, I will likely be
lighter with the pencil as we can see that
the area that is truly dark is the one
we just worked on. So here I apply less pressure with my pencil to
achieve this effect. And I speed up the video a bit since this part isn't
particularly interesting, it's more or less the same thing we've done multiple times. And still with my 12 B pencil, I continue applying
shading on the spots, making them slightly
darker where I notice that the spots are
naturally darker. We can see that at the
corner of this leg, there are some elements, some sort of lines to
define this edge better. So I am adding them as well, but they are a
little bit lighter. I keep adding the
spots in this area, and you can see that as we
progress downward on the leg, the spots will become thinner, smaller, and also a
little bit lighter. I'm still using my 12 B
pencil for the moment, but I'm going to switch with
something much lighter. The four B, I think, is more appropriate
for this area. So I keep applying these
parts scribbling with my pencil here and there to
create an irregular texture. I continue my progress
downward and reach this area which could be
considered the giraffe's knee. We have this joint here, which is slightly
darker than the rest. So I sheded it by pressing a bit harder with
my four B pencil. Then I had fairly dark lines over it using my eight B pencil. This way, they stand
out well because I apply quite a bit of
pressure on my pencil. After that, I take the eraser
pencil eraser pen, sorry. And go over the area. Sorry, working
between these lines to create slightly
lighter elements. Since the entire area isn't as dark as I
initially made it, this helps create more volume. Now continue working a
bit on the lower area, but overall, the work on
the leg is almost finished. We can see that
the giraffe's leg isn't the most technical
or detailed area, so these few additional
pencil strokes should be probably enough. Finally, with this leg, we are going to
work on the hoof. When observing the hoof, we can see that there is a fairly dark line on the
upper part that defines it. Inside and just below
this dark line, there will be some
slightly lighter areas. Similarly, on the upper part, I will also have a
few lighter elements. So here, I got a bit mixed
up and ended up with a son that doesn't quite
satisfy me, so I erase it. And an electric eraser is also a great tool for removing
mistakes efficiently. Then I go back to
refining this element. At this point, I think that
the lighter areas look good, but I don't want them
to be too light. So what I will do is take
my blending stuff and use the accumulated graphite
on it to slight slightly, sorry, darken my work. So that's what I'm
going to do right now, and that will be
good with this area. Let's move on now to
the central area. In this section, I will
work on both the leg and the belly as they are quite
connected to each other. I start by doing the same
thing I did earlier, working with my four B pencil
between all these spots. Then I will have some texture between each of these spots by incorporating small
dark elements and some lighter
ones here and there. One of the traps we can fall into when creating
this type of drawing, whether it's a
giraffe, a dalmatian, or any other animal
that takes a long time to draw is getting bored
and rushing the work. This is a common
pitfall for any artist, and I speak from experience because it has
happened to me, too. When you start feeling
tired of your drawing, when you're getting bored or repeating the same
steps over and over, just set it aside.
There's no rush. That's one of the great
advantages of drawing. Like painting, there's
no drying time. You have no pressure, no
deadlines to complete. If you want to take a break for a few hours,
it's not a problem. I can come back to it later, and the drawing will be
exactly as I left it. The same applies if I
need to put it away for a few weeks because I can't
stand looking at it anymore. I can stop anytime. Honestly, the best tool against artistic fatigue it's
simply taking a break. Whether for a few minutes, a few hours or even a few days, stepping away allows us to
return with fresh energy, fully ready to
finish the drawing. It's much better to
pause for a while and complete the piece in
the best conditions rather than rush and rush through it and end up disappointed
with the final result. At the end of the day,
you don't want to look at your drawing and regret not taking a break
when you needed it. I am going back to the spots, and here we have one
that is triangular and really interesting with
these triangle shapes. What stands out about this
spot is that in the middle, there is a very dark area
which I'm going to define now. This dark element is useful for creating volume
in this section. Make sure to include
it and, of course, refine the edges of the spot, keeping the natural
irregularity. Right next to it, there's
another interesting spot. What's notable about this one is that it has a square shape, but inside, there
is a lighter area. So I had this lighter
element first before working on
the spot itself. Then I switch back to my darker pencil and
refine the entire spot, maintaining all its
irregular details. So we are not going to work
this entire belly together, but I think there are certain
elements here that deserve a bit more attention
and that we are going to see together right now. One thing to notice is the slight difference
in value near the leg. This difference is
important because it helps suggest the
volume created by the leg. It is essential to train
your eye if you haven't already to observe this
small shift in value, these subtle variations
in shading with some areas being slightly
darker than others. In this case, we have some
darker elements here. Another place we'll see them is on the lower
part of the belly, the very bottom section. This entire area will
have some darker tones, so it's important to
emphasize them properly. Another area that deserves our attention is the
upper part of the belly. Here we can observe small
changes in size in size, sorry. The spots become much smaller as if they
were transitioning to the overside of the body toward the hidden part of the belly. Due to perspective
and distortion, the spots appear smaller, so it's important to
take note of that. Finally, in the area
landing up to the neck, we can see that the spots
become elongated and rounded. These shapes help define
and form the neck, so it's crucial to capture the detail properly
and to make them long. Now, I will be working on this entire section
of the belly, and I encourage you to do
the same and we'll meet up once it's done for the rest of the body
of this giraffe. Here is my giraffe, and as mentioned earlier, I've made good progress
on the rest of the belly and legs in the same
way as we as before. You can see that I made a small modification to the
drawing on the hind leg. So now let's work
on this last leg. This area is noticeably
lighter overall. So I started shading
with an HB pencil. However, in this section, we can see a a dip or some kind of volume
in this area of the leg. So I darken it a little bit and work with
a four B pencil. After that, I go back to using an HB pencil with a light touch, shading the rest of
the area before adding the final details and spots. What stand out in this section is that compared to
the rest of the body, it remains
significantly lighter. Okay, now I can move on
to refining the spots. We can observe that these
spots are also lighter. While the difference
isn't drastic, there is still a
noticeable shift in the grayscale values, making the spots
slightly less dark. So I adjust my shading
and strokes with the four B pencil to maintain
this subtle variation. Another detail to note
here is the very subtle, but still present is a faint line that separates the belly
from the hind quarters. I likely mark this
line with my pencil so that the separations
remain visible yet delicate, ensuring that it
subtly distinguishes the hind leg from the belly
without being too harsh. Some of the spots in
here have disappeared, so I'm going to
add some back in. These spots can almost
be placed randomly, and the result will
still look good. So I had some here and there adjusting as needed to
ensure that the final look on the leg is well balanced and visually effective to
create something good. All right, so I
think it's pretty good with the spots right there. However, just like
we saw before, the edges are quite irregular, so I'm going to
work on that point. And also, there are some
dark areas over the spots. So I'm going to work
them out as well. And then I think that
we look pretty good. There we go. And I will continue this work on the spots
across the entire leg, darkening certain
areas here and there. Overall, it should look good. Now only the final
touch remains, which you will see in
just a few moments. So around the hooves, I'm going to add some blades
of grass here and there. This will make my drawing
look more natural, preventing it from seeming like the giraffe is just
placed randomly. I had a few lines to create the grass
overlapping the hoof, sometimes pressing
harder, sometimes later. And overall, this should
work pretty well. And so this is the final result. Oh
4. Drawing textures - feathers - rooster: Let's get started with
the work of this rooster. I have my outline drawn, but before I begin shading, I need to add some details that will help refine the
drawing more precisely. For example, I can start by sketching the wing located here. I observe its direction and approximate placement
before drawing it. Right next to this large wing, there is also a much smaller
one that I am drawing. Additionally, within
the larger wing, I mark the main
guiding lights that will help with structure. On the side, there is a
curve line that defines a boundary for the small
favors in this area. So I will work on these small
favors and add them in. I'm not aiming to
replicate each favor with millimeter precision exactly as in the reference photograph. Instead, I focus on the overall pattern
and most importantly, the direction in
which they flow. For example, on the side, we can see that the favors
are quite straight, so I will draw them in a
similarly straight manner. Then I move on to the
favors next to them. Observing this, I
notice they are slightly diagonal
angle to the side. So I will follow that
direction as well. When drawing these small favors, it's crucial to maintain
their consistency in size, neither too large nor too small. Additionally, I ensure that they are fairly aligned
next to each other, just as they appear in
the reference photo. On the lowest area, there are also some
favors that I am adding because even though
this area is darker, we can still notice
these favors, and so I will have to work them. I will have to make
them good afterwards. So that's why I am
drawing them right now. All right, the fevers on
the lower part are done. Now I can refine the separation
between the neck and the rest of the rooster's
fevers more precisely. Finally, for the head, I had already defined
it to some extent, but there are still additional
details that I can ad. That's what I'm
doing now to ensure greater accuracy before moving on to shading with my pencils. And finally, on the
fevors in the lower part, I will add a few
more lines here and there to make these elements
appear more defined. Another very important
detail to refine will be the large fevers on the right. Before drawing these lines, it's crucial to carefully observe the direction
of these fevors. They should have a slightly curved and elegant shape which will help complete the work on the favors in a
visually pleasing way. And then once this is done, I think it will be good and we will be able
to start shading. Now that all the areas are well drawn, we can
start shading. I'll begin with the eye. This is a habit of mine, and regardless of the animal, I usually start with this. I first shaded it using
an HB pencil because, well, you can see that
it's pretty light. And then with something
darker, like an eight B, I used to define the small
central point of the eye. Not much is needed to make
the eye look realistic. This small dark spot
with the eight B, along with the contour that
can also be shaded with a dark pencil will be enough
to create a convincing eye. Key is to be precise
with the placement of the dark point in
the right spot, sorry, within the eye. After that, I can lightly shade the surrounding elements as they are relatively
dark as well. Alright, the right side is done. Now I can add a few more details on the left side of
the eye like this. Overall, that should be enough for the dark
elements of the eye. Since I'm already
using a dark pencil, I can also work on
this lower area that I call the glue
glue in French. Honestly, I have no
idea what it's called. I enjoy drawing
animals and roosters, for instance, but I'm not
an expert in their anatomy. In the upper part of this
area, it's very dark, and as we come downward, it gradually becomes lighter. So I adjust the pressure
on my pencil accordingly. Now I'm using a 12 B pencil to emphasize the very dark areas at the top and on the edges. There are some additional
darker details that I can also define. Next, I tap and
add small dots to enhance the texture before
moving on to the comb, which is also quite dark. For the central part, I use a six B pencil like this, while for the sides, I will darken them a bit
more with softer pencils. For now, I'm establishing
a relatively dark base, and later I will refine
it with more precision. What is really important
now is to keep the pencils well sharpened to work on the contour properly. Really sharp tip helps define the edges of
the comb more clearly. So I carefully outline it. And with these dark details, the comb is now well
defined. That's perfect. It actually reminds me of my teenage years when I dare to style my
hair into a mohawk. But anyway, there we go. The comb is done, and we can
move on to other elements. Forgot to mention that I also
erased it a little bit with this erase of hand to add some
lighter elements as well. So as you understood, I am working on all
the dark elements of the rooster's head. There are some near this area, which will be very dark. We will also find some dark
elements around the beak. So I'm optimizing my time by adding all these
dark elements at once. And as always, I work on the
most obvious elements first, which will help the
rest stand out well. I found that the dark elements on the head stood out nicely, which is why I chose
to shade them first. On the lower part of
the rooster's beak, we can see a small
dark touch, as well. On the upper part,
I will be a bit lighter with my 12 B pencil. Next, I will apply a
very light shade to the rest of the head because
overall, it is quite bright. I might hide a few darker
details later for the head, but I think it will be good. It doesn't need a lot. I would say that the work is quite detailed for
all that we have done with the work of the head and quite faithful to the
reference photograph. So just a few details, and that will be good. Now we can move on to the neck
area and start working on the texture that is what we are interested in with this
tutorial, the feathers. So once I had the final
details to the head, I will take I have taken my eight B pencil and I have started working
on the neck area. I'll begin with this
slightly dark section. Then I have switched to a
four B pencil, and this way, I work on the adjacent
and lower areas with something a
little bit lighter. This area of the neck will be enhanced by a few dark
lines that I will add. And for this section,
that's pretty much all we need to create
realistic texture. A few well placed dark
lines here and there will help achieve a more
realistic look for the rooster's neck. Now, we are going to work on the side area where all
the small favors are. Before shading the
entire section, what I will do first
is use a dark pencil, 12 B to work on the
contour of these favors, which will be very dark. I initially started
with an eight B, but I felt it
wasn't dark enough, so I switched to 12 B. I will now define the contour
of these fevers, where I notice that the cast shadow of the
favors is quite dark. Pay close attention
because in the shading, I feel like the darkest parts
are mainly on the side. Meanwhile, the vertical line, the one going downward, tends to be lighter,
just as there is often one side that is brighter
and another that is darker. It's important to be mindful of this because if you simply go over each favor with the
same intensity and darkness, the result may not
be as effective. So be sure to carefully
observe where the darker elements
appear along the edges of these favors and
then add them yourself. This way, we create a strong foundation
for shading before applying the overall tone for the different
sections of these favors. On the lower part around here, we can see that the
feaors are really dark. However, the contour
still stands out well, so I'm going to press
even harder with my pencil to ensure
it remains visible. Now you might wonder why when I initially traced the contour of these fevors with
a lighter pencil, I didn't immediately work
on the shading and make the dark feaors as dark as
they appear in the reference. That's a fair question. I
could have done it that way, but personally, I prefer to do each step at
the right time. For example, I think
there's a time for outlining and sketching and
then a time for shading. I didn't want to mix things
up by starting to shade one area while still
defining the contours. While it's true that both
approaches can work, I personally prefer dedicating specific moments to each
stage of my drawing, one for the outline, one for shading, one
for details, and so on. Now that I have done this, I can properly shade
my work by adding the right gray values to the
different visible areas. For example, on the upper part, I can see that it's very dark, so I use my 12 B pencil to
emphasize these elements. The same goes for
the lower part. It's also extremely dark, so I apply my 12
B there as well. 14 B will be also very fine. It's just that this pencil was really next to me,
so I used the 12 B. 12 B, 14 B, it's really
pretty much the same. For now, I started I have started being relatively
light with my pencil, but I make sure to
press down firmly in certain areas that
need to be very dark. The fact that I
worked on the lines first and clearly defined
the contours allow me to shade these different
areas more broadly without having to work on each individual
favor separately. If I had done it that way, it would have taken much longer. It is a possible approach, but defining the contours first now makes it easier to shade
larger areas efficiently. I also go over some of the faber contours again because I notice that after
shading with the 12 B, some areas don't appear
dark enough anymore, so I refine them. On the side, there are also
very dark febris and I can see from the shading that
similar to the lower area, one edge is very dark while
the other remains lighter. I continuously adjust
the intensity and pressure of my pencil strokes to ensure the right
values come through. Across the rest of the
area, in this area, the shading remains
relatively light, so I adopt my pencil
choice and pressure to maintain the correct value without making
elements too dark. Within this large light area, there are still some slightly darker details that stand out, so I make sure to
emphasize those as well. And overall, this
section is now complete, and I can move on to
working on other elements. One thing I will
also be doing in a few seconds will be to work on the small area that are
just above the rooster's leg. It won't be something very
much complicated to work on. I will shade it with the 12 B and erase some of the small
areas with my eraser pen. But for now, I just want
to finish the fibers and shade again some areas that I feel need to be
darken a little bit. B Let's move on to the area below the neg
that we previously worked on. Using my 12 B pencil, I will a small, very dark lines to
break up the feathers a little and make them blend
slightly into the black area. This prevents the edge
from looking too straight. Instead, we get an
irregular border, just like real feathers that
sits next to each other. I'm approaching this in reverse avadan
defining the contour with lighting elements
of this favor. I first drew a straight outline, and now I'm breaking it up
with some dark strokes. It's an unconventional way
of doing it, but it works. So sometimes it can be good
to do it that way as well. In the area below, I notice a lot of dark elements blending
into the adjacent section. I mark them with my 12 B pencil pressing down firmly to highlight these
very dark features. I have identified the spots where these darker elements
stand out the most, and I make sure to
emphasize them with strong pressure on my
pencil so they really pop. I could have approached this
differently, for example, by first shading the
entire area with a lighter gray and then adding
the dark elements on top. Instead, I started with the
darkest elements first, and we later refined the
lighter ones over them. Both methods work, and
I switch between them depending on what feels right
for each specific section. To finalize this area, I enhance some of the
lighter details by adding a few subs of touch
with my eraser pen. I will do that once I will have finished shading with
this medium gray. Now I'm going to work on this other favor just
below the large one. Once again, we can see
some very dark elements, but they are slightly less intense than in the area above, as there are some
lighter sections here. As before, I start by
marking the darkest area, particularly along the sides. While doing this, I
make sure to leave a small white space on the left side where we can
see a very light line. It's not pure white, but
it's noticeably lighter, so I leave a small gap for it. While continuing to shade the
darker sections around it, the adjacent favor
can also be shaded quite dark while still
leaving a small white space. Next, I will continue
shading this large favor. On the lower part of
this large faber, we see very dark elements, but as we move upward, the shading gradually
becomes lighter. To achieve this effect, I adjust the pressure
of my pencil, ensuring a smoother transition
toward the lighter areas. And now I will take my blending stub and
blending step, sorry, and we'll gently run it
over the white line because this white line that we have
seen and left blank before, I don't want it
to be pure white. I just want it to
slightly tone down. I also added a few
lighter touch to the large favor to create depth
and variation in texture. Let's work on this
small light area just next to the one we
have done just before. I will start by
shading it delicately with a light touch to create
a soft and bright base. Once that's done, I will add
some darker elements on top. On the right side, we can see
that it is extremely light. While on the left,
there's a light base with dark lines over each over it, which I will head
using my 12 V pencil. This time, I'm working in the opposite order compared
to what I did earlier. I start with a light base, and then I layer darker
elements on top of it. I felt it just felt more logical for this
specific section. Adapting the approach to
the situation is important. Sometimes it makes more sense to start with darker areas
and work lighter, and other times the
opposite works better. Ultimately, both method
can lead to good result, but it's about choosing the
approach that feels most comfortable for a
particular area and most comfortable for you. Now that I have added
the darker elements, I also refine the irregularities on the right side
of this section, adding a few more darker touches compared to what we had earlier. And overall, this
should be good. There's no need to
overwork this small area. Then we can shade Woosters lay. They aren't particularly
complicated, but the key here is shading
light to create volume. The goal is to avoid a
flat rectangular look and instead give the impression
of real cylindrical legs, along with the small spurs
we can see at the bottom. I start by marking the
darkest areas on the legs, which are mainly on the
sides and lower section. That's why I use my 12 B pencil pressing firmly to
define these dark zones. Since these areas are the most visible and
define the lower part make sure they stand
out while leaving white space for the lighter
sections of the leg. Next, I add a softer
shading to the dark areas, creating a smooth transition between the dark
and light elements. The contrast is what
helps builds volume, making the legs appear
three dimensional. For texture, I had
small strokes and tiny dots here and there to create more natural
roof effects. And to enhance highlights, I also use an eraser pen to
introduce lighter details. Overall, that should
be enough to give the legs the right
texture and volume. U the final febers are extremely dark, and my strategy here is to first define the edges and the
darkest area of these febers. So I use my 12 B
pencil pressing down very firmly to achieve
deep and rich blacks. Even though these
favors appear black, they don't have a uniform
darkness throughout. Some areas are slightly lighter, which helps create the
illusion of volume. With the 12 B pencil, I work on each of
these large fabers emphasizing the darkest parts before moving to the
lighter details. This approach ensures
that the depth and texture of the fabers
how well defined, making them look more realistic
and three dimensional. And I speed up the
video a little bit for these very dark
elements that I am adding as it's not
very complex to do. I'm just pressing very hard on my pencil and adding
these dark elements. Now that I have defined
all the dark elements, I can start working on the
lighter areas of the favors. For example, on this favor, there are slightly lighter
sections at the base, though they are not
drastically brighter. I am still using my 12 B pencil, but I apply less pressure. The difference is subtle, but it's noticeable and
essential for creating volume. On the adjacent favor, this one, um, however, the contrast in
values is more pronounced. So I use an even lighter
touch with my pencil to ensure that the
transition between dark and light is smooth and natural. Adjusting the pressure
this way helps emphasize the depth and
structure of each favor. In this area, we can also see some slightly
lighter elements, so I will mark those as well. When working on the favors, I try to maintain consistency in their
size and placement. But if each favor
isn't positioned exactly as in the reference,
it's not a big deal. The key is to keep a sense of coherence throughout
the drawing. Regarding shading, it is important to
maintain uniformity, meaning I shouldn't have dark areas on the left
side of one favor, and then suddenly on the
right side of another. The shading should follow the same general logic
across all the favors. Likewise, the size of the favors should
remain consistent, avoiding a mix of tiny favors in one area and oversized
ones in another. Maintaining this
consistency in this area of the black favors ensures the plumage looks
natural and harmonious. I mean, the favors looks
natural and harmonious. Of course, I still aim to be as faithful as possible to
the reference photograph. Finally, you may have
seen that I have added a few dark
elements that slightly overlap into the lighter area to create a smooth
transition between before moving on
to the last favors in this section that I
have just started shading. I am doing the same process as before on these large fevers. The only difference is that their direction is
slightly different. Nothing too complicated, just a matter of adjusting
to the new angle. The only thing to watch
out for is the last favor, which will be a bit lighter. Finally, the last
touch I'll add to these favors is with
the eraser pen. I'll use it to erase certain areas and add
a few highlights, making my favors
stand out even more. With that, the rooster will be completed and the final
result will be finished.
5. Drawing textures - Fur - The cat part I: In this video, we are going
to work on the third texture. And for that, we will be
drawing a beautiful cat. And the aim of this video is to see how to be able to
create a third texture that looks in three dimension
that looks in volume without having to draw
every single hair, every single fur of the cat. So we'll see how to do that. And what is also
going to be very interesting with this
subject is that not all individual hair go in the same direction and so we will see how
to deal with that. So let's go and let's
draw this cat together. Let's start a new exercise
to work on third texture, and I thought this cat was an excellent example
to practice with. We have dark fur, light, intermediate light fury in a
dark area, and vice versa. The fur goes in many
different directions, and of course, cats are among the most
popular animals to draw. So I found this to
be a great subject to practice this texture
and make progress. So here is the reference model
we will be working with. Attached to this section, you have the reference image that you can print on to focus solely on texture rather than
outline, shape, et cetera. If you'd like, you can print it as usual on drawing paper or on regular paper and then
trace it on to drawing paper. That's entirely up to you. So for this cat model, I'm working on 15
by 20 centimeters. Sheet. So let's get started, and we will begin with the head. And if you want, you can also draw the entire
outline with shapes, rectangular forms, et cetera,
just like we did before. That would be also an excellent exercise to practice with. So it's really up to you. Et's get started and begin this drawing by
working on the eye. Looking at the eye, we
can see that there is a small and well
defined dark pupil. You just saw me working
on it with a 12 B pencil. I'll keep this pencil to work on all the dark
elements of the eye. The upper part of the eye
is quite dark, whereas, as I move onward, it gradually becomes
slightly lighter. So I adjust the
pressure I apply to my pencil to achieve a
lighter and softer shading. Then I go even lighter to work on the inner
part of the eye. We can see that the
difference in values is quite noticeable by applying very
light pressure with my 12 B, pencil, I managed to
complete the entire eye. Finally, for the
corner of the eye, you can see that I worked
on it pretty quickly, but it is slightly darker
than the iris area. Okay, now let's move on to working on the
fur around the eye. Above the eye, we can see that the area is generally somewhat dark due to
the brownish fur. So I apply a first base layer
to cover the entire area. Once this base is applied, I can start working on
the fur in this area. So now I'm working with four B pencil on
these small hairs. There are a few individual hairs that are slightly darker, so I mark them with
my four B pencil, but with a little
bit more pressure. My pencil is well sharpened to allow me to draw the
hairs precisely. Most importantly, it is crucial to give them the
correct direction. So before drawing them, I carefully observe which way the different individual
hairs are oriented. At the corner of the eye, we can also see a few
slightly darker errors. So I press firmly on
the pencil again. These errors are important because they help
define the depth of the eye socket and add more
dimension to the drawing. Next, I decide to mark this
black area on the ear for the simple reason
that it serves as a reference point for
continuing my drawing. This black detail
is very noticeable, so I go ahead and outline it. I also add overkey elements
to ensure accurate placement. Example, I noticed that the left corner of
this black area is roughly aligned with
the corner of my eeris. Thanks to this observation, I can position correctly this black area
of the right ear. On the other ear,
the one on the left, I also add these dark markings, and here I switch to a much lighter HB pencil to create a base
layer for this ear. Meanwhile, on the ear,
the one on the right, I only use the HB pencil
on the outer edge. The rest of the ear's interior
is significantly darker, so I adopt my approach and use a four B pencil to establish
the base in this area. On this, I also had a few individual
hairs here and there. In fact, I chose to start
with this because it's very clear and easy
to locate element. We can clearly see the
direction of the first. So it seems like a
good place to begin. Each time we had one
element after another, it becomes easier
to place the rest, even those that might
initially seem more confusing. We gain more and more
reference points. In this case, the
ear serves as one of those helpful
reference points, especially since
this cat's face has many different fur patterns
going in various directions. Another relatively
simple feature to place and work
on is the muzzle. Here, I can define its
edge with a 12 B pencil. The inside of the muzzle
will also be quite easy to work with as it doesn't
require too many details. This is also one of the
advantages of working on a small format paper or drawing the entire body
of a cat, for example. You don't need an
overwhelming amount of detail to achieve a
realistic result. What truly matters is applying the right shading using the
correct values of gray, and then adding a few
well placed detail. That alone is enough to bring
realism to the drawing. Just below the muzzle, I can draw a reference element, the line of the cat's mouth, but I won't go further from now. I'll continue working on the rest of the area
around the eye. At first, I thought
this area wasn't put, so I plan to shade it
lightly with an HB pencil. However, after
taking a step back, I realized this area is
actually very, very light. So I'll erase it
with the eraser pen. I'll also take this
opportunity to erase my outline lines because I
don't want them to be visible. These lines don't look good, and in the final result, they wouldn't appear realistic if they were too noticeable. So I have erased them. With the HB pencil, I can lightly shade the area around the eye because
while it is light, it's not completely pure white. So I use HB here. I can also lightly
shade near the ear area where the fur is
relatively, sorry, light. And HB seems like a good
choice for this section. Since I'm already
working in this area, I can also mark the
dark attachment next to it with my 12 B pencil. I can at least lay down
a base with the 12 B. You can see that
when working on fur, we always start by
applying a base, and then we had
details on top of it. That's the approach
we'll take throughout. Now that I have
applied the 12 B base, I can add a few stray hairs that extend into the lighter area. Vo will refine these
details later. For the rest of this
section of the head, I switch to a four
B pencil because the area is overall,
slightly darker. The four B seem like the right choice for
shading this part. Now that we have our base, we can refine the
details of the area. Near the eye, I
notice a dark spot, so I mark it with my pencil. I press down quite firmly
to get a deep dark tone, and from this dark spot, I then add a few
slightly lighter hairs, adjusting the pressure on
my pencil accordingly. In the area below, I can add a few airs that go roughly in the
same direction. They are not dark,
which is why I work on them delicately with
the four B pencil. Still using the four B, but pressing a little
harder this time, I can redefine the mouth. However, instead of drawing
a clear visible line, I create the effect of small hairs along the mouth
to make it look more natural. On the mouth area, we
can also add a few airs, just like in this section near the ear where there
are some darker hairs. This help emphasize
the separation between the neck and the
head just right there. And this allows us to define the area properly and
not with a solid line, but with small first strokes, just as seen in the
reference photograph. And I continue my work by adding a few hairs here and there. Then as we get closer
to the muzzle, again, we can see that some of the hairs are slightly darker. So I keep marking them
with my four B pencil, applying a bit more pressure. The same goes for
the small dark spots from which the cat's
whisker will emerge. I mark them with slightly
darker pencil strokes. I continue my work adding some slightly darker
hairs in this area. At this point, the head has
really started to take shape. Now, using this eight B pencil, I will emphasize some
elements that need to be darker than anything
I have shaded so far. I take a careful look at each part of the
face and ask myself whether it looks good as it
is or if it can be improved. I check if any
details are missing. For example, in this area, near the ear, I felt that
it lacked a bit of fur, so I added some more. The same goes for this section, connecting the
muscle to the eye. I found it needed a few extra
hairs to look more natural. And by working this way, we keep refining the
drawing and overall, the head is almost finished. Just a few more details, and it will be complete. Et's move on to
shading the body, starting with this
light area on the left. First, I apply an HB layer
across the entire area. This will give me a light
base on which I can later add darker elements or lighten
certain parts by erasing. Using my HB pencil, I work carefully with the side of the lid
to be as delicate as possible and ensure smooth coverage across
the entire paper. In the lower part, however, the elements are
noticeably darker, so I strengthen my shading by switching to a four B pencil, which I think will be more suitable for creating
a base in this area. That looks pretty good. And
now we can start refining the upper section and go into further details because
the base is pretty good. So using my four B pencil, I'm going to add a few
short strokes moving toward the left to begin
working on the fur texture. This area is particularly
tricky because it's quite irregular with fur
going in multiple directions. The most obvious strands seems to be the ones that
I am drawing now. So I start with later, I will add additional
darker hairs to build up the texture fervor. So let's continue
working on this area, adding more first stroke. I carefully observed the
different direction, the small clumps of hair, and the strands that
are grouped together. I had them accordingly
to build the texture, and gradually we move
towards the lower area, which will be a large section
with a lot of fur detail. We are also approaching the side area where there
is a very dark patch, and near this patch, there are also some slightly
darker hairs as well. And the transition between them will need to be
carefully blended. At this point, I switched
to a darker pencil, the AB to enhance
the line of thir that clearly separates the head from the rest of the body. And finally, in the
area we just worked on, there are also some darker
elements that I add in. These darker strokes help create more depth and volume
within this section. And overall, for the fur
texture just under the neck, I think it looks good. It now has a realistic feel and the fur details are well
defined, so that's great. Now we can move
towards the center of the body where they will
have much darker areas, especially around the legs.
6. Drawing textures - Fur - The cat part II: Alright, now I'm moving back to the four B pencil because
I am darkening this area. While it's a bit lighter, I darken my base layer slightly because earlier
we worked with an HB, which turned out to be too
light for this section. Within this large body area, there are also smaller
sections that are darker, and I make sure to include them. These areas help enhance the depth and variation
in the fur texture. So that's it for
now for this area. And so I keep working on this leg of the
animal because, well, the HB was pretty
good to get a base, an overall base for
the entire body. But actually, when you
look closer to this leg, it's darker than it was. So as I darken this entire area, I am also working
a little bit on the fur texture with adding
these single strokes. On this pu, I will use an eight B pencil
to refine the edge fervor. The four B seems too light, so I darken this edge
which appears too bright to create more depth
and make it stand out more. While improving the
base of this area, I also work on the texture. You can see that I use the
side of my pencil lead, but I also make sure to draw small fur like strokes
that extend outward. I apply this technique along the entire edge and it makes
a noticeable difference. It helps the two pals stand
out better, which is great. Next, by applying slightly
less pressure on my pencil, I had more strokes with the
AB extending toward the left. I keep a light a touch to create a balanced effect and the
result looks quite good. Now we can also work
on the center of the body and had some
more darker details, some darker single hairs. I have added a few
more f strokes here, and on the other p I
continue working downward, adding more elements to
enhance its realism. I focus on placing the fur
where it appears most obvious, marking those areas and adding small fur details accordingly. One mistake to avoid when
drawing an animal with fur is thinking that you need to draw every single hair individually. That's not the right
approach, I think, as it won't necessarily look correct or
aesthetically pleasant, and it will take an
excessive amount of time. Instead, we should
focus on defining the key first strands
that help create the illusion of free
dimensionality and fur texture. Our work with different
shades of gray combined with these
carefully placed strokes is what ultimately brings out the realistic texture
in the drawing. On this left pile, I can add more elements
with the eight B pencil to create darker areas and
improve the texture. With that, we'll be nearing the completion of this
part of the drawing. Now I'm going to set the pencil aside and
use the eraso pen to add a few first strands
extending from left to right, even though we are working
on a small format sheet, and my erasor pen, while fin still has
a certain thickness, meaning it can create lines
as fine as an actual air, I do my best to add
these lighter details. And by introducing the
subtle highlights, I enhance the realism
of the fur texture and bring more depth
to the drawing. Now let's work on this
large black patch next to the very light fur area. One thing we notice is that the transition from
the light area to the very dark area
doesn't happen all at once. There is a buffer zone, a kind of intermediate area that allows for a smooth
transition between the two. So I apply a medium gray tone
to create this transition. And to refine it further, I can add a few
individual hairs that extending into the lighter area. I do this with my pencil and
also use my eraser pen in the opposite direction to create lighter hairs blending
into the darker area. Now, with my 12 B pencil, I will fill in the
entire area of this black patch to
establish a solid base. I can add a few individual
hairs at this stage, but I'll mostly work
on those details later when refining the overall
texture of this section. For now, I shade the entire
patch pressing firmly to achieve a deep black tone
that fully covers the area. I use the side of my pencil lead slightly to get a
smoother result. And finally, once this is done, I can add a few very dark hairs that extend from the black patch into the lighter fur area. This helps to create a seamless transition between the black patch
and the white fur, making the blend look natural. And in the opposite direction, I will use my eraser hand
to create the illusion, the illusion, sorry, of light hairs extending
into the dark patch. At the same time,
I slightly lighten certain spots within
the black area since it's not
entirely pure black. There are a few slightly
lighter areas that are visible. And with that, I'm satisfied
with how the patch looks, so we can move on
to the next step. Now, I take my four B pencil to define some fur areas that might seem white
at first glance, but are actually
more of a gray tone. That's why I think the four B is the right choice for shading this lower part of the animal, particularly around
the belly area. So I'll work on this
section with the four B, and we'll check back after that. As I continue shading this area, I realize there is
a very small area that is a little bit lighter, so I shade it with
some HB first. And for the upper
part of this body, I will go back to
the four B as it is very much darker
and kind of gray. So the four B will be very
useful at the top of the body. Now I will define this black patch that
we can see on the side, which helps clearly separate the ple from the
rest of the body. Just as I did with
the larger patch, I will carefully work on
the transition between this black patch and the
rest of the lighter fur. To do this, I had some
darker elements and use my eraser to create
lighter fur marks. Within the grayish fur that I shaded earlier with
the four B pencil, I had some slightly
darker elements. We can see that there
is a whole series of fur strings aligned
next to each other, which will help create
a sense of volume. I make sure to define
them properly. And at the edge of this
large black patch, I will also refine the transition by adding
additional darker first strands, just as I did on the overside. I continue refining the area by working over it
with a 12 B pencil, but overall, this black
patch is just about done. Now I will focus on the light of fur area that I texted earlier, adding small details
here and there. I carefully observe the spots where slightly darker
elements stand out. To enhance the fur texture. Most importantly, I pay attention to the
direction of the fur. Even though most of it
flows diagonally downward, I ensure that each stroke
follows the correct movement. I will keep working on all this gray area before finalizing the section
with the darker details. Around the patches, we can see quite a few slightly
darker elements. And in the upper
part of the area, the fur that is
supposed to be light is actually fairly dark in reality. So I'll darken it
further by adding more layers over the base
we previously applied. This will not only
enhance depth but also help refine the fur
texture more effectively. Now we can continue
working on the body by focusing on shading the large
black patches of the cat. For this, can use either a
12 V or even a 14 B pencil. As we work on these patches, one important thing to
keep in mind is that, even though they may appear extremely dark or
almost pure black, in reality, some areas will be slightly lighter
than the others. For those lighter area, I will apply less pressure with the pencil to create
subtle variations. This will not only
adapt to the fur but also make the black patches
feel more realistic. So for the lightest part within
these large black plches, I will simply use
the softer touch with the pencil to create a natural looking texture and
slight relief in the flour. As with the other areas I've
worked on for this cat, I would have had some
lighter first strokes using my eraser just
as we did before. If I were working on a larger format such as
an A free sized piece, then naturally, all the
elements will be larger, including the first trends,
which will be thicker. In that case, I
might consider using a white pencil to hide highlights
on top of the shading. However, for a white
pencil to be visible, you need to apply quite
a lot of pressure. That's why I can't
really use it here. Pressing too hard would
create lines that are too thick for this small
scale drawing. Another good technique for
adding fine white details over darker areas is using
a posca style marker. This allows you to create
crisp white highlights, and the effect can
be quite nice. But for these two, you need to work on a large size paper. A free size is something
like 42 centimeters by 29. So it's quite bigger than
this paper I am working on. Here, I am working
on this area with my four B pencil since
it's not very dark. Additionally, in the
reference photograph, this area appears
slightly blurred. To emphasize the soft
out of focus effect, I will minimize the
details and use my blending stump to smooth out the graphite
marks I have made. After blending, there
will be very few details in this section only
around this grayish patch. I will add a few darker
elements to define it slightly, but overall, this will be
about it for this area. Finally, I will now work on
this area on the right side, where there are
also dark markings. However, it's important to note that not all of this area
is completely black. So I start by applying a dark base with
an eight B pencil, but I don't use 12 B for the entire section
as I did earlier. I apply the eight B first, and then I will have some darker details on
top using the 12 B. This way, I can achieve the correct range of gray values for this part of the draw. After that, the only thing left will be the
small patch below, and I'll check back
once it is done. Okay, now let's work on
the different hind legs. These are the best example to focus on because
the front legs are not entirely visible or at
least not in full detail. I begin by applying a base layer of shading
to define these legs. In the upper part, we
can see that there are quite a few dark elements
that we can refine fur. For my base, I started with light shading
and on the side, I intensified the
strokes a bit more. In the upper section, I worked with an eight B pencil. For the lower part,
for the lowest part, sorry, of the legs, I honestly don't remember exactly which pencil I used
for the very dark area, but it was one of the
darker ones between ten B and 12 B to achieve
the deep shadows. I carefully defined
these very dark areas. Looking at these legs, we notice that some areas
are extremely dark, but next to them, they are
slightly lighter area. To create this contrast, I soften my strokes and apply less pressure in certain spots, ensuring that not everything
appears too dark, because if we observe closely, these legs are not
entirely black all over, especially in the lower part. Just above the leg, I added a small dark
detail which helps create the right amount of depth and properly shape
the form of the leg. Now we can start refining
the third details in this area with more
small brush strokes. And finally, I will
work the upper section. In the upper section, the
fur is noticeably darker, and we will mark those
details more distinctly. Right now, I'm adding
these dark elements. These ones will blend slightly with the lower
part of the belly. And by doing this, we will
enhance the transition, making it look completely
natural and seamless. Now I'm going to
finish the drawing with the shading
of the last lay. And I have sped up a little
bit the video because it's basically the same thing
that we have done before. And so I'll see you again for the final touch of the drawing. That will change pretty much
a few things you will see. The final element I'm going
to add is a little bit of the background because since
this cat is mostly white, I want its fur to
stand out more. Using a light pencil, I will softly shade around
the entire edge of the cat. I will work with the
side of the pencil lid gently shading
around the contour. This way, the very light
fur will stand out better. For example, on the side, I can already see that it
makes the fur more visible. Will do the same
above the head and continue this process
all around the outline. On the right side, the
background is slightly darker, so I will use a darker
pencil there to create the same effect while maintaining
the correct contrast. And I can also add
these elements around the puss to make everything
stand out even more. I haven't shaded the
entire background, but even with just this, the cat already stands
out quite well. Finally, the last
details to enhance the fur texture can be
done using my razor pen. I will add small strokes with it to highlight the
fur on the side, which is quite irregular. This helps to complete
the fur texture and emphasize the natural
unevenness along the edges. After that, I can also use the erasor pen for the small
whiskers under the chin, as well as the ones
near the ears. Won't be very much noticeable, but it's still a nice
detail to include. If they don't stand out too
much, it's not a big deal. Lastly, I can apply the same technique to the
fur at the back of the body, which will nicely
conclude my work. With that, the drawing
will be complete.
7. Drawing textures - Wrinkled Skin - The Elephant part I: In this video, we
are going to work on the skin texture because some animals don't
have scales or hair. They have a skin, just like we do human, and we are going to work on one of the most complex skin
that we have to work on, and that is the one
of the elephant. The skin of the elephant
is an excellent subject to make some progress because
it has a lot of wrinkles, a lot of folds, a
little bit like the reno we worked on
on the shading part, but even more complex, I think. So there will be
some nice contrasts, some nice highlights to work on. And I'm going to show you how
to do that without spending hours and hours trying
to draw every microfold. We will see how to create
an elephant that looks realistic with just the right details
placed here and there. So let's dive in and draw
this elephant together. Alright, let's get started
with this elephant drawing. I'm working on an A four sheet, which is 20 by 30 centimeter. And with this, we'll see how
to work on the skin texture, particularly a very
wrinkled skin. As usual, you have the model
with the outline provided, so you can focus
only on the texture. So let's go. We can start, and the image will
appear in a few seconds. Let's start our shading work, and I will begin with this large area of
the ear on the right. The first thing to
do, in my opinion, is to apply an initial
shading to create the base with the dominant
gray of the area. I would say that the
dominant gray here corresponds to my four B pencil. So I will shade everything with the four B before
refining the details. We can notice that on the
upper part of this ear, there's this fold forming line. For now, I suggest we work only up to that
point and apply our base in the entire area
to the right of this hole. As I mentioned, I am using a four B pencil and working
with the side of my lid, applying light pressure so that the shading remains uniform. This ensures that the pencil doesn't press too
deeply into the paper, allowing for smooth
blending afterward. Right now, it's looking good. But I want the entire
area to be evenly gray, eliminating any visible
white underneath. This will give us a solid
surface to work on laser. And to achieve this,
I'm going to take my blending stump and
using circular motions, blend the shading across
the whole elephant ear. Now that my area
is well blended, I can start refining
the texture of the skin and creating depth
using different pencils. When working on a
section like this, you might wonder where to begin. My answer is always the same. Start with what is most obvious. In this case, the most
prominent elements of the dark areas of the ear are
the most obvious elements. So I will begin by
defining those. By starting with the
most visible features, I had one element, then another, and another, and
gradually the ear or any part I'm working
on takes shape. And on the upper part, I
notice a dark element, so I had it first. Then I move on to the
surrounding darker details. Since I've already started
with this dark area, why not continue with the smaller dark
patches next to it. So I also observe that
the edge of the ear is slightly darker than the rest in this area and also
in the entire ear. So I make sure to
emphasize that shading properly entering the
edge appears darker. In this area, I also notice
many small dark lines, which is which I now add using the sides of my pencil
lead for a subtle effect. Between these dark lines, I see some lighter areas
standing out these highlights. Now it's my turn to define them. For this, I use a
kneaded eraser. As you can see, I
have shaped it into a fine point to work precisely on these
highlighted areas. I can now move on
to the lower area, once again, focusing on the
right side of the folds. We'll continue in this way, adding all these
slightly darker folds here and there as
we observe them. I am working with the
side of my pencil lead, and in some area like here, when adding texture to create those slightly
darker patches, I use small circle of
motions with my pencil. This technique helps achieve
a more natural result. It doesn't look like
a deliberate pattern, but rather like an
organic dark enq an organic darkening
of the area, which is exactly what I want. I don't want any
recognizable shapes in this shadowed area, a more pronounced darkness. That's why working with the side of the lid and occasionally using small circular
strokes is really helpful. Earlier, when I blended, it was because I wanted
a consistent, sorry, dark gray base, covering
the entire area, eliminating any right
from the paper. But now that I am adding
these details on top, I work with the side of my lid and no longer
need to blend. Another thing to notice is
that the edge of the ear, besides being dark, is
also quite irregular. So with my pencil, I enhance this irregularity
by adding small points in some areas and emphasizing
the round shapes in others. These little details
contribute to making the ear look
more realistic. And overall, the
progress is going well, and I want it to add much more to the areas I have
worked so far. All I need to do now, I think is to add some
darkness into the left side of this ear just right here to add some details just
like we have done before. And also another
thing I need to do is to had some lightness to make some areas brighter
in some areas of the ear because in some places it looks a
little bit too dark. And for that purpose, I
will use my needed eraser. And you may wonder
why would you use the needed eraser and not
the eraser pen to do this? Well, eraser pen is
a very great tool. However, I prefer to
use the eraser pen when I really want to have
something very light. Whereas with the needed eraser, I just remove a little bit of graphite to make the area
a little bit lighter. And so that's why I
think the needed eraser, in this case, is
more appropriate. Now, let's move on to the central area where
the eyes will be. To begin, I had a few
elements around the eyes. I am refining the different
lines that I can see, and this way, it
will be much easier. I want to establish a few more precise details before shading and adding depth. This helps me set up
better reference point. I will also start working
on the eyes right away. I like drawing the eyes early in the process because they give direction to
the overall piece. Once they are well done, they boost confidence for
the rest of the drawing. Plus, in the case of an
elephant like this one, the eyes aren't too
complicated to render. One thing that I notice
with this elephant is that the edge of the
eye is extremely dark, so I apply the shading with my pencil to define
it right away. I am applying my pencil
strokes inside the eye, and you can see that there is a subtle difference in value. It is a little bit lighter, so it's very subtle, but you can see it a little bit, so that's why I pressed
a little less on my pencil to make sure it
was a little bit lighter. And then I can start
shading all around the eye, and I am applying
my four B pencil to create a base which I
will detail afterwards. Now that I have applied
the base in this area, I can start working on it. Right next to the line
I had drawn earlier, I noticed some slightly
pronounced details, so I have added them. Then near the eye area, we can see a few small wrinkles. Using my 12 B pencil, I mark them carefully, making sure to work
with the tip of my pencil so that they
are dark and precise. Just a few well placed lines are enough to create
depth in this area. And yes, to create
depth in this area, I will also use my eraser pen. Next, I move on to
the adjacent area. Since the center of
the elephant's head is quite complex with many
variations of gray, I will progress
little by little, focusing on small
sections at a time. In this case, right
next to the eye, I have a relatively large
area that is not very dark, so I decide to shade it evenly
using my four B pencil. This provide the base
that I can build upon. Once these elements are defined, I will blend them to achieve a smooth texture just
as I did with the ear. While Frobi is not
extremely light, the elephants skin is
not very bright either. This allows me to establish a balance base for the drawing, even though this is considered
a relatively light area. What I also notice right
next to the area we just worked on is a small section
that is slightly darker. Using a darker pencil, I will shade this area still working with
the side of my lid. Here, I use an eight B pencil to create a noticeable
difference in value. Another thing we can see is that the upper part also has a significantly dark
section on the right. For the small line and area, I shade with a 12 B pencil
because I want something even darker than what I
had previously applied. Even though it's a 12 B, I don't press too hard. I still work with
the side of my lid, which helps keep
the shading soft. And then I blend everything
with my blending stump. Similarly, for the small element that I'm going to that I
have added a bit lower, I wanted it to be
slightly darker, but without overloading the
area with too much shading. That's why I'm going to
proceed step by step, working on small section and adding details gradually
to complete this area. And so that's what
I'm doing right now. I start marking small lines, irregular, some are
horizontal, some are vertical. They go in different directions. So I'm almost like
scribbling to create the right texture for
the elephant skin, and little by little, this area takes shape and become more realistic thanks to these carefully placed
pencil strokes. And to do that, I use an A B pencil. And with my eraser pen, I also added some blank area, white area, sorry to create even more volume within the
skin texture of the elephant. In this previously
darkened area, I also had more small
darker elements with my pencil this time
using the tip of the pencil. This make it even darker than
what I had created earlier. The combination of dark
and light elements in the skin area really helps me build the depth and relief
volume of the skin, which is full of wrinkles. Then just as I did earlier, I worked precisely
in this area to a lighter elements
with this eraso pen. I find that working
on an elephant's skin is an excellent exercise for
mastering skin textures. Many animals don't
have fur and have a similar type of
skin like hippos, renos or pigs, for example. But elephants with elephants, the challenge is even greater because their skin is
extremely detailed, covered in wrinkles everywhere. And if you can successfully render the texture of
an elephant's skin, you'll find it much
easier to work on the skin of other
animals as well. And as the saying goes, hard training, easy battle. So if we master the
elephants skin, working on animals on other animals will
feel much simpler. It's always great, I think, to challenge yourself and push your limits
even with drawing. So now in the adjacent area, we can see that it
gradually becomes darker. And so to create the shading, I use my AB pencil to
establish a darker base. Just like before, I will blend this area before refining fur. One of the things I find I think is particularly
interesting about working on elephant is that we not only focus on
wrinkles and folds, but also approach them
in different ways. The folds on the ears
are not the same as the small wrinkles in
the center of the head, which are different from
those of the trunk. And the texture of the trunk is also distinct from that of the tusk or even the
forehead of this elephant. And so with a single subject, we get to explore a wide variety
of textures and details, and that's what makes working on elephants so
fascinating, I think. I can continue my work
on the left side of this slightly darker area
that we just worked on. For that, I will focus on the small wrinkles that
we want to emphasize. So I'm using the tip
of my pencil a little, but I like to hold
it this way because it gives me a slightly
different level of control. I am making a few almost
random strokes to bring out the small wrinkles
on this elephant. I can continue this work by moving a little more
toward the center, although it seems to
me that there are slightly fewer wrinkles here
and they are a bit lighter. To bring out all these
details that we have added, I will then continue
working with the eraser pen as we did in the previous area to highlight some lighter elements and start creating a bit of
volume in this section. These very light
touches will help add brightness and depth to my work. I will now focus on this
higher area of the elephant, which I will work on
with an eight B pencil. However, what we can
notice is this per area, is that it will be quite
light on the right, so I will keep my pencil
strokes rather soft. And as I move toward the left, I will gradually increase
the pressure to create a more pronounced
effect as we can see a clear gradient
happening in this area. With my eight B pencil, I could achieve this effect
using multiple pencil, but it is entirely possible with just this one AB pencil by adjusting the pressure
applied to each drop. And I will connect this area
to the right of the ear, which we hadn't
worked on earlier. I will also blend it with my blending stem just as we did before to create a smooth, evenly shaded surface to work
on a fully gray tone base. Now we can work on this
area to the right, which connects to
the ear section. What we notice here
is a small thong that creates a sort of separation between
the head and the ear. Just like in the lower part, there's a slightly
darker area that helps define this separation. Next, I will refine
the ear section, adding a few darker
elements to enhance the distinction between
the head and the ear. Inside the ear, I will work
on the texture by drawing numerous small lines going in different directions to
create a rough, natural feel. I also notice that the upper part of the
ear is quite dark, similar to what we observed
on the side of the ear. The outline is slightly
darker as well. I've already added a few
slightly darker lines, but I can intensify
some of them for more depth with an
even darker pencil. And overall, this section
doesn't require too much work. As always, the eraser pen helps create highlights
in lighter areas. If you weren't yet convinced of its usefulness
in this drawing, this is where it truly shows its importance in defining
the bright spots. So I went back over
this area because I found it too light when I
had applied the eras of pane. Now, I am focusing again
on the central zone, adding details to enhance the wrinkled texture
of the skin. Even though wrinkles are not the most pronounced
in this area, the skin still needs careful attention to
capture its natural look. I've also darkened a
few elements more than Before. And as I move
toward the left, the lines I will
he will be darker, since this side is
naturally darker. Logically, the details should
follow the same value. The key here is to ensure a
smooth transition between this upper section
I'm working on and also with the lower area
that I previously shaded. That transition needs
to be seamless. And as before, the
upper contour of this part of the head
should also be quite dark, and I have carefully defined it to ensure the correct value. Now I am moving on to the
left side and starting by shading the elephant's eye with a 12 B pencil to
make it really dark. This eye will be a bit less
visible than the previous one because the entire area is
darker and more shadow. The contrast is less pronounced, so the eye won't stand out
as much as the first one. Next, my goal is to shade this entire left side and create a base just like we did earlier. However, this area
contains a lot of dark elements along with
some lighter spots, but overall, it is
quite shadowed. I am applying a 12 B base, but not too dark, just enough to establish a medium
value for the area. On top of this base, I will a darker details
where necessary, especially around the eye. Essentially, I am starting with the lightest or almost
lightest value of this section and gradually
building up the darker area. This approach, I think, is the simplest because this
region of the elephant has many variations in darkness with some elements being more
pronounced than others. Trying to define
every single detail from the beginning will be
too complex in my mind. This method I am doing now
allows for more flexibility. For instance, in this
particular spot, there is a very dark mark. So still using the 12 B pencil, I apply more pressure with
the side of the lead to make it stand out now that
I have created my base. This will also help in smoothly transitioning into the central
area I worked on earlier. Making the transition to
the upper section was tricky because the left side elements
weren't defined yet, so I need to be mindful of that, and I will be able to work on a great transition with
what we did before. Next, that when I will have applied all
these small areas, I can blend everything
using circular motions. The key here is to seamlessly
merge the shading with the adjacent area while preserving the details
I added before. These texture skin details should remain sharp
and well defined, so I'll be careful not
to overblend them. I mean, the details we
created before with the other areas that we
try to blend in with. All right, now we have
a really good base, and we can start working on the details of this
area and the details that are very noticeable on those wrinkles that you can
see all around the eye. I'm going to add them with
my 12 B pencil pressing quite hard to make sure
that they really stand out. Okay. And then, well, I will observe carefully all these wrinkles that
we have in the area. For instance, we have some
vertical wrinkles right there. So I add them. What you don't see me doing
when I work on a drawing? Is that before actually
adding all those details, creating my base, et cetera? Is that I brainstorm
a lot thinking, Alright, We will I
begin my drawing? What details do I see? What is the direction of
those lines that I can see? Where should I begin, et cetera, and asking myself these different questions
really helped me to create a better basis and
create a better drawing. It's really important, I think, to take the time to observe and to brainstorm to create
a better drawing. So that's what I did.
And in this area, so I am adding more details. You can see that in
this black patch this black area
that is very dark. Some elements are even darker, so that's why I added some
even more darker elements. And also, I think
that this area needs to have something a little
bit darker as well, because the contrast between the left area and the
center was too important. So that's why with my pencil, my 12 B pencil, I am shading it again, to make sure that it
gets darker and so that the contrast between
these two areas is not too important. So this way, I think
it looks better, and I can get back to adding
some details in this area, some small wrinkles
that we can see. And all these wrinkles put
together create something, some sort of grid, I think. And all these elements
cross each other. And this way, my texture, my skin texture, will
look pretty good. And all around the eye, you can see that before I
added some very dark wrinkles, but there are some that are smaller and a
little less darker, so I add them as well. Also, in this area, we can see that we have
these dark elements, and this way, it helps to
create depth in the region, in the area of the eye. So that's why I am
also adding it. And I think that we'll be almost good with this area
all around the eye. One thing that will be
important to add as well will be to erase a little bit of some elements to create even more depth and to have
some light and dark elements, just like the work of
lighting shadows works. So it's important to have them. So that's what I'm doing. I am removing some of the graphite. One thing, sorry, I forgot
to record and to shoot is I thought that these
areas that I am erasing, when I erase them, it
made them too bright. Oh, sorry you see it, actually. And so I decided to
blend them a little bit. In this way, the graphite
goes in this too light area, and therefore it makes them with just the right value
just like what I wanted. Now I can start working
on the other ear. The first thing I do is
mark the edge of the ear, which is very dark. Using my 12 B pencil, I apply firm pressure to make
this line clearly visible. This serves as a reference point before shading the
rest of the area. What we notice about
this ea is that there are very dark sections as well
as slightly lighter areas. For shading, I will try to
be precise from the start, unlike with the head where I
apply the single base layer. Head was more complex
because it had many different base values
in terms of gray tones. Here, that's not
as much the case. So I'll focus on
carefully shading, clearly marking both the
darkest and lighter areas with my 12 B pencil. For moderately dark sections, I will apply lighter pressure, white for the very dark areas. I will press firmly, even as I create the base layer. I do this by using the side of the lead of the pencil lead so that despite the
strong contrast, the shading will blend
smoothly afterwards. And I repeat this process
across the entire area, making sure to balance the tones and we'll move
on once this is done. Now that I have a solid base and I have blended everything, I'm going to refine the
details of the elephants ear. Looking at it closely, we can see that the entire
edge is extremely dark. So once again, I
use my 12 B pencil, applying even more pressure
to make it stand out more against the base
we established earlier. At this stage, it's all about
observation and patience. I carefully analyze
the different details and folds in this area. Proceed as I did with
the previous ear. However, since this
ear is in more shadow, I need to press even harder
with the pencil to make the dark areas more pronounced and ensure the depth
is well captured. I also notice that just
like the previous ear, this one has very
well defined contours with sharp, meticulously
worked edges. So I take the time to
refine these edges, making sure that they are
precise and distinct. Additionally, in the center of the ear and also
along the sides, I observe small shadow areas. I work on these using
the side of my pencil, sometimes making small lines, other times scribbling
lightly in circles. The goal here is to create
a sense of volume and three dimensionality
so that the ear looks as natural and
realistic as possible.
8. Drawing textures - Wrinkled Skin - The Elephant part II: Another set of dark
elements that are quite important and need
to be carefully added, are those found in
the upper part of the ear where it
connects to the head. By incorporating these details, we ensure a smooth and
natural transition between the ear and the
central area of the face. This step is crucial
because all the elements we are working on must
feel interconnected. Every part of the head, both ears, the central section, and even the lower areas like the trunk are part
of a unified whole. That's why it's so
important to work carefully on the transition between these
different sections. Unlike the tusks or legs, which are clearly
separated from the rest of the body and can be
worked on independently, these facial features
require seamless blending. To refine the shading, I use my needed eraser to lift some graphite and
soften certain areas. I choose this eraser
because I don't need to work on precise
line in this section. Just tapping lightly with it is enough to create
subtle adjustments. So that's why I didn't
use the eraso pen. But finally, with
the erasor pen, I can clean up any excess
graphite around the edges of my line to ensure a polished
and flawless finish. Now we can start
working on the trunk. The first thing
to notice is that the entire left
side is very dark, whereas the center
and right side show a difference in value,
appearing much lighter. The lightest area is mainly
along the edge where the trunk connects to the ear and the elephant's hindquarters. To begin, I will use
a four B pencil, but we quickly switch
a dark gray to work on the central area where there is a clear
contrast in value. As always, I use the side
of my pencil for shading. With the trunk, I am to
be precise in placing my values because
similar to the left ear, this area doesn't have overly
complex shading transition. This allows me to work with more accuracy on these
different sections. Next, with a navy pencil, I will shade this entire section as the left side becomes darker. And the lower part of the trunk is also noticeably darker, so I will adjust my
shading accordingly. So just right there, A B
seems like the right choice. Another key element to keep in mind is that on
the left corner, there's a lighter section
that helps create volume and separates the trunk
from the left ear. This is essential
for achieving depth. And so that's why I
think the eight B should be something great for
this area as well. On the far left
side of the trunk, I switch to a 12 B pencil
and apply strong and deliborate strokes as this
area is extremely dark. I want to establish a solid
base with deep contrast, so I shade all the way
down with firm pressure. At the bottom of the trunk, it's important to mark the slight relief volume that defines the interior
curve of the trunk, ensuring it stands out properly. Once all of this
shading is done, I will blend everything
using a blending stump to create a smooth and
well balanced base. Now we can begin working
on the trunk in detail. This will be a major task. We'll start with the
left side details which are really crucial because they help
establish the volume and direction of the
trunk. Trunk, sorry. Most of the details in this section will have
a slightly curve shape, blending toward the right in this area that I am working on. I begin by adding these fine detail lines
using dark pencil. I initially started
with an eight B to define the marks
clearly, but quickly, I'm going to switch to a 12 B because some elements in this
area are extremely dark. So I begin marking these
lines, and at first, I plan to work on this entire
central section at once, but I realize it will be more effective to focus on
finishing the left side first, entering the volume is properly built before moving
to the other area. So at first, I have added a
few curve line in the middle, but then I decided
to take it step by step and concentrate on
refining the left section. The small descending lines in this area are essential for
creating the trunks volume. So I continue adding several
of these lines adjusting my pencil pressure to vary the contrast between darker
and lighter strokes. This variation is what starts building
volume in the area. And all these lines follow the same general
directions for now. Later, additional lines
will be layered on top, moving in the
opposite direction, causing them to intersect
and intertwine. This crossing of lines is
what ultimately create a very realistic texture and reinforce the rounded
form of the trunk. Also, I think I will probably
erase some of the areas to create some more
volume by adding some very small and
light highlights. I am adding more dark
lines in this area, and you can clearly see
the difference in value. By pressing on my pencil harder, I create stronger contrast. At this stage, you're likely
becoming more familiar with identifying these
value differences yourself. This demonstrates why it's crucial not to always apply the same
pressure when drawing. Varying the intensity creates a much richer and
more dynamic result. And as I continue adding lines, you will notice that as we move toward the narrower
part of the trunk, the downward lines
start to fade. Instead, instead, they gradually transition into the defining
curved lines of the trunk, which will shape its form and reinforce its
rounded appearance. At these points, at
this point, sorry, we have really started to establish volume and
depth in the trunk. As I begin to draw
these circular lines, we are getting closer to refining the actual
shape of the trunk. These new lines will start to intersect with the ones
we created earlier forming a realistic texture and emphasizing the
natural curvature, sorry, of the trunk. Now we can start working on the circular lines that define the shape of the trunk and give it that characteristic
curvature. One thing to note
is that some lines, like the one I just added, start relatively
straight before curving upward and taking on a
more circular shape. It's essential to carefully
observe each fold in the trunk to ensure that we are following the
correct direction. The way we angle each
pencil stroke is what ultimately determines
the trunks form and movement. Another key element to pay attention to is the
value of each line. In the air per
section, for example, there are small subtle
lines that sometimes extend slightly upward
but remain pretty light. Controlling value is just as important as drawing
the lines themselves. It's what gives the drawing a realistic feel and
ensures the trunk as depth. The variation in value doesn't just apply
between different lines, but also within a single line. Sometimes as line moves from left to right or
from right to left, it gradually
lightens or darkens. That subtle change is also very important for capturing the
natural look of the folds. Additionally, between the
main and prominent folds, there are several thinlines
that help enhance realism. These final details had
texture and prevent the trunk from looking
too smooth or artificial. Right now, I am focusing on getting the
major folds right. Observing them carefully
and positioning them precisely in relation to other facial features
is very essential. Once I have accurately
placed these large folds, I can start adding
penlines in between, just as I am doing
now to further refine the texture and
realism of the trunk. Finally, another crucial step
in making the trunk look voluminous and
realistic is working between the wrinkles to
add lighter details. I use my eraser hand
for this because it allows much greater precision
than the needed eraser. With it, I carefully
remove small amounts of graphite almost randomly
to create highlights. These techniques helps the
wrinkles stand out more, adding contrast and depth. And by lightening
specific areas, the trunk gains more volume, making it look more natural and free free
dimensional, sorry. In some places, it
may appear that some elements that I have
erased erased seem too light. And as usual, the
technique I use when I find certain elements too light is to take
the blending tool, the blending stump
and blend over them. This will make the
area slightly darker, allowing me to achieve
the right shade of gray. And I'm going to speed up
the video a little bit right there because it's basically the same
thing that I am doing. And so I don't have
much thing to say. And yes, it's basically the
same thing I'm going to do. On the edge of the trunk, I am now working
with a 12 B pencil, applying firm pressure because this area is extremely dark. I want to establish an even darker base to
ensure strong contrast. Similarly, in the
center of the trunk, there is a very
pronounced shadow with a highlight
right next to it. This contrast is what
creates depth and volume. I carefully refined this area to emphasize the natural
curve of the trunk. For the dark trunk I have
added along the sides, I will blend them out because I'm still working
on the base layer, not yet focusing
on fine details. These dark marks help
strengthen the foundation before moving on to the
final texture refinements. I can also add another shadow, the cast shadow of
the tusk right there. We can see it on the trunk. And then I'm going to speed up a little bit the video
because basically the work on the rest of the trunk is basically the same thing that
what we did before. However, there are a few things that change slightly,
for instance, the wrinkles will be
shorter in this area as the trunk gets thinner
and when you go downwards. So make sure that you
adjust those lines as well when you are working
on these final elements. And also, this area of the trunk will be a little
bit darker, therefore, my lines will also be
a little bit darker, and even though I will erase a little bit some areas to
create some highlights, I won't erase as much
as what I did before. So that's basically the only
things that will change, and that will be it for
the drawing of this tran. But even though I
sped out the video, take your time,
enjoy the process, and make sure that you
are doing your best to create the most realistic
possible trunk. Now, let's move on to the tusk. As you can see, I have already shaded the small
area above them, which wasn't too complex, so I moved past it quickly. When we think of an
elephant's tusk, we often imagine them as
very light or almost white. However, in reality, and we can see that
with the picture, they appear quite the opposite, and the upper
section of the tusk have a medium gray tone, covering most of the surface. I will also add some
darker details in this area afterwards to
enhance the texture. Meanwhile, the lower part of the tusk is slightly lighter, but I still need to establish a light gray bellies before working on highlights
and shading. Create a sense of depth
and the illusion that the tip of the tusk
is coming toward us, I will carefully manipulate
light and shadow. The underside of the
tip is extremely dark, whereas just above it, there is a bright highlight. Above the highlight, there is another slightly darker section, which helps define the
tip and make it stand out more against the
rest of the tusk. By adjusting this
value correctly, we can achieve the rounded
three dimensional look of the tusk and make the tip appear realistically protruding. Protruding, sorry, it's
hard to pronounce. The texture work on this
tusk is essentially made up of small scribbles
and subtle dark touches, which I will add here and there to create a natural world look. Additionally, I will use
the erasopen to leave some graphite and introduce lighter highlights in
the selected areas. That's really all it takes to achieve a realistic texture, a mix of dark and
light marks that mimic the natural
imperfections of a tusk. Now, as I mentioned earlier, I will give focus on
refining the tip to give it that sharp protruding effect by carefully adjusting the contrast
between light and dark. And I will create
the illusion that the tusk extends outward
toward the viewer. Now, we will focus
on the hind leg, which is mostly
hidden in shadow. Because of this, it's a very
simple area to work on. I am using a 12 B pencil pressing firmly to
create a deep dark tone. The first step is to
carefully define the edges, making sure not to go
outside the intended shape. Since I'm working with
such a dark pencil, any mistakes will be
difficult to correct, especially if I accidentally cover an area meant
to remain light. So I apply strong
pressure with my 12 B to ensure that the shading
is as dark as possible. However, there are slightly lighter areas
within the shadow, not by much, but enough to
require subtle adjustments. To create these variations, I use my eraser pen to
lift some graphite, ensuring the correct balance of value throughout the area. So I will do that
once I will have shaded the entire area
with my 12 B pencil. But overall, this section
is not very complex. So once I finish
shading it properly, we will quickly be able to move on to the next
part of the drawing. We are now about to work on this front leg of the elephant. I have skipped the shading of the second tusk because it's basically the same
thing that what we have done with the first one. So I didn't think it
was very interesting to show you how to do that. Again, so with the front leg, it's going to be
interesting because we will have some
different type of wrinkles to work on also the work of light and
shadow is interesting. So I started shading with the eight B on the
right side as it is a little bit lighter
than the area on the left. And so for the left side, I switch and use my
12 B pencil to have something a little
bit darky when establishing the
base of my shading. So for the moment, I don't I don't care
about the toes. I will shade them
afterwards once I will have finished
with this leg. And so I shade this
area with the 12 B. And once I will have done this, I will be able to
blend everything with my blending stump to create
a smooth surface to work on. On the right side of the toes, I should have used the eight B, but I felt, Okay, I don't want to switch
my pencla we'll just use the 12 B while pressing
a little less harder. Alright, now let's detail
this area of the front leg. So at first, I start with
the area at the top. So this area is pretty dark
and we have a few details, but we don't see them much, so I won't spend a lot of
time on this area as it's not necessary to overok it
and to add too many details. So I had a few one. We can see that these details in this area have some
sort of vertical line. And as we go downwards, we can see that
these lines tend to have some sort of natural curve. That goes in direction
of the right. So I try to add it as well. And right there, it's in this area that we can
see the main wrinkles. They are very dark and
have a very nice curve. So I add it as well. And one other thing that is
interesting with these lines that we are creating is
that with most of them, what we can see is that as you draw them from
left to the right, you can see that this
line tends to lighten and gets a little bit thinner as
you progress on the right. So that's one thing I
will also try to do with those wrinkled line. And so I make some progress, and I can also darken this area on the left of the lake because
it doesn't feel too dark. So using the tip of my pencil, I darken it and I
also darken it while making some lines to
reinforce my texture. And so I will
progress this way to complete my area of the leg, which will probably need a few more highlights
using my eraser pen. And so that's how I work with
this leg of the elephant. And even though this
leg is not exactly like the trunk or like the
head or like the ears, what we can notice with this
work on the skin texture of the elephant is that it's basically the same
thing everywhere. What's really important is the work on the
shadow and light. We start by shading and creating a smooth base that we can
detail with some dark lines. And right next to
these dark lines, we have some highlights
that help create volume. And what we can do
right there with the elephant is one thing
that we'll be able to do with any kind of animal that has a skin and a skin with wrinkles, and that is very detailed and
texture like the elephant. Now that I am in
the detail phase, I can focus on refining the
toe nails of the elephant. So to refine them, the edges of the nails are
darker than the inside, which helps them
stand out clearly. The darkest area is where
the nail meets the ground, so I make sure to
enhance this contrast by pressing more
firmly with my pencil. And the shading itself isn't
too complex of these nails. I had a few darker touches, then layer in some
lighter highlights for realism. But I'll do that. A little bit later, before I reinforced the shadows and
had small detail strokes. But overall, this work right there remains
almost complete. Now I want to create more
volume with the eraso pen. And so using this eraso pen, I leave some graphite to
create highlights following the direction of the
existing wrinkles of the elephant skin. These lines are mostly
vertical or slightly curved, similar to the wrinkles
we worked on earlier. And by following the
natural texture, the details I previously
shaded start to pop out almost as if it
almost as if by magic. So I continue refining the
overall shape and texture, making sure that the skin
details blend smoothly. In some areas, I feel that the erasa pen lighten
the highlights too much. So I use my blending stump to soften and darken
them slightly, bringing back some balance. About the toes, again, the leftmost toe is significantly
darker than the rest. So I adjust my pencil pressure accordingly to match
the correct value. And with these adjustments, the work on the foot
is nearly complete. Just a few final refinements, and we can move on
to the next part. So I'm going to finish toe these different toes,
and that will be it. And we get very close to
finishing this elephant. I will move a bit more quickly through this last
part of the drawing, focusing on the final leg. We've already worked on
a more complex together, so this one should
be much easier. So for the final leg shading, this left side leg has fewer folds and details
than the first one, making it less
challenging to shade. By this stage, you should already be very familiar
with the process. So I'll follow the
same steps as before. The upper part of the
leg is very dark, but there's a slightly
lighter area near the tusk, which I'll make sure
to leave less shading. So let's recap the process. First, we shade the base. I apply my pencil strokes carefully to establish
the general tone. Then I'll go blending using my blending tool to smooth out the shading for a
natural transition. And finally, I will add those
details once the base is set and go with final
details to enhance realism. So nothing too difficult here, just repeating the
same techniques that we have already
mastered together. So I hope you have been
drawing along with me and that your result
meets your expectation. It's been a real
pleasure guiding you through this elephant
drawing process, and we'll see you in
a few moments for the final results of
this elephant drawing. No. And so this is the
final result. O.
9. Drawing textures - Scales - The Snake part I: In this video, we are
going to work with the snake to work on
the scale texture. The scales are really
fascinating to work. It really helps to create something nice about the
animals and make it beautiful, but it's also very important
to create a sense of volume with the snake because on each of the different
scale that you will have, there will also be
a part of shading that will be important
and it won't be necessarily the same shading
throughout the entire animal because the shading
that you will apply on the scales will help to
create something voluminous, something in free dimension
and move your snake from something flat to
something in free dimension. And the scale also follow
the curve of the animal. So that's why their shape might not be exactly the same
for the entire animal. So this is a really
fascinating subject ten. Let's dive in right
now. All right. Welcome to this new
work on the texture, and we are going to
work on scales with this beautiful snake that we're about to see on the video. So we are going to work
on this new texture and focus on drawing the body of the snake on an A
four piece of paper, that is to say 20
by 30 centimeters. And I start by refining the eye area as we can see
its distinct circular shape. To avoid getting lost in the
complexity of the scales, I use a methodical approach. First, I identify well
defined scales such as the one directly beneath
the eye that I am drawing. Then I locate a larger
scale on the side, and so I decide to sketch it because this one
is pretty obvious. I can see it's right
next to the eye, and so I draw it. And from there, I can use
this as reference points, ankle points to expand outward, gradually constructing the
pattern of overlapping scales. I extend my reference
lines towards the snake's tongue and
mark a prominent scale. Near it, helping to create a
sense of direction and flow. While I aim to faithfully
replicate the scales, slide variations in
placements are not a problem. As long as the overall coherence of the scales is maintained, minor shifts won't affect
the realism of the drawing. So don't stress if a scale
isn't perfectly placed. What matters most is the
overall structure and texture. The key is to progress
systematically moving from one defined
section to the next, ensuring that the scales flow naturally across
the snake's body. If I notice that I have added an extra scale or missed
one, it's not a big deal. We will work with what we have, and the snake will still
look the same overall. Of course, the goal isn't to
place the scales randomly, but as long as we try our best, a few extra missing scales
won't ruin the drawing. I use the first row of
scale I have already drawn near the eye as a reference and start
tracing the next one. The most obvious
scale to place are those under the mouth. You know, the line right below that separates
the head from the body. I begin with this because when
I look at the body scales, I realize that area is more complex due to the high
number of overlapping scales. I mean the area on the left that I showed
you with my pencil. And since there's no rush, I will work on those later. It makes sense to start
with the simpler elements first and then tackle the more detailed
section afterward. This way, we can
progress more smoothly, sorry, across the
different areas. Now I can move on to this
large section of scale, there are many small ones here, and keeping them consistent in shape is also very important. So these scales that
we are about to draw, we can also see that they follow a curved pattern and their
size remains relatively small. So if the scales
become too large, the drawing might
lose its coherence. So maintaining proportion
is really a key. I will continue
working on this area, and one interesting
detail to note is that the scales at the bottom
become increasingly bigger. Since we're seeing the
snake's body in perspective, this size helps to create a
sense of depth and movement, making the body appear
more cylindrical. To achieve this effect, scale size play a key role. The lower scales are much larger than the ones at the top. Adjusting their
proportions correctly is essential to
maintaining realism. Additionally, the
middle and lower scales tend to have a
diamond like shape, which is another
important factor to consider while drawing. Other than that,
there's nothing else particularly new to mention
about the outline process. Just stay focused,
take your time, and it will all come together. After all, these are
just small scales, and as I mentioned before, if a few are slightly
off in placement, it won't significantly impact the final result
of your drawing. Finally, you might
notice that there are moments of latency when I'm
drawing with my pencil. The reason is simple.
I don't rush. I take my time carefully
thinking about each stroke before making it
to draw scales accurately. This is an important
part of the process. Taking your time allows for
greater precision and ensure, sorry, that the
drawing turns out as detailed and
accurate as possible. Let's start the shading, beginning with the eye. First, I define the area
around the highlight, the bright part of the eye using an eight B pencil
with light pressure. Then I go over the edges
with my eraser pen to clean up any excess
graphite that I may have overlapped
into the highlight. Next, I switch to a 12 B pencil, pressing very firmly to make the eye as dark as possible
before fully shading. I carefully outline the shape to avoid going outside the lines. I have to apologize because at times when shading this eye, my hand blocks the view of my pencil movements while
working on the eye. This happened because I
was deeply focused on precision and didn't realize
my hand was in the way. But in reality,
the technique for the shading of this area of
the eye isn't overly complex. I'm just applying
strong pressure with the 12 B pencil to achieve
a deep black tone. So I'm very sorry. About that. So let's get back to it, and as we approach the
brighter highlight area, I reduce the pressure on
my 12 B pencil to blend smoothly into the lightozon creating a gradual transition. All around the eye, I continue shading very darkly, still using the 12 B pencil to emphasize the bold contour. I also make sure to leave a clear space around the eye
for the bright highlight, which enhance the overall
contrast and realism. And Once I have done that, I take my blending stump and gently blend around
the circle of the eye. I don't want this area to remain pure white because that
wouldn't look natural. Instead, it needs to be a soft light gray to match the actual tones around the eye. After blending that section, I move onto the
surrounding dark area using my 12 B pencil. Again, I prefer to outline
the shape first to ensure precision and precision and avoid going outside
the intended area. As I apply the 12 B shading, I make sure not to use the
same intensity everywhere. Some sections around the eye
are lighter than others, so it's crucial to adjust my
pencil pressure accordingly. If I make everything
uniformly dark, the contrast won't look right. So to control this, I first mark the lighter zones with a softer
application of the 12 B. This acts as a guide, ensuring that when I go
in with heavier pressure, I don't accidentally over darken the areas that
should remain lighter. And by setting up these
reference points, I can maintain a better control
over the overall shading and achieve a more natural
and well balanced gradient of the area. Finally, using the eraso pen, I had small highlights
in the areas where I think lighter
details should stand out. There aren't many, but
these subtle touches help enhance the realism
and depth of the eye. Now we can start working on the base shading of the scales. But before that,
the first step is to outline the scales
around the eye. Well, focus on this
section first, taking it one step
at a time to avoid getting overwhelmed by the
complexity of all the scales. I begin by carefully marking the different
lines around the eye. These scales outlines
are very dark, so I press firmly with my
pencil to make them stand out. When when we will move
on to shading the body, the scales will be more subtle, especially around the edges. But here, around the eye, the lines are bold
and well defined. So it's important
to emphasize them. And this is the first step, and I apply it to the entire area
surrounding the eye before moving forward and
actually shading inside each individual scale. One might wonder and
it's a valid question, why I didn't shade
this way and apply such dark lines to
the scales from the very beginning.
The reason is simple. When I first sketch the outline, I want to keep them
light and adjustable. At that stage, I'm not 100% certain that every
line is perfectly placed, and I might need to erase or
modify some of them later. By drawing them
lightly at first, without pressing too hard, I give myself the
flexibility to adjust, lighten or erase any lights
that don't feel quite right. This way, I can
refine the scales gradually before committing
to the final dark outlines. But if you are 100% sure and very confident with your drawing and you want to
do it in the first place, then it's up to you and do it if you feel like
you should do it. Now I'm going to start shading each scale individually
with precision. To avoid brushing
and ensure accuracy, I think it's better to start by working one scale at a time. I start with the scale
to the left of the eye. Observing it closely, I notice
that it's somewhat dark, so I shade it with
a four B pencil. This give me a medium dark base, which I can darken
fervor if needed. With my four B, I
establish the base layer and then add darker
elements on top. This is the approach I
will use for each scale. First, identify the dominant
value of the scale. Two, shade it accordingly. Three, had darker details
in specific areas, and four lighten
some spots if needed using a needed eraser
or the eraser pen. So now I'm using the needed eraser for slight lightening because
instead of the eraser pen, this midpoint eraser works
better for subtle adjustments, allowing me to gently type the surface without
making it too bright. And then I can add some
more details to make my scales even more realistic just by scribbling
with the pencil. Above the eye, the shading
is not extremely dark, but it's still a
noticeable graton. So I return with
my four B pencil to shade this area lightly. One common pattern in these scales is that the
corners tend to be darker. So I carefully add
these darker accents to my scales to enhance depth and definition of these
different elements. This scale, this one that
is very close to the eye, has a very light base. So I start by shading lightly. Then once it will be done, now I have something very light, but not white, and
that's very fine. I can add slightly
darker tones on top, keeping them moderately dark. And using my four B pencil, I will refine this
subtle texture to create a natural and
realistic effect. We will continue working on the scales in the upper section, following the same
step by step approach, carefully observing
and analyzing each scale before shading it. Drawing scales isn't
particularly difficult, unlike for textures, which
can be more complex. However, it is very time consuming and can
be very, very long. So before starting a
subject with scales, it's important to ask yourself, is this something I
really want to draw, and do I enjoy this
kind of detailed work? And if the answer is no, you may quickly
get discouraged as drawing skills require
patience and dedication. But if you're up for it, the result can be incredibly
rewarding because it's a very long process and it can give you a very good result. So that's why I think it can be a very rewarding thing to do. So back to the drawing now I am reaching the
snake's nostril area, which consists of three
concentric circles. The innermost and outermost
circles are very dark, and the middle circle
is slightly lighter. That's all there is to
shaping the nostril. It's not too complicated. I then continue shading
around the area, and the region
surrounding the nostril has slightly dark gray tone, and I apply the same
shading approach to the scale below it to
maintain consistency. Okay, for the next scales, I'll follow the same process, so I'm spinning up the
video a little bit. The lower part of the
drawing under the eye, we can see that all
the scales have roughly the same value
and similar shading. And so to speed up the
process a little bit, I'm using a slightly
different method. Instead of shading each
scale individually, I'm shading them all at once. I start by applying a very light base over
the entire section. Then I go back and
darken the lower part to create some contrast and to apply the right values
at the right place. This approach allows
me to work more efficiently and speed
up the shading process, making it easier to maintain a consistent look across all
the scales in this area. For the scales in this section, I initially applied a general
shading across the area. However, as I progress, I now need to work
more individually because not all scales have
the exact same shading. So I start shading
one scale at a time. In the first one, I noticed that the upper part
is quite dark, so I apply a shading
accordingly. With my slightly darker pencil, I can also lightly shade some of the other
surrounding scale, but my main focus remains
on the first one. Next, I define the dark
borders of the scales. These bold lines in the middle resemble
the large patches, which I carefully outline
and shade inside. Inside these patches, the
shading isn't uniform. Some areas are lighter, while other, especially
along the edges are darker. To create the right balance, I adjust the pressure on
my pencil pressing, sorry, harder or lighter as needed to achieve the
correct grade values. And I will continue this process for the over
scales in this area. And another detail
to note is that the edges of these dark patches
aren't perfectly smooth. There are many irregularities, so I make sure to include these inconsistencies
to give the scale a more natural and
realistic appearance. And
10. Drawing textures - Scales - The Snake part II: Since the process
remains the same, I will speed up the video
until the section is complete, allowing us to move on to a different area with a
slightly different technique. Now, let's get started
with the tongue. So at first, before
shading the tongue, I am shading this very thin
area just right there, which is actually the mouth and the small things that
we can see about the mouth. It's pretty dark but not as dark as some
other elements might be. So I am with my 12 B pencil and I don't press too
hard. On my pencil. So for this tongue, we can see that there are
some very different value on the entire tongue. It's pretty light
at the beginning, and as we progress
until the curve, it gets darker and darker. So at first, I apply with the 12 B being pretty light
on my pencil strokes. And when I approach this area, I start to press a little
bit more firmly on my pencil to get something
a little bit darker. What we can also notice
with this tongue is that the edges are
particularly dark, so I press very hard
with my pencil to make sure that it is as dark
as what I want to be. One thing we can notice
is that there is a very light highlight
made of pure white. So as we want to draw and
shade the background, well, our highlight won't be as
noticeable as this one, but still you will
see that we'll be able to complete
something and make it noticeable just by adding
some gray all around it. And so for this area
with the curve, I darken it even harder. And in this light area at
the beginning of the tongue, it's pretty light, but still there are some dark elements. So I had them with a few lines, a few dark lines in this area. And finally, the side of my
tongue is also pretty dark. So I try to work with
the tip, and this way, I make sure I am accurate, not like before because I
needed to erase a few elements. By the way, the electrical
eraser was pretty good because these elements
that weren't accurate, I had to erase them, and they were pretty dark. So with the electrical eraser, it allowed me to erase
them even better. And I can also erase the small highlights that we have at the beginning
of the tongue. Now let's get back to working
on the scales themselves, focusing on the lower area
just below the mouth opening. For these scales, I will
use the same method as earlier shading
multiple scales at once, since they share a lot of
regularity and common traits. I start by reinforcing the edges of the
scales with my pencil. One thing to notice is that the outlines of these
scales are much lighter compared to the darker contours we worked on earlier
for the head scales. To match this, I adjust my pencil pressure to
keep the outline softer. However, the middle
line that runs through the scale needs
to be much darker, so I adapt my
shading accordingly. Even though these scales are
lighter overall, some area, especially the beginning
of each scale of each of these line contain
dark elements. So I go over this dark
section, this section, sorry, again, to enhance the contrast
where it's necessary. So I apply this technique
scale by scale, making sure not to rush
and overwhelm the drawing. Technically, I could shade
the entire snake at once, but I don't recommend
this approach. So that's why we will focus on this small area of
the mouth opening. And this is why I, um I don't like to work on a large section
all at once because first, you can't get lost
in all the details. It can be very overwhelming
to work on this entire area. Secondly, you could
feel discouraged as large area take much
longer to show progress, and it can be hard and you
can struggle to measure your improvement because you are working on a very big area, so it makes it harder
to stay motivated. So that's why I prefer that we focus on this
small area first. Now that the structure
is in place, I can shade all the
scales at once. You could see that I began
with a very light base for the upper part and then
gradually darken the lower area near the mouth using
a four B pencil and a depth and
dimension to this snake. Sorry, I didn't mean
near the mouth, but near this dark line. While talking, you
may have noticed that I blended these
different elements together as I wanted
a smooth base in some areas before
adding finer details. I also use my kneaded eraser
to soften certain strokes, especially where I wanted the shading to be lighter
and more delicate. With my darker pencil, I now we rework, sorry, the edge of the mouth, since this area needs to
be a bit darker. This will help to make the mouth stand out amid all
the surrounding details. On the lower section, I also had some darker
elements where necessary, as there are some naturally
deeper shadows in this part. I make sure to observe
carefully before shading. Don't just apply
shadows at random. Every time I shade an element, I first analyze my
reference photograph to notice to notice the
small variations in tone. Only after the short
observation phase, do I start shading
according of course, you don't see this
part of the process since I'm not just sitting
at my desk thinking, but this observation, step by step is essential for accuracy. Regarding the mouth, we had already shaded it earlier
to make it darker, but I have now added an
even deeper shadow on top. There was a small and
well defined line that was very visible and
deserves special attention. So I made sure to emphasize
it in the drawing. And finally, now that almost all the elements in
this area are in place, I can add some darker
details where needed. Looking closely, I noticed that some scales contained
very dark spots. So I use a 12 B pencil with strong pressure to
enhance these shadows. I also found that the upper area lacked some contrast
in certain spots, so I added a few more
dark elements there as well to balance the
shading and make the texture stand
out effectively. Now, let's work on the smaller
scales covering the body. Just like with the
lower section, instead of shading each
scale individually, I will work in small groups. This method allows for better efficiency and
consistency across the drawing. I start by refining the
edges of the scales. As mentioned earlier, I like to outline lightly at
first and precisely, then go over them again to
adjust the overall value, ensuring the contours
are dark enough. Next, I will apply a light base layer
over multiple scales. Since these scales
are in the light, they appear much brighter
than the surrounding ones. However, they aren't pure white, so I will use an
HB pencil to add a soft gray tone before working
on more detailed shading. And so as you understood, I'm going to work on these
very light scales that you see just before the
dark and black ones. You know, they form
some kind of curve. With the base done, I
move to darker shading. Using a four B pencil, I identify specific scales
that need deeper tones. For example, I noticed that one particular scale isn't as light as the surrounding one. After checking my reference, I confirmed that it should
be slightly darker, so I begin shading
it with the four B. Now I can start redefining
the scales contour. Observing carefully, I notice a common pattern
within this scale. The lower part of almost each scale in this
area tends to be darker. The left side also
often appears darker, though this varies per scale. Not every scale follows
the exact rule, so I continue analyzing
each one individually. Near these dark outlines, there's often a soft transition, so I likely blend an
additional layer of shading to enhance the depth and realism of these
different scales. And I'll continue the
same shading process across the rest of
the slide area, so I'm speeding up the video
from this point onward. Some scales have a very
dark area among them, but not all of them. So I really take my
time before shading. I double check each scale
to ensure I am applying the correct values and maintaining overall
consistency in the drawing. Now I am moving on to the area with the
extremely dark scales. The first step is
careful observation. I take a moment to determine how far these dark
scales extend. Before shading, I
mentally map out their boundaries to ensure I
am placing them correctly. If I happen to darken an extra scale, it's
not a big deal. It won't ruin the drawing. What's most important here is understanding the shadows and highlights within
these dark scales. Even though they appear black, they aren't completely
black everywhere. Some areas have very bright
reflection which are essential for creating realism
and three dimensionality. Additionally, some highlights
are quite pronounced helping to emphasize the shape
and texture of the scales. To approach this, this
is what I like to do. First, I outline the scales
that need to be the darkest. This ensures clarity
and prevents miscade. So you can see that I have
drawn all the outlines of the different scales that
are very and secondly, I mark the brightest areas
first because this gives me more control and helps preserve the necessary highlights before
adding the dark shading. It's similar to the
approach I use when shading around the eye earlier
in this tutorial. And I like this method because it ensures
that the contrast and lighting within
these dark scales are accurately captured, making the drawing look more realistic and three dimensional. And if some areas need to be brightened a little
bit more, well, what I can do is to use my eraser pen to make
it even more brighter. Once you gain confidence, you won't always need to
start with the light areas, and I don't always do it myself. However, in the beginning, it can be helpful to ensure everything
is placed correctly and to maintain good control over the eyelights and shadows. And so I'm going to do
this for this entire area with the black
scale so we'll see you again in a few moments. Now I will work on the
remaining scales on the left, following the same
approach as before. At this stage, the rest
is just a formality, so I will move at a
slightly faster pace. I first reinforce
the dark edges of the scales as I notice that most of them have
pronounced borders. Then I can shade
multiple scales at once, working in sections
rather than one by one. I start with the lower area, which has a moderate
level of shading. When shading scales, I look for connected areas with
similar shading patterns. Here, the values
are fairly uniform, so I work on all of these
scales at the same time. Once the base shading is set, I refine the details
like we did before, darken the edges of the scales
as most have dark borders, and then a small and
scribbled details within each scale
for better texture. At times, just like right now, I noticed that my
initial outline of the scales wasn't
perfectly precise. While small mistakes
aren't a big deal, if I see an error
that's easy to correct, I take the time to fix it
just as I'm doing now. Small adjustments like this always help enhance
the final results. With some final touch up, particularly around the edges, there isn't much more left to do on these remaining scales. And finally, we will work
on the upper section where we can see some
particularly beautiful scale. Some of them appear
slightly black or darker in certain areas. So I take the time to
identify and mark them, making sure to highlight
the contrast between these dark elements and the
lighter details nearby. At this point, the snake
has fully taken shape, and we can see that even if some scales are in
place 100% accurately, the overall result is still coherent consistent
and visually correct. So that means that the technique
was applied effectively. This same approach could be used for any over scale animal, whether it's a turtle, lizard, chameleon, crocodile, or
any similar creature. The process remains the same. Working groups of scale
whenever it is possible. For complex areas like the
one around the eyes of the snake then shade
each scale individually. Start with a base
layer and then refine the contours and textures by adding darker elements
where necessary. And most importantly,
preserve and enhance the highlights as they
help the detail stand out. So I hope this snake drawing
tutorial has been helpful. Drawing skills isn't
necessarily difficult, but it requires patience
and a strong mindset to achieve satisfying
final result. So I hope my tutorial
was helpful for you, but if you feel that some
techniques could help you more and that if you like a few things
about my tutorials, but want to use some other
techniques for the rest of it, then feel free to use it. The best technique is the one that you feel most
comfortable with. So this will marks the end of this tutorial, and
in just a moment, I will reveal the final
result of this snake drawing. Go And so this is the final result
of this drawing.
11. Drawing textures - Wool - The Sheep part I: In this video, we are
going to see how to draw the wool texture with the
drawing of the sheep, and wool texture is a very interesting exercise because the wool
is not very easy. You can easily get confused and get lost because there are so many small elements that are very similar to one another. And we are going to
see how to be able to create this wood
texture without having to draw every
single little detail and without getting lost. So let's do it right now, and let's draw this
sheet together. Let's get started on a new texture study this
time working with wool. For the sheep drawing, as usual, you have access
to the printable outline, so you can focus
entirely on creating the wool texture without spending time on
the initial sketch. I'm working on a
small format AFive, which is something
15 by 20 centimeter, which is enough to render the wool texture without
taking too long. The first step is to
work on the inner lines and identify the wool clusters
that stand out the most. For example, around the neck, I notice a few distinct lines, so I had them in. The goal isn't to draw every
single strand of wool, but to include enough to create reference points before shading the texture in more detail. After adding a few lines
to the snake area, I observe where the
most prominent ones are and mark them accordingly. Similarly, I see overlines extending towards
the lower parts, so I will have them as well. These are generally
dark lines that I can emphasize to
create structure. Once these key
elements are in place, I can start shading and build the wood
texture between them. But first, we are going to
do this on the entire body. Let's continue with
the lower part. In this section, I notice a large slightly darker
area that stands out well. Since it's part of the wool
texture, I will mark it. But before that, I had a few overlines on the
sides that I had missed. It's better to include
them now before I forget. Now back to this fig area I mentioned earlier,
I had it in. On the sides, right there, there's also a
defining line that separates the neck from
the rest of the body. This will be emphasized with
a lighter shading technique. I also notice a few
additional lines on the side that I include. Around the legs, there will
be pronounced shadow area, so I mark those as well. Beyond this, I don't think there will be many more
details to add, since the hind
quarters and belly of the ship will be less defined
and slightly blurred. This part will also be lighter, so it won't require as much
wall texture detailing. That should be all for
the initial markings, and now we can move on
to shading this sp. This time, instead of
starting with the head, Aldrm straight into working
on the wood texture. Around the neck, there is a very dark area
that I can shade with my 12 B pencil or 14
B will be fine as well, applying heavy
pressure to define the strong shadow that separates
the neck from the head. Next, I shade the rest of this section with
the 12 B as well, but with a much lighter touch. Over this base, I
start adding small, slightly irregular
and curved lines, almost like scribbles
or jag strokes. These wavy, broken
or rounded lines are enough to create the
impression of wood texture. And to finish this section, I will also add some
lighter touches, placing small highlights
by making subtle dots and marks in certain
areas with my eraser pen. I'm going to do this right now. And this combination
of three values, the 12 B with soft pressure, the 12 B with heavy
pressure for darker lines, and the small lighter marks, along with the chaotic natural
direction of the lines effectively recreates the
wooly texture in this area. Moving upward, I notice some very dark lines
that stand out. Again, these lines follow a slightly random
scattered direction which I try to replicate to
enhance the wool texture. I mark one particularly
prominent line before continuing to
add more details. Next to this dark line, I will work with a
much lighter shading to create contrast and
make it stand out. I continue with
irregular strokes using small scribbles to emphasize
the wools even texture. If you observe closely, the patterns in wool
are highly irregular, going in all direction, and that's what I
aim to capture. Over this to base, I will repeat the same process, but with a slightly
darker pencil, layering more random strokes. Between the first area
I shaded and this one, I will have a fairly
dark gradient and then overlay with more dark
lines to blend the texture. I also use an eraser pen to introduce some
lighter highlights, helping to create some depth. From here, I can continue
working on the area above. This section contains a lot of distinct overlapping lines. So I try to replicate them. I revisit some of the
earlier markings, pressing harder on the pencil
to make them stand out. This interplay
between shadow and light is essential for
creating volume in the wool. The key is to let go a bit, embracing irregular
and sketchy strokes, drawing as if your hand is slightly trembling
while making these lines helps achieve the natural randomness
of wool fibers. Now that I have marked
all these lines, I can start shading the
area more precisely. The lower part as well as
the side appears darker, so I begin by applying a base layer using
an eight B pencil. Moving to the right
and slightly higher, the shading is
noticeably lighter. To adjust for this, I switch to a softer pencil with
a lighter touch, ensuring a smooth gradient. This help establish a solid
base for the entire section. Oh Now that the base is set, I go back in with a darker pencil to refine
the irregular wool texture, and I had small scattered
dark strokes over the lighter areas I previously
shade with the four B. This layering process
reinforces depth and volume. Next, I will repeat the
process with an as a pen, bringing out some highlights to make certain wood
clusters stand out. The back and forth between
dark and light details is what really helps create the illusion of fluffy, voluminous wool. It may seem repetitive. But patience is key when
working on this ship's wool. The technique I am
applying here will be used across most of its texture so consistency and layering are essential for achieving
a realistic effect. Um For this lower section, I will follow the same process. I begin by drawing
very dark lines, ensuring they remain irregular to maintain the
natural wool texture. Once these lines are in place, I can work on the
spaces between them. To do this, I start with
a light base shading the area gently before adding
darker details on top. I find it easier to
begin with a light layer first and then build up the
darker elements afterwards. This layering approach
helps maintain better control over
depth and contrast. While shading, I
make sure to use the side of the pencil
lead rather than the tip. This techniques makes blending
easier and results in a smoother transition when I apply additional
shading over it. Overall, this method, I think, gives a more natural and
cosive texture to the wool. Between these two areas, I now add small and
darker elements using short and scattered
pencil strokes, still keeping that slightly
scribbled irregular look. I observe my reference
photograph to gouge the density of
these darker marks, ensuring they are placed
naturally and not too uniform. As I work, I notice that after
shading the lower section, the upper area I initially shade now appears too
light in comparison. To maintain balance,
I go back and add darker darker and add
some darker elements, sorry, adding a
few more shadow to reinforce depth and cohesion
in the wall texture. This constant
adjustment helps keep the shading harmonious
and realistic. Now that the texture of the entire area is
shaping up well, I will move on to shading the upper part of the
shape with a light touch. I also erase the outline, itself its purpose, but I don't want a straight
visible contour. Since the shading I am about to apply is lighter
than the outline, I don't want the line
to stand out at all. I softly shade this rare
section of the head, keeping it light
and subtle, sorry. Over this vase, I will
have some darker elements, maintaining the wool's texture. However, because this area
is naturally lighter, the dark strokes I had
here are also softer. I apply much less pressure on the pencil and use a lighter grade lead to
maintain a balanced contrast. Finally, to refine
the wool texture, I go back to this area I go
back in with the eraser pen, working between the
darker areas to bring out highlights and enhance
the natural look of the fur. With that, the texture of the sheep's neck area
should be complete. Now, let's move on
to the lower area. This large section of the chest or whatever we might
call it for a shape, I'm more of a drawing specialist
than an anatomy expert. In this part, I have slightly sped up the process,
but don't worry. I will still guide you
through it step by step. I have sped up because
it's basically the same thing that we have
done with the upper part, even though it's a
little bit bigger. So the technique here
is the same as before. But since this area is larger, we'll need to approach
it with patience. So I begin by marking
the dark lines that define the wool
texture in this section. Looking at my
reference photograph, I identify the most
significant markings. There's one particularly dark and curved line in the middle, which I've already drawn. From this line, many
others extend outward. Below it, there are
additional irregular lines. They follow a general direction, but there is still
some randomness. I mark the most prominent ones first before shading
the entire area. Since these lines
are quite dark, I know I can shade over them
without losing visibility. Starting with these
guidelines help me structure the area before moving
on to broader shading. For this section,
I'm going to use an AB pencil to shade as
it's relatively dark. However, I don't press too hard. I want to keep some control
over the shading without making the entire area too dark. I leave some flexibility
adjusting as needed. I carefully observe where the
AB is the most applicable, using it primarily on
the darker regions. I continue shading with
the side of the pencil, which helps blend the
strokes smoothly. Yes, working with wool texture is time consuming
and repetitive, as I mentioned before. However, I find it satisfying
because despite the effort, we can gradually see
the texture forming. What might initially seem like
a complex texture becomes manageable when we carefully analyze the interplay
of light and shadow. By maintaining consistency
from start to finish, we can create a drawing that gives the illusion of real wood, almost making the
animal feel tangible. So even though it's
a long process, it's worth sticking with it, keeping the same careful
approach throughout. So let's continue, and
we are going to make it. We're going to create
a great shape. Now I will work
between these lines, adding more texture with slightly darker scribbles than the shading I applied earlier. I will also use my eraso pen to enhance the lighter areas. Making certain wool
highlights stand out. A key step here is erasing the control
line on the side soil. I will also do that just like
we did for the upper part. Since we don't want
a visible outline, the goal is to create a natural
wool texture that blends seamlessly both on the edges and across the rest of the body. On the left side, it is also important to leave
a lighter band to help visually separate the neck from the body and create depth. This sold contrast ensures that the different parts of the
ship's forms are well defined, but I won't leave this
light area just like this, I will also add a little bit of the shading because
even though it's light, it's not as light as
the white of the paper, so I will darken
it a little bit. Finally, along the
edges of the legs, you can notice that they
are particularly dark area. These need to be carefully shaded because they will enhance the definition of the legs and emphasize how the
wool overlaps them. In the reference photograph, there's a clear
difference in volume between the legs and
the surrounding wool. This depth is achieved
entirely shading, so paying close attention
to this transition is crucial to getting a
realistic sense of form. And as I mentioned
earlier, around this lake, there will be very dark
elements that will help create the illusion of volume in the word that overlaps it.
12. Drawing textures - Wool - The Sheep part II: Now that this area on
the left is finished, we're going to work on
this one on the right, this big area of the belly. So the first thing I do is
that I'm going to try to shade everything quite accurately
with my four B pencil. I'm going to look for the
areas where the four B might be appropriate and might be the best choice for the shading. So here and there, I can go with the four B, and with this line also that goes into this very light area. Underneath this area, there is this one that is much darker, so I adapt and switch
to a darker pencil to shade this one because we can see that the shadow
is more pronounced. Also in this first
area I shaded, I notice a few small
sections small regions where I can shade with this
darker pencil as well, and it helps to create a better transition
between those elements. What I can also do is erase those control
line because, well, the shading I will apply will
be much lighter than this, so I don't want it
to be noticeable, just like I did with
the rest of the body. And in this area that
is very, very light. I can shade using my HB
pencil, and this way, I have a nice and light shading. Now that I have done this, I can go back to
working into details. For instance, in this area, I am adding more lines that are irregular to make
a better transition between this area
we worked on before and this one we are
working on at the moment. So I can see that some
lines are going upward, some are more horizontal. So I adapt from what I see
on my reference photograph. And this way, I will
have a nice result and a nice transition between these two big areas
that we work on. Now I'm going back
over this light area because even though I had
worked on it with an HB pencil, there are still some
slightly darker elements that need to be added
here and there. This will help enhance
the texture as well. That, what we can notice
about this light area as well as the entire section that seems a bit further away, is that the texture and details appear less defined, less sharp. This means I'll need to spend less time working on the
texture in this part. On the background of the ship, there's a slightly darker area, which I make sure to
emphasize properly. This shading also extends
to the upper part of the body to the upper
part of the body, sorry. On the lower part, I also add
a few more darker elements, enhancing the texture to
make it stand out well. Bit by bit, this
section of the body is really starting to take
shape and come to life. Now what I think is missing is the final touch that I will add after and I
will tell you about. Before that, and
before I forget, I need to work on the
area near the lake. This part as a strongly
defined volume, which is emphasized by the darker elements I
am adding right now. Similarly, in the light areas, there are also some
slightly darker elements. So I make sure to
mark those as well. With that, everything is
coming together nicely. Now just a few final
light details to add this final touch I told
you about, and we'll be done. These final details,
I can add them with my pencil eraser, and this will look
very good to create a nice wool texture
in this area. And so in the end, even though
this was a larger section, it took less time to work the texture of this area
because it appears less detail, as I mentioned earlier. And don't forget to work on this area to separate the
leg from the body and to have this highlight that is very light and helps to create
volume with the leg. Let's work on the head now. As usual, I like to
start with the eyes, but this time, I won't fully complete the eye right
away. You will see why. I begin by marking the
darkest elements of the eye. We can see that the iris
inside the eye is very dark, blending seamlessly
with the pupil. In this case, the two are indistinguishable
in the dark area, especially since this part of the head is also in the shadow. So I worked on
this dark element, but I have stopped
there for now, and I will continue marking
the other dark areas nearby. Since the eye is not very complex or time
consuming to draw, I've decided to first establish all the dark elements in
the area of the head. This approach will give me reference points for
the rest of the head. Head has quite a few
different shaded areas, and it's essential to
work on them carefully. Having so many different
shadowed section can make it challenging
to navigate. So I make sure to clearly
define these dark areas first. So what are the
darkest elements? The shadow under the ear, as I mentioned, the
edge of the muzzle, which is also very dark, and the line of the mouth, which stand out significantly. I have now marked these key areas and moved on to something
slightly lighter, switching to an eight B pencil. With this, I can
extend the shadow. I started below the eye, which gradually lightens as
it moves towards the left. That's why eight B seemed
like the right choice. Another dark element is the shadowed area in the
central part of the head, specifically in the
upper central section. I had this shading
with an eight B pencil drawing a line to establish the shadow and
then extending it, connecting it with the nearby
dark area close to the eye. By shading these
key elements first, the face become easier
to work on since I now have clearer
reference points. This will help me
accurately to accurately place the different shadow
areas across the sheep's face. And, I continue applying the shading in this area. At this point, I think I've marked everything that seemed appropriate using the eight B. Now I switched to a four B
to define the lower area, which is noticeably lighter. It looks pretty good so far. We'll see if any adjustments
are needed later. With the four B, I shade
this area and start thinking about other spots
where it might be useful. Maybe I'll apply a bit here, although it feel like it needs something darker but still
lighter than eight B. So I use a six B to work between these
different shadow area. As always, I make
sure to work with the side of my pencil
for an optimal result. I also look for other areas
where the six B might be appropriate perhaps
around the ear and a bit more in this section. But overall, I think that's
enough for the six B. And on the side, some
areas are quite light. So I'm going to switch
to another pencil, and to begin, I will apply an HB base layer
in this section. Later, I will have some
darker elements over it, but for now, it seems
like a good foundation. And now back to the eye. What I notice is that
on the side of the eye, the shading is quite dark, almost blending into the iris. As we move to the right,
it gradually gets lighter, so I adjust my pencil
stroke accordingly. On the upper part of the eye, there is a strong
dark line which I mark using my four B
applying heavy pressure. Then I work between these
elements using a lighter shade. Um, Finally, I tried to mark a few eyelashes
that can be seen on the ship using very fine lines. However, they are
not very prominent, so I won't overdo it. It already looks good enough. Now that all my shading
is roughly in place, I realize that the lower
area isn't dark enough. I suspected this when
I first apply it, so I go over it again using eight B to
deepen the shadows. Lastly, I also shade the ear, which I had forgotten, and I start with a four B base, which I will refine
further in the next step. Now I'm going to try
to add more detail to the rest of the head area,
enhancing the texture. On this part of the head, the wool effect is less pronounced and it looks
more like short fur, so I'll work with small
lines to create that effect. I am now using a
ten B pencil to get a slightly lighter
shade compared to the line on the left side,
the line of the mouth. From this line, I have
added a few dark marks. Right next to the mouth, there's also a darkened area, so I work on that with
the ten just as I do along the line that separates
the neck from the head. This line contains
many dark elements, especially in this corner where the shading
is quite intense. Ultimately, the sheep's
head is quite dark, just as it appears in the
reference photograph. So for the shading
to be accurate, you need to make sure the tones are just as deep and rich. In the middle section, I notice some darker elements, so I had those as well. I then switch to a six B
pencil for shading the rest of the area since I need a
lighter touch in some section. This is the approach I will
use for the entire head area. And I'm analyzing the different sections
and asking myself, does this area
need more texture? Should I add small details on top of this first shading did, in most cases, dark
elements dominate and there aren't many highlights in this part of the drawing. So this is kind of
the second phase of my shading process, adding small details
while also creating a realistic texture that effectively represents
the sheep's head. Finally, to complete
the work on the head, I have taken my
eraser pen and will add small lighter touches throughout the
texture of the head. This will help create a bit
more volume as there are a few slightly brighter marks that contribute to the depth. Now, the only thing left
once this is done will be to work on the sheep's
hair, here, sorry. This hair is not too
complicated to shade. There is a fairly dark
mark on the side, so I think I can start working
on it with a six B pencil. After that, I will add a few scribbled details inside the ear to complete the texture. And once this is done, the head will be finished, and we can move on to the final section of the
drawing, the sheep's legs. Let's move on to our final step, working on the legs. I'll demonstrate the process
on one leg and for the rest, we'll meet again once it's done, as the approach will be quite
similar for the overlays. I started about lightly
shading with shading, sorry, with a 12 B pencil to
create a base layer that is still quite dark since the
lay are mostly in the shadow. The 12 B seems like the
right choice for this. Next, I shade the upper part, focusing on the darker elements. There's a very dark shadowed
area that I can as well as a slightly darker line on the side of the leg
that I can also mark. To enhance the texture, I had a few dark lines as I
reach the middle of the leg around what appears
to be the joint, and I noticed that this
area becomes much darker. So I apply more pressure with my 12 B pencil to emphasize
this deep shadow, and I try to identify the
darkest areas precisely. For example, I see a large dark spot in the
middle, so I had it. Similarly, around the hooves, there are very dark sections
which I also include. Finally, in the center of
the leg near the joint, I notice some slightly
lighter elements, so I make sure to let
them pretty light. There's no need to
overwork this lay. The results already
look satisfying. I will now finish the remaining lay using
the same approach, and in a few moments, I will share with you
the final result. So this is the final
result, and as you can see, I have added some grass around the legs to make my results
look more realistic.
 Tristan, Teacher and Artist