Transcripts
1. Intro - The Mini Ice Cream Cone: [MUSIC] Did you see a
lot of crocheted items passing on your feed
these days and you're, " It's so cute. I would like to be able
to make one." Guess what? In less than an hour, you'll make your first
Amigurumi with me. Hi, I'm Emilie Bolduc, a French-Canadian
crochet designer and I'm the one who's behind
Crochetmilie's brand. I crochet since I'm eight
years old and I have an Etsy shop full of fun and modern crochet patterns to make. It's a pleasure for me
today to show you how to make this cute
ice cream cone. In this class, not only will you be able to
make this either, but you will learn
essential techniques that will help you to crochet
other fun projects. You will learn how to crochet in rounds using the
single crochet stitch. How to change colors, how to create textures, and how to add garments. In no time you'll be proud
of your new skill and your only regret will be
that you just can't eat it. Are you ready? Let's
start crocheting.
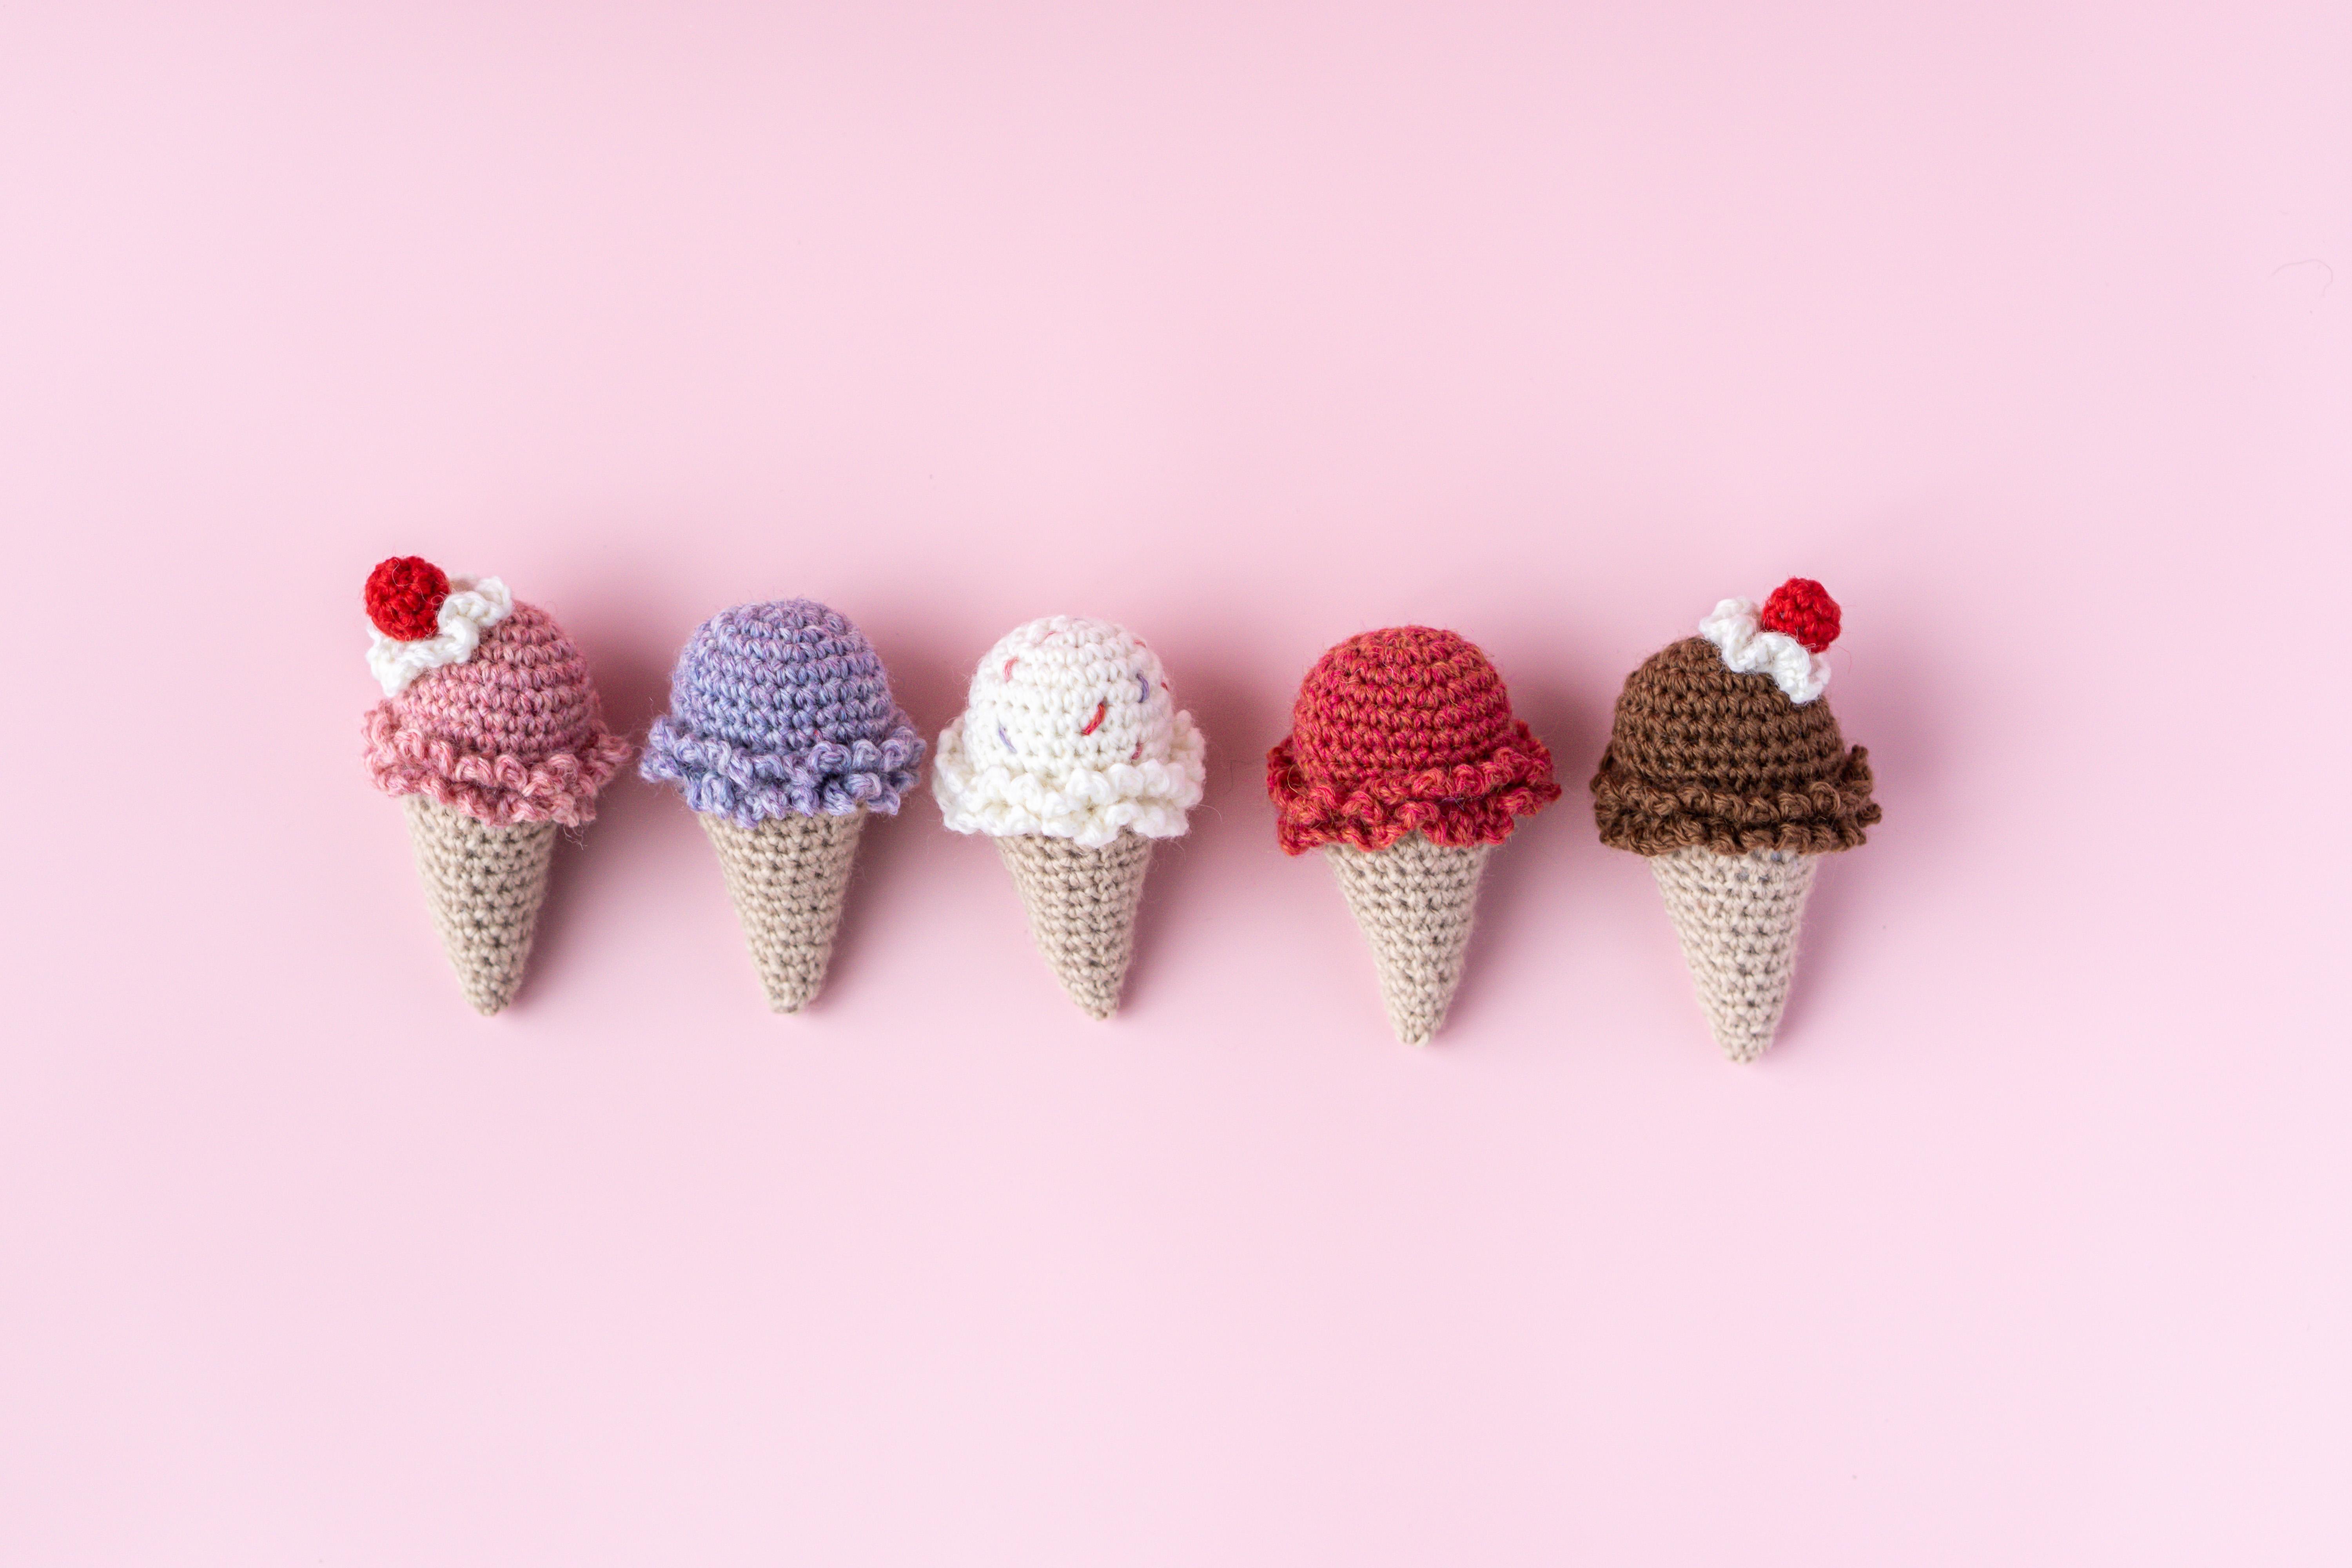
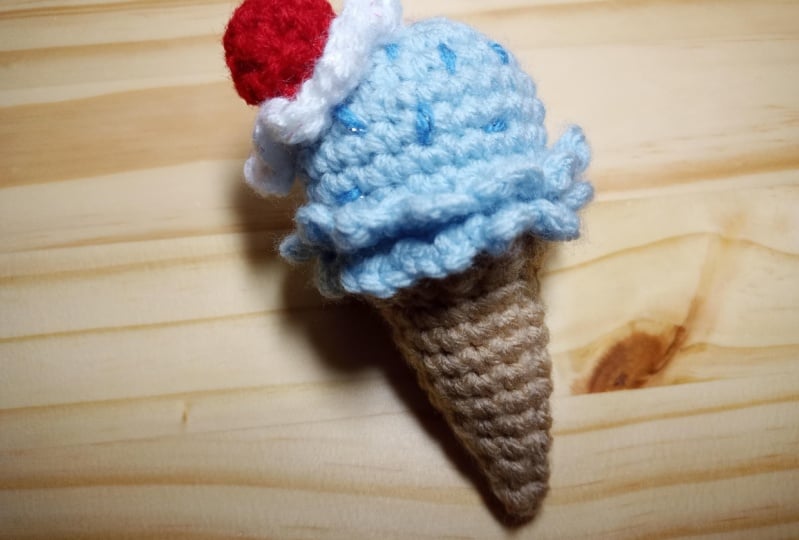
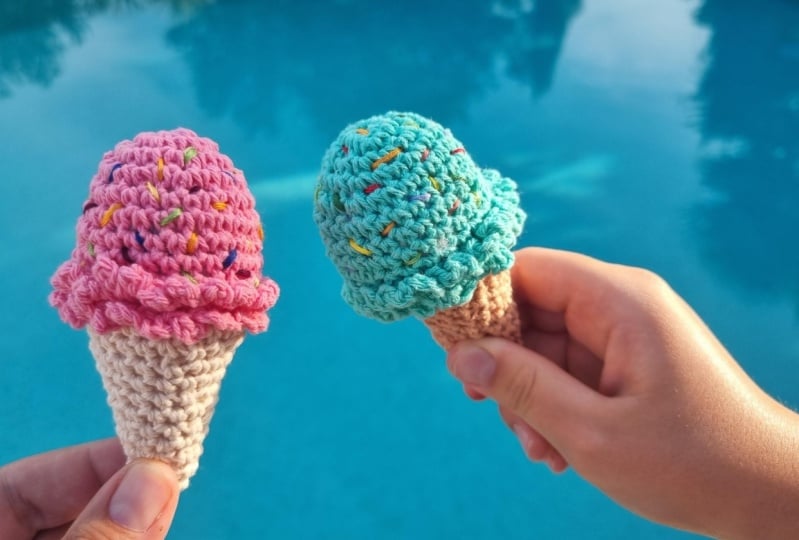
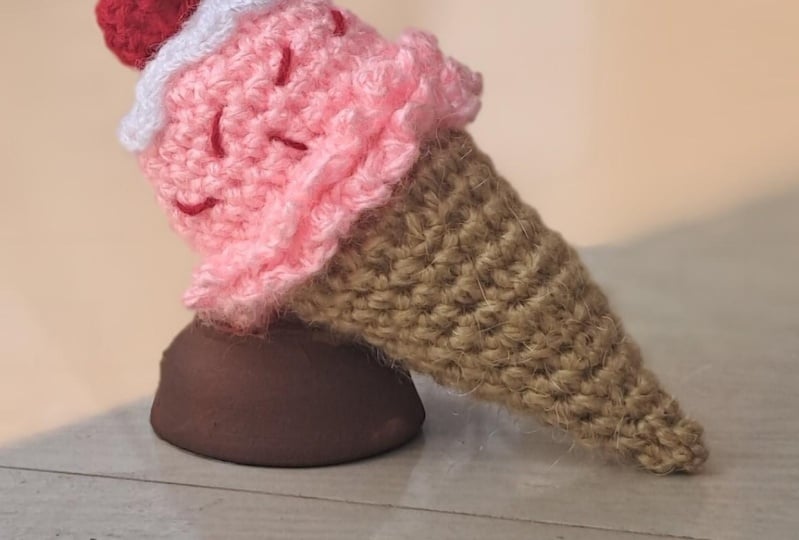
2. Project Intro: [MUSIC] In this class, we will crochet this cute
ice cream cone. You will have the option
to put some sparkles, or a little cherry on top. You will learn how to crochet in rounds using the
single crochet stitch, how to join color, how to create textures, and how to add some garnishes. I can't wait to see
your project done. Don't forget to
share the pictures with me in the project
gallery below. Let's now take a look into
the materials you will need and which stitches
that will be used.
3. Material & Stitches: You will need a
2.75-millimetre hook. A little bit of
sportweight yarn, I used a wool of
Andes from nitpicks, but for real, you can
use any yarn you want. If you take a thicker one, like the worsted weight yarn, you can use a bigger
hook too like a 3.5 or a four-millimetre hook. Your ice cream cone will
just be a little bit bigger. You will also need scissors, a yarn needle, a stitch marker,
and polyester stuffing. If you would like
to grab the hook I used the clever one, I put the link in the
description below. Let's now see which stitches that will be used
in that pattern. We will do chains, single crochet, and slip stitch. If you're unfamiliar
with these terms, I will explain them in this tutorial but if
you need more help, you can look into my complete crochet course
to learn the basics. I also put this link in
the description below. Let's now start to crochet. See you in the next video.
4. Ice Cream - Rnd 1 to 4: [MUSIC] To make the exact
ice cream cone I did, you can use the 2.75 millimeter and
the sport weight yarn. But for this video to be
easier to see what I'm doing, I will use a 3.5 millimeter
width worsted weight yarn, so the ice cream cone will
be a little bit larger. You can do the same
if you prefer to. We're going to start
by making a slipknot. It's like making a knot
but never finishing it. You hold the two threads and
you tight it, I'll repeat. [MUSIC] You put your hook inside the loop and
close the knot on it. Not too tight, just enough that your hook slide
really well into it. With your other hand, you will turn the yarn around
your little finger and over your index and with your middle
finger and your thumb, you will hold the knot. I repeat it again, around your little
finger and above your index and with your
middle one and your thumb, you hold what you're doing. First, move yarn over
in front of you. Take the yarn and pass
it through the loop. You just made a chain. You can see that your index
can control the tension. You can do another chain. We're going to start
the first round. We're going to make
a single crochet into the second chain
from your hook. You hold the thread
with your finger, you pass into the
chain yarn over, pass through the chain, hold your two loops on the hook, yarn over, pass through
these two loops. This is a single crochet. I'm going to make another
one in the same chain. You pass into the
same hole, yarn over, pass through the chain, yarn over, pass through
two loops on your hook. So you've just made two
single crochets so far. You're going to repeat this four more times into the same hole, the same chain, for a total of six single
crochet in this round. [MUSIC] At the end you can count if you really have
six single question made; 4, 5, and 6, this is the first one. You will start your round two
into this single crochet. You can enter your
hook into both loops. You see the little braid. You can grab these
two loops like this. It's a little bit hard
at the beginning, but it's going to be easier. Yarn over, pass
through the stitch, yarn over, pass through
two loops on the hook. You can grab your
stitch marker and you're going to place it on to this single crochet so you will know that this is your
first stitch of around two. You can pull in the
beginning thread just to tight the ring a little
bit and continue. With round two, you're
going to do an increase. That means two
stitches into one. You're going to make
a single crochet in the same stitch as your first
one you made like this. In every other stitches, you're going to do
the same thing. You're going to do two
single crochet in each of next stitches for a total of 12 single crochet
made in round two. [MUSIC] At the end you can count
if you really have 12 stitches made in this round. We're going to start Round 3. You can remove your
stitch marker, and then you're going to do a single crochet
in this stitch. You can place your
stitch marker back on it [MUSIC] and you're going to do another single crochet in that same stitch,
another increase. Next stitch, you're going to
do one single crochet only. [MUSIC] Do a single
crochet in next stitch. [MUSIC] One single crochet in next one and you're going to repeat this
pattern all around. [MUSIC] Make sure that
you have a total of 18 stitches in this round. [MUSIC] Round 4, you can
remove the stitch marker. You're going to do a single
crochet in the first stitch, this one, place your
stitch marker back on it. [MUSIC] Make another
single crochet in this same stitch
and you're going to do a single crochet only
in two next stitches. One and two. Two single crochets
in next stitch, and one single crochet
in next two stitches. You can repeat this
pattern all around for a total of 24 stitches
in this round. [MUSIC] Make sure again
you have 24 stitches made and we'll continue
with Round 5. [MUSIC]
5. Ice Cream - Rnd 5 to 12: [MUSIC] Round 5, remove
this stitch marker. You're going to do a single
crochet in this stitch. Place your stitch
marker back on it. You're going to do
another single crochet in the same stitch and single crochet in
next seven stitches. Two single crochet
in next stitch and single crochet in next seven stitches and
repeat that one more time. Make sure you have a total of
27 stitches in this round. Round 6, 7, and 8, you will do
the same thing. A single crochet in
every next digits. You can always put your
stitch marker back on the first one of each round to remember
where to start and finish. We're going to count
the rounds together. It's the first one,
second, third, fourth, fifth, [LAUGHTER] sixth, seventh, and eighth round. Round 9, we're going to start to decrease by doing a
single crochet together. The invisible way I will
show you right now, you're going to go into the front loop of
next two stitches. We're going to transform
two stitches into one, yarn over, pass through both loops, yarn over, pass through
two loops and the hook. Put the stitch marker
on the stitch you just made and you're going to do a single crochet in
next seven stitches. You'll repeat this
pattern two more times. I will show you how to
do a decrease again. You pass into two
next front loops like this and you are making a single crochet
in next seven stitches. You should have 24
stitches made in round 9. Round 10, you can remove the stitch marker
and just place it back on the same stitch but just to the back loop
of it like this. For round 10, it's going to
be a little bit different. You're going to do four
chains and you're going to make a slip stitch into the front loop
of the next stitch. Yarn over, pull through this stitch and the
loop on your hook. This is a slip stitch. You're going to continue making the same pattern you
are doing four chains, slip stitch into front
loop of next stitch. You can use your other hand to just help you making
this slip stitch. Four chains, slip stitch
in next front loop. It's going to make the
texture of the ice cream. You will have at the
end 24 little bumps. The last one will
be in this stitch. Make your final slip stitch
and that's it for round 10. For round 11, we're
going to work on the back loop we
skipped of round 9. You're going to
enter your hook into this back loop and you're
going to do a single crochet, put your stitch marker back
into the back loop again of this stitch and you
will continue to make a single crochet into
every back loop around 9. You should have a total of 24 single crochet
made in this round. The last one is a
little bit hard to see but you see this
little thread here, that's where the last
single crochet will be. Round 11, we're going
to repeat round 9. You're going to do four
chains and you're going to make a slip stitch into the front loop
of the next one. Make four chains. Slip stitch in front
loop only of next stitch and repeat that all around to
have 24 little bump again. When you will make the last one, bring your beige
yarn near of you. The last slip stitch
you're going to just enter into the front loop and you will join the beige yarn to finish your slip
stitch like this. You will pass the
beige yarn through this stitch and the
loop on your hook. That's how we join
colors. [MUSIC]
6. Cone - Rnd 13 to 24: [MUSIC] Round 13,
I'm going to do a single crochet into every
back loop of Round 11. [MUSIC] You can place your stitch marker back
until both loops this time and pull on the
thickening thread of the base you're on just to dive in
it and continue making single crochet in each of
next back loop stitches. [MUSIC] Last one will be in this little trip here. That's it for Round 13. [MUSIC] Round 14 we will start to decrease a little bit to form the cone shape. You will do a single crochet
together here by taking next two front loops and doing a single
crochet into them. You can replace your stitch
marker back on that stitch. I suggest you now to remove your hook and to secure
these two threads here, the pink and the beige one
just to make sure they will not lose one time so you can
make edible nuts with them. You can cut the pink yarn
because we're finished with it. Hide this thread inside the ice cream and you
can continue your round. We already made our
decrease and you will now make a single crochet
in next six stitches. [MUSIC] Single crochet, two together with
next two stitches. [MUSIC] Single crochet
in next six stitches. You can repeat that
pattern one more time. [MUSIC] You should have 21
stitches made in this round. We're going to decrease
again a little bit so you're going to
do a single crochet, two together in next
two front loops. Put your stitch
marker back on it. You're going to do a
single crotchet in next five stitches
and you repeat that two more times for a total of
18 stitches in this round. [MUSIC] Round 16. We're only going to do a single crotchet in
next 18 stitches. No decrease this time. [MUSIC] Round 17, we're going to make a decrease a single
crochet, two together, like this, and a single crochet in the
next four stitches. You repeat that three times for a total of 15
stitches in this round. [MUSIC] Round 18, you will simply make a single crochet in every next stitches for a total of 15 single
crochet in this round. [MUSIC] Round 19, you're going to do a single
crochet, two together. Follow it by a single crochet in the next three stitches for a total of 12 stitches
in this round. [MUSIC] Round 20,
you're going to do a single crochet in
next 12 stitches. At the end, you can start to feel your little ice cream cone. At the end of the round, you can remove the
hook and start to fill your little cone
with the polyester stuffing. [MUSIC] Replace your hook into the loop and we're going to
continue with next round. [MUSIC] Round 21, we're going to make a single
crochet two together. Follow it by a single crochet
in the next two stitches, repeat three times for a total of nine
stitches in this round. [MUSIC] Round 22, you just have to make
a single crochet in the next nine stitches
and after that, you can fill the cone
a little bit more. You can use the tip of your hook to help you fill it more. Round 23, you're going
to single crochet, two together follow it
by one single crochet, you repeat that three times for a total of six single crochet. [MUSIC] Last round, you will finish with a
single crochet in each of the next six stitches and after, I'm going to show you how to close your little
ice-cream cone. [MUSIC] Your last stitch
can be a slip stitch. It makes it a little bit
more even at the end. Pulling the thread,
remove the hook from the loop and you can cut the thread by
leaving a good length. You pass it into the loop to secure the end
of your project. You can replace the little fiber inside to make a great shape, and you will pass the ending thread into
your yarn needle, and you're going to enter
into the front loop of each six stitches like this. [MUSIC] You're going to
pull hard on it and enter your yarn needle
inside the middle of the whole and bring it
anywhere in the cone, and that's it you just close your project with the same
thread where we're going to secure it by passing back and forth between
stitches like that to just make sure that
the end will never open and the final cut. That's it. Congrats, you made your
first ice cream cone. Let's add some garniter
on it. [MUSIC]
7. Cream & Cherry: [MUSIC] Just before
making the little cherry, I just want to show you, if you just want to make
some sparkles on the cone, I will show you
quickly how to do it. You can take any thread
of colored yarn and you pass anywhere you want with it to create
the little sparkles. At the end you can make can make a double knot with both threads, and hide them inside. That's it. With white yarn,
make a slipknot, enter your hook inside the loop, tie that and you're going to
start by making two chains. You're going to make
five single crochet into the second chain
from your hook. Round 2, you're going to
do a single crotchet in the first single
crochet made in Round 1 and you can place your
stitch marker on it. You will do another single
crochet in this same stitch, and two single crotchet
in every other stitch for a total of 10
stitches in this round. At the end you can count if you really have 10
single crochet made. Round 3, you can remove
the stitch marker. Now you will do four
single crotchet in the front loop only of
every next stitches. I just made four single
crotchet in one front loop, you can put your stitch marker
back on the first one you made here and you continue. In next front loop, you will do four
single crotchet. You repeat that all
around and you will have a total of 40 single
crochet in this round. By making several
single crochet in the same stitch that will
make the little wave. The last one's going to
be in this front loop. You can finish with a slip stitch in the first
single crochet you made, like this, and you're done with the little
whipped cream. You can now fasten
this and put it aside. For the little cherry you
will take the red yarn. I'm going to show you
another technique to start crocheting in rounds. It's called the magic ring. You turn your thread two
times around your hook, you place your hand, you pinch the little
circle made and you pull the thread inside
it and you chain one. If you don't want to try that, you can simply make two chains, like the ice cream cone we made, and you will do four
single crotchet in this ring or in the
second chain from your hook. After making your
four single crochet, you can pull on the
beginning thread just to tighten the ring, and you'll continue
with Round 2. You're going to do two
single crotchet in the first single crochet
you made in Round 1. You can place your stitch
marker on the first one you make and continue by
making another one, and two single crochet
in the next stitch, and you continue like this
all around for a total of eight single crochet
made in this round. Round 3 and 4, you will do a single crochet
in every next stitches. Eight single crochet
in each round. Don't forget to put your
stitch marker back on every first single crochet you make to remember
where to finish. Your cherry will
naturally tend to round on the wrong side
during crocheting so you can flip it on the good one to always crochet from the outside
of your project. You can remove your hook and put a little bit of
stuffing inside. You can use the tip of
your hook to help you. Put your hook back into the loop and we will continue
with Round 5. We will close the
cherry so you will do a single crochet
together four times. The last one just skip a
step and pass into all loops on your hook and you can fasten this and we
will close the end. Pass the ending thread
into the yarn needle and you will enter into every
front loop of the stitches. Enter your needle into
the needle and that's it, your little cherry is done. We will now put it on
top of the ice cream. First, we will sew the whipped cream on top
of the ice cream cone. You can enter the
beginning thread between Round 3 and 4 of the cone and the with the ending thread you
can sew it all round. At the end you can bring that thread to the other
one and make a double knot, enter the thread inside the
cone and cut the other edge. Take your a little cherry and
with the beginning thread, enter it in the
middle of the cream, and with the ending thread
you can sew it like this. At the end, bring the
thread to the other one, make a double knot with them and hide them
inside the cone. You've done it. Be
proud of you. [MUSIC]
8. Final Words: [MUSIC] Hello again, it was a privilege for
me to show you how to crochet this little
ice cream cone. I hope you had fun and I can't
wait to see your pictures. If you want to share them
with me feel free to post them in the
project gallery below. If you enjoyed this course and my style of crochet creations, you can find my collection of modern and easy to make patterns on crotchetmilie.com or in
my Etsy shop chorchetmilie. You can subscribe to my
newsletter to not miss anything and to take advantage
of exclusive discounts. I regularly work on new classes so don't
hesitate to follow me. See you next time. [MUSIC]
 Emilie Bolduc, Crochetmilie - Modern Crochet