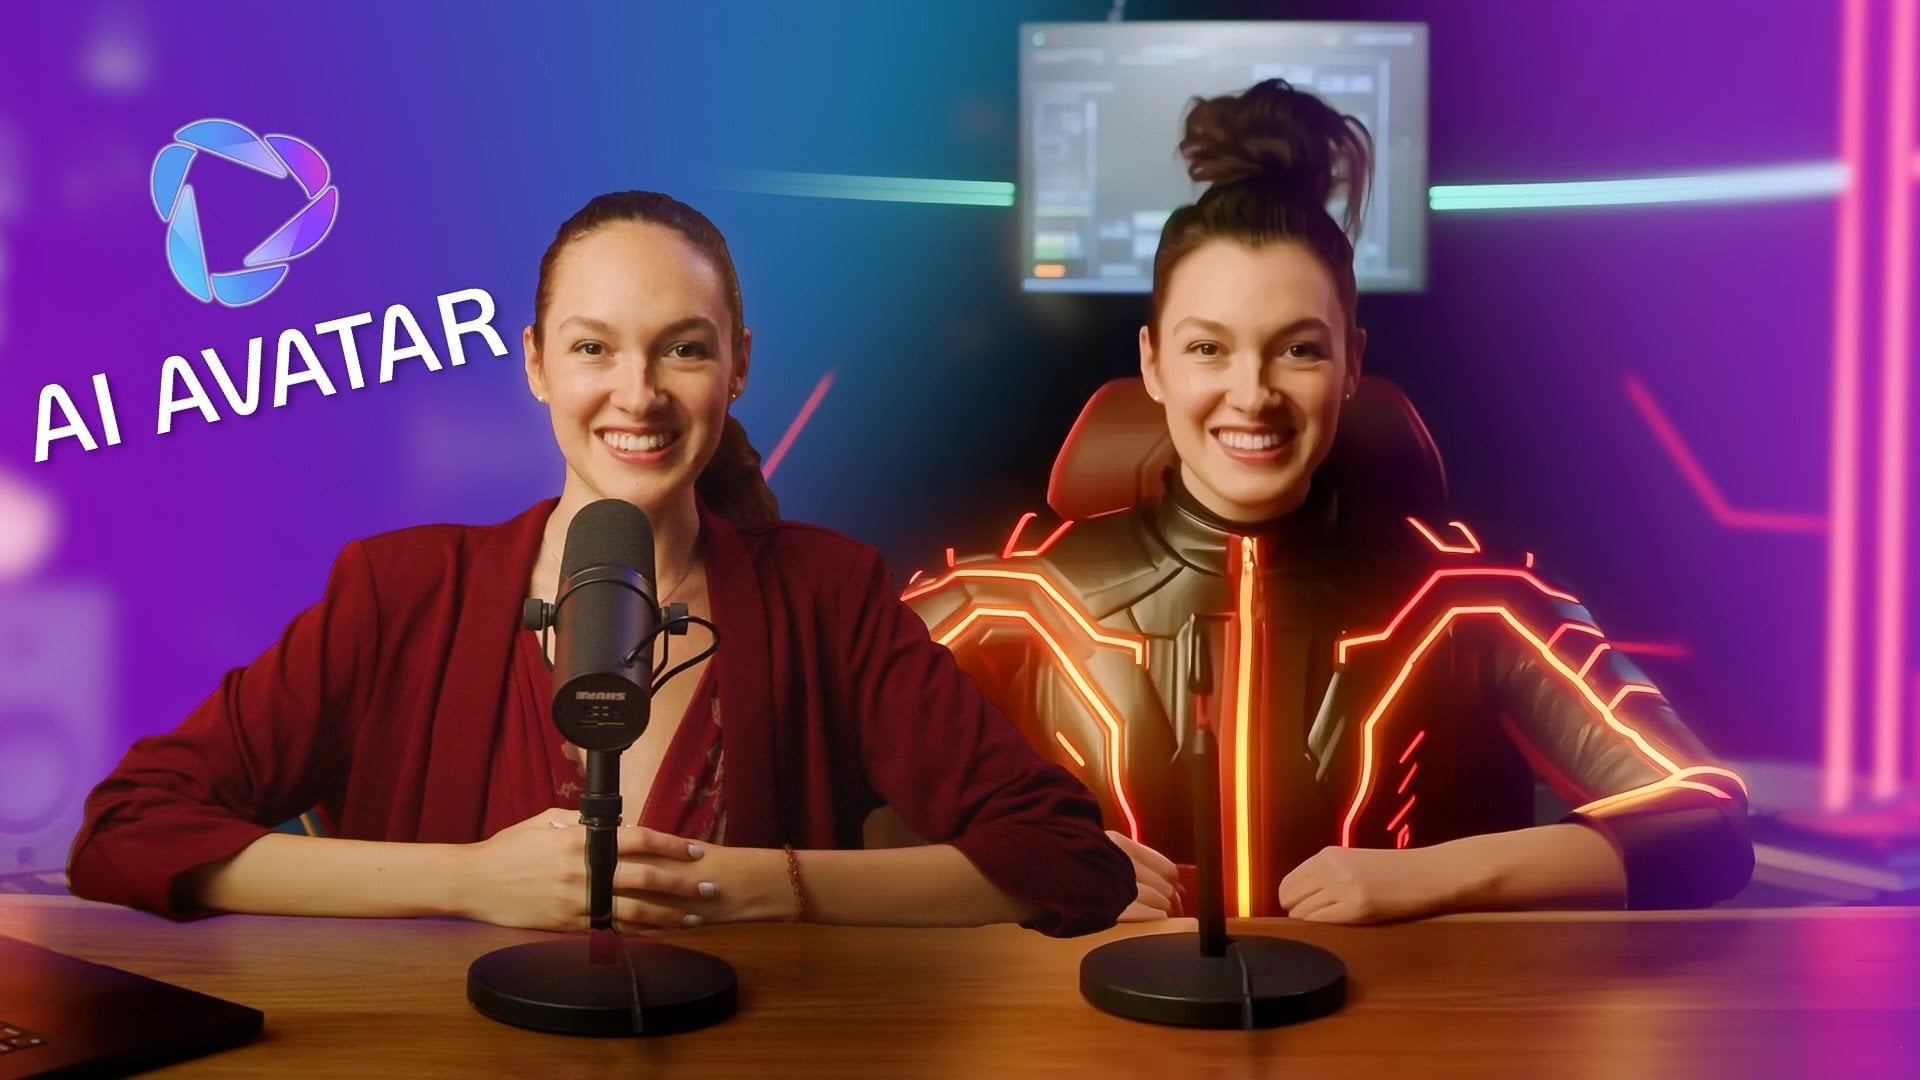
Transcripts
1. Introduction: Hi, my name is Vitale, and I create marketing and creative content using AI tools. This course is a
step by step guide to make ad style
videos from scratch. We'll go through the entire
process from idea to visuals to animation and turn it into a polished
short form ad. Inside, you will work through two real examples a burger ad and a stylish soda commercial. No fluff, just clear practical steps you
can follow right away. You will use tools like
Chat GPT, producer AI, and link AI, and edit
everything together in CAPCat. Even if you have never
made ads before, you'll be able to follow
along and create your own. If you want to start making stop scrolling content for
brands or social media, you are in the right
place. Let's begin.
2. Module 1 — Prompt Engineering Fundamentals: Module one, prompt
engineering fundamentals from concept to command, crafting effective
prompts for AI visuals, what is prompt and
why it's mattered. Let's start with
the core concept. A prompt is a
written instruction that tells an AI
what to generate. Think of it as a creative
brief, a mix of what you want, how it should look or feel, and what context it fits into. Whether you are
generating an image, a video, a piece of
music, or a text. The prompt is what guides
the AI's imagination. It's not just about
naming objects. It's about describing the scene, the emotion, the
style, the movement. In short, a prompt is
a director's note. The more clearly and creatively you express
what you want, the more control you have
over the final result. Here's a formula I often use. Subject plus mode,
plus visual details, plus motion or action,
plus style reference. For example, instead of saying generate a
video of a burger, you could say a juicy cheese
burger on a wooden table, golden lighting, slow
cinematic cinema pan, steam rising, cozy
rustic atmosphere, food, commercial style. Notice how much more specific, emotional, and visual
the second one is. That's the difference between a random result and something
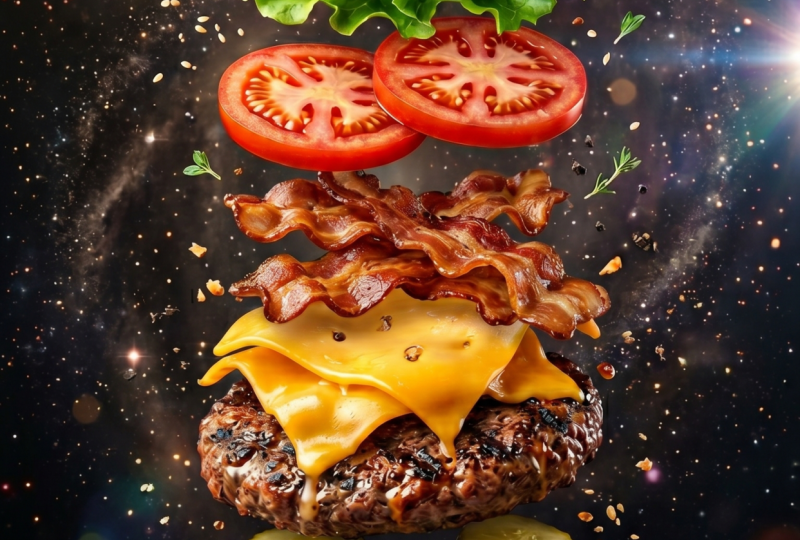
that looks like a real ad. Extracting prompts from visuals. Now, let me show you how this works using one of
my own projects, an AI powered burger
ad I recently created. Let's play a video first, then we get back to extracting prompts
from these pictures. Building up the heat. Feel that funky de. Everything you need is
right here with me. I'm gonna feed
your soul tonight. Make you feel so.
Everybody shall. By the end of this
course, you'll be able to create ads just like
that on your own. And trust me, it's going to be easier than you
probably think. I will guide you through
each step in a simple, fun and beginner
friendly way so you feel confident making your own
awesome content in no time. Alright, let's the magic begin. I have prepared a
folder with some of AI generated images I
used in this process. You are welcome to use
them to follow along, or if you want to try
something different, just pick a reference image from Google that matches your idea. You have your image, we'll head straight into HDPT, upload it, and ask CHADPT to
describe this picture and make a prompt for
generating images from it. All right, let's tell CHADPT exactly what we are
about to create. I'm going to describe my
action step by step first. I will upload a few pictures, and then I will ask for a prom to help me generate
similar images. It's super simple
and you will see how easy it is to get the AI to
understand what you want. Let's dive into the
first one together. A moment to notice how well ChaGPT understood what's
happening in this image. It's not just
identifying objects, it's picking up the wipe, the composition, the mood. That's what makes
the description feel so rich and detailed. It's like having a
creative partner who gets what you are going for. Now the prompt is generated,
honestly, it's solid. I'm going to copy it in Google
Docs for easier access, just my little habit
to stay organized. I will also make the
full prompt file downloadable for you in case you want to revisit any of them or use them as an inspiration
to your own work. You will want to
repeat this process for every image you
are planning to use. I won't lie. It can
be a bit tedious, especially when you're
working with a big bag. But hey, that's part
of the game when you're building something
awesome with AI. To keep things flowing, I'm going to speed things
up on my end and throw on some music while I finish grabbing prompts for
the rest of the images. Feel free to do the same
whatever keeps you in the zone. All right, guys, let's quickly recap what you have just
learned in this module. You now understand what
prompts are and why they're a secret ingredient behind high quality AI
generated visuals. You have learned a
simple, reliable formula, subject plus mood plus
details, plus actions, plus style, and how it can instantly grade
your image results. You saw the difference between the gu prompt and a
detailed AdWorFIPmpt, and you discovered how to
extract prompts from images using chat GPT to build
your own library of ideas. This might have seen
a lot at first, but you're already ahead of most people trying to
figure this stuff out. The next module, we are diving into AI image
generation and side by side comparison to see how your proms really
perform. Let's dive in.
3. Module 2 — AI Image Generation & Comparison: Module two, AI image
generation and comparison. Now that we know how to
write effective prompts, it's time to see what AI can
actually create with them. In this module, we will
test the same prompt across different image
generation platforms and compare how well they
interpret our vision. This step is crucial because
even the best written prompt can look completely different depending on the tool you use. We are going to use
four popular tools for this comparison ChatGPT, Mid journey, SRA, if
available, and link AA. Each platform has
its own strength. So are better at realism, others shine at stylization
or motion adness. We will use the same
prompt in all four tools, and you can decide on your own
which platform you prefer. I'm just showing the options. Now comes the fun part turning our prompts into actual visuals. We are going to
generate images using the prompt we just
created with ChatGPT. To save us time, I
have already generated the first image using
four different AI tools. In a moment, I will work through each result so you can see
the difference for yourself. Each tool has its own
unique style and strengths, so it's up to you decide
which one fits projects best. I have included links to all the tools in this
video description. Feel free to explore them
all after the lesson. All right, let's
take a look what Mid journey has
generated for us. Look at this. So cinematic. It's really reminds me of a
McDonald's style commercial. I personally like it a lot, but let's keep going and
check out other options. Next tub, Sra. We got two generated
images here. They look quite similar to the result from
ChatGPT and honestly, both are solid choices, especially considering
they are free to use. And now the last one Kling AI. This one my absolute favorite. At the moment I'm
recording this, I used Kling AI
two point oh with the colors model for most of my visuals, and
you will see why. Just look at these images. They're rich, vibrant,
and full of texture. Seriously, they almost
make you hungry. Later in this process,
you will upscale these images to boost the
quality even further, right before turning
them into video. Now I'm going to take all
generated prompts and paste them into the text to
image section of link AI. If you are using clink, make sure to activate
the latest model. At the moment I
was recorded this, the latest model was colors two point oh and enable
high resolution, these settings will give you
the best possible results. Here you can also choose
how many images you want link to generate
from a simple prompt. If you want to save some credit, selecting two is good idea, but I usually go with four, it gives me more
variety to pick from. Offer one free plan
and free paid tier, so you can start with
the basic free option and try generating images. Then decide if you actually need a paid plan, no pressure. Another cool thing about
clink is that you can publish your generated images and
videos on your public profile. Other users can view
your creation and even recreate them
using your prompt. Here's the fun part. After a certain
number of recreation, you earn bonus credits. Plus, every time you post a short video like
the AI pirate ad, we are making this course, you will get extra credits, too. Honestly, I have created half of my videos almost entirely
using these bonus credits. So it's a great system if you
are active on the platform. Now I'm going to go through
all generated images and pick the one I like the most or sometimes even two
if I can't decide. Once I have made my choice, I will upscale the best one
to prepare it for the video. All the upscaled images
are downloaded into a separate folding just to keep things organized and
ready for the next step. Now let me show you
the final result. These images turned out so good. They sharp, cinematic,
and honestly, they're making me hungry,
not going to lie. My wife and I just ordered the takeaway burger after
working on this part. That's a wrap for Module two. We just explore how to turn a prompt into powerful visuals and compare the results across four different image
generation tools. Have now seen firsthand
how much style, quality, and motion can vary
from tool to tool, even when the prompt
stays the same. This step is the foundation
for everything that comes next because great video
starts with great visuals. In the next module,
the real magic begins. Think of it as the
Hogwarts moment of this course where we take those images and breathe
life into them as motion. Get ready to turn steel frames
into cinematic AI videos, saving the module free.
4. Module 3 — From Still to Motion: Creating AI Video with Kling AI: Module free. Welcome
to Module free. Now it's time to bring
those images to life. This is the moment
where your contents start to feel like a real ad. The one we will be using
today. Cinematic content. It delivers smooth
motion, great lighting, transitions like a
fast paced car chase or complex dynamic shots. I handles action
extremely well with advanced motion tracking and more aggressive camera movement. For most ad style clips, 5 seconds is more than enough. And one important tip
professional mode. Back when we were
generating images, we focused on writing detailed descriptive
prompts because more context usually means
better visual output. For video generation,
especially when creating short form
commercial style clips, in fact, in many cases, simple prompts work even better. For this project,
the best results came from using
primitive prompts like clean direct and
focused on action. Cling generate short. Feel free to experiment
for yourself, but don't underestimate
the power of simplicity when it comes
to video generation. All you need is press the generate video button
and make sure cling 2.1. Next, you will see the
inspiration preset section. You have a few
great options here. I sliding left or
right, and more. I always recommend mixing different camera movements
across your scenes. I will work through
how I set mine. All right. Let's start by selecting a camera
movement preset. It's perfect for giving our shot a smooth cinematic
feel action focus, something like this type of prompt works great
for product style ads. The video might take a
few minutes to render, but we will not waste any time. Let's move straight
to the next scene. For this shot, I'm going to cross zoom out camera movement. This adds variety and helps create a more dynamic
final sequence. That's all we need. Then it generate and let
Kling do its magic. Once again, I'm choosing the rotator around the
subject camera movement. Later in the editing phase, I might combine it
with a subtle zoom. For the prompt, I
will keep it direct, show it in front of the camera. Like we are getting
closer to the sizzle. Fresh bacon slice
fall down on a grill. And the same camera movement for the second bacon slice image as well to keep consistency
across shots. This allows us to reveal a bit of
surrounding environment, giving the scene more
depth and atmosphere. In one of the next models, I will show you exactly why
I use this combat so often. Fresh burger with a
smoke in a kitchen. This keeps the
focus on a burger, but also hints at the
full meal settings. Just fremre clips to go. Fresh salad leaves
falling on a plate. Next, we have got the
cheese shot. As it falls. Hot cheese falling on a
table in slow motion. I will stick with
a Zoom in camera again to keep the
focus tight and clean. Now let's give a
Kling a few minutes to render all the clips, and then we will check
out the results. The camera zooms out
just like I wanted, and the visual spot on. Now let's take a look at the
hands presenting the burger. I'll mark it is
accepted for now. On the Bon slices,
this one's a bit. I will probably
grab 2 seconds for this clip and combine it
with the next Bon shot, especially the end where the slices fall down with
a satisfying bounce. Is the rotation I was
aiming for smooth, cinematic, and full of death. Especially the last few
seconds. Cling nail this one. Now the final clip, the following tomato slices. Honestly, not great. The water splash looks a bit artificial. Not happy with it. We are almost done. One of the final steps is adding music to bring
everything together. In the next module, we will use ChatGPT to help us
writing a music prompt and generate
custom soundtrack using Producer AI.
See you there.
5. Module 4 — Sound Design with Riffusion AI: Module four, sound
design with Producer AI. Alright, we are almost
at the final stage. Just one more piece to prepare before we move into editing. Now it's time to generate
music and possibly even some background vocals or light
lyrics to match our video. Most importantly, we want to create audio that's
copyright free, so we won't run into
any issues when publishing our real on platforms like
Instagram or YouTube. For that, I'll be
using Producer AI, a free AI music generator that's perfect for
this kind of task. I will drop the link
in the description. To generate a music
prom for producer AI, I'm heading back to
ChatGPT and asking it to help me craft the right description
for this soundtrack. For this video, I want something dynamic and modern
in a hip hop style with a temper around
120 to 130 BPM. That kind of rhyme works
great for fast cuts, wood css and overall
high energy pacing. Let's see what kind of
prompt it gives us. Alright, here's the prompt
generated by ChatGPT, and honestly, it
looked pretty solid. If I had written
it from scratch, it probably wouldn't sound
de structured and polished. You can always generate a few different variations
and compare them. Sometimes a slight
change in keywording can shift the whole
wipe of the track. Once you find a prom
that fits your needs, just copy it and
let's head over to Producer AI to start
generating music. Producer AI is a
browser Based tool that lets you generate music
from simple text prompts, no downloads, no installations, and no complicated setup. It's fast, beginner friendly,
and surprisingly powerful. Under the hood, it uses machine learning model trained to understand musical structure, including rhyme, genre,
instrumentation, and even emotional tone, all based on your description. You can guide it by
specifying genre instruments, tempo, vibe or even referencing
a known musician style. As you can probably tell, I use Producer AI quite a lot. One time I got bored and end up making a full reggae album, 20 songs in just 30 minutes, but that's just another story. Here's where we past the prompt. We got earlier from ChatGPT
simple and effective. And right next to it, there
is a little magic bottom. It lets the AA generate
lyrics for your track. We are going to give
it a try just for fun. I will type in a basic prompt
like Burger at Commercial. We are not aiming
for Grammy here, just something catchy and
light to match our video. Think of it as letting AI do
some quick ghost writing, nothing fancy, just good
vibes for a background track. Hmm, not really. Let's tweak the lyrics a bit
and mention that the burger comes
with French fries. It's not a big change, but it adds a nice touch of context. So let's generate
and see what we got. By the way, Producer AI allows you to generate
two tracks at once, which is super convenient. Once that done, I usually
generate two more, so I have four options
to choose from. It's always good
to have variety, especially when matching the
music to your final edit. Alright, let's listen
to what we have got so far and see if any of these
tracks hit the right mood. I think I will go with
this one Berger Rush. It has a right energy and fits
the p of our ad the best. Let's go ahead and download
it in MP free format. And that's it for
now. Music ready, and we're all set for the
final edit. Great work. You have made it through one of the most creative
parts of the process. We have written prompts,
generated images, turned them into
cinematic video clips, and now dit custom
royalty-free music. At this point, you already have the raw materials for
a complete AI Power. And in the next module, we will bring
everything together in CapCut where we will
edit the video, sync it with music,
add transitions, text, and polish
the final result. Whether this is your
first AI project or just another tool in
your creative arsenal, you are doing amazing. Take a short break
if you need one, and I will see you in
the next module where the real magic happens,
final editing.
6. Module 5 — Final Editing in CapCut: Module five, final
editing in Capcat. Welcome to Module five. This is where everything
comes together. We are inside Capcat now, and we will build our
finished video step by step. I'm using the pro
version of Capcat which unlocks a lot of
advanced editing features, transitions, effects,
and export options. But don't worry, even
with free version, you still get access
to all the core tools you need to edit and
finish your video. You can absolutely complete the project without paying
for a subscription. Leave the link to Capcat
in the description so you can download it and start
experimenting right away. First, let's create
a new project and import all the
video clips we generated earlier in Klink plus the music track we
got from producer AI. I like to keep everything in clearly labeled toldiers makes
the process a lot faster. Now let's drag the first
video into the timeline. I always recommend starting
with high impact shot, something that catches attention in the first few seconds. This is especially important
for real shorts or TikToks, where you need to hook
the viewers immediately. Capcat offers a wide variety
of transition and effecs that can really help
your video look professionally edited, even if you're doing
it all on your own. In this project, we'll try a
few different transition and visual effects to enhance the flow and match the
energy of our footage. If you have time, I highly recommend to exploring
CapcatFull library. You'll be surprised
how much creative control you have even
in a free version. Personally, when
I start editing, I rarely know exactly how each transition
will look in advance. I like to experiment, try a few different options,
and most importantly, I try to sync the
movement and cuts with the music to keep the
rhythm tight and engaging. Once I have laid out
the basic structure, I start trimming each
clip down to two, 3 seconds, just enough to show the action and
keep things moving. To split a clip, quickly, press Command plus B on Mac or Control plus B if
you are on Windows. Remember, keep it dynamic. No one wants to watch a slow motion burger at unless it's for a five star steakhouse with true fill and classic
music in the background. Alright, I have finished
dreaming all the clips. The flow feels good and
the pacing works well. For the soundtrack, I decided to use the last
part of the song. It has a nice buildup, and I think the
lyrics actually fit the vibe of our ad
surprisingly well. Sometimes you don't need
to use the entire track, just the right moment that
connects with your visuals. Now I'm trying to jump
into creative part, experimenting with transitions,
timing, and efforts. Part usually takes me
around 15 to 20 minutes, depending on the mood and
the complexity of the video. If you want, you can skip ahead and check out the final result. Or stay with me and see exactly how I build the final
edit step by step. Who knows maybe you'll pick up a few tricks along the way? Here is a simple trick to add
more energy to your edit. Split your clip into a few pieces and apply different
zoom levels to each one. Some parts can be slightly
zoomed in, others zoom out. Subtle variation
creates a feeling of motion and makes the
scenes feel more dynamic, even without any actual
chimer movement. Another easy way to make
your edit more engaging, play the speed of your clips. Speeding up or slowing
down certain parts can really change the dynamic
and help break the ride. So the video doesn't feel
repetitive or boring. Just small changes
in timing can make a huge difference in how
the whole sequence feels. Another cool feature you
can use is keyframing. It lets you create smooth zoom in or zoom out
effect over time. Here's how it works. First, set a starting keyframe at the
beginning of the clip. Then move to the last frame, apply a small zoom in and
set the final keyframe. This way, the zoom
feels much more natural and gradual like
a slow camera push. Compare that to just trimming the clip and
instantly zooming in. Keyframes give you
way more control. All right, we are done with trimming and
timing the clips. Now let's add a fade out
to the music at the end. The video finishes smoothly and doesn't feel like it
cuts off abruptly. Next, we will add a few
transition and effects to polish the overall flow and make the ad look like
professional and refined. I think we done here
everything trim, mate, senset and polished. Let's sit back and
watch the final result. Can't resist this
burger anymore. Resist this burger? My soma it crouch beyond
that kitchen door. Beyond that kitchen doors,
crispy fries Waiting. Can't resist this
burger anymore. Mmm. I like it. Looks great, right?
What do you think, guys? What's that hard? Not really, uh Just a
few tools on creativity, and now you have got a looking
ad made entirely with AI. Before exporting, let's double check export settings.
About the format. You should take ash 264, resolution two K
or four K frames, 30 frames, and Bitrate
set to recommend it. Give the file a clean name
like Burger at final, and hit Export, and that's it. Congrats. You have
finished creating your first completely
AI powered commercial. From writing prompts and generating visuals to building
video, music, and editing. And final polish,
you did it all. That's not a small
thing. This was more than just a
practice project. You have now learned a
full creative workflow that professional used to
create ad content at scale, fast and with zero
camera equipment. But now it's time to level up. In the next module, we will take things a step further.
Imagine this. A big brand reached
to you, let's say, Pepsico and they want you to create an ad for their
signature Pepsicm. This time we are not
generating random food images. You will need to recreate the
actual look of the product. Label the design, the lighting. Everything has to feel on brand. We will dive into reference
based image generation, advance prompt control, and how to match your visuals
to real product. Think of it as first
real client brief and you're going to crush it. I will see you in
the next module.
7. Module 6 — Product-Accurate Image Generation for Big Brands: Module six, product accurate image generation for big brands. Welcome to Module six, and now we are
entering the world of client level commercial work. Imagine a brand like Pepsi reach to you, they want a short, catchy head that
showcase their product, the iconic Pepsi can, with all its signature
color, shape, and branding. In this module,
we will go beyond creative freedom and
focus on accuracy. You will learn how to use reference image to
guide AI generation, maintain brand
consistency in visuals, write prompts that balance
creativity with control. Prepare visual assets for
client review or animation. Before we jump into creating, let me show you a Coca cola ad I recently made using
the same workflow. It will give you a quick idea of the style and structure
we're aiming for. In this module, we will
create something similar, but this time featuring
the iconic Pepsicm. YomaPsTik me on
bubbles in the air. Dancing without care. Yoma Everything is. Cool. Now let's head back to ChatGPT and start shaping our idea. AI generated Pepsi ad designed specifically
for reels and TikTok. To make the result as
accurate as possible, I have downloaded
two reference images of Pepsi can from Google. We will use them to
guide the visuals. When choosing our
reference picture, make sure the product is
isolated from other objects, ideally on a clear background. Helps the AI better understand
the focus of the image and avoids mixing in unwanted
elements during generation. The cleaner the reference, the more accurate and brand consistent your result will be. First, I will ask HRGPT to
analyze the Pepsi can based on a reference image and turn that into a detailed prompt
for image generation. Then I will ask to generate five short dynamic scene ideas that we can use for our video, all centered around
the same Pepsi can, keeping the brand
look consistent. All right, ChatGPT
did a great job. It understood what's
on reference image and gave us very detailed
description of Pepsi cam, exactly what we needed
for our prompt. And the scene ideas,
not bad at all. I, fire and ice,
even some fireworks. That could actually look
pretty cool in motion. It looks like we have got a solid base to
start building that. Next, we are going
to ask ChatGPT to generate prompts based on
the scenes it suggested, so we can use them later
for image generation. The proms already
look pretty solid, well structured,
and descriptive, and to make the result
even more accurate, we will also add our Pepsi can image as a reference
during generation. Now we are heading over to Kling AI image
generation section. First, make sure to select
the latest scholars model. It usually delivers
the best texture and lighting results for
commercial style visuals. Then paste the prompt
we got from ChatGPT. After that, click
on Dipsik butto. Kling will automatically enhance the prompt and show us
the optimized version. You can compare both and decide which one works
better for your case. In this experiment,
I'm going to try DipskEnhanc prompts just
to see how it performs. And of course, don't forget to upload our
PepsicNRference image. It will help guide the AI to generate something more
accurate and brand aligned. Since we are creating
this for reels or TikTok, we want a vertical image. So let's set the aspect
ratio to nine to 16. I usually go with
four images outputs. It gives me more
variety to choose from. But if you want to save credits, selecting two outputs
is totally fine. And don't forget to double check that high resolution
mode is enabled. It makes a noticeable
difference in quality. Once everything set, just click Generate and let
the AI do it think. Repeat this process for
each of the prompts, apload the reference image, choose your settings,
and generate. We want a full set of visuals that cover all the
scenes we planned, so take your time
and go through them one by one. Great job. We have now generate
a full set of visuals for our Pepsi
ad using prompts, references, and AI magic. Take a few minutes to grab a
coffee or stretch your legs. You have earned it.
In the next module, we will go through all the
images, choose the best ones, upscale them for
high quality output, and then use them to create
a dynamic AI powered video. We are getting closer
to the final result, see in the next module.
8. Module 7 — From Images to Motion: Module seven from
images to motion. Welcome to Module seven, where things really
start to come to life. We have generated all the
scenes for our Pepsi ad, and now it's time to
turn them into motion. In this module, we will
go through the images, pick the best and most
visually striking ones, upscale them for quality and use link AI Video generation tool to animate them into short
professional looking clips. First, take a few
minutes to review all the images generated
from our proms. We are looking for clean
composition, strong lighting, and a clear view
of the Pepsi can, since it's a visual
centerpiece of the ad. You don't need to
use every image. Just pick one or
two that looks the most convincing and eye
catching and upscale them. This will improve
sharpness, resolution, and give us a cleaner base for animation. Take a
look at the image. It's almost perfect.
But do you see the text in some Asian
language near the can? Yeah, we definitely don't
need that in Pepsi AD. Luckily, it's an easy fix, click the inpaint
button and click. Highlight the
section you want to clean up and let
the AI do the rest. While Klink is working on that, let's take a look at other
images we generated. To be honest, I'm not
loving the ones we fire. They feel of brand, maybe
a bit too dramatic. I'm not even going to
bother generating them. I think the ice based
scenes will give us more enough great
materials to work with. Take a look at in painted
image. It looks great. Then wanted text is gone, and it only took a
few clicks to fix. By the way, I accidentally
generated four outputs. Probably didn't need that many, for in painting,
one or two versions are usually more than enough. I also want to generate
the image with fireworks. I really like the atmosphere
and energy they bring, but I think we can get
something a bit more polished. Let's give it another
try and see if we get images that better match the
overall quality of the ad. I also realized I'm missing
one important scene. I want to create one more image, something more
lifestyle focused. I'm thinking of a beautiful
Latina girl drinking Pepsi on a sunset beach just to bring more human emotional
elements in the ad. It will add variety and helps the brand feel
more relatable. And here we go. The
next set of images for the fireworks scenes just came
in. It looks much better. The overall wipe is cleaner, more dynamic and definitely
fits the energy of the ad. I especially like the last one. I'm going to upscale it and
keep it to the final cut. And the scene with
the beautiful girl drinking Pepsi is ready. Take a look at the last image. It looks incredibly realistic. The lighting, the expression, the background,
everything just works. I will go ahead and
paint the details on the Pepsi can to make it
look even more cleaner. Then upscale the image and definitely keep it
for the final video. Alright, let's give
a few minutes for all the images to
finish generating. Once they are ready, we
will move to the next step, turning these visuals
into dynamic video clips. Let's start generating our upscale images
into video clips. We'll begin with the scenes of the girl drinking
Pepsi on the beach. For this one, I'm
using a Zoom in camera effect to slowly
bring focus into the. The prompt is simple and direct. Young woman drinking Pepsi
cola from a blue can. We will go with
five second clip, selecting the Kling 2.1
model and heat generate. Next up, the fireworks scene. I think a camera rotation
around the can will work perfectly here to bring energy and bit of
celebration fill. Prompt for this one, smoke coming from an
open can of Pepsi. Fireworks in the background,
simple but effective. Now the third scene, the
Pepsi can falling into water. I'm keeping the rotation camerame again for
dramatic effect. Here's the prompt Pepsi
cola blue can falling into water in slow motion
with water splashes. This could give us a
bold refreshing shots. Let's generate and
see how it turns out. For the next scene, I
go with the Zoom in camera effect and simply copy
paste the existing prompt. Sometimes there is no
need to overthink it. Let's see what results we will
get with the same wording. Now for the second Pepsi can
falling into water scene, I will again choose the
camera rotation effect. It adds nice dip and
energy to the motion. The prompt I'm using here, a blue Pepsi can falling into water in slow motion
with the water splashes. Very straightforward
and it should work well for this
action based shot. The last two images, I will keep it simple just like
we did earlier. I will reuse the original
prompt, but this time, I will apply two
different camera styles, one with a zoom in effect and the other with
the camera rotation. Let's generate them all and see which version
turns out best. Alright, let's check the
videos we just generate. First up, the girl drinking Pepsi with the zoom in effect. That one turned out great. Clean movement, solid framing. I'm keeping it. Next,
the fireworks scene. Hmm, didn't expect the
cam to rotate like that. Might be able to take
a few seconds from it, or I will just regenerate
it later if needed. The following clip
looks good overall. I will keep it. I might even add a reverse effect in a post
just to give a bit more lay. We'll see. This one,
I'm on the fence. Not sure what to do with it yet. Maybe I'll reverse it too or just use quick 2
seconds fragment. Now, this one, that's dope, especially force free seconds, perfect, pacing and
mood, accepted. This one has something a bit unusual magical vibe going on. It's different, but I
like it. Accept it. What's that? I'm not
sure, but you know what? Let's keep it and see what we
can make of it in editing. All right, I'm
downloading all the clips now so we can get ready
for the final assembly. That wraps up the creative
part of this module. We have selected, upscaled, and animated all
our best images. Now we are ready for the final
step editing our Pepsi ad. In the next and last module, we will bring everything
together inside Capcat. This is where all
comes together. See you in the final module.
9. Module 8 — Final Editing: Assembling the Pepsi Ad in CapCut: Module eight, final editing, assembling the
Pepsi ad in Capcat. Welcome to the final
module of this course. Time to turn all our hard
work into a finished ad. We have written prompts, generated visuals,
animated scenes, edited music, and now we will bring it all
together in Capcat. By the end of this session, you will have a fully
edited vertical video ad that looks like it came
from a professional studio, but it was made entirely with
AI and a bit of creativity. Now it's time to generate
music for our final clip. As usual, we'll start
by going to Chat GPT to help us craft
a solid music prompt. Let's be a bit more
specific this time. I'm aiming for 140 BPM
hip hop style track that feels dynamic and modern. All right, this one looks great. The description hits the
right tone and rhyme. Let's copy the prompt
and head over to producer AI to generate
our soundtrack. All right, let's jump into
Capcat and upload everything. Our music file and all the video clips we
have just generated. For editing, I'll be using the same techniques we practice
in the previous project, trimming clips,
syncing the music, and adding light transitions. To save us some time,
I will speed up the process a bit.
And that's it. Here's our finished
AI Power Pepsi ad. Drinking that We went all the way from idea to prompt to writing to
generating visuals, animating scenes,
composing music, and editing the final cut. You have now created
two complete ads using only AA tools, one for a juicy burger and
one for a world famous brand. You didn't need a camera,
a production crew, or editing experience,
just the right tools, some creativity,
and this workflow. I hope this course gave you a fresh perspective
what's possible with AA and show that you can use it to create real commercial
quality content, whether yourself, your brand, or your future clients. Thanks so much for
learning with me, and if you build something
with this process, I would like to see
it until next time, keep creating,
keep experimenting and seeing the next projects.
 Bros Academy, null