Transcripts
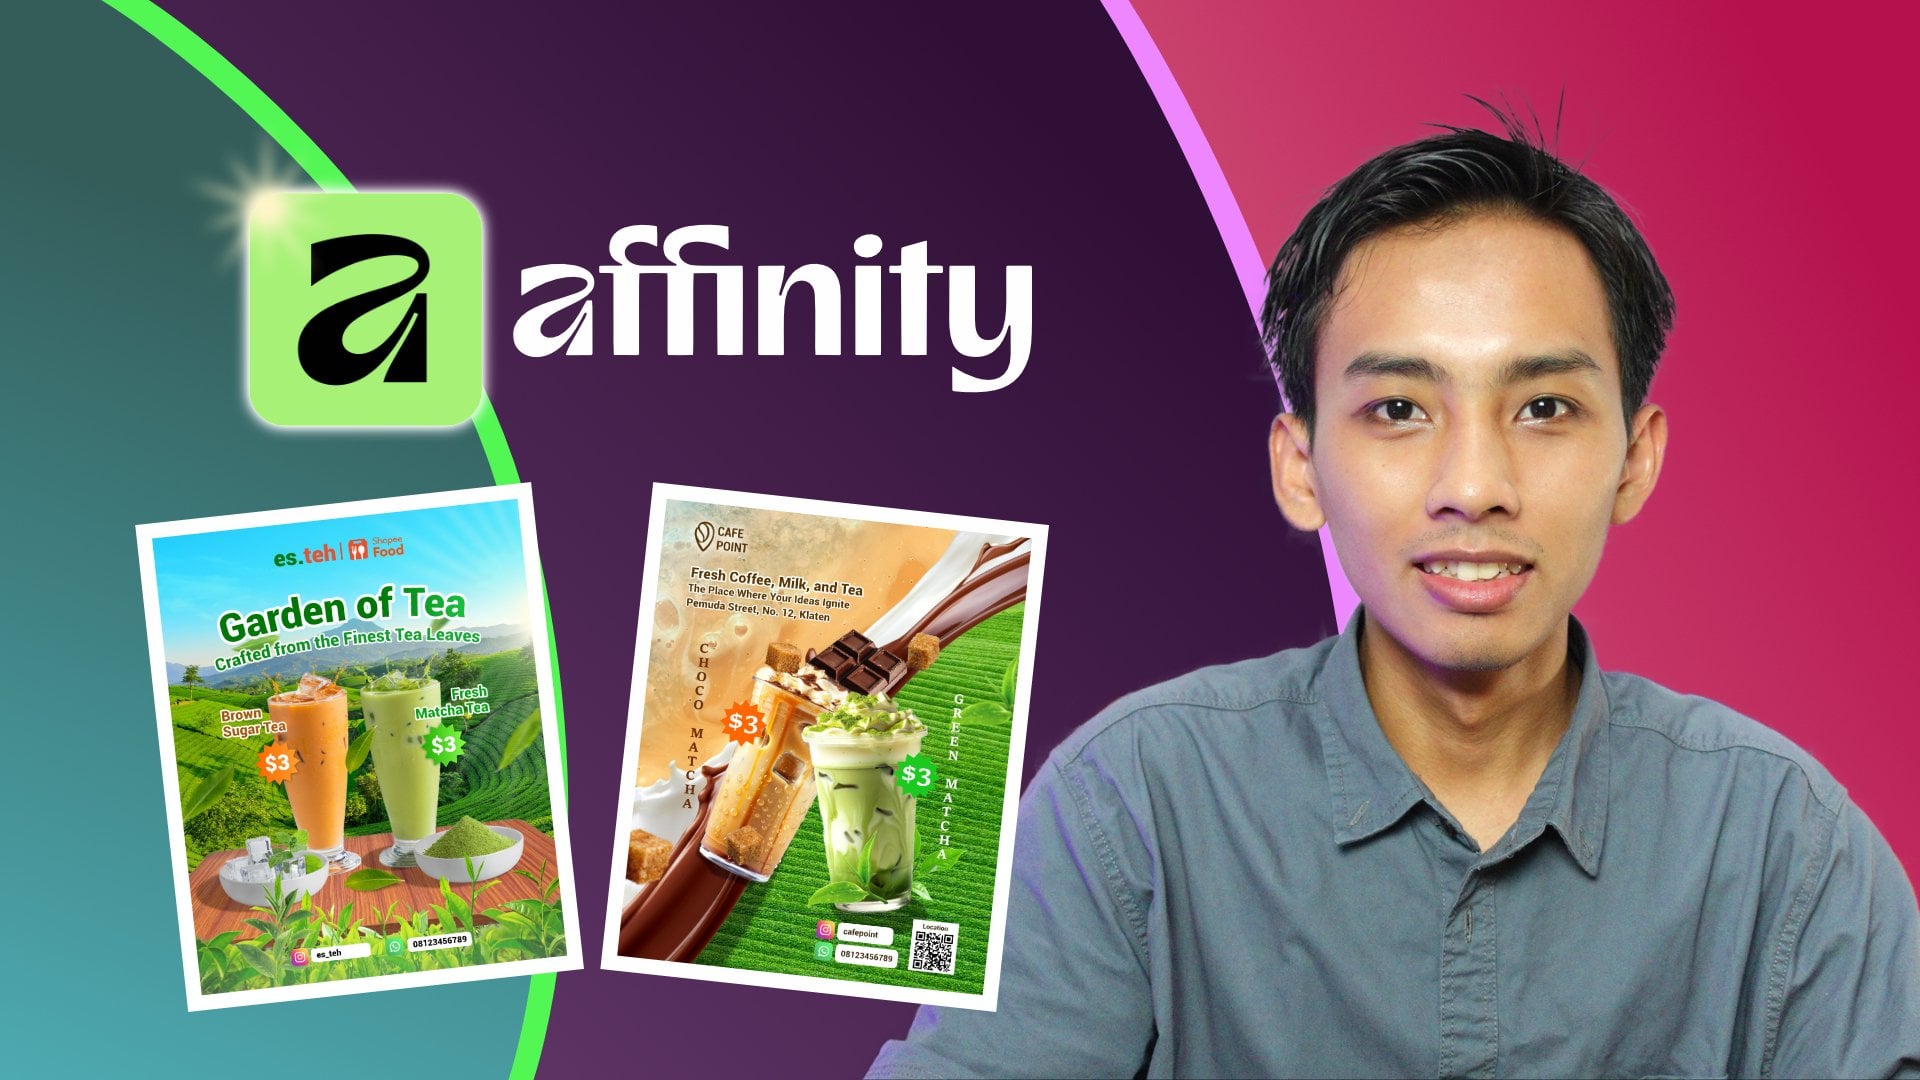
1. Introduction Series 1: Affinity is officially updated from Version two
to Version three, and the changes are huge. The most exciting
part, Affinity Version three is completely free to use. Just log in with
Canva Account to unlock all the features.
This is game changer. Well, many competitors
continue raising subscription fees or
charging high cost, but Affinity is offering professional design
software at no cost. That makes it one of the most accessible design
software available today. This class, we will explore
Affinity version three step by step for beginner
level to advanced level. You will learn how to create design for a wide
range of purposes, including digital marketing,
professional design, and other visual design works. So what do you will
learn in this class? Well, we will dive
into Affinity tools, especially in Vector
Mode and Pixel Mode. Well, they look similar, but each other has
different features. We will also break down
the user interface so you can edit faster and access features
more easily and make your design
process more efficient. Next, we will learn the foundation of
graphic design software. Everything in
Photoshop, Illustrator or in Affinity has
similar foundation. When working with images, we will often involve
with color adjustment, blending modes, and filters. Color adjustments are
essential for image editing. We will learn how to fine
tune colors as we want, and blending modes are key to applying colors and
effects in unique ways. Well, Affinity filters are packed with creative
possibilities, and we will expore
them one by one, learning how each
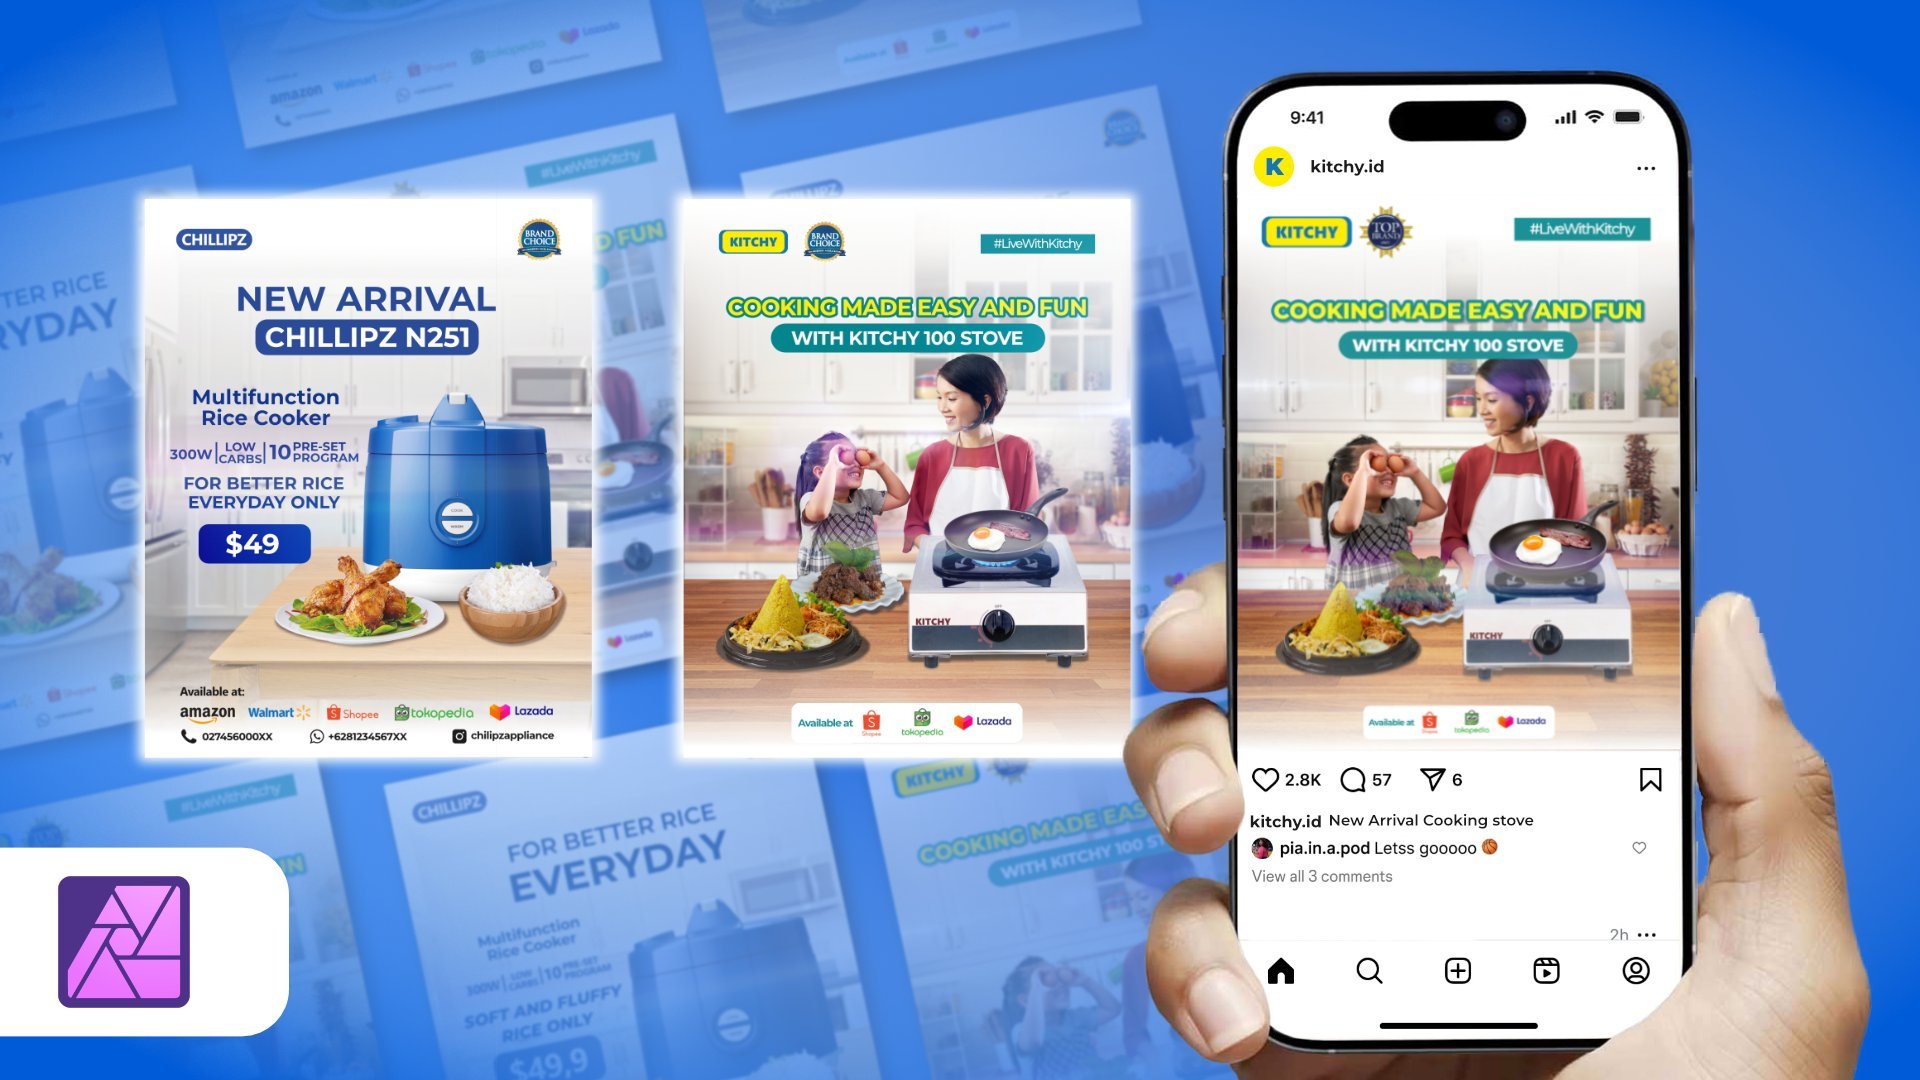
filter works and how to apply it to our projects. This class isn't just theory, you will get plenty of practice through real projects such
as designing mockups, social media design,
creating protect design, and retouching photos,
and still many. By the end of this
lesson, you will have a solid foundation in
Affinity software. Once you understand
the tools, adjustment, filters, and blending modes, you'll be able to
create design you want. Instead of just
admiring create design, you will start analyzing
how they are made and even start to analyze
how to recreate the design. And that's the power of
learning the fundamentals. This course is designed for beginners who want to learn
Affinity from scratch. Step by step, we'll move
toward more complex methods. Have structured the lesson in a systematic way so you
can follow along easily. Gain practical insight and apply what you learn
with our practice. My name is Fathoni Ashari, and I'm excited to
guide you to learn affinities software together and see you in the next session.
2. Affinity Installation and Setup: Before we begin the learning
in the first session, there are several
steps we must prepare. In this session, we will walk through how to set
up Affinity from installation setup
to a few key settings that will make the software easier and more
comfortable to use. You can install
Affinity on laptop or pc's that running
Windows operating system, or devices like MacBook or
Mac Mini that running MacOS. However, I don't recommend
using iPad version since its interface and features are not as complete as
the desktop version. Before installing Affinity, make sure you have
a Canva account. It doesn't need to
be premium Canva. A free Canva account works perfectly as long
as it's active. Next, we will visit
the Affinity studio, Affinity website to download the latest version of
Affinity software. So you can using the
browser you want. I will die Affinity studio. The studio. Here in the website, we click Get Affinity, right? And then we need to sign up
to get the installation file. So we click sign up to download. And because I have a login
Canva in this browser, so I just click Continue. And here in the page, we'll bring into two options. Mac desktop with Mac OS
and dekstop with Windows. Because in this class, I will
use the Windows ecosystem, the Windows operating system, so I choose the
Windows here because my system busy using
Intel processor, so I choose Intel or AMD here. I just click here.
If you using MacBook or MacMini or using the
Mac operating system, you chose click
Download for MacOS because I am using Windows, so I just click Windows
Intel or AMD here, and the process download will begin and we go
to the download page. And please just waiting the download process
until it finished. After the tunnel
process is finished, you just click Double click in the file we
have downloaded off. Maybe you go to the
directory file, you save this file. I just click Double
click in here, and automatically the window will appear like this
and just click Install, and the network you are
connected to this matter, would you like, Oh, this
is just a Window setting. It doesn't matter. Click yes. And the installing
process will begin. We'll wait until the
installing process finished. And automatically, the
Affinity will launch, right? And just waiting here
until the Affinity loading into the first page
like this, right. So before we continue
to the next step, I want to set up the setting in Affinity because
in my experience, I found several
uncomfortable experience. So we have to set up
the setting first before we get continue
to the next session. So before I go to the setting, I will set the page
or new document, like new document here, right? Like new document, and here. In this document, I will
ooe the Document unit two Pixel and change the
width to 3,000 3,000 pixel, 3,000 pixel like this, and the way ahead to
2000 Pixel like this. And after that, I
create the document. So if you still curious up
this page up this window, we will deep dive more letter
in this practice session, but for right now, it just for demo in the setting. I will create
document like this. And the first setting we have to set up is Mark selection tool. For example, I will create this some shape like
rectangle tool here, here, rectangle, rectangle tool, and I will draw
rectangle tool here and maybe I will drow the oval or a circle with
hold shift like this, or maybe I will draw the
triangle just like this. So I want to show you how
the unconvenient one. Like this, I will
change the color, click the color, this one, and move to the red. We changed color to Blue, for example, and this one
to green, for example. This, for example, like this. Now we'll make it more closer. So I want to show you
the unconfortable one. This one is a mark selection
tool, marquee section tool. If I want to choose select this rectangle, I can
select like this, but when I try to select
like this and my selection just a little bit touching the lu circle and automatically, the Blue circle is included. Same case when I want to
choose the blue circle and my selection is touch
the rectangle and also green triangle, the
result will be like this. Sometimes this is
not convenient when we working a lot of
project, a lot of object. Let's try when I
open when I copy, let's I copy this one. Again, I will copy in a little bit complex
object like this one. I will go to the
edit setting and go to tools like this and
select Marquee selection, behaviour and click enclosed required Object to be enclosed by
Markey just like this. And for example, if we click
here, click here, here. So when I try to just only choose this one
and this one, it like here. And then I think it's more so I think it's
more convenient when we editing with this marquee
tool behavior like this. We need to cover all of
this area to get selected. And then the area is
not fully covered, is not selected here. So this is the setting
number one we have to set. The next settings, I want to explain about the selection
object selection tool. So the next setting,
the setting number two, I want to explain about this
one Object Selection tool. When we click the
Object Selection tool, so this will appear
machine learning models. Before I explain, I
will import an image. In the project section, I have
uploaded all of this file, all of this material file
that I use in this class. So don't worry, you
just download this file and use we can using the same
file for the next practice. It contains all of the material
we needed in this class. So don't worry if you want to follow step by step in this class and you
don't have the file. So don't worry. I have
provided all of this file, you just download and extract. So in this adjustment layer, there is image the apple image. So I want to use this Apple. I will import, just
drag and drop. Bring the inside of this
document like this. So like this. We want the
size of Apple is too big. So I think I'll
need to scale down transform smaller
scale down like this. Think I'll make fit on the page to the
document like this. Usually, when we're working
on the image like this, we want to select this apple
and to separate apple from the background to make selection and then to
remove the backgorund. We will very often doing that. To make selection, we can
use Object Selection tool. But when we click the
Object Selection tool, there is the notice will pop up. Mochine learning models. The Object Selection tool requires the segmentation
model to be installed, manage installed
models in settings. So we is click Settings and
in the machine learning, the segmentation, we
click turn on here. And we need the Affinity software, we'll download it
additional file, additional model to make this segmentation
setting available. So we just waiting until
the download is finished. We just waiting
one or 2 minutes. It depends on the Internet
connection, guys, but I think it's not
waiting too long. So just wait until the
loading model finish and Okay. The downloads
finished, and we can close this page setting page. And let's try again in
the object selection tool. Like object session to, and
we bring the cursor in here. We wait We will wait until this sign appear because the
Affinity software will analyze the object, we'll analyze the image, and they will doing some automatic selection
using machine learning model. Just click here
and automatically, the Apple has select and we
literally making selection, easy like this, and we
just create selection. Very easy. After that, if we remove the background, just click the Musk
layer like this. It's easy, guys. So this
is the segmentation model. We have to in this setting, click machine learning
and segmentation model. So this is the second settings
that we need to set up. The third settings, I want to
setting about the performance. I experience many times
that the Affinity is crash. The Affinity is sports
clos during editing. Or sometimes when I open the
Affinity, it will crash. The third settings
that I want to share with you is
performance settings because sometimes I experience many times Affinity is crash. Affinity force close during editing and it's not convenient. If you also experience
rising in your Affinity, maybe this setting
is worth to try. go to the setting, go to
the performance. And with these settings, your Affinity is fine, so you don't need to change. But if your Affinity is Crash, this is worth to try. In the renders settings, you choose the most
strongest graphics card on the system because I use
the I graphics card. So I choose Intel Arc A380. So it depends on your system, depends on your
PC specification. And if you experience
the press many times, you can try to disable the
OpenCL compute acceleration. You just disable like
this and just close. And the Affinity will ask us to restart application.
Just click. And because our document is
not save, yet. click yes. Like this in the same
direction as a file demo, I will click Apple like this and Affinity will restart this. And we can open the Apple
pile that we have open here, Apple, that we have
created previously too. So, guess, so we have
set three settings. The first is the
Mark selection behaviour here and then select
objects section two. And then the third is the performance settings if your Affinity experience
crash, right? And after that, we
will start to learn Affinity and break down
the features one by one. So see you in the next session.
3. Document Setup: Friends, in this session, we're going to talk about
how to create document in Affinity because the Affinity
has unique features. Divide document into
port and multi pages. So let's move to the software. When we click the
file, click the New. We can see this is a lot
of preset paper and then also available in the RGB
mode and also CMYK mode. So you have to careful here
between the RGB or CMYK. And also, this is
the Photo size, Canvas and also fed
you in web like on social media and some
device Potrait to create, you know, the portrait mode. But I want to highlight
about these features. When you look at the setting,
this is the artboard. And this is the multipage. So I want to show you the
difference between when we turn on the artboard and when
we're using the multipage. We have three mode how to create
document in Affinity. So let's practice one by one. So the first document
we have to create. We turn off the artboard
and also we turn off the multipage.
What we look like. I change the document
unit to Pixel, and I will change to let's say
3,000 pixel by 2000 Pixel. More easy to remember. And then click Create
Document. Here. Here, when I import this
image, again, this apple. The layer just like this. And when I copy, or duplicate CTRL plus G, for example, when
this copy of Apple, I bring to the outside, so the image doesn't appear. So the image, it's hide. So mode in this document mode, the object just appear as long as the object still
inside in this document. For example, when I create
the rectangle in here, let's say I will bring the
color rectangle in blue here. When this rectangle, I bring to the outside the rectangle
will be vanish will be gone, or it's like hide. So in this document setting, the object just only appear as long as this object in
the inside of document. While the object in the outside
document is not appear. So this is the first document, the first first and this is gone
and this is back. I will save with
default document. So the next document,
we click New here. What if if we turn
on the artboard here. Turn on the artboard and unit, we choose the Pixel, and we change to 3,000 by 2000. Just easy to set the number. Right? And then Color format, we choose the RGB. And then we click
Create Document. Remember, the artboard d is
active. Create document. Here I will save the
document first with artboard document like this. So if we import or drag
and drop the object here, for example, I'll using
the same object here. When I click copy and paste bring this apple to
the outside and here, it will still appear and
it will still visible. And some cases when I create the rectangle
here, for example, and I bring the blue color, in the blue color, still appear because this
is in the inside. When I bring to the outside, it's also still appear. So this is really suitable for us who are
working with a lot of objects. Sometimes the object
unnecessary object, we bring to the
outside temporarily and bring the object
inside letter. And also, we can create
the another artboard We can also copy
the artboard, this one. To copy the artboard
we just click Copy. Just click the artboard
all of this and hold ALT and bring to the bottom, to the side or to the bottom. Now we have two Arboard. The artboard, maybe we can rename artboard, this
one, artboard two. So this is the artboard one, this one, and this is arboard two. It's very easy when we're working with a lot of Project
with the same document. So this is we can create
document in this artboard, and then at the same time we
also create another design in this arboard still
in the same document. Maybe we can change the color. We import the another image. Maybe I will use
this one. This one. We bring the stop under
the layer like this. So it's very useful if
using this document with artboard active because we can working a lot of design at the same time in one document. The third mode in Affinity offer when create
document is this one, I will turn on or activate
the multi page like this. These are facing pages and arranged horizontally
right number page one. And yeah, and also we create
the document like this. This is the page mode. The page mode is only
available in layout. So because we're
in the pixel mode, we moved on the layout. And if we add the
page two, Okay. So the multipage is very
useful when we're working on, you know, the many page like a newspaper,
magazine or brosure. So this is the multipage mode. This page one, we can
create rectangle, for example, in here,
and this page two. When we draw the rectangle
with, for example, with green, this is page two, and also this is page three. Like this. So on this page
one, patch two, page three, and then when we
add the pages, we automatically we can set. The number of page one, for example, or two, and insert in the after, it will insert in here
and insert before, it will insert between
page one and page two. So you can doing
some experiment. And this is page
four and page five. So we'll continue
continue and continue. This we have learned three mode to create
document in Affinity. First is a default or command,
the default or command, will by default when we
working on the Photoshop or we're working on the
other editing, right? And the second mode
is artboard document. This is very visible when we're
working with many design, but still in the same document. When we bring the
object to the outside, still visible and bring to
the inside also visible. In this mode, we can
create a lot of artboard, so we can working on
with a lot of project, but in the same document,
still on the same document. And not only copy, we can also edit in the artboard, edit the dimension of artboard. For example, when I click this Arboard one and I
click Transform here, so this is the 3,000 by 2000, so I can change, for example, I will
change 3000-3 thousand. So the size will
square like this. So it's not only we can
copy in the artboard, we can also edit the
dimension of artboard. So the artboard mode is very beneficial if you're
working with many design, but still in the same document. next session, we will explore
this user interface, user interface in the
Affinity software. So in other you more
familiar with the tools, and then we can more
easily recognize which tools that we
want to use later.
4. Exploring Menu and Features: Hello, everyone. So
in this session, we're going to type about the
user interface of Affinity. So we will explore the Affinity user interface
from the menu, from the tools and the window. So this is very important
for us before we doing before we learning into
the next step because sometimes when we
often using the tools, we often using the dialog on the window setting
on the window, so we have to explore one by one first
before we next to it. So let's move to the
Affinity software. First, I want to
create the document. As I remember, guys, I
will using this Pixel. And this one, I will type 3,000 pixel and by 2000 pixel, right? And I will turn on the
artboard like this. Well, I turn off the margin. And I want to save to my preset. So I save to my preset, I will name it demo, click Okay. And that's the way we can serve the preset
in this affinity. And then we just
create document. Like this. Okay. The next step, I want to explore the user
interface from the menu first. As you can see here, there is a menu from File
Edit Document text, Vector Pixel layer view
Window help, Window and help. In the file, this is
like usual software. In the file menu, this is home. I basically when we
open a new document. In the studio, this is a very important guys.
This is very important. Basically, this is a preset or as a layout preset
of user interface. This is this Vector Mode. Pixel Mode layout mode
slice canva retouching, color creating Typography,
and compositing. This is basically
like the preset. When we click the vector, we are in the Vector Mode. When we click the Pixel, that the window, this window in this menu is automatically
changed into Pixel Mode. Usually, in the Pixel Mode, we often editing
the image editing the photo and containing design
that based on the Pixel. And if we moved to the layout, the windows
automatically change. The windows automatically
change in the layout mode. Usually, we working on the
browser or newspaper or magazine or Pook or layout in
Book, something like that. And canva AI is the Canva AI. The menu is also changed. So in the Canva AI we have
to use the feature. And retouching is also
available on the Pixel mode. When we look at the
color grading too, it's also often when we
editing a photo, right? Maybe the color correction, we doing some adjustment
in the photo. So basically in this color
grading and this one is basically just a panel
of this one, the adjustment. This one is also
similar with this one. And the last from the
studio is compositing. Typography Typography
when you're working with the paragraph and then also working with text, this one to manage
the paragraph. This one to manage the text individual text,
and thing like that. This is just about distribution distribution
feature from Vector Mode and Pixel Mode. So the vector and Pixel mode, it will distribute
to other format. This is just about the format, not about the different tools
or different application. Because mostly all of this
feature in the layout to the compositing
is also available between vector or Pixel. So that's why in this class, we're going to focus on
the vector and pixel because when we more familiar
with vector and Pixel, we deep dive up the tos
in the vector and Pixel. I think all of the rest of it is just it's more easy
to understand, right? So in the file, when we click Open, so
basically we open an image. So for example like this. So there a thing when we drag and drop in
here in this document. So the image imported into
the document like this. My we scale down like this. But when we click, just click Open and then click
to click into the image, the Affinity will open the
image into the new type this. So this is untitled is the document that we
have created before. And then this one, this is the image we just click
File and click open, and then automatically, Affinity will open the new
type like this. So next close, the close is just for close the
image like this, close. So to set document, for example, like this untitled, I will save enter interface demo,
for example, like this. So this is the document we have created has a name document name. Then save us to save the document in a different
directory next in the edit. There is an undo do redo. For example, for example, guys, I will put in the burger here this so in the undo transform, just like this to undo
transform, basically undo CTRL+ Z. And then redo redo. Maybe you're familiar. That
copy a copy flatten here. Copy flatten here means
when we click the copy this one and I copy and I paste here. So the flatten
will be like this. It will literally same like screenshot like screenshot
this case, this one. So I delete, Okay. Copy flatten, duplicate,
duplicate layer, link selection. Yeah, I think for duplicate, let's literally same
copy and paste. delete paste, default, create
style settings, settings we have explored some settings previously
in machine learning, some settings just
only available in a premium account and
color user interface, maybe we not really need
to change in the settings. But right now, maybe
in the next step, we will discuss a little
bit about setting, but for right now, we
focus on the menu first. Next, in the document
in these pages. This is only apply when
we create document, when we create document
without artbord without artbord and using
multi page, right? We create this one. We turn off the artbord and
turn off the multipage. When we create
document, and this one, the pages document
pages click new here, the new document
will lie in here. When we put this object in here, for example, this rectangle
and this rectangle. So we move, change the color, and this one change the color. So we can we can work many document at the
same time here too, actually. But again, it's like more
organized too, like this. So it's not combined
into one layer. The layer is separate. But
when we close to here, yeah, it's not visible. This one is kind of different
with artboard mode. So this document features only
available in a multi page. And also, new add, we can add also
multipage at multipage. For example, this one, I delete the second page, and I will using
this one pages. We can add multiple pages. For example, the number pages, I will add a number
of pages to, for example, and I will insert after page
one, absolutely. And then, yeah. For
example like this. And automatically, you
will add two pages at the same time like this guys. And if we move to the layout here, Page one, patch two and
page three, like this guys. So this is document
for document setup. Move on the user interface
again, Document Setup. In the document setup, we can create the
resize or resize the document or convert the color convert the
color format for example. Basically, in the document setup is also available in here. This one. When we click
the output one, this one. We can also change the
document set up in here too, like resolution document. Beside this one.
And then rotate, rotate here means to
rotate in the document. We need to change the
rotation of document, just like this, like
this. Just like this. Bring back to normal
and flip horizontal. So the flip horizontal here means is not to flip the object, but flip the page
like this, like this. So basically, like rotation, but it's not rotate.
This is flip. We moved to the
text. In the text, this contain a lot of features. But basically, in the text, when we're working
with the text, for example, I will
hide all of them first. When we working with the text, here, for example, I will type. Hello world. So this one, this one, this one, text
from the size spacing, ligatures, baseline,
all of this one. Basically just
available in here, this one. This one. This is for like font, typefont, size, both Italic sometime
like that and alignment. And to edit the character, we can click this one character. Make it more wider, this one. This one, too, we can make
it shorter like this. So many things we can
edit what we want. And we will discuss
it more later. Next, next, we have discussed
about text and vector. So in this vector, I will
hide this one first. So in the vector, I want
to headlight this one. Geometry, a convert to curve. Geometry, new b grown. So I want to headlight
all of this one. So for the example of demo, I will draw on the rectangle or some shape for example
the rectangle to draw the precise rectangle, hold shift and draw on the
rectangle one like this. And I also draw on
the triangle Hold shift draw on the precise
triangle like this. I will make it more bigger,
for example, like this. And then I will
change the color. For example, this is blue. For example, this is red? So, I want to explain about this vector menu because
this is very important, one of the very
important features. I want to start with
convert to Curve. So before I convert
to curve I can't edit. I can't edit the corner. I can't edit the corner, right? I just be able to
edit the corner, maybe to make rounded
it like this, to make straight like this. Concave. I can't edit
it from the node. I can't edit. No.
Just scale up, scale down, rotate,
something like that. But when I this vector,
convert the Curves. So this corner change into node. So this is not only rectangle, but it'll become shape. So after I convert
to curve here, it's easy to edit. Like here, I edit
here, I edit here. Like this. Very easy. So I redo. The
converter curve here means to convert from the rectangle tool
into into curves. And now we're talking about
the geometry, the geometry. For example, this is the
rectangle is the triangle. I will making it overlapping
like this, right? So when we select all of them, In this vector in the
geometry, there is a add, substract, intersect,
xor, divide and compound. Here is basically the same
like this one, like this one. So when we click add, it will combine between the
rectangle and triangle. It come like this. So I undo. Oh, no, no, I undo. So this is kind of
different story when I move this rectangle to
top top of this one. So when I click the
rectangle and click the triangle and I
add just like this. So the base layer, the base layer will influence the top layer
basically like that. So when I select all of them, and I click substrate
so this one, this top layer will
influence the base layer. Basically, it will crop, right? And when I click the intersect, so the shape will
cutting each other. The part that overlapping overlapping between the
rectangle and then this one. And then this one, when I
will take XOR just like this, the effect, this has
become one shape. And the last when I click this divide into three
object at the same time. I undo. What if you maybe you curious about what is compound when we're
using the compound? It's not broken the shape. When we add the
compound subtrack intersect the using compound, it will not broken the shape. For example, when I
click at compound. So when we break down
in this compound layer, there is still consists of
triangle and rectangle. So the shape is
not broken, right? The shape is not broken
and still be able, we move from here to here. You know, geometric
effect still apply, but the object is not
broken, just like this. We move to the image image
tracing to tracing image. We will practice letter. We will practice letter
and expand the stroke. So expend the stroke here. Basically, when I try to, for example, this one with the blue rectangle,
I will add the stroke. The stroke here, this one, the stroke, this one. The size of stroke, for example, this one, this one, I'm going to use this
one, the stroke, right? And when we click
this, you know, expanded stroke, separate from the rectangle, just like this. Then the stroke will separate. Next fill holes, fill mode. fill holes, fill holes
what is Fil holes. Yeah. fill host. That's
the vector menu. Move to the Pixel.
Pixel selection from the filter,
Pixel selection. This is also very, very,
very important part. So I'm going to delete
this one just like this. This filter contain
a lot of filter. So maybe I bring back
this one. Or hello world. I will make this triangle and rectangle to under
this this pixel. The filter, for example, there's a blur
average, gaussian blur, sharpen. We start noise to
take lighting colors, and we will deep dive one by one in the next
session. So don't worry. This very exciting
when it comes to the pixel and filter like this. Let's say I'm going
to import this one. This apple again, right? And then when we talking
about Pixel selection, there's a color
range, tonal range, Alpha range, so many
things, actually. But yeah, I will, you know, like selection
in the red color when we select color range to green our blue because
there is no green or blue. So yeah, absolutely, it's
not really impactful. And we will talk about
all of this later. This is very, very important menu when it comes
to selection the object. I think for right now,
we will set for letter. The new layer, new mask, e. So this is new layer, news new adjustment layer is
basically to add the layer. Basically, you can add this one. Pixel layer is similar
to the new layer, group layer or container layer. Basically the similar one. For example, when I click
the new layer here, and this one will
create a new layer. This is also pixel layer. So same. In a pixel mode. So I delete, I delete it. So basically the
vector and the pixel, new layer, mass layer, Adjustment layer is
just to add a layer, but in a different purpose. It merge is basically
to infer the color. We will also talk
about later and merge to combine
all of these layer. For example, when we like this. This one, when I'm going to
when I click this one, merge, merge visible, and we create the This is basically just
screenshot, like this. This one. No, no.
Yeah, this one. For example, this one. It's
basically like screenshot. So I delete this one. And then next livestock
group, live tone blend. We will talk about
it later, Rasterize. Rasterize here means
to change this mode. This mode, for
example, this picture. The first. This picture, this is still on the image,
this original image. You know, when we first import, the size is so big, right? The size is so big. So this rasterize layer is to make this image into the
exact resolution. Previously this image, this blue car resolution is absolutely more
than this one, more than 3,000 by 2000. When we click rasterize, the resolution will change depends on this
resolution like this. So when you rasterize
like this, yeah. The image is not
as big as before, following the
resolution in here. And then the restoration
is also important because every time when we apply
in the pixel layer, also need to rasterize
the image first. I think in the layer is also
setting to apply this part. Set to apply in this
part, the layer, select Layer Effect, we
talk about layer tpo, group to make a group. For example, when
I click here and click here, I group this. So it become one layer, but actually this is just group. So this is not merge, screenshot or snapshot,
group layer into one. This layer, new group, lock unlock to lock
the layer like this. When we lock the layer, when we lock the layer
like this, this one, this layer cannot be clicked and cannot be
selected or cannot be removed or delete until this
tangle lock is unlocked. This one, too, yeah. And then we can edit
layer. Just like this. Master page, hide show. I think it's not. We can talk
about letter view in a view. In a Zoom meter,
we can zoom in, zoom out, zoom in, for
example, like this. Zoom out like this. Document, Document and
fit is maybe same. It is 100 100% or actual size. Next, we moved on the
window in this window is to place manage all of this window from
the color swatches, stroke appearance, this one, layer, path brushes, style
navigator history transform. All of this window also available here, for example, color,
history layer, Navigator, switches transform, and all of them also be able
to edit in here. Like maybe we can
edit also this icon, the tools to
arrange all of them. Like Pixel is like
Histogram Info Library. If you want to, you know, like, using all of these tools, we can appear the window. So the window is to manage
the panel, this more or less. And help, this is help
the Affinity provide to make us to ask or to, you know, Check for
update, for example, and send feedback if you
experience some error and you want to report to the
developer and about this one. This one using Affinity
March 20 206-40-2301, right? Okay, we have explored the menu. Next, we're exploring the
from factor and Pixel. But the first, we want
to expand the factor. Well, we exploring one
by one these tools. We also practice to create
design, to create project. So see you in the next session.
5. Start Learning Vector Mode with Shape Tool: Hello everyone. So previously we have learned about
the menu in Affinity. While explaining the tools, we also practice to create little project to implementate the tools that we are learning. So at the same time, we
explain tools and also practice. So let's break down
the Vector Mode. We move to the
Affinity software. So in this session, we want to create
another document. The new document, I will
click New Document. For this one, I would
go with 2000 by 1,200. And I turn on the Airport
and create document. This for Vector Mode,
right? Create document. 2000 by 1200 and turn on the artboard
create document here. I'm going to explain
about this one, this rectangle, how to create shape in Vector Mode, right? This one, this is
the shape tool. We can create rectangle tool, ellips tool rounded, triangle, diamond, trapezoid,
so many things, polygon, star, double
star, so many things. I'm going to explain
in a simple brief that the vector is different
than the pixel. vector, when we
create the rectangle, for example, we bring
the color green, for example, or maybe blue. And I will copy. This just for explanation. I will delete the color and I will add the
outline like this. When we in the Vector
Mode, when we zoom in, so there's no one, you know, like the pixelated, the Vector Mode working
with coordinate. When we zoom in
until the maximum, there is no pixelated, right? It also happening
here in the outline, there is no pixelated at all. Even when we zoom in until
in the Pixel Pixel view, there is no pixel at it. It's a very sharp
because this is the different mode between
pixel and Vector Mode. But when we import an
image, for example, when we import the image, there is a pixelated
or on this one. For example, this
apple, I print here. When we zoom in until
the pixel view, there is pixelated, you know. You know what I mean?
Just pixelated. The edges it doesn't
clear and then pixelated. When you zoom in here,
there's no pixelated. When in this one,
Yeah, of course. Because this is a bitmap. Because this one is bitmap and this one on the vector mode. So this is also
happen when we here. This is factor view mode and
this one a pixel view mode. When we on the factor view mode, there is no pixel at it. But we click this one Pixel. Yeah, there's a pixelated. So the transition between the
background and the shape, we bring back to the
factor view mode. So I will delete all of them. So back to the shape
tool here, this one. So in this one, I'm
going to create rectangle tool like this. Create like this. Because rectangle
tool has outline. It's a very thick
outline, right? This one, this outline, I will drop to zero like this or maybe just a
little bit 0.1 like this. And I can add the color. I will fill the color this one. This one, displays when we put the color into the rectangle
or maybe which is like this. Or more visible rectangle. This one, the color, the color window is the
place to put color. We can put color we
want, like this one. This is for set stroke and
this one set fill This one. We can set fill what
we want, right? And this is one. This
is the wheel color. Maybe I will set to
Blue. Like this one. And in this color, we can also change this one
from wheel to sliders here. And we can change the color
like this, like we want. And we can change also
boxes like this one. So we can change so many things, so many things form
to create the color. This one is to set fill to
set color like we want. And this one set stroke. I want to remove the
stroke, just like this. Remove remove the stroke like this from this
from this one, from a black stroke. Just click one set fill to no. And yeah, we have created the
rectangle without outline. Or maybe we just click here
from one point to zero, and then the outline is gone. Okay, I will change the color
maybe a little bit here. Like this will change
and stretch to full from the page
like this, right? So, I will create the another
the rectangle tool. You can follow step by step
what I'm doing right now. Here and I can change the color to a little
bit brighter like this. And we can also
create this elipse tool. So elipse tool here. When we draw elipse tool
it will become the, you know, become the elipse. But when we sift when we
hold the sief become circle. When we draw like this, it's become lives and hold
become circle like this. Here, maybe I will reduce the size with hold
shift like this. I will put in here maybe
a little bit bigger. Yeah. And the circle I will bring
to here and this rectangle. One, I want to change the
color for this wheel. I think it's more like this. Well, we also change the
color with trough wheel. We also change the
color with this. This is circle. This is circle, and this is the color. And here, the gradient tool and just the Gradient
tool and click here, right? So the oval and the circle
has gradient effect. But I want to change
the color. This one. This has 2.2 dots or two points. So I choose this one and I
change to maybe a little bit blue, blue, This one. Click this color, click Gradient. And this is when we click here, it will become the gradient. So we can also inverse, we can also click
reverse to flip this blue become in here
and this white bcome in here with reverse
like this, right? And here, I will click here in a white color and
I change the color. Or is more darker. Here. And I will also copy
and copy this circle, I will copy here and bring here, right? Just like this. So we have create, what is it? The rectangle, this one, also rectangle, maybe a little bit too lower
and this one rectangle. Little bit to here, maybe I will revise the
color for this rectangle. Just and reduce this one
to a little bit darker. Yeah, like this. What we are going
to make, actually. Yeah, let's see later. So we have created the rectangle and utilizing some
color grading. And next, we will create
the shape with Node Tool. See you in the next session.
6. Combination Shape Tool and Node Tool: So in this session,
we're going to continue our practice
in vector mode. This session, we're
going to create the shape but using the Node tool. So we will create the shape
that utilize the node tool. For example, when we create the shape
like rectangle tool, we can't change the shape except
height and weight, right? And we can do nothing. Maybe just give him rotation
or something like that. After we convert this rectangle to convert to curves
on this vector, right? And convert to curves like
this editable in nodes. So we can edit with this one. This node tool, we can edit. We can edit here.
We can edit here, for example, we can edit
here, for example, things. So this is the from the
rectangle, we can edit the node. So I did two or even I can edit. I can make little
bit curve like this. I can a little bit
curve like this. Just when we convert from
the rectangle to Curves, and it will also
apply in every shape. You want to make a polygon
tool, for example, in this polygon
converter Curves, and we can edit like
this, become trapezoid. In this project, we will
utilize this elipse tools first. So I want to combine with
rectangle, this one, right? Like this. In this tube, we bring here here. In this tube, I will give the color. I will
change the color. Maybe in this ellipse, I'll bring to the top, this color to a little
bit like this. And this rectangle,
this is from rectangle. I will bring the
color blue like this. I want to make a tube.
This is as a tube. So to make it curve,
we have to change. We have to convert this
rectangle to curve. Right click and click
convert to curve. And right now, we're
using this tool, no tool, and using the center point and make it a little bit ending
like this, like this. Right. Or maybe it's too
much or we can zoom in like this too much. And this one, we can
click this corner, this node and make it
until it's similar to this one like this. Yep. More or less, it's like this. We can put object in the
top here, for example. So maybe this is
not really connect, we can touch little bit
like this. All right. Next, I want to
change this color. I want to change this color. Just a little bit give
the gradient effects. like here, click Gradient, and this is a very
unique gradient, guys, you can see, maybe you can pay
attention this one. So in this color, So in this color, you click here in this is like
gradient color, right? This is white, and this is blue. This one in the blue part, I want to copy the
color code, right? I want to copy the color code. To get the color code, you just click color here
and you get the color code. You copy and click here
in the white area, white color, and this is
color code for white. And you copy like
this. And enter. So it's like this is
a solid color, right, but actually not because we can edit and this one in this one. So I want to make this one. In the center, it will
gradient with new color. Just click double click in here in the center
or in this line. Just click Topo click in
here like this. Right? So in this center, I will change the color
to what like this. And a little bit wet from blue, just a little bit wet like this. And I will make it narrow. Tend to like this, this one, too. So it's like the color is, like, different
from here to here. Right? So we can also use
utilized gradient like this. And this one too, this
one, too, this one. In the top part of tube, we can also change the color. We can click gradient like this. Or if we just click in
here and change the color, we change the blue, for example, like this, maybe it's more blue. This one, too. The more blue. This one is also a
little bit blue. And in the center here, we make a little bit better. Right? So we have created
this tube, right? So as if this tube is, you know, stand in front of the background and the
top of what they call it, maybe low or something, as if. So in a vector mode
to create a shape, we usually using this
one rectangle mode, and we at it with node tool. Okay. Next, we'll add
another attribute. I will import an object. You put in the
folder, vector demo. I will impart this leaf and I will track and
drop and put in here. Right. So well, previously, we
have created the shape, combination shape with node
and modification shape with node now. So number two, with this image, I'm going to
modification the shape, this one, in order to get
similar with this one. So what if we use the combination of this
shape to make this one, to make this one? I'm
going to show you. Maybe this is a
little bit longer, but it will very exciting. So if you look at this leaf, it's similar to the
love heart tool, right? We will create with
the heart tool. For example, like this or maybe just similar
like this, right? Similar like this. More or less. Will be like this. We change from the color from
the gradient to color, and maybe just
choose a like this. So after we create this
hard tool, as you can see, when we click topple click
in using Node Tool here, you can see this is the
little bit dot we can drag in here until divide it into two or make it a little
bit here like this. So I want to get like this. So and then I will rotate. To be able to edit in Node Tool, we have to convert to
Curves, convert to Curves. In order to this side, these Curves, be able
to edit with Node Tool. So we click right click and
then click Convert to Curves. And right now, the
Node Tool will provide the feature to edit the
to curve of the shape. For example, I will
little bit make it here like this and
just like this. This one will
bring to the top and make it this like this. Just like this. All right. It's not fully,
you know, precise, but we can create more precise, actually, maybe, like this. Just like this. Or like this. Or this one is I think is maybe we can also
reduce a little bit. Yeah. Right? This is more similar than compared to the
previous shape, right? So how we can create this one? So hole in this leaf. It's not easy tho, but yeah, we have to learn about that. We're using the node tool here. If, as you can see here, this is the curve, right? If we double click in here, we will create the
new point point node. And we click here, again, we will create a
new point again, and I will create this one. So we have three new point, three new node, and I have one. Okay. Yeah. So this node, it will hold this curve. So it's not affected
if we change this one. And this node also hold this curve in order to not effective with
this one if we change. So which is through grab
like this to the center. Maybe it's too much like here. Yeah. Oh, mybe just
a little bit here. Yeah. And this is
like curve, right? So between that, we
create two nodes, again, in here and
in here, right? So this curve, maybe we
can create convert to smooth like this and little
bit draw to here. Right? And this two, we can convert this one
to smooth like this, this one also too
smooth like this. So we have created the first hole for this
part, for example. Maybe if it's not
really precise, maybe we can grab this one and
little bit grow like this. And this one also
modify like this. This is the first hole
we're going to make this. Right? Okay. And one, this one, too. We also using this one. We create the fourth. And we grab this one maybe one and this one we grab here. Like this, right? And maybe just a
little bit closer. The example in this one, a
little bit closer, like this. Which is if we make it more rounded or more
smooth in the corner, just like this and click
convert to smooth, like this. This is also
conferred to smooth. But the consequences it
will be like this, right? So we need to make
two node, okay, here and here, for example, and this one click smooth. And this one will bring here. So this node will hold. This course is not affected by this modification
and this one too. For this one, this node, I want to make a
little bit corner tool using this corner tool, right? A little bit like this. Make a little bit rounded and this one, too, I this one too, a little bit round it like this. The next hole in this one, we add the shape, this one, Oh, it will affected This one, I will create
again, this one, I create and
i just draw here. Is through here. It's true here. Again, this block like convert to smooth like this, for example. And this one for the easy part, I think I will go with
this corner tool. And this one, I'm going to
make a little bit around it, but to make it a
little bit rounded, you have to make
sure that this one sing this one, Convert to sharp. Convert to sharp, and
you'll be able to using the corner tool like
this little bit rounded. Just like this and this
one too in this side. We create for node Like this. Again, click Smooth here, and I want to make this
round it with this one. Just like this. And this one like this. Rather than we start using, you know, to make it a little
bit rounded it with tool, we can also using this one
using the corner tool, as long as this not using
convert to sharp like this. Next, we create the fourth hole, this one and throw like this. Make it smooth and this
one using the corner tool, make it here and to design here. Also the same. This one, using the pen tool at the
pentool using this one, no tool here here for
example, we draw like this. and I convert to smooth, smooth. And this one using corner
tool and using corner tool. Alright guys, maybe we
can rearrange the node using Node Tool little bit here. We have to create the
hole in the side. Next, we will just
add this rectangle. We will just add the pentool. So this one, I'm
going to use pentool to make the bone leaf. This Pentool if we click
this Pentool here, the pentool Pentool and click one, we will create the dot. And this dot will so
we can drag and drag and slide and moving carefully
to make a shape like this. Right? And we need to click this again to make a
little bit another curve, click like this and two and two, and I will change the Pt maybe 0.5 to make it more
small Outline. Right? And I'll start from here and try to like this and click here to make it new curve
to make it curve direction, right, this and
click here again. Maybe click like this, click like this and bring
back to maybe to here. Head and click here
and click here. Right? And back to first node s
in the curve will join, will cover or closed. It's not open but close. I join, I connect it from the last node
to the first node. After that, choose bring color because this
color is more brighter, so we bring color more brighter. So we can remove this
a stroke like this. So this is a bone. Because the bone is too, you know, it's too thick, right? We can edit it with a no tol. Maybe we just, you know, moving a little bit, make it more thin
bone, like this. Just like this. And like this, right? Right. More or less will be like this. This is the first
bone we have created. The another bone, here and here, we will draw the another
bone using pentyl two. This one this one
and click here, and we can also using with this. Give the color. So
if you want to give this color that precisely with this or the same with this, there's another change
to copying the code. As you can see here,
this is the color that use the last reason use. Or you click Color Picker. We repeat. Just this one. This is for set stroke. We set fill first like this and click color picker and move it so click in the color
picker and move into the target and let it go the
left click like this, right? So the rest of it, which is remove this
outline like this. Maybe a little bit correction. I think, just like this,
for example. Yeah. To save the time, you just copy paste
and put in here, for example, and just, you know, doing some
transform or scale up. Again copy paste. On this one, maybe we can rotate a little bit like
this and put in here. Again, with this one, node tool, we can modification
this tool like this. And we can draw with this, for example, this one. Next, this one. Right? If we practice it more often, I think it will easy to
create the modification. Next, we need to draw
this bone, we select four of them
and copy paste, right? Okay. And then we flip this position, right click and arrange put in the transform and
flip horizontal like this. Or maybe we can just click here, transform and flip
horizontal like this. Using rotate like this and
put in here, for example, We can readjustment
the position. All right. So the rest of it, I will just creating
this one or a little bit, make it like this one is a leaf bone And convert to curve again, and I will make it as
if it is one of leaf. So more or less is like this. Or I think we can
change the color too. I think for this bone,
is more darker, right? Maybe I will here in the bo
line here until this curve. And we select this one, this curve, hold polyline,
and change the color. I think to dark, it
will be awesome. Yeah, like this. It's
more appropriate, right? Okay. So this is the
first way to create the leaf using combination
between shape tool and also node tool. So the next step, I'm going to show
you how to create this leaf using tracing
image tracing image. And I'm going to use Pentool one. And previously were using not with rectangle tool
Shape tool next, we're going to use pen tool. Previously, we using
the corner tool to make it more rounder and also we can using pento and also sometimes
also using corner tool. So see you in the next session.
7. Create Our Own Shape with Pen Tool: Hello, everyone. So previously, we have created the leaf with combination of
heptol and Node tool. We're going to make a leaf with Pen Tool and we're
using tracing image. We will practice our skill, our pentool skill
and tracing image. So let's we tidy up first, this one, this artboard. I want to duplicate
this artboard, right? Just click hold ALT. This one and I have
to artboard two, and this one is artboard one.
This one is artboard two. So I want to delete
it all of them. Just leave it this leaf. So we're going to
make another leaf and we will compare
the leaf letter. Next, I'm going to till it in this leaf and
still using this leaf. If you difficult to
create to duplicate port, just click artboard one copy and paste and then you
bring the artboad one. Maybe to the bottom
or on the left. If you difficult to doing
that or I repeat again. In artboard one, just hold ALT and drag the
put one like this. It's very easy to
very easy. Okay. Next, we're going
to tracing image. There is two methods
using pentool here, using pentool and we
tracing all of them using pentool and also using this one. Vector image trace. We are going to try the first
method using pentool here. So the pentool is basically to make a line
following this line, following the shape of leaf. So to do that, I'm going
to start from here, which is follow the line here. So the pentool, this is the first node I make
and the second node, Oh, it's too thick, right? If the you know, if the outline is too thick, we can reduce maybe to 0.1, 0.2 or 0.1? Yeah. 0.2. 0.2. Yeah. This is the first
node and second node. And I'm going to make a
three node. Third node. Next, I click here
to make a new curve. This is also as a
practice skill, our racing skill using
pentool like this, click here to make
a new direction. Here Click here to
make new direction. Here, here. Maybe click here, right. I here, click. Just remember if you want to
make this curve curve line, you just click and hold
and move it carefully. Click hold and
move it carefully. Click here to make
a new direction, click hold and move it
carefully with your mouse. Hold and move it carefully. Again, click here to
reset the direction. click here, hold, move. Click here, hold,
and move carefully. Click here like this. Click here, move like this. And we're following
the path of this leaf, the shape of this leaf. A and the latest node will join in the first
node here, guys. And we can give the direction, set fill this one and
with this one here. Here, the result
will be like this. So if this has a outline, so we can delete the
outline like this, right? And finally, you can create
this leaf and the rest of it we just create this leaf bone. Maybe I will reduce the
opacity first like this. This one, right? I reduce the opacity to help to help the visible of this leaf. So because, you know, the top of this leaf,
there's a curve that we have created previously, this one. So I reduce the opacity
to make it visible. This one. Yeah. So I'm going to draw
this hole, right? This hole. This is very
important, this hole. To throw this hole is very easy. Still using the pentool draw
this which using like this, following the shape of
this leaf like this. Then All right. Because this curve is under of this one we bring to
the top, like this. And next, we also
draw this one, this one. Using pentool like this. This one. And I also draw, oh, I don't know what the name. Leaf spine, leaf bone. Just draw like previously. Maybe I will draw like this. I will following the dark, the dark bone, right? Following very carefully. This one, this one, like this. We bring this curve, the opacity to 100 like this. And then we fill this one, this spin to more darker. I'm going to use this one first, color picker or the set fill. So I set fill this color
picker, exactly the same. Maybe I will increase the, you know, more daker. All right. And I will remove
the outline. Like this. And for this one, for this hole, I want to use this hole with this hole using
defied like this. So it will hold, divide this shape and the shape. And also this one, this one
and this one will divide. So we have created
the second leave by tracing this image. Maybe for the color,
I'm going to make, you know, a little
bit gradient here. I think I will make I
will give the color. This one is more darker, and this one is more brighter. But just like this. So we have created two leaf. I think this is too dark right? We make it brighter. Just like this. Alright, guys. So we have created the leaf. This leave this is the
first leaf that create previously This
combination of shape. Yeah, heart tool and Pen tool. This one node tool. Node tool. And this one is the
result of tracing image from this image, this leaf and will
become like this. Which one do you
prefer the method to create in the leaf?
There's still one more. There is still one more
method that I'm going to show you to create this leaf. We're going to make with tracing so I will choose I
will choose the artboard, CTRL+ zero. I have to rasterize this first. Click Rasterize here. And then after this image from not rasterize to be rasterized because
sometimes the Affinity, if you want to apply some
filter or some effect, we need the image in
the rasterized mode. So we convert to rasterize refusly before we apply
this image stress. And I think I will increase
to 50 50 to 50 here, when we click in here, it
will contain a lot of shape, a lot of shape because this result of tracing is
accumulated from small shape, small shape, from the tracing until it a lot of shape here. And after that, if we
just want to, you know, select selection in here, maybe we can ungroup
because this is in the group mode, right? In the group, we need to
ungroup first ungroup here. And as you can see, this contain a lot of shape, lot of shape that from the leaf. So we need to, you know,
make selection here. We cover the selection. We move the leaf like this, and we delete this and we need to tidy
up about the residue, the residue of shape
that we unwanted. Or maybe I will bring. Okay. This residue. By carefully. By carefully. This one is need a little
bit patient, right? I think I will bring to
a little bit like here, and I will lock this one, this layer, this rectangle. This rectangle, I will lock here tangle lock and not moving to anywhere
because I lock the layer. And we can let you
remove unwanted right? This one, maybe it
seems very exhausting, but this is the way we
dressing in Affinity. Yes. So we group here and we ring to here. So this is the first
method with tracing. We create the leaf, the combination of shape tool
and also from Node tool and and this is using the tracing
image trace. So this is the three ways
we create the object. I'm going to use this
one using here maybe. I'm going to put this leaf. Maybe this leaf is
in here, right? And this leaf in here. Yeah. So I think it's
too bright, right? So I'm going to change this color more darker and select one by
one this tone leaf. By hot shift and
click one by one. And yeah, more
darker than before. On this one left. All right. I'm going
to group this leaf. I'm going to group this
leaf, become this one. So I will give them
leave leave one. And this one, so
I'm going to group this one to become leave two. I think I need more,
you know, more darker. So in this one in the leaf one, click a polyline to curve, except this one,
except the mine image, and I will make it a
little bit more darker. And I will do the same
in leaf two here, First, here I will make a
little bit darker like this. Okay, guys. Next, we will create more complex shape,
more complex shape, or maybe next we'll
create the same, the combination of shape, but resemble a certain
product or certain mockup absolutely exciting. So see you in the next session.
8. Practice Tracing with Pen Tool: Hello, everyone. I'm
glad to see you again. In the previous session, we
have practiced to tracing image to become the object. Now, in this session, we're going to practice
to tracing again because the essential in the vector mode is we'll
be able to create a shape, we'll be able to manage
the color and also utilizing pen tool and node
tool create object and object. So I think these
skills that containing the color gradient and
then also Pen Tool, also Node Tool is
very, very important. So I think it's worth to sharpen our skills
with practice. So let's move to the software. So this is the letters, our work from the
previous session, right? Click on zero like this. So we have created this leaf. We have created this leaf and this tube and then the background. Right? From the tracing before, I'm not using this lip,
so I will just deal it. Just deal it like this, right? So because this document
is not saved yet, as you can see here, the
name still untitled. So I need to save this document. To save this document is easy. We can combination
CTRL+S like this or to save the document,
it's a very easy. You can in the combination
CTRL+S, and we'll give name vector demo. Like this, and we save. And then the vector demo, the document name to vector demo. Or practice tricing is I
want to use image this one. Vector demo, this one. This one, banana leaf So I found this image
on the Internet. But unfortunately, this banana
has a white Background, right? And then there is the easy way we can confirm this banana. This banana leaves
from this one, white background and we remove the background not
in a bitmap mode, but in vector mode. The solution is we can trace
using the previous way we have learned previously trace
image and magically. When we click group
like this and we put out this background and we have the banana
leaf right here. This is fully vector and sellect able like this and we can
change the color, for example, like this, the change color we want. That's the first way to
convert this picture. This picture in bitmap in
to vector mode like this. But we are not using this way. Maybe this is very, very practical, very
easy in a short time. And you can use this method. But because this session we're going to practice to
sharpen our skills. So we are going to use
this pen tool also node tool, Node Tool to draw this one. So we back to this picture, this one, like this. And I think I will edit in here, just in here directly in here. Yes. So I will fit
the page like this. So we will draw the line
following this path because I think in the next
step or maybe if you're facing a lot of
project in the future, this skill is very useful. How we can use Pen tool not
only in a vector mode, but as in Pixel Mode, it's not only, you know, creating something like this, but sometimes when we editing in a photo editing in bitmap, this one is very, very useful. So again, we click here
using Pen tool? Using pen tool, we click here. Remember, this one, this
stroke if this stroke is zero, and maybe our line
is not visible. Okay. Oh, 0.2. So okay. We repeat, click
here and click here. Like this, by gradually,
click this point to another point
and move slowly. Reset the direction, use this point and reset
the direction, this point. Moving gradually
moving carefully. This one, this one, like this. Right? So this is indeed
takes a long time. But as a practice, this
is very important. We sharpen our skills, that the pen tool is one of
the most important features, and we often use it in
a in a many use case. So at the end of the day, when we create an object, we will use this it's not
only creating the object, but to make a selection, for example, to fill
many other things, we will use and utilizing
this skill on this pen tool. Remember, when we
come to the pen tool, we have to connect the last node to the
first node like this. So it will cover like this. Next, we're going to
create this part. What do you call
it? Spine leaf or bone leaf this one quick here moving gradually,
reset the direction. This one, as you can see, this is a shadow some shadow so has different different
color between this one. The first shape we
make and then here. So from this shadow we also select. But in a simple way, just
in a simple way like this, we don't need to really precise. Just again, that if your node
is not following this line, just make it a little
bit similar like this. It's okay. Indeed,
it takes time, a lot of time, but our
practice is worth to try. In the process of
creating object, this is using the Pen
tool using using imagination to create
the new object, right? Maybe I will speed up to make the duration
shorter, right? Right, we almost done here on the first leaf because there's another leaf
we need to create. Don't worry, this is part
of practice, right? If you still feel
difficult to make a node, this method, this
practice is worth to try. Like this. The next, we just is fill the color. So we click this one
and make sure that we set this fill and
using the color picker, if you want to get the
same color as the example. And then for the shadow maybe just a little
bit darker like this. And for this one, I think
it will more brighter. Just give a little
bit brighter like this. The rest of it, you
can select this one, one, two, three,
this one, right? And click here. Set
field to none. And here, the result will be
like this. Like this guys. So it's very resemble with
this example one, right? So maybe for this one, this one, the leaf bone, I
will little bit make it yellow, like this. Okay, guys, very similar, right? So I put in here for
this banana leaf. Or maybe I will make it
a little bit brighter. Like this, and this one
make a little bit brighter. And don't forget we still
have one more, yeah. So as you can see here, this leaf contains three
color, first color, two color, and three color, and even four color
for this bone.
9. Continue Our Practice Pen Tool: Let's practice the
leaf number two. It would be exciting, right? here. We click the next poin reset. click again the next poin
click reset, lick next. Poin reset curve like this. Right? Maybe we will draw
the bone first before we leave like this. Let's create the bone. Okay. Maybe here like this. And like this. The leaf bone Next, we will draw this one. I will hide first. This one I will hide to get easy when we draw on
this one, this leaf. All right. Next, we throw on this leaf. We start from here. By
gradually draw the leaf. This is very exciting. When we finish to create the object and
our object looks good, feel happy and satisfied
at the same time, like, Oh, I can create
something amazing like this. Sometimes in a small
thing, small achievement, we have to grateful, and then we have to
celebrate sometimes. Just celebrate for ourselves. You know, we have made small
progress, but we are happy. Next, the number two, we will create this
with this method. It's exactly the same. Like this, throw
carefully, like this. Because this class
is from basic step. I think don't worry by gradually
in the next session, maybe it will literally
more complicated step, and it takes a lot of
them again to learn. Yeah, this is part of practice. And my concern why this Vector Mode is important because it's like more basic, I think, it's more easy to
learn Vector Mode first, then we move to the pixel mode. Right? Because in a vector mode, we more depend on our
skills like this one. Just like this, more dependable
in our skills, right? So we bring back the curve.
So we have created this one. bone, this dark leaf
and the brighter leaf. And the last, we will create, you know, shadow here. But yeah, we will
create Shadow letter. First, we will give the
color for this bone. Just click here, Color Picker, and take the sample like this. Then in the dark leaf, we also click Color
Picker, drag and draw, and use the target and
release like this. And also, this one, because this one isn't the bottom in the
bottom of this one, so we bring to the middle
or to the top to the top. And we bring the color. I think I will color picker, I will take this
color like this. Here, guys, the result and
we can select this one, this curve, hold shift, and chose this one, this one. So we select all of them here, and remove the set stroke. That's stroke here. So this is the early
result, right? This one is the
example, this one, the one we recreate. So the next, we
will make this one. The shadow. Just throw with
our imagination, guys. Sometimes we, you know, based on our imagination like this, sometimes
just like this. Even though the result, maybe the result is not
like what we want, but, yeah, it's
part of practice. This is important. So the key is don't think
that our design is a bad. Maybe in our eyes is bad, but in other people's
eyes, maybe it looks good. So yeah. Yeah, everything we create, we need more appreciate. Just draw like this. Nah, like this. Maybe you're wondering
why we draw like this? Why we draw like this? How we can create the shadow like the example
one, remember, guys? When we select two
curve like this, it will appear some option
geometry like add substract, intersect, XOR or divide. So in this case, I'm going to use
divide, you know, this one, and also got
this one overlapping. So to be safe, this one, for this one, for this one, this curve for
this curve, right? I want to copy, first, I want to copy this iter plus
G to copy in that. So we have two this one, two, this one, right? And I want to choose this select these Curves,
one of this one, and also hold shift and click
the latest shape we want, this and choose the divide. So we have three
Actually, this what? Oh, this is just part
of small like this, so we don't need that,
which just delete it So we have two separate it. And we start to give the color in this
one, change the color. So in this one, the
object we want, and this one part of
another part of the shape. So we're going to change the
color a little bit brighter. This curve. Yeah, this one in this
curve, this layer. So we click the
set field here and a little bit brighter this. Or maybe we set two
colors like this. Yep. So here the result. Similar right? It's
very similar, right? Yeah. Like this. And I'll bring back to here. Little bit rotation. Yeah. So Okay, we have created and
practice do an advertising. I think we have created
three leaf, right? Three leaf. So I want to
delete the example one. Okay, we have created
three leaves. That was absolutely
awesome, right? Awesome. We need to, you know, appreciate more about
what we create. Okay, I think I think I will create a little bit
more writer for this one. And this one. Like this. Yeah. Okay. Oh, this one is too dark. So you can re edit, re
edit what you want, right? So the next session, we're going to create
the combination of shape and combination of pen
tool to create an object. We will playing some shape and color gradient
to create an object, more precisely to create
a certain product So see you in the next session.
10. Manipulating Shapes Into Objects: So in the preview session, we have practice to create
the object to create the banana leaf with tracing and utilizing pen tool
and also not. Right now, we're going to create a product using combination of shape tool pen tool and gradient
color. So let's do it. We move to the
affinity software. So the product that I want to
create is sunscreen lotion, and it will stand in here. Like this. So let's
create the product. Before I doing that, I will
tidy up this layer, right? Because this layer a little bit crowded and unpleasant to see. So this one, this
one and this one, this ones become one. It's become a leaf, right? I will group here, and I will give the
name leaf four. Right. So it's more little
bit organized, right? So I will create this little
rectangle here like this. And I will make it
more bigger like this. And then I also create
another rectangle, too. Here, like this. Maybe this tall is more
or less like this. Here. Right? Like this. Maybe I will bring
the color to orange and this one to, to white first. And then this one, I'm going to convert
to curves because I want to d it in this
part and in this part. I will convert to curves, convert to curves like this. And this one, this note
using this no tool, I will click and gradually and be careful I
ing to connect this node. And also, I did like this. bring until this node is meeting. Next, I also create the can, this rectangle tool here, like this in the
top of this one. This one is more need to
more wider like this. And this one need to re edit like this. Re edit like this. Yeah, and this one too. Okay, this rectangle,
if we stretch, gradually like this, and the stretch is just on
the side like this. But if you hold the CTRL from the right side and the left side is
also changed like this. Yeah, I think it's
more appropriate. I will add the gradient. I'm going to use the
gradient to like this. When we click in here, the color immediately change to gradient. I want to copy this color here. So in the right and
also left is the same. So I will click here, and
I will copy this one copy, and I put in here
and paste in here. So the color back to solid. But actually this gradient, it's look like solid color, but this is in a gradien form. So I will click here,
like in the mid center like this and I
bring to this side. This one, I will make
a little bit brighter. This one. And then
I will narrow, you know, the space, narrow the space like this. Maybe it's too bright. It's a little bit like this. And I will add this one, this area add node
table click like this and make it brighter. This one. And I will create
one more this one. This one. In this middle, I will go with more
darker, little bit darker. This one. Or maybe
les like this. This is to dark, maybe I will go a little
bit, temporarily, I think it's enough like this. So because this is like tube, right, remember, previously we
create a curve like this. So we also create this one. So we convert this
one to convert the curves to be able
to edit this side. And by gradually here
using node tool right? And we draw a little
bit to curve like this. Just a little bit. I
repeat, just a little bit. Like this, little bit. And this one too. Just a little bit. Maybe
I will go with this one. Like this, and this one. This This one, too, like this, like this. All right. And then I will bring this
little bit to bottom. And we using the node tool
to bring down like this. I like this. Right. Next, I will add some
separation in this area. Using rectangle tool, still
using rectangle tool, like this and change the color. Maybe for the temporary, I will change to
solid like this, maybe more darker, like this. From here, I'm going
to convert to curve. Just click, right
click and convert to curve and gradually using node tool, we also bring back
this one like this. Right? Maybe a little bit. Just little bit. All right. Cool. And then let's fill with gradient like
previous shape before. Click gradient. We click
here, this color. We get the code, we copy, we put in here, we
paste in this code, though the color look
like a solid color, but actually this
is the gradient. And then we edit. In here, we create
new node, new point, and then little brighter this one
too a little bit brighter. In the center, I
will make a little bit darker. Little bit darker. Yeah. Like this, maybe too dark a little bit dark. Mm. More or less be like this. So next still in the cup. This area, I want to add
a little bit attribution. I will using the
segment tool, this one. Segment, I think. And now we put in
here, for example. Here. Wait. Where is it? Segment. Oh, this one. We bring under the curve. This one, like this, yeah. I put in here example here. So to reduce the size, hold CTRL+Shift and this mouse CTRL+Ship and gradually
you reduce the size. So the size will be
reduced at the same time. Size center. Next,
I want to change the color to solid temporally. Maybe like this. Right? When we look at the here, I'm going to change this one, the segment tool to
convert to curves a little bit make it curve in this bottom like this, right? And for this color, remember, this color, I'm going to a little bit apply
a gradient like this. But Again, I want to change the color first here to
make it look like solid. But actually, this is the
gradient and maybe just a little bit change little
bit like this, right? And this position,
we're using this one. Fill tool, right? Fill tool. This one is exactly when we edit in here.
This isn't the same. This node with this
node in this point, with this point, this point with this point, the same tool. In a different form. I can grab and move this gradient direction
like this, right? Right? I can move with
gradient direction. And in this gradient, this is in the dark area and
this is in the bright area. And I can make in this middle is more brighter,
little bit brighter. And this one in
the bright area, I will reduce like
this and this one, I will reduce more or Maybe you go to here like this. Oh, I think I will
edit this one. This line. This line, I will edit the color. I will make a little
brighter. Like this. Like if this area is placed in our thumb to open this bottle. This one may be a little bit
Yep, more or less like this. Yeah. Nice. All right. Alright. So I want to duplicate this one curve this curve. So I have two curves, right? And I will bring this
curve in top of here. And I will reduce the opacity
to maybe 230, 30 or 25. Like this. All right. Like these guys more or less. Maybe it's too thick,
right? Too thick. I'm going to use hold+shift
or CTRL here and hold. So I'm going to make this
lines a little bit thinner. I hold CTRL and then stretch to down
just a little bit. Yeah. All right. Yep. I think it's enough. Yeah, I think it's enough. Okay, guys, so we have
created I think this is not. Okay. Sometimes it's, like, it's too strong in this line. Mm. What should I do? Maybe I will little bit revise. I'm going to revise this one. In this curve, I'm going to revise on this color,
little bit darker. Like this. Yeah. And for this line, too, a little bit brighter
this one. Brighter. Yep. Little bit brighter. Yep. Nice. Nice. Alright,
everyone, in this area, I also want to create
the gradation to do that, just click in here, right, click here and click
Gradient like this. I want to change
one of these point, color, maybe just a little
bit dark like this. So we know which
dark which bright. After that, we will use this filter like this and I'm
going to change direction. From here to here. And we can also
adjust the gradient, you know, the gradient
amount with this slider. Maybe this one is to talk out make a little bit brtter
like this and like this. And for this one, I also
want to make the gradient. This one. Little bit darker. And change this position
with fill tool. Put in here. Here. And then we bring like this. And for temporary, I'm going to create little just a
little rectangle tool. Rectangle tool. I just create a little here
like this and make it darker. Okay, this. Maybe a little bit Brighter like this
and this one, too. Just here little bit brighter A little bit darker. Yeah, more or less
like this. All right. Next, we're going to create
the label, the label product. So after we create
this prduct placement, we create the label product. Still utilize the pen tool
and shape and color gradient. So see you in the next session when we create the label product.
11. Practice Create Label Design Product: Hello, everyone. So in
the previous session, we have created a product shape using combination of Shape tool and two and this one, node tool. And also, we fill the color
with gradient tool like this. So in this session, we're going to create a label, label of the product because this
is a black. This is a space. We will fill this with a
label from this product. In creating the label, we still utilizing
the Shape tool. And then Pen tool and
also Node tool and again, we will fill the color with, you know, with Fill tool Either we're using the Gradient
gradient tool or solid color. So let's move to
the creating label. Because this label
will fill this area. So I'm going to create a
rectangle here. Like this. The size is exactly
like this package size. So I want to move
this here to Artboard In this rectangle, I moved to Arboard beside
Arboard number two. So in this airport, we can
make the label in here. Maybe I will bring
here to the center. So if you curious how to make this rectangle to the
center. It's very easy, guys. If you just using
this one, alignment, and click here and click here, automatically this
rectangle into center. Maybe I want to make a
little bit h like this. Other than that,
I'm going to draw some accent for this label, and then I will fill with some, you know, copywriting,
headline or text. This step, I'm going to
use this one pen tool Usually, the lab bell
has some accent. Sometimes the accent
in the top area or in the bottom area or
in the side area, the label from the product. So I'm going to draw this one. I think I will start with this
one. Creating small first. This one I will draw this one, draw this one like this, make it little bit curve, little bit curve like this. And then make sure that this last node will join
the first node like this. This is the first shape. I will create again this one. This one, like this. Still creating the like
this, this one and this one. Using the node tool, I will make maybe
a little bit here and a little bit
close to here and maybe a little bit
here and this one. So we can adjust
the node like this. Next, I will create some accent or maybe I will make it
a little bit like this. All right. And this
one like this. Next, I will create
again, this one, for example, and
this one like this. The little bit closer
to the bottom. And like this. So this is also practice. We manage the node. That's still one more, I think. Still create here, maybe
just a little bit accent. Like this. Yep. Right? If we feel that it's like
we need more bigger, which is like all of this
here. Lock all of this. And then we hold sift and then we stretch to the bottom like this to
make it more bigger. Like this. Right? Sometimes, I'm going
to make this one more close to this one
close more closer. Like this. And then
make, you know, little bit accent to here
little bit accent here. Little bit accent
here. All right. Next, I want to also make
this in the bottom. Here. I want to make
accent in the bottom, like this, this one, like this. So I can This one like this. And I will add a
little bit here. Like this and maybe
just little here. Ohh. i repeat. Right. So after that, let's
fill the color. I'm going to fill this color. This one. This one,
first, this one. This one first, with orange, maybe orange like this. And this one is white. This one, I think
it is more orange, more tend to yellow, and this one is yellow. This one also, yellow, but a little bit brighter. Like this. And this one I also
fill with yellow, but a little bit
orange, like this. And this one to yellow. Yellow. Yeah. This
one also yellow. This one I will put in white. Look here. I will
remove the outline. Block all of them,
select all of them here. And set stroke here, set stroke. I will set fill none. Like this, this one also here, click Set stroke and then
click Set fill none. So the outline will be gone. This one, I will add gradient I'm going to add
gradient, this one. And for this one, Maybe tend to orange like this. And this one using fill tool I'm going to change the
direction like this. For example, Yep. This one, too, the gradient here. And I'm gonna change to a little bit yellow and
more brighter like this. And this one is more
like this, right? It's like a little
bit gradient effect. This one, gradient. Here. Maybe we apply like this, and this one is more
darker like this, right? And this one is also too. I'm going to add gradient, here. Like this. But I'm going
to use this Fill tool for this one to change
the direction like this. Alright, I think pretty
enough with this one. Just sometimes maybe to make a little bit correction
for example like this. Yeah. Yeah. Alright, we have
created the accent, and then next we fill
with the text and logo. So I'm going to put in the text. So in the text, there
is two options. There is a artistic text
tool and frame text tool. The difference is the
artistic text tool when we want to type the
individual text. When we click the
frame text tool, we use the frame text tool when it comes to the paragraph. So the frame text tools more advanced when it comes
to the paragraph. But when it just type the
headline, typing the title, typing the short
sentence or short text, maybe it's more, you know, more easy when we're
using artistic text tool. So I'm going to use
artistic text tool here. I'm going to create it here, and I will type the name product. The name product is
sunny, like this. We'll put in SUNNY. Okay, so okay, I'm going
to explain the difference between artistic
text and frame text. So in other that, you can understand the differences.
12. Finishing Label Design with Pen Tool and Color: This is the artistic
text tool, right? But when we create
frame text tool, we have to create the
area first like this and when we can type Sunny. So the difference is when it comes to the
frame text tool, it will type with
the sunny sunny, I will only feel
just on the frame. When we bring to here, but when we are using the artistic text tool and we
click the Sunny and Sunny, again, it's not dependable or it's not limited
by the frame. This the early difference is, we will talk about
the difference letter in different section. So I will tell it and I will use this artistic
textol using Sunny. Sunny, and I will
change the color to this one or maybe this one. Yeah. I think, yeah,
temporally is okay. And I will use hold. If you're not pleasant
with the font, we can change the
phone as you want. Maybe I will use the
Helvetica example, Helvetica Like this right. If you don't have the
Helvetica font, don't worry, I will put this font Helvetica because the Helvetica is
also free, free to use. I also include it
in the set section. So you just install the font and use it in this practice. So I will type this sunny here. And then I will create this
another artistic text tool here, I will type sunblock protection, for example, I think I
will use helvetica too, but I will reduce the size. So we can this one helvetica
to change this font, this one to change
this font type. So we have ultra compress,
lightens condensed, bold. So many things we can choose. You can choose this one. Bold. And I'm going to
change to this one. This. Reduce the size like this. Bring to the center. If you want to easy to
get in the center, you just click to here Alignment and click Center
Align Center in this. You bring to top under here. Sunny, Sound block protection, if you want to change this
another font is fine. I will use the helvetica. Helvetica, maybe I will use helvetica light Yeah, just like this.
Helvetica Normal. The interesting of the affinity features, we can also create
manage the character. Each character with
this one character. We click the A and will
appear in the window here. And we can edit the
space between a letter, for example, this one. What do they call it?
Tracking and to make it more distance from each
each letter, like this. Sunny sunblock protection. And I'm going to make a
little bit higher like this. Next, we can close this
window if we turn, and we can just click here
and if we just close panel. Is as next, I'm going to add
this rectangle for this one. Here, And then in the middle of this here, I'm going to fill with text
like this, will type done. Again, we click here at this distance this
percentage to add distance. We can also reduce the percentage
to make it more closer. We can increase the
size increase the size or change the bold Semi bold. Now I want to change to Okay, and I will type again
here ultimate protection. Ultimate protection. Like this. Just for example, guys. We can also align the justify center or maybe we can align
the aligned center. This one? Yeah. Align
center. Which one? Yeah. reduce size, like this
the ultimate protection. I think we need to
reduce this one, right? Yeah, maybe 10%. Yeah. So ultimate protection. For this color, if
we don't like it, just change in the
Gradient color. Maybe I'm going to
change with this one, and in the middle, I'm going to add some light, maybe a little bit,
little bit lighter. Yes. And then it with
fill tool like this. So in here, we can edit with O I think we need to
make it more darker here in the center here
and a little bit brighter. And here, too. Yeah.
Ultimate protection. Next, in this area, I'm going to type this
another text here. Maybe I will type SPF. 30. So this is like the contain
of sunblock protection. The contain SPF 30. But I don't know
what exactly is. I just saw some sunblock
protection product and there is SPF 30. So I just type in here. Maybe I will google latter. SPF 30 and I will bring their color like here
or same like here. Oh no, maybe a little bit. Yep. Okay. SPF 30. And then I'm going to create Text about
essensial sunscreen. I also don't know this
meaning, but yeah, I just saw some
sunscreen product and they write it write this
helvetica use helvetica also. Helvetica using this. Mm Light Helvetica if when we using
this one and it's overlapping, we can add this one. What it called it
leading overide like this. Make it to the center like this and reduce
the size, I think, or reduce this
leading override and change the one and the
color to this one, essential gel for this one. Yeah, I will copy
in this color code, and I will paste to here. All right. So maybe I will
bring a little bit to up. And the last, I'm going to
create some logo unique, some logo here in
the top of Sonny. Here, the top of Sonny. Create a little bit logo
identity as a brand, for example, to create logo
because this is the sun sun. So I'm going to
create a logo that represent the sun, simple logo. I'm going to this
one. That leaves too. Yeah, Ellipstol like this or maybe I will draw in here Ellipse tool like this
in a blank space. Here, I will add this outline
set stroke here and delete, you know, the set field to none. And I will use rectangle tool
to divide to divide this. So I'm going to use
this rectangle tool. Remember, when we click
this rectangle tool and then we can see in this
here is a zero PT. So the shape that
we create doesn't has outline and it will later
rec. But it's just height. So when we click this
one rectangle tool, make sure that we
before we draw, we see in here, and this is not zero, maybe 0.2 or zero
point something. As long as there is a
number in here, it's fine. we can add this to
0.2, like this. After that, this
rectangle will divide in this circle into a half. How to do that, we will utilize this feature a
geometric feature. You just set in the center
in the center of a circle, and we set all of them, and we click,
subtract like this. It becomes a half of circle. After that, we are going
to use, you know, start. I hold the shift like this. and put the
star in the center. Like this. Maybe I will make a
little bigger, hold shift+CTRL Like this. And in the star, the star, I'm going to add the
number points to how much? 15? One, two, three, four,
five, six, seven. Yeah, 15, for example, right? After that, Maybe to big. The star is too
big. But it's okay. Yeah, more or less like this. Bring to the center. Yeah, center of This one center. Right? In this star, I'm going to edit
this inner radius, maybe this one and
outer radius This one. Like this. So as if this logo will slicing, as if this logo will
slicing and we will slice this half circle. So next, we cycle of them
and like subtract here. And the last, I also
add this elipse tool. Here. This is as a
representation of sun. And I select all of them and
click substract here. So this is just
simple simple logo. I will put in here
in the center of sunny shift+ctrl
little bit smaller. Yeah. And I will fill the color
like exactly this color You know, like using color picker and target
Sample and release here and remove the outline
line like this. Sunny. All right.
13. From Label to Product Design: Okay, friends, let's review
about this design. And right now, we want to move this label into
this space, right? Before we doing that,
I think I will go. First, we need to group
this one group CTRL+G. Here. So we can move. We will move this
label to this space. We move this label
and this space. So we will see later which
pattern using the white background or in the orange,
red, orange background. Background, this Background or this
Background, we will see later. But let's copy this one. We copy this label. And we move to here
and click paste here, and we put in here. Yeah, I think it's correct
in this position, right? So let's pay attention
to the layer. This layer is for the label layer. This layer is for the package, the product package, right? So I'm going to copy
this one in this one. I want to copy Ctrl G
or r C and V. So again, this layer, this copy layer, I will bring to
the top of group. So this label, we will name label right this one in the top curve, I will click right
click and click creating clipping mask or create clipping mask
like this, right? So it will crop this label and following this shape
this clipping shape. So we will see is it
better with this background here when we break the croup here this
is a clipping mask. We place in the object
under this layer. This one is the rectangle. And if we hide this rectangle, and the result
will be like this. And we hide this rectangle, the result this product label
without a background if we unhide this rectangle here, if we unhide, this is the
orange color. Which one better? This one or this one? I think
this one better, right? Yeah. This one better. And
then a little bit. Correction, I think it is too
much. Like this is better. Yep. Alright. After we put
the label in here, the more or less the
result will be like this. Or this is too thick. I will reduce a little. Yep. The result more or less
will be like this. I still maybe. The result will be
like this. And we can adjust the position, right? We can adjust the position, maybe I close this one first. We can adjust the position of the bottle or with the stand. Maybe it's more to this, right? And this one. Which one? Or for and this one, maybe I will reduce turn
the bottom like this. Okay. And if this is too high,
we can reduce also. If we so I'm going
to show you guys. If we just stretch like this, so the shape is, it's
not appropriate, right? So how we can reduce this high without distracting the shape. So using the No tool and
we entering this one. And we select both of this
node tool and gradually, we reduce the size or maybe we can draw like this
drag like this. More or less like this guys. So if you want to
make the du bigger, you just select
all of them here, this and hold sift and start
to scale up like this. Right? This one. Nice. Yes. Yeah. Maybe a
little bit to bottom. Like this and this one, too. And I want to using this one. Oh, background maybe still
unlock Oh, yeah. I lock this rectangle. First. Yep. So we have created this what they call
it? Let's review. We create the shape and tracing how to create the leaves and
create the product, you know, with combination of shape, combination of gradient. And the next, we will working on the effect,
the Layer Effect. The layer effect will help
to make some effect in this shape in this property
like this to get more, more proper editing, more proper editing
like giving the shade, giving the headlight or
something like that. So see you in the next session. We put some effect,
and then later, we put texts like headline, title, copywriting
and another title.
14. Start Learning Layer Effect: Hello, everyone. So in
the previous session, we have learned to
create a lot of design, right, from creating
the background, creating a combination
shape and gradient. And we have also learned
about Pentool and Node tool to create some object
like banana leaf or leaf. And in this session,
we're going to apply some effect
in each object. For example, this circle,
Background, this one, and also in this leaf, we're going to apply several
effect with Layer Effect. So let's move to the
Affinity software. So the layer effect,
what I mean is here, the layer effects here. We will learn a about this
window and layer effect has a feature hinder and we will deep dive about this because this
is the easy way, the easy way to apply
some effects, right? So let's learn. We recently, the design that we have
created is up to here. So I'm going to apply some effect in this circle in this circle
and then in this circle. So let's click in here and we'll explore
the effect one by one. Click here, and then
click Layer effects here. Let's learn. Let's explore
this feature one by one. You can pay attention
here. All right. The bevel or emboss when we
click the checklist, this one. So maybe we can doing some
experiment like this. So the bevel emboss will give the some shadow to the inside and in the
outside at the same time. And we can adjust the shadow with the
radius, how much thick is. And then in softness is about how the shadow
is distributed. And then also the direction, which one the direction
between the shadow and hightlight here like this. And we can also
change the color. For example, yeah, I'm going
to use the blue color, something like this,
something like that. So the bevel and emboss practically creating
the Shaow and headlight. And we can also
adjust the direction of hightlight come from and
the shadow will create. So basically, it's like this. If you feel that this effect is not suitable for
this background, we can move to the next
background and to next effect. This one is outline. So in the outline, it's just literally
same like when we bring the outline
through here like this. This is the outline with the
stroke, the outline by stroke. And this is the
outline like this. And then we can also
in the rat use, change the color here,
the same, like the same. Maybe it's too thick here. And alignment you can do just the center
outside or in the inside. So it's basically the same. And we can also change the
blending modes overlay. We will learn blending
mode in another section. We will dive about blending mode. One, each one of them, we learn about all of this one. We're just learning using the normal painting mode
because to explain all of this, it takes a lot of time and
a lot of understanding. Okay? This outline
map is not suitable. We moved on the 3D. So this is very
interesting though, because the treaty is
not actually make it a treating that we
can move from side, top bottom, it will
give the 3D effect. For example, like this, treaty effect when we run
the ratios like this. So this rectangle and this circle is as if
if the effect appear, right, the effect appear. And we can do some experiment like soften the lighting,
right, and opacity, maybe we can reduce the opacity, you know, diffuse make
it more darker, right? So diffuser
here means to make the light is not strong heating. But the light is more darker
and darker or to a more, you know, when when the
lighting is focused, so this area
headlight is in here. But when you diffuse here
means the lighting is distributed to other direction. So it will give
the darker effect. And we can still experiment
in some effect like this. This is for the headlight, for the shyness, many things. Ambient or maybe we want to create another
source of lighting. So things we can
experience about it. So practically, we can add the 3d effect in the
shape without layer effects. But again, we need to
doing some experiment. If you feel that, Oh, this one is good,
this one is good. Okay. You can move to
the direction like this. Okay. Yeah. For temporarily, maybe we'll move to
the inner shadow. We move to the Layer Effect. In the inner shadow too, it will produce
in the shadow too, but only in the inside. Let's click inner shadow here
and we slide the red ice. So in the inner shadow
just creating the shadow, around of them to the inside. So in the shadow that we produce is from the outside
to inside like this, from the edge to inside. And we can also adjust the shadow the opacity
of the shadow, like this and offset
is like this. Intensity. How the, you know, like how strong the shadow
is using the intensity. Again, this is the
inner shadow to give the shadow from the
edge to inside of shape. Next, we move to inner glow. So the inner glow is
basically like inner shadow, but it's not a shadow, but inner glow will give the highlight or glow
effect or like this, from the edge to the
inside to the center. And we can change the color
actually. It's not white. We can change color as
we want, for example, because this piece
of color is blue. Maybe we can choose blue. This one like this. Maybe this is good
for preferences. Well, this is okay,
too. This is fine. Nice. Maybe a little bit, shining from the edge
like this. It's fine. Like this. And you can also
change the painting mode, normal screen using screen, right? Yeah, using screen. Okay, we move to the overlay. So the color overlay
here means we can add solid color
here, solid color. But we can just reduce
the opacity like this. So basically the color
overlay here means the image, it will cover with
the solid color, which is when we took this, for example, when we
increase the opacity. I will bring the solid red. But when we reduce the opacity, it will close to the blue, like the original color. Something like that. We move
to the gradient overlay. The gradient overlay
is the same. The object will cover
with gradient color. And then if the opacity
ratios closer to zero, it will pack to the
original color. When we draw the 100%, it will close to
the gradient we can also create color in
the gradient here. Maybe it will combination of gradient it will also throw
for example, like this. Here we reduce and
here at the same time. So just to close
the original one, and this is close to
the gradient overlay Maybe we can choose here at
the same time like this. Okay, we moved to
the outer glow. The outer glow, it
will give the glowing. From the edge to outside. So this is opposite with the inner shadow
inner inner glow from the inner glow from
the edge to the inside and then outer glow to
the edge to the outside, from the edge to the outside. Like this, there's no other editing option
except an intensity. Yeah, it's just intensity
just to adjust how much the strong
the outer glow is. We moved to the outer shadow. The other shadow here means, is to get a shadow in the out. So basically, out shadow
opposite with inner shadow, just like this to give the
shadow from the outside. And this is the opacity
and opacity to intensity, and then the upset. Set maybe change
the miss of shadow I don't know how to explain it, but it's like the shadow
a little bit move. It's not on the right place. We can still applying
the direction like this. Right and last of it
is a gaussian bluer. gaussian blur give the blur effect from the object like this blur. And also, if you still not sure, maybe this one from
the leaf and I will apply gaussian blur like this. All right. After we introduce with
all of this effect, so I'm going to create
little effect within this shape using
outer shadow here. So I'm going to apply
some shadow in here, and then the rate I will
reduce the intensity, I will also reduce
like this, right? Alter shadow, maybe I will increase the
rate a little bit. Yeah. I'm going to change
the color from black to blue because this
one has a blue object. Maybe just a little bit, darker blue like this, right? And I also apply
gaussian blur, this one. Because this is the object, it should be a little
bit blur, right? Like this. Have you
seen the differences? This is the gaussian blur. When I turn off
the gaussian blur, this or maybe the caution
blur result to a little bit. This is the gaussian blur when Turn off and then turn on gaussian blur a little
bit, give a little bit. This is the shadow using this.
It's a little bit blur. And also, I apply
with this gaussian blur too and also some shadow, right? I just here and
click Layer Effect. Just the outer shadow
first like this. We move in here
and increase the radius the offset, maybe nope. Intensity. Oh it's too much. Just reduce the and
reduce and reduce the radius Like this, right? Maybe the angle here. So angle is just apply when
we're using the upset. Angle just apply when
we're using the upside. And the color, remember, we move color to here. To blue darker, like this. And don't forget we apply some gaussian blur like
this, maybe one pixel. Yep. So as if the object is in the in front of the
background like this. I also want to give this
effect in the leaf effect with Layer Effect also
Layer Effect and using the outer shadow
again, outer shadow But for this one,
I'm not going to use so from the bending mode, I will use normal Normal. We using normal just for normal, maybe reduce the opacity
and I'm going to use offset like this one, upset like this,
for example, Yep. But it will reduce
the opacity a little bit reduced like this and
change the color too, maybe because the base is blue, so we can blue like this. And click. Late. And also, for this one, for this leaf, I also going to use the shadow. What if we add the shadow
for this banana leaf? So the result will be like this, the shadow which is the offset with the
direction like this. Like this. Reduce the
opacity. Like this. And we can change the color
because this space is green, so I'm going to use
green dark green. Yeah, like this. Right? I will give
a little bit shadow in here and also
apply with this leaf. I will create the effect from outer shadow like this
and increase the radius, increase the offset
like this and reduce the opacity and also
change the color, this one, using
the dark like this. Maybe in the offset I will
reduce the offset, no, no. No upset. Intensity, I will
increase the intensity. Yep more or less like this. So it's more
pleasant in the eye. Maybe I can I can move
a little bit here. Or this one, I will make
a little bit smaller. all of them, hold CTRL Yeah. It's like this
and this one too. So for this one, I think
I just leave it here. Hold CTRL like this? Yep. Little bit moved to here. After that, we can close
the layer effect window here.
15. Adding Shadow and Lighting to Design: Okay, friends, so next, I want to make some
lighting in this area. So the light will be
hit this product. So to create lighting, I'm going to use this one. I'm going to use the combination of star tool or double star. Okay, I'm going to use
the double start tool here like this. I hold shift, make it more brighter and proper star tool
here for example, like this and this one. In this point, I'm going to add two and 12 for example like this or temporally
temporally, and I will increase to 18, for example, and then I
will remove the outline. Yeah. That feel noon this, I'm going to put in here or
maybe reduce the inner radius And on radius. I will increase
a little this one. This one. 60%? Yeah, I think it's enough. Oh, no, no. 70%, 75. Yeah,
I think it's not bad. Okay, next, in this I will
increase again in the size, hold shift and then
increase the size. And I will put in
here, for example. Here, for example, I will
increase more bigger like this. Okay, I will put
in here like this. Yeah. And then we can change the color my pages
little bit brighter like this. After that, I will
apply the Layer Effect. I'm going to apply
the Layer Effect and using the gaussian blur. And we put temporary
gaussian blur, like this. This one. 8.8? Yeah, maybe. Yeah, I think it's enough for temporarily, just like this. And I'm going to
make it more bigger and bigger like this. We can still edit
with a point radius. We can, you know, I don't know, inner radius we can increase
the inner radius like this. Yep. Or here, right? The double star. And if the
lighting is so, you know, so strong, maybe
we can apply maybe some increase the gaussian blur to increase again, like this. And we can also
reduce the opacity. This one, will reduce opacity. The double star layer,
will reduce the opacity. This one, maybe 75%. Just like this, right? So this is like a
lighting, right? Lighting. Or maybe the color, the color you want to make a little bit too white,
just like this. It's fine. Or if
you think that, oh, this is not really, I'm going to make it a
little bigger the lighting. It's fine. You can create like this, make
it a little bigger. Or you want to increase
the star and the start of increase the headlight or increase the line
of lighting like this. This also possible,
still possible. Yep. Yeah. All right. Nice. And next, I'm going to create a little bit
shado from here. A little bit Shadow do using
the Ellipse tool, right? Maybe I just create
this a shadow like this. And this ellipse, I will bring under the bottle.
This one, maybe. Yep. Just apply here Yeah, from shadow and this one, I'm going to change the color to maybe dark blue like this. And for this shadow I'm going to convert
to curve like this. Just like this. No, no, no. All right. And then to make it
the shadow with this, I will reduce the
opacity to 50%. Yep. Or maybe 75, 50% is fine. From the color, little bit blue. Okay, like this. I don't know. Maybe better blue or yellow. Let's experience orange. Oh, I think it's better blue. Yep. This one, and we also apply Layer Effect, gaussian blur here. Like this. And reduce maybe I will decrease the opacity to 30. Okay. Oh, no. I think from the Gaussian blur, I will reduce this for zero. One pixel, one pixel? Yeah, one pixel. It's fine. Just fine. I think if there
is an light from here, this array should
be darker, right? This a should be darker. I'm going to change this
curve this curve flyer, this one. Yep. This one. Yep, this one, the curve, this one, I'm going to
change the color little bit. So I will make it
more bright right, more darker little bit. But I want to change the
direction like here. Here and here. But it's like it is too much. Maybe I will reduce like this. Yeah. Alright. Okay, so we've
created some effect. Like, I think it
looks absolutely different from the
previous session from the previous session, right? Before we put a lot
of effect in here, like a shadow, lighting, Gaussian Blur,
something like that. And you can still explore
the effect by yourself. You know, maybe, Oh, I prefer to create the 3D
for this circle. It's fine. You can experience
with yourself. But I think it's more
prefer with here. Or maybe in this one, this
one is also has a Shadow for example, it's fine. We will create the shadow. For this stand product, right? Create like this
for stand product. Right? This ellipse bring
bring to under this one. I don't know, which one? This one? Yeah. Or maybe I
will hide first. Yeah, I will little
bit give a shadow for this stand Right. Change the color to blue, dark blue here, reduce
the opacity to 30. 30. Like this. It's fine. And increase
the add a shadow. Which one? Gaussian blur. Like this. Like this. Here. It's one. And I'm going to give the tips. We can still using this one with some effect with fill tool here. Oh, this one. This one. Yeah. I or darkness, right? And we can click here,
give the opacity. Yeah, right? It's more amazing, right? So the opacity. So we can also
apply some effect too. And this is one opacity and
to be to the left side, this is the opacity will reduce. I think it's a good shadow. So we'll just bring back the
lift this one, and here. Here, we have
created the effect. So in the next session,
we will put the text from the title headline and
detailed description. Or maybe you can take rest while before we
continue next session. Yeah, I hope you
still excited because still a lot of tips that
maybe we can learn together. So see you in the next session.
16. Create Copywriting with Text Tool: Hello, everyone. So in
the previous session, we have created a design
with many tools, right? And right now we are focusing
to learn about text tool. So in the Affinity,
provide two text tool. The first is artistic text tool, and the second is
frame text tool. So we need to, you know, know the difference is and
how to use it in the design. So let's dive in, and we move to the Affinity. So the design that we
have created previously, I'm going to add, you know, some text, like the title or
maybe description or maybe a some text that help this design to convey the
message that we want to share to audience to
consumer to using that, we just click,
right click click Artistic Text tool here and just the right to
place in the text. I'm going to put it here, and we can adjust
the size first. Here, which is hold the left click until and then we adjust the size
like this as we want. Maybe I will go with this one, for example, this one, and I will type Sunny So like this. Let's break down
one by one tool. Maybe this tool
is the place when we can adjust the
size, the phone size. We can increase the size
and reduce the size. This tool is the place
to change the color. If we're not satisfied
about this font, we can change here with your collection
font in your system. And then this one is to type the font because sometimes
the font also using the variety of font like bold italic or sometimes it's like medium bold or light. So yeah, we can change the type the variety
of font in here. And for this one, this is for changed like
uppercase or lowercase. Or sentence case, title case. And then this one is
to give the bold. It's like the same
like this option. But this is just
shortcut for bold bold italic and underline. This one is when we want
to writing the square, for example, or a unit. So certain unit using this and this one for
change in the color. Here, I'm going to change to white and I'm going to
use this bull like this. All right. So it's
the same like this. But they got sunny. And then this one is
to highlight color to maybe to give
a color background. A color background, color background something that
we can change the color. We can change the color
like this as we want. Right? So I'm not using
this background color. And this one is to
alignment, right? So, this one is to give
the paragraph leading. Give a bullet, number list. Then I'm going to
copy this logo. I think this logo is
very unique, right? I'm going to copy this logo? Yep. This one, maybe I
will close to panel. Transform. Yeah. This
one, these Curves. Just copy and click in
this here and paste. Like, bring here and hold
shift to increase the size. Right? Maybe I will
go with this one, increase the size
again and it looks like in the logo
in the product. I'm going to write this too
SUN block protection. So I can also just copy in here. But again, I'm going to use
this one artistic text tool again and just small font, right? I will type and Oh, the layer is under the background. So I will bring to
top SUN block. Okay. Sun block protection. Remember, if I want to
change this letter, this one, what do
you change case. I just use uppercase this sunblock protection
here and my bin too big, I will reduce this
size and put in here. Helvetica normal. Helvetica, just like this. Unblock. Yeah.
Sunblock protection. I will type on this one, like watering moisture moisture. Like this, I will increase
the type and the size. And I'm going to show
you the the character. So I'm going to explain this one, Typography and character. This one, Typography. This one, I'm going to bring back to here. So in the Typography, there
is a containt of some features like
when we want to using math formula,
something like that. So we can create superscript, subscript fraction or ordinal. So again feature in here, right? And this one. Character. No, this one, I'm going to a little bit long to
explain this one. The character is basically just cover this one from
here until to here. But in just one
window like this, if you more convenient
using the window like this, character like this,
maybe you can bring here, you can use this character. Or maybe just feel comfortable
when using this one. It's fine. It's
basically the same. It's also co from the
Typography, too, here, the shortcut for Typography, the optical alignment,
something like that. And language sometimes when we working on with
the paragraph, and I'm going to show you this one position and transform. So the position and
transform, right? If we want to add some distance between
the font, for example, we can use this one tracking or maybe we can start
from here from kerning. So the kerning is basically increasing the space distance. For example, when we
increase this percentage, look at closely like this. And for this one, this is striking is basically to increase the distance
between letter. For example, like this
when we choose this one, for example, and we choose
this tracking like this. It's basically increasing
the distance between word. Maybe I will go
with 25, again, 40, 50, 40, 30, 40. I think it's a more
good look, 40. This one, base lene
is to increase the difference between the top paragraph
bottom paragraph. We will learn about it later. And this one leading
off write Oh, maybe. And the next this one Base
lane and leading overide. This is for editing
in paragraph. We will using this letter. And this one she is
to make like italic. When the font doesn't have italic feature like this
Italic is not available, we can use this one,
the manual Italic. Using this shear. So I'm not using
Italic with this one, so I will set to zero. And this one to
horizontal scale. What is it's like, basically, stretch the font, you know, stretch the font
and make the font. I think it make the font
is a little bit broken, like, not the same
like the original one. It's like stretch, right?
And it's not good. So I will think back to 100. Maybe for this case,
it's not suitable. And for this one, is how to stretch to
the top and bottom. Well, the breath is late
is stretched to side and stretched to horizontal to vertical and stretch
to horizontal, basically, this is
just like this. Sometimes you're wondering,
what if we want to create this, you know, the writing Curves and following the certain shape
and then following a certain line or
curve like this. So I'm going to use I'm going to show you how
to doing that in Affinity. So this is the interesting
feature, though. This is the interesting feature. This is the ellips tool
or rectangle tool. Or you can use any
shape tool from here. But from this case,
I'm going to use ellips tool like this, right? And I'm going to
throw like this. Just remove the pill to none
and such stroke like this. So here I'm going to show you. I choose the artistic text tool and I will maybe I will zoom in, maybe just hover the most to close to the line
until the letter from A, A sign to T sign, T and wave line, we click here. And right now, we can type for example sunblog protection. And this one. This
one in the, you know, the rectangle, rectangle,
we can move moving. We can move and set up
like what you want, and this one, is also. So the red and green triangle is to adjust and to manage the font size and
the font curve. And then maybe if you're
not satisfied about this, if you want to change the font, we can block and
change the font. To Helvetica Roman like this, right? And reduce the size, absolutely, reduce the size and like this. What if we, you know, put this change to change
this one and I put in here and we'll bring a
little bit like this. Sunny, sunblock protection. If you think that this is not suitable for this
case, it is fine. I just want to show
you that we can also create the curve writing
and following the line, following the certain shape, like we create in this one. So if this is one, this is not suitable for
this case, I just delete. I just undo and
peel it this one. Okay. Okay, next, I want to put this paragraph text descriptive
text to create that, I'm not using the
artistic text tool, I'm using the frame
text tool here. The frame text tool, before
we writing the text, we will create the frame first, like a box like this. This is the place when
we writing the text. So we can put the copywriting here maybe per additional
information or, you know, like more
specification, more detail or anything that really want to
convey to the audience. So I will maybe I
will reduce the size. Uh, maybe seven, I think. Yep. I will not writing the
description for this product. For example, actually, I have prepared the
text first here. I just copying the text
that I have created before. Maybe if you have
your own copywriting is just fine writing
in this box. I'm just going to rewrite It keeps your skin
stop and refresh. Refresh while shielding
you from sunburn. Sunny ensures you
glow with confidence. with confidence. No. Here. So in this copywriting, so I think from the copywriting, it's like the product
should explain which problem that can be
solved with this product. For example, like this product, we stay from worry from the UV rise something like that because sometimes
from some people, due to the sunlight, maybe in the beach or
maybe in the outside. It's like they worry
about the skin burn. So the problem is skin burn. So this product maybe can help to reduce the
effect of skin burn, so it will solve the problem. And then besides the
solving the problem, also, we can emphasize or we can convey the advantages
other advantages, maybe you ensure you
glow with confidence. So this is the result to give the Audience confidence
when using this product, to give the perception is not only just the
effect, the real effect, but also the perception that
when we use this product, like, we feel like
more confidence and we more safe, for
example, like that. So yeah, I think that's one. First is to answer the main
problem with this product. The main problem that can be
solved with this product and number two is to build a
perception to build perception. When using this product
you can more confident, you can feel glow
and looks glow. You have to consider that
when writing the copyright. Maybe, this is just
maybe maybe you can consider this when you're writing the
copywriting, right? So I'm going to change
the color to white. This one. Or maybe it's two I will reduce the phone
next maybe to 6.5 on this. And this one here. For this one, I'm going
to use the best line. So the best line here means. So the best line here means
to move the whole writing. The whole paragraph is more
to the bottom or on the top, just like this, too
simple like this. And this one in a lading
of right here is more to give the space between one row on the bottom
row on the next row. So this is just to
give the space. From each row like this. Yeah, I think I will
use this 18, I think it is enough like this. And if you feel like, Oh, this is not pleasent the eye, maybe we can change
the alignment to just the file left or maybe
align center like this. It's fine. I think
it's also good. But I'm going to use justify
like this, right? Yeah, I think it's right. Enough. So maybe I'm going
to make a little bit here. Yeah. And bring to the top, adding to the bottom, giving the space like this. Yeah. So remember, when we
choose the frame textool, this is the frame, the
area we can create. If the frame I make it shorter or maybe
I reduce the area. So the writing is gone, writing will be gone, and it's not covered all
of this writing. So you can see here, some sign that has shown that
some writing is not visible so when we make these
areas more wider, more broader, so we can
cover a lot of writing. So I will just using
like that. All right. When I need to add the writing, I will increase the
broad this frame size, just like this. Alright. Next. After that, I need
to right, for example, just maybe here, using
rectangle and giving the side and the color to orange maybe and set filled to none. And I'm going to use
Artistic Text tool So in this area,
I'm going to use the Artistic text tool to create the website for example,
www.sunny.com. For example like this, I will bring to here, Maybe just like this and
give him the song, you know, gradient like this. Like this. Alright,
maybe I will relocate it the content like this. Honey. Like this. So make it more. Balance between lead and, I will go this one tiny
sunblock protection or I will increase the size to seven like this and some sign and some
part is not visible, and I just increase the
sizes of frame like this. So here, guys, if not, this one or maybe we just
click here close panel or bring the which
is closed panel? All right. And here, this is the design we
have created, right? From the early step, we introduce with the
vector tools, right? And step by step, we using mostly almost covering the entire the entire tools that available in Affinity
in a vector mode. So this is the first step, guys, this is the first step
to introduce the tools. It's not ending in here. Those after that, maybe you can create your own
product maybe with the own text with the own description and upload it into the
project section, right, to show that to appreciate to
yourself that your effort, right, maybe sometimes it's
not the best your effort, but you need appreciate
a little things. You need to appreciate a
little progress, maybe, yeah, with at your own
product for example, or your own imagination
product and then the result, you can upload in
the project section. And then maybe maybe I can give a feedback in the
project section, right? And then this is a we have introduced
the vector features. Next time we will move
to the Pixel Mode, and we'll introduce from the start the Pixel Mode like we're doing in
the Vector Mode, we will create a project
and step by step, we will use each tool and then apply the tools in
the project in the design.
17. Start Learning Pixel Mode: Hello, everyone.
Good to see you. In the previous session, we
have learned Vector Mode. We have learned about
the tools and how to implement the tools
into the project section. This section, we move to
the Pixel Mode and we will learn about the tools that
available in Pixel Mode, and also implement the Pixel Mode into the
project section. So basically, we will doing the same previously on the vector mode. But this is we will
learn the Pixel Mode with different tools and
different implementation. Some features that
are available in Vector Mode are
available in Pixel Mode, and some features that
difference between them. So we will learn one
by one and then, more familiar with the tools. If we learn and the tools, both of them in Vector
Mode and Pixel Mode, it will really beneficial to us in the future when we're
working on a certain project. So let's move to the
Affinity software. I'm going to create
new document, right? Click file, click New Document. And this time, I'm going
to use the preset. The preset that I want to
use is you can scroll down. I'm going to use this
one QHD 4K, and web. Yeah, this is the
4K resolution. Right? So the document
that I want to use, I'm going to use preset,
the preset document. The preset I want to is four k, QHD 4K k that
has 3840 by 2160. Like here and here from the
Batch width, 3840 2160. But I'm going to activate
this artboard, right? I'm going to activate this
artboard and I'm going to use the DPI to 300, right? So maybe it will creating the
large document, but yeah, I think it will worth to
try using 4K resolution DPI 300 and activate the
artboard and create document. Like this. So why I choose the 4k resolution
because in the resolution, the workspace is close
to the screen here. So minimize the playing area,
the playing area like this. So it's more convenient
to us to more convenient in this tutorial because the resolution of
the command is close to, you know, like this one,
the aspect ratio of this our workspace in the
Affinity software. Because when I working
with, for example, when I create the
tutorial with potrait, for example, A4, for example, portrait mode. Now the artboard. So yeah, a lot of blank space, and sometimes it's not
convenient to us because this is our workspace
is just in here. Next, our focusing in this
session is to import the file, import the image,
import the photo. The Photo later, we
will manipulate it. So our focusing
first is to import, and sometimes we also learn
about the composition, like how to arrange the
object in our design later. So. Alright, friends, you can go to the material
that I want to import. I put in the Pixel Demo
Pixel demo folder. You just go to the Pixel
Demo folder and click. And here, this is
the file that we want to use in our practice. First, how to import. Basically, to import the file is similar to the vector mode. We can also drag and drop. For example, I want to put
this picture this picture, this one as a background. So I just drag
and drop in here. drag and drop
into Document Dan, and this is the picture as important to the
workspace like this. So the second way
to import document, we can also click
File, click Open here. And then we can also import, for example, I want to
import this one. But rather than the file automatically import
in this document, but the Affinity will create another tab for asset
for this material. So the difference is
when we drag and drop when drag and drop we can also directly input into this document. When we click File
and click Open, Affinity will automatically
create a new document, right? And the new document is based
on the picture solution. For example, when I
click this Apple, here. So the Affinity will
create new document based on the Apple
picture resolution. And the third way to
import the picture, we can click File,
click place here. And for example, I want to click this uh Wooden and I
click here, right? So the difference is
when we track and throw, we can also directly into Documen and also
when you click Open, the Affinity will
create new document based on the picture resolution. And then the last is
we can click Place two basically in the
same like the drag and drop directly to the here. This one, we can move
with most like this, we can also rotate like this. You can also flip right
click and transform rotate, flip horizontal,
vertical horizontal like this, maybe vertical. And this is where we learn about the import
the image open and, you know, moving the
rotation like this. For example, I want
to put in here. So the next we can also CTRL
zero to fit this workspace. Maybe I will a little
bit bigger like this. And the next object
that I want to import, I chose this one, please. I want to impart this one. This one. Which one? This one, if I put in
here, leaf, right? And I put in here the leaf. Maybe I will zoom out a
little bit, put in here. This is just how to
import the file, or maybe just directly
to open the folder like this and import it file
one by one like this. Like this, right? Again. Oh, I want to
import this leaf. Yeah, just track and throw is the most easy way to import
the file, right? Like this. Maybe this one import like this. Here. This is just for
how we import the file. And also sometimes
we learn about the transform clip and sometimes about the
center and the alignment. When we click here, for
example, in this one, I'm going to sew this session. So we have learned about
how to import the file into the pixel mode, right? And this is a lot of assets
that we have to import. In the next session,
we will working on the selection
object because when we manipulating the object, manipulating the picture, we will doing a lot of
selection in this practice. And maybe if you're working on the manipulating object
or manipulating picture, the selection skill
is really important. We will learn a lot about selection and see you
in the next session.
18. How to Selection Tool: How to Make Object Selection in Affinity: Everyone. So in this session, we will deep dive about the
selection tool in Pixel Mode. So I think this
selection will take a long time because we have learned a lot
of this selection. So in this session, we will focusing practice
about selection. In Affinity, Pixel mode, there is a object three
tools object selection tool, a selection brush tool
and flood select tool. So we will tip type
about three of them. And then because the
selection is very important. So I think we need more time. Because we will discuss a lot of a lot of things in
selection tool. So let's move to the
Affinity software. So for the practice selection, I'm going to create
the new artboard, right to create the new artboard, which is simply copy
this artboard, right? This is when I breakdown, just like this and I
just click CTRL+G the artboard so I have duplicate the artboard
or in the simple way, you just click ALT hold ALT, and this
airport is moving. Here. And then automatically, we'll create the artboard, right? So I'm going to
create this under airport to met them
when we practice. So it's like when we sketch something or maybe we
doing some experiment, we will using this artboard We'll delete of them. So this is the artboard when we experiment about the tools, and this is the artboard when we create or implementing
the tools. So I'm going to change
the name to pixel demo. And this is just artboard one, just make difference, right? So for the explanation
of these things, I'm going to import this image, this one to this board. Example like this here. So I want to explain
the difference between the object
selection two, selection brush tool and
flood selection tool. Okay, so this is the tools that available in Affinity to select
the Object selecting tool. To implement that, use this, we click this layer and
click this object size tool, and the Affinity will automatically analyze,
just like this. And we hover the most hover the most to which one the
object we choose, we can use the background or
we can use the apple apple. Please. And after that,
we just click here, and automatically
we have created the selection tool
just simply like that. It's a very convenient when using the Object
Selection tool. But remember, if your software, if your Affinity doesn't available in Object
Selection tool, you have to activate it with this one to the edit
to the setting, to the machine learning and
active the segmentation. We have created the selection. And which is click refined or also directly
to the mask layer. When we click the
mask layer directly, so the apple will isolate it
from the background, right? Here. So we move to number two, the selection brush tool. The selection brush
tool here means this tool works like the
common way the common way, we're using the selection, and we select carefully
to this object like this. Just like when we edit in a photoshop or yeah,
in a photoshop, it's very common to use this method and
it's also available in Affinity too. So if we want to select one, this one, this area
is a very small area. We can reduce this
size like this. We can reduce and try to select in a small or
in detail like this. It's very easy, though. Sometimes, when I
selected is too much, it's cross the lend to outside like this
or maybe like this. It's, you know, like
crossing the edges. So we just click this
mode, add and substract. Just click the substract and
we can reduce the selection. Because sometimes we often, doing some mistakes
in a selection. Our selection is
cross to the edge. You like this one. And to add, just click Add
here to add the selection. Like this, to add or to remove
or to remove some part, which is click Add or substrate. And if we satisfy the result, we just click Mask layer
and automatically, the Apple will eliminate it
from the background, right? This is the number two, the second way. So I redo . We move to selection
number three, this is the flood selection. So the flood selection tool is like it works based
on the color. So if we click here
in the background, because the background has color maybe tends to
white, white gray. So everything that have similar color with this
background will select it. For example, when I click
here in the background here. So the color that
resemble or similar to the sample that first I click this area,
we also select it. But it's kind of different story when I click in this Apple here. So when I click in this red area, so it will cover
just in a red area. When we click to the, you
know, little bit yellow, so it's also apply in a
little bit yellow area. So fruit selection is basically to select
the sample color. So this is the three way
when we doing selection. But sometimes when we
pay attention closely, when we try to create
the object selection, for example, sometimes here, click the layer here. And the result
will be like this. Some area is not selected well, you can see that, right? Some area is not selected well. So how we can solve that, right? Because some area is
not selected well, how to fix this one. So let's move to
the next session. We will still learn
about the selection, but we will selection our project this one. We
will select this one. This is okay, some area is
not selected well, right? And how to solve that, how to improve our selection
to get the best result. So in the next session, we will make selection Make remove the background for
this object or, you know, for this orange leaf
leaves, this one, this one, and this one, and this wooden, we will select all of them, and I'll explain how to
get a better result. So see you in the next session.
19. Object Selection Using Pen Tool: Everyone. So in
the previous session, we have learned about this
object selection tool, selection brush tool and
flood selection tool. We have practice one by
one of these two and right now in our mini project, right, or our practice. And later we will
selection of this leaf, this orange and
these leaves too, and also how to create the
better selection result. Because in the previous session
some area or some part from our selection from this one is not selected properly,
right? This one. So if you could support
what we are going to make. So I'm going to make the
product promotion, like the breakfast before, but using manipulation of image. So from the next step, I'm going to import the asset. So I think for this page, I'm going to just delete
we not need anymore here. And I'm going to
import this one. But rather than we
just take androp here. I'm going to import with open. I file, click open,
click image this one. And we Affinity, will create new tab or new document
to open this one. So we're going to
promote this product. This is just image sample. In this session, we're
going to selection of this plus and also selection of this material from leaves, orange, all of them, and also this wooden. So I'm going to make
the promotional design for this product from the ice tea and the it will, you know, like, stand in both the
tree wooden tree. And then this is some, you know, supporting object. But this supporting object
still has a background, right? So we will make it
selection later. So we will focus
for this one first. Actually, I can just
track and drop this image to here like this and make
it selection in here. Right. And we also can
create selection in here. But for this image for
the get better result, the principle of selection is the bigger resolution
of the image and still preserve the detail is more easy to us to select the object
rather than when we, you know, like when this one, just make it small like this
and just doing selection. So some detail is not
selected properly. So I think the best way is just select it with
open document. When we open
document, the detail and the resolution following
the image resolution. So the detail still preserved. And okay, next, the method
that we're going to use, I will use the object
selection tool here. And please wait until the
Affinity analyze the object with some method of machine learning,
machine learning method, and automatically with
a simple and easy way this glass has selected, but some area is not
selected properly. This area is not
selected properly in this straw, this area. So we will fix with
selection for us here, we increase the size here and maybe fix this one like this. Like this. Some area if some area is not covered up properly for
this area, for example, if some area is
cross tune the edge, which is click the
substract and we can we click the add to bring back this selection. So it's close to
the edge like this. We click the substract
Add like this one. Maybe we can reduce the brush. The more smaller this brush
is more the easy to select. And we click again. Maybe maybe we
spend a little bit longer time to create
this create this one. Like this, for example. I think it is more or less
satisfied with the result. We click the refine. In this refine, as
you can see here, some area maybe pixelated
it, we pixelated it. So we will talk about later, this window because this window different use case also
different configuration. So it's like to setting this
one is more flexible, right? So we're working with
this window depends on the picture we working. So for this one, I'm going
to reduce the border width, reduce the border
width like this. And make a little bit smooth. Just a little bit smooth.
And I reduce in the ramp. Maybe just keep to zero. Yeah, we're doing a lot of experiment or smote we
reduce the smooth like this. We little bit some experiment little bit reducing
the ramp like this. Yeah. If we satisfy
about the results, just click Output
selection and click Apply. Like this, and then click
the mask layer here. So this is the glass
that we have selected. Right? And after that, which is copy or
making rasterize, we can make rasterize
or just copy. So the difference is when
we click the rasterize, we unable to edit the
selection, right? When this mask layer, when we click the rasterize, the rasterize will remove the mask layer and
make it this image become uneditable in
the selection tool. So it's become one image and
it's not editable again. When we still keep this mask
layer, this mask layer, when we still keep
this mask layer, we can still modify the
selection again, right? So for this use case, I will keep this mask layer. Just for maybe some
case that maybe we need to editing the selection
again in the future. Okay? So we just copy this
layer, this layer, just click here and
CTRL+C and move to this workspace and click
CTRL+V here. This one, the product
that we have selection, like this. All right. So the first object we have
selected successfully, this is the glass, the icT. Next, we will making
selection for this one. So this isn't the same
method like the previous. We can directly selected this wooden table in here in the bookspace or we
can open the file, click Open lay open and
use the tree trunk, using the wooden,
cutting wooden here, and doing selection
like previous step. Before we move to the document
the document in here. So I think, yeah, when the object
selection is white here, maybe we can use this one
load selection tool here, which is click in the
white Background, right? So the white background
will select it automatically because
the background is white. So this white color will
automatically select it, right. So maybe in some area that
not selected in here, here, here, here, this one. So before we doing that,
we going to invert because this selection is not select this wooden but select
the background. When we click this mask layer, the object will cut
and still the background. So we need to invert Invert and make this selection
to select this object, not the background.
How to doing that? We go to the Pixel, we click Pixel selection, and click Invert or using
combination CTRL+SHIFT+I which is invert like this. Here. So for right now, this selection
select this wooden. When we click in here,
the mask player, the background will come, but we
can still left on this one. It's not visible
in the document. So just leave it here. I think this, you know, the selection is perfect. If you satisfy about
the result and not need to revised, just copy. We CTRL+ differs to this select this and here
is a fully function. Is fully selected and
isolated with this background just copy CTRL+ C and we bring to the document
and CTRL+V here. Here we remove this background. We not need this one. We put in here, yeah. Or maybe we make it more bigger. Here, make it more a
little bit bigger. Yeah. This one. This one, I'm going to put a little bit. I'm going to make it more
a little bit smaller like this or maybe like this. Yeah. And for this one,
just a little bit. I and the next we'll make a selection
for this orange. So previously, we selected
in the different document, and then we copy into this
document for this use case because the dimension of this orange just
appear small in here. And I think we not need even
though in this resolution, the detail still preserve, right? Even though in this resolution, because still preserve and we
just doing selection in here. Just make it the resolution
more little bit bigger. Still in the inside
of document, right? It's not close to the
document like this because the selection letter will
just eliminate it to the inside and the outside
part is not selected. So make sure that this
when we zoom out here, still in the inside of document. Okay, between that,
I'm going to use this one Object Selection tool because it's very easy,
right? It's very easy. We just hover careful. And then click here
and also click here. Just click click and then yeah. And then we have make selection. But some area is not
perfect selection. Some area in here and here, we will fix with the
selection brush tool, right? For example, for this one, and for this one, yeah. To move to the substract, we can hold ALT Hold ALT like this. And move to the AD, which
is released ALT and add. Rather than we just click this
one and move on this one, you just click ALT to substrate
and release ALT to A. This one, small. Yeah. If we satisfy up on
the result, fix some area. You can click
Refine refine this. Maybe some area
you're not satisfied. You can reduce this border met, for example, like
this reduce the ramp. Yep, click Apply and later, we click the mask layer here. After that, we click CTRL+D
So if you pay attention, this image, even though the
a coverage is like this, but this document, this image, this line will still cover the resolution Prafus before
we making selection, right? So that's why we need
to rasterize this one. We need to rasterize this one. We right click and rasterize. After that, here the cover
area just on this image area. The previously, sometimes
when still in this condition, we have to make editing
or make a transform. So that's why the rasterize and the resolution just
following this image. It's more easy to
us to manage later. We bring to here, scale down and put in
front of this class. Yeah, put in here.
20. Make the Clean Selection: We also make selection for
this leaf in this document. If we using the object
selection tool here, maybe I will we need to
make selection one by one, this leaf like this, like this, like this until it cover
all of this image, right? Here. When I click CTRL+D, when we using the
selection brush we need to make
selection one by one. I also it's not efficient
though. It's the same. When we create the
flooding selection tool, the flooding selection tool
is a very efficient too, but this flood
selection tool only select this white area. If we click It click Invert, so we also apply in
a whole document. So we kept using this
flood selection tool. So from the pathway, we using this one
object selection tool and start to choose one by one. Yeah, just like this. And then for this part here, I'm going to show you
some little trick. Here, even though in this
area in the inside area, this is white area, it should
be not selected, right? So we can fix with refine. We click refine, click refine
here, and this white area. Right? We click made here, click made and just like this. Well, automatically, we'll automatically
unselect it, right? It's very easy, very simple. Maybe some area, it should be not maybe it's not to
reduce the opacity. Maybe some area also
selected and then and then it's like
the whole like this, which just click foreground to
bring back This one to bring back the opacity or this area deleted
area like this. In the foreground when
clicking the foreground, it will increase
the area like this. When clicking the background, we will remove the picture and prioritize the
background like this. And after we satisfy this one, this one is also Oh, no, no, no. click foreground and bring back. These some leaf that may be deleted due
to the selection. After we satisfied
about the result, we just click Apply and click mask layer
here, the result. just CTRL+D and we have
selected leaf with, I think it's a good result. We bring to front and put
in here, right? Here. Next. So for this leaf. I'm going to selection
in a new document. So I will open here
and click this one. So it will open the
new document here. And which one the best
tool to select this? When I using the
object section tool? So it's not working
properly, right? It's not working properly. Let's wait. Yeah, it's
not working properly. If I want to choose the Background, but the object section tool doesn't recognize
which the background is. When I using the
selection brush tool, yeah it takes really
long the time. Just set one by one, and sometimes we
making a mistake. So it's not efficient. So the best way using
the flute selection tool. Just click the background
in a white area. And we invert. CTRL+Shift and invert. And here, the selection
select this object. But to pay attention closely, this area still selected. Include it. You just click selection brush tool to fix that. Here, Yep. To fix this selection. Like this, if we want to
refine, just click refine. And then some area still, you know, still include
it in a white area. Just increase the size maybe. Yep and draw. Remember, in the position in the matte posion
just draw like this. So basically in the matte, it will prioritize the object. So because this leaf is a green and the
background is white, so there's a contrast image. So the more contrast, the color is the more easy to this one. This mate will
eliminate the background. So like this, even though
this has a white position, but easy to remove
like this which just click apply, and
then click mask layer here. R plus D. Then you can also directly copy or click Rasterize to make this one to this area coverage is only in the image,
not in the document. After we rasterize,
which is copy and move to the document like this. Here. Like this.
And we put in here, we just delete this
document, put in here. Like this. Maybe small large. All right. Next, make selection, this leaf. The same method will open this one and click this
one in the new document and using the flood
selection tool or objects session tool. Let's see which one the best method to
select this object. Maybe the object session
tool will choose the background so the result
will be like this. What if I choose the flood slicing tool
and choose the background? The slicing will be like this. So I think what if I choose this object slicing tool
and I choose this object. Oh, results I think it's better, right?
I think it's better. So remember that in
the selection object, maybe we use the
different tools. So to choosing which the best the tools is
base on the object. Maybe this object is suitable
for objects and tool. Maybe in this object because
the background is white, maybe more easy to set in
a flood selection tool. So different object maybe
using different tools. So after that, we
click refine here. And this one, this area still has a white
acron. Just click matte. And just draw. Just clean up. It's clean up. Yeah.
It's clean up. I think Affinity has
provide the solid features, right for doing
selection because it's like it's not only one way or
one tool, but several tools. And later in the
different session, I want to share to you how
to select the best way. Sometimes when we edit it, sometimes we editing the hair or editing the fur of
animal or our hair, the difficulties the next level. So maybe I want to
share this way to you, but different session.
So don't worry. Mm. Oh, yeah, yeah, maybe sometimes. This one. Oh, this one is not good because this one
should be deleted, right? So I will choose
the foreground and reduce the size. No, no, no. Just the background.
And remove this one. Right? Remove this one because this one is not unwanted part. Oh, yeah. You're right. We not need this part. I know this way in this
part. Oh, yeah, yeah. The leaf is This one. select this one. Using background, remember? And how about this one? Yeah, this one, too.
Oh, no, no, no. We don't it. And this one, yeah. Because this is
shed though, right? Yeah. Okay, the last
Oh. This one is also. Oh, a little bit tricky, right? Yeah, don't worry,
but this is the step. Maybe it's worth to learn, too. Yeah, just like this. Okay. Maybe this is and there's
some area that we unwanted. Maybe we can remove
with pine crustol here still in this in this, you know, in this selection. If some area, the result
is not good, right? So areas still left residue. So I'm going to remove this one. Doing that, we can utilize this one pine prestle
and start to remove. Maybe it's not
removing all of them, but it will reduce
the this effect. So the overlay, basically,
I will explain later. But in this use case, the overlay it will work
with because this one area, this shadow area has a different contrast
with the green area. So when the contrast is
one, it will remove. Again, this area too, satisfied by the result is
just click CTRL+D and rasterize. Posterize and we opeal
and move to the object. This one, we remove
this one and copy here. Like this.
21. Practice Selection Session: Hello, everyone.
In this session, we're still learning
about the selection because the section
is very important. And I think in the vector mode, the section is in the core. One of the most
important features that we have to learn is
in the selection. And in this session, I'm
going to show you how to select the object
using Pen Tool. Previously, we
have learned about the Object suction tool and Selection brush tool and
flood selection tool, and now I'm going to use pen tool
Like the previous before, we have traced leaves
in the vector mode, and right now we are also doing
the same the same method. We're using the method of
tracing, tracing image, and then later, the
result of our tracing is to make a selection and
then to select the object. I think it's worth to
try and let's do it. So I think this is a lot of tab. I want to just delete all of this tab I
don't need it anymore. I don't need this one. I I don't need
anymore. I delete. To make it safe because
this is the untitled right? To save the document is also very easy. You
just click File. Click Save here, CTRL+S here or combination pattern
CitrL+S like this. And I want to save into
the Pixel demo like this. I will give name
Pixel Demo. And save. So the name letter will
change to Pixel demo. So I want to open the image, the Apple again,
right Apple again. Here, I will open the new tape, here, the new tape. And this here, all right, the first method that I want
to show you is using pen tool. Besides the pen tool, we will learn previously
in the Vector Mode. The pentool is to
select the object. In the vector mode is to
unit to tracing, right? So we're using the same
method to tracing the image. To doing that is very easy. We will tracing
this one, decide, and after that, we will
make a selection here, make selection, and
then click here. So let's doing that. I want to start with
the most difficult one, this one, here, and to here. Like this. Remember, if the line has
a color here as color, we will change this one, the color to set to none here or if you pay
attention to this one, this is set background,
and this is foreground as an outline and
background as a color. So we just set field
to noon like this. And if you think that
the line is thick, we can reduce the line maybe
to 0.50 0.5, like this. And this maybe 0.5 is not 0.8, right? So again, let's continue
to our dressing. So my recommendation
if you pay attention, this is the area for backgorund. This is the area for
image for the object. So my recommendation
don't choose in here. If this is white, you choose this one. So the transition between
this objecck and this background, maybe you can choose this
one or this one. This one. So, or maybe just close to the
object color, maybe this one. Yeah, again, little bit to
the inside. It's fine. Other than containing
the white color, my recommendation
just choose the, you know, it'll bit to inside and left
the white residu two. Right the way si tool. So remember, in
the previous session, we have learned how to
dressing the object, right? And this is still
beneficial in this method, even though it takes a
longer time, indeed. So I want to show
you that there is an alternative way to
select the object. It's not only just
selection brush tool, quick selection tool or
flood selection tool, but still here and another
way to select the object. I think too much, we'll
start with this first. Here, here. Like this. And I'll start from here. Yeah. This is very, very, you know,
very critical time. Remember, this is
the background. This is the object. So we
reduce the reside white. So maybe a little bit too
in the inside, right? Maybe a little bit too
in the inside like this. Even though maybe this
area still part of fruit, but, yeah, we just left. We just need to eliminate
the white area, right? So a little bit to
the inside like this. Remember, like this. Just like this may be too much. Maybe we gradually. Recognize which part of object
and which part of background. So in order that
our selection is not left much residue residue
from the background, right. So I think I'm going to spit up the speed up the video, right. So it will save duration Here, remember, guys, when we working
on the dressing with pentool the latest node will connect with the
first node like this. Yeah. After that, after
we make a selection, just click selection like
this and click mask layer. And here, I think this is very very precise, because yeah, because we working on
this selection manual, we know which one a for object, which one a for background. This is very beneficial
if the object is symple, but we need to precise, very, very precise selection. You can use pen tool to get the precise because
we select it manually.
22. Selection Feather Object and Animal: Hello, everyone. So before we move to the next
tool like fill tool, paint brush tool and all of them, in this session, we're still
working with selection tool. And this tool, I'm
going to show you how to select this fur. Maybe if you found that
this animal like this, this cat has a
really complex fur. Right? And then how
we select this fur? How we select this object? How do you select this cat, where the cat has fur like this. How we can separate this object, this cat with this background. So I think this is a
very interesting way. And the method I'm
going to use is like quite the same like previously but a little bit with
little bit tricks. And we will separate between this object cat and
then the background, and we will make it isolated
with better result, with a good result. So let's start. So I will open the file. I'm going to open the
file and choose this one. This one here. We'll create
the new tab like previously. And then this one because
this is a very complex. And when we're using this one, the Object selection tool, I think the result, please wait until the
Affinity analyze. We will see about what if
we're using object selection tool? Yeah. Yeah, I think
object selection tool doesn't recognize this object. If this is recognized, I think, it's not working.
It's not working. Wait. But actually,
we can use this way. But, yeah, we will use it later. So I'm not using this way. I'm not using the
Obsession tool. And what if we using
Ss and press tool? Yeah, I think it's
not work also. What if and the
background is included. So what if this one? Yeah. So area for this
fur is also included. I'm going to use little bit trick. I'm going to use pentle
we wear pentool this one. I just draw shape like this. It's not. I will
delete this color. I just draw following the
shape of cat like this. I maybe this is not common is not common way to select this
object with four like this. But yeah, I think
it's worth to try. Like this. Don't make this
shape is far from the foot. I think the more
closer is a better, but I want to make this
claimer that the foot with this far away from
the main object is still really hard to select. So yeah, we just doing the best try to try to doing the best
way to select this cat. On that, make selection like this and click mask layer here. And after that, we will
click this one mask, right click and refine mask. Here, click matte using the
matte rights and increase the press the size is close
to this one, like this. And we will try to little
bit carefully. It's not too inside the cat, just around four like this. Again, with a
little bit careful. Right? We're doing the
same method to all of these like this. Maybe some area is
hard to remove, we repeat selection like this
and continue in this area. This one so basically, the cluster, this shape or the pen tool we create
before is a better. So yeah. Like this, right? Maybe some residue. We till it. Still
residue in here. We till it. Residue
in here, we till it. Again. So we can
select with perfectly. Maybe some part is
hard to select. But yeah, this is
part of effort. Sometimes our in the hard case is also really hard
to select, indeed. Yeah, I think I think it's
satisfied with the result. After we satisfy,
we just apply here, and this is the result, right? This is the result
of mask layer, this is before,
and this is after before, and this is after. So after that, I'm going to
add this pixel layer here. And using this fill tool, we fill with a
ring to the bottom here and bring to black here. And with this one, so we have some residue
here, right? So residue. So residue to doing that. In this mask layer, I will hold ALT, hold ALT, and then
click the mask layer. So. Hold ALT and click
mask layer here. So some area, as you can see, some area maybe has
residue, right? So we'll using pine prestol
here to remove the residue. If the residue in outside here, which is set for cron is black
and we reduce the residue, maybe we'll reduce the opacity, to reduce the residue, we will using the lower opacity and maybe start to
throw like this. Again reduce the opacity. Oh, maybe it's too low. Maybe 20%. Yeah. To reduce the opacity to reduce this opacity to reduce opacity
to reduce this residue. Oh, yeah, don't forget
this is the overlay layer. Maybe if you still on the
normal, bring the overlay. Yeah, I forget the step
is to bring the overlay. Yes. So sometimes some area
will lose this part too. Sometimes some area
lose this part. Like, for this one,
this area is losing Color losing because maybe
the effect of selection. And to do that, we
just bring this one, foreground to white. This one. Oh, foreground. This one foreground to white. And back to normal we increase this opacity, we start to draw
here in this area. Oh, still Or maybe it's
still on the overlay. Oh, yeah, still on the
overlay, it's fine. We set the background to back, but foreground this area
still on the overlay, we draw a little
bit here to bring back this maybe 80. And we reduce the size of this brush we draw with carefully. Maybe this area. And
this area, too, right? Some area losing the part. Yeah, I think it's enough. In this part, losing the area. Okay. After that, we
hold ALT and click again and hide this
pixel here, the result. So here, to select
the cat with fur. I think the result
better, right? This is a little bit
trick to select fur, select the animal that has
fur or something like that. It will also apply when
we select the hair or select the complex object. Here, I think it's
better than forget. I think the problem
that we forget is to when we in the mask mode, make sure that we're working on the overlay blending
mode, not in normal. Yeah. That's the correction. And we have learned a lot about selection from
using this one. Object Selection tool, and then selection brush tool,
flood selection tool, and selection using Pen Tool, and also selecting
for using some trick. And then next we move to understanding how
we using field tool, flood tool, and then
next Paint brush tool and a paint Mixer and
color replacement. So see you in the next session.
23. Fill Tool and Flood Fill Tool to Fill the Color: Hello, everyone. I'm
glad to see you again. In the previous session, we have learned a lot about
the object selection, and we have learned about
the Objects section tool, selection brush tool and
flood selection tool. In this session, we're
going to focus to learn about fill tool and
flood fill and later, we will learn also
about paint brush tool, paint Mixer brush and color
replacement brush tool. So before we continue
to our project, I'm going to explain brush
field tool and flood tool first and how to implement
this tool into our project. So let's dig the fill
tool and flood field tool. Here, guys, in the
fill tool, this one, fill tool is basically quite similar like
in the vector mode. Or maybe I can say it's
similar or precisely identic. So the fill tool that available
in vector mode here, and a fill tool on this one. It's also quite same with the pixel that
available in this one. This one. So to
implement the object, for example, I will create
the rectangle tool here. This is the rectangle tool with solid color with black color. I can change the
color like this. I can change to green, yellow, and choose choose
the color what you want. For example, like this, so
when we using the fill tool, we can change from the
solid color to gradient. So in the gradient color, it's also the same
like the vector mode. When we click here, the shape
will have gradient color. And this is like
orange to white. So gradient from white to orange. And we can also edit the
color like what we want. And also we can change
like this one to midpoint. To slide here like this. And then the opacity,
for example, like this, the opacity of red color, red color or orange color, the opacity, or we can
reverse like this. This fill tool is not only to provide gradient tool
from this one to this one, but also fill tool also provide
these unique features. This one, when we click
solid's back to solid, right? When we click Elliptical
with elliptical like this. Right? The elliptical here. So elliptical is like to give the ellipse effect like
circle put tends to ellipse. When we choose the
radial, yeah, like this. The radial here means in
the center is orange, and then to the edge is red. And then next features from
field tool is conical. I think it's basically
just like this. Yep. Conical, yeah. And one of the most interesting
is a mesh in the mesh. So basically, we can
create many points, horizontal or vertical, we
can create many points. And each point, we
can adjust the color. So this is very, very
interesting features, actually. Sometimes, if you want
to create a background, for example, you can
using this mesh tool. For example, I want to add this one and change the
color to little bit yellow. And this one maybe just
a little bit darker. Or another color
like this, right? So we can create many
things, many possibility. We can also change this one and this one maybe use different
color like this. And we can create
many points here. And we can also edit this point. It's basically combination of gradient tools and Curves,
right? Gradients. We can create gradient. It's not only in one direction, but also in vertical
or horizontal, and we can also it this curve. So like this, this is
the mesh tool and it's like common we use to create
the background get the background. Like this. So this is
in the fill tool, and the last and the other features from
mass is bitmap. So in the bitmap is basically we using the picture
to create a pattern. For example, when I choose
this one, for example, the green apple
like this, right? When I bring to here
will be like this. Yeah. When I more smaller this one, the apple look like this. And when I zoom, so the apple is
like a more bigger. Zoom out and zoom in like this. And then from the bitmap, we can also click Rotate. Yeah, rotate is basically
just rotating the direction. It's similar to transform
using rotate 90 decrease, 180, 270, and then
hundred 60, right? It's like similar. And this
one is a sa transform, bring to the original one. And then like this. And in this one, in the extend
there is a wrap and then mirror to give a different
effect like mirroring, right? And then repeat.
So in the repeat, when we impart the original
one, original one. This is the original one, right? So repeat it will
extend this part, decide, and decide, and
this one and this one. So the background looks more wider and then like
the extend the extend fill, something like that
in the refill. The last is zero.
Yeah, just bring back to the original form. So basically, repeat
and zero is opposite. Zero is back to original one, and then the repeat back
will extend the space. So we bring back to none Yep. We buil to solid color, use this one to give the gradient color
to the field color, we also edit it in the
outline because the outline, sometimes we can also edit. For example, like this, if we
add this outline like this. So we can also edit the outline color
gradient like this, yeah. For example, I choose this
one to choose this one, this color, something like that. So it's also payable
to create like this. The Outline has a gradation. It's not only just fill that we can change the gradient
but also the outline. This is the field tool. And how about the flood fill tool? The flood fill tool
is basically to give the color best on the
sketch or for example, when I create this one, this is the paint brush tool, right? And I choose this one I'm
going to reset first. I choose the, you know,
the bright color, and I will create for
example, this one. And using the fill tool and
using the flood fill tool, I can directly give
the color for example, I'm going to use red. And then automatically
like this. So flood color so flood color here means to flood the color as long as the inside of the inside of brass when
we look at this one, when I create this
rectangle to like this, and I delete this one. So this flood fill tool doesn't
apply in this one. It can be applied
in this one because the filter is just
available with pass, right, with press like this. When I create like this, and then it will I'm it will
flood by color like this. So the flood color here
means to, you know, like to bring the color
to flood the color, but still limited by brush and then covered
by brush line. So this is very useful
when we're working with a sketch or maybe drawing
about drawing a manga, drawing a comic, for example. And then because the comic is when we drawing the comic,
drawing the character, we mostly working
with brush and then coloring from the brush using weekend using
flood color like this. Next, we will
implement this tool, this fill tool to our project. So I just delete this one. We move to check
our project here. So I'm going to implement
this fill tool. We can also change this one, this sky color using fill tool, or maybe a little bit
correction because this sky look a little
bit dull, right. So, we bring a little bit colorful or maybe strong color
or pop up color. With object with this
one field to doing that, I'm going to create this
one directangle tool. Like this, the
outline is so thick, so we can reduce the outline or to set to zero to
remove the outline. And in this one, right? In this one, I'm going to change the color to
gradient Of course to gradient. And then I'm going to
change to to white. And this one in the orange, I'm going to change to blue because the sky color is blue. After that, we click this one. When we click the fill tool, there is two point right
from white to blue. And then we can change
the direction like this, change the direction like this. Like this. Right? And we add it in here again
in the Gradient. In this color white, we can reduce to zero like this. Right. And this
one in this blue, maybe I'm going to use this one slide a little
bit to bottom like this. Right. And bring this rectangle to above background like this. So maybe just a little
bit adjustment like this. Or I'm gonna change this background, maybe a little bit to little
bit to bottom. I zoom, I zoom, zoom, zoom in like this and bring to a little bit
to bottom. Like this. Oh, it's too
much. I was too much. Hold CTRL to zoom out. Okay, I think for temporarily, I will set the background
like this and I will create this one little
bit to the bottom like this. And after that, This one, this one, in this rectangle, we will change the
blending mode from normal to multiply like this. Or maybe to color
burn, but so strong. So multiply, we can also click the screen or lighten
screen to make more brighter, lighten and screen will give more
brighter in the color. When overlay is too
much saturation, right? Too much saturation. So I'm going to use multiply this one. It's like more
strong blue color. But actually, we can
also edit this one, this sky because
this is too blue. I'm going to change a little
bit like this or like this. Oh. And if our blue is too much, we can also register the
opacity, for example. If you can register
the opacity, Like this. When we slide this one, the midpoint, I'm
going to put in here. I'm going to set in
here here and mybe will little bit bring
to top Yeah, right? So we have changed
the sky color, right? We can also change the field. Using this fill tool. Doing that, you can
also create this one, a rectangle tool and
create tangle that cover this field
green field like this and then change
this color maybe to green this, you
know, like this. For example, this one, right? And when I click this one, use this Fill tool, you can change the direction
here from in a white, we put in the top and
this green to the bottom. So basically, we also
change the green red the green when we choose this color from this
point this pattern point. And we change the
color like this and basically we change
the green color. We change from
normal to multiply. Yeah, like this from multiply, and we can also still correct
this green, like this. So this is the way we can
change the a Color field color, this is before,
and this is after. This is before,
and this is after. Okay, so we have learned about this one fill tool
and float fill tool. So because the layer
is start to crowded, so I'm going to organize
this layer that maybe it's more easy to us
to change the name, right? To change the name is more easy. So I'm going to change this
name layer from this one. This is leaves one, for example, and this is leaves
two. Oh, no, no, no. Leaf two. This one. leaf one. This left two. This leaf three. And maybe this is grass shadow this one sky sky color. And this one for background. And this, I will
give name orange. And it's a cut wooden. So it's like it's more
easy to us when we look at the object in this layer because we have
renamed this object. So next, we will learn
about this one paint brush tool paint mixer brush and color
replacement and Pixel tool. And then we can also, again, implement this tool
into our project. This project is
not finished yet. Still long process,
still long process. So see you in the next session.
24. Learn Brush and Mixer Brush Tool: Hello, everyone. So let's continue to learn the next tool. In this session,
we're going to deep dive about this paint brush. The paint brush tool paint mixer brush
plasma presto, and pixel tool. And we will deep
dive one by one. So let's move to the
Affinity software. So the paint brush tool here means paint brush is
actually very versatile. It's like this is
so many function. It's like combination between paint brush and with the filter, combination paint brush with the color adjustment,
so many things. But in the basic function, the paint brush is to draw
is to draw a brush, right? Just sometimes to paint, painting or paint something. Here, when we bring
to the brush, when we click the brush, this is the brush preset that
we can use Right. And here, this is a category brass we
can use from acrylics, basic try media
engraving, gouches, inks, markers, masking, oil, pencil, so many things and watercolors. So the paint brush tool, we will use based on our needs. Sometimes when we
draw a painting, maybe we're using
the watercolor. Sometimes when we want
to make a sketch, maybe we use a pencil and
drawing to make a pen. So this to change the
press size, right? The more the more pixel press. So when we slide to
the left, it's like, smaller brush and slide to
right is a bigger brush. For example, when
I choose the 30, is like really small brush. When I increase the precise
to 200, just like this. Right? So it is to
change the brush size. Here, there's two. This is the opacity. Besides, we can create opacity like this. We can also create the opacity. When we reduce the
opacity, maybe I will set the
opacity to 50, for example, the result will be
like this, right? There is a transparent
between them. For example, when I put
in here, for example, a solid color in this layer. I bring to here. So this one is like the brush. This one is 100 opacity,
100% opacity, right? 100% opacity, and this
one is 50% opacity. And brush, when we
create the brush, it's not form as a shape, but it forms as a bitmap. So when we draw on the brush, the Affinity will create
new layer, pixel layer, and then as long as we
not change the layer, the random brass we can
create is become one layer. Here. So we can edit individual
brush like this, right? We can edit because this
is based on a pixel layer, based on a bitmap, it's like
different with a shape. Like we create this rectangle tool or shape tool or pen tool. It's like, different different. So I just delete. Remember, we can also
change the result of brush. Maybe I will try to
using pencil, right? Using pencil with, for example, natural 2b, natural 2b. And we can draw
something like this. Maybe we will draw sketch of because I'm using
the moss I using mouse. So it's like it's not
convenient, though, when we throw So it's like we can also draw, you know, throw for example, we can create something like this with pencil tool, right? Yeah, I just delete the pencil when we can also create
another pencil preset. So different preset,
also a different result. You can also create
the watercolors. Maybe I will choose
a different color. Green, for example, and
I increase this one. So it will create the
watercolor effect. Maybe little bit bigger. Here, the watercolor. We also can change to like this. It's like spray spray paint, right? Just like this. So the brush basically to draw and
to give the color. Maybe if I using pen
tap to drawing, it will more easy to
walk in with brush. So basically, brush is to draw something
into a pixel layer. We can change here the preset of the press from the texture, oils, you know, markers, so many things, so many
things we can draw. Next, we will move to
the paint mixer brush. So the paint mixer
brush here means, as you can see here, so maybe I will deal it till this one. Okay. This yer pixel
layer, I will till it. And I'm going to
import this image, for example, this image. Pain mixer brush, right? This image Okay, next, we will learn the
paint mixer brush tool. So in the paint mixer brush tool
basically this combination between two or more color
and then it will mix. For example, when I create this with paint brush tool
create the yellow, yellow like this, right? Yellow. And also
will create blue. This one, it'll be. This one, blue, right? And we will see the result after we create the
paint brush tool like this. This yellow and this blue. We move to a paint
mixer brush and click C to clear the preset
and as you can see here, it will mix like this. Like this. We can adjust this strong
like this one, like this. So it should be around
50% 50% like this. And in the paint brush tool mixed
brush tool there is this one. This is the just, the flow of the brush if we reuse, like this. I will do. And again, if we in the mixer brush tool, this one, this is the flow of the brush. When I bring reduce
the flow of the brass, the result will be like this. So it's so basically, it's like mix from
yellow and blue. Make different different, you
know, different use case. For example, I'm going to make
this one yellow and green. And for example, blue, and also Purple, like this. Right. So what would
happen if we using this with this one
pine crust mixer. So we click here and then we
gradually just like this. Right? Maybe I will
increase this one, this hardness, right?
The flow, yeah. Click when yellow with green this green
with Blue like this, blue with this, like this. So when I click here, like this, like this. All right, this is the
function of brush mix brush. And what if I import
this image to this here? What will happen
if the mixer brush apply in the image like this? To doing that, we need to convert this
image to rasterize. After we create the rasterize, be able to use this
one pain mixer press and the result
will be like this. Maybe I will reduce
the size a little bit. And clean the preset
here, clean preset. And maybe I will reduce again, and the result
will be like this. Yeah. So the paint brush tool
is like combination between the first the first color we hit in the mouse and
when we move to the side, it will also influence the color around the sample, right? But so it's not only
applied in the brush, but in every object or every image that present
in Bitmap mode like this. So when I close to the zero, for example, 10%, the
result will be like this. It's more subtle, right? The more we close to zero
is more subtle. The mix is. Sometimes it's also applied
to blur some part with this one. The mixed Mixer brush here. So this is the mixer brush.
25. Replacement Brush: Replace The Color of Object: We move to the color
replacement brush tool. So I'm going to save this
image as a sign here, I will put here. And I will copy import
again, this one. Maybe I will make the
dimension like this one. Yeah. Just here. So I want to give name in the
artistic text tool in Mixer. This one, paint Mixer
brush this one for replacement brush tool. And I'm going to show
you the difference between paint mixer brush and
replacement press tool. To using the
replacement brush tool, we'll click here Color
replacement brush tool, and we can change
the color we want. For example, I want to convert
this apple yellow green. Use this layer first, click this layer first and go to the color
replacement brush tool, and s the color,
the color we want, maybe I'm going to use green color and buy
gradually this one. So what if we set
all of them 100%, and this one is
10%, use tolerance. So the result will
be like Right. And what if we
increase this one? So I'm going to show you that the important part is tolerance. So I want to headlight
the tolerance first. When we increase the tolerance, the result will be like this
to increase the tolerance. Here. So part is
not selected yet. We increase the tolerance again. To 40? What about 40? It's not tolerance. We increase more to 60.
How about this one? Yeah. So the more
higher tolerance, the more higher area
we'll cover will change its color like this. So this is how to change
the color, right? Until we can also
change the color in the shadow so that every
contain the color, every contain the red color, it will change to yellow. To green. Yes. So I will undo. What if this one, this opacity, if I reduce the opacity to 50, right, the result
will be like this. Still this one, choose this layer, still contain in the red. So it will the green
will influence in 50%. So there is red mix
from green and red. Like when we increase
the tolerance, will increase the opacity to. So basically, to change the color is just one
stroke like this. When we using the 50% opacity, just one stroke like this,
the result will be like this. But when we add draw, so the second draw
is like mores mores more from compared
to the previous time. This is the 50% opacity. And then the second withdraw
this is the more firm. And then the third
draw is the more from. So there's a difference
between the first draw, the second draw and
the third draw. And the last draw
maybes more foam again. So this is the opacity
because we changed to 49%. So we bring back to 100 and this one is when we
reduce the size, it will make more
smoother result, for example, like this
smooth result, right? Smooth result in the edges. When we more reduce
close to zero, is more smoother like this. To change the colors
more smoother. And then again,
the importance of this replacement brush tool is
this one in the tolerance. The more the lower tolerance so it's only affected the sample
on the first we click here. When we click in
this spread area, with the lower tolerance, it's also applied in this area. And we move to here,
it's not affected. And we choose this
area in the dark area, for example, it's only
apply in the dark area. When we move to the bright
area, it's not affected. So the most important
part that we have to pay attention
is this tolerance. Tolerance and some
setting in here, maybe if you want to make, you know, like this
one, more softer edges and then engage the
tolerance like this. Maybe to 65, and the
result will be like this. So it's like more
softer in the edges. And then if you want to make a little little bit
yellow from the Well, a little bit yellow, just like this or increase the
opacity little bit yellow. Yeah. Just a little bit yellow, just like this. All right. And what about this
one stabilize. When you click the
stabilize, right? I will very stable. I will bring opacity to
100, for example. This one, 30 pixel. When you click the stabilize, so it will very stable very stop stable of draw, very staple. Compared to the unstople and the result
will be like this. It's it's not stop,
just like this. So to change the color,
just click here, click the color
replacement brush tool and set the size, right? And then maybe I'm
going to use this one set this hardness, set this flow opacity, and choose the color we want, and then start to
draw like this. Here. So this is the difference between
paint mixer brush here. I will mix the color
from the first, click the sample, and then it will mix with the surrounded. And then the replacement
brush tool here, it will change the color
from the red to the green using replacement brush tool
26. Practice Brush Tool to Create Shadow: Okay, friends, so we have learned about the
paint brush tool, paint mixer pus and
color replacement, brush tool and Pixel tool. Now, we will implement this
tools into our little project. So as you can see here, this is the main object, this orange, this leaf. And as you can see, is not a placement
properly, right? So we're going to create this shadow in this
area or this area, this you know that
is more natural. For this orange, right? For this orange, I want to create a shadow for this orange. Between that, I just click here. This paint brush tool then
so I'm going to use this one paint brush tool
we click brush the basic. I think I will set
opacity to 30. Let's say to 30. And this one, I will reduce
also to 20, let's say. And then this one, use the color to maybe to black. To draw the shadow I'm going to make the
pixel layer here, the pixel layer, a new layer, bring to under the
orange, this one, and gradually we draw
this or a shadow one. Maybe I will reduce
the size, right. The size I will draw This one. Yep. I think for this one, too. Yeah. Just like this, we can draw we can here. And increase again or reduce
opacity, more softer. And then again,
maybe ten or nine. Yeah. To give the good result
to bring the good result. Alright So this is the
first shadow we make. So if you think that
this shadow is to dark, this one might be some
area Oh, is too much. It's too talk. We can reduce
the shadow. How to reduce? We can click Pixel, click mask layer, here, right? Click mask layer. And this
one set foreground to black. And then here, gradually, we can reduce the the dark, the darkness, like this, right? To set to 10%, for example, doing some experiment like this. And then, yeah. Just like this. If we think that this shadow
is to dark like this. Next, we will create the
shadow for this leaf, too. But I'm going to try
to certain method. It's not using this one, but I'm going to use in a different way to create
this set, this leaf. Doing that, one, this leaf, I'm going to copy, right? This one I'm going to copy. And in this one, I will add
adjustment layer to Curves. So maybe this is, like, should be discussed in
a different section, but, yeah, it's fine. This one, this leaf one, and this curve will affect
it with this leaf one. So before I it these Curves, I will bring the
curve adjustment to leaf one to inside lift one. So it's basically
create clipping mask. So the curve adjustment just apply in this leaf one, right? And then I will bring to bottom. So I will hide this leaf
one, the top leaf one, I will hide and the leaf and leaf this
leaf one in the bottom. So I will set a little bit
to darker or darker side, like this, more or less. And then after that, I will
bring back this leaf one, the original one, right? And in this leaf one
in the dark leaf one, we stretch a little
bit down like this. Like this. Set like this. For example, Right. After that, I will reduce. I'm going to reduce the
opacity to maybe 55. Yep. So it's like the leaf has a background and I will
add this filter. So this is just introduce. Introduce some filter,
some adjustment, just the gaussian blur
here and click radius. Here. So this is like
the result is quite similar to the left when we create the press
using paint brush tool. And sometimes I will
increase the opacity to 75. Yeah. So it's like similar
result, right, between this one and this one, but using different way. So I'm going to show you
that in this orange leaf, we using shadow
with brush, right? And this one we
create shadow using a combination of Curves
and gaussian blur here. And what if we
implemented this one? This color replacement
brush tool in this orange. It's okay. Let's try
in this orange, right? We choose this color
replacement brush tool, and we choose the color here. I'm going to make this orange, little bit yellow,
little bit yellow. This one. And set to opacity
to 10% is fine. Or maybe just a
little bit to 20, 25, for example,
and start to draw. Okay, we'll increase this to 50. If too much, maybe we
reduce again, a little bit. Just little bit like this. Yeah, right? This we changed a little bit yellow for this orange.
I think it's fine. Next, if you think that, oh, maybe this shadow is dark, but this orange is still
brighter in this area. So this area should be darker. Red is not red like this. To do that, we will use
this shadow a paint brush tool We will use paint brush tool also, but in a different way.
So I'm going to show you. In this one, it
is orange, right? I want to add Curves again. I want to add Curves
again and bring this curve adjustment
inside the orange, right, inside the orange and start
to draw manage the curve. We until a little bit darker
like this and after that, we will invert in this
curve adjustment, clickt plus I. Yeah. After that, in this
curve adjustment, we'll draw using this
one paint brush tool. Set this baackground to black
and then start to draw. I will reduce the opacity to 15, for example, and
reduce the size of Maybe 15? Yeah. And start it draw. Or maybe, yeah, yeah. Set this background to
white because we invert previously
set foreground to white. And here, set things using opacity 15 and then
the rest of it like this. And then you can start draw
start draw like this. Still, it will also
utilize brush tool right? So we can draw like this. Sometimes we also
draw in this part. Or sometimes we also
have to careful, right? Yep. It's more
darker. It's fine. We can create more darker
like this, like this. Right? This one, too. All right. I think it's
more natural shadow, right? It's more natural shadow. And we also still implemented
pain brush tool in many ways. For example, I'm going
to make this part, little bit darker, right? This part a little bit darker. This area an area. Still using the paint brush tool. Using pin brush tool I will
increase the size, maybe, more thicker to
400 like this. Yeah. And then I'm going
to use this one, change the color
to maybe to black. If I draw like this and
then set the opacity to 15, if I draw to 100, the reduce is like this, right? It will cover all of this image. So I will reduce the size to 15 or 10% like this and maybe it will
increase again, right? Doing that, just slowly to drawing in this
area like this. Or I will set this
pixel this pixel above above this background above
this background above this, yes, above this
background like this. And I draw I will
draw this one. So it will affect it
in the top of background. It's not affected in
the leaf like this. So it's like giving more
little bit dramatic effect here. So this is before,
this is after. This is before, this is after. If we think this is too much, we can reduce the opacity
here to reduce the effect, maybe to 75 like this. So before, this is
after. This is before. This is after here. All right. We have learned about this brush to from paint brush tool to
from paint brush tool, Color replacement brush tool. And we also learn about this
one practice one by one, and implement it
into the objeck. So next, we'll learn about Erase Brush tool and
Adjustment Brush tool. We'll focusing this
one the next session. And don't forget this
project is not finished. Still a long way to
finish this project. While we're learning one by one, this tools and to
implement this tools, we will implement
it in this project. So see you in the
next to discussion.
27. Erase Brush: Make Object Selection by Erase the Background: Hello, everyone. So let's
continue to our practice. The next tool that I want to discuss is Background
erase brush. And the Background erase brush
is contained erase brush tools, background erase brush, and
flood erase tool. So this tool is
basically to remove this object or remove the
bitmap, actually, to remove. But each tools also has different each tool has different function and
different implemented. So let's start with
the erase brush tool. And let's move to discuss
this tool one by one. The first tool is
erase brush tool. First, I click this
object, this object, erase brush tool, and I
click the erase brush tool. So the erase brush tool is
basically to remove this to remove this object like
this to remove this Pixel. Right? So when I when I create
this rectangle tool here, and this rectangle I will bring behind this one, this one. So when I erase,
it's literally erase. So it will show the rectangle,
the rectangle, right. So this is basically erase. And the erase brush tool just apply on the layer and
that's selected, right? Yeah, it's basically like this. The erase brush tool. And in this erase brush also
apply size for size. This is opacity. This is
flow, this is hardness. If we want to use
this stabilizer, this is important. Just eras. There's no any
feature behind it. Just erast like this.
When we erase something, that will erase totally. So the as brush tool
when we set to this one, the hardness to 100, the erase brush is really
really from edges, right. When I reduce this hardness to 50 for example
is more softer, right? It's more softer. So it's like same like
refuse brush we learn. The opacity, yeah, ah the opacity, it
will hit different. Maybe I will choose hide one. I will hide the rectangle. So I will just hide this
one. Just part of this. I will hide like this, maybe increase the size. So it will reduce the opacity. So basically, it's
still removed, but gradually like this. Still, basically,
the tool is to erase. Next, we move to the
background erase brush So I delete this rectangle. To give the example, I
will erase like this. To give the example, I will erase like this erase brush tool. Okay. Next, we move to
the background erase brush. In the background erase brush
here, I want to explain. So in the background erase brush
only removing the background. But there is some condition. This object, the min object
that need to preserve, right, must be different
contrast to the background. So because the object is a
red and the background is a gray, so from the contrast
is different, from the color is different. So it will more easy for backgrond erase brush
to remove the background, right? So let's chew it. We click this one, background brush and set this one to 100, 100, 100 and this
one is important. The tolerance. If we choose 10% like this here, are we reducing the size first? Oh, okay. If we using 10%,
the result will be like this. Or, we choose this layer. So we choose this layer. This layer, yes, and use this background erase brush and
set it first like this, my configuration and start to. And this is very Yep. Perfect. Start to remove
this set set like this. So because this apple and this background is the difference
color is so strong, the contrast is also the
colour is a firm difference. It's easy to press to
remove this object. But sometimes
sometimes some area like this is not removed. Still hard to remove, right? But sometimes when
we click again, it's it's not selected. Maybe in these part
it's hard to select. You know, sometimes
it's not flown. It's not some areas not
selected, it's not removed. But we increase the tolerance. We increase tolerance to, let's say, to 30%. Let's see what the differences. When I set to 30%, let's so still be able to remove this background,
but sometimes it's not. Yeah, like this. It's too much, I will reduce to 20 like this. So after that, after we select
it around it like this, and then we can using erase brush to continue
to continue these erase. And then here, we
can remove the background. Right like this. Maybe some area like this, we can remove background. But this is basically
similar result of, you know, making selection, but using the erase brush tool. So I want to back, and
I want to show you in the the sample of erase brush tool. So I'm going to apply
Background erase brush tool in a different document, right? So I want to open this
image in this blend mode, blend mode folder and I'm going to choose this
image, for example, right? And I will little bit zoom
zoom in and put in here. Like this. Then I will crop. I will crop with I will borrow the feature from
Vector Mode crop tool. I will put on this feature to
crop this image like this. Alright. It's basically
just creating clipping mask with a rectangle and
back to pixel, right? So I'm going to apply the
erase tool with this one. So before I'm doing that, I will set a convert to restorize this stars layer and become one image like this. And using the erase brush this
one background erase brush Using background erase brush, I will
increase the brush 100 yeah, I think it's perfect. So and start to throw
the background erase brash. Remember, in the sky, color is gray, and then the
mountain is dark, right? Tends to black to dark. So the contrasts a very
contrast from the color. So it's more easy to
apply the erase brush tool. So I think from the tolerance, I will say to 20%. Let's see. For 20. This one, this one. Yeah,
I think for this one, I will set to 50 or 80. Like this. Gradually like this, again hold the most, hold the most and hear, right? So the letter we just
remove like this. You know, if this background erase brush
hard to remove the rest of it, we just using this one erase brush tool continue our remove
like this, right? So this is how to remove this background and the background
is as a sky like this. And maybe we can
change the sky, right? Maybe we can change the sky. I'm going to use
this one, this one. The background we use
in the project, and then put in here, and then yeah. Yeah. So we can remove
the sky just using Background erase brush
and then change the sky color like this. So next, we move to
the flood erase tool. The principle is something like flood fill tool but it's
not filling the color, but remove the color. And for this gas's
remove the background. Between that is very easy. Click flood erase tool, right? First I click this
layer first and click flood East and just
click here in the background. And automatically it will
remove or erase the background. But before we click here, we can set this tolerance. For example, when I
reduce tolerance to 15, this is the result. When I set tolerance to
30, this is the result. So it's based our tolerance
based our tolerance, and then our object, right? And our object. This is to flood vt erase. And we have practice
to apply some distal, petron erase brush to remove
the sky and change the sky color. So next time we will learn
about Adjustment brush tool, burn brush tool, dodge
brush, and sponge. And also, after that, we learn about this
one Filter brush tool. So adjustment
brush tool. So see you in the next session.
28. Adjustment Brush: Applying Adjustment Color Through Brush: Hello, everyone. So
in the eraser tool, we have learn up
the eraser tool. In this session, we're
focusing to learn new tools. And the tools is this one. The Adjustment brush tool. As you can see here, this is lot of tools here
from Adjustment brush tool, tone brush tool, Burn brush tool,
dodge, and sponge. And we will discuss one by one. And also, I'm going to
show you how to use it and also explain
about the settings and also show in the demo. So let's move to the
Affinity software. These tools first
Adjustment brush tool because the Adjustment brush tool is very, very important, guys. It's very important. And
it's like combination from this one paint brush tool
and also this one. Adjustment layer.
For more detail, let's start with the first
tool that is Adjustment Brush. Doing that, I want to tidy up this layer first because this layer is start
to crowd it, right? This is this one. So for the demo,
before I explain that, I'm going to use this one, this wood cutting wood, and I will put in here
as a demo, right? Because this one, this cut
wooden still in the mask mode, so I'm going to resterize to make it a pixel
layer like this, and I will scale down like this. Maybe I will put in here. Next, I also want
to use this orange. But because this orange
has, you know, like, apply some effect in here
in here, apply some effect. So I'm going to making
new selection from this orange. This one. Yep. I just doing
quick selection. Quick. Alright. All right. Maybe I will tidy up some
part, right? Like this. If you satifsy the result, just click mask layer
here and diselect maybe if we see some part
like this is not good, maybe we can fix
with paint brush and clicking the mask layer just paint brush tool and reduce the size, right on this one in the
foreground to black and start to little bit edit in this one. And then I'm going to
rasterize this layer, rasterize here, and I
just copy here, copy, and move to the
pixel demo and copy here and bring to
this page like this. So as say demo, guys. Alright and I just copy. This is for tone brush tool and
this one for Burn brush tool. Okay. So I'm gonna explain one by one the
difference between these. Adjustment Brush tool here. So we click here, let's pay attention
to these settings. This one is color
adjustment, right? Color adjustment from
exposure level white balance, brightness, curve, Channel Mixer. And we can find and we can find the color adjustment in
here, as you can see here. So when we click here, Adjustment Brush tool,
let's set to 100, and this one is for 20%, right? And I will choose
the exposure, right? And this one, we
just full range. This one, we just full range. And we can choose exposure
level, wet balance, curve, select color, HSL, recolor, some things we can choose. But for example, I'm going
to choose exposure, right? And I'm going to start draw in this one. Start
draw like this. Right? And automatically,
this one will pop up. The adjustment window for
exposure will pop up. And we can draw like this and increasing
the value to make it brighter and decreasing the value to make
it lighter, right? This one. So we choose the red value,
for example, like this, 0.0 0.4, like this and we start continue
to draw like this, tu brightening this layer. Because this layer,
this exposure is in the top layer
we bring to this one. Just for affected
this cut wooden. And we can continue our brush
to make it more brighter, all of them in this area. And if we feel that, oh, I think it's more and more
brighter, increase this value. Just increase this
value like this, maybe 0.6 and it
will more brighter. Again, 0.7 more brighter, right? And if we reduce this size, it will more darker reduce. So when we here, it will affective
in the headlight when we slide to the left, it will effective in the shadow. All right, maybe I will
delete this one, right? And I will move to
the for example, HSL adjustment and start
to create like this. The HSL here means hue, saturated and luminosity, and automatically will pop
up the HSL adjustment. We can continue to
our draw like this. We can continue to
our draw like this, right? And the HSL adjustment, we start to set. Like if we slide this one, maybe this one, for example, reduce the opacity, reduce the saturated and increase the luminosity or decrease
the luminosity is fine. And maybe we change
the color right. You want to change the color of the wooden tree, like this. It's also possible using this Adjustment brush tool and
using HSL mode, right? Using AHL mode. So if we want to back
to the original, just click Reset and back
to the original, right? Maybe I was increasing the saturation just for
saturation like this. And if you want to using
another adjustment of brush tool, just click Add
Adjustment like this. For example, so maybe I am satisfied about this color right about this tone
about this color. So I'm going to add
the adjustment. And I want to make
this more brighter. So I'll just add adjustment. So I want to change to Curves
for example. Oh, no, no. So what if I'm going to use more than one
color adjustment? This is the HSL
shift adjustment, right from here, HSL, and I'm going to also
use these Curves. So it's still possible
curve or exposure. For example. This is trips. For example, I'm going to use exposure and at adjustment here. This layer will create HSL, and also exposure adjustment
that we just created. And in this adjust exposure, I just want to make this area. In the stop area is more brighter. Just draw overs like this and automatically it
will appear, right? And I'm going to make this
more crater like this. Like this and I'm start
to draw the rest of it. Right. So this is the way we using this color
adjustment brush tool. If you wondering,
what is this one, full range, shadow
midtones and headlight. So I'm going to explain the
shadow midtones and headlight. Maybe you wondering how we can differentiate between shadows,
headlight and midtones. Okay, we move to here. So I've created this one. So we will break down
what if headlight, midtones and shadow?
This is the original one. I give the name original one, and this is the hightlight bush. So we will highlight. We
will push in the highlight. To push in the highlight, we're using the color adjustment, this one, and click
Curves like this, right? In this curve, this
is for highlight. This one in the top
Curves is for highlight. This is for shadow. This is for shadow,
and this is for midtones. But before doing that,
I'm going to make this curve adjustment the
inside of this layer here. This layer, this layer. So I will rename headlight. And this one for tones. And this one for shadow. And this one for midtones. Here, I bring the adjustment
instead of headlight. So in the headlight,
we'll draw this one. On this one. I will
delete this one first. Delete. Yeah. This highlight
I will put in here, you know, next slide to the left is more brighter and more brighter When we increase the highlight, this affected just
on this area, right? The more just affected
in the more brighter, just like this, right? Just affected in the more
brighter like this, for example. This is highlight push. How about the midtones? Before we move to the midtones, I'm going to choose
the shadow first. So I click the Shadow and I click this curve
adjustment here. And bring the curtain
adjustment in the inside of shadow this. And after that, I'm going to show you which one the
shadow curve This one, this is the shadow, and we bring to the
right like this, it will boost the shadow. So the shadow will affect it
in this area dark area, right? And the shadow sometimes also
increasing the saturation, but the point is
it will you know, move to the more black and increasing black
level from the image. So it's basically to
increase the shadow increasing the
black level, right? This is the shatow
And then the last is, I'm going to show
you which midtones is. I'm still using the curves, bring the curves inside of
midtones and then this one, the me tons, the flow
of midtones is like this. This is to boost midtones. This is to reduce the midtones. So I will boost midtones
like this. More or less is like this. So when we push the midtones, it will affected not
only the highlight, but overall the overall
image, the overall image. Right? Because the midtones when we reduce the
tons is like this, we will bring tend
to a shadow, right? It's close to shadow, but the midtones when
we push the tons, more or less is like this. So it's not only this one, the highlight part, which boost but also overall,
almost overall part. So it will affect
it in whole color, but it's not as
strong as headlight and not as strong as the Shadow. So this is the headlight,
midtones and Shadow. And when we bring back to
this Adjustment brush tool, when we choose the
adjustment brush tool, this is full range Shadow
tons and highlight. So I'm going to edit the
shadow this one, right. Before we move to
the tone brush tool, I'm going to edit this one for the shadow of this orange. Before I'm doing that, I'm
going to make this one. I'm going to move
this one, this layer exposure and adjustment
layer we have created previously to the inside
cut wooden like this. So it will just affect
it in the cut wooden. And then I'm going to
create add the shadow. To do that, I just
click here and then add Adjustment brush tool here. And using exposure at
adjustment like this. I will create another
exposure adjustment, and maybe we can draw this one. This one for orange
shadow. We can draw. And then this one will
reduce the shadow like this, maybe in this one
too, like this. It's basically the
same as we are doing previously right. Like this. And then I'm going to make this orange Area is also darker. Just click here background and then in the
Adjustment brush tool, click this one layer, this orange because this
orange, this orange, right? And I'm going to add this Adjustment brush tool
and add exposure. Like this. It will affect it. And I will bring
to the inside in the background in this
orange, this orange layer. This one, orange layer. So exposure adjustment inside the orange orange, like, right? And then I will draw
in this area like this. Maybe I will reduce the size. Yep. And start to draw.
Increasing the size. start to draw. Like this. Reduce the size to get smaller. Maybe also reduce the opacity. Yep, to get a proper. Yep. And a little bit too dark. This one, too, like this. And if we, you know,
like this one, some area is like the
darker is cross the line, which is switch this one, switch for brown color to
white and then to remove or to black to remove.
Right, to remove. Increasing the
saturate, opacity. I just like this. Yeah. We can also switch. So in this one, when the
foreground in the white, we withdraw the exposure
like in the value. When the foreground in the black, we remove we remove the
foreground, refusely. Remember, when the
foreground is white, draw we draw on the value of this brush
and we switch to black. We delete the effect. We deletes effect, the brush adjustment, please. So basically, if you it's
not natural for this shadow, I want to bring back to the wooden and then this exposure. Right, I'm going to
increase this one. Just increase, darker, more
darker like this here. This is the shadow We have created the fix change the tone to tone color or
change the color of this wood, and also apply some shadow for this orange using
adjustment brush tool. You can experiment
with yourself. What if I using the level with
balance brightness Curves and then HSL and
also make it more, you know, multiple
adjustment here. And again, if you
said the foreground is to draw the shadow
based on the value. And when we switch to black
in the foreground to black, you to bring back to erase and back to the
original one, this one. Okay, we move to the next tone
brush tool here, tone brush tool.
29. Tone Brush Tool and Burn Brush Tool to Ehance Color: Okay, everyone, let's
move to the next tools. The next tool is a tone
brush tool here, guys. So basically, it's like the
quite similar to the previous tools, but there's some different color the tone brush tool here means
based on the tone color. So we can change the color. But not using the
adjustment layer, but using this color. For example, I'm going to
I'm going to rename this one orange orange one
because this is orange two. I'm going to change
to orange two. This one two orange three. Orange three like this. This one. Okay, the wooden cut wooden cut wooden two,
cut wooden three. Like this. So I'm going
to show you guys. This is to brush tool
using ton brush tool. And this is the
white color, right? And I draw on this white color. The will be like this. By default, the color the to
brush tool on the mode overlay. So we need the overlay. We can also change
the blanding mode, but by default is overlay. So it will change
the vibe change the tone color by overlay like this because I chose the
white color like this. So what if I red
undo and I change, for example, to yellow. The result will be like
this, the five turn to yellow like this. So it's basically to change
the vibe color, right? To change the five color. Maybe I will increase
the size a little bit. Yeah, to get more faster. Basically, to change the
five color like this. If we change, for example, to this one, it's also possible. This is will brown
color, right? Like this. So basically, the tone
brush tool here means we'll change the color based
on the color we choose. And in the dodge and burn mode, we can also choo inverse bland. But I think for commonly
used is touch and burn and end the
mode to overlay. And then if we create this
draw across the edges, which is bring this layer to inside the cutten wooden two, and it will create
clipping mask. And then here, cut
wooden two, this one. This is before, this is after. And we can also recolor
this orange too, which is click here using
Ton brush tool and at layer. Click this object and click this Ton brush tool and
choose the color we want. Maybe I want to
make more red dish. Redish. This one. Yep. Just draw like this
to make it more red. For example, I will increase this opacity to make
it more red like this. Be careful guys like this. So we can change the
color like this. Like this because we bring to the inside orange
too, and then here. This is before and
after before and after, we can recolor this one. This is tone brush tool. And
what if I want to make, you know, add the other tone
brush tool? You just click here. But in the same object, I want to make more one layer. It's similar to the previous one. Just click at layer here. All right, click at layer, and bring this one dodge
Burn and choose the color. For example, I want
to make a little bit yellow to the edges, right? Just reduce this one. Oh, no, it's too small. 22? Yep. Maybe
reducing the opacity. 20? Yeah. But carefully, we can draw this one
maybe more than maybe tend to green like this. Yeah, just like this
to throw like this. Yep. This is before,
after. Before after. Or if you want to change
to white, more brighter. I will increase opacity. Yep. And if this is too strong, it just reduce
opacity like this. This one layer opacity. And this is before this
is after before, after. Yeah. This is the tone brush
change the color, to change the object color. And then I think you can also doing some your
experiment with tone brush tool. I think it's quite similar. This is to reduce the hardness. This is flow, opacity and size, and this is the blending mode. With overlay. You can also experiment with
another blending mode, but by default, using overlay. Okay, next, we will
learn about burn brush tool the burn brush tool. So basically the burn brush tool
it will darker the midtones. So for example, this one, I'm going to move
this one first. In the burn brush tool here, it will darken the midtones because this is one by default, it will meet midtones here. And if we throw like this, on this wooden wooden tree? Yeah. I will reduce this
hardness to zero here. So basically, it will increase to darken and the midtones will as if bring the
burn effect, right? Like, bring the burn effect. I will increase the size. Right? I will bring
the burn effect. This is a burn burst
tool like this. It's like the wooden is burning. It's it's like burn. Burn this tool is
different, guys, because this burn is
not create a new layer, but also directly brush in this layer in
this original layer. But if you pay attention, guys, this burn brush tool is not creating new layer when we draw when
we brush in the object, but it will directly
apply to the object. So it will make the
original object destruction and it's not repairable. When we switch to the set foreground to the black, for example, it's you know,
it's not restored, but still increasing the dark. So apply directly to the layer, and it will cause destruction to the original
layer. Here, guys. This is Burn brush tool. So what if we choose the
shadow or hightlight? So I think the result is
quite the same when we maybe I will reduce
this one to 50, right? So it's quite the same.
It will make more darker. So basically, this is just which color range
we need to change. We can choose ton,
shadow and highlight. It's not a big difference. And every mode this one bring
this color is more darker. Basically, it's like, burn. We move to the dodge brush tool. Before we doing that, I'm
going to copy this one. I'm going to copy this
one, copy and paste here. And this is cut wooden four. And this is orange four. Right. And I delete the adjustment color
adjustment like this. And I will copy one time
more, one more to here. Alright let's move
to the dodge brush tool. Before we doing that, I'm
going to take a rest a while. You.
30. Dodge Brush and Sponge Brush to Applied Color Adjustment: Hi, everyone, so let's
continue to next tools. The next tos is dodge brush tool. In the dodge brush tool here means opposite
from burn brush tool. In the Burn brush tool is to create
the object darker to create midtones darker or two
darker the color. But in this burn brush tool, here means the opposite
from Burn brush tool. The dodge brush tool will make every color is more bright
bright, is more brighter. It's like boost the headlight. So I'm going to show you. This one, touch brush tool. Here, I choose the object first. This one, good wooden four. I choose this one, dodge brush tool. And here, by default, it will set to midtones
because the midtones, it will, you know, affected with this toes. And then if we draw like this, so it will brighten this one. If we choose, if we draw
like this more and more, the result will be more brighter
and brighter. I will undo. And then we can also
create this one to make it more brighter than
the original one, right? Like this. And then absolutely, we can also change this opacity, change the hardness, and then
change to this size too. And then, yeah, we set to
midtones and with hes reset. So basically, it's like
opposite from the burn brush tool. So like this. You just draw like this
to make it more brighter. And it also destruction
the object. Here means not
create a new layer. So dodge brusht tool not
created new layer, but directly applied to the
layer to the object layer. So, you know, like it will
distract this original image. And we cannot undo or
we cannot restore. For example, when I set
foreground, still, even though brighting the
color foreground we choose, the effect will come is
brighter and brighter. So just like these there is no other
dodge brush tool basically to make the object brighter this
more less is like this. There's no other
set things we can explore in the dodge brush tool. Maybe we can change
to shadow but again, the principle isn't the same. It will make it more
brighter and brighter. Maybe it's just the color
range that different from shadow midtones and hightlight
that we have learned previously, right, when we learn previously
dodge brush tool. Maybe I will size increase
the size like this. Or undo, just like this. Yep, from midtones from
this one, like this. So this one dodge
brush tool and this one, sponge brush tool. So sponge brush tool is
very unique, actually, guys. This is similar like a sponge brush tool
a little bit unique. So I'm going to show you. I will choose this object first. The sponge brush tool here means
to increase the saturation. The principle is if
we we can increase saturation and also to decrease the saturation
or to desaturate. And we can choose the
vibrance or HSL saturation. When click the saturate and click the vibrance, the
effect will be like this. This is 100%, 100%, right? The effect, it will push the saturation from the
object color like this. It will boost the
saturation. Right. But if we choose the saturate and then we
move to the HSL saturation, it will boost by HSL saturation. It's very strong, right? It's very strong when in
the mod HSL saturation, and it can be edited in the color, default
HSL saturation. But we can reduce
the opacity in here. Maybe we choose the
saturation, HSL saturation, but not as strong as this when
we set the 100 like this. So what difference between
HSL saturation and vibrance? The vibrance, it will just boost the midtones,
color, the mid tones color. And it's not as strong
as the HSL saturation. Well, HSL saturation use hue, saturation, luminosity
by default. So HSL saturation
is more stronger, more stronger than the vibrance when it comes to
increasing the color, increasing the saturation
of color like this. I undo. But we can also
desaturate or maybe I can also create this saturation
for this orange like this release saturated, right? But sometimes it's not
pleasing in the eye. And we can also reduce the
saturation with desaturate. When you click the desaturate, we can also move
vibrance and saturate. When you click the vibrance, the desaturate is not
as strong as it was. Or maybe just yeah,
just like this. When we click saturation, we will literally convert this one to black
and white, right? So remember this is destruction
of the original one. So it's not create new layer. Yeah, and no way when we
want to restore, right? So you have to using
with carefully. So this is desaturate saturate, if you want to desaturate
with strong effect or maybe just like as if we convert to
the black and white, right? And then if we click
vibrance or maybe it's more soft the effect because the vibrance is affected
in the mid tones, not in the full range. And then it's not as strong as the HSL saturation like this. So oke guys, we
have learned all of this adjustment brush tool
right, Adjustment brush tool. We have learned all
of them, and we know the differentiate between tools, even though the same using
the color adjustment, combination with paint
color adjustment. But right now, we know the
characteristic each brush tool
31. Implementing Adjustment Brush Tool in Our Design: Before we have learned of
this Adjustment Brush Tool, right? So maybe we can a little bit edit this our project with
adjustment brush tool, too So I'm going to edit some part or some
color of this object. I'm going to change some color, like in this leaf color
or in the cut wooden like this leaf color
and cut wooden color. And then, yeah, let's try. I want to make I think I
will to make this one. I I will hide
temporally like this. And yeah, I think I will little
bit go to up like this. So I want to make a little
bit change in the color. So I want to use tone brush tool. So with this, I'm going to make set to a little bit
to orange like this. Or like this and reduce
the opacity, maybe. 30%, like this. Right? I want to
change the vibe. Like this, right? And so I'm going to implement or use the
Adjustment Brush tool here. And this one, I'm going
to increase the exposure, a little bit exposure
in this area because this one first, yeah. Because this area, I want to increase the exposure
of this one. This exposure increase
a little bit like this. Right increase a little bit. This is before, after
and before, after. And this exposure,
I'm going to put in this inside cut wooden like this is before,
after before, after. After that, I want to change
from exposure to HSL, like this and add adjustment. So using HSL sift adjustment, I'm going to set this one
maybe to 25 and then yeah, start to draw to increase
the the saturation, right? To increase the saturation. Like this. Yeah, I will increase
the opacity. Next, 30%? Yeah, to increase
the saturation. So this is before after
before, after. Nice. So what if I bring
back all of them like this iced tea and
this leaf This one. Yep, bring it to town. This Yeah, I think it's
more vibrance, right. So between this wooden and
then this color of iced tea, green is more strong or more saturated,
more vibrant, right? So maybe I will go
a little bit here. Yep. Yep, like this. And then I also apply some color adjustment
in here in this leaf. I will using the same
Adjustment brush tool, or dodge brush,
maybe Sponge brush tool. What if? Oh, nice. Sponge brush tool. But we can't change the color. It's like too strong,
right, too strong. So I'm going to using the other the same adjustment brush tool
using HSL brush tool here. Here or increase in
the saturation maybe. Increase to 60. Maybe
it's too strong, right? But yeah, let's see. After that, I will bring
HSL shift to leave too. And then in here, I will reduce a little bit this one and change
this color to this one. This is too warm, little bit
cold and increase this one. Mm, I think it's too
much saturation. Yeah. Oh. Okay, this one, this leaf, right? Before, after. Before, after. And the next, I also edit this one, too. Using the same tool,
adjustment brush tool and then draw this one using
HSL, like this. And bring the HSL
to leaf tree. And then I will make it
more cooler like this, and then Yep,
reduce the opacity. I reduce the luminosity and
increase the saturation. Like this. Mm. Yeah. So we have applied
some color adjustment, right, to some object like this. I think it's better than the previous one without
adjustment brush tool. Yep.
32. Ehance Color With Adjustment Brush Tool: So to implement the
adjustment brush tool, I'm going to use this one. Here, recap in the
Adjustment Prestol here. We can first, after we
choose this object, we want to adjust and then click here,
Adjustment Brush tool, and we have to choose the mode we need
from exposure level, weight balance,
curve for example, I'm going to use HSL like
this to increase this one, to increase hue saturation
or just exposure to increase the saturated or
to increase the brightness, like this, such a at this one, the exposure to
increase this one. Maybe I will increase
the size like this and then start rest in this area that we want to boost
the brightness like this. So I think it will be
easy to us, right? When we understand about this adjustment layer,
this one, all of this. And we will learn about it
later, all of them one by one. But for now, for the example, I'm going to show you
that this is how to use. Maybe I will reduce
the opacity to 30 and apply in this
part like this. It's not make the damage the
original one because this is creating the new layer
here and this is before. This is after, this is before. This is after, and
this is before. And then we can also
choose the other example, I'm going to use HSL here, a hue saturation and luminosity to increase
the saturation, right? Increase the saturation
just like this, maybe I will adjust the
saturation, increase saturation. Right, and maybe
increasing this one, the opacity and then
start to draw. So it will make
the color pop up, and then we can adjust
which one the area we need to improve this
saturation and maybe reduce. And then in this area, this darker area because this area, I want to let it
darker like this. So again, all of them, if you think that our
saturation is too much, we can reduce like this. So this is before,
this is after. This is before, this is after. It's very easy when we using
the adjustment rustle. And this one in the burn brush tool think
it's quite the same. It will, you know,
boost the shadow. And then this one, a dodge brush tool tool. This is the increasing the
highlight, for example, I closed on this, and I start through choosing the layer
object and draw like this. But unfortunately,
you know, this one, in the dodge brush and
then paint brush tool, it will damage the original one. So it not created the new layer, but it's also applying
the original layer. So it will make the
original layer destructive. Or damage the original layer. So sometimes I think
I'm not recommended this one if it will damage this original layer because
sometimes we need to back to the original one and still
in this one, this layer. But when we draw like this, it will damage the
original layer, right? So you have to choose carefully which one the object sucks
into doing some adjustment. I think this is a good tools, but there's other alternative
to we can choose. But when we look at the result, I think this is awesome.
The tool is awesome. And if we reduce this one, 80%, and we increase this one plus
increasing price like this, it's more awesome, actually. It will really increasing
the saturation, right? And again, we can
doing after and before because it's not
creating a new layer, but also apply in
the original layer. So I'll just bring
undo all of them. And then the last
is sponge brush tool. This one. Again, this one is
increasing the saturation. Right? We can increase
saturation from this one HSL. It's the same when we using the pine brush tool and
choose the HSL, this one. It's also the same using Sponge
tool and choose the HSL. If we feel if we think
that this is too much, we can reduce the opacity here. And start draw the area
we want, like this. The Sponge brush tool also
damage the original one. So from these tools, this Adjustment brush tool and tone brush tool the two of them is not damage
the original one. To be safe, I think the two of them is very, very
recommended, right? But if you want to use
these three of tools, I think it's okay as long as
you know the consequences, then the original
one will damage. So let's move to the
filter brush tool.
33. Filter Brush: Applied Filter Using Brush: Everyone, previously, we
have learned about this one, this adjustment brush tool, right? And right now, we'll
continue to filter brush tool. So the filter brush tool
here is basically is very important
one because we will learn filter brush tool, blur brush tool,
to smudge brush tool. And I think this is
very, very important. And we need to discuss one by
one the tools first before we implemented our project. So let's move to the
Affinity software. In this one, and this
filter brush tool is basically the combination
between brush and filter. As you can see here, in the
pixel here and then filter, there is a lot of category
filter from blue, lot of blue and sharpen, distort noise, detect
lighting color, astrophotography,
so many things. And then if we talking
about one by one, the filters, I think it
takes a longer time. And I think for this to
understanding this tool, I just maybe give the
sum example of filter. But before we, you know, apply some filter, we need to understand about
these tools first. So the first is the
filter brush tool. To introduce the filter brush tool, I'm going to import this
image, the green leaves. You can go to the
folder Pixel demo. And then there is a picture about there's a
document about green leaves, and you choose drag
and drop to here, and then it will
open new window. I'm going to make
this the isolation. Here means I'm going to remove the white background using
flood selection tool, flood selection tool, yeah, and then click the background
White background like this. And then I'm going to invert, because this flood selection tool will select this
background, not this leaf. So I'm going to invert
this one Pixel selection and invert. Here. After that, I just
click the mask layer. Now I click CTRL+D to deselect
and then after that, I will restraize to become
the pixel layer, right? And I'm going to cop in
this one, so I will hide. This is for pickup. This is
for I will give name leaves. And this is one leaves too. So I'm going to hide the
lives and then here. So as introduce for
Filter brush here, as you can see here,
we'll reset first reset. This one, the first thing we
click the filter brass tool, adjust the size, like
this and this one, we can choose the
filter we want. When I want to make you know, give the gaussian
blur for this leaf. So I just using brush and
then apply for this leaf. The result will be like this
if we apply gaussian blur. And we can adjust this opacity, also flow and hardness
to make for example, when I adjust this one to 100, the result
will be like this. Right? It's so strong. This is the hardness. This one. Maybe if I reduce
the opacity to 50, for example, Yeah, 40 or 50. So it's like it's not
strong as before, right? Because the opacity is not 100%. So this is the gaussian blur, I will pack to 100 and I will maybe close to zero
or maybe zero, and I will apply here. This is for gaussian blur. What if I choose the different filter for motion blur? The result
will be like this. This is motion blur. So this is the difference between gaussian blur
and motion blur. Maybe you're wondering
what's different between gaussian blur
and motion blur. Motion Blur is like as if
this leaf is moving, right? And this is just general
blur in general. And what if I choose Lens Blur? The result will be like
this, Lens Blur similar. Alright, we tried to filter a polure and we
move to another reset. Like for example, clarity. When you chose the clarity, the clarity will increase
the detail of leaf. As you can see here, right? This is the clarity
before, after. This is before,
and this is after. So the clarity here
means the clarity will boost the headlight and the shadow at the
same time to make, you know, like to appear the detail to
improve the detail. So this is the clarity. What if I next to change, for example, unsharp mask? This is also
increasing the detail, but in a very high level. Here. As you can see here, the detail is very strong. This is as you can see here, it's very, very sharp. Right is very sharp. You know, the difference
between clarity and sharp like this. And what if I choose
another preset? Like add noise, for example. So here, when the
leaf apply at noise, it will, you know, have noise to fill the noise. So it's basically using
brush and filter effect. We can also add noise like this, apply like this, right? So this is the way
we use the filter. So I just delete all of them. This is just for practice. And then I will bring
back this leaf. And now I'm going
to make some leaf. I will copy some leaf
and I will put to here, right to our project. For example, what I do? And then how to, you know, breakdown one by one. Because this is still
a rasterize layer. I'm going to, you know, make it separated each leaf. So to doing that, I will using this one, freehand
selection tool. Just using freehand
selection tool like this to select repeat this
one like this. And then and then after that, I will click Ctrl
plus G. It will create the new layer based on
the leaf layer in this one. So I will give the leaves one. Next, I will set CTRL+D
to this leg and make it a new selection using
freehand selection. Then again, select
the two leaves one and CTRL+J. Next, we're doing the same to all
of this leaf if you want, like this and then CTRL+J Next, CTRL+J. can you leaf two.
This one, leaf three. This one, four, five. Six. All right. And we just copy one by one. For example, I will copy
in this leaf one and I will put here or maybe
just copy all of them. Select all of them, click copy
and bring to this page and paste in this arbor
like this, right? Just here. Just bring this one. I will put in here, for
example, I will put it here. Maybe it's too small
will increase. So I will copy for this one. I will copy bring here and
just rotate in the opacity. Yeah. So so I will make it thicker sometimes. This one. Yep. All right. So after that, we will apply some effect in this one
with filter brush tool. Maybe I will choose this one gaussian blur, this one. leaf four I will use the gaussian blur
As too strong. I'm going to add
some some filter in this leaf in the fly leaves. So I will choose this
one filtered brush tool. And for this one, for example, the the most leave this one. First, we click
this one leafs four, right, and click this
filtered brush tool. And we use motion blur, for example, like this, right, and then maybe one swipe, two swipe, three swipe. Y. So as if this
leaf is moving fast. Okay. And then after this
one, after this leaf, I will add some
Build the brush tool again in if one here,
this one, if one. I'm going to add the
motion blur again, just drawing like this. And then I think, Oh, this is a broken, right? You think the broken.
But the actual is we can edit the motion blur. to doing that in the leaves one, we click to click
in the motion blur, and then we can edit the
radius like this, right? We can edit the red ice
and choose the direction which one the leaf will flyng
in like this, for example. So maybe we also create some correction in
here like this. And then it's not only
motion blur though. I can also create, for example, this one, this one, I'm going to add this motion blur
and gaussian blur. This one, like this. Just drawing like this. And if you think
this is too much, you can reduce gaussian blur
like this. Right. Yeah, this. So again, this is the filter,
filter brush tool. Remember, the filter
brush tool is also not damage the original one
because we can still preserve the original
one because we're creating the tools creating
new layer like this. Right? And then after that, I want to apply the
filter brush tool in here in order to more understand in the
filter brush tool here. So I will also apply in
this cutting wooden, like the previous example, right? Like filter brush tool. Or maybe just click
cut wooden first, and then click Fill the
brush tool and then click. For example, I'm going to use
this one clarity, clarity. As you can see here, when
I using clarity, right? This is a before. I will make it more detail or improving
detail from this one. As you can see here,
from the cutting wooden digital absolutely improved and it's not distract
the original one. I also create digital
in this part also. Right? And this is this
is before, this is after. So basically, clarity
here means to increase to boost the hightlight and the shadow at the same time. So the result will be like this. So besides, we also know which one the
filter we want to use. And then we also
have to understand which one the filter we want to use to apply in
this subject, right? Because the different subject, different tools,
different filter. For example, when I click
clarity in the orange, for example, the result
will be like this. Right. Right. Yeah, like this. This is before and
this is after. This is before and
this is third. So it's a very useful base on
the subject we want to use. And then you can experiment
one by one about this one about this filter
brush tool like this, you can try, for example, with a text unsharp mask. Unsharp mask here
means it will create a lot of detail like this. So this is very, very
high detail, right? So it's very high detail. But we can also reduce the factor or reduce
the radius like this. And then like this. So this
is before, this is after. This is before, this
is after, right? You know the difference is and then this is way we using
the filter brush tool. And then the filter of at filter added filter
is basically the same when we dit filter like this to dauble click in here,
is also the same. And the full range, we also want to choose shadow,
midtones and highlight, which one we want to push, like the previous one.
So basically the same. So the point from these
features is we have to understand which one
the filter we want to use for affected the subject. So this is the
filter brush tool moved on the blur brush tool
before I'm doing that, I will delete them delete this one. Oh it's not just height. So this blur brush tool is basically also the
same like this one. For example, for this leaf, I want to make this blur. For example, blur brush tool. I think I want to make
this one blur. Which one? I think just click here first
and go to the blur brush tool. And then Blur brush tool
here means it will create a blur general blur blur
in general, just like this. Right, I will create
blur in general. So, unfortunately, in
the blur brush tool created this new
layer or mask layer, so it will damage
the original one. In the blur brush tool, let's say, I'm going to use this
one on this blur right. for this flower, click this layer flower and then
click this blur brush tool. I'll start to make this
more blur This one, this leaf and this part two. This part, this area, right? Maybe I will reduce the size to make it easy and mobilize. And then I maybe reduce more. Like this like this, you know, so it's like
giving the bokeh effect. And I'm going to make these
flowers become focus, right? Is a flowers become focus. And the surrounding of
the flower is a blur. And then sometimes
combination with filter brush tool right to make it, you know, to make it
clarity using clarity. And for this one, I will
increase the clarity like this. Right? So as if this is Blur and then the
focus is focusing in this area in the
center of flower. Right. So this is how we use the lure brush tool easy
like these guys, right? And then next we move
to the next tools. The next tool is
sharpen brush tool here. Sharpen brush tool is basically a clarity as sharp and harsh. So the sharpen brush tool is to sharp the object to
sharpen the object.
34. Sharpen and Smudge Brush Tool: So for the explanation
for sharpen brush tool, I'm going to make this picture. Just I'm going to
import open this one and then open in
the new type like this. This is the eagle head. I will copy this one background. This I will name the original. This is I'm going
to make Sharpen. sharpen brush tool. Like this, and we will see about this feature,
sharpen brush tool. Click sharpen brush tool,
and choose clarity. So basically, between clarity
and sharp mask and hearts, this is the different features. Clarity, it will boost the
shadow and then highlight, so it will improve the detail. Meanwhile, the unsharp mask, it will create the
pixelated, you know, to add more pixel
to improve the detail. And hearts is also
make more title, but in a strong way. So start with clarity here. I've using sharp brush tool here. Just draw like this in the eyes area in this
y in this head area. And this one this one can this area like this. So the clarity here
means it's more subtle when it comes to
the improving detail. So this is before,
this is after. As you can see, this is
before, and this is after. This is before, this is after. Very subtle, but improving
the detail, right? And then next we move to the made name sharpen brush tool
and sharp mask. Here unsharp mask, right? And let's try the unsharp mask. We moved on the unsharp
mask and start to draw. So the unshared mask
is more harsher. Right? When draw times, the effect is more harser. And the detail is absolutely more stronger than the clarity. As you can see here, this is before, after. Before, after. Before and after. It's a very strong unsharp mask, but we can also
reduce the opacity from unshared mask
within this one, this area when when people
draw, like this. And the last this one. Harsh. Just name harsh like
this. This is very strong. harsh like this. Just one draw, and then the effect
is like this. Whoa. Maybe it's
too much, right? We can reduce opacity to 18, for example, or
increasing to 30. Yeah, like this. Just one draw, but we can create the
effect like this. This is befor, this is after. This is before, this is after. So unsharp mask, I think it
will create more pixelated. So the pixelated is
more firm, right? So this is the feature of
a sharpened brush tool, right, is to make object, maybe the object that has a little bit blue or a
little bit fur like this. It will, you know, be able to improve the
sharpen by a sharpen brush tool. So sharpened brush tool here means to improve the detail
of the object. And for example,
in the eagle head, we can create the eagle
head is more improve. From the original to this
one. This is clarity. This is unsharp mask, and this one is
very harsh, right. And then next, we move to the this next tool,
median brush tool. So in the median
brush tool here means to reduce noise to reduce noise. Or maybe the median brush tool is a similar features or
maybe the same features, like when we choose the filter brush tool and
move to the noise. So let's learn. I will do all of them, right? I'm still using this
one, this original one, and I will duplicate
this original. And this is I'm going
to name median rust. Before we learn
the median brush tool. I'm going to add this
one Median brush tool. I'm going to add noise in here. And then I will go tune the
Pixel Filter noise here, I will add this one, the layer, Pixel, filter, and noise. Add noise here. Maybe I will add noise
here to this picture. Maybe it's just noise like this. Yeah. Add noise like this. Apply, right? So this equal head, this is before and after, before and after,
this is at the noise. But in this noise, we are going to remove
or reduce this noise with median brush tool,
median brush tool, here. Choose this layer
that contain noise, and then gradually it
will reduce the noise. E. I will reduce this
noise and this one. I will reduce this noise. But the consequences
of reducing noise, the images lose the clarity, lose the detail, right? So the consequences of
removing the noise, it will lose the detail. It's more like painting, right? Painting effect because it will lose the te tile to
remove the noise. So the consequences of
this feature is like this median rustle to
remove this noise, but lose the detail,
lose the clarity. The function of
median brush tool here. So the last is median brush tool. This feature is actually sometimes is very
unique to doing that, I'm going to add here
another picture. So I'm going to use this
one SkySunset here. Okay. This one, and I also going to Import
cloud this one. Just bring to this layer. Here, this is like sky and I will head I'm going to head
in the cloud temporarily. And then let's learn about
this smudge brush tool. So smudge brush tool basically, it's to to make the color
you know, like, more mixed. Next, I will maybe
I will increase the size first. Okay, perfect. Oh, the rastras layer refuses
because it was not rasters. Alright. We just
in the background and then start to
draw like this. Maybe I'm gonna reduce
this one to 80. It's like this. Yeah. You can see the
differences like this. So it more mix each
other like this. This one, too. Right.
Yeah. It looks cool. And then this one, this cloud is the same. I can on this one, so and this cloud, maybe I will reduce this one. Let's experiment guys because different
object, different setting, right? Just like this to
make it cloud, right? That's so cool. I
think this is cool. I think this is cool. Yeah. Yeah. Yeah. Yeah. On this one. Yeah, something like this. Increasing the size, maybe. Like this. Yep. Experiment. Yeah. The more we experiment,
the more we can learn different object
with different brush, different setting. Oh. Yep. Yep, perfect. Nice. So with this tool, we can convert the vector, the vector look like to become like this
become mess like this. This is the filter
of smug press tool. So case we have learned all of this tool
for filter brush tool, right? This filter is very
useful when we combine with brush and filter.
35. Clone Brush Tool: Uniqe Way to Cloning Object: Hello, everyone. So
in the previous session, we have learned filter
filter brush tool, right? We have learned Filter
brush tool combination from the brush and
then the filter. We are going to
learn Clone brush tool, the Clone brush tool and undo brush tool. So Clone brush tool and Undo brush tool is a unique
features in Affinity, and maybe and I think it will
interesting if we learn. So let's move to the practice. To learn the Clone brush tool I will use this one
and this picture. This picture, you can
open from this one, this one, open and then I can drop in here to
open new type like this. So the clone brush
tool here means is to clone the certain object
from the sample, right? The brush here means is to clone a certain object or part of object that take
from the sample. So this I will
make it maybe give name sc-fi. Just like this. In this case, I will duplicate this person, this astronaut. I will duplicate
or make it clone and then stand maybe in here or in here using this
one, Clone brush tool. And later we'll also apply
to fix this acne, right? This is also be able
to fix this acne. But before we doing that, I'm going to do this one to duplicate this
object. This person. To doing that, I'm going to using this one, tone brush tool. But before I apply tone brush tool, I'm going to make
the pixel layer, new pixel layer here. And this pixel layer, I will bring this one to choose a current
layer and below. So it here means that the object that we draw
or we brush in the pixel, take the sample from this one to be able to draw
in this layer. So so we just pixel layer, we create we have just create and then just clone brush tool. And for this setting, I will set to 100
and this one to zero. Yep. This one, okay, rest
of it just like this. And I'm going to increase
the size like this. And I will reduce the size. Maybe this one. I'm going to take a sample
for this helm like this. Hold ALT and click this sample. And then I will bring to maybe
to here to here like this. Just draw like this. draw by gradually. draw with carefully, right? Just draw like this.
Just draw like this. Maybe the brush is too big. We can reduce the
brush, smaller, smaller but under
100 yeah, awesome. But gradually we draw. And if you pay
attention closely, this one, this is two. This one, this one,
as you can see here, plus sign, black plus sign, it will also indicated that
if I want to draw this part, this sign also pointing the same position and
the same part, right? So you just sometimes
if you like, you can as an navigate know, like this plus sign as an navigate I think this one just
like this, right? Maybe it's too we have to
really, really, really careful. So in here, we draw to here like this, and
the rest of it, we have to set it
with carefully, just like this, really,
really carefuly Maybe I think I need to
make it smaller, right? Make it smaller. Again,
this one, like this. Maybe I will, you know, using this help, like this. Really, really careful
because this is very Oh, if some part, I think to here like this. And also this here
like this. Oops. Nice. Yeah. Yeah. Maybe, you know, it's like this person is standing
in here and you know, some area is also
cross the line. It's like this. Like if
this tone is in here, but some shadow wet shadow
is a content shadow in here. This one So I think to remove this residue, white residue, right to
remove this white residue, I'm going to use this
one brush tool, right? This pixel, I'm going to mask mask layer and utilize brush tool, set it to and then set
the opacity to 100. Yeah, just one. Just reduce
this brush and pay carefully. This one. Just remove. Just remove reduce the press
until you make it smaller. Just remove what. Here,
remove the manual. Maybe in this part. And here, more or
less like this. Right to duplicate this person using Clone brush tool, right? And the next, we also
fix this one with Clone brush tool to doing
that. I a simple way. I just copy this background. This one I'm going to give name original and this
one clone brush tool. To remove this acne
is a simple way. You just click here. Maybe I will increase this brush. Again, increase the brush, more just ALT take a sample, and gradually just remove
Again ALT take sample like this, just remove from top
to cover this one, from bottom to
cover this one. And So this is before, this is after. This is before, this is after. This people, this after. To make it more precisely, I'm going to use this one. I will reduce to 80, and I will take this one
I'm gonna take this sample this skin color,
through this to make it camuflase
before and after. This one, before and after. Before and after. We also
doing the same previous step. Next, in a clone brush tool
layer, we take a sample. I will take a sample like this, just click here and close. Here, sample in the besides or close the most closest to the object
we want to remove. And we remove gradually
and carefully. Sometimes it's not natural, so we take a sample from
the close skin like this. So this before and
after, before and after. Next, this one, hold ALT
take sample B here. Click here. Before
after before, after. Before and after next, this one, we just
remove this one. This one, remove this one. Again, sometimes we
have to careful to take the sample to place
this one like this. Remember, before and
after before and after for this one, yeah. Take a sample from this and close sample for this area
and put in this area. Opacity reduce Opacity. To make it here, to make this one. Here. to camouflage So next for the left, still some acne still unremove. We remove or too
small brass, right. We remove close to the location
object location, right? Oh, it's not suitable, right. Close to the object. We want to remove this one. This one. Like this. So before and after,
before and after. I will increase the
size to make it a little bit bigger
or it's too much. To give the fill off
pattern like this one, because the skin
Yeah. All right. This is before and
after, before and after. So this is the way we remove
the acne using brush tool. So the result also depends on our skill to using
clone brush tool. Sometimes it's look good. Sometimes if we're
not satisfied, yeah, we have to
repeat the process. So next, we will also learn
about the undo brush tool. This is unique features
that we have to learn slightly
interesting features. So move to the undo brush tool. In the undo brush tool, I'm going to use this image. You can open this one. This one.
36. Undo Brush Tool and How to Implemented it: So this one, the undo brush tool
here means we can using several layer to become a sample of our brush to make
it more easy to understand. Let's practice. I'm going
to copy this one duplicate. For this background I'm going
to use the original one original this maybe
snapshot one. So using this filter, we have to using this
window, which one? General snapshot. We have to activate snapshot
here, the snapshot. First, in this layer snapshot, I'm going to add the effect
maybe from HSL, this one. I will reduce I've already
saturation like this. Right. For example
just like these? Mm. I will put in the
inset of snapshot. So in the HSL, just apply
in the snapshot layer. And then after that, I will
click this one. Add Snapshot. So in this snapshot layer, I'll click Add
snapshot and I'm going to bring enter Name for snapshot. I'm going to name give
name, for example, HSL. HSL. Okay, so here,
this is the snapshot. The first snapshot
is like the capture, the capture screen suit, but from this one from
this layer because this layer snapshot also
apply adjustment. So here. Then next instill in
the layer snapshot, I'm going to add
additional filter, you know, I'm going to add motion blur for
example, like this. And I will add a motion
bore like this. Right. Next, I will create
another snapshot here, and I will give
name Motion blur. So we have two snapshot
HSL, and Motion blur. The rest of it, which
is just hide And we're using
the original one, using this one,
undo brush tool here. We click the HSL first, click this one, click activate. This is to activate this one HSL first and start
to draw like this, right? So we'll draw for the snapshot from the sample that we have created previously. So I think I will
reduce this one. This one, hardness, maybe to 20. Yeah. Like this. So in this eyeglass effect, it's like saturated
desaturated, right? Because we previously
reduced the saturated level. So it's like
desaturated like this. So it's different color, different color in this class, because we have
desaturate it previously. And then after that, we moved on the motion
blur, this one. And this motion blur,
maybe I'm going to reduce this one because when we want a percent
it's too strong, right? Too strong, like
this or it's not. So I reduce 50%. I like this. Like this. Or if the 50% is not strong
enough, yeah, we reduce. We will increase the
percentage like this. It's too much. 69. Yep. Here, right? So this is the final result. So when I compare to
this, oh, yeah, yeah. Maybe I will impart the So this one, I will import letter
from this original, this original and original. This is the original
and this original. So this is like this is
from snapshot layer we use, and we have edited this layer, and this is still for
this original one. So just unhide. This is before,
and this is after. This is before,
and this is after. So basically in this one, the undo brush tool is combine several
snapshot as a example, right? As a brush sample. This one for HSL, the first time when we reduce the saturate it to desaturate it and add a motion blur to the shadow the building
shadow to the building, you know, mirror, right? So this is the feature
of Undo brush tool. You can apply in
different terms like different mirror or
different something. But the principle is like this. We're using the snapshot. Take a capture several
snapshot as a sample brush. So this is the function
of undo brush tool. Next, we will move to
the painting brush tool, healing brush tool, brush tool,
blemish and red eye removal. See you in the next session.
37. Inpainting and Healing Brush Tool: Hello, everyone. So in
the previous session, we have learned about clone
brush tool and undo brush tool. So in the next session, we're going to learn about Inpainting brush tool
healing brush tool, patch, tool, blemish and red eye. So basically, all of
these tools is to remove unwanted object or to remove certain part of our
object or our image. So to explain more, I'm going to start
with this one. Inpainting brush tool. This
is very important. I think one of the easiest when we want to remove this
object in this affinity. So in the painting, for
example, like this. So before I edit this picture, I'm going to duplicate
this layer, background. So this is um I'm going to
change to original this one. Uh, so this one, this one in painting brush. So I'm going to remove these
people, these persons. I just click painting brush. The configuration is like
this more or less, yep. And I think will
increase the size. We painting to cover all of this area of this
person, both of them. So it's like the magic eraser in some apps smartphone
apps, right? So make sure that
our paints brush tool, what do you call
it inpaint brush. I will cover all of
this area like this and after that, release the mouse. And then in painting
brush tool, will analyze, and then just please wait and it will co this you
know, this person. Maybe some residue. Here, here. And the result is absolutely I think it's good,
right? It's good. Sometimes it's good, right? And this is the way
we remove this person unwanted object from
this to this before, after before, after
before, after. Maybe some area like this, it will Make it, before, after. Before, after. Before, after. It's very clean, very effective to remove
the unwanted project object. Next, we move to this
one. It's also the same. We're using the painting
inpaint brush tool. We duplicate first
in the background. So all of this
file I also upload into this pixel demo folder. So just just drag and drop and open open to this new type. And then after that, we just draw here in this little child maybe if this object want to remove, it's also possible like this. Just wait and remove. Maybe this water
is like unusual. Just roll like this.
I think it's cool. I think it's cool, maybe
some residual here, and then like this.
Yeah, I think it's cool. It's easy to remove unwanted
object with this one, also this one too. Just in the beach. It's a very easy, very effective inpainting brush tool to remove the
object. Move to the. If you're curious
about this method, I think this is
unwanted object, right? As you can see here, yes, maybe I will told first and this one with inpainting brushtool, I will remove this object. It's like, why this
person is here? And then because the bokeh effect and then it looks like
unnatural, right? Sometimes maybe some people
they think they think that, Oh, this is what is this? So it's very easy. It's very easy. We
move for this one. Inpainting, remove this
part. Just like this. Yeah. It's very clean, very smart to remove. Maybe in this. Very easy. Very easy. Yeah. This
is the Inpainting. And how about the
healing brush tool? So inpainting actually
also be able to remove this one. So
I'm gonna saw you. Inpainting also be able to
remove this acne because which is using this
inpainting and by gradualy, which is draw in this one and
then automatically remove. Yeah, just like this. It's a very
convenient, very easy. Maybe this is we can reduce a little bit
or reduce this one. This hardness, like this. Right? It's easy, right? Inpainting, brush tool, we remove Maybe it's too to Yeah, like this. And then we draw like this. Yeah, it will be awesome if we just to maybe it's not to 100, but it's around 75, for example, let's do some experiment. Oh it's too sharp. Oh, this one, this one,
this one set to 100, put the opacity. Yeah. What if I just block like this? I think the result is not good. Yeah, right? It's too
overwhelming to remove. I think I need to reduce
the brush tool because, yeah, it's just to
remove small part. Like this. Here, Yep, even
though not perfect, but it's like better
than the previous. This is after before,
after before. Yeah. I think it's
better, right? After before. After before. All right. And what
about this one? Mm. I think Inpainting also. I think it's be able
to remove this acne, but again, it's not
removed totally, and then we need to careful. Let's copy this one
duplicate like this. So in this layer top player, I want to apply this
Inpainting brush tool. What would happen
if this use case? Mmm. It's too much, right? So we can reduce the size this one and then
increase this one. So let's do it. Gradually. Yeah,
it's not ppthoh. Yeah, of course. This is
very very hard to remove. But I think we can make it or reduce this acne
with inpainting brush. It's not totally removed, but, yeah, I think
it's better, right? It's just like this.
This is before, this after before,
this is after. So that's the way
to remove the acne, to remove unwanted object, to remove all of them. When it comes to
remove the object, inpainting brush tool is absolutely one of the best features in the Affinity Pixel
because it's very clean, very easy to use, and
almost, you know, reliable. So next we will try
Healing brush tool. So on the healing brush tool, I want to remove this one. Oh, so I want to Inpainting. This is the result when
using inpainting brush tool. So what if we using this one? This one, Healing brush tool. So the healing brush tool let's say let's I will name Healing. So that's using healing tool. First, we need to
take the sample like this and by gradually remove. Maybe we're using the bigger
the bigger brush We take the sample,
we took the sample, and then we move like this. We we take the sample from around this skin around
this skin like this. So in order to get the natural
the natural contour or the natural skin,
like this, right? And then again, we take the sample from the
most closest part, and then we move a little
bit to cover the acne. So like this, right? And then take the sample that
close to target like this. Again, bun this one. Burn this one. On this one. Maybe it's too much. I
will reduce the brush. No, no, no, no, no,
no, no. Which one? Can? This one? Yep. This one. This one. Yeah. I think
it's better, right? Better than paint to
better than in painting. I think some reason. Yeah. This is better.
Better result. As long as we patient to
find the right sample, click ALT to take the sample, this one, and move a little bit. Okay. So I think the advantage of Healing brush tool
is the contour or, you know, like the
contour of face or the texture of the
face still preserved. So Healing brush tool is
preserved in the texture face. So it's not like, like, you know, like for example,
when we look at this one, this is in painting brush tool
as you can see here, this is like it's too
obvious that this is, you know, like editing. It's very obvious, you know. But when using healing
brush tool, it's a very clean. It's a more cleaner
than inpainting brush tool. Yeah, Healing brush tool
or removing the acne I think more better than
inpainting brush tool, right? This one, the result of
healing brush tool in here too. Maybe I will name
inpainting brush tool. And I, you know, like hide. I will copy in the
background the original one, and I will give the
name healing brush tool. Let's see. Let's remove this acne or it's
not totally removed, but at least try. We will try. So Healing
brush tool using this one, Healing brush tool
is to big. Yeah. Taking the sample, the
close to the target. But absolutely, it
takes a lot of time. But, yeah, it's worth to try, though. It's worth to try. So Healing brush tool
here means to take the closest sample from this target and cover the
target with the sample. Yeah. This like this? Oh, for this one, right? I think I'm going
to make this one. Make sample on this one. Make sample on this one. It's basically like,
you know, this one, clone brush tool but I think
it's more it's more suitable for healing some part or healing specific part or
little bit detail like this. We take the sample from the
closest one and cover here So, yeah, healing
brush tool is suitable. It's very suitable for
removing the acne. This is before, after
before, after before, after. Very, very clean. I think it's very clean. It's not totally removed, right? But it's worth to try. Yeah. So the texture
face still preserved. While the acne, I
think it is way way better than than the original one. So again, to remove the acne, healing brush tool is better. Next, I want to
also try this one. This originaI will copy, and I'm going to use patch tool.
38. Patch and Blemish Removal: Patch tool. Using Patch tool. To use this one patch tool, we draw the selection. So basically, we create the
selection and then carefully, we move a little bit or move
this cursor and then find the right sample of maybe in the sample we can take around
here around the target. Like this, after that,
yeah, this is the result. we draw the selection
and move like this. Again, we draw the selection, find the right sample
and like this. I think it's not good
for this use case. because this selection is not
smooth and we can't set the, you know, the hardness. We can't set the hardness. Like, it's very
obvious in our eyes. When we zoom in,
it's very obvious. Oh. I think it's good, too. It's good, too. So what
if I texture only? What if I collect texture only? Oh, so texture only here
means the acne is preserved, but the surrounding
of acne is a change. So it's not suitable. What if transparent? Let's try. Oh. Nice. Oh, I think
this is the cool feature. Oh, that's so cool. Yeah. This one, transparent here means the selection will
preserve the skin texture, but we change this
sample like this. So it's not totally
remove the acne, but reduce to reduce
to reduce the color, right, to reduce this color. But this is not actually
solving the problem. Yeah, we just using
as a default like this and then remove
manually like this. It's like not a good not a good solution
for removing acne. But yeah, I think
for the alternative, it's good to try, worth to try. Between Inpainting brash tool
blemish brush tool and this one. Page like this. For this one, this is the bigger. So find the right
sample, is too big. Yeah, let's compare. This is when this is
the original one. This is when we're
using patch stool. This is when using
healing brush tool. This is when using
Inpainting brush tool. So I think the winner
is healing brush tool, because healing brush tool is
easy to use, actually. It's very easy to use. But in painting brush tool, I think it's hard to manage when it comes
to removing the acne. But the healing
pastol is the winner. Yeah, absolutely the winner. And then patch tool,
yeah, it's worth to try. The past tool can preserve
the texture, right? But it's not removing
all of them because we hard to find the
right sample because, yeah, it's based on the
selection, Based on the patch tool. Next, we still have this
one Blemish Removal Tool. Blemish Removal tool. I copy this one, a background I will give name
Blemish Removal Tool. Well, let's find
out how it works. We just click and Track. There is no other option
available to adjust this for us. Let's find out. Oh, this is cool, cool feature. Yeah. So I think the feature this one patch tool between patch tool and Blemish Removal
tool is a similar. When patch tool, we have to create selection first and
we move, right? When blemish tool the selection
just in the circle, and we cannot change anything
here except the size. So let's see how about this performance to remove
unwanted object like this. Oh, it's very hard
to remove this part. But let's try. Let's try. Okay, let's compare. Let's make comparison
between all of this tool. This is the original.
This is Blemish Removal. This is patch tool. This is healing. This is in painting.
Which one better? Inpainting? No,
a healing past? Still I think still better. patch tool, better, looks better, looks good, but it's
not the better one. This one? I think it's also
quite awesome to remove. So the number, the winners
still healing brush tool when it comes to remove the
acne and then second, I think, is blemish removal tool. So we have learned about
this one Inpainting brush tool, healing brush tool, patch
tool, Blemish red. And then next, let's talk
about the red eye removal. So in the red eye removal, here means usually, so when we take a photo in the
midnight using flashlight, flash camera, sometimes it
will cause our eyes is red. So the result, the eye because like the reflection of lighting, the
reflection of flash. So it makes our eye is red, and then sometimes
it's also annoying. Sometimes also some people
also call it red cat. So for example like this, you can open on the folder, pixel demo here, man with
red eye, just like this. This is because flash
camera, sometimes like this. And to remove that,
which is using this one, red eye removal tool. And this one. This
one like this. So it's more natural.
Simple as that. There is no other
option, other features, just click here and then
click here and click here. Here, here. Again, again, until
the eyes looks normal. This is we can remove
red eye because sometimes due to
the flashlight on the camera will
make the red eye. Our eye is a red. This. So we have learned
about this one inventing, healing, patch, blemish, red eye. Next, we'll learn about pentool. Yes, pentool in the Vector
Mode, we have learned. I think it's quite the
same pentool and node tool. So pen tool and not be able
to use in the Vector Mode. And next we will learn about
this one artistic text tool. And then from our
little project, next, we will put the text here, text here, and text here. So still a lot of space we
need to put in the text.
39. Text Tool and Finishing the Project: Hello, everyone. In
the last session, we have learned about
this Inpainting brush tool. We have learned about
all of this inventing, healing patch, blemis, red eye. And then we also practice these
toes into to remove acne, to remove unwanted
object, and so on. So in this time, we will
continue to work in this design. Because this one after Inpainting brush tool
actually is a Pentool, but we have learned Pentool in a vector mode. We
have learned about that. And also in rectangle tone, this is shape tool is also
learned in the vector mode. So basically,
paint tool that develop in Affinity in a pixel mode. And then shape tool in a
pixel mode is also the same as pen tool and shape tool
in a Vector Mode. Also, this one,
artistic text tool frame text tool is the same precisely. And then, but because this
season is not complete, so I want to add some
text in here and in here, so I will use this
one artistic text tool and frame text tool
complete this design. So let's continue and finish
our design, this design. So because this is not
complete with text, so I'm going to put text in here and in here.
So let's do it. I just want to put
the short text. I'm going to use this one
artistic text tool here. It's like exactly precise, like in the vector mode, which is typing here. For example, I type fresh, and then I took
all get this one, press, bring to the bottom here, and we iced tea. IT, for example, like this. And then this one here, you can see this place to change the font this place to
change the style font style. And this is to change the size and reduce the size,
increase the size. This bold italic and so on. And we can explore these tools
like in the factor mode. And then so for this case, I'm going to use this
font. Which one? Which most the
best of like this, I'm going to use this one. This one? Okay, I'm going to use this one. I think it's a little bit cool. The font is Gak Tahu So I think I know the language, the name Gak Tahu. This one, yeah. So if you don't have this
one, don't worry. I will include this one in
the file, the file project. So you just install the phone
and then you can be able to use this phone,
the type phone. And then I will
increase the size of this writing, of course. fresh tea, like this. More or less, I will maybe a bit like this. I'm going to put here here, for example, fresh iced tea. And then this is for
change the color, but solid color here, one color, which is the gradient. Click like this. This is
white and this is black. So we change the white color
to green color. Like this. And in the black color, we change to maybe a
little bit to yellow, like this. Just for example. So, you know, you can experiment with yourself
which color you want. But in this project, I'm going to use this one cream. Fresh iced tea. But because the color
is not strong, right? Sometimes it's like
overlapping the color, so I want to add this one a Layer Effect.
This layer effect. Remember, this layer effect we also learn in
the Vector Mode. The Layer Effect, we can
add some effect here from bevel outline 3d shadow in the glow to the gaussian blur. So I'm going to put the outline here and then change the
color to white here, and then slide the radius Oh yeah. Like this, I'm going to set to 13. I also put the
outer glow, maybe. So let's some experiment. Just little bit like this. Intensity fresh Yeah. We moved on this writing. We changed the color
using the gradient. And then this one, I'm going to copy this one
from this green. I'm going to copy
this color code, and then back to here and
then in here in a white color. I put this color code and click Enter like
this and for this one, also the same, click here, copy this one, copy color code for this yellow
color, here, copy, and back this text, put in the back, and then change the color
code like this. Like this. So maybe I'm going to a little bit draw like this. Yeah. fresh ice tea. So the rest of it,
just click add this Layer Effect at
the outline here. Remember, we put 13 pixel
like this and then change the color like this and inner
glow or other outer glow. Yeah. Outer glow.
radius like his. Um, and putting this ratice
to 20 25, 21, 20 25. Before, after, like this. fresh ice tea. So it's more cool, right? This one like this. Yeah. Rice T. And then next, I'm going
to also use this one, this space to put writing to put text using
Artistic text tool again. And I'm going to put
text like special rice. Like this, and I
changed the font to poppin roboto maybe change
to black temporally. And then I'm going
to use poppins like this and use a bold
bold one, right? And then change the
color to green. Then using this
one, Layer Effect, put the Outline,
change to white, and then click radius
special price. Add red use special
price like this. Yep. Special. So I bring this leaf
to this item body, and this one special price. So I'm going to use this
sample color like this one. This one, I'm going to
put color picker. This one. Yeah. So if we want to take
the color sample, we click in here first
text and using this one, Color picker then for sample, I choose this color, this and I choose this
color, this one. So I'm going to use this
one special price, right? And I copy CTRL+G for example, and then here or I clip
this hold ALT, this one, and draw so and automatically, it will create the
copy of this text. So I'm going to put special
price and then write only only because
this special price. So I'm going to put this one. How much for the
glass of icedTe. Mm $1? Yeah. $1 is actually very
expensive, though for icTe. Yeah, because we live
in Asia country. Yeah. And then for ice Tea, $1 is very expensive, though. So so maybe if you live
in Europe or in America, icTea for $1 is cheap, but we in Asia countries
in Asian countries, yeah, $1 is expensive
for ice tea. again. And I'm going to use this one, the rectangle Tool,
the rectangle tool. So I'm going to create rectangle here and change the color. Maybe I'm going to
use this one to representing this one
orange, like this. And I'm going to make this little bit corner in the edge a little bit,
you know, rounded. So we use this corner and
click rounded like this. So next, just give the
text here, visit now. Because this letter
has a background. The background is orange. So when
we put this green color, it's not really suitable one. So we choose to move we
changed to white, right? So maybe I think it's more little bit strong
orange like this. All right. So special price,
only $1 visit now. So I think for this one, I'm going to choose this style, maybe extra bold,
extra bold. Or plaque. Oh, it's too much. Extra bold is absolutely
awesome, actually. Yeah, I think I'm
going to make a little bit smaller on this one. Special price like this. Visit now is also
smaller to anyone. 21 and make it more
smaller like this. Special price,
only $1 visit now. Yeah. I think I just
make some adjustment. Example, I put in here and
put in here, put in here. What is this? What is this? What is this? Oh, this is
the background. Oh, yeah. The prod. So I just using
this one Inpainting presto? Yeah, to remove this
one. Oh, go visa. So I unactivate it first using if I can using
the painting brush tool, just using patch tool
Yeah. Okay. It's fine. So I will
activate it this layer. Okay. After we review this text, I think this object is too big, object, the class ID is too big. Maybe I will a
little bit make it a little bit smaller here. So because there's a
space in here, right? So we choose this one. I'm going to choose
I'm going to add the logo, this logo, right? Just drag and drop here. Yeah. So I have created
the logo previously, so we're not getting the
logo from scratch, right, because I have created the logo and just drag and throp here. So the logo here means is
like the log of a place, maybe from restaurant cafe
or maybe some we often found in the maybe
some small small star, maybe some small store, food stand, something like that. Food stand, and also they
provide the drink like this. freestea like, yeah, from fresh iced tea. All right. I think this one, the special price, I'm going to add a little bit the outter glow. This one, the outter glow. Yeah, glow like this. This one, too, outter glow Just using radius 100%.
Oh, it's too much. The opposite, no, no, no line, noodline.
Wait, quick, quick. This one, outter glow Yep. And this one outer glow If you reduce the
to 50, just 50. And this one also 50. This one outter glow 50. And Yeah. After this one, we have learned Vector Mode and we have
learned the pixel mode, right. After this one, we move to the three principle of
designing in Affinity. So after this, we will learn
a lot about three things the adjustment and filter
and also blending mode. So the adjustment here, the color adjustment precisely, we want to learn one by one. From level, white balance, HSL, almost all of them. After that, we move
to the blending mode. So we'll learn about this blending mode
because this is very important to know about normal, what about normal and how we can move with the different
blending mode, how they works, and then the theory behind it from multiply screen overlay, we often use that, but what kind of theory behind that we
will learn one by one. And then next, we will
also learn a lot about the filter because
this is a lot of filter that available
in Affinity. So we'll learn one
by one to make it, you know, to make our
foundation is strong. I think from this project in the Vector Mode project
and this one project, we just using this tool. Not deep dive
about this filter. We mostly in the vector project and then this pixel project, which is using while we
learn about this tool, we implementing into the design. And I think we just
limited to using filter, which is using several filter,
several adjustment color. But in the next step, while
we learning one by one, this adjustment layer and then blending mode
and then filter, we also apply what we learn into the design into the the
image or the picture. So my goal is, you'll be able to know
about the fundamental of Affinity software and that the Affinity software is
providing the tools, right, providing the feature, like
in vector and Pixel Mode, and also they provide the
rich features like Filter, this one, and also adjustment, and also blending mode. So it's worth to continue our learning journey
and then yeah, see you in the next
session when we learn one by one about the adjustment, filter, and blending mode. So see you in the next session.
40. Level: Modify the Tone and Color Composition: Hello, everyone. I'm
glad to see you again. In the previous session, we have learned about the Vector
Mode and Pixel Mode, and we have also learned all
of the tool that available in Affinity between in the Vector Mode and
also Pixel Mode. Right now, we will deep dive
about the adjustment layer. Like I mentioned in
the introduction, that we will build the strong foundation
in Affinity software. And then one of the
most important thing that we need to learn is
the color adjustment, filter and painting mode. So because we have learned a
lot of the tos and then we have more familiar about the icon, the tools, the user interface. And then we also
practice tools one by one. And then right now, we move
to the Adjustment layer. And this session, we
will learn one by one, and we'll cover all of these
adjustment layer so you will understand the function
of adjustment layer, each adjustment layer, also how to implement
it in the design. So let's start it and we move
to the Affinity software. So I'm going to create
the new document, right? And this one, I'm going to
use this 3000 by 2000 pixel, but I'm going to
reduce this DPI to 72 because later we will
working with a lot of effects, sometimes also using filter, and then the more higher DPI is also giving the
burden to the system. If our PC system has the low specification or maybe it's not high
end specification, the more DPI will burden
in our system like they will using more resource RAM
and more resource processor. So I think DPI 72 is a
perfect for our practice, especially when working
on the Pixel Mode. So I use I set the 72 DPI and don't forget
to click Artboard here, and then I will save
to my preset here. I'm going to type the name
is Demo 72 DPI. Like this. And I click Okay, and I click this one demo 72 DPI and
click Create document here. So we'll create this document. So the adjustment layer
that we want to learn. So when we look at this part the adjustment layer
that we want to learn, there is a white balance and there
is a level where balance adjust color until
normal to the normal. Don't worry, we will
cover one by one. We will learn
together one by one, so you will understand
the function of this adjustment layer and how to implement it into design. And first, we will
talk about the level. So the image that I'm going to impart in the
adjustment layer here, this image, you can open the adjustment layer here
and then find this image. This image, drag and drop here, and then you scale down. Just scale down. Like this. And then the resolution, the aspect ratio of the image also suitable with the
resolution we create. And then before I apply this adjustment layer,
this one, right? I'm going to copy this artboard. You can click this Airport
and hold ALT and just track the artboard one into
the new airport here. So I delete the image. So we have created the
two artboard, this one, rpod one, and I'm going
to rename artboard two I pod one for this photograph, and then this one
for plane space. We also have the plane
space of artboard two and I'm going to import
this one. This one. This is the color palette
from white to black. This is white, and
this is 10% of black. This is around 20 to 25, and this is 50% of black, and this is 100% black. I'm going to apply the
achievement layer using level. This one I click here
and click Level here. So this level is
affected in this maybe I will rename color Color pallet. Alright, so let's we click
this here, Level Adjustment. Here, I'm going to explain. So in this window, there is a black level, white level, gamma output
black level, white level. And we can also choose this
one from Master red green, blue and Alpha, and
this is the RGB. This is a color mode, and this is opacity, and this is blending mode. So the point is of the level is the black
level and wet level. We're working with this
and then gamm and then the output white level is opposite
within the black level. So I'm going to demonstrate. If we slide this one, if we slide to the
right gradually, it will increase the
black level, right? So here, this is
the black level, and this black level, this slide will affect it in this part will increase
in the black level. Right? And then if we
slide more to the left, we'll also affect it
in this part, right? The more we slide to left, the more the black level
will influence the color. Even in the white color we
convert into the black level. So the black level here means to make the darker
area more darker, more darker until
comfort to the black, right? This is the black level. When we slide on the
left, and on the right, it will increase in the black color until
convert to the dark. Right. So what about
the white level? The white level is also
opposite from the black level. When we slide this white
level to the left, it will increasing
the white level. Pay attention in this color. When I slide to the
left, gradually, it will increasing the color to white or to make more brighter until the color
change to white color here. I set when I slide to left, we automatically
so the white level basically is to make the color, more brighter, like this, right? And how about the gamma? The gamma, we're working
with around the midtones. So the gamma, when we slide
increase in the gamma, we increasing the dark color. So it will add more darker in every color in
every color like this. Cam. When we reduce the cama, it will make more brighter
than the color here. Like this. So what about
this output black level? The out black level
basically the opposite from the black level and
similar to the white level. And the output wet
level is opposite from white level and similar
to the black level. I'm going to show on
the output black level, when I slide on the left, more brighter and brighter. But the peter is kind of
different than the black level. The output black level here means is to influence how much the black level
will affected in this one because it's not
influenced one by one, but the whole image, it will black level. I will reduce the black level until it converts to the plaque. Well, this white level it will make it darker and
darker, the whole color. The color until it
becomes black here. And then this opacity
is also, yeah, to how much strong
the adjustment level, we can use the opacity. Bending mode, we can change the bending mode to
many things here. So basically it's like this. And sometimes we also be able to edit the individual of color. For example, when I click the master, when
I click the red, for example, so the black level here means it will
to reduce the red. And because the red is reduced, so the color only left
the blue and the yellow. The result is the color
will convert to more green, red, to more green
because the red we will, you know, reduce the red. But when we increase in red, this one is to
increase in the red. The affected is it will
post the red saturation, for example, right to
increase the saturation. And when we 0%, the t is also gone
when we black level into 100 black level into 100%. So the 100%, it's also
the same with 0%, right? Same. Okay. We can
also click the green. When we green, red is the green, the result is purple
because combination of blue and red is a purple like this. When we increase in the green, so yeah, the green
will appear strong. So this is how we can edit
individually color in levels. So let's implement
it to the image. We're working with this image. We click level adjustment
here and then try to increase the black level here means to add
the black level. So this area that
previously has black level, black color, right or darken
area will more darker. Like this and left some area
that previously is brighter, like the headlight, this
area and headlights area. On this phase two, it will left. And then automatically, it will convert all of them
to black and white, we also here with light is
more brighter and brighter, especially when photo has
a headlight like this one, headlight, it will influence
more stronger like this. So the black left layer
means to make more darker. And white level to
make more brigher. Well, gamma working
with tones here. And then maybe I will yeah, increasing the white level
here and black level. And the gamma, to convert
more brighter, right? So this is before
after before, after. Before, after we working with
level adjustment, right? So this is how we can change the color with
level adjustment. Or maybe, I'm going to
change the individual color. Maybe I will make the
green more greener. Yeah, we can doing like this. We can change more greener. So the green will affect it, and this area will affect it. It's like to give a little
bit more greener like this. So this is before, after. Before, after. Levels here means
basically to make brighter or darker this image. Here's the level adjustment. We move to the next
adjustment layer, white balance.
41. HSL: Applied the Hue, Saturation, and Luminosity: Hello, everyone. So let's move to the next
Adjustment layer, HSL Adjustment layer, Hue
saturation and luminosity here. So before we discussing
this more further, I have created the new document 3000 by 2000 and then 72 DPI, like the preset we have
created previously. And then for the demonstration, I'm going to import
this picture. This one, strawberry picture. Just like small like this. I think I think I'm going to using the crop tool I
borrow in the Vector Mode, borrow this feature crop tool. I will crop here, more or less like this, more or
less like this, and I will copy CTRL+J
this one. Scale up to this one. At text here, this is the
original or original. I think I reduced the text just for identifying that this is the original and
this is the HSL effect. In the HSL effect, we will add this one HSL and then bring the
HSL instead of this. Maybe I will rename
stroke the one very. This one. And this is and
I will apply this one, HSL, and bring to the
inside like this. So we have all we have two HSL, which is deleted
one, one of them. Okay. So we have added
the HSL adjustment here. This is the window of HSL. As you can see in this window, this is the hue shift saturation
shift and luminosity shift. The hue shift is
like basically to change the color,
the whole color. When I slide to the
left like this, so the whole color
will change based on the color we choose like this. When we slide on this one, it will change to color
we choose like this. Sometimes it's not literally
precise in the color, because when we
slide on this one, on this blue, but the
background change to, you know, change to cream. And then this strawberry
change to purple. And then it's not like really precise like what we
want and it's not, you know, following this color. And then in the saturation
shift, this one, when we slide to
the right, it will boost the saturation like this. Right? You can see
the difference is we increasing the saturation. And then this one, it's close to white and black and white
color, desaturation. Again, it will strong. I will bost the saturation. When we increase the
saturation, this is more red, and then the green is
also the colors pop up. And then the luminosity, it will also increasing
the saturation, more subtle, like this. This is the luminosity
working in the mid tones. When we slide on the left, more darker, and then
the left more bright. It will also
if we combination between the saturation
and luminosity. Like this. Like this. We can increase the saturation like
this is more blue, this is more red, and
this is more green. What if we change the color? For example, I want to change
the color for this red. I just click this red. I'm going to make it more
warmer warmer to yellow. Just click the red color. This is when we choose when we want to change
the individual color, we choose the red, for example, and then start to
slide this one. So just a little bit yellow,
yellow, more yellow. This is why this one is just how we change the individual color. This is for purple, blue. And then here, this is
red in the. When we set to
zero, back to red. You can also change the
blue, the background, right. I'm going to change the background to a little bit blue sea, blue sea here. As you can see the
differences. Yeah. This is HSL. To
change the color, we can change the color
as a whole color, right, with hue sift or
with individual color. Maybe I'm going to make this green more saturate saturate it. Like this. As you can see here, the green
is more greener in here. So this is how we can change the color
with HSL adjustment. So if you want to change
the color using HSL mood, you can change the whole color or the individual
color like this. And you can also increase the saturation to
make the color more pop up to make color more
stronger and luminosity, here, this is make more darker or make more red in luminosity. So this is the
principle of HSL color. And then let's save to HSL. HSL demo. Here. So we have learned black
and white, white balance. So we have learned about the
level white balance, HSL. Next, we will learn
about the recolor.
42. Recolor: Change to Targeted Color: So I'm going to create
new document, again, using demo 72 DPI, create document, and we will learn about
the recolor here. From the recolor, I'm going to use this
picture. This one. This one. All right. I'm gonna apply
recolor for this image from this picture and just
click Recolor like this. And automatically, it
will change to red. But we can change the
color based what we want. This is also the change
the whole color. We can't change the
color individually here. So I think this is like Hue, Hue, HSL, hue saturation,
and luminosity. But when in the hue level, we can change the
individual color, but this is the change
in the whole color. But even though this seems like, Oh, this is really hard to use. But no, I'm going
to show you how to use this adjustment layer. This one in the hue, we can choose the color we want. When we set yellow to yellow, set green to green,
blue to blue, pink to pink and red to red. So it's different with
the HSL adjustment because the HSL
adjustment, right? We when we set the
HSL adjustment here, it's hard to us to change the color because
when we set to, you know, some area change, some area also change. It's like change hard
to control, right? Even though we can
control, actually, but little bit hard to control. But in this one, I'm going
to tilt this one, recolor. And I activate it recolor here. So hue. For example, I'm going to set this more
blue, for example, right? And the saturation, the
close saturation to 0% is like the close to white
and black, right? Sat saturation, a
thing like this. And the lightness with close to 100 is close
to, you know, to white. Is more brighter when the lights when lightness set to minus, it will also more darker. I reset all of this
one or this one. So this is the
original one, right? This is the original
one. And I'm going to set this
one is more cooler. So I'm going to set this one. I will activate.
I'm going to set to maybe a little bit of blue like this and I'm going
to change the blending mode, the blending mode to multiply
or to overlay, like this. For example, when we
choose the multiply here, and we reduce this one. When we reduce this one, it's close to the original one. But it's not multiply, though. We can also apply, for example, darken and we will also
try the other blend mode. But for this one, I'm going to multiply first. And in this one,
in this opacity, I'm going to set to 50, and then maybe I will increase in the
lightness a little bit. So when we set to the multiply, the lightness, when we set 100% is close to the
original one, right? When we set to 0%,
is more darker. This is the original.
This is the -100% darker. So I would think I will
reduce a little bit to 30%, for example, or maybe
more 45 50 Right. And the opacity to 50. And then this is
before, this is after. This is before, this is after. And then we can just also
change to maybe to blue to purple to red or to make
it more warmer like this. So it will change the whole five using the multiply
blending mode. This is before, this after. If we want to make Oh, I want to make more
brrter just like this. But it's close to
the original one. This is the original
one, like this. And what if we change
to other blending mode? For example, I want to set
this is to zero first. And besides multiply, we can also change to,
you know, darken. I'm going to choose the darken. So in the darken
when we set this the saturation to 100% is
given the blue blue five. When we set saturation to zero, it will close to
the original one. For example, when
we set the opacity, when we set on the
opacity to zero, it's closed and then
sadness saturation to zero, this is
the original one. And by gradually, we set the opacity for
100 for example like this and then sat saturation.
To blue like this. This is when we move to
darken and then opacity, maybe I will bring
to 50 like this. This is also possible. We can change the lightness. This is when we set to 100, that's close to
the original one, let the multiply, and
then set to here. Here, the overlay blending
mode, the opacity, I will change to 100, right? And the saturation. Like this Lightness. Like this. So to change the color, maybe I will set
to 50% like this, overlay and the saturation
is also maybe 50% or 100 likeness like this and just change
the color like this. Maybe I will set more. When you say opacity
to the original one, to 0 to original one, but when we set to maybe
25%, yeah, like this. This is before, this is after. We can set more like this to purple and then reduce
this opacity maybe 15. Yeah. This is before, this after this
before, this after. So the recolor basically
is to change the vibe of color to adjust the color in the whole colors not
individual color. And to make this working, so we can choose the
color we want with hue, set the saturation,
set in the lightness and then using this
blending mode. Sometimes we multiply, if
multiply, darken or overlay. And you can still experiment with with
other blending mode. But in a different setting, different different
configuration. But again, this is how
we use the recolor. Using hue, saturation,
lightness, and blending mode. Let's save this first. I'm going to serve with. So I'm going to
serve with recolor demo m. And then next, we will learn about
black and white. So see you in the next session.
43. Black and White Brightnest and Contrast: Okay, everyone. Next, we move to the next
Adjustment layer. We will discuss
about the black and white and brightness contrast. Next, I'm going to create
this one, new document here. And then I also still
using this picture. So basically just we can
using this picture too, which is delete the
color adjustment, but I'm going to,
create new Document. So I'm going to create
new Document and then also sometimes we can we still review back to the
recolour or back to the HSL, so will be save We'll using this, you
know, new document. Okay. This is new document. And then let's discuss
about black and white. So this is the black and white. Basically, the black
and white is to convert the picture into black and white mode or
desaturate it or black and white. Like we take a picture with
a black and white effect. This is before, this is
after black and white. Sometimes we want
to some area of the color appear more stronger
than the other color. Sometimes, Oh, I want
to make this mountain. This mountain is more darker
in the black and white mode. This is the most darker is in the wooden in the
forest spot, right? In the forest spot, is
the most the most darker. Meanwhile, the mountain is more later convert on the
forest with black and white, we can also change
black and white level. I want to make this
water is more darker. Water is more darker. Meanwhile, in this
area is brighter. So we can edit all of them
with individual color. For example, I'm going to
make the mountain first. The mountain is working on this one with blue, blue color. When we send the blue
color like this, you know, the mountain is more
firm, right, right? Because we also move
the blue this light Ayy contain a blue color is
also more stronger, right? This is before This is
more stronger blue because the mountain also contains blue color blue colour from the shadow of
the sky, for example. Yeah, this contains blue color or we want to change this water. It's more darker because the water contains
a green color. So in the green color, we move to this part like this. It's in the water
areas more darker. The black and white. I'm going to group
this one like this. Black and white, edit it. Like and white. I edit it. And I'm going to open
this layer original. I'm going to change
the name to original this and in this
black and original, I'm going to reset the
setting like this. So I will make comparison
between this one is edited, and this one is original, and this one is edited. You know, the difference is, this is the same mode
to black and white, but this is original, the sky is not firm the
mountain is also more lighter, is not strong enough
compared to the forest. And this water is also
not strong enough too. But when we edit it here. So the black and white
here means we can set the individual color that
appear in a black white mode. Maybe, Oh, I'm going to make
the forest more brighter. So we can work in
with the green. Oh, this one, this one yellow. So the yellow will
make the forest more brighter, like this. Maybe I will back do this one. This. So this is how we can
setting the black and white. Before, after before, after. This is how the black and
white works in Affinity. Next, we'll move to the
brightness and contrast. On the brightness and
contrast, I think, before we move to the
brightness and contrast, I'm going to save this document, and I'm going to make
name Black and white demo. This. Next, I'm going to
create the new document, create new document, and using still using the same picture. So to using this one, brightness and
contrast is simply to slide right and
left right and left. Brightness contrast
is pretty simple. The brightness increase the
brightness more brighter. The contrast here means to increase from the
contrast is combination from the shadow,
headlight and saturation. The more number higher, the more color will pop up, the more high, you know, like a shadow will darker and then headlight will
lighter contrast. birghtness well brightness is just make this darker or lighter. The contrast is more to
increase the shadow, headlight and saturation
at the same time. When the contrast bring to the negative,
it will more dull. The color will dimm
and some, you know, like white spot,
something like that, or vignet more thick net. So the color is not strong, the shadow is shallow, and then this highlight is also dim more dimer,
just simply like that. For example, I will
set like this. This is before, this
after before, this after. You can set the
opacity here like this the other adjustment
layer and blending mode here. Just simply like that.
Just simply like that. Brightness and contrast. Set, this'll give them the brightness and contrast demo Like this. Next, we will
move to the posterize. So see you in the next session when we're talking
about posterize.
44. Posterize: Flat Color or Tone in Images: Hello, everyone. So let's continue to the next
Adjustment layer. The adjustment layer that we want to discuss is posterize. So to make a demo of posterize, I will create a new document
here, create new document. And I'm going to use this
Photo this this one. I'm going to utilize this photo. Because this photo
is potrait right. So I'm going to resize the artboard 2000 by 3,000 from landscape
to potrait like this. And then the photo will be
suitable with the aspect ratio. Let's apply the Posterize. We click this Adjustment
layer, click the Posterize. So Posterize here means it will divide or simplify this picture into several color
from the headlight to the shadow from the lighter
to the most darker. So it will make some,
you know, like this. And then here in Posterize in the posterize level,
there is a number. The number represent
how much color that we need to represent
all of this color. So for example, if
this four color, this consist of one,
two, three, four. Even though we also
have this one, this is also contain four color, one, two, three, four. So in the certain area, it will divide into four colors, more or
less is like this. When we increase the
posterize level to six, it's more varied color
from like this one, two, three, four, five, six in the certain area. The more number we add
the more color we'll create, the more color we create. Like this. This is the
posterize level. So this posterize level also really useful when
we try to create, for example, try to
create a vector mode, and then we can
draw for example, we can draw pentool like this and then start
to throw the ice, start to draw this
phase like this. So the posterize also useful
for help to trace the image, to trace the image when we
want to convert to the vector. For example, I can say, so what if I this one, I will make this one merger. I will merge select
it here, this one. And this layer, I want to trace with an image
trace like this. So so it will make our
tracing image tress is more. It will create the firm area. O, this is the one color. This is the same color. So the posts will
help for, you know, like a vector for image
trace to identify the color. O for this color has same color and then
this one using this color and then When
you click Apply like this, yeah this is Vector Mode. We can change the color. We
can also change like this. This is the function of posterize. So I will undo. Meanwhile, Posterize
is also meanwhile, we can also combine the posters adjustment with for example, I want to make this gradient map. Meanwhile, the gradient is
still letter, you know, but yeah, for early
introduction, I will use gradient map. So the gradient map here
means after the posterize, after we create posterize or
combination with posterize, the Gradient Map will
divide color from green, blue and green, red,
green, and blue. And we can change the color. For example, the
green, maybe we can change this one to black, and then this one, green, maybe we can change
to a little bit, like this and then blue, we can change too like this. So this is like this. So this is representing of
the shadow because, you know, like, representing
of the dark area, this one representing
to the mid, like this. And this one representing
to the light, the brightest or headlight. Like this. So we can also using combination with posterize and gradient map to create
this picture. This is the posterize,
and then this is the combination posterize
and gradient map. So this is one of
the way we using the posterize and
the combination of posterize with other
color adjustment. Mostly when we're
working with dressing, for example, we can trace
with pentool like this. We can easy to create the shape based on
this posterize, right? We can easy to create the shape using pent with this
posterize like this. For example, when we want
to create the vector face vector face art,
for example, like this, a it was it was more easy to us to create the edges
like this from the face, which color, which dressing, which line we should draw. And then the posterize
will help to draw this shape with pentool. To turn the face,
to turn the eyes, to draw the edges
with posterize, it will easy to help. To create the vector phase. So we move to the next
adjustment layer, fibrins. But before we do that, let's save this one
and give the name Posterize demo like this. So we have learned about
level, white balance, HSL recolor, black and
white, redness Posterize. And right now, we
move to the vibrant. So see you in Vibrance and
adjustment layer.
45. Vibrance: Modify the Intensity of Subtle Colors: Hello, everyone. I'm
glad to see you again. So in the preivous lesson, we have learned about this adjustment layer
Posterize, right? And in this session, we'll continue to our practice to the next Adjustment layer. The adjustment layer that we
want to learn is Vibrance. And to implement it and to
demonstrate the vibrance, I'm going to use the
example for this picture. So you go to the Adjustment
layer, Adjustment folder, Adjustment layer folder, and then I'm going to use
this photo, this one. This one. This is the
orange photo like this. Maybe I'm going to borrow
the feature of crop too. Yeah. And I'm going to crop this orange,
for example, like this. And I'm going to copy this
one or hold ALT to make the duplicate So because the vibrance adjustment here contain of vibrance
and saturation. So I'm going to explain
what the fibrins is, what the saturation
is more deeply with the differentiate this picture. And I'm going to
make type the label. I'm going to make this original. vibrance So, and then for this layer, I'm going to change
to the original based on the type on the label. This is vibrance, Vibrance
and this one saturation. Sa duration. So let's deep dive up
this vibrance adjustment. I'm going to apply this
adjustment in this vibrance layer. Click this one, click
Vibrance, this one, and bring the vibrance inside of the vibrance layer,
vibrance label here. And then from this saturation, also apply the adjustment layer vibrance and bring the
vibrance to this saturation. Here. So we have at the vibrance adjustment in the saturation and
in the vibrance layer. And then we will see upon the difference
between all of them. So we will start
with the vibrance. This one, click this one. So the vibrance here means
it will post saturation but more subtle because the Vibrance is working
with the midtones, so it will post the saturation, but it's not as strong
as the saturation. For example, if you want to
increase the saturation, you can slide the vibrance
to the right like this. You see, this is very subtle. The slide to the right to post saturation or to left to
reduce the saturation. Even when the
vibrance close -100, it's not white and black. This is different with
desaturated, right? This is different with
dissaturate it because it's not completely white and black, but it's like more dull. And then if we boost to 100%, the saturation, the color more pop up
compared to the original one. Yeah, after, this is
before, this after, right? So what about the saturation? This one. So I moved to
the saturation layer here. And then in the
vibrance adjustment, I click, it's kind of
different with saturation. Saturation will boost the
saturation more stronger, way stronger as you
can see like this. The difference of
vibrance saturation, saturation is more harsh
and more strong, right? So sometimes in some areas
like oversaturated, right? It's not natural anymore. It's like, it's too odd
from the color, right? So maybe saturation
is really useful if if you want to push the saturation with brines
but it's not strong enough, you can use the saturation because saturation
offer more stronger in saturation to push
the color, right? And then at the same time, the saturation is also bring the desaturate this
slider to the left. I will completely
black and white. To minutes 100, it
completely black and white. As you can see here,
this is the original. This is the vibrance,
Vibrance is more subtle, and saturation is like offer
more stronger saturate. This is the function
of Vibrance. Meanwhile, we can also
change the blending mode to multiply color lighter
screen, so many things. So for this case, I think
we can just, you know, setting up in this slider to
get the result that we want. This is the vibrance, right? Is it the original, the
vibrance and saturation. And let's save this one
to Vibrance vibrance Tim right. Next, we will move. The next color
adjustment is exposure.
46. Exposure: Correct Overexposure and Underexposure: Okay, let's move to the
next adjustment layer. The next adjustment layer
layer we want to talk about is
the exposure here. This is the exposure. So to doing that, I'm going to apply. I'm going to take the
example using this picture. Which one? All right, I'm going to use this picture. Maybe it's a little
bit. I'm going to change this artboard, right? To 2000 by 3,000. Like this. Okay, like this. So I just delete this one. Yeah. Just full full layer. So I'm going to talk
about the exposure. So the exposure here means basically to increase
in the brightness. Increase the image. So I will move this
exposure layer. When I slide to
this point to left, it will more brighter. This is more darker. This is more brighter, this
is more darker. But actually, this exposure is kind of different with
the brightness and contrast, Shadow, midtones and headlight. So this is like, increasing the shadow midtones and headlight increasing
at the same time. But when we reduce, this one is also reducing
at the same time. So this is different
to this one. When I apply to brightness
and contrast, for example, the brightness I will uncheck this exposure
adjustment first. When increasing the brightness, brightness is more
subtle, right. Compared to the exposure,
brightness is more subtle. So it's not really increasing
the contrast because the condos also has the
different setting here. So the brightness, it will
make brighter more subtle, compared to the exposure. Exposure is more harsher. And which is a
sliding little bit, but the effect is so strong. Maybe I will set the
one, for example, but the result, you know, some area of over exposure. So areas also over exposure. To explain more further,
I'm going to use this one. I'm going to activate
this window. Which one? Pixel. Histogram. So I'm going to use histogram. Scope. Yeah. So I'm going to explain this histogram and scope to explain the brightness, different brightness
and contrast. When I increasing the
brightness, right? When increasing the brightness. So the brightness, this one, this is area for the brightness. This is a representation of
the brightness is too strong. You know, this is area for
representing the brightness, this area representing
the shadow and this area representing
the midtones. And here, in the graphic, the brightness it's, you know, like, up to ceiling, right? And then this is
like oversaturated, absolutely oversaturated. But the actual is when
we look at the color, I'm going to use
this one, this one. Pixel. Info. Here. So
I'm going to explain. When we set the info like this, this one is not totally white. When this area is
using the white, it will be 255, 255 and 255. But it's not. This red has 247, 242, and the blue, 231. So this is not totally white. Even though this is
oversaturated, right? Even though this
is oversaturated, maybe I will set
more further, right? Even though it's look
like oversaturated, but it's not totally
white because the brightness is more subtle. But when we look
at this exposure, this one, the exposure, right? When we set this one, just 1.1, just one. Maybe it's not 2.5 to 2.5,
but when I increasing, just a little bit
increasing here, this is totally white.
This is totally wet. And then as you can see here, the blue is more the blue and the green
and red absolutely. This is like offers to red it and literally this
areas become white, right? So this is the
difference between exposure adjustment and using
brightness and contrast. And it's also happen when we
are using the brightness, this one, I will back
no, this exposure. This one, when I
reduce this one, as you can see
here, when we using the exposure to the
dark, maybe minus two. And then this area,
the headlight is there is no graphic
in the headlight, even though in the midtones not. But, you know, in the
shadow the graphic is like some area of
shatos too much darker, too much darker, right? Too much darker. Like
this scope is also representation this
is more darker and the shado is domination
in this picture here. So this is the
exposure adjustment. But let's see in the brightness and contrast in the brightness contrast when we increasing the brightness here, it's more subtle, right?
It's more subtle. There is still left
red in this area, and then the tone is also still strong and the sato
is still strong. So the color is more spread
in the brightness and exposure. In this highlight area still there, in the mine is
also still strong, and then the shadow is also, you know, like, domination. This is the brightness
more subtle, compared to the exposure, this one, because, you
know, this is more harsher. This one, the shadow
is domination. When we move on this one, this offer saturated
is more domination. So maybe if you just
want to ramp up the shadow brightness and
sometime using the exposure, but if you want to make, you know, the picture
is more brighter, but it's not distraction
in the color, you maybe bring the brightness
and contrast is more prefer. I think I just maybe 0.5
is enough like this. This is before after before, after, maybe 0.7. Here. This is before, this after. This before, this after. So maybe if we not, we just bring to here, maybe, for example, this is
histogram bring here, scope, just bring here. But if we're not using this one, just click a Just delete, close the panel, and we
can add to the general, this one or Pixel, this one. Okay. I hope you will understand the
difference between brightness contrast
with exposure. Next, we will learn
about the threshold. So see you in the next session.
47. Threshold: Create Two-Tone, Black and White: So let's move to the
next adjustment layer. Before we move to the
next Adjustment layer, let's say, and then this name, I'm gonna give name exposure demo For this one for threshold, I'm going to create
new document here. I'm going to import. So I'm
going to import this image, and I'm going to this image. I'm going to import this image
to explain the threshold. So I will add this one,
the threshold here. So this is the original right when I activate the
threshold like this. But when I slide to the left, the threshold will convert
the highlight into black. So when we slide to
the close to 100, the threshold will make
the highlight gone. So it will convert
totally to black. But when we move this
threshold to the left, it will convert of color
become a headlight, find where the most darker area. And then this is the before,
this is the darker area. So the threshold
will, you know, like, preserve or maybe eliminate in a headlight and then
preserved in the darker area. But this is opposite
when the threshold, I moved 100%, I slide
to the 100% like this. So when I slide the
threshold close to 100, so you can see here
this is the area the most lighter because
this is close to white. So the dresshold preserve the light the most lighter area. To implement that, I'm going
copy in this artboard, just hold the ALT like this. Just remove. I'm
going to transform the dimension 2000 by 3,000. And I'm going to
import this image. This one. This picture. And I'm going to show you
how to use the threshold. This one. And I'm going to copy. I think I will copy again
to plic at the artboard. I delete the photo and I
will impart another picture. I'm going to use this
one, for example. All right. So let's experiment with this
photo with this picture. So next we will apply the threshold with this
picture like this. This is the midtones area. When I select this
point to right, it will increasing, you know, like the black area and it will preserve and then show
you show us which area, which is the most
brighter area, right? W the most brighter area. This will identify
the headlight, right? So if we close to here, so this is the area that
the most brighter right? So this area, the most
the most brighter. With threshold, we can identify which area the most brighter like this and close
to the midtones. So the mid tones here
means in this area. Close to the hijab area, and then close to the hijab, this area hijab and
then close to this area. So I think in this area, this area is a midtones, and then which area
the most darker. Yeah, this area and the most
targar area is in here, here, in the bottom
like this here. This is a the most,
you know, darker. With the tsult we can
identify upon that. So maybe I will
set to like this. So it's like
silhouette sometimes. With this threshold,
we will identify which area and the most brighter and which area and
the most letter, and then which area that contain the mid tones in here because the 50% is represent
the mid tones. So we move to the second photo. This is also in the same. Just applying the threshold
here and automatically, we can identify the most
peter area is in here. Here. Yeah, it's in here,
the most bright area. You know, this is the height
light from the sun sunlight. Well, we can also
identify which one the most darker area darker area is here in a part of hair. So you can see here
in a part of hair. This is the most darker
area from this picture. So the threshold
will identify upon. Like this. This is how we can use the threshold
to identify. But actually threshold
is a similar propose. We can combination
with, for example, threshold with the overlay or multiply or darken
or lighten, like this. And then we can reduce
the opacity, for example, for some purpose, right, or maybe two different This
is how we use threshold. And then actually, the
threshold is also be able to combination with other
adjustment layer. So to do that, we will
implement it threshold, combination threshold and Curves. So see you in a curve discussion when we're using threshold and
Curves at the same time. So the next, we will
discuss about Curves.
48. Curves: Modify Color by Tweaking the Master Curve: Okay? Yes. And next we move
to the next adjustment layer. Like this one. The Adjustment layer, I'm going to import
this picture. This one? Yep. Oh, I think we often use
this picture, right? Yeah. It's not it's fine. It's not problem. So let's
deep dive about the curve. This one. This is curve. Actually, we have learned
these curves, you know, in a previous In a pixel mode, we often use these
curves, right? But yeah, we will dive more in this matter in this discussion.
So on the curves. So how we use these Curves,
Editing these Curves. With given the node like this, maybe I will use this, this one, or maybe like this or like this, for example, in a simple
way, this is before. This is after based
on the curves, we will draw in this
using this node, we can draw we can slide up, go to the tone, bring the up, bring to the down like this. But as a theory, this area is for highlight. This area is for highlight, and it will boost the
highlight more brighter. As you can see here,
this is some highlight, like in the cloud, in this mountain, some area
have strong highlight and it will more strong when we increasing the
highlight like this. You can see here, the highlight
is brighter and brighter. This is for highlight.
And this is for shadow. When we slide on the left, the shadow more darker
and darker, right? The shadow like in this
forest in this leaf. And this one, this
area is for midtones. This is to increase the midtones. So the midtones here
means it will make the the color is more brighter all of them or
more darker all of them. It's not only the highlight, but also the shadow like
this, the midtones. So besides we can move to the highlight and
the shadow and the midtones, we can also draw the, you know, the note like
this, for example. Maybe like this,
we can improve or increase the shadow and increase the head
light like this. And then this is before, this is after this is
before, and this is after. And then besides, we can also adjust this highlight
shadow in the midtones. We can also adjust individually. If I want to make this
red, for example, this red is a more I think I'm going to make a
little bit blue bluish. So this t, if I slide to here, is more reddish
or maybe the d is strong to convert
to the other color. But when I make a
red is you know, like reduce the light. To the shadow. So when I
bring the this here, it will totally delete the
right color from this picture. So the result will be like this. And this is normal, so
maybe I will reduce the red and maybe
reduce the green, for example, and the
result will a little bit blue or bluish. So the blue will terminate
in this picture. Besides, we can also add in the shadow tons
and the highlight, we can also change
the individual color, great grand blue
color like this. So like a reset. So I think, yeah, I'm going to make this
picture more blue. Reduce the red, reduce
the green like this. So it's like more I
think it's more natural. In my perspective, this
is more natural, right. Besides, we can edit individual. We can also edit the master. The master here means
we will create this, you know, this all color
with Curves note like this. It's like Curves. So this is after these people
this is after. So with the course
adjustment layer, we can also making correction in the picture
because sometimes the picture maybe is not really correct in the color profile because
the color profile, the result from
the camera or from the application is
different from the reality. Sometimes when we take
a photograph, you know, like using the color profile in the camera sometimes
or in the device. So the result, the camera and then in reality is kind
of is a different. So that's why we can
edit the correction, the correction between a
shadow midtones and highlight. We can also using
Curves to do that. To doing that, I'm going
to copy this artboard. I'm going to use the
different picture. I'm going to use the
different picture. This artboard, I want
to make this 2000 3,000 to import this picture because I'm going to
import this picture. This one in Adjustment Layer, I'm going to import
this one. Which one? Okay. I'm going to import
the photo of tower. In paris, right. So I'm going to import this
one and we'll set this one. Here, I'm going to use this
picture and I'm going to make the correction
using the Curves. So to doing that, let's try. This is really worth to try.
This is really worth to try. This one, I'm going to make the color palette from the
shadow midtones and highlight. I'm going to create these
three rectangle like this. So I'm going to make
this as a shadow. Oh, no, highlight.
This is I'm going to make as a highlight and
then this is mid tones. And this one Shadow. Let's find out which
the most darker and which the most brighter
using threshold. So I apply the threshold
here and bring the threshold inside
of Eiffel Tower. So maybe I will eiffel tower. Like this. So with this result, we can identify which one the most darker area and which
one the most brighter area. The most brighter area here,
the most brighter area. This one, this is the
most brighter area. This one, this is the most
brighter area and this one, the most darker area. So let's identify. The most darker, I'm going to start with the most brighter area. The most brighter area
is here, here, right? So I'm going to identify. I'm going to make this border, this one and change
to, you know, like. This area is more writer area. Just for sin, identify to
identify the threshold. So we know that
this is which one? Which one is one. This one is the
most writer area. So this and this white, I'm going to use one. Which one? Maybe I will
increase the Yep. This one. This is the most brighter area. And then I'm going
to take this one as a sample with We set this fill. Don't forget to fill this one and then
click Color Picker, and then this one. This one, this is the most
brighter color sample. Next, I'm going to find
the most darker area, this one, the shadow,
the darker area. The darker area here this is
the darker area is in here. We move to the here and
the most darker area. For example, right? So in the darker area in here, so we choose the
color picker here, this is the behind of car, right? This is the darker area here. And then the Shadow
let's find the Shadow The midtones I'm sorry, the midtones. Which one when we draw in the middle is the
change, the change. The most changes when we set the midtones
very harder, right? So let's zoom zoom in. Which area the As
you can see here, as you patterns in here,
when I move to here, it's a change, right, close
to the midtones like this. So I'm going to set
this one to here. So, for example, this one. So, it will change. Right. So let's find out the colors here. This
is the midtones. So just click here. This is midtones. So we have creating
the color palette from this picture sample. Is the most highlight.
This is the Highlight. This is tones, and this
is a shadow sample. So let's find out how we use this color to the
Curves adjustment. So to doing that, I'm going to add this one, Adjustment Curves, this one. This curve adjustment,
I'll bring to the top of the So the
curve adjustment, I will bring to the
top layer here, right? And then let's make this picture correction with Adjustment layer with this one. Doing that, I'm going
to make this window, this pixel and info here. So in this info, we'll
identify the RGB, the color code from this sample. And then with Curves, we will adjust this color correction. First, I'm going
to set this one. This is not literally white because this when
we chos target. So take sample on this one, click this sample from location. Take from sample on
this one, this white. And this is not
literally white because the white should be 255, 255. But this is 248, 252, and 241. It's not 155. So we click the
curve adjustment and set this one from
the white to 255. To do that, we move to
the individual color. We start with red. This is red, is 248, right? For this sample is 248. We move to the left. To make the red is
255, like this, 255. And we move to the green. The green is 252. We
make it to 255, 255. 255 like this. And then we moved to the blue. The blue is also 241. We increase to 255
like this, right? So next, we move to the black. So in the plaque, because the black is a
representation of the shadow, the shadow should be zero. Zero, green zero, and blue zero. You doing that, let's
using this blue first. Blue should This is
13, it should be zero. So we're reducing
the blue to zero. Like this, right? And move on the green. The cream is ten,
should be zero. We reduce the green to zero, like this. And then red is five. We moved to the red and then
slide the curve to make it zero or zero. Yeah, zero. Right. And then last we move
to the midtones these midtones. The midtones should be 128, like in the green
because the half of 155 is 128 because midtones is, you know, like midtones is
between highlightand shadow. So in the middle highlight
of shadow it metons. So the 255 divide
two become 128. So like in the green,
it should be 128, but it's not red and blue, is not 128, so we
have to adjust. We moved to the
red from this one, we moved to the red
128, 128, like this. And then next, we
move to the blue. The blue should be 128 to. 128, we increase 128. 128, which one? Which one? Yeah. So this is the curve
adjustment we have created. Because when we take the sample, this one is literally
white because 255 to 255, 255 between red,
green, and blue. And this one is also
literally black because 000. And this one is 128, 128. So with the Curves adjustment, correct color from this picture. So I'm going to copy in
this Eiffel tower. I'm going to copy in this, and one of them I will
bring to the top. So this is before,
this is after. This is before, this is after. This is original, and this
is after Curves adjustment. Maybe I will hit this color
palette to make it clear. This is original, right? And this is Curves will influence the
Eiffel tower in here. And this is the original this
is when we apply correction, color correction using the
Curves adjustment. Here. This is original. This is
we make the correction. So this picture, I think this picture, this
course adjustment, I think is close to
the real condition because sometimes this
is the original one. I think maybe some color
is not really correct. But this one I think maybe it's close to the real
condition, like this. This is how we can, you know, make the correction color
using curve adjustment. Again, for the conclusion, the curve adjustment
here means we can edit the Curves individual color
from red green and blue, and then we can
adjust with Curves. We can can create. We can also make a curve adjustment
with this curve node, and then this area
is for highlight, this area for shadow, and this area for midtones. So that's the Curves works. So I close this panel. Let's save, and we
give name Curves. Like this. Next, we will learn
about the channel mixer. See you in the session when we're talking about
the Channel Mixer.
49. Channel Mixer: Adjust the Color of Individual Channels: We have learned the Curves. I think Curves is one of the harder part to
explain, right? But it's because I think when we're working
with the color adjustment, we often using the Curves. Next, we will move to the
next adjustment layer. This is the channel mixer. The channel mixer
here. Channel Mixer. So to do that, I'm
going to create this one rectangle in
here, for example. And I'm going to using this
one info, again, this one. So this channel, I will
move to this rectangle. I will set to here. This is 154. So I want to set to 100 or 100. And maybe maybe I
can change this to slider and this
one RGB set to 100. This one, 102, and
this also 100. Oh, here, here is the 100
201 hundred. So let's move. We apply the gradient
Channel Mixer here. When we apply channel
mixer in this rectangle, right? For this rectangle. Oh, I'm going to put the channel mixer into the
inside of this rectangle. We can change the
individual color. I think this is the
simplify of Curves. Channel Mixer is like the
simplifier of Curves. When the red is 100%,
for example, like this, if I increase if I, you know, decrease this, right? So the color result is
permanent blue and yellow, and then the result
will be a little bit green contained green
because red is a reduce. And when you pay attention, this one, when we reduce to, for example, to 50, and when I reduce to 0%, this red is zero because I have set this one to 100
and 100 hundred. So each percentage represent
each number of color. All right. Each percentage is a representation reducing
or increase the color. I increased to 2000. So it's also 2000. So it will range
between -200 plus 200. It's not co 255, but just only 200. -200 plus 200, like this. So I will bring back to 100. And also in the green, when I increase when
we move to the green, for example, the
green is 100%, right? And I reduce the
green, the result, the dominance is red and
blue and resulting this one. The purple, right? And maybe reducing the blue, the result will be green because the red and
green is dominant. Is the channel
mixer is like this. So I'm going to implement
this Channel Mixer with a picture, right? So I copy in the artboard here. Like this, and I'm
gonna delete this one, and I'm going to
import this picture. This picture. This one. So if you pay attention
closely, right? If you pay attention
closely this picture is so contain green
colour to everybody, like in here, here, here, here, contain cream
to everywhere. What if we apply this one? The uh Channel Mixer, like this. Channel Mixer. So in
the Channel Mixer, so to remove the green or
to reduce the green, right, especially in the green because the sky basically
is a blue, red. The sky is basically in
the color is a blue. So e a blue. I'm going to increase
the blue color because sky content is a blue. And because the green
is too much here, I'm going to reduce the green. But when I reduce the green, the red is also pear,
that is, right? So I'm going to want to
red and reduce the red. So in the blue is
dominant. Okay. I'm going to set to one another. And in the blue. And because this is still contain alot of green, we
can reduce the green. But the consequences is
when we reduce the green, the yellow will appear,
especially this one. This one. So I think it's more natural, right? So the result will be like this. This is before,
and this is after. This before, this is after. This is before, this is after. So the green is not
changed much, right? It's not changed much, but the sky will change a lot. For example, if let's I reset. If I want to change
this green color, I'm going to choose
the green because the green contain a
lot change, right? The green color. So it will produce it will result in
more green than before. This is before, this after the sky that's previously
in the original one, right? In the original one, the sky is a little bit contained on a blue it's changed to
green, like more green. So the first step,
we need to change. We need to decide which color you want to change
or you want to boost. For example, when
you change the blue, when you change the
blue for the sky, let's choose a blue and
boost the blue color. And this is actually, I think, simplify of Curves
for some reason, but it's not like Curves. It will more easy to use than Curves when it comes
to change the color. Because remember, Curves
working with the shadow, headlight and midtones, but this one, Channel Mixer, is like to change the color, but using the individual
individual color, like red, green, and blue to change the color,
something like that. Sometimes we also change the printing model like
this, like multiply. We can reduce the
multiply this one, and this is after this before. And this is before this after. Multiple opacity. And then you can
also don't forget to change the opacity here maybe to 100 to make the effect
is more stronger. Again, first step if you want
to change this Mixer channel, click I'm going to
reset first to review. If you want to change the
color using mix layer, please decide which
one color you use. Maybe if you want to change the sky because the sky
contains a blue color, choose the blue color here, choose the blue
color and start to increasing the blue
percentage like this. And then maybe you can
reduce the increase little bit to this screen,
little bit increase. And then this one. So okay. More less like this, right? This is before, this is after. Yeah, I think it's
more natural, right? It's more natural
for some reason. Don't forget you can also
adjust this opacity like this. All right. So this is the way we using the
mixer Channel Mixer. Next we will move to the
next adjustment color is gradient map. This is very interesting. The gradient map, we will
combination with threshold. So what looks like
the gradient map, combination with threshold.
See you in the next session. Untitled. Let's save I'm gonna give
the name Channel Mixer. Mx So hello, everyone. Let's move to the next
adjustment layer. We talk about the criterion map. So this is one of the unique
unique adjustment layer. So before we doing that, let's save this
document first, right? And I'm going to
create new document like refuse, create document. So as a Timo I'm
going to use Right. And then let's move to
change the dimension. Uh
50. Gradient Map: Change the Tone Color by Gradient We Make: So, hello, everyone. Let's move to the next adjustment layer, we talk about the criterion map. So this is one of the unique
unique adjustment layer. So before we doing that, let's save this
document first, right? And I'm going to
create new document like refuse, create document. So as a demo I'm
going to use Right. And then let's move to
change the dimension. So I'm going to import
this image to here. Again, I must change
2000 by 3,000 here. Next, so I'm going to show
you how to gradient maps works. We choose the gradient map here. So when the beginning when
we click the gradient map, the gradient map will
automatically give us this red, green,
and blue color. This is the basic to identify
hat midtones and headlight. This is the red is
representation of shadow and the green is representation of midtones and then blue representation
of headlight. This nut doesn't mean the red is more darker and the
green or the blue, but this is just
like to identify. Oh, this is the red
color is a shadow. Green color is midtones and then blue color
is a white light. Okay? We can change this
color like what we want. And we change to this one. For example, over soft light, the result will be like this. And we reduce the opacity,
result will be like this. That's like after before
before, after. Before, after. The result will be like
this. If we just using RGB, the default like this opacity, this is not convenient. Is not lasting on the
eye because we need to change this color gradient map. We move to the normal. So let's change this color. So for this case, I'm going to change
this one for example, I'm going to change the
blue for the shadow. The shadow I'm going
to change to blue. And actually, we can delete
first. We can do it first. So basically, to
make it more easy, this shadow, I'm going
to choose a blue. And this headlight, I'm going to choose maybe the
yellow like this. So this is like make
more easy to us. And if the color like this, the shadow is blue, and
the headlight is yellow. So automatically
in the midtones, is like the transition of
blue to yellow, right? And then if we
change to multiply, for example, like this and
reduce the opacity to 50. So this is before,
this is after. This before, this is after. So the gradient here means we can control the shadow and the headlight
at the same time. And then we can also
set for example, I'm going to use maybe like this and this one is more
stronger like this, like this. So this is normal, right? And, if we change blending mode to normal,
we'll be like this. This is before, after. Before, after. We can reduce to 25, for example, and before, after. And for example, if we change the shadow to more
darker like this, if this is too much, we
can reduce like this. We can also set Okay. You can also change
the demo multiply maybe it'll be like this or lighten. Yeah, this is before,
after before, after. We can strengthen
these two 50%, right? So you can change
to multiply and reduce opacity or
lighten or overlay. This one overlay so
strong. So strong effect. Maybe 25% if we
change to a form. So you can change the
blending mode to normal. darken is also apply darken. A soft light like this. Just reduce the
opacity like this, and this is before
before, after. Okay. So the nuance
color is depend on our here because for
example, this leaf. So the color here, we cannot change the
individual color. The color we want
that we can change is a the color that contain
headlight, shadow and midtones. For example, what if I change the highlight
to green like this? And this area and the highlight will more greener, like this. And this shadow maybe I'm
going to change to yellow. Like this. And this, I'm going to change
to maybe to blue, like this. This is before, after. Before, after, like this guys. So this is the way we use
gradient map and the normal. If we use the normal, maybe we reduce to close
to 25% or maybe 10%. This is before, after. Maybe just a little
bit change right, we increased to 50%. Before, after we change
to multiply to get more stronger effect
or to overlay. The blending mode we use is
one of them is a multiply, overlay lighten or maybe
so many things, actually. But let's using the
overlay like this. And this is before
after before after, like this to here and
I'm going to, you know, change the document dimension
because the picture we want to import this
one is this one. I'm going to import this one. This is also the same. Like previously, let's we
add this one gradient maps Gradient map. Remember, this is a
representation of shadow. Maybe I'm going to choose because this shadow is
a content of green. So maybe I'm going
to make this using the close to green like this, for example, the shadow,
close to orange. Just close to orange
like this or wrap and this one. Like this. And then click this one. Oh, this will be like this.
I think it's not good. This normal, use blue, and this one is more
yellow. This one. So I'm going to delete first, til it first, right? From Blue. Or tend to green like this. And then this one, I'm
going to choose a yellow, tend to orange,
orange, like this. And in the middle,
I'm going to put Right. Like this. It's the same
like before. So let's move. I'm going to use red use
this opacity like this. So it's like giving the
vibe of sunset, right? So this is like in the
sunrise in the morning time. This is the afternoon, right? Before after. So we can still control in this shadow because
the shadow, for example, green, we can make the green
more darker. Like this. You can see here the cream is darker and the highlight
light is brighter. We can also change the heat
light a little bit brighter. This one, too, shadow,
the shadow of this part. So what if we apply the gradient map in the photo on the picture
of person, right? So I'm just copying this one. Yeah, I'm just copying this art part and delete
this eiffel tower. And then I'm going to
use this woman person. Yeah, I think. We often use
this image, too, right? But yeah, it doesn't
matter. This one. So if you can see this is the highlight and the
highlight is similar to this cloth and then also the highlight is
similar to this phase. But the shadow, it will
fall off this syal. It will cover of the syal in the shatto because the
shadow tends to dark. And then the midtones tends to yellow also midtones also
similar to the first two. So this is the highlight,
highlight, the cloth, Midtones and then this is the shadow. So we apply in the gradient maps. Here, gradient maps, here. Green is midtones and
blue is a highlight. So I'm going to
change to maybe blue. This one I'm going to change to I'm going to delete
to make it more easy, right? I think pink is not
bad though blue, pink and in the midtones, I'm going to choose and I think this one. But for this one, I'm going
to give the dark color. This one is close
to blue like this, more or less. So, which one? The crowded the layyer
start to crowded guys. What is this? I tell it. Okay. So we can reduce to 25%. And then this is before,
after before, after. We can also make
it more darker in the shadow or increase
to 30, for example. And then the midtones, we
can experiment the tons. Maybe, oh, I'm going
to use this one pin. Oh, that was so cool. Here, pin. And then this one, we can also experiment this one. Okay. I think this
is before, after. Before, after. So the
unique of the gradient map, we can adjust how much the shadow the shadow of this nose for this
nose for this area, you know, the shadow we
can adjust the strong. We can choose a strong or not. When we close to the
tuck is very strong. When we close to the light color is the shadow will be, you know, like faded and then the
face is full of white. So yeah, I think it will
be awesome like this. Like the shadow is
really strong, right? Okay. So maybe I'm
going to change the multiply to
multiply lending mode, and increase or to
overlay to make a strong soft light. Like this. This
is before, after. Before, after. Before after. Before, after. So the unique of the
gradient map here, we can how much how
deep the color is, how deep the shadow is, how deep the tons or
how deep the highlight. We can make the highlight
more timer or more brighter. This one is original and after
we apply with gradient map. I'm going to say I'm going to type the next adjustment, we will talk about
the selective color. So see you in the
next session when we talk about the next
color adjustment.
51. Selective Color: A Way to Subtly Adjust Colors: Lets continue our practice
in Adjustment layer. Previously, we have learned
about the gradient map, right? We have learned about the
gradient map, and right now, we'll continue to
the next Adjustment layer, the Selective Color. The Selective Color here
means I think it's more or less is similar to the
HSL, but it's very, very subtle because
the difference or the enhancement of the color is not as
strong as the HSL. We can still improve
the color individually, we can edit design, magenta, yellow and black, and we can also go on
the individual color, which one the color
we need to boost. But it's very subtle, and then the improvement
is not much. But how it works,
let's learn together. For demonstration, I'm
going to use this picture. This one. Just and drop here. This is the watermelon image, and also this one. This orange. Slice. So I'm going to this one to explain
the selective color. Maybe I will go maybe
I will rename with this orange and then Watermelon. So let's learn about
the selective color. I click this one. We discuss first about
this one, this watermelon. I click the Adjustment layer and then add the Selective Color. To enhance this color, we can see here this
is in the color, we can choose which one color
we need to boost from red, yellow, green, ion, blue, magenta white, natural and
black Because for example, I want to boost this red color. Right. To doing that, make sure that the selective color
in the top of watermelon. And then I choose the red color. And because the red color
containt magenta, right? And the red color
is around magenta this one, magenta here. And to make it more boost
because I think it is boost. We can also still
post using cyan. We can rectus the cyan. And then the result will
be more stronger, right? Will be more stronger. So when we remove the
cyan like the science will remove this some
detail like this. And make it the red
is more stronger. So what if I want to put this
area, this watermelon pill? Maybe we think that this
is the green color, but actually it's not because if I just the color picker
here and bring them here, actually, this is
a yellow, right? Because this is a yellow,
we go to the yellow. But if you still that, what if I use green? If we choose the green
to boost this area, and then there is not a changes not changed much or maybe it's not changed
at all, right? Just a very subtle
change because the base of this color is
yellow. So green. So we can go to the yellow, and this one in the yellow, we move to here. Then the result, this is
before, this is after. As you can see here,
this will improve because the base color
from here is a yellow, not a green like this. So this is very, very subtle
in a change in the color. If you curious about
how they works, if you pay attention
closely here, this is the red. Red color is in here, and then the opposite
of red color is cyan. So if you want to
improve the red color, maybe you can still improve
by reducing the cyan. Here is very strong. But it's kind of different
if you in this position, if you make the
cyan more strong. So the color is not, you know, like, post anymore, but it will pop up, you know, some detail here or the
color is not strong anymore. Remember, guys, when the
selective color is not containt any color because as you can see here, as I mentioned before, if we want to edit
in the red color, the opposite of the
red color is a cyan, and then the clus of red
color is a magenta. So we can edit the
magenta and cyan. For example, when I moved
on the yellow, yellow, we can edit yellow here, and then the opposite
yellow is a blue. So maybe blue is
close to the cien. And then if we chose
a cream, right. So the opposite of
green is a magenta. The close of green is a yellow, and then we can edit this
one around this one. And then the opposite
of green is a magenta. So we can reduce the
magenta or induce the magenta to get the
effect is more strong. The red opposite of cyan, the yellow opposite of blue, the green opposite of
magenta, something like that. So that's why it's not
containing all of the color, but we can also choose
the target first. The target, the color we want
to move. We want to change. And then we can edit
in here, Cyan magenta, yellow, so move to
the next picture. Maybe I will bring
this selective color to adjustment to watermelon, and then we can click Selective Color again and then bring the selective color
to inside of orange. So we will experiment
in the orange. This one, for example, if I want to post this
yellow, yellow color, right? I want to post the yellow
color, maybe this one. And then because the
yellow opposite is blue, and then we can edit this
one, yellow color and blue. If I push it like
this is so strong. But if I increasing the blue, the ion and the yellow, maybe it's not as
strong as before. But when I click the opposite, the saturates more pop
ups the more strong. If the yellow, I make it here, make it to increase, and then the con I
will reduce here. So the yellow will,
you know, like, more outstanding
because the influence of cyan is not strong. So the yellow will comes
out with the strong color. And then maybe we just edit the magenta to make
it more orange. Or we can adjust a
little bit magenta to make it orange like this, or maybe to make it
yellow more stronger. But this is like
oversaturated, right? So we lost the all of the detail. So maybe I will increase
to make it this orange from the
yellow to orange. This is before, this is after
this before, this after. This is the version of the
subtle version of HSL. Because sometimes when we HSL, we hard to choose the red color or maybe we can still make individual
color like this. For example, I'm going
to add this HSL here. Let's say I using HSL and I deactivated the selective
color adjustment. Here, we can increase
saturation here. But it is a very, you know, like harsh effect. So the selective color is
a version more subtle. The selective color offer
more subtle result, but again, it's not as
strong as the edges. So more or less is like this to enhance the color.
I will give name. Like the color. Si. So next, we will discuss the
next adjustment layer. The next adjustment layer
is a color balance. So see you in the next
adjustment layer.
52. Color Balance: Ehance Color in Shadow, Midtones, and Highlight: So let's move to the
next adjustment layer. The next adjustment
layer we want to make is a color balance. So the color balance
I think this is a very unique features, right? So to discuss about that, let's create let's
create the file, click new this one DPI 72
DPI and create document. And to experiment with the
color balance Color balance. So I'm going to
use this picture. This one. All right. So this is like, you know, like this picture contains
this one. This is highlight. This area is a shadow area, and this is area
full of midtones. So this is, like, maybe suitable for experimenting
the color balance. So let's click the color balance here to influence this picture. And color balance is
actually similar to the Curves, Curves layer. This is very similar.
This one, Curves. This one is very
similar in some reason. People we talk about multiply. So let's go to explain
the color balance first. So here, here, we can
change the tonal range. We can change the shadow,
midtones and highlight. If we change the
midtones, right, because this is a has the highlight as the shadow if we
choose the midtones and then maybe a little
bit change to here, so it will change all of them. It will boost all of the color to more cyan or
more reddish here. So the highlight and the
shado is not changed much, but it will change the
midtones color, right? We can also change to the
magenta or cream or to blue. So actually, I think this is
similar to the white balance, but well, wet balance
it will, you know, like the balance
between warm or cold. But this is we can change
the individual color. We can change to the
red or change to magenta to cyan to
green, yellow, blue. We can change
individually, right? This is more reddish, cyan and then what if I change to the shadow or turn
the headlight first? Because this area
is a highlight. The more brighter area
is a headlight, like more saturated
of exposure. Yeah, I think the sun
is a part of highlight. If we change the highlight, maybe the sun is because
the sun is a yellow, maybe I will move to the
yellow here or move to here. So it will post the headlight. It will boost the
highlight part like this. This is the same as
you can see here. So the highlight will
boost much like this. It will ask me the same
in the red, like this. So this is the highlight. Maybe I will boost to
this one or this one. Yeah, this one to
push the highlight. And what if this is the shadow? So I'm going to maybe I'm
going to click Reset. The shadow is contained in this
area, right in this area. In this three area is a
content lot of shadow right? So if I slide the shadow here, so it will boost in this area. It will boost in this
area, the tree area. And also the house, the tree in the house will influence a lot with the shadow. And then the height lot
is not influenced much. Because this is contents of
red or cyan, maybe I will. For example, if I want to change to green,
for example, here. For example, if I want
to change this grass, green and then some shadow in this tree, which
just click here. And then this is very easy. Very easy to change
boost the grass. So again, the how we use is the first we have to decide
which one we need to boost. Shadow, midtones or highlight. If you want to change
the overall five, we can start with
the midtones, right? And then we go to the sign if we need a little bit blue or red. Maybe I will go a
little bit like this. And then if you want
to boost the headlight, you go to the highlight
and then change this one. Maybe I will highlight
to blue like this. And if you need a shadow, maybe shadow little bit
green, for example. So this is before, after. Before, after. So this is very subtle taste. It's not like the adjustment and the color balance because just
only change warm and cold. But the thing is, let's I explant first. The actual is, if we click
the highlight, I read first, the principle of this
color balance is similar to the Curves. Let's I explain. If I choose this one, the highlight and move to
the green, for example. It's similar similar
to when I click here, click Curves like this, right? And I chose this red and
maybe I will deactivate it in this color balance and I move this one because this is the
headlight area, right here. So because the
curve is so strong, right, it's so strong. And then let's we evaluate it. This is Curves adjustment. And this is color balance. As you can see, you can find
the similarities between the principle is
Color balance one this is curve adjustment, and I deactivate it and
click Color Adjustment, a color balance adjustment. So the principle is more
or less is quite the same. Here, I is too much, right? Like this, this
is color balance, I deactivated, and this
is curve adjustment. It's a similar similar result. So I uh, so let's
move to the shadow. This shadow actually the same. For example, if I want
to change this one, this green area, right? This is Shadow, green area. I will put in the
green area like this. If I put in the shadow the
green shadow like this, this is very similar the principle in the
curve adjustment. For example, here, I
deactivate it this one. I click Reset first. And for the master, I will choose the
green for example, because the shadow is
in the bottom area. So we just simply
activated in this one, bring the shadow to the top. It's like increasing
the shadow like this. So this is from the
curve adjustment. This is from color adjustment. Similar, right? Curve
adjustment, color adjustment. Curve adjustment, color
adjustment is a very similar. So basically, the color
balance is I think this is. I think the color balance is simplify from the Curves, right? The color balance is
simplify of the curves. And then we can just click which one the tonal range from the shadow
midtones and headlight, and we choose the target
the color we want. Maybe I will start
with the highlight. I'm going to increase this
area highlight to maybe a little bit blue and red like
this and move to the shadow. Shadow, I will improve. I will also increase the
ion ion and blue like this. And the or mobil a
bit green like this. And the midtones, I'm going to, you know, maybe just like this, increasing the red and the
magenta, maybe and this one. So this is before
after before, after. We can change the color. It's like more subtle
than the curves and also more subtle
than adjust adjustment. So this is the
color balance offer. So let's move to the
next adjustment layer. We talk about the invert. We talk about the invert. So see you in the next session.
53. Invert: Convert the Color to Opposite Color: Okay, so let's move to the
next Adjustment layer. Before we doing that, let's save this document to color balance. Then for the invert adjustment, I'm going to copy this
one this selective color. I'm going to copy because I'm
also using this material. So I copy this one to invert because this
picture is simple and then it's a perfect to,
demonstrating the invert. So I just delete all of them, delete the adjustment layer
that still in this material. Okay, so I'm going to
explain the invert. We have this one, the orange layer,
watermelon layer. So let's apply in this invert. So the invert is basically
just invert the color. So I'm going to
explain. Click here. So let's move to the
watermelon first. Click invert like this. I'm going to put invert
inside of the watermelon. So this is before, this after. And we we don't have
any setting to invert. It just invert the color. For right now, I'm going to explain. Before we invert, this
contain a lot of red. As you can see
here, this is red, and the opposite of red is cyan. So that's why this
area, red area, if we activated the invert, we'll convert them to
can this similar, right? From red to cyan. Next, this is yellow, yellow to similar to green. But actually, this is yellow. Yellow, the opposite with, you know, like this one, blue. And then maybe a little
bit to maybe blue. Yeah, more blue. So when we activate
it, this is blue, close to the purple or here
because this area is here, here, and then the
original color in here. So this is opposite, right? And then what next? This one here, is a part, right? Purple close to here. So this is basically
this opposite to change the color opposite on the opposite color wheel like this. There is no other other setting. For example, this one.
So next this orange. I click this one, this invert, and automatically
it will invert the color. Because this one, this is
blue. This is blue here. So the opposite of
blue is orange. So that's why it will
convert to orange. And then because this is a orange color and then
the pgrony blue is a blue. So it will just convert all of this orange to
blue like this. So this is opposite
direction, right? Is opposite direction. So that's the inert
adjustment layer just to invert the color, pass on the opposite color. Science to red, blue, to yellow, green, to magenta,
something like that. Next, we will
continue to next step to the next adjustment
layer, maybe which one. Maybe I'm going to first with the Split Toning
and lens filter lot and then see you in
the next session. I'm going to save this one. So I'm going to split invert. demo. Rename and for demo.
54. Split Toning: Recolor Highlight and Shadow: Okay. Hello, everyone. So let's continue our next practice. And the next practice, we will discuss about lens filter, Split Toning, lens filter, and LUT. So let's discuss. Next, we create new
DocumenTmo create Documen. For this demo, I'm going to
use this picture, this one. Yep. Because this picture contains this area and the
sky area is a highlight, and this building, a
lot of shadow here. It's a perfect to experiment. I think I'm going to use
this one, two, this picture. I'm going to import this one. previously we using this picture to experimenting the color
wet plans, right? So because in this
picture this yeah, also has this is
full of highlight, and this is also a shadow. Maybe I will put in here. Okay. So let's discuss
about this picture first. We will discuss about
this split toning. So the split toning,
is like white pans. So we can say that the
split toning here is to change the color
at light and shadow. It's basically maybe
similar to hue saturation, HSL, but also similar
to white balances. Yeah, it's similar to HSL because as you can see
here, this is highlight. We can change the color
on like in the HSL, and also we can
change the shadow also in the shato then this is the saturation and
shadow saturation. So basically, this is the HSL, but the focusing is on the
headlight and the shado. For example, like this, if I want to change
the color of sky, I just I just choose the
sky color we want. I want. Maybe I'm going a little bit
too purple, for example. And let's like this highly
saturation like this. This will become purple, right? And then the affected
is more on the sky. Is less affected in
the building because the building is full of
a lot of shadow here. But in the sky is a
lot of headlight. Change the color
to maybe to blue. So this is a pffter
before, after. It's more vibrance,
it's more saturated. So in the split tonning here means it will split between hue, between highlight and shadow. So the next week, I'm going to, you know, change the
color in the shadow. Maybe I'm going to change
color to as you can see here, even though I choose the orange, but because I chose
the shadow part, so the affected it is
only in the shadow. So in the building, for example, it will change the
color from, you know, like from from just a little bit dull to
more saturated like this because this is before,
after before, after. So the sky will boost on the saturation and
change color to blue. And then this one, the shadow, also post the saturation
and little bit orange like this or to brown to
pop up brown color. So this is before, after. Before and after. This is the split toning. So move to the next image
to the next picture. The principle is the same. I I add the split toning
here, the split toning. And then for example, I move Tund a little bit cyan or blue like this and move
to highlight saturation. And then the sky will affect
it. The sky will affect it. This is the saturation here. But this building object is not much affected because this
is contain the shadow. So let's we moved to the shadow. I'm going to move I'm going
to change this one to orange. Same, and then change to this one orange
or maybe to blue. So you can see here to purple. So even though I
chose the purple, but the sky is not
really affected, but the building
affected to the purple, only in the building
that affected, right? If I change from the purple
to greens also the same. The green will
influence the building. So this is the split tone here
means using HSL adjustment, but the focusing on the
headlight and the shadow. And this is split toning
influence the picture. This is after before,
after before, after. So maybe it's like it's not natural when we
choose the purple. Maybe I'm going to
blue or orange. Right. That is too much, right? Yeah, I think like this. After before, after we using
the Split Toning move. Right now, we will talk
about the lens filter. So before we move
on the lens filter, let's set this one
for Split Toning. We move to the next part. We talk about lens filter.
55. Lens Filter: Add Certain Color Like Lens Camera: Previously learn about the splittone. And then right now we're
focusing to discuss about Lens Filter and LUT, lot. And this is very exciting.
So let's discuss. Okay, I'll create the
new document like this new document
and create document. And for this demo, I'm going to utilize, for example, Oh, because the artboard, I'm going to change the
RPO to 2000 by 2000. Okay. And then I duplicate this layer. I delete this image. For example, I will put
this one, for example. Yeah. This lens filter is basically the lens the filter that maybe we often
using the camera. So the camera here
means on the lens, we can adjust or we can attach
the additional lens like lens filter to bring the effect to certain effect
based on the lens we put. So yeah, here means
the lens filter. It's basically to cover
with a certain color. And then, yeah, similar
to the lens lens filter, maybe if you find or
search on the Internet, a lot of lens filter. We can attach on the
cameras, for example, or maybe if you have
if your smartphone, that available lens filter features on the setting, yeah,
something like that. Doing that is simply
we just click here, Lens Filter and the
filter color you want. Maybe blue like this
to give a warm effect. Like this, also,
this one, this one. So we can check the perserve luminocity or not
depends on your need. Example, we're focusing with this one and then
change the color. Maybe in this one, for example. And then we can also preserve the luminosity or not
depends on your need. You can see here in some
highlight still the same. Some highlight the same, but when we uncheck
preserve luminosity, highlight will influence. It also depends on your need. Which one the best? I think like this. And
this is before, after. Before. This is
the original one. I think the original one using similar filter color using the green, more greener, right? When we move to the
filter color with purple, the result will be like this. This is simple to use the
filter color or click Preserve luminosityy to
preserve the highlight or preserve to preserve some
Tita highlight like this. And then let's move
to the picture. We click we also click the
lens filter like this. So it will influence
this picture because this is
close to the flower. I bring, you know, like the flower vibe, close to the pink or purple
like this. Just like this. Maybe increasing the density,
the optical density. This is close to the original, and this is maybe 99% 90
69 or 60% or just 50%. This is before after
before, after. Because this is the
background cherry blossom is similar to the pink color. So I think, yeah, to choose the pink or
purple is a good one. So this is before, after before, after simple lens
color here means like we put the additional lens on the camera before
we take the photo. And then we can change the
color depends on the lenses. Just simple like that to
using the lens filter. We moved on the LUT. So for the LUT, I'm going to using the
same material like this. So I think I'm going
to delete the, you know, the lens filter. I delete the lens
filter to bring the original one to
experimenting with the LUT. Here means click
Adjustment layer here and then click LUT. So lots contain a
lot of settings from more than one
color adjustment in the inside in the setting. So we can choose loading the LUT. For example, you can download
lot on the Internet. So for the lot, you can
download on the Internet. For example, I use at four
tra, 800, for example. So the LUT, it will consist of file that
has be extension, right. When we click here, and this is it will enhance a
basical to enhance the picture, but consists of more than one
adjustment layer setting. So the inside is a
lot of settings. And then we just import
the file, and, yeah, we can literally change the image, for
example, like this, this is we change we
move to this picture. Click here. Click LUT. load LUT of the example, I use this one and
then like this. Before after before, after. If you think this is too much, you can read this
opacity on this one. Before after, maybe
it's not change much. Maybe I will increase the
opacity to 50 before, after or to experimenting, again, I'm going to
import this one. For example, this This would I think I'm going to create the
additional artboard. No. Change the color for 3,000 like this and then
put this food like this, for example, and
I apply some LUT. Here, click load LUT like this. This is before. Oh, I delete this one. So this is before, after. And for example, I think
this one, this Burger. So let's find out which So the important part is LUT is not suitable for
every picture, right? So for example, in
this one, this one, this food, when we
apply some LUT, so the result maybes not suitable for
this picture, right? Maybe it's not suitable
for this picture. This is here. It's not suitable. It's not suitable
for all picture. But for this one, for example, this is before, after
before, after. Like this. Before after, maybe I
will increase using some Curves to boost
the highlight, to help the lot to help push
the highlight a little bit. So this is before,
after before, after. Before, after. So a lot will automatically
enhance the color. So different lot,
different purpose. Usually, on the Internet, you can download so many LUT. It depends on the topic. Maybe, yeah, for food or traveling or wedding or
graduation, so many things. But again, lot is not
suitable for every photo, but yeah, we can
experiment about that. How to use Lot is like I
give the example previews. So this is a lot, how it works. So move to the next session. We talk about soft proof see
you in the next session.
56. Conclusion: Hello, everyone.
First, I would like to let you know that this class
will continue in Series two, so you can access the
Series two class through the link that I have
put in the description. In Series two, we will continue our learning journey with Affinity and explore more
features in greater detail. We will discuss filter
effects one by one and then continue with
blend modes and brush tool. For Series two, we will use the same material that
used in Series one. So you do not need to
download the material again. You can simply continue
learning as usual. Of course, Series two
will also include many explanation and
practical exercise, just like in the Series one. This way, we can continue
learning together and applying the different features available in Affinity to our design. Thank you for following this
class until this point. We have now reached the
conclusion section. In this section, I would
like to summarize some of the important points that
we have learned together. The first thing I would
like to emphasize is the importance of understanding and mastering the basic tools, especially the tools that we use most often in
design process. This is not only important
when learning Affinity, but also when learning
graphic design software. If we're moving to the
more advanced topics, we need to understand the basic tools that are
available and how to use them. That is why in the
first session, we focused on explore tools. By understanding the
different tools, we can more easily
decide which tool is the right one to use for a particular design
case or project. We have also learned about the user
interface in Affinity. In general, Affinity has
Vector Mode and Pixel mode, and each mode has its
own tools and function. We explored many different
tools such as Pen Tool, selection Tool, brush tool, Shape tool, artistic
texts, and many others. After learning about the
tools and the user interface, we then move on some of the fundamental
features in Affinity. Some of these concepts
might also be found in other design
application or software. One of them is adjustment layer. Adjustment layer are
an important part of the design process
because we often work with colors
and visual modes. And with adjustment layers, we have many options to adjust
elements such as a color, highlight, exposure,
saturation, shadow, and midtones and much more. Basically, the main goal
of this course is to learn how to use the tools available in Pixel
mode and Vector Mode. Well, also understanding
how to use features such as
achievement layer, filter layer, and bland modes. Once we have learned and started to understand
these fundamentals, designing in affinity
will become much easier. We will have a good
understanding of the basics, and the next step is simply to practice using the tools
and features available. We have done
throughout this class, we have created different design and completed many exercises. Through these exercises,
we can better understand the process of
creating design in Affinity. Everyone, please do not forget to leave a review
for this class. I truly appreciate every review you share because
your feedback can help me evaluate the course and create a better
class in the future. Also, do not forget to upload the project that you created
during the exercise, including both the
main project and the other exercise that
we completed together. By sharing your work, you can also inspire other students. As a final tip for me, learning design may
take a long time, and during the process,
there are maybe times when you feel
challenged or even bored. However, no matter how much
progress you have made, do not forget to appreciate your own work and achievement. Every design and every
project that we create is part of the learning process
and a sign of progress. Each experience will help us move one step closer to
becoming better design. Once again, thank you very
much for joining this class. I'm very happy to
be able to share my experience and learn
together with all of you. I'm Fathoni Ashari and see
you in the next series.
 Fathoni Ashari, Design and Content