Transcripts
1. Intro: Hello. My name is Ruben Kaba, and we're filming a skill share on action sports photography. I'm a action sports photographer from Squamish B C, and I shoot primarily mountain biking and skiing. Throughout the year. We're out in the Squamish Valley with mountain biker Kevin Landry, and we're going to be trying to capture imagery that shows action shows landscape and tries to help walk you from learning how to use your SLR camera in manual modes for sports and trying. Teoh, apply that toe landscape high moments of action, getting creating clean, crisp images. And then after this, we're going to go back to light room and look at those shots and see how that they worked throughout the day. My imagery is known for great landscapes, creative concepts and going on massive expeditions around the world to really interesting places like the U Gone Alaska or northern Norway. This course is gonna be good for a student who wants to learn more about how to use their SLR camera in their manual functions, but get it to work really well for action with fast motion to create clean, crisp images and then also capture a landscape around them and how that applies to any sport. Though we're only shooting, shooting mountain biking today, we're gonna be looking at it in a way that applies to anyone who has some sport that they're covering. So if that's rock climbing, if that's surfing, if that skateboarding in a city, this lesson still gonna be great for you, what I look for when I'm out shooting is great landscape that's going to be ableto be captured with a rider inside of it that shows the wonderful places that we get to explore or also peak actions, something that's really impressive on a mountain bike or whatever sport it is that you're shooting and trying to just capture how impressive it is that these athletes do amazing things in their own sport. And after this entire lesson, we're gonna be able to create imagery that really speaks to the people who want to see this imagery as well, not just a mountain bike shot. That amount Hikaru looks at and dismisses, but something that's gonna capture them, something that captures a unique perspective of the sports that really stands out amongst the rest, the imagery that you might see online or on Instagram day after day
2. Examples: all right, we're going to start off by looking at some imagery of mine that shows examples off the different types of skills that we're gonna be working on today. Uh, there's a bunch of things that aren't f stops and apertures that go into making a good action. Sports photos. If anything, it's actually what more makes an action sparked. Photo successful or non successful? Uh, so we'll just jump right into it. This shot here is of my friend Reese, riding in Calgary when there was just a snowfall that didn't stick to any of the trail. So we got out early in the morning and when made some shots. And there's a lot of things going on in this that really, really work to show what we want out of photograph. The first thing in action photograph is the fact that is action. So you can see here that he's leaned over in the corner, and that's really, really key for any sports photograph because you need not only something to be happening. That's interesting, but you want the athlete to be in a position that indicates that they're moving really fast here. If Reese was going through this corner very slowly. He wouldn't be able to be leaned in the corner as much as he is, and that really conveys the fact that he's moving fast. So in any image, you want to help have that show how fast the person's moving. If he was in this little piece of the trail here, that's flat and straight. He would have been standing up straight on its bike and he could have been tracked standing there. Or he could be going 100 kilometers an hour and you would have no idea the next thing in the shot that we really can learn from this so well, cause it's such a great black and white is this ribbon of black dirt. It just shows you exactly what's happening in this photo. So that's every image that you wanna have of action. Sports is going to show a story of where they came from, where they are in action and where they're going. So this shot and everything else that we're going to go through shows that all of the time this shot here is a little bit of a counterpoint to that one. It's almost what we call a guy in the sky shot where some photographers will point out of athlete but include no reference, no contact content of where they are. But here you see where he took out from. And you can assume that there's snow down here in front of the photograph because of where he is, and you see that there are mountains around. So some of the times you can break the rules and get really, really close to breaking the rules and still have it work. This is what I would say is a bit more of an action primary photograph, where it's less about the scene and the context of where he is and more about the biking that he's doing. So this is obviously a stroke shot, and it has a whole bunch of other technique that we're not working on today. But what is important is just how interesting the biking that east doing is that he has this bike completely sideways, and he's just a little bit off the ground, which is so hard to do on a bike. And sometimes you simply want to get the photography out of the way and the context out of the way just to show a really, really good athlete at what they're doing. And then the rest of this image that you're seeing here. It balances out because there's negative space here so that it's not just a simple Kenny sideways in the air, right in the center of the frame. But it still leaves, um, distance for him to move across. This is, ah, image of a guy named Marcus Wareing skiing out north of Whistler, and this is what I would refer to more as an environmental action shot where the skiing is in and the skiing is impressive. But it's almost more about everything else in the frame that makes it so cool and that the athletes in there is just another point of importance. So there's a whole bunch of story in this image. You can tell that is coming down the slope. He's in this corner, he's going down the rest of the way. But then you also get to see this boot pack going up and down. Has all of this story happening then all of this environment, all of this beautiful landscape that you really want to show off so we'll try to make some environmental action imagery out today when we go out mountain biking where we're actually focusing more on everything. But they're writing and they're just making the riding happen in a spot that's photogenic. This is a shot that we're going to do our own version of today, and it's a panning photograph, and you've probably seen this type of thing down all the time with race cars. And they do this type of shot with race cars all the time because a car that's perfectly still and crisp on perfectly in focus ground doesn't look like it's moving at all. So this image, uh, you use a long shutter speed to make everything else but the rider be in motion. So as Stevie here's riding down the trail, I'm moving the camera in the same speed is him on. By doing that, you get this clean, crisp image of the person and the entire background moving really quickly, and it's a great way to convey motion and speed. Uh, when in other situations it might not look that great, and these ideas that I just talked about, I showed you a bunch of act of mountain biking entry, but it works for pretty much all sports. Uh, that you're looking for a story through an image clean, crisp action, uh, sense of landscape. And the story of where they're coming from and going to this is ah, cool are that I skied near Squamish with my friend Tobin and you can see where he came from is he's inching down the slope before he starts making turns down it, and you know exactly where he's going. It creates this drama of this entire story, even though he's not actually in motion. It creates this sort of gripping photograph where you're anticipating what's going to happen next, or this shot here is of Alex in the allusion Islands in between Alaska and Russia. And this shot is one of her environmental, uh, seen images, and you see her in this massive, vast landscapes were skiing down this volcano and that ah, story in that setting is, if anything, it's almost more than Alex. There on the slope. It's more about everything else where you want to look at the image and, oh, there's action that makes it even better on the side as well
3. Project Assignment: for your skill share assignment. We are going Teoh, be trying to follow those rules that we have for action sport imagery. We're trying Teoh, uh, capture moments that are have dynamic body position somewhere that conveys the idea that they're moving really fast, not just standing up flat on a bike or on a skateboard. Then we're going to try to tell a story through an image somewhere where they were, where they are and where they're going, and then finally trying to capture the peak action off that sequence. So the very, very best frame that conveys the most dynamic shape For that we're gonna be deep. Be trying to create three images. The 1st 1 is going to be one of these environmental action images which convey more about the place that you're in. Then necessarily just that one, uh, moment that's happening for the trail. Something that's, ah, a lot about, uh, escape park that you're in the city that you're in. If you're shooting waves on the ocean, whatever that might be, then we want to do a panning photograph. Ah, shot where you're using a slow shutter speed to create, uh, the feeling of motion and that the persons traveling very quickly the third image is going to be the peak action image, which is going to show more detail of what's going on, where you're really getting in closer and tighter, to try to convey how impressive whatever it is that your subject is doing and try toe yeah , really key in on them.
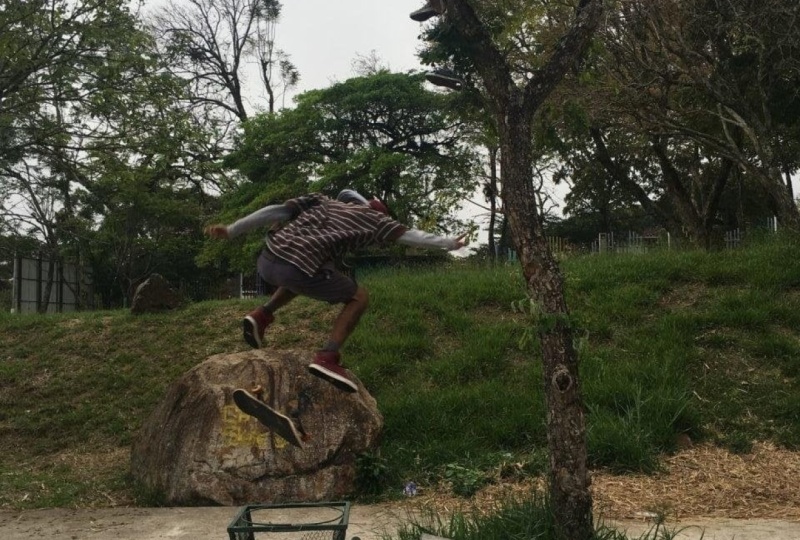
4. Enviromental Action: All right. So here, we're gonna be working on the environmental action image where it's an image that is more about the place that a sport might happen and the sports happening inside of it. And we're not trying to create a bunch of images of this. We're just trying to create one specific frame that shows the entire environment. So this is a part of trail that I've written through all the time. While I'm out mountain biking, I have noticed that I love this big cedar tree, and we've got all this amazing stuff happening. Beautiful ferns, which is what you experience when you're out riding in Squamish. So we're trying to create one shot that has all of that and has a great, decisive moment in it with peak action and a story that runs through it and everything else that we've talked about and trying to pull that all together into one clear image. In this kind of image, it's really important to capture the entire environment. But make sure that you've got a really dynamic moment, something that you've got really great body language that shows that the persons in motion . So when I've written through this piece of trail, I noticed that there's a sweeping curve here and then another one just down here. So I know that there's already two pieces of moment movement where you're gonna be leaning the bike over. So up here, I've got Kevin in this corner and we already communicate where you're going to want to be for the shot, and it's going to be within about a meter of trail where the most dynamic moment is gonna happen and communication with an athlete is really key. Hopefully you, Congar oh, out with a person and collaborate and figure out what that is. But you can also do this at a skatepark and make sure that you've got this one place that it's happening and just chat to someone who's even out there skating around and say, Hey, can I take a photograph and try to create something around this one shape? And a lot of the time athletes like seeing themselves and capturing what they do. So they're gonna be able to collaborate with you. Here we go. I turned on the cover button. Yes, let's see it. So here I'm just reviewing the files to see what's going on in this moment as he's coming through and the way that he rode this, there's the moment actually ends up having a little bit of action later where he's almost more sideways after. So I just noticed that and I might try to modify it. So it's a little bit, maybe less interesting for the writer, but it actually is gonna make a better shot where it just clarifies and creates the one moment because all three of these frames air cool. But we only want one. That's perfect. Yeah, yeah, see, you are hopping and then ending x outside. Can you just try to ride the inside line of the corner That so after I shoot an image, I'm always checking to see that I did nail the focus so you can zoom in on your camera and then go through these different files and see what was going on with in detail. So then you know exactly what you're getting. One thing that I did notice after shooting this I have this tree right in the center of the frame, and even though I've got Kevin outside on the thirds, this is sort of breaking up the image too much. So I'm probably just gonna be able to take a little step up to the one side and move that tree off to the one side and still have Kevin on thirds. And it's just gonna help balance out that shot a bit. There you go. Nice one. So now we got Kevin staying on the ground a bit more, and even though he might not ride that naturally, we've got him really leaned over in this corner and he looks like he's going really fast. What she waas is just slightly different from what he was doing before. And we got that tree off to the one side, balancing out the frame a bit more. Yes, yes.
5. Action Primary: all right, now, the weather started changing on us and it started raining. But we're still gonna make it work. We're in a coastal rainforest. You just go with what's going on. Uh, we're not working on an action primary image where you're trying to emphasize and capture what the athletes doing. So it's less about the place. You still have that in the photo, But you are really concentrating on trying to make the action the primary thing that a person is looking for in a shot. Uh, for that we need to make sure that we find the perfect timing in the air where the rider looks the highest and most stylish ID. And then also you need to be giving context the image so that showing for us the trail and the takeoff and the landing as well. That way, you, the viewer, knows what's going on. They understand this little moment that's happening, and it gives they'd rounds out the image that you don't need to see anything else for that one thing to make sense. So we decided to shoot this jump here. It's one of the bigger jumps on this trail, so it's gonna provide the most hide in the air to be making heaven look good. And for any sport that you're shooting if it skateboarding and escape park, try to look for for this type of image where you were concentrating on action, just the most impressive thing and try to wrap the rest of the photograph around that, uh, So Kevin's gonna be somewhere along the distance of the Jumper sitting already. And what I do when I get here is I try not to choose a specific photo that I want right away. I try to walk around and see what's all around me, so I'll walk 3 60 around the job. Then I'll climb around in the bushes for a while and see what jumps out at me. Is it going to be the ferns that are on the side of the trail? Something else that I'm gonna add into the imagery to make it more of a dynamic shot and show more of what's going on around the person. So we're just walking around trying to find what can look good. We're up trail looking down at that same jump, and it's a little bit of ah faux pas for almost any action. Sports photo to be looking at the Ryder going away from you, you don't see their face and you're just taking a picture of their, but most of the time, sometimes it does work. Don't ever be close to something, but is something to keep in mind Most of the time, it doesn't really look right. Uh, first, I think we'll start shooting from the other side. Teoh. Try to stick with sort of those general rules that make good shots most the time. One of the other things that I'm looking for when I'm walking around and seeing what I like in an area is how Aiken simplify the image. Forests are really beautiful when you're walking through them and looking with your two eyes. But when you're looking at a single still image, sometimes I get a bit too chaotic. So we're trying to ah, simplify what's going on. I'm using that word a lot of times, but you're trying to create large blocks of like visual blocks of something so a big tree, or use a specific plant so that there's something in one part of the frame and in the action as well. All right, we are now down trail, looking up at that same jump. So I confined an angle where I'm looking at Kevin's faces. He's coming towards us riding, and I realized that the tree on the left and the trail on the right create this sort of little window. And that's just something that you can always count on for making a great shot, as if you can fit a rider into a little like visual window, our little circle or something that will help isolate them and really help them pop out from the image. And that also works right now because I'm shooting on ah, 50 mil with a really wide aperture, so that background is going to be quite blurry, and he should just pop out nice and vibrant in front of the background.
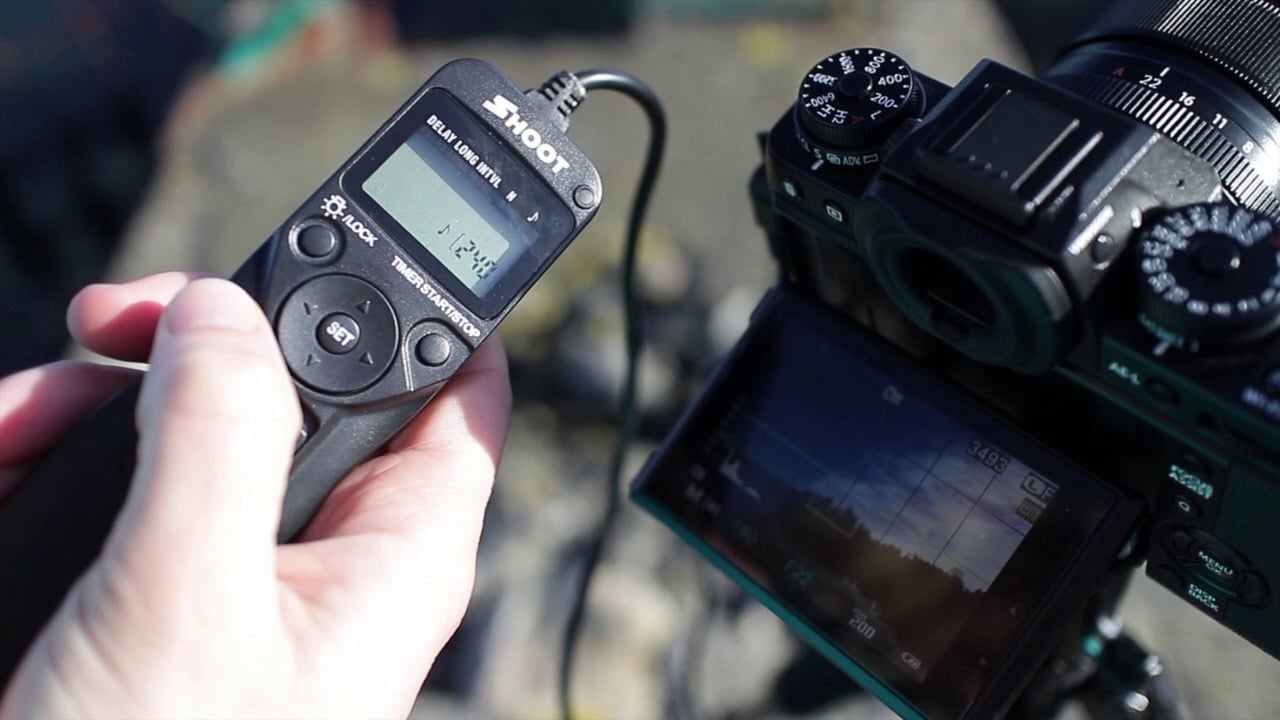
6. Panning Shot: uh so for that last shot, where we were doing the environmental one shooting with a wide angle lens so that you had captured the entire scene. Now we're going to switch over to this panning shot, and I'm shooting from a longer distance, some switching over demise 7200 lens to try to capture detail of him as he's riding along and really convey the motion and the speed that's going on. So we're in this little valley here, and it's really useful for us because then I can shoot directly across from the action. So for a panning photograph, it's really useful when you're completely perpendicular to what's happening. So the rider is going to be going directly across from where my camera is tracking along with him. So if you see this valley here, it has trailed coming straight along one side, and then I can scurry up on the other side and get a clear view of him as he's riding along . So were the other side of the valley here. What I'm looking for is that all have a clear sight line of a lot of this trails that I get a lot of moments where I'm going to be able to get a clear view of him, and I want to be able to see the entire scenes that I get a better, more time to catch up to him as he moves and track him all the way through this. And this is one of those moments where you're just shooting a ton of shots, and it's also just practice doing a ton of these and just working with it and finding that which moment works out. Try it a couple times. You drop a lot of frames when you're doing pounding photographs, but it's just a learning process of what's working. And do you need a slower, slower shutter speed? Or can you work with something quicker if they if they're moving quite quickly? So we chose a cloudy day to come out and shoot in the forest because you don't want these bright contrast e dots of light throughout the forest that your camera doesn't see in a way that look as nice to the human eye. But it is pretty dark, so you have to push how far your eye eso can go and without getting too grainy. But he's panning photographs, help you get a long shutter speed and get a lot of light. So there really useful for one of these days where you have bright enough spots, and if it's too dark, try one of these shots for this kind of shot. You're prioritizing your shutter speed, so the most important one that you want to get good is a long enough shutter speed that you're going to get some motion as you move the camera and not too long that you'll lose track of them in a long exposure. So it's not a one second, and it's not at 1 5/100 of a second, it's somewhere in between, and you play with it a couple times, depending on how shots are turning out. And as you experiment, you'll find what it is your aperture in your eyes. So just have to fit to make that work. So I'm shooting close to Teoh F eight so that more of this is gonna be in focus and I don't have to worry too much about focus. And then I S O is just finding whatever it is that makes that correct exposure. At this point after doing a couple little test shots, just pantomime ing. What? It's gonna look like you confined your exposure and what's gonna work for me. It ended up being 1/30 of a second, uh, aperture of F four and 1600 RSO, which normally you wouldn't need for a pounding photograph because your shutter speed to so long. But today it's really dark. Ah, for the aperture of F four, He's going to be a consistent distance away from me within a range where it's gonna be able to work out. So I know that he's going to be about 100 yards away. I focused on that hill and then I switched off the autofocus so that it's not gonna play with me as we track because you're out of focus really hates panning. It just doesn't like to work with. So on I s o on the other action shot. It went up to 3200 and then 6400 which is almost where I would say I never shoot it that but in some circumstances, that's the only option you've got because my aperture was already wide open and you work with that you don't always want to go to high I s O because it can get a bit grainy. But do you sort of just have to deal with it? Different cameras have a different sort of what I call a ceiling to where you want to shoot with the I s o Range. Five years ago, I would never go over 800 I s O. But now my camera I'm comfortable going up to 1600. If your camera doesn't have that great of quality sometimes just don't worry about that. You're learning your experimenting and you're also posting it toe Web, not publishing it as a double page spread. Then it's fine. You can just shoot at whatever it is to learn the skill. And you'll have that wonderful camera sometime in the future anyways. And sometimes it's worthwhile anyways, pushing that I also just to get a sharp image. If it's a bit grainy, you know what? Don't worry about it. People aren't gonna be concentrating on that as much as a great action image that captures a great moment when you're doing one of these pounding photographs using the selector for auto focus to move it around in the frame and then figure out exactly where you're gonna want that rider to be and then track that person as they're moving across with that cursor and that will help you make sure that they're going to be clear no matter what happens and leave enough space ahead of the photo and behind her story ahead of the action and behind the action so that you have that full story of where did the writer come from and where they're going. You need to keep that comfort us, that there's space on both sides and then you keep them on 1/3 or something else so that they're not just right in the center. So after trying that once once at 1/8 of a second, I actually had too much difficulty keeping him clear. So I'm gonna go with that middle ground 1/15 of a second, and then that just aperture and ah, I s So we're just following along for correct exposure. Damn it. So this shot, it always takes a lot of tries. So some of the time, it's something that's good to do at, like a mountain bike, race events, or even just sitting on the side of the highway and tried panning cars going past or something that you get a lot of tries to do it. This is try eight already. So it also requires a writer who has a lot of patients. The piece of trail that we chose has thes sweeps. So rather than just tracking straight across, I'm having a pen up and down with him as he moves. And that's just causing me to drop shots a couple more times than I would like. So is that kind of thing where if you want to try to learn how to do this shot, trying to get straight motion and if you have that, you're gonna be able to get the shot more quickly. Yes, yes, yeah. Show us. Uh, no, we're good. So there we finally got this shot where he is. I didn't curse be in there or it's nice and, ah, focused on him. But then when you look at the rest of the shot showing all of the motion that's happening and successfully got him off center and with a tiny little crop, it's gonna be a beautiful shot
7. Editing Enviromental Action: All right, we are back in my office and we're looking over these photos that we shot today out in Squamish. Uh, we'll talk about what I'm doing with specific details of editing and exposure and contrast and white balance and all of that. But then also how we're selecting photos and why I changed different things in the field. So this first shot is our environmental action shot where we're not looking as much about it being so impressive of riding but trying to capture more of the beauty of the forest in the place that we're in. So this is the I've gone through and selected which images were the successful set. But you're still going to be able to see a couple different frames of what worked and what didn't. And as we what happened as we modified each shot, Uh, so I'll just click through this first set of shots and this is Kevin coming around the corner and you get to see what's happening the whole way through this image sequence and what I want to concentrate on right away is the peak action. When does this photograph looked the absolute best for just a single frame. So this image here at the beginning, he's already leaning over and you're sort of anticipating this corner. But he's going to be leaning over more in an even more aggressive manner than if you where to pick the very late shot. This shot. He's sort of getting more centered in the frame. He's a bit obscured by these ferns, so it just feels late and the positioning just looks sort of awkward. So we know that that action is gonna be something that happened in this corner here. And that's also why we for shooting this photo so that he was going to be up in this side of the photograph. Justo use rule of thirds and make the image quite dynamic. So I choose one of these two frames here and for me. I think I would pick just this 1st 1 the way that his shoulders lit up help separate him from the background. In this next frame, it's just his face, the side of the helmet. It's all a little bit more obscured and you see less of the trail behind him, and that also points out the story of the image. So he where he came from, where he is in the peak action and where he's going to be going after that. Now we'll junk into editing the shot. Uh, recently I've been getting into just trying to use the daylight white balance of my camera and seeing what that looks like. Uh, and if you're not shooting in raw, start shooting and rod right away. Uh, it's just a great tool for getting more and more value out of the sensor that you're using in the camera. Uh, just as a rule off what I found works all the time. I end up using about half of, ah, highlight reduction, half of the shadow, uh, almost all of the time. In the beginning, you'll also notice that this whole images being dark since we started working on it, uh, it's under under exposed a bit, but as you could see at the beginning of this, the hissed a grams, telling us that it has all of the information in here, and that also prevented the sky from getting too bright. If we shot it so that it was brighter, then you would have lost more of that right from the beginning, uh, now rather than using this contrast, if we if we use the contrast, just a lot of this goes toe pretty black right away. You lose all of this detail in here. So what I'd rather use is the tone curve down here and the tone curve is gonna let us put more of the contrast into the darks without all of it just becoming too dark. So if you just pop this up a little bit, pop this one down, then the tone curves putting contrast into this lower part of it. So looking at this photograph, I find that Kevin still quite dark. And this is just a mountain biking problem. Almost all of the time when you're shooting that the posture of mountain biking hunched over always ends up with them being dark. So I'm gonna push a little bit more shadow, fill into the bottom of it and use a little bit more of this contrast in the bottom to try to bait, make a bit more, uh, light happening there. And I often find that forest images because there's a lot of detail drifting out of the edge of the frame. A lot of these do well with just a little bit of a vignette as well. So I'll just darken down the edges a little bit, Not to the point where you pay attention to it, but just so that you can see they're just in general, guide your ID more to the center of the frame and doesn't drift out of the corners as much . And I'd say I like this image now is pretty beautiful. One other thing that could be a little creative to do some of your imagery is playing with the white balance a bit on this sort of cloudy cold day. Going with a bit of, ah, colder tone might make the image look a little bit more like the feeling of being there. So I think I might say that is the shot that I like. Um, otherwise, a lot of the other tools and light room. I don't go into a much, uh, I will do lens correction work. Uh, and I will do sharpening. But that's often more working towards a specific clients needs, or deciding if it's going to be a shot for Instagram or what's happening there
8. Editing Panning Shot: Now this is our panning photograph that we shot second and this is the first set of shots that I did. And when I looked at them on the back of the camera, I mentioned that there wasn't really enough motion in the shot and I didn't really like that. So I slowed down the shutter speed. So this one, I think it was shot at 1/30 of a second. But it just sort of feels like the whole thing is out of focus. It doesn't actually indicate the motion as much. So that's why I started trying to shoot a photo that was gonna look more like this one here , where you can see that it's a specific firm that's drifting across the frame and you get this cool image that has all of these streaks across the sides. Uh, now we'll jump into the editing of the shot and this one again. I'll probably just go to daylight. White balance. Um, you some highlight and shadow, uh, then just get into tone, curve here and try Teoh. Use all of this. Use it, get more contrast into everything without anything becoming too, uh, to brighter. Too dark I often just like putting his almost as much contrast into a shot as you can without it getting excessive and again mountain biking. I just end up shooting with more and more shadow fill. It just often helps prevent too much of this going to directly to black now that there's contrast in it. If I took that away and show what's going on this tree stump above, just go straight to black up there and it's sort of catches my eye too much turned something that I don't want to be a visual element into a visual element. Let's fill that back out. And then this one, I think we'll end up using quite a bit of vineyard ing that will help it look really good. And for a place where you might not have been able to make a great action moment if this was all, still, there wouldn't have been too much visually going on. This is why I wanted to use this panning techniques. So he's just flying through the forest from this, uh, view from across the Valley
9. Editing Action Primary: All right. Now we are working on the third shot, which was shot on the junk trail where we're working on capturing action in the best way that we could, uh, on this one, we went through a couple different styles. So, uh, Kevin, like this table that he did, but said, Hey, let's do this. Uh, the second take and this one, I like it quite a bit because it creates this window around his face. So I think actually, we're gonna edit both of them. But before we get into those, I want to show you the photo that I didn't like his much, but still tried shooting it because I thought it. Hey, it's worth a try. Let's give it. Give it. It is chance. And this was shooting from just down near the takeoff. Um, with Kevin heading down the trail this way, this is what we were talking about. About this about shot sort of just doesn't look fantastic. As you're looking at, sort of You don't know where he's going. You are also just without knowing that people ride bikes. There's nothing that looks human about this. He just is this big blob on a bike, and it just doesn't look as good or is interesting to me. Let's get back to these two that we did, like get into the standard settings that I was doing. Uh, some highlight reduction will just go pretty much full shadow. Feel right away cause that's what's working for the other ones. Modify this tone curve Teoh. Brighten up this image a little bit because it's needed and then darken down the shadows here. I wouldn't mind if some of this goes to black out here. If this is all black and creepy and dark and on this left side, it also also too dark for me. Then that might not bother me too much. One thing I just noticed, which I didn't notice in camera is just little things along the edges of the frame that distract me. So this little piece up here, I think it's just music photographer, not other photographers. It doesn't bother them as much, but I really don't like seeing this little element right along beside, so I'll crop in just to get rid of that. And then along this side there's this is a little black band. It's out of a tree, and just that little adjustment helps my eye not drift out at the side of the frame. And I sort of I go through this editing process quite quickly because I have done so many of these types of images that I know what I like. But if anything, I would just encourage you to experiment. Whole time. I would open up the left side of this frame where they have a whole bunch of stock options and just go through them and see what's happening with all of these different types of, um, stock editing layers. And you might like some things out of it and also imitate other photographers that you like , try some processing techniques that you find online that other people are doing. Uh, also just realizing here that this might turn into a really nice black and white image because he's so dark everywhere around here and the background is sort of even tone. Let's give it a try. Oh, yeah, that looks great. Um, sometimes I shoot images intending for it to be black and white. Sometimes it just sort of happens. But the way that the lights filtering down directly onto his shoulders creates this nice, bright layer around him, The highlight on the tire and a lot of contrast popping up from the background. And that really, really looks great. You can play around with, um, this layer once you convert something to black and white. This ah set of black and white conversions can really help so you can brighten up his red shirt. If you want to compare to the green background and darkened down everything else that screams that he'll really be the brightest thing in the image you can get really, extremely. That looks quite bad when you push it that far, but it helps understand what's going taking these green colors and just making the greens darker. So let's take that back from looking hideous. But it's right in there, and it actually looks pretty cool. And this was our, uh, action primary image, where you're trying to see trying to maybe get the photography over the way a bit and just concentrate more on Kevin and what's happening there. You can also see this window that I talked about while I was shooting. When I was standing down on the trail, you could see that you're gonna be able to frame him against this tree in the background. And the other stuff is gonna the trees further away weren't going to bother you as much. And that was just how I tried to figure out exactly where to stand Stand. There was an earlier frame where his front tire was overlapping with this tree on, all I had to do is move a little bit left and that realigned the jump so that he wasn't going to be having other big objects competing for your eyes. Attention. Uh, did I already put a vignette on this? No, Uh, just a little bit, almost on every image I find, but just a little bit Helps guide your eye in and keep it inside the image. Uh, and here we've got a story. As we were talking about the whole time as well. The trail coming into the frame, seeing that he's above this jump and nobody is going to be landing down here in the foreground because that's the way his motion in the case of these traveling and yeah, I love that image. And just to see what this image looks like. Ah, um in the same way that the other style that Kevin wanted to try himself. I'm just gonna copy these settings. Gonna check all except for the crop. Copy them. Move over to the second file and paste it here. See what I think of this next one. Uh, I think this shot might not work as well in color because our story in black and white I don't like as much how confusing it looks with his style. So let's try moving this one to black and white. The setting It's already just move these across eso. It is going to bring it back to the file that we want. And it's interesting that I like one image black and white. I like the other one in color and they're pretty much the exact same file switching back and forth. Uh, it looks so similar, but because of the style one works, one doesn't. And that's just experimenting and Photoshopped. And seeing what you do it do not like this one's black and white and will stay this way. This one I like in color. As for which one. Sometimes the riders will choose which one goes. Sometimes we'll send out both versions to a photo editor, and they might pick one for a magazine versus the other and find without. I'm not too attached toe one versus the other. And it's just great to have different options. They might be looking for a black and white photo, so then you can give them that they might be looking for a color. And you've got that there as well. This guy is that corner missing again? So just cropped that out of the way. Same thing on this side. I think that's the shot.
10. Outro: all right, That's the end of our skill share class. Uh, we're gonna move away from all of that technical stuff that we were just talking about and sort of get back to what just photography is about. It's for me. It's about capturing the things that I already doing him working inside. So go find the sport that you love and left a document and just go experiment with it. Do the stuff that we talked about experimented. Do the Assam you learn so much, But you're going to really get into making great images when you go out there and do it a ton and are inspired by the actual sport that you're doing and that these athletes are doing a lot of these. A lot of great images happened when you're out there, so go out there and do a ton of it, an experiment bringing ideas from whatever else it might be. If you bring in ideas from another action sport photographer, you might get great shots, but the look similar to theirs bringing ideas from wedding photography from anywhere else and that kind of sort of pollinating that you can bring in ideas from anywhere That's just where you end up with really, really amazing photos that no one's seen before, where you bring in an idea from the opposite side. Uh, I hope you enjoy the skill share class, and please also fire up any questions you've got. If there is something that I sort of left hanging and you've got, um, you have these hanging questions left stone, but by
 Reuben Krabbe, Photographer: Skis, Mountain Bikes, Misadventures