Transcripts
1. Introduction: Hi, I'm Hong Chu and I'm a
motion designer in Canada. I'd be animating in Adobe After Effects professionally
for eight years now. I've worked in
advertising agencies for clients like Adidas, PayPal, Walmart, and many more. [MUSIC] Today I'm going
to be teaching you how to animate an advanced kinetic
type intro video in After Effects from storyboard
to final animation. Kinetic type video is very common and popular type
of motion graphics video. It's an essential part of motion graphics that will
help you understand how to work with typography and using typography to tell your
brand story creatively. Once you understand
how to animate kinetic type video
in After Effects, it will make you a more polished and marketable animator towards your competitors and be able to create fun
projects on your own. It's also a solid
starting point to advance your motion graphic
skills and get you prepared for more
complex animation, as well as exciting
future opportunities. In this course, I will
show you everything you need to know to
animate a short, but the best kinetic type video. I'll show you the complete, and full professional
workflow from preparing your storyboard inside
Adobe Photoshop. How to set up your After
Effects file for animation. Seamless and
professional workflow between Photoshop
and After Effects. Advanced animation
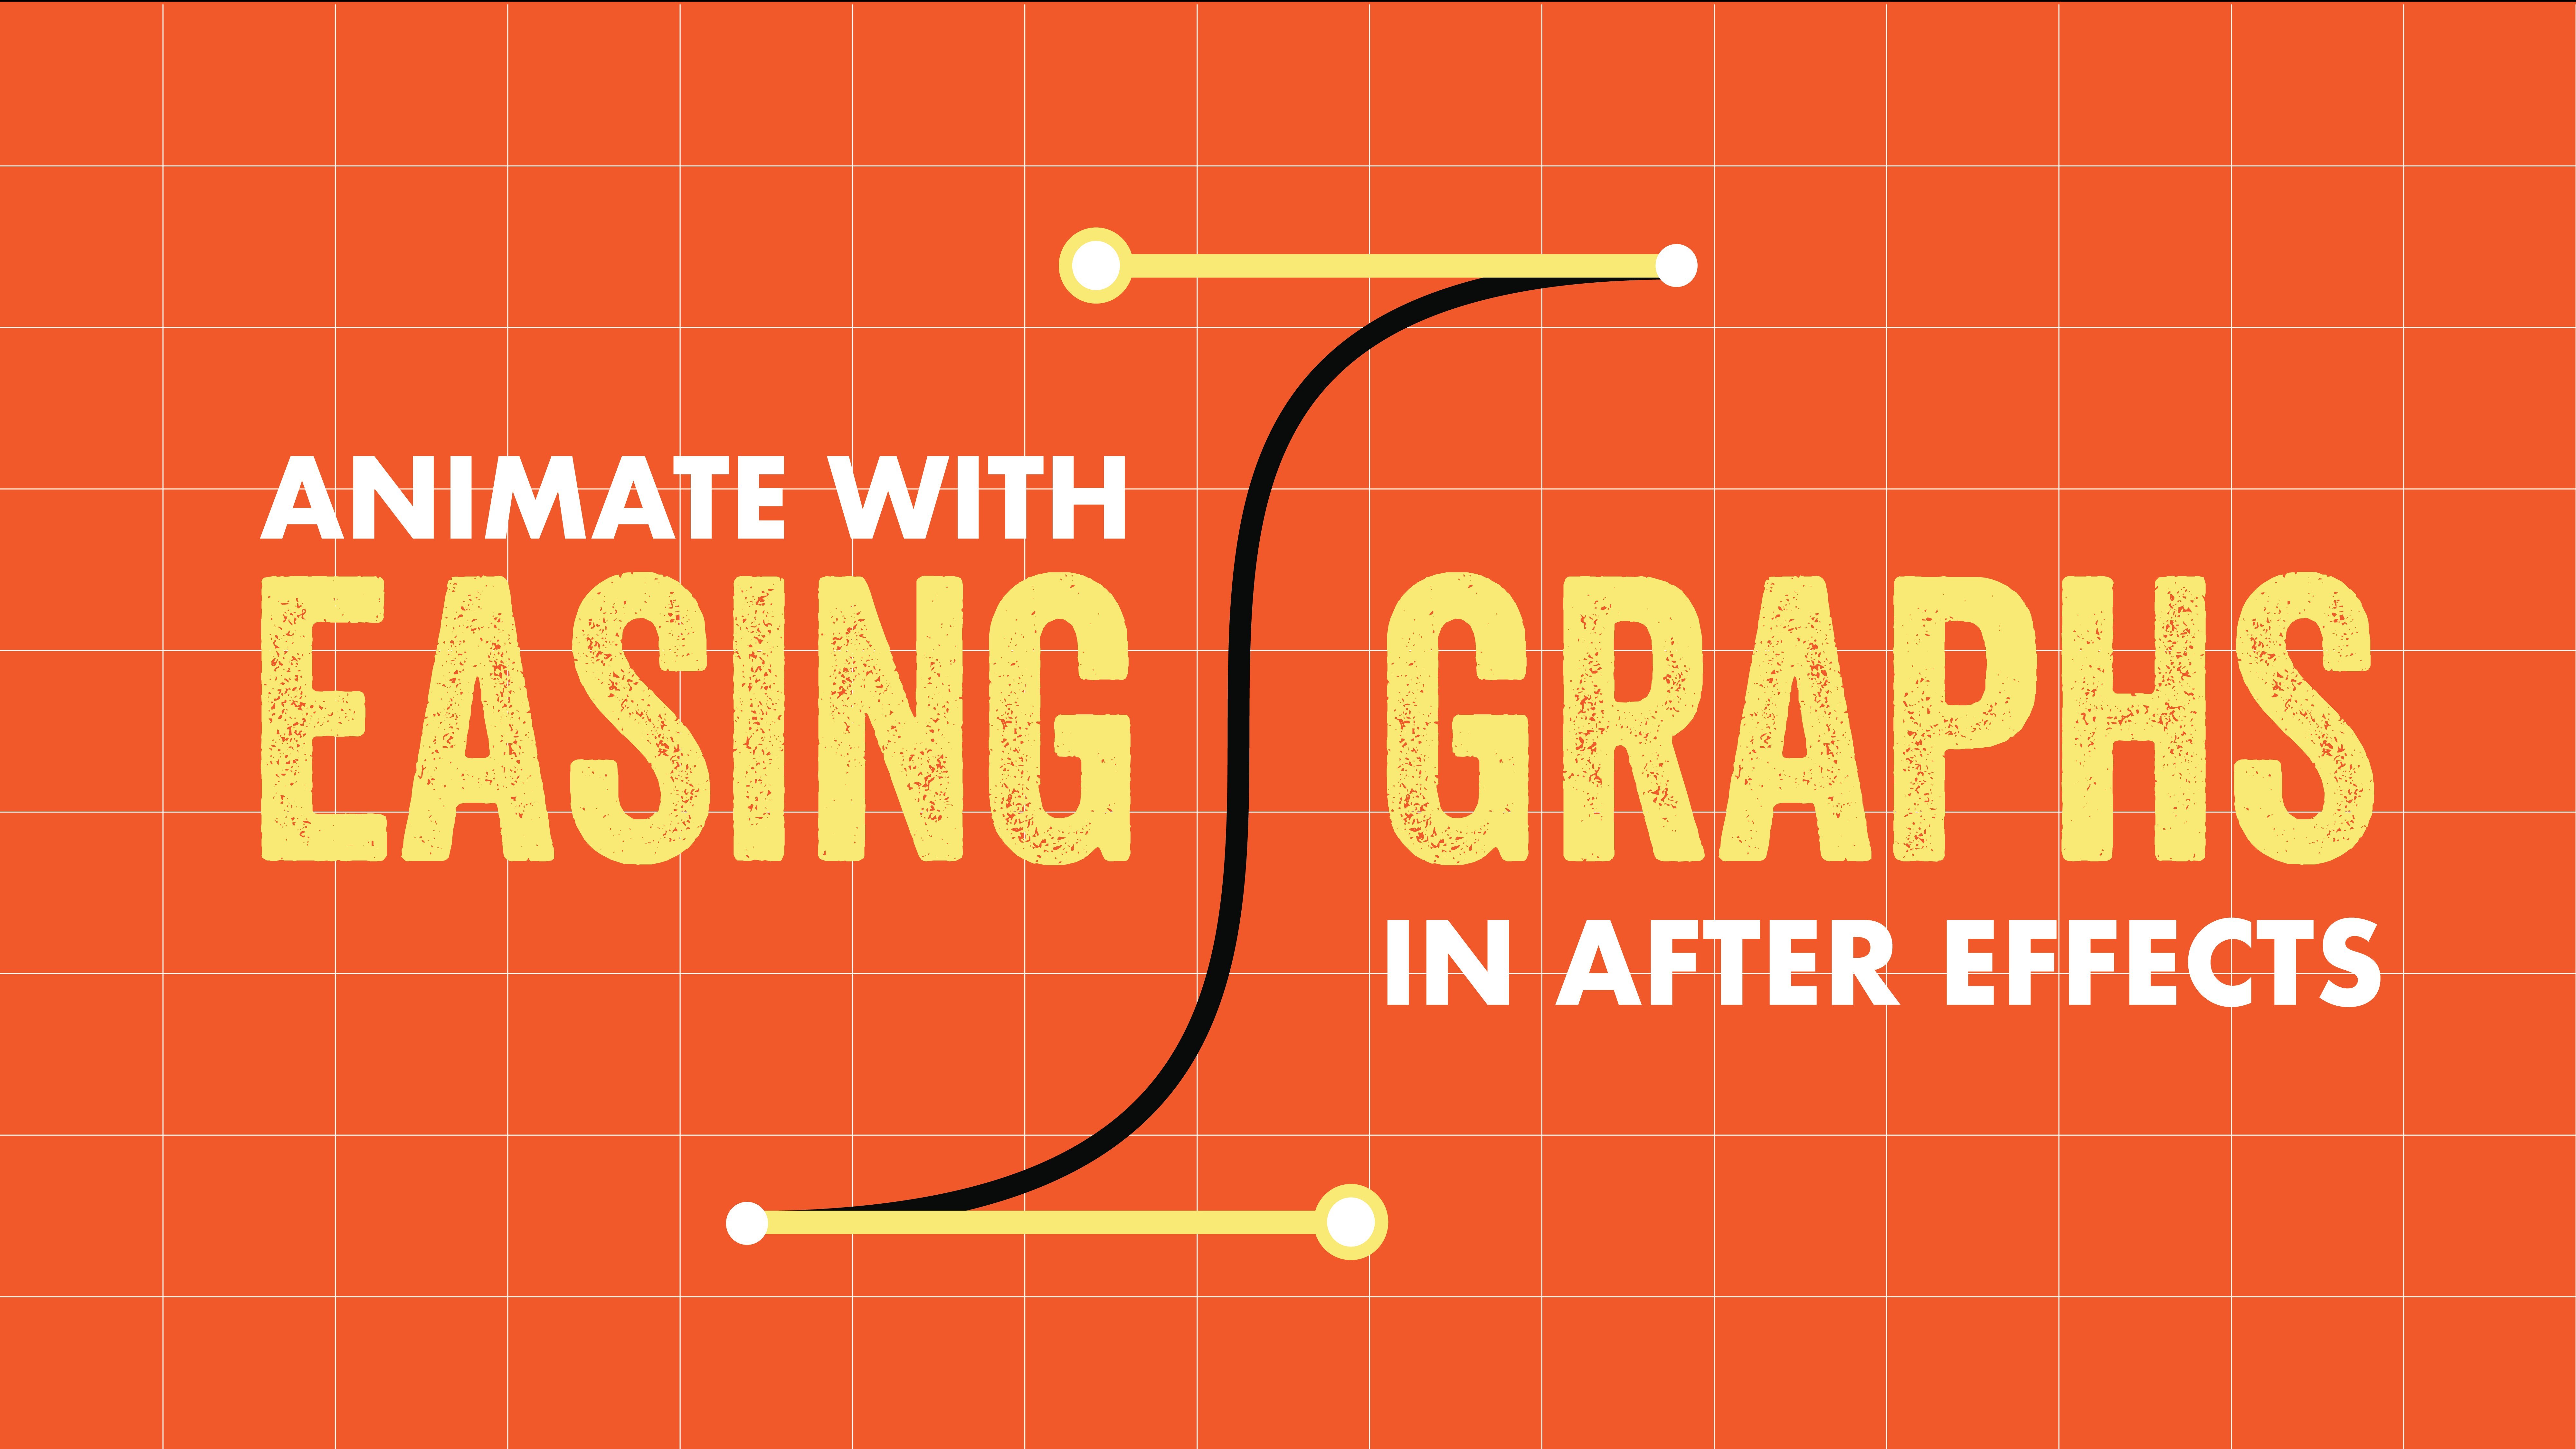
using Graph Editors for silky smooth transitions
and life-like movements. Popular and most
exciting special effects for kinetic type videos. Advanced techniques
to polish your video with secondary
elements and glitches. How to animate
with full control. Simple and effective
way to create complex animation with
least key frames possible. Tons of keyboard
shortcuts, workflow tips, and tricks that I use all the time for my daily
professional work. For the class project, you'll be applying
the skills and techniques learned
in this class to create your own 15-second
animated kinetic type video. I've already provided the
storyboard we use in the class, but you can customize it and come up with
your own design. Make something that you'll
be really proud of. This class is for someone who has already
done some level of animation before and is
comfortable using the software. We won't be explaining how the
program works, but rather, we'll focus on the
advanced stuff of how you can animate
as a professional. If you're someone who
wants to improve on your existing motion
graphic skills and add advanced animation
techniques into your skill set, this class is for you. To be honest, this
class is quite hard. If you're not familiar
with After Effects and have not done any After
Effects animation before, I recommend you to check out
my other beginner classes to get familiar with the software before you take on this one. The concepts and
techniques we'll learn in this course
will be easily translated into any
type of projects and advance your level to
become a better animator. Beyond just creating your
final kinetic type video, you will also develop
greater insight into visual narration and expand
your animation vocabularies. It will train your
eyes to become animator size and provide you with a brand new
way of looking at animation in storyboard
in the future. I hope you have a lot of
fun learning and animating. I'll see you in the class.
2. Project: [MUSIC] Welcome to the class. Before we begin, I want to
talk about the class project. For the class project, you will be animating your own 15-second kinetic-type video based on the
storyboard provided. I'll take you through
the whole process of how to customize and make your own storyboard all the way to the final animation. First of all, I want
you to read through the project description there as listed in detail
the steps you need to take to
complete the project. Get familiar with what
we'll be animating. I'll take you on a journey
of creating an exciting, advanced kinetic-type
video from scratch. As you're taking the course
and working on your project, I encourage you to share
with me the final video in the project panel so I can
provide personalized feedback. A 15-second kinetic-type
video is not an easy project, especially if it's your
first time doing it. There'll be struggles
and pains, trust me. Your brain may even hurt a little bit but same
as learning anything, it's a part of the
process and I'm here to help you
get the most out of this course and answer any question and clear any
roadblocks along the way. If you power through it
and complete your project, you will learn a ton and be a much better animator in
a couple of short weeks. Once you follow me and
complete this project, you will get an idea of what the full process is to create a kinetic-type video and a lot of the
advanced techniques, the process and workflow, and animation techniques
we teach in this class is applicable to any
motion graphic works. It will help you get ahead
of the game and give you the confidence to be ready
for any future client work. Not only that, in the end, you will have a full exciting advanced kinetic-type
video to put on your demo reel that
you can pitch to potential client and
get work right away. That's it with class project. I'll see you in the first class.
3. Storyboard: [MUSIC] In this class, let's
talk about the storyboard in order to animate it in
Adobe After Effects, we need to have something in Photoshop prepared
for the animation, which is the storyboard. I already have my
storyboard file in Photoshop setup
here, as you can see. Right now, I'm in
this storyboard.psd, which is a Photoshop file. Then in the layers panel, you can see I've got Frame
1 all the way to Frame 10. If I turn on the eye icon, you can see as I scroll through the different
frames we have. So, these are our storyboard. There are pretty simple
and straightforward. If I open Frame 1 and then just hide all of these
different layers above it, you can see I only got a text layer as a
background and then there's one main
text layer which is animation and then we got
almost black background. Only three layers
within Frame 1. Then if I go to Frame
2, when I open it, I've got one animation text outlined and then one in
purple in the middle, and the other one on top, which is also outlined, four layers in Frame 2. These are very simple
and straightforward. Once I have these setup, I can bring this
storyboard.psd file into After Effects to animate all
these different topography. If I go to the folder, I can open the storyboard.png. Then you can see here, this is our full storyboard, from 1-10.This is
what it looks like. You can almost see
there's some motion and we can apply a lot of
different effects and different animation
movement to the topography to have a kinetic
type intro video. Another thing I
want to mention in this video is that
if you want to change and customize to
your own intro video, you can also go to
different layers and then change the text
within the layer. If you don't want the first
word to read as a animation, you can actually do that. You can maybe put like sports
intro, something like that. You can customize it
based on your own needs and to come up with
your own animation, your own introduction video. But for now we'll
keep it as animation. Then also in terms of color, you can also change
the color if you want. Let's say if we go to
Frame 4 and then we have this background, ON, and then we have the front one, which is in a purple color, if you want to do a
green, you can do that. You can change the theme to
a green color if you want, or you can change the
theme to orange color. It depends on what
color you like. You can actually
customize the storyboard to your own favorite color and come up with
your own storyboard. In the end we'll have
something like this laid out from Frame
1 to Frame 10. It will roughly show what
we'll be animating each frame, and then for this one, it will last around 15 seconds. That's it on the storyboard. In the next video, we'll
jump into After Effects and create an animation file.
4. File Setup: [MUSIC] In this video, let me show you how to
set up After Effects file with the storyboard we had. Now, let's open After Effects. This is the panel once
we open After Effects. In the center here,
you can click on this new composition. Then I'll name this one
the main composition, Main Comp, which is the main working area
for our animation. For the width and height, I'll keep it 1920 by 1080 and then leave
it to square pixels. For the frame rate,
I'll actually do a 30 frame per second. Then the duration, I'll give
it a 15-second duration. Background color, keep it
to black. Click, okay. Now we have a main composition
setup in After Effects. Next thing I wanna do is to
import the Photoshop file. We can actually double-click on this project area and then
navigate to our storyboard. I'll go to the storyboard PSD, which is the Photoshop file, and then import, as I'll try to do the composition
retain layer sizes. Make sure you do not click
on this Photoshop sequence. Because if you
click on this one, it's going to give you
a hard time later on. This is only used when you
are creating a sequence. For 95 or 99 percent of
the time we won't need it, so just make sure
you don't click on this one and then click on Open. It's asking me if I want to keep the layer editable and
then I'll click on okay. As you can see in the
project panel here, I've got a storyboard
pre-composition and then a folder that contains
all the Photoshop layers. The way I want to organize this project panel is I
want to create a folder, first of all, call
00 _Render_Comp. This is going to be always on the top since I put
00 in the front. I will drop this main composition
into the render comp, so this main comp is going
to be the working area. Also when we finish
the animation will render this main composition, which is a render comp. The next folder I
want to create as a asset folder named assets. Then I'll drop these
storyboard layers, this folder into the assets, which is the asset folder. Next one I want to
create, is a Precomps. The precomps folder will host all the pre-composition we have. If you want, we can still do a music folder or music
and footage if you want. But for now, I think these four folders are the ones we want
to keep right now. It can keep our
project panel pretty organized so that it can help
us later on down the road. Let's navigate to
the precomps folder and then go to the storyboard,
double-click on it. You can see over here
we got one through 10 frame in each
individual composition. Each composition will have all our Photoshop layers
inside that composition. If I go back, go to
Frame 2 and then we got all our different layers. Then if we check Frame 3, we got all these
different layers. What I want to do
now is go back to the storyboard composition
and then select from 1-10, click on the Frame 10, hold down Shift and
then click on Frame 1, select all of them. Command C, copy it, and then go back to the main
comp command V, paste it. Now, within the working area, which is our main composition, we have from Frame 1 all
the way to Frame 10. This is going to
be the place where we'll be animating our
kinetic type video. That's it with how to set
up our After Effects file. In the next video, we can start animating
the first frame.
5. Start Animating: In this class, let's start
animating the first frame. Let's navigate to the first
frame layer over here in the timeline and the
first thing I want to do, I want to space them
out a little bit, space out all these
different frames and then have everything turned
on with the eye icon. Let's say if I want every single frame to
last for one second, I'll just drag these
different layers and then stagger them, offset them for one second each. Now if I hit the play button, you can see it will
be just static frames cutting to the
next one after another. That's our staggering
offset right now. This first one, let's
animate the first frame. To animate the first frame, let's go into the
Frame 1 composition, double-click on it.
I want to zoom in. If I zoom in, I can
almost tell there is a purple outline backgrounds
behind my animation text. I think right now,
it's in front. I'll drop it beneath it. Then, first of all, I want to convert these
to as editable text. I can click on the first one, right-click and then create, convert to editable text. Is going to change
the Photoshop layer into a live text area, and now we can actually change the text to whatever we like, but we'll keep it as
animation for now. This one, same thing, right-click and
then go to create, convert to editable text. For the background, I'll
leave it like that. That's great. Then now I just need to animate
this animation text here. Let me zoom in a little bit. I can click on here to fit
it to the preview area. Right now you can
see the anchor point is not at the center
of this layer, so I need to make
it in the center. To do that, I can go to
this pen behind tool, hold down Command key, double-click on this one, and then it's going to change the anchor point into
the center of my layer. That's what I want. The animation I
would like to do is, first of all, I want
to do a scale change. Let's hit S on the keyboard, and then go forward
maybe 15 frames, 1, 2, 3, 4, 5. I'm using the shortcut. You can see on the
left corner here, hit the stopwatch add a keyframe and then go back
to zero seconds. Let's change this to zero. Then we can easy
ease function key F9 to easy ease the keyframes
and go to graph editor. Let's try a curve like this
to ease it all the way in, so it's like this. I feel like it's a bit slow, so I want to bring the
two keyframes closer, make it 10 frames. This is the first
animation we have. It's already got some energy. That's good. Now I just need to duplicate this layer Command D, Command D, two times and then hit
P on the keyboard, put a position keyframe, and then go forward 10 frames. Bring this one up, and then bring this one down. Let's easy ease it. Go to the graph editor. Another way to easy ease a
keyframe is to right-click and then go to keyframe
assistant, easy ease. I'm using the shortcut. The shortcut is F9. I'm holding down
the function key and then F9 on the keyboard. You can see the shortcut here, it says F9. It's the same thing. Go to the graph editor. I want to do a
easing graph here. Another thing is to
make sure you are in the speed graph instead
of the value graph. You can click on the
second button here and then change the
graph to the speed graph and now you can see
something similar to what we have here. If I click on this button here, it says Fit all graphs to view. Is going to fit this
graph to the view here and make it bigger so that it's easier to drag the handle. This is a graph we
have to achieve this animation here. That's good. That's the first animation
for our text here. After this, I want to
bring the middle text up and then scale it up all the way and then make these two top and bottom one into an outline. The way to do that is after
we have this motion here, I want to go to this
middle one and then make sure we go back to
the selection tool. We already have the
scale property here. Make sure I hit a keyframe
over here and then go forward maybe a couple of
seconds, make it bigger. Yeah. Something like
this would work. Then we will have these two
layers change to outline. The way to do that
is I'm duplicating these two layers and also
cut it at this point. The way to do that
is Command Shift D and now you can see I've
got two different layers. That's the exact same as the
first two that are selected. However, they're cut at
20 frames over here. These are two
separate layers now. This Layer 1, Animation 5, is the same as
Animation 3 over here. Basically, I
duplicated the layer and also cut it at this point. Now I just need to change
these two into outline. The way to do that
is very simple. Just go to the
character panel here, and if you don't have
character panel, you can go to Windows and then select the character
panel over here, and then just hit on this
swap, fill, and stroke. It's going to change our
animation text into an outline. If I'll play the animation, this is what it looks like. However, when it grows bigger, it's overlapping with
my outline text. At this point, I still
want the text to maybe move a bit further away from this text
in the center, so there is a cut
at this point here. That's the animation we like and then let's go back
to the main composition. Let's see the animation. Something like this, however, I'm still missing something. Over here I want to
add two solid layer. Go to layer, new. And then solid. I want this animation
to have a cut look instead of a smooth transition
or a smooth scaling up. I want it to be cut, so basically like glitches
in the kinetic typography. I want to go to
this color picker and then change it to the
backgrounds dark blue color. Make sure this is
the glitch maybe. Click on "Okay", and then cut it to two frames. Hit left square bracket and
then go forward one frame Command right arrow and then use option right
square bracket to cut it. Basically, this layer
only last for two frames. One, two, it will be our cuts. I'll put one here, one here, and then duplicate it. I'll put maybe one over here, and then, let's
see, one over here. This is the style we got. There's almost a flash of
the background color as cutting in between
the animation, so the animation is
not very smooth. Let's go back to the
main composition and see what it looks like. Yeah. I think that works and that's how we
animate Frame 1.
6. Null & Cut Layers: [MUSIC] In this lesson,
let's animate Frame 2. We already have the
Frame 1 animation. We can take a look here. This is our Frame 1
animation and right now we have the Frame 2 just cut in around this
one-second five frames. We can go to Frame 2
composition, double-click on it. First of all, to
animate Frame 2, I want to turn these three
layers into editable text. Select all three layers, right-click go to Create, convert to editable text. Now we need to change the anchor point to the
center of these three layers. To do that, make sure you hold down Command
key' on the keyboard. Double-click on this
Pen Behind Tool. Now you can see all three layers have the anchor
point in the center. To animate these layers, what I want to do is I want to first duplicate
these three layers, Command D, and then maybe I can change it to a different
level color, let's say red. I can turn off these
first three layers. I want to change the word into motion instead of animation. Then I also want to
duplicate this layer again. Put one more motion on top. Then duplicate this one again, put one more on the bottom. Duplicate again, put
one more over here. Now I've got six layers
with motion text on it. Then I've got three
layers with animation. To animate these layers. I want to move this
one all the way up. Turn these animation back on. Now I want to move this one up. Now I want to control the position property of all these layers with
one null objects, go to Layer New and
then No Objects. Make sure we have everything
parented to the null. Then put key on the keyboard. I can animate the null objects. Once we have position property, we can right-click
Separate Dimensions since we're only
animating the y position, we can separate dimension only animating on the Y position. Hit the Stopwatch to add a
keyframe and then go forward, maybe 10 frames,
11, 12, 13 frames. Move it down like this and then move forward and maybe
another five frames. Make the motion tax
settle in the center. Something like that. Then I need to select all three keyframes. Right-click Keyframe
Assistant, Easy Ease. Go to the Graph Editor. Make sure you're
in the value graph instead of the speed
graph this time, click on this icon and
then hit Value Graph. Fifth graph to view. All I want to do is to drag these handles to give
it a bit more energy. Something like that. If I preview the animation, this is what it looks
like. That's good. If I go back to the
main composition, let's preview the whole
thing from Frame 1 to Frame 2 see that? That's good. We got
this animation here. Maybe we want to hang on
this frame a bit longer. I can move everything,
maybe two frames. It's got a two-frame
hold. That's good. Now we got this motion here. The next thing I want
to do is to make sure this motion tags
the purple one is traveling downward to this line here and then to this line
here and then come back up. I want this motion text to travel down and come
back up in the center. In order to do that, so from here, just find
this motion purple. What can name it
to motion purple. Then we can cut it
at this frame here. Command Shift D, move it down, and then go forward
four frames, 1, 2, 3, 4, cut it again. Command D. Move it down. Go forward, four frames. Cut it again, move it back up. Go forward four frames, 1, 2, 3, 4, and then cut it again. Go over here. Let's see
the animation here. You can see our purple motion
tax is traveling down here. I think we're missing
one frame here. I just need to move these one, maybe over for two frames and then extend this
one for two frames. We have motion, go down, go up. Yeah. This is what we like. You can see right now I'm
not animating anything. I'm just cutting
the layers to make the motion texts to cut
through different positions, and each one is lasting
for four frames. Now we have the
purple text ready. We just need to fix the
other outlines here. For this frame, where's
my outline over here? This is my outline. I need to cut it at this frame here and then move
this outline up. At this frame, we have the purple underneath this outline. There are switching
places, you see that? Then if the purple go
down again at this frame, I need to find this outline. Command Shift D. Move
this outline up. At this point here, Command Shift D again, move this outline down. When the purple
return to the center, we need to find
this outline here. Command Shift D.
Move this outline to beneath the
purple motion text. Now let's see what the
animation looks like. You see that. Our purple
motion text is switching places with our
outline motion text, and it's traveling down and then going back in the center. That's the animation we want. Let's go back to the
main composition and see the whole thing. Move this one over a little bit. Maybe there shouldn't be a hold. Let's see. I just don't
want there to be a hold. When it cut into
the second frame, you see there's one-second hold. I don't want that, so I
want to cut that hold, maybe cut this frame to
layer in for two frames. Right now over here, it's the front of the Frame 2, I need to move forward two
frames and cut this over here. Option left square
bracket, cut it here. So when it comes in, the Frame 2 is already moving, it's already in motion. I want my transition to
always be in motion. I don't want the transition
to come in and stop there. That's not a transition. You see that? That works. Let's save the project. That's how we animate
the second frame. In the next video,
let's keep going to animate Frame 3[MUSIC].
7. Special Effects: [MUSIC] Let's do a simple
transition of a flash. It's very common
for a kinetic type. All we need to do is go to layer and then create a
new solid layer, change the color to white, rename the name to flash, and then click "Okay". Drag this layer all the way
between Frame 2 and Frame 3. First of all, I want to see when we want the Frame 3 to come in, so around here, when the motion texts in
the frame stop moving. Why not start moving
here and we want to transition to Frame 3 over here. For this one, I need to move the start of this layer to here. Use our keyboard shortcuts, left square bracket to
bring it all the way here. We need to put this flash
on top of Frame 3 also. Align it with Frame 3, hit "T" on the
keyboard to bring up the transparency and then hit the stopwatch
to add a keyframe. Go forward 10 frames, Command Shift Right arrow and
then add another keyframe, change the transparency to zero. This is going to
be our transition. All we need to do is select the two keyframes and
then right-click. Go to keyframe assistant, change to Easy Ease. Go to the Graph Editor. Make sure you're in the
speed graph and then we just need to do a curve like this with an extreme easing, and we cut the
layer at the end of the keyframes option,
right square bracket. Now we have a flash transition.
This is what we have. Let's play the animation again. That's what we have. Command S, save the project. Let's go to Frame 3 to
animate this motion text. First of all, change the motion
text into editable text. Now I need to bring the
anchor point in the center. Use a trick we have hold down
Command on the keyboard, double-click on this
pen behind tool. For this one, I need to
create a composition for the text because I need to
add a special effect to it. To create a pre-composition, click on this layer and then
hold down Command Shift C on the keyboard and name it to motion click "Okay" now we
have a motion composition. Let's go to effects and presets panel on the
right-hand side. If you don't have it, you
can go to Windows and then click on this
Effects & Presets. The effects were trying
to search for is called CC scale wipe. Now we have CC scale wipe in
the Effects & Presets panel. We can drag this one onto
this motion layer we have, and then we can animate
the stretch of layer. Right now is stretching upward, which is not what we want. We need the direction to be 90 degrees all the
way to the right. Now I want to set a
keyframe on the stretch. When its zero, that's the final state
of our animation. Hit "U" on the keyboard
and at the beginning, it should go all
the way like this. Select the two keyframes, F9, Easy Ease, go to the Graph
Editor and give it a extreme easing
curve like this. Let's see the animation. That's the animation we
want. That looks good. Command S for saving. Go back to the main composition. Let's see what the
animation looks like. That looks nice.
Looks good to me. The next thing I want to
do is to do a transition from Frame 3 to Frame 4. Let's go to Frame 3. Inside the Frame 3, I want to add a
Radial Fast Blur. First of all, let's
go to Layer, Create, New and then Adjustment Layer. This is going to
be our fast blur. Let's go to the
Effects & Presets panel search for CC
Radial Fast Blur. Since you already have
the layer selected, let's double-click on this and then this is C effects
we want to get. Basically around here, I want to animate the amount of the Fast Blur from 0-50 percent. To 50 and then let's Easy
Ease the two keyframes. Give it a extreme
easing curve this way. Maybe give it more time. Something like that. That works. Now, I just need to give
it a bit more motion. What I want to do
is I just want to animate the tracking
of this motion layer. Double-click this
motion composition and then go inside
this layer here. Go to texts and
then over here in the animate let's
add a tracking. From zero, I want to line up. This is the end of
our motion blur, and this is a start
of our motion blur. Let's go inside. The start should be
zero and then the end should be something like this. Then we can Easy
Ease a keyframe. Make sure this curve is similar to the motion blur curve we had outside like this and then
if we go back to Frame 3, this is the effect
we want to get. I think it's too slow. There's a spot where
everything is stopped. I need to tie the motion blur transition closer to this
animation the front. I just need to move
this motion blur all the way here when it settles and then the
transition starts. Move these keyframes over here to line up with
the motion blur. Maybe I need to even
overlap a little bit. I can just overlap
this part here. Drag this one. I think that looks better. Then we have Frame 4 coming. Let's see if I can change the scale property of this
motion layer as well. Let's put a keyframe on
the scale and then make it bigger and then Easy Ease
the two scale keyframes. Go to the Graph Editor. Make sure we have an
extreme ease like this. That works I think.
That works better. Let's see the animation. That looks good. That's it
with the Frame 3 animation. In the next video, we can
keep going with Frame 4.
8. Range Selector: [MUSIC] In this lesson, let's
keep the animation going. Let's do the frame 4 animation. From the last transition
we had from frame 3, we have the motion text
and then cut it like that. We want this on text to be
shrinking from big to small, to transition from
the last frame to give a very smooth movement. To do that, all I need
to do is first of all, I need to go into the frame for composition and then
select this on text, make sure we change it
to editable text and then change the anchor point
to the center of the text. Hold down command,
double click on this, hit S on the keyboard. Bring up the scale property. I want this on to be in
the center of the screen, so I need to go to
the Align Panel. If you don't have
the align panel, go to the windows and
then choose Align. I want to use it to align horizontally and then
align vertically. Make sure the on
is in the center. I want it to start pretty big. Then after maybe 15
frames become smaller. Easy ease. Go to
the Graph Editor. We have extreme ease like this. Maybe it's too big, make it smaller, and
maybe it's too slow. I need to make it to 10 frames. Let's go back to the
main composition. Let's see the transition works. Got pick up and down, that works up and down. Bigger bigger and then smaller. Save the project. That's our animation for
the on in frame 4 and we can do frame 5
here altogether. The way why I want
do it is I want to go into the frame 5. Right now I think the
frame 4 is too plain. I want to bring this text
into frame 4 as well. Let's go right-click Create
and then editable text. Let's copy this one command C. Go back to the main
composition and drop this text into frame 4. Go to the character
and make sure we change it to
purple color here. Change the anchor
point to the center. Maybe move it down a little bit. This text here, maybe you can make it
a little bit bigger. Move it down. I
think it's too big. I need to have it over
here. That's good. Now I just need to animate this text to have it
randomly right on, somehow, while we have this
on animation coming in. To animate this one layer, we need to add a text selector. Click on this layer and
then go to Animation, Add Text Selector,
Range selector. Now we have animator
called Range selector added under our
one-of-a-kind layer. Under the Range selector, there's a button called Add. We can click on this, choose Property and
then we can add a opacity change to
the range collector. First we need to do is to change the opacity down to zero
without adding any keyframes. Then now, once we have the
opacity changed to zero, once we drag the starting
point of the Range selector. Let's turn off this on
because it's overlapping. It's covering my
text layer. Zoom in. Once we have the starting
percentage from 0-100, you can see it's actually
lighting our text on. This is the animation we need. I've set a key to let
it start from zero and then 100 over here. However, we want
the text to come in randomly instead of
just one after another. We need to go into
the Advanced tab and then turn on this random nicer. This way, you can see our text is randomly coming
onto the screen. But right now, I feel
like it's too slow. In order to keep
the same pace as we saw on animation here, I want to also
animate the offset. I want the offset to be zero at first and then maybe
offset it to 40 percent. Then maybe offset back
to negative 10 percent. Then go forward 30 percent, offset it back to negative 20, and then offset it
to maybe 20 percent. I just need this text to randomly coming up and
then stay there like this. I think that works. Let's
see the whole animation. That works. That's it
for frame 4 animation.
9. Track Matt: Remember we had the
frame for animation? This one of a kind layer, and now I can copy it. Command C, go back to
the main composition. I want this Frame 5 to have the same one of a
kind layer animation. I can delete the old one we had. Just uses new one. Then make sure we change
the color to white. Something like that. Now, all we need to do is
to animate this on trend. We also have a very subtle
background over there. Maybe I can scale
it up a little bit, put it in the center. Then for the first two layers, let's right click
"Create" editable text and make sure we have the
anchor point in the center. Let's also make
sure this on text is in the center of the frame and the trend is also in
the center of the frame. It's going to start
something like this. Once we have that on settles
from the previous frame, we're going to cut
to this frame here. We have the on here, and then we have
position property. Let's animate this on, travel to the left and then
let's have this trend. Hit P on the keyboard. Let's have the trend to
travel to the right. I think something like that. Then let's easy
ease the keyframe. Go to the graph editor. For this one let's do
a curve like this. I think I want the trend
now to pop on the screen. I want it to slide
over to the right. It should start from
somewhere around here. Then I can easy
ease a key frame. Go get a extreme easing
curve like this. Maybe let's see if I changed the curve this one to
something like this. I think that works. Now we just need a track mats. Let's go to the
Layer, New, Solid. Then we can draw a track mattes on this solid layer,
this shape here. Turn it back on. This is our track matte. Make sure this track
matte is traveling with the on layer so I need to go to the parent link then
parent it to the on layer. We have this track matte
on top of the trend, and the trend is going to
be using a alpha matte. Let's turn off the track matte. It's already turned off. Let's see the animation. Yeah, that works I think. Command S save the project. Let's go back to the
main composition. I think that works. Command S for
saving the project. Let's go to zero second and
preview the whole thing. Now we already have our
five second finished. This is our first five second. Let's preview this again. Let's say with our first five
second in the next video, we're going to continue
with animation and we'll animate Frame 6.
10. Advanced Range Selector 1: In this lesson, let's
work on Frame 6 and also the transition
from Frame 5-6. Let's go back to Frame 5 that
we already animated before. Once we have the animation
settles and stops, we just need to have
these two lines go on a separate way. I want this on-trend
to come to the left, should have the screen and
then this layer down here, shoot to the right
of the screen. First, let's hit P
on the keyboard. Put a keyframe on the
position property, and then Command
Shift right arrow. Shoot it off like this. Now, I just need to Easy
Ease these two keyframes. Right-click Keyframe
Assistant, Easy Ease, and then I can drag keyframes,
something like this. Yeah, that works. The next thing I want
to do is to move these two layers all the
way outside from the left. Right now I've got
this ON layer. I go to a track matte. I got this TREND layer. If I change the position
of the ON layer, let's see if I click on the
layer and then the trend, put a keyframe on the position, and then move both off-screen. Yeah, that works like this. Now I will just need to
go to the Graph Editor. Change the curve to an
easing curve like this. Now you can see
they're traveling on separate directions, that works. Let's go back to the
main composition and then once they
travels over here, I can use Frame 6 to
cover the whole thing. Now we transitioned to
Frame 6, that's good. Let's double-click Frame 6 and then we can
animate the Frame 6. First of all, let's right-click the Skills layer Create
Convert to Editable Text. Make sure we have the
anchor point in the center. I can even change this one, maybe make the text bigger. Then I want to find
my Align layer try to make it in the center. Yeah, that looks good to me. Let's try use a Null Object, go to Layer New and
then Null Object. Lets us parent this Skills
layer to the Null Object. Now we have a null and then I want to change
the position property, animate it a little bit, and also the scale property. Maybe like this. Shrink, move from here, a
slight move to the left, and then when it
settles, shrink down. That's the full animation. We have F9, Easy Ease. Let's do the position-easing
curve first. Let's do this extreme curve
and then let's go back to the scale property
do another curve. I need easing on both ends
so I need a curve like this. Just try this. I think that works. Command S for
saving the project. Another thing, I just
need to animate this text here using a Range Selector. Again, let's go to
the "Animation Tab" and add a Range Selector. First of all, what I need
is a stroke opacity. Let's go to the range selector
and click on this ad here. We have a fill color opacity
and then stroke color. Let's go to the stroke color. Use this opacity here. Then what I need to do is I
need to change it down to zero and animate the start here. It's hard to see because we
have our fill color right now. In this case, I want to
add another selector. Let's go to animation and then choose another
Range Selector. In this one, let's add a
property, fill color opacity. Let's do the fill
color opacity first, change everything down to zero, and then we can animate
the start percentage to having something
like this come up. Let's do the start at zero, go forward 10 frames, change it to 100 percent. From 0-100 percent,
easing the keyframes. Then we can do like
a curve like this. Maybe it's too fast let's drag these two further
away from each other. Yeah, I think that works. I think the animation looks good and then we can
copy the keyframes. Command C, go to this
other Range Selector and then Command V, paste it in. Move the fill color opacity
forward a couple of frames. I just want to see where's
my stroke opacity. I might need to add
a stroke right now. I don't think I have a stroke. Click on the skills
layer, go to character. Over here in the stroke, I need to add a white
stroke like this. You see we have a
fill color in white and then stroke color in whites. Now you can see we have a stroke that goes
around the Skills Text. In the Range Selector, we have our stroke opacity
animating on first and then we have
our fill opacity emitting a couple frames later, so we can achieve an effect
similar to this one. Let's see the animation. I think we can move this
skill down a bit further. I think that looks good. You see that? Basically, we're using
the Range Selector and then change the
opacity down to zero and then only animating
the starting percentage to have the stroke
right down first. Then a couple of frames later we have the fill color right on. That's how we
achieve this effect. Let's go back to the
main composition. Let's see the animation here. That looks good. Let's save the project. That's it with our
Frame 6 animation.
11. Advanced Range Selector 2: In this lesson, we're
going to animate Frame 7. Since we already have
the Frame 6 ready here, I think when the skill
text shrinks here, I want it to transition
to the Frame 7, so I'll cut it here. In case you didn't understand
the lesson from Frame 6, we're going to animate Frame
7 the same way as Frame 6 although this time we have almost a dark-colored
background. But we're going
to do essentially the same thing just
to demonstrate how the range selector works and how to animate stroke first and then fill color second. Let's go into Frame 7 and then
choose this master layer. Right-click create,
convert to editable text. Then make sure we have the anchor point in the center here. Hold down Command, double-click on this
pen behind tool. Now I just want to
make sure we have this text in the
center of the frame. Let's try to find
the align panel, which is also under Windows, align and then uses
align horizontally and then align vertically. I can maybe even make this one
a little bigger like this. First of all, what
we want to make sure is we need to make sure this one has a stroke
color around the border. Let's go to character. If you don't have
character open, you can go to Windows and
then choose character here. Right now you can
see I only have a fill color on
this master text. I need to add a stroke color. Click on the stroke, and then use the color
picker to set it to white. Click on this white color here. Now you can see I have both
a stroke and a fill color. The next thing I want to
do is to add a selector. To do that, I can
click on this layer, go to animation, add text selector,
a range selector. For the range selector, after I add it, right now
there's nothing to it. There's only a start and
end position percentage, and there's also an offset. In order to work with
a range selector, we need to also add
another property. That's where we need to click this Add button, add a property. First we need to do is to
add a fill color opacity. If we add a fill color opacity, and without doing anything, if I change the starting point, nothing happens because
everything is 100 percent. However, if I change the
fill opacity to zero, once I change the
starting percentage, you can see that range selector
is controlling my text and have each letter
right on from zero percent opacity to
100 percent opacity. This is how I control the
fill opacity of each letter using the range selector
starting percentage. If I add a Keyframe here at
the start from zero percent, and then after a
couple of frames, I'll change it to 100 percent. Now, I have each letter
right on individually. This is our animation. All I need to do is
select both Keyframes, Easy Ease, and then I just need to do a curve like this. You know what, wrong direction. I need to do a curve like
this to Ease it out. That looks good. Now I have my fill
opacity animation. Another thing I need
to do is to add the stroke color
opacity animation. In that case, I need to add
another range selector. Go to animation, add
text selector, range. This time we need to add
a stroke color opacity. As I said before, if we keep the stroke
opacity to 100 percent, nothing is going to change. But however, if I change
it to zero percent, then if I toggle
between zero percent of the starting points
to 100 percent, you can see I'm writing on this text only the
outline part of the text. That's how we
animate the outline. Now I just need to add a
starting Keyframe at zero second and then change it to
100 percent at the end. Easy Ease a Keyframe, go to the Graph Editor. We're still in the Speed Graph. Change this curve like this. Now I have both a fill color right on and a stroke
color right on. However, they're overlapping so you can not see
the stroke anymore. That's why I need to delay
the starting point of the fill color by a
couple of seconds, a couple of frames, four frames. Now, since I delayed the
start of the fill color, you can see the stroke first and then the fill color second. Maybe four frames is too much, I delay it for two frames. I think that looks good. That's how we achieve this complex animation
with only four Keyframes. Let's go back to the
main composition. Let's see the whole
animation here. Maybe three frames, because right now I still
cannot see the stroke. Maybe it's traveling too fast. I need to give it more time. That looks better to me. Cut here. Also for this text here, I want it to shrink a little
bit from the start here, maybe go forward a little
bit and then shrink down. Easy Ease a Keyframe and
then change the curve. Something like this. Let's see the transition. That works. Then once it settles, I will just make it
grow bigger again. Scale property, it's
going to be easy over here and then
grows like this. Go to the Graph Editor. That works. That's our Frame 7 animation. Like that. Then over here, we're going
to cut it to Frame 8. I feel Frame 7 is too slow. I need to bring the
transition earlier. Once it settles, it will
transition out right away. Give it some overlap even. Over here. Yeah, that works. That's it with our
Frame 7 animation.
12. Become Motion Insiders: Before we continue, I want to share with you an exciting news. Motion design courses just became more affordable
at motion circles. With our motion
insider membership for as low as $7 a month, you will get unlimited access to our top tier motion
design courses, trusted by over 50,000
students worldwide. Time to elevate your
motion design skills to become the best
animators you can be. As an insider, you
will also receive complimentary project
files from all of our Motion Circles
YouTube tutorials. And enjoy an exclusive
25% discount on all the other incredible
animation projects from other artists in
our project file shop. Don't miss out on this
opportunity to level up your animation skills while becoming part of our
vibrant community. Join us today at motion circles.com and unleash
your creative potential.
13. Complex Animation: [MUSIC] In this lesson,
let's animate Frame 8. But before we do that, I think I forgot
something for Frame 7. Right now, it's only got a
white color text coming up, which is not a very
good transition between our Frame 7 and Frame 8. So I think what I want to
do is before it goes up, let's delete these
two keyframes, I want it to shrink down first. Let's cut it and duplicate it. Command Shift D, and then let's just do a
small scale property change. I want to change the color
to this one, to the purple. Let's find the purple color. This is a purple. Let's grab this color
here, Command C, and then go back to
our Frame 7 over here. I want to change this one to a purple color and then
turn off the stroke, hit on this icon here
to turn off the stroke. Now we only have a
purple master layer. I just wanted to cut
smaller and smaller, maybe five frames, and then cut it again. This cut, and then start
growing like this. That will be our
animation for Frame 7. Cut, and then we
have it grow like this to transition
it to Frame 8. That works. Then we
have the Frame 8 here. Let's go inside the Frame 8, make sure we have all these
converted to editable text, and then have all the
anchor point in the center. This one, I want to animate the same way as we
did before with a CC scale wipe effects, and
I need to Command Shift C, make this a composition,
click "Okay". I want to parent
these two layers into this middle
layer and now I want this middle air to come in
from bigger to smaller. Easy, ease to two keyframes. Give it a easing
curve like this. That works. Then now
I just need to copy, go to the main composition. Remember this effect
we have in Frame 3, I just need to copy
this effect here. Copy the four
keyframes, Command C, and then go to Frame
8, paste it in. Make sure we change
direction to 90 degrees. I also want the animation to start already when
it first come in, so I need to make sure
this first keyframe of the stretch property is
all the way in the start, so when it comes in,
it's already animating. Something like that. Go back
to the main composition. Let's see the animation. That works. That looks nice. Command S for
saving the project. Now what we need to do
is I want to go inside this motion design Command C for copy the layer, and then
go outside Command V, to change it to accelerate. Now we have an accelerates. Change this layer to a white color like that and then I can copy
the other two layers. Change those to
accelerate as well, but then change, let me turn off these. For this one, I want my
stroke color to be in this purple color so go down to the layer style,
and then go to the Stroke, use this color picker, choose the purple color. Then this one as well when I
change the color to purple. Now we have three layers of accelerate, and then three
layers of motion design. I just wanted to do
something similar to the start of the animation. Remember we had before. I want to use a null object to control all of these layers. Make sure we parent this
Layer 4 and Layer 7 to the null object because
we already have this outline layer parent
to the middle layer, so we don't have to parent the outline to the null object. Again, if I change the
position of the null object, you can see I'm already
changing everything. Once we have this
one settles in, I just want to
separate dimensions, animate the y position, and then bring down
the accelerate layer. Easy ease keyframe.
You know what? This one. Let's do
the value graph, and then skew AS curve here. Something like that, that works. Then once we have this here, I just want this
accelerate layer to come in one after another. Basically, I want this
one to not come up, change the starting points of these two layers at this point, use the keyboard shortcut,
left square brackets. Then we have this. One layer here and then the last
one is going to be here, so this one right here. I want them to cut in like this. The third one come in first
and then the middle one, and then the top
one. That works. I want them to cut in like this. After they're cutting like this, and then I want the top
and bottom to disappear like this and then I
want the middle one to grow bigger like this. Maybe with a hold
keyframe, just like a cut. Right now, they are
a smooth transition, but I want to have
a whole keyframe, so select the three keyframe, right-click, toggle
hold keyframe. I want it disappear before it changes the
size, so like this. Once the middle
layer change size, the top, and bottom layer
disappears like this. Something like this,
maybe even bigger. That works for me. Let's go back to the main composition, let's see what it looks like. That works. That's when we
cut to Frame 9 like this. That's why we cut to
Frame 9 over here. Command S for
saving the project. That's it for Frame 8 animation.
14. Complex Transition: [MUSIC] In this lesson
let's animate frame 9. Now, we already have
this ACCELERATE text growing up and up. Now, we cut to frame 9. Double-click in the composition. Let's right-click
"Create Editable Text". The two are disappeared. What we can do is just to duplicate the one at
the bottom, command D, and then duplicate it again, command D. That's our layout. Now, we need to do is first put the anchor point in the
center of the text. I need to move V3 further away and then change
this one, maybe. Make sure it's in the
center of the frame. Then Command Shift C for
pre-comp. Click "OK". Remember the scale wipe effect
we had before in frame 3, let's copy that again. This one. Go to frame 9, just put it here, and make sure the degree
is 90 degree like this. You know what? At first,
I think I want to keep it bigger like this, 160 percent. Then once it settles
I want to use a toggle hold keyframe. Once it settles like this we're going to have
these background come in like this. That works. Then a couple of frames
later we're going to change this ACCELERATE
layer to CAREERS. Basically, just cut it. Square bracket here, cut it. We have ACCELERATE and then this one should be CAREERS, C. We'll cut it here. Maybe it's too slow. We need to cut it here with
a CAREER and then one, two, three, four, five, five frames later
add a keyframe. One, two, three, four, five. Make it bigger. One, two, three, four, five. Make it all the way as big as this middle text
here. That works. Then I can change
the three keyframes to Toggle Hold Keyframes. Now, I just need a null object to control
the size of everything. Hit Scale property and
then go forward 10 frames. Make it bigger like this. Make sure we ease them and
then go to the speed graph, change it to a curve like this. It's easing out. Then if we go back to
the main composition, let's see the animation. I want the stretch to be happening even after
the scale change of this ACCELERATE texts. There's a continuous movement. You see that after
it becomes smaller, this part is still
stretching so it's got a smoother transition to it. Then over here I want
us some overlap. Maybe we can transition out. Once the career overlap at our line we can
transition out. Then once the CAREER text overlap the outline I also
want to turn off the outline. Option rest square brackets, go backward one frames, command left arrow, option
rest square bracket, cut it. When the CAREER occupy the whole space the
outline disappears. That works. Command S
for saving the project. That's it with our
frame 9 animation.
15. Strong Ending Frame: [MUSIC] In this
lesson, let's work on the final frame of
the storyboard, which is Frame 10. As you can see here, we already have this
transition from Frame 9 with the careers texts coming up bigger and bigger. We're going to cut from here and having the motion
circles line coming in, shrinking from big to small. Double-click on this
Frame 10 composition. Let's first animate this
motion circles text. Let's do the same thing, select both layers and
right-click Create Editable Text. Now we just need to put the
anchor point in the center, hold down command, double-click
on the pen behind tool. Right now, the website is pretty small so I want
to make it bigger. Hit S on the keyboard, pull up the scale property, and then we can make it
bigger. Something like that. Now we're going to animate the scale property of
this motion circles. Hit S on the keyboard, add a keyframe, and then move
forward a couple of frames. Make this text larger,
maybe like this. We can select both keyframes and then right-click Keyframe
Assistant, Easy Ease. Let's go to the graph editor, let's make an easing curve
like this, that's good. Then let's see the
animation, that looks good. Then after it almost settles, I want this text here, this website come from
the top coming down. I'll use the position property, hit P on the keyboard,
set a keyframe, and then move it further
a couple of frames, drag this one up. We have a position
change from top to down, easy ease is the keyframe. Go to the graph editor, we can do a curve like this. Now I just need to cut
the layer a couple of frames after the keyframe. Maybe here, use the
keyboard shortcut option, left square bracket
to cut it here. The text will come in like this. Maybe one more frame, go for one more frame, option left square bracket. This is the animation we have, let's go back to the
main composition and see the animation. I think it works, I can probably make this
one come in earlier. When the motion circles
almost settles, I can bring up the website. That looks good, command
S for saving the project. Now another thing I want
to do is, first of all, when it comes in, I don't want this color to come
in right away. I want the color to come in from the right-hand side
coming to the left. In order to do that, we need to change this text
here into the purple color. Let's try to change the
text to purple first. Hit on this layer and then
use the color picker, pick a purple color
or a pink color. Then I want this
filled background to come in from the right. Basically, maybe
around 10 frames, I want this color fill to
come in from the right. Hit P on the keyboard. Add a position
property go forward 10 frames and then add
another position property, drag it all the way here. That's my animation, it goes from right to left. I just need to easy ease these two keyframes and then
give it a easing curve. That looks good. When the color
background comes in, I want the text to
become in white color. All I need to do is to duplicate this layer here, command D, and then change this
text into a white color. After I have this text in white, I want to use the gradient fill as a track matte for
this text layer. Duplicate the gradient fill, put it on top of the white text, and change the track matte over here of the white
text to Alpha matte. If you don't have the
track matte option here you can click on the second button at
the corner over here, is going to give you
this track matte option. Basically, when the color fill comes in is going to change this text color into
white, like that. Let's go back to the main
comp and see our animation. Now, I'm just missing a
black background here. I need to go back to
this composition, go to layer, new, and then solid, add a black background
underneath, and then go back again. Maybe not even black, I think this is a
dark blue color. I need to copy this
dark blue background, command C and then
go to Frame 10. Add it in the back, delete the black background
that I added just now. Let's see the animation. That works. I think
that looks good. Another thing I want to
add is I want to add some flashes like the first one that we have in the Frame 1, just a couple of
solid color flashes. Command D, duplicate
this solid layer, put it on top and then
cut it to two frames. Basically, move
the starting point of this layer to
this point here, use the shortcut left square bracket and then
go forward one frame. Command right arrow, and then cut it option red
square bracket. Now I have this color
fill just for two frames. Hit U on the keyboard. Now I have it outside
of the frame so I need to pull it back
inside the frame. Just delete this
keyframe stopwatch, and then move this one
over onto the frame. Go to the align panel, I want to make sure it's
right in the center. Then that flashes one
time, I'll duplicate that. Command D, I'll just let it flash maybe
three times, let's see. Maybe two times is enough. That looks good. Over here, the third time, I want this whole thing to
flash into black and white. What I want to do
is go to layers, new, and then add an
adjustment layer. Cut it for two frames, left square bracket, and then go forward one frame. Command right arrow, and then use option right
square bracket. On this adjustment layer, I'll name it black and white, and then go to the effects
and presets panel. Let's search for an
effect called tint, double-click, I swap the color. This is going to be our
black and white frame, and now I just need to
add a curves effect. Search curve, and
then we can bring up the contrast to
something like this. Maybe drag one more frame. It's going to flash to black
and white all of a sudden. Let's see the animation
from the start. I think that works. Command S for
saving the project. I also don't want this
text to always stay in still in this frame for the
last couple of seconds. I want the whole thing to
drift in a little bit, moving smaller and smaller. Go to this motion
circle main text, which is the white one. Go to scale property, hit S on the keyboard. It's going to last for
maybe three seconds. I want to add a scale
change to 130 percent. You see we can see this
purple text underneath. I need to cut this layer
once the white text come in. I need to cut from here, select this layer, option restore bracket
to cut the layer. Then I also want to
parent the website onto this white text so
they're shrinking altogether. That works. Go to the main
comp and see the animation. I think it's too fast, and also it's lasting
for five seconds. I need to pull this
keyframe all the way over here and then I want to change it to
maybe one percent. It's not moving too
fast, let's see. I think that works. That's
it with all our animation, let's preview the
thing from the start. That's our full animation. In the next video, I'm going
to show you how to add a glitch effect and also a couple of other
secondary animation.
16. Glitch Lines: [MUSIC] In this video, let's add some extra elements to make the whole
thing more polished. The first thing
we need to add is a glitch line overlaid on
top of the whole video. To do that, let's go to the layers panel
and then go to new. Let's add a solid layer. We can do a black color. Click "Okay" and call
this glitch lines. Let's go to the Effects
and Presets panel, search for Fractal
Noise over here, double-click on this one. This is a fractal
noise effect we have. We need to change some of the setting in order to get
the glitch line effects. The first thing we
need to change is to change over here
in the noise type, change it to block. Then the contrast we need
to pull up the contrast. The brightness we need
to bring it down. Make it very subtle. Then go to transform and
check this uniform scaling. We want to change
the width to 1,000 or 10,000 and also change
the height to one. Now, we get a bunch of lines
over here. You see that? If we manipulate the contrast, we can tone down the whole
thing a little bit more. If I zoom in, I want to
see it more closely. Let's go to the sub setting. For the influence percentage, let's change the
influence to zero. It's going to give me all these
straight lines over here. For the sub scaling, the least we can do is 10. Complexity. I think it doesn't matter.
We can keep it at 6. Basically this is what we want. We just need to manipulate the brightness a
little bit more. Tone it all the way down. Then you can see the lines
are very subtle here. Over here in the glitch
line blending mode, let's change it to screen. Now you can see we got these lines overlayed on
top of our animation. However, they're not
animating right now. I just need to go to
the evolution options and then go to the random seed. If I change the random seed, you can see there's all
these animation happening. I think the lines are too much, so I need to change the
brightness a little bit more, maybe tone it down even
further to maybe negative 250. Now we can see only a
couple of lines are left. Over here in the random seed, I want to add an expression, hold down Option in Mac, and then click on the Stopwatch. Over here, we can
type in times 20. Let's see if that works. Can you tell there's very subtle glitching lines
animation over there. Maybe it's too subtle. That works better. Or maybe time times 20 is too fast. Let's do time times 15 or 10. After we have this, another thing we want to add is go to Effects
and Presets panel. I want to add a
posterize time effect. If you search for a posterize, there's this posterize
time, double-click on this. Basically it's changing
your frame rate from 24 frames per second
into anything else. For now, we want to do
10 frames per seconds, there's more of a glitching
look to the fractal noise. I think that works. Let's
preview the whole animation. Now you can see we have a glitch line over there
in the background. That's it for the
glitching line. In the next video, I'm going
to show you how to add other secondary
elements to the video.
17. Secondary Animation 1: [MUSIC] In this video, let's add some
secondary animation to the whole introduction video. Let's go to the
Project panel over here and then hit on this, Create a New Composition. For this one, we can name
it to animate as circles. Keep everything the
same click ''Okay''. Now we can draw a circle
with the tools on top. Hold down this rectangle tool, go to the Ellipse tool, and
then we can draw a circle, hold down Command and Option and Shift to constrain
the property. Then you can use Spacebar to move the position of the
circle while you are drawing. Release it. This is our circle. For the circle, I
want it to be in the absolute center
of the composition. I'm going to the Align tool, align it vertically
and horizontally. I need to have a stroke to
the circle instead of a fill. To turn off this fill, I can hold down Option
on the keyboard, click on this fill
three times 1,2,3. Now, I only have a stroke
around the circle. Let's go to the Ellipse tool, go to the stroke, and then I want to
change the Line cap. Instead of Butt cap, I want to change
it to Round cap. This is going to be
our first circle. Let's go to scale property. Let's make this smaller. Then I want to change
the Stroke width to 15. Let's duplicate this circle, command D go to Scale
property, make it bigger. However, change the stroke
to thinner, maybe seven. Duplicate this circle again, make it even bigger and then
change the stroke to 20. Then duplicate
this circle again. Hit ''S'' make it a
little bit bigger. Change the stroke width to six. Now, I just need
to make two more, command D, make it bigger, change to a thicker width. The last one, command D, make it bigger and then change the stroke
to make this thinner. This is going to be our
circle that we have. Now we need to animate
this circle here. Let's go to the first circle, let's add a Trim path effects. I can manipulate
this ending point over here to animate
the circle on and off. The way to animate this is, I want to add two key
frames, start and end, both from zero and then
go forward 15 frames or 20 frames and then change the starting and
ending to 100 percent. Easy Ease two key frames
go to the graph editor. Drag these curves like this. Now I just need to delay the ending portion
of the circle. If I solo this layer over here, you can
see the animation. I just drag the ending
key frames all the way to the right and you can
see the animation like this. It's coming up and then wiping
on and then wiping off, this is the animation we need. We can copy all the
key frames command C and then paste them all on
these different circles. Command V. Let's
see the animation. They're all traveling
at the same time. However, this is
not what I want, I want them to travel
at different time. I want to change the offset
of these key frames. Basically select everything
and then over here in the Search bar, type in offset. Now we can see the
offset over here. Basically what I want to
do is for the first two, I want to give it offset
like this, the second, the third circle,
and the fourth one, I'll give it an
offset like this. Then the last two I
offset it like this. They're starting at a
different position. Let's see the animation now. That looks better
and more complex. Command S, save the project. I think that's it,
that's what I want. We can use this composition to place it into our animation. Let's see where we
should place it. How about here? If we have our circle animation
here, make it bigger. I don't want the circle
to build like all the way so that we have as
full circle on the screen. Let's go into this composition. Hit ''U'' on the keyboard. I think I need to move these
end value key frames a little bit to the left to
have something like this. The circle is always changing, we don't have a full
circle built on the screen and animation
is shorter, it's faster. I think that works, like that. We should have something
in this frame here because this frame is pretty boring and we just need the color
to be in this purple. Let's go to the
Effects and Presets panel search for a fill effect. Take this purple color. These two are all
the way together, so I need to delete the
first one, it's too much. I'll just put it
on this on-screen here and make it bigger. To tie Frame 4 and Frame
5 better, that works. This is a circle animation
as a secondary animation. In the next video,
I'm going to show you another secondary animation.
18. Secondary Animation 2: [MUSIC] In this video, let's animate another
extra elements. Let's go to the
Project panel here and then click on this "Create
a new composition". We can name this
one, animated lines, and then click "Okay". Now I just need to go to
this pen tool and then draw a straight
line horizontally. That looks pretty good. Then I want to duplicate
this Command D, move it down a little
bit and then change the stroke width to
maybe 20 pixels. Also, I need to
change the Butt Cap, go to the Stroke, and then change the
Butt Cap to Round Cap. The same with the first one. Just need to change the
Butt Cap to Round Cap. Move these two closer and then I need to
duplicate another one, Command D. Make this
one thinner, maybe 13. Then duplicate another one. I think that looks good, and this is our lines. We need to animate
the lines the same way as we animate the circle. We can actually go to the
animated circle and see if I just copy this trim path
keyframes Command C, and then go to the animated
lines paste it in, Command V. Let's
see the animation. I think that looks even better. We don't even need to
do anything ourselves. We can just copy
these two keyframes. Let's copy the keyframes
onto all of them, and that's our animation. That actually looks good. Then I need to select
the four layers command Shift C and name it Line 1. Now I just need to
duplicate it to Command D and then
go to rotation, give it a 90 degree rotation. This is going to be our cross
or the x sine animation. If I go to the scale, I can make it smaller, maybe 80 percent for both. Let's see if I copy another
one, this one here. Then go to "Scale", turn off this
constraint property. Put a negative on the x
scale to turn it around. Then this one, I can
do the same thing Command D go to "Scale", checkoff this constraint and
then negative over here. I just need to move the position around to
better align everything. Give it a better alignment. I think that looks good. That's our animation over here. That looks good. Command S
for saving the projects. Let's go to the
main composition. Let's add in our animated
lines over here. This one, we don't
have to be this big, maybe 20 percent scale, and put it on the side here. Maybe I want us to start
all the way over here. Cut this layer option
left square brackets. Duplicate this one, put it over here. I'm trying to find
where we can put the big one Command S
for saving the project. We can actually try to put
the big one over here, let's try if it works. Let's drag this
one animated lines and then align it over here. Let's use R for rotation. Let's put it over here. I think that works. We're
going to add a bunch of other things later on to
make it more polished. But right now, I think this
one that x sine over here, I think it works. I want it to start
with this frame here, so cut it over here
like that. That works. Then we can do another one here, Command D. Let's do this
one on the right-hand side. That works. For the
accelerate over here, we can do the circle, drag the circle down. Put it on top of the Frame 9. I think that works. The last one for
the motion circle, we can still use these
animated lines here. I'm just randomly adding
these animated lines and animated circles to
give it more variety, and then give some extra
elements to my whole video. That works. I can even
add the animated circle here and make it smaller
in this frame here. This is cubic. I can actually change
it to maybe 20 percent. Then add one maybe over here, change it to 10 percent. That works. Let's see
the animation for now. I think this is too small, over here. I can still
add some little circles, I'll copy these two
circles Command D. Now let's preview
our full animation. It's a bit slow right now, but I can render it later on and then show you
the full animation, but you get the idea. We just need to
randomly place in the animated lines and
the animated circles in various sizes and
then various places to give more interests
to the whole video. I think now the last
thing I want to do is to add some subtle background, outline text, just like
the first scene here, we have an animation text
sadly in the background. I just want to add
those details in, like this background
is not that plain. Let's find this
frame here, Frame 6. I want to duplicate
the scale Command D and then get rid of all the
keyframes and animations. Just want to make
this one bigger, and then go to the
character property. Delete the text animator, and then delete the
fill color like that, and then make it all the way up big and big in
the background. Something like that. Then change the stroke to maybe 0.1, and maybe change the
transparency to 50 percent. I think that looks good. How about that?
Maybe 25 percent? I think that looks better. You see that 25 percent
opacity at the background, just give the background
a bit more texture. That looks good. Then I just need to add
it to the last frame, which is a final
frame here, Frame 10. Duplicate this one, hit "U" on the keyboard, delete all the key frames. Hit "S", make it super big. Then change the stroke
color to white. Here we go, just make it big. Change the stroke width to 0.1. Let's do the circle part
like this is a circle, make it even bigger. Then change the transparency
to 25 percent or 30 percent. I think that works. That's it with our final full animation. In the next video, I'm going to show you how to export it, and I'll show you the exported MP4 format video as a whole.
19. Export: [MUSIC] In this video, I'm
going to show you how to export this into a
MP4 format video. We already have our
full animation done. To export the video, let's go to Composition, and then let's choose this
to Add to Render Queue. After I click on "Add
to Render Queue", you can see over here we can
choose the output module. Click on this "High-quality." Normally we would upload it
into a QuickTime format, go to the format options. We will choose this Apple
ProRes 422. Click "Okay". Then everything stayed
the same click "Okay". We can choose a folder, kinetic type animation folder, and then let's name
this one to outputs. Click on "Save" and now we can
hit on this Render button. You can see it's
rendering our video. Now we have our video ready. Let's go back to the
folder and then watch it. Over here in the output folder, let's double-click on this one. This is going to be
our final video. However, it's in MOV formats. If you want it to be encoded
into the MP4 format, we need to download the
Adobe Media Encoder. I'm going to show
you how to do that. But first, let's watch this
15-second for animation. [MUSIC] Yeah, that's our
15-second for animated intro. If you want to change
this one to MP4 format, we need to open
Adobe Media Encoder. Just go ahead and open
Adobe Media Encoder. With the Adobe Media
Encoder open let's drop this MOV format video
into this queue here. Over here, we can actually change how we want to encode it. We can change it to H264, which is a very common
format for MP4 video. Over here, we don't have
to change anything, in the setting, we can
change a output folder. It's going to be the same
folder within this output. Click on "Save" and then hit
on this green play button. Now, it's going to encode our MOV format video into an
MP4 format video. [MUSIC]
20. Congrats: Congratulations, you made it. Now it's time to
finish up your project and share with me and
your fellow students. Make sure to post your video
into the project panel to get feedbacks and
inspire other students. This is a hard one, but now you've conquered it. If there's anything that
you're not clear of, feel free to ask
me any questions you have and I'm
here to help you. If you can remember some of the techniques taught in here, you can always go back and
refresh your memories. I also have a few other courses that you can check out to learn different techniques to improve your animation skills. Thanks so much for
taking this course. I hope to see you in my
other videos. Cheers.
 Hongshu Guo, Motion Designer