Transcripts
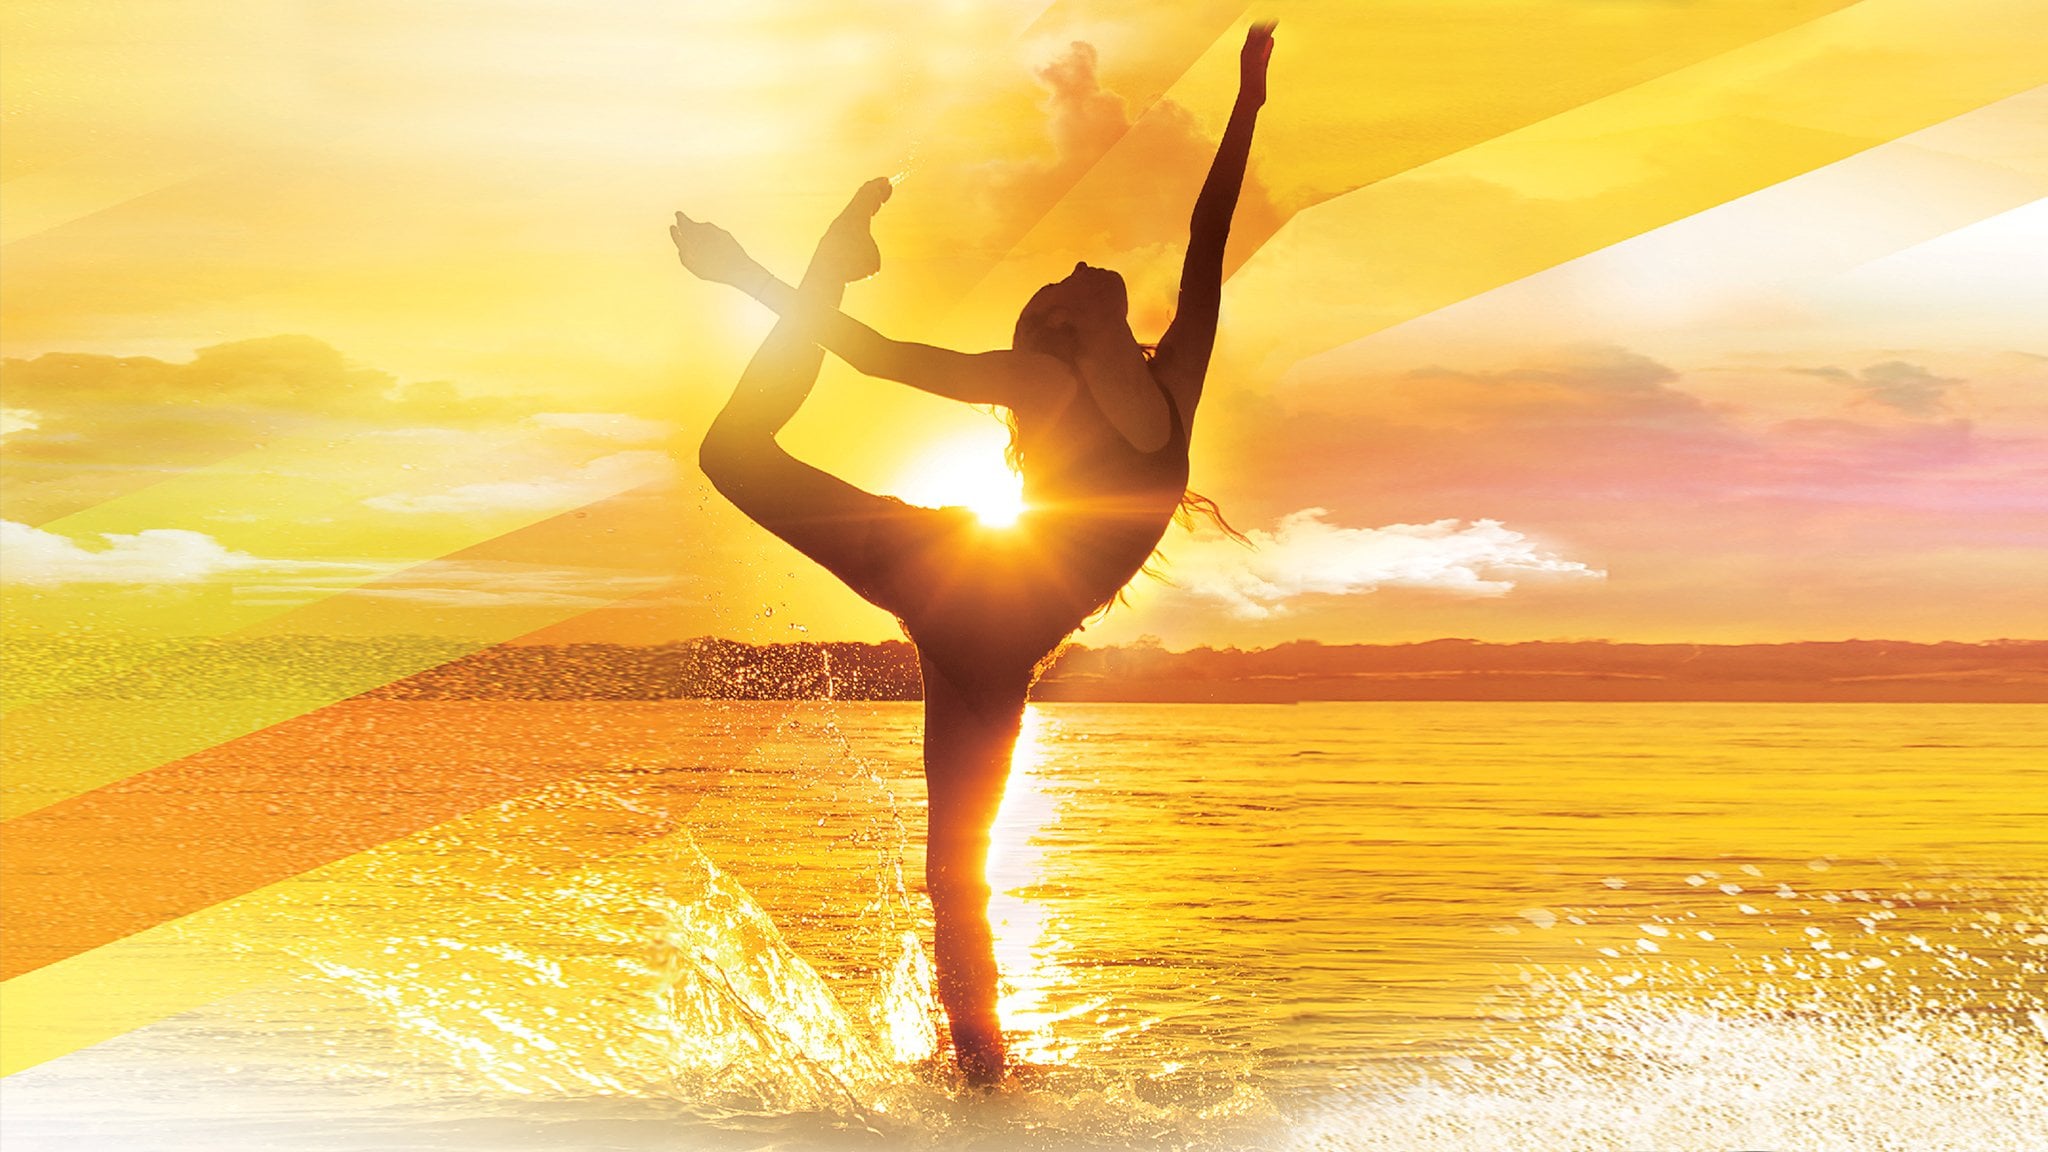
1. Welcome Video: Welcome to the adobe light room chorus. Thank you so much for enrolling in this video. I just want to cover some of the different questions you might be wondering about this course. First, is this really the right course for you? Let me explain a little bit more about who we designed this course for. John and I came together to make this course for beginner to an intermediate photographers who might have a DSLR or mere lis camera that they've played around with. Maybe you're just shooting photos on your phone, but you want to make your photos look better. You see those photos and magazines and online that just are amazing. Most of those photos I would say 99.9% of those have been edited, and a lot of those have probably been edited in Adobe Light Room. So we want to help you take your normal not so amazing photos and make them look amazing. So for anyone that just loves photography, this is a great course for you. Now that you know a little bit more about who we created this course for, Why should you take this course from us? I know what is like to pick instructors or try to pick instructors and college, high school or just with an online course or YouTube tutorial. And I know how painful it can be to sit through a boring instructor. So we want to make sure that we are as engaging and excited about life term as possible so that you can get excited to. To this day, I've had over 200,000 students enroll in my courses, and most of him have enjoyed them. And Jon is a professional photographer who runs his own photo studio Together. We have years of digital photography and instruction experience, but most importantly, we just love photography. And we love seeing students of ours go through our courses and really achieve their dreams with the instruction that we give them. You may be wondering, Is this course going to be boring or not? If you're excited about this topic of photo editing and photography in general, this is going to be a great class for you. If you're only mildly interested, you might get bored fast. Does that make sense? But I think if you're excited about the tar fee you're going to want to binge watch these lessons just like you would a TV show that you're really excited about. And then, lastly, just a few quick tips for taking this course. We've included practice photos that you can download and edit along with us. In this lesson, we've included some downloadable Zip files that include all of my sample photos and all of John sample photos. Throughout the course, we kind of flip flops from section to section. All teach one. John will teach one. Sometimes we split up a section, but you'll be available to find the photos just with the photos that you download in this lesson. Also, we've added MP three audio files for all of the editing lessons, so that if you want to listen to the lessons on the go, or if you want to, just listen to them while you edit using light room. You can do that to those can be found in the next lesson. Adobe Light Room is always changing and growing. We're going to be teaching this with the latest adobe light room creative cloud version, and there's lots of different buttons and aspects of the course that we go through But there's a couple things that we skip over. For example, they have a maps tool, a way to organize your photos based off of the map of the globe. It's a cool feature, but it's not the best way to organize photos. So there's things like that we might skip over in this course. But if there's ever anything that we did skip over or we didn't go into as much detail about, let us know, we would be happy to either explain it further with the Q and A forum on the course or creating a completely new tutorial for you. Because if you're wondering about it, there's probably other people who also want to know about it, too. Please give us any feedback you can to help us make this a better course with all of our courses that I've ever created. I know it's not perfect in the beginning, and I depend on feedback from students like you to make it the best course that it can be. Thank you again for enrolling, and we'll see you in the next lessons. I hope you're excited because we sure are
2. Lightroom Crash Course - Edit Your First Video: Hey, Phil. Here in Welcome to this crash course lesson on editing a photo in Adobe Light Room. As I mentioned before, this is just a quick run through of how to edit a photo completely in adobe light room. In the following lessons, we're going to take a step back and go through every aspect that I'm going to show you in this lesson one step at a time. So let's get going. So when you're in Adobe Light room, you have these different modules. I'm in the library mode right now and you can see all of my photos to import photos. We can just click this import button and then find where we want to import photos from. I'm going to import this photo right here. Geneva statues. This is a park in Geneva that I visited a couple of summers ago. And when I'm ready to edit, I can click this developed tab and this gives us all the options for editing. I can open and close the different windows. Teoh, give me more room to edit if I want. Over here on the right side, I have all of my editing options and there's different tabs here that you can open and close to get different options for editing. The first thing I'm going to do is crop this photo. I'm going to click this button right here. This gives us the bounding box, which I can drag in or out. I could also click and move this image around, and so I'm just going to crop this in. And then just by dragging on the corner, I can rotate the image and I'm tryingto horizontally align it to this the bricks right here . I'm gonna undo that just by pressing control Z on my keyboard or command Z on my keyboard. If you're on a Mac and let me just actually, Reese, you can go back to the very beginning without any edits you've made but going to reset because I want to show you something very cool. So if I click crop again, I'm going to crop in gonna move it right here. There's a cool way to automatically level a photo to ah horizon or to a line in your photo . And that's with this little level tool right here. If I click this button right here, then go on top of my image and then just drag a line across the horizon or whatever I want to be level. It will automatically rotate the image to that point. Then, when you're happy with your crop, you can just press the return key or the done button in the bottom. Right. So for this photo, I want to make it kind of cool. So I'm going to drop down my basic tab. We have our white balance editing tools right here. The white balance is fairly good. I'm actually going to make this a black and white photo. So I'm going to skip down there to saturation down here. Then I'm going to play with the contrast and the exposure. I can control the entire exposure of the image right here with this slider. The entire contrast with this lighter. Or I can edit individual parts of the image the highlights shadows, whites, blacks with these sliders. So if I want to add more contrast, I can bring down the blacks and bring down the shadows and maybe bring up the whites a little bit. I wanna make this super contrast E. So I'm just going to make this a little bit extreme, but I think the way this photo is with the statues, it works well. If it's super contrast e, I can even bring up this contrast lighter a bit, maybe dropped exposure. Overall, I might go back to crop and just crop in just a little bit. So just to this top step right here, So we're in just a little bit more. Just return on my keyboard, make sure we're not cutting off that guy's head. The's next options are other ways that we can edit the exposure of different parts. This is the tone curve, and we're gonna be going over this in the future lessons. Really, the rest of these I'm not too much interested in. The only thing I might be interested in right now is the effects tab, and this has been yet ing so. If I want out of and yet I can out of. And yet by dragging down the slider and I might add just a little bit of a vignette, add some more feathering and let the highlights come through a little bit more. So I think that's pretty darn cool. Kind of scary, actually. There's lots of these other tools. We're gonna be going over in the class, but this is pretty cool. If I want o compare this to the original image. I can click this button right here, which is the comparison before, after, and then I can cycle through the before and after settings just by clicking through it. I think it's pretty cool. This is kind of an artsy pick. Maybe I would print and put up on the wall. Say, I'm happy with it. Let's export it if I go up here and go back to library the quickest way to export it Just by selecting that photo and clicking this export button or while I'm in the developed tab with my toolbar film strip down here and have the photos selected, I can just go up to file export or command shift E on a Mac or commit control shifty on a PC. I'm just going to say where I want these this save. So I'm going to just put it on my desktop again. We're going to cover all of this later, so I'm just gonna run through these. I'm gonna call this Geneva statues for file settings. I'm going to leave at J Peg quality 100. But I'm going to resize to fit and I'm going. I want the with to be 2000 pixels the height. I don't care what it is. Whatever the right aspect ratio is for having the with B 2000 pixels and the resolution 1 50 p p. I is good watermark. I'm not going to want a watermark. We're gonna learn all about that in this course. The rest these. I'm just going to leave as is going to click Export. It's going to export up here. Then if we go to our desktop and open Geneva statues, we have this edited image. Super cool. I think I am gonna post print this out. I've always loved this photo. I love this stature. I love this park. It means a lot to me a study abroad in Germany and was able to visit family in Switzerland . And then I took my wife back to Switzerland. And that's actually I proposed to her in Switzerland, not at this park, but in Sione, Switzerland, where my great grandfather is from. Actually, eso Yeah, Switzerland's a great place. And enough about that. Enough about me. This is the first photo that I edited in this course for you guys. Hopefully you get a rough idea about how easy it actually is to add it in Adobe Light room . From now on, we're going to break down all of the different aspects going from the program layout, importing organizing to all the basic editing features, explaining exactly what each of those are then going into some more advanced editing tools , followed by some techniques, more advanced techniques and walk throughs of our entire editing process. Thank you so much again for enjoying air enrolling in this class, and I hope you're enjoying this class so far, and we'll see you in another lesson by
3. Understand the Lightroom Layout: everyone fill here. You can't see me. I'm down in the bottom left corner of this video. I'm so excited to have you here and in this section of the course, we're going to be going over the basics of light room, the program layout, importing photos and organizing photos. Because it's so important for us to be smart in the ways that we organize our photos so that when we go back and edit our photos later, maybe even months, years down the road, we can easily find the photos that we want In this video. I'm going to go over the basic layout of light room so that you know how to navigate it. So first things first, Let's just start off with the top left. This isn't going to be how light room looks when you first open it, you won't have any photos that you've imported, but you can see here. I've already imported photos will be doing this in the next couple of lessons. So it's OK if you don't have any photos imported yet. Up at the top left, you have your file menu. This is standard for most applications. I'm using Adobe Light room. Creative cloud version 2015. The latest update and I'm on the Mac. It will look a little bit different on a PC, but I know Oh, Dobie is trying to make their applications look similar on Mac and PC. So up here you have your menu. You can get all kinds of things like importing, categorizing, organizing some edits. And a lot of this stuff will be doing right here, down here in the actual application itself. When there are things that we suggest you find from up here will let you know the next thing are our modules. So we have different rooms in light room and these do different things. So here. And if you don't see this menu up here at the top, right, you can click this little arrow and you can click it on and off. If you want to save more room and have more space for editing. We're in our library room right now, which is where we import and organize our photos. Next is our develop room, and this is where we actually edit our photos. And then these following rooms map, book, slideshow, print and Web are form or specific case scenarios where you can actually tagged photos on a map, and you can have an entire map of the globe of where you've taken your photos. You can create a book out of your photos. You can create slide shows, professional slide shows. You can print photos and set up how you want to put your photos, and you can also publish your photos directly to the Web via light room. We're going to be spending most of the time in this course in the library and development developed panels because, honestly, that's where I spend 99.999% of my time using Adobe Light Room Below. In library you have on the left are Navigator and some other options, and all these little windows dropped down by clicking the little arrow on the left on the left. When you have a photo selected, it will pop open in your navigator and I'll just jump quickly down on the bottom. This is your little toolbar that has all of your photos selected. If I change which one I have selected, notice how it changes up here in the navigator over on the left. These are different ways to catalog and organize. Our photos were going to be going over some different ways in the next couple of lessons. In the middle of this is the folder that you have open. So over on the left, you have different folders. As I mentioned collections folders, I don't see what's cats. Okay, this is a folder with all of our my cats. And when you open up those folders, they pop open over here on the right side of this window, and we're still in the library room, arm or metadata and options for our photos. We can see a HIST a gram. We can do some quick developing if we have some presets. If we just have to do things like fixing white balance for a group of photos, we can do that right here without having to go over to the develop tab. You can add keywords. You can add other metadata, and this is stuff that you would add to your photo to help catalog. So when you're searching for photos later down on the road, if you use a tool like Adobe Bridge to catalog your files, you can just search for keywords. I can tag these photos as cat photos or specific cat named for my cat, Zohra and Shell A. Or I could tag it with specific lens type. Or actually, it already is. Catalog with specific lens types, you can see if you go to over to the metadata, you can see all of the things that it already knows about this photo cameras air so smart these days it's amazing. So it has the dimensions that has the exposure were set up. It has the lens focal length. It has the is. So we were using the flash if we used it, the camera model the lens were using. And we can even add comments below and then moving down below. We have our filmstrip panel down here that includes all of our photos that we have opened in this folder that we have opened. There's lots of ways that we're going to organize and rate these photos, but we'll hold off on that until the next lesson. I'm just gonna go jump over to the develop tab. So this is the new module where you actually edit your photos on the left. You have your navigator again you have different collections where you can open collections right in here. And also presets will talk about presets later. In this course below, you still have your film strip where you can select which photo you are editing and then over on the right, You have your editing tools. I'm gonna let John cover all of the basic editing tools in this course. But like everything you have panels you can open and close the panels with these arrows on the right side, The one thing that's different about light room than some other adobe products is you can't move things around. So I can't take this basic little window, move it around. I can't just delete it or get rid of it completely. It is there, and it is right in that position. And it's good because that's kind of the way they've set it up in the way that you actually edit a photo. It goes through the workflow of editing, So this is a basic overview of Adobe Light room. I hope this has really helped you understand a little bit more about how the program works . If this is the very first time you've opened light room, then I'm sure it's helped a little bit. If you have any questions, let us know. I would be happy to go in depth on other aspects. If there are things they're like, Wait, what? You skipped over that. I was looking at the library and you didn't go over that button down there. Don't worry, I would watch through, especially the rest of the lessons in this section, plus the next couple of sections before you worry too much because we'll be covering all of the key things you need to know. Thanks for watching, and we'll see you in the next lesson.
4. Importing Photos to Lightroom: in this lesson. We're going to be importing photos into adobe light room. So if this is the first time you're opening up adobe lie room, you won't have any photos like you see here with me. I have some photos of my cast, and I shot. So Yeah, I know. I like cats. I don't know if I'm weird or not, but I do like cats. I like dogs, though, too, And I can't wait to get a dog. But I do have a cat right now anyways, back to light room. So when we do want to import, the easiest way to do it is just going to your library module and then clicking this big import button right there. This will open up a viewer that opens up your files on your computer so you can see here over on the left that I have my source. And this is similar to on your computer. You have your main computer, you have other external hard drives that you have connected. So you want to find the file? Is that you want by just going into the menus for this one? I have some photos that I want you to downloads that you can practice with. So if I go to classes, these are all the classes, the home teaching or ab taught under light room and click sample photos. And when you click the actual folder itself, all of the photos will appear. If there are photos from here, we can make selections whether we want to even import voters or not. I know that a lot of times I'm on a photo shoot and I'm taking so many photos. I know I'm not going to want to actually important edit some of them. I know some of them are just bad. Sometimes I just make a mistake. The focus is off completely and it can't be fixed in light room, so I might not want that photo imported so I can actually uncheck the photos that I don't want to import. You can click this button right here to uncheck all and then go through the ones. If you only have a couple that you want to pick or press the checkoff, you can also view these larger if you need, so you can increase the size of the thumbnails. Or you can click this button down here on the bottom left. That says Luke View. And this means that we can see all of the individual photos, and you can press the arrow keys on your keyboard to go scan through them. So here in this sample photos folder, we have some photos from my trips to Europe, even my wedding. Just photos that I've shot around town and you can actually import these, download them and so you can follow along. So I encourage you to do that right now if you haven't done so already, and then when you're happy selecting all the photos, just click this import button. Now our photos air in our library, and we can go forward with editing them. But before we do that, I want to show you how you can quickly get back to this folder if you need to. One is by going to the catalogue, and you can see if I open up catalogue that previous import is selected or highlighted, and that's this import. So if we close light room and we open it up in a week or two and we want to edit this same exact folder, we can just click the previous import catalog. You can also see that has Kellogg's for all photos. All sync photos, different types of catalogs. There's also our folders. So if we drop down folders and we find our sample photos that we've imported folder than we confined this folder, the way folders is set up is this mirrors what's on our computer. So on my Mac, I have all imported all of these other folders we can see you know, night photos that I've shot, camping photos that I've shot engagement shoot, which was a shoot that my buddy shot for us in different folders. But a better way to organize is by creating a collection. And I'm going to show you how to do that in the next lesson.
5. Creating Collections in Lightroom: The best way to organize photos in Adobe Light Room, in my opinion, is to create collections, which you can see right above me. Collections are folders that you create with in light room, and the last lesson we saw that you can go back to this folder by going under folders or even catalog. But once you start importing a lot of different folders, this can be kind of confusing to find this exact specific group of photos so we can create a collection. The way we do that is by selecting the photos that we want to add to a collection. Or you don't even have to do that yet. Let me just select these top three, then under collections. I can just click this plus button over here and I'll say, create collection. I'll rename this and I'm gonna name this photos for light Room course I'm going to check, include selected photos and then click create Now in collections. You see that we have this photos for light room chorus folder, and it's easier to find then going through here, and it's also searchable, so if we have a bunch of collections, we can search through this catalog, but how do we add photos to this collection now that we have created it? One is by going to our previous import or to any photos that you want to add, selecting them and dragging them into this collection so you can just click and dragging and see if I let go. Now they're added. Now, if I select photos for a light room course, we have this collection selected. I go to my engagement photos. Then that's a different collection. You can also create smart collections. So if I press this plus button and I say create smart collection, then I rename it. I can add photos. Depending on a number of factors. We're going to learn how to add these factors in the next lessons. But I think you'll get the point where when I say you can add photos to a catalog based off of their rating so we can actually rate photos and light room from 1 to 5 stars and say A. We want to add a collection with created collection with all five star rated photos, Then we can create this collection. So if I call this five star photos and say create, then this will actually create a collection with all the photos that I've imported ever that have five stars or more. Now, I don't have all my photos on this version of light room, so I don't only have 349 5 star photos, and a lot of these are from my wedding. But this is a cool collection. We can also go to back to smart collection. You can base it off of different labeling what type of where it's from, what type of camera it is. So I could put all my Canon five D photos, all my Sony A seven s photos, any type of camera like that. We can choose all kinds of options and those air smart collections. We can also create folders or basically sub categories for our collections. So say we want to create a collection set, and then maybe this is ratings we say create. And now we can actually put this five star photos collection into ratings. And then if we want, we can just say, create smart collection, then say we say four star rating and then we'll actually change this from reigning is greater than or equal to two. Reading is four stars, and then we'll create it. So now we have 333 4 star photos and these air under this bigger ratings category. So that's how you create collections. And the next lessons were going to be going over some different ranking options, and these will help you understand how we can also do other labeling techniques to photos, which would then in turn, become a collection. Thanks for watching, and we'll see then.
6. Ranking Photos: before we actually edit photos. It's a good idea to do a little bit more organization and with photos, I like to rank my photos. So I'm actually going to import another folder just to show you my process. Because all of the photos that we imported in the last import with our sample photos those are all photos I want to use. But I want to show you how I would import a typical photo shoot folder. So I'm gonna go to my photos, find the folder that I want to import. This is actually just a little random photo shoot that I did just walking around the town around my neighborhood. I just shot some photos and some flowers, and I'm just going to select all of them. And I'm going to say import, and I just want to mention something to over here. Now that we know what a collection is when you import, you can actually check this ad to collection option. You can create a collection right here, or you can add to a collection you already have. And I think this is a smart way to automatically organize your photos. I'm going to say import. So now this is what I dio pretty easy. I will actually just open up these and full view mode just by clicking this button right here. And then I will just scroll through these. I'm using the arrow keys on my keyboard and then using the numbers on my keyboard 1 to 5. I can rank these photos so I'll probably go through these a couple times. But I typically personally, I will choose only the best of the best for a five great photos for okay, photos or good photos that I'll still at it as a three photos that aren't good. And I don't think I'm going to edit as twos and in photos that are just completely bad. I'll leave or I'll put at one. So this one, even though I could actually edit this one because it's a rod, I could drop the exposure, make it look good. I'm not too sure about this one. So I'm just gonna put it for a to for now. And you can see I'm just choosing on my keyboard. I could also go right here and give it a star rating right here. Or I could just do it on my keyboard. It's faster for me again. Here, overexposed. Gonna put it to this one is a little bit under exposed. And sometimes I like to see the next ones to see if I got a better angle. But I like this one. So I'm gonna put a four. This one I like, But I like this one a lot better. For some reason, I think my auto white balance is on, so I'm gonna put this one is a three. This one. You know what? Actually, I'm gonna keep this one. I'm gonna keep this one as a three. It's not great. This one. Um I'm just gonna put as a to I don't think I'm gonna edit that one. I like this one a little bit more. It's a little close up. Something to put it as a four. This one's kind of cool. Maybe I'll edit all put as a three. This one's a little bit wider. Kind of neat. Put as a 32 Then I walked back and we have this basil plan. We saw this pre Mantis little tiny thing. I only had my white lines on me, so it was kind of tough to get in there, get a sharp photo if we wanted to check if it was sharp or not. We can just actually move our mouths over our image. It's automatically the zoom tool, and I could zoom in. It zooms in, and I can move it around just by clicking and dragging. And then if I just click in one place, it zooms out. So I'm just gonna pick one of these toe at it, find one that I think is good. Not this one. That's one. That one's of one. That one's the one, and I'm just going to compare these two very quickly, maybe zoom in, see if this one's a little bit more in focus. I think it is. So I'm gonna put that one as a four, this one as one. So now I want to just show the photo that I've ranked higher than a three so that when I go into my edit module, I only have those ones available to do that. I can use these filtering options. So if I click this star rating right here, three, then it's showing me all of my images greater or equal to three stars instead of rain King photos with the five stars. You can just accept or reject photos, and you can do that with these flags right here. So let me go back unfiltered these or just click that button right there to get all my photos back. And maybe I just want to reject these, and I can just click this button right here to reject or press acts on my keyboard to reject and pee on my keyboard to pick So this one reject X reject X pick p pic peak Reject x picc p PICC p Pick P Reject X Reject eggs Reject X inject X pick P. So now if I want to just see photos that I have accepted, I can filter for picks or I could filter for rejects and you can choose multiple. So if I just want to see rejects and just like the reject fly right here, I see both rejects and picks. I can do that. You don't want to see rejects or the pics plus the photos that I have not actually flagged . I can check that, and then the last way is with labels. So if I want to. I could label these photos. Say we want to set a label color of green, and this really is up to you. You can choose what your labels mean. Maybe green for me means nature photos. I just like multiple. Good. Is that label color pick green. Then I pick green down here. I can see off my green label photos from all of my photos. As you can see, I don't use the labeling that much at all. Really? I mainly use ranking, but that it is available for you. If you want to do that, I'm just gonna go back to my previous import to see all and then set my filter to just three or above. Now, when I go over to my develop tab, all of these air here and I can still go back and see all the photos if I want or just filter for the ones that I have selected instead of going to the loo viewer, it's full screen. You can just go to the thumbnail view and now you can see that you have all of these attributes up here. We have our rating, our flags and our colors And so now we can just go in here and add our color label or not down here, I still have my custom filter on, so I'd have to turn that off to be able to see it. But that's a quick way to add a label or rating or flag to any photos. Thanks for watching in the next lesson will be learning how to do some face tagging in light room.
7. Face Tagging: and back here in light room in our photos for light room course collection. And we're going to do some face tagging so similar to how Facebook can recognize people's faces and automatically tagged them with whoever it is. Light room tries to do the same thing. So when you have a collection selected, you can just press this people button down here, you'll see that it will start detecting faces in the filmstrip. So whatever photos you have down here in your film strip, it will start detecting those faces. So this is awesome and selected some of the faces from these statues. I forget who these were. These were like ancient philosophers. You'll also notice that it has already asked me, Oh, is this Isabel because I've created a profile for Isabel before? For some other photos. I've also done my own face, but apparently my face is changed and you can see that light room doesn't do an amazing job . I would say that Facebook actually does batter. You can see you hear it doesn't know who I am, even though I've created profile for myself. But when it does, let's just start with if it doesn't know who I am. Let's start with Christian down here cause I've never could've profile for him. We can do is just type in Christians name or whoever's name pressed the return key on your keyboard or enter. Here's Monica. So I'm gonna go in here and see Look at something funny happened after a while it recognized me and asked me, Is this Phil? So I'm just going to click that check back. But in same for Isabel, Check Mark. And for here I'm just going to start typing in my name. And then when I see my name, I'm just going to click that name or press enter on my keyboard. Now you can see we have name people in unnamed people. These are people that we haven't tagged yet, And if we don't want to tie them, we can just click these ex parte boxes. And then the name people are all up here and then within this collection, if we want to see all photos of Phil, I can just double click this Phil and it shows me the photos of me. And then if I want to go in and edit, I can go in and edit, and you can see now our faces are tagged and with the person. And if we go to these next ones, and some of them actually weren't tagged. But here we have is a bone, Phil. So let's go to this one. So if I want to tag this one, I can draw this face region box by just clicking this button, drawing it over my face and typing in my name. And same for is about. I can type in Isabel, Select Isabel. Same for this one. Even though it's not my face. I do want this categorize with me and is about so now. The cool thing is, if we go back to our catalogue and we say all photographs, then we just like people. It will show all the name people we've created profiles for. So if we go to fill it will look and find all of the photos that I have tagged with my name for same with is both. We'll go and find all of the photos where Isabel is tagged. Then you can go and add it. Those specific photos awesome Now weaken tag people's faces. We confined those people specifically and edit those photos. It's just another way to organize your photos in Adobe Light Room. Thanks for watching this lesson. This concludes this section of the course, and in the next section, John, my co instructor, is going to dive right into it, editing with the develop module in Adobe Light Room. Thank you so much for watching, and we'll see you a little bit later. I'll be following up that section with a specific section on adjustment layers and then exporting and saving your photos from light room. Thanks and have a great day.
8. Editing Your Images - in 5 Minutes!: and I hope you're excited right now. We're gonna go over how to edit your images in light room. If you're anything like me, it's gonna be 90% of what you do and what you need to know in light room. It'll tell you how to adjust almost everything you want in your image, and it will show you some functions that aren't even so obvious in the menus. Unfortunately, I think you're gonna get most of what you need during this module, So please stick with me. By the time you're done, you'll be able to adjust your image about any way you can think of. What I'm gonna do now is in the next four minutes give you a brief down and dirty of all the functions and in the lessons that follow will go over each one in detail. So please join me on those two. Let's get started in the basic panel. We've got exposure and all these menus you can simply click and slide right and left to increase and decrease them. Contrast is going to move your lights and darks further away. And exposure will make universal adjustments to brighten and dark in your image. You can click and drag on your temps slider and on your tent slider attempt if you want to make it warmer or cooler tent. If you want to correct for a color cast, use this to correct images. This for creative control really down here. Highlights shadows. Whites and blacks lets you push those parts of the image, the brights and the darks further closer together in a little bit more refined with and contrast id down here. Clarity, clarity bumps up your mid tone. Contrast. Vibrance is a delicate way to increase the saturation of your image, and saturation is the sledgehammer that adjust all of it at once. Whoa at the basics. If you click, are we get to the crop panel now. Here we can change the angle by clicking and dragging or clicking and measuring angles. You can hit return and you're done. If you hit are again. It's nondestructive, so we can go right back and click and drag in the middle toe. Adjust where it is. Click and drag on the edges to adjust how much it is All right, hit, return when we're done. That's basics, and that's crops so Let's go tone curve tone curve gives you this handy curve, which lets you push down and pull up parts of the image. Here's the dark parts. Here is the bright parts. It's also got these presets medium contrast, linear and strong contrast, and it will show you where it's at, and it'll let you custom click and drag goes. Of course, there's other options. If you click here that you can adjust the region's separately hue, saturation. Luminous is a great way. We're making great time. By the way, we're totally gonna get through this to do Hugh Saturation and Luminant All in these three tabs. What does take saturation for a moment? If you want to make our greens greener in the grass, we can just click and drag up here. Or we can click on this bullseye, hover over the green color, click and drag up, and you see it makes those adjustments. We can also go into the hue and do the same thing. If we want to make the greens, click the bull's eye, we go. If we want to make the greens a bit yellow er or injure, and you can see it's pulling some of the other colors, and it makes those adjustments. We could click and drag these sliders or click and drag over here, or just enter values as well. All right, split tone split tone lets us adjust the highlights, and let's adjust the hue of the shadow separately, commonly used to bring the shadows bluer. Bring the saturation of that adjustment up and make the highlights warmer and bring the saturation up balanced lets you decide if you want to favor the shadows or the highlight color correction. Moving down detail All right detail lets us sharpen the image. This is the amount of sharpening, and the radius, if you push to the left, makes it a softer sharpen for portrait's into the right. Makes it a harsher sharp in detail. Lets you refine that and masking controls. How much you see of that. If you click the option or all key and you make that adjustment, you can see with more detail exactly what's happening. It's a great feature. Noise reduction lets you control the luminant on the color noise. If you wanna have less or more details, less or more contrast, you can just click and drag same with details and smoothness. Here, lens correction is a great tool. Just click. Enable profile corrections and it'll automatically adjust for your lens, which is fantastic. If you look under effects. You can look at the amount of grain de hazing and highlight by clicking and dragging here. And then we're gonna make my times. You got to keep going. Camera calibration down here. These your cameras, uh, different calibrations and profile. So you can select from Adobe Standard to any one of these. And now you're images look like they did in your camera, which is one of my favorite adjustments from here. You can further refine those profiles there. That's it. Under five minutes. Everything you need to know about how you can develop an edit, your images. Next lessons will be in detail for each one of those. I hope that was helpful. I can't wait to see in the next lesson, So let's get started digging into these details
9. Crop and Rotate: you know, I had it wanted taken image that's got a crooked horizon or vertical line that's off. Or maybe I just should have reframed it differently, but didn't when I took the picture. Now those are all great reasons to use the crop and straighten tool, and I'll show you everything you need to know about that now. So in a W light room with your image selected down here on the bottom, you're gonna just click are and you'll notice that all of a sudden you got a whole bunch of features and we'll go through him in detail now. So you understand everything you need to know about this future in light room so you'll see on the right. First of all, here, that crop and straighten came up, and that allows us to select aspect ratios, said the angle and then constraint image. But it also gives us thes handles and features right inside. The image itself will go over both of them. Now the first thing I'll point out about this future is some of the crop features, so it's got these corners and I can drag click on any one of them and drag it crop the image horizontally, vertically or both at the same time. The other thing I can do is by going inside the image you'll see. I've got those two carpenter squares. I can click and drag and release, and once you're there, you can obviously click and rotate around so you can get the image just how you want. The other thing you can do right here in the image without even having to go to the dialogue box is to go outside my house outside the image and you'll see that arrow that's got to arrows about a 90 degree angle looks like, and you can click and drag to rotate the image and you'll see that while I'm doing it, I've got this great grid line. So if I wanted to get that line vertical, I could have just clicked and dragged down until that was lined up vertically. Now, when I release the grid goes away, I want to point out a quick feature about that, though I prefer to keep it an auto, which is how it behaves right there. But if you click always, you'll notice that right here, going horizontally and vertically across the image. There's a rule of thirds line guide, and if I rotate the image again, I get that helpful guide here, and I really sit, and I get the rule of thirds guide there, not a big fan of that. You can also go to show no guides by going to never. And once that happens, I got nothing. Again, I prefer. And I think the most useful way to use this feature in a w light room is to use an auto mode where it will show me a grid when I want it, which is when I'm rotating an image. When I release, it'll go away so I won't be distracted by it. So that's how you can use the features that are available here without going to the dialogue box. But next up, let's go into the crop in straitened dialog box over here. Now we'll reset the image by clicking reset so we can start with the fresh image and we'll just go down the order here, done the list. Now I can again click on that dialogue box, and I've got my standard crop future, but I can also click over here on this aspect. And once I've clicked there, I've locked the aspect of the image that when I click and drag on a corner, the aspect of the image, which would be the with the ratio of the wished with to the height remains constant, one of things that the little confusing is. As I scroll down, you noticed that it flipped on me there. Well, it turned out that the ratio is the same, right? The image just the ratio is just flipped from the with to the height. A little confusing but right. It's tall and skinny, and here it's wide and short, but that the ratios are still the same. Honestly, I never used this feature to flip the ratio, but if you're gonna crop for a print and you want just a certain area, you might find it helpful. Ah, click reset. You'll notice that when I click here, I also have an option to select standard print sizes and also standard sizes for other application like video. Once I've clicked, those say, one by one. If I'm doing some social media work, I can click and drag, and the image will still allow me to adjust it but it will always maintain the original aspect ratio. So even if I move it around or if I just click the height, it'll automatically adjust the with. So it's always one by one. I recommend that you stay with standard aspect ratios, particularly because normally your images air going to be a Siris of images, and you want some continuity unless you're making a deliberate creative choice. Always keep in mind print sizes, too, in case you're gonna make prints later on, which is why these features in the aspect ratio are so helpful. Next up, let's talk about the angle so I can click on the slider, and if I drag left and right, it's gonna be adjusting the angles again. The grids come back to help guide. Make some visually aligning that vertical line, which I think looks good right there. 2.94 degrees. I can release it, and my image should be roughly vertical now if I want to be a little more precise, and this is the way that I used to straighten tool that I can click on the ruler and then I can simply click on the top of this vertical line and then on the bottom of it. And once I release it, it's given me 3.22 So it turns off that I think I was a little off when I used that slider , which is normally the case. That's why I like to use this ruler, which I just did under the straighten tool there. There is one other way that can be helpful sometimes, but I find is a little inaccurate when I want it to be accurate. It's this auto button now. In this case, when I click it, it does a pretty good job. 2.47 I think that's pretty close to vertical here. I think actually, it's probably rotating a little to the left. Too much still, in my mind, that line is vertical when it's right here. Eso three point away at that time so you can see that the auto will get us close. It usually works better when there's a real clearer line that's going across the horizon. Honestly, I don't use it very much, cause it's not super accurate. But if I'm just in a hurry and want to kind of straighten it out while I'm doing, Um, or important adjustment somewhere else, I might use it. There's a final button down here that you can click and constrain the image. You've noticed that this whole time the crop has never, even if I click and try to drag it outside of the original dimensions of the image, it won't do it. And that's all that this function is ensuring. Honestly, Light Room does that by default with pictures like this, so I wouldn't worry about that too much. Let's go ahead and make that final crop so I can straighten it out here by using the ruler and selecting the edge. I can then hit return, and I believe we have a vertical line, which is what we wanted the whole time. Now there could be other reasons for you to use the crop and straighten tool in the next image. Here, you can see that, as is most common for images, I've got ah, horizon, that sort of slipping off the page to the left. Not a great scenario. Now. I shoot portrait's all the time, and there's so many things to worry about, from lighting to smiles, expressions and backgrounds. It's really hard to line up exactly to get your horizon straight. So I find myself doing this all the time. I can hit the R key and again I can click and drag outside the image tow line. It what I think is perfectly close there. I'll reset it to show you the other way that I can do this. I can click the ruler. Now, let me give you a quick tip here. If you select a small bit of the horizon just a a few degrees or ah, small portion there. The distance between the lines was very close together. You know, I think that looks pretty good, but I tend not to do that. I think a more accurate way to do it when you've got a long horizon here is to go across the whole image of possible. You're pretty close to it because I can see a few degrees a lot better over this greater distance than I can when I'm just working with shorter distance like we had the first time . So you can see I've got a good straight horizon there. I'll reset. So we'll take a look at what the auto feature does. I Click Auto, and in this case, you can see it's done. A pretty good job matter. Fact will leave it that way and just click done. Now we've got a straight horizon. There's another way or reason you might want to use crop in straitened tools, which is maybe a creative choice. So in this great picture of Ah pond, that's got a water lily and a concrete structure here. Maybe I want to make this top line straight. I can click the our future and we'll write it. Let's try it with a 1 to 1 aspect ratio. Okay, I can go ahead and click the ruler and select the top two points here and what my new image will be. Now that looks OK, but there's a problem with waterlily. It's outside of it now, and that's really not what I want. The two images the two parts of this image that are really important, really, that concrete structure in the water lily. So you saw that just by clicking and dragging, I'm able to slide. This image and light room is really smart here, right? It's not re sizing anything. It's not bumping this off the image It's just sort of sliding the image with the way that I want the crop to work, and that looks pretty good to me. I'll reset it and show you may be one other way. We could have done that, which would be to select the 1 to 1 crump rotate to use our grid lines, rotate, rotate their good, and I can slide it from their hit return. And I've got an image that's really tight on the two elements of this image that are interesting to may Now may be the final reason that you would want to use the crop in straitened feature is because you've got a distracting element like this one. Unfortunately in your image, sometimes its just unavoidable. So I can hit the R key. And here's what I'm gonna try. This time is I'm just gonna take this line created by this distracting element, and there it is. Now my crop and straighten has done that for me, and I want this beast in this boy's face in the image and you can see that I can't quite get there until I took it and I just clicked and dragged it up to get what I've got there. But I think if I actually clicked the shift key and drag that corner in see, that's allowed me to go up and get a little bit more. Have this face in the expression. By doing that, of course, I've lost a bit of the bottom down here. In my mind, that's an acceptable tradeoff in less than ideal circumstances, like we're in right here, all right, that's everything. I think you need to know about the crop and straighten tool. Next up gonna be talking about something just is important that I use all the time as well . It's going to be the tone dialog box within the basic features of adobe like room that allows you to make some of the best corrections, I think and all of the application. So let's get started
10. Tone: All right, let's talk about tone. And when you think tone really think exposure, there's a lot more to it. Have you ever taken image that was too dark or too bright? I just don't have any depth to it. Well, that's really a problem with the tone of your image. Let's talk about all the functions in a W light room that relate to tone real quick, and then we're gonna go in a more detailed look at each one. So let's start with a quick overview. You can see that we have our image here of this turtle, and we've got a couple adjustments in tone. I'm gonna walk you through The first, which I almost never use, is the auto adjustment. Now auto adjustment is going to make adjustments to all of these parts of tone, which are exposure. Contrast highlights shadows, whites and blacks as it thinks best. The problem with auto is that it really has got no idea what you're trying to do with your picture, and it has no way to get you there so you can see I really don't like the corrections auto made in this case, which is why I personally don't use it. Which brings us to the first great way to undo the changes you've made in town. You just double click on the word tone, and what you'll see is everything goes back to the way it waas really helpful, All right, so now that we know that auto isn't the way to move in tone in adobe light room, let's see what ISS exposure helps us move the brightness up by clicking and dragging to the right or down, making it darker by clicking and dragging to the left. Let's go ahead and reset. That contrast allows us to push the brights in the dark's further away, adding some more drama and death to our image by clicking and dragging to the right there to increase the contrast or by going to the left to decrease it. Highlights allow us to adjust the brightest parts of the image well, almost the brightest parts. We can click and drag to the right to make the bright parts brighter and to the left to make the bright parts darker. Shadows allow us to adjust some of the darker areas of the image by clicking and dragging to the right and again to the left, and you can see what happens to the image as it makes it brighter and darker in the dark parts of the image in the last two. Here, whites and blacks are the whitest and the darkest parts of the image. So by clicking and dragging, we can go all the way up and make the brightest parts of the image very, very bright or to the left and make the brightest parts of the image darker. The blacks are the darkest parliament that we can either raise or lower in terms of their exposure. Let's go ahead and reset everything. So that's a basic overview of what's available to you in tone. Well, that's really not going to get us a whole lot until we understand what each one of those adjustments doesn't. How you should be using him. So let's get started talking about that. The first thing I want you to notice, and we really need to understand is actually not anything to do with those exposure or adjustments at all. It's got to do with this up here in the upper right part of your screen, in light room under hissed a gram, which you can hide or you can display by clicking on the triangle. And I always work if it displayed. So please do that in a W light room. If you don't already, you'll be able to see our hissed a gram. Ah hissed a gram at its most basic, and we'll talk about more details about what it is later on. But at its most basic, all you need to really understand is that hissed. A gram is a visual representation off how brighter, darker picture is. So you can see here that this picture is a little bit dark, which is how I like it. Turtles bright, most everything else that was pretty dark. And you can see that that grey outline is tall and kind of to the left now, by slim plea switch images here. This is a very bright image, and you can see that the hissed a gram has now shifted way to the right, meaning it's bright right. That grey outline has a lot of area to the right, and not much to the left. Now we'll switch back here to the dark image, and again everything has shifted. Left now? Briefly. If you already know that about a history, you might not know that those outlines you see behind it are showing us the blues, greens and the reds and the overlays of those colors, so that as we make adjustments to say, the temperature or 10 it will also change the history. Graham. You may also not realize that when you mouse over different parts of the history Graham, it'll display for you where the blacks are shadows, exposure highlights and the whites and you can see because it's made those areas of the history gram lighter gray than the rest of the background of the history. Graham, which can be a really wonderful feature. And let me tell you why, right so you can make adjustments down here. But most people don't realize that you can also make adjustments right up here in the history am. So if I want to just bring my shadows up, I can click and dragged the right and look my imaged and the history Graham changed. I could do the same thing here in the exposure section. I can click and drag or in the highlights, click and drag and you can see that clicking and dragging in the history. Graham has made adjustments down here in the tone curve and to the image itself, which I think is a wonderful future. Let's go ahead and reset all those adjustments real quick so I can show you how to make them down here in the tone section as well. Now let's deal with this image so very few times does an image come on my camera, where I just love it at the get go. But this image, unfortunately, is kind of close to that. So I'm going to show you maybe some just minor adjustments to this one, and then we'll go look at that other one here in a second so you can see how it works on two different images. So as much as I do like this image, I will say that some of the parts of the turtle are a bit too dark, particular like around the neck, where it goes to almost all black. Now I know it doesn't go all black, because as I go to the history, Graham and I hover over the show shadow clipping box. I can click on that triangle and you see that nothing has changed in the picture. But now if I were to click and drag the blacks to bring them down, do you see that blue that just came over the image? Now those blacks have gone from having information to not having information, cause they're just totally black. Now, if I were to click that triangle again, you see that they go away. You know, I can either hover over that triangle and see them, in which case they'll come and they'll go. Or I can click and hold and in which case, they stay there. It's a really helpful feature, but we don't necessarily want to push our blacks that far down, of course. So with this image, the blacks, some of the areas that aren't all the way black but are still very dark. I don't have enough detail to my eye, so I want to bring those up a little bit so I could do that two ways. The first is I can go into the blacks here in the history Graham and click and drag and just bring that up a little bit now. By hitting the forward slash, I can look at the before and the after. Not much difference there, so maybe I'll go into the shadows. Click and drag that a little bit to the right as well. Now let's check the before in the after. Still not enough. So it's click and drag one more time. Ah, there that did it. We saw the shift in the history. Graham. Here's the before, and here's the after and we can see that I get just a little bit more detail in the shadows and now in those areas in the neck where there was details and texture in the skin that I couldn't see before. I'm lucky that I can now, which is great. So that might be all we want to do with this image. But before we leave it, I do want explain a little bit about contrast. So we mentioned. That contrast tends to add some drama to images, and you can see that this pictures already got great contrast because it's got areas here that all the way up in exposure very bright, but still have enough detail and then areas that are very, very dark. So you've got a really wide range of contrast right? Ah, big gamut of exposures, which is really helpful. But if I wanted to increase the exposure, I could click here and drag to the right. And you see what happened to the history Graham is that it took those mid tones and it pushed them towards shadow and highlight. I think some or drum enough I goto left. You can see that it compressed that history and brought everything towards the center because it took the shadows and blacks highlights and whites, and it pushed them down towards the Midtown's. So that's all contrast is really doing, and you can completely do that manually is a matter of fact, right? I can take the highlights and bring him up. I can take the whites and bring him up, take the shadows and push him down the blacks and push him down. And you see that in many ways I've accomplished something similar, although a little more extreme when I do it manually there. So that's what contrast does. You don't want to use a little bit of contrast, but I prefer to do things manually down here in the highlights shadows, whites and blacks area. So I hope that shows you using this dark image, how you can use the hissed a gram to understand your exposure, and then how to make those adjustments in your image using the tone dialogue. Let's go to the second image and take a look at what we do here now. In this case, I've actually made an exposure adjustment so we could see what happened in the history. Graham previously. Let me undo that. This is a great image and probably doesn't need a whole lot of touching up, either. But let's say, for example, that we wanted a bit more contrast, which I might want to in this case, because you can see the hissed. A gram is pretty centered, right? So if I select contrast and maybe bump it up a little bit, say, plus 15 that look at the before and the after, it does look a bit better to me, particularly look at the face before and after. I think that's nice and accomplishes what I'm looking for, but I can also go in here and maybe bring the highlights down a little bit. Now there's an issue with that that you may have just noticed if my mouse over this triangle to the right, that'll show me highlight clipping now because I pushed the shot of the highlights down. I mean, just that again backed where it waas. You'll notice that, actually, we've got highlight clipping, meaning that's pure white right there. So when I pushed it down, right, the highlight clipping doesn't show anymore. But the colors look weird, right? There was really no color for a w like room to work with here. So as I pushed highlights down, right, it just sort of looks off to me. And that's really what happens when you've got those highlights clipped is there's no information there for light room to work with. You've exceeded the dynamic range that was available to you. So we'll go ahead and turn that off because now we know we've got a bit of a problem with highlight clipping, which we kind of could see because we've got some very bright and very dark parts of this image. Nonetheless, I do like contrast, being boosted a little bit, and we could probably deal with maybe a little bit more shadow. Now, I'm not gonna use any more contrast because the contrast is pushing those brights even brighter, and we know that we don't want to go any further with that because of the highlight clipping that we already saw. But I might want to take my blacks down a little bit. A swell Now, if I click before and after, you'll see that we have a subtle but really nice adjustment there to get a good image tuned up even a little bit more. All right. I hope that helps you understand tone in the basic section of Adobe Light Room. It's so important, and probably one of the most valuable tools for beginning photographer tohave. Let me leave you with one final little bit more advanced tip is well, that you can use to really fine tune the contrast of your image before we go on to the next lesson. So if you hit option or Ault, depending on if you're a PC or Mac, you can adjust any one of these whites blacks etcetera. And, as you say, bring your whites up. What's happening? Is it showing you where you're getting clipping? Same thing with blacks as you click and drag those images that are showing up that aren't white are getting pushed down to where there's a loss of the shadows. The same thing is true. If you go to the highlights, for example, in drag, right or if you go to shadows and again, click option or all and drag left, you're seeing where you're losing detail in the highlights in the shadows. Now let me tell you how I like to use. That is a little bit more of an advanced trick and how to use tone better on an image that doesn't have highlight clipping problems to start with as this image does, what I would do is I would go in, I would click option, and then I would click and drag whites, right? And so, in this case will kind of start out where hopefully a good images is less clipping. That's been about a click it and drag until I just started to get some. And in this case we know that we can't do that cause we've got those issues really identified. And then I would do the same in black, right? So Blackwood would have started here, and I would just push it down until I got maybe just a tiny bit of clipping in the blacks. That's a way to ensure that you've got a full tonal range from all the way to white all the way to black, maybe just teeniest bit of clipping, right? So it's a great advanced technique, few to improve the dynamic range. Really, that contrast of the image in a W light room Now I hope that's been helpful with next segment that we're gonna work on is probably, you know, in order of importance we did cropping, which is what's in the picture. And then we did tone, which is the exposure in the contrast. Next up, we're going to white balance because I'm here to tell you if you're white, balance is messed up. You have a real hard time enjoying that picture, but also it provides you a lot of great creative opportunities. So let's get started looking at white balance right now.
11. White Balance Adjustments: images that are super yellow or super blue when they're meant to be true. Colors are the worst. It just doesn't look right. And everybody knows it, especially if you're shooting for clients. And that's one of the best things about a W light room. Is there such great ways to fix it right in light room? Super quick? That's we're gonna do now. In this lesson, you learn how to get perfect white balance. I don't even show you a tool that you can buy that will let you get it every time without having to guess. So let's get started. First thing I want to do is show you exactly how to select a white balance. So in this image, I've adjusted it over here for shade, as if you had set that white balance in your camera to shade. You can, of course, also click here and pick any number of these Ashot auto daylight cloudy shade, tongue stone and all that's happening is it's adjusting the temp in the tent, so we'll go back to cloudy Here, perhaps so cloudy has selected 6500 and plus 10. Now. You may have slipped that in your camera, in which case you could go to as shot. And that's how it would look also. But for this demonstration, we're gonna go back to cloudy. All right, so here's the image that you've got. And as you can see, it's a number of white painted wood slats where the sun is coming through and an umbrella leaning against the side. Well, if you hit the w key, we're gonna come up with this great eye dropper, and that I drop her simply lets you mouse over any part of the image that should be a neutral color. And if you click it, you see that it? We went to custom now, and this temp intent changed. What you want to do is get the right temp intent for your picture. If you've got someone in there and you're trying to get accurate rendition for skin tones, or maybe you're shooting a landscape or portrait and you want to just make sure that you've got the details correct. Maybe it's inside of a building, and you want a white room to be perfectly white. There's any number of good reasons to adjust your white balance. So were in the white balance function with our eyedropper selected, I just want to point out two things real quick. The first is that if I click this show loop, you'll see this pick a target neutral icon and dialogue box just popped up right in the middle of the screen. And that's really helpful because it's showing me what I'm using to select, right? I don't have to guess at what light room Miss sampling. It's showing me the pixels that it's actually sampling to come up with white balance for a neutral color. I almost always use it, and I'd recommend you use it as well so that you're just more in control of your white balance. The next thing that you see here is auto dismiss. So if I click auto dismiss, what will happen is when I select my white balance point, I sample it by clicking. You see that the loop went away. That means that I can go back to zooming in and zooming out with the click of a button or anything else that I'd like to do next. If I hit W again, I can uncheck auto dismiss, And now, when I select a white balance. I keep getting to pick, continuing to go around the image and getting the white balance that I think is best. I actually don't use this feature. I tend to click auto dismiss for the reasons that I'll show you in a moment. I really only pick one white balance point. But if you're kind of searching around an image, it's nice to have auto dismiss off so you don't have to keep clicking on the W button. The other thing I want to point out is that in the upper left here, where the Navigator is, which again we can hide and display by clicking on the triangle, you'll see a preview just by scrolling over different parts of the image of what it would look like if you clicked it again. Very helpful feature toe watch as you try to figure out the white balance for your image. So let's go ahead and pick White balance shall way. You're going on a neutral color, and so I'll go to a spot that I think is a nice, neutral great, which should be pretty easy with the way this image is lined up. I'll go ahead and click it, and you'll see that it made some subtle adjustments over here to the temp in the tent. This looks pretty good to me, but remember, I could make creative adjustments. Here is well, now. Temp allows me to make some great adjustments that can be creative. For example, in this particular image, I might slide it way to the left, getting a super blue and cool image if that's artistically what I wanted to have happen. Maybe what I want to do is make it really warm, as if the sun was right outside and setting so beautifully casting golden light everywhere . So the temp adjustments slider here by clicking and dragging. Or, of course, you can click over here and ah, scroll up and down. What you've clicked in that number to make adjustments as well can be used for corrective or can be used for creative adjustments. But if I go down to tent and I click and drag to the right, I don't know that I would do that to get that super magenta color to an image creatively or green. To be honest, both kind of looks sort of creepy, and so I'd probably just go back, select a good white balance and then adjust the temp because 10 is really for corrective. Not so much for kind of creative adjustments to your images, in my opinion. But with that said, Let's move on to another image, and it's actually almost the same image. What I do is I put a color checker passport. It's a device you can purchase from X ray, no affiliation with them, but they make the best, in my opinion, tools for getting accurate color. So you can see here that if I let me zoom in so you can see, but better perhaps so if I zoom in here on the top row, these two blocks that have notches in them are actually for selecting a white balance. So if I just click on that click and let's go to auto dismiss and this is why I usually turn out or dismissed on click that I auto, dismiss it and you can see that now it's made the adjustments here to get may perfectly true. White balance temp intent. So every image I take and I use there is going to give me perfect color. Now you can do a great card as well. They're affordable and fantastic tools there really made for this kind of adjustment. Now let's go ahead and assume that we don't have one of those tools, though. Here's the next image that we've got. And it's an image of Iraq and kind of a gravel garden so we can click W. And then we can go over into our image and scrolled around taking a look at the preview in the Navigator and this looks nice to me, so I'll go ahead and click it and you can see that we haven't image. That may looks pretty true. Now I can click w again. And maybe this time I want to, you know, maybe make creative adjustment and make it warmer, right? And so I've got a good white balance, meaning my tent is good and I'm just gonna pull on, make it warmer. Or if I wanted Teoh, I could come in select a different spot here and again. It's cool it down a lot. It's like w over here and you can see that I'll turn auto dismissed off when I'm in this kind of environment so that I can continue if I wanted to just to click around the image right, selecting different spots and seeing in my main window how it looks. Let's go ahead and stick with that now. To undo these, you can go back up and simply select as shot. And that's how you can use white balance color cards and different spots in your image to see your loop and to make great selections so you get perfect color. I hope that helps and stick around for the next lesson because it's just a useful.
12. Clarity, Vibrance and Saturation: have you ever looked at an image and wondered how they made it look so dreamy or how it was so harsh and punching? Well, the answer lies in presence, which is clarity, vibrance and saturation, which is what we're gonna look at now. Awesome. Well, look at this image first, and we're to take a look A clarity. So again, we're still in the basic module here off light room who scrolled down. And now I've got presence, which is really where you're creative and artistic control start. It's in the basic mode, but it's probably a little bit more advanced than basic, So clarity is really a mid tones. Contrast adjustment. What does that mean? If we look up here again at our history Graham, which we talked about in the previous lesson, you'll see that again. It's broken up into black shadows. And then this exposure, which is your mid tones and this mid tones exposure, right? Same thing here. So your mid tones is where this adjustment is gonna work and increasing the contrast member just kind of pushes your lights and darks further to both ends, makes your lights little lighter in your dark little bit darker. Let's take a look at what that looks like. You're So if I take clarity, watch the history grams. I pushed to the right. You see that kind of getting pushed apart a little bit and watches. I pushed to the left how it compresses into the middle of a little bit. That's all clarity is. So have you noticed what happens to the pictures? So if I go all the way to the left at minus 200 for clarity, it's got that sort of dreamy, painterly look as if done by, you know, a painter trying to capture the mood of something. It's really nice and could be a great effect and all the way to the right, really harsh and can achieve kind of a grungy hard look to an image just with adjusting one slider. So in this particular image, right, it's kind of a dreamy setting. Horses, mountain skies, clouds. I would want to push left, probably not too much, but I'll give it about minus 29 minus 30 here, which is a good amount. We've taken the edge off and you can see from the before and the after that it's added just a hint of kind of dreamy softness to some of those mid tones. Next up, let's take a look of vibrance now. Vibrance and saturation are related, but different vibrance allows you to adjust sort of the intensity of the colors, but only those colors that aren't really saturated already. So think of it as like saturation. Calm down. A low key version of saturation were not so much in danger of blowing at your colors and making it look on natural, which is why it's so popular. And I tend to use it over saturation almost all the time, so you can see that as I push vibrance up a little bit, I tend to get a little bit better pop out of my colors without going overboard. So let me show you overboard and let me show U minus 100 and you can see that at minus 100 . It's not black and white, right, cause remember, it's not dealing with all the colors, just so sort of clothes that aren't all the way or close to being saturated. So bring it back to maybe for this image plus 10. Now let me show you the difference when I move saturation all the way, the left. Now we're black and white. It's got all the colors in there. And when I go all the way to the right, you know we're up there. It's very, very saturated. But we can make kind of global adjustments to all the colors, making them more intense by sliding to the right or more subdued by sliding to the left. I'll bring it back to zero in this case, and I'm happy with the way the image looks. We've adjust the clarity down to give it a dreamy look and the vibrance up just a bit to make the colors a little more lively. Now let's take a look at the next image where will use them any opposite sort of a way. So in this image, I've got a great metal torch. It's got wonderful, sort of harsh look and feel to it, and it's got some great contrast and edges. So in this case, it wouldn't make that much sense for me to take clarity and slide it to the left, which again gives it sort of a dreamy, painterly look. It doesn't work with this image But what does work with this images? As I click and drag to the right, here's the before and after and you can see I really get that kind of harsh metallic look out of it. Which would This picture looks really nice vibrance. If I move it up a bit, I can get that flame a little bit more intense, press it down a little bit to make it look like almost a black and white with that flame really sort of standing out and me actually like that. So maybe I'll go down minus 15 for vibrance here. And what that does for me is it really makes that flame, which has got intense colors, stand out a little bit more in the image because everything is dropped back just a tiny bit again with saturation, we can push that up to bring all the colors up in intensity and move it down so that they're more muted in subdued colors. In this case, will continue to live it zero. So that's how you can use presence to adjust your clarity, vibrance and saturation to take creative control of your pictures and really achieve the kind of look that you're in for? All right, We're getting crazy. Now stick around. We're going to do the tone curve. Next. You're not gonna want to miss it.
13. Tone Curve: I know I know what you're thinking. Why in the world are we going overtone again? Well, it's because Adobe gave you more creative control than you realize. So before we went over tone in the basic tab, and it's important for you to understand what we did there. So please go back if you haven't seen that already, because we're gonna build on that now must you got to take real creative control over that tone and produce some really kind of interesting looks and push your images as far as you want to. So let's get started. We're to talk about tone curve now and how to use it in all of its different ways. The first thing we'll do is we'll just go ahead and said it the linear down here, which is the default, how it normally comes and when a point. Some things out to you. This is really the first mode, and it will be how tone curve opens up. You can click to hide, click to expand. You'll notice that it's broken up into regions, shadows, darks, lights and highlights. And here's records interesting is you now get to adjust which each one of those images are by clicking and dragging on the slider. And once you've done that, you can go into, say, highlights and you can bring it down. But here's the interesting thing. If I really defined these highlights to be darker, it will re apply those adjustments, and you can see that all happening in the history Graham on the top of the screen. I can then, you know, re define what I call lights, and then I can make a light adjustment, which will be applied to my image. And when I adjust this zone, I'm now applying that adjustment across that zone, and the same thing goes down here for darks and shadows. I can go ahead and redefine what those areas are and the adjustments I want to make. I can also go up and move those owns. Now. This isn't point controlled zone control here. Let's go ahead and reset all that by double clicking on the highlights, lights, darks and shadows, and I show you the second way you can do it, which is pretty cool, too. Go to this bull's eye and click it. Then if you go into your image, you can see that it's selecting the areas that you're working in. Let's say I want to push the center of the flower up. I click and drag up and notice that it's made that adjustment for me. That zone has been pushed up. Let's say I want to push the darks in the wood here down. Just click and drag down and look, the wood got pushed down for me. Now I've got an image. If I look at the before and after that has a lot of pop in contrast, and it just by clicking the parts I wanted brighter and the parts I wanted darker and then moving Moran. That's the second way you can use tone curves in a pretty great way to adjust your image. Let's go ahead and reset all that and take a look at the next way somebody. DoubleClick highlights lights, darks and shadows on back to the original image. Now the next thing I can do is kind of let it do the contrast and exposure adjustment for me by going into medium contrast, and here it's just pushed down my shadows and pushed up my highlights a bit. But if I want a little bit more contrast in that I can just click strong contrast in it. Auto applies that adjustment for me, which is pretty cool. It doesn't have as much control is the way I showed you a second ago, but in a pinch, it could get your great image. Let's go ahead and adjust all that back to linear. And here's where it starts to get really crazy. Click down on this box in the bottom, right? That's a point on a graph, it says clicked at a point curve. Once I've clicked that Look what I've got now I don't have those owns any more on the bottom. Now I have really is my tone curve and this cross hair. Now I can do the same thing I did before. I can click on this bull's eye, click on the Bulls eye here, bring it into the picture, and I can click and drag up. And now it's just a point. It's no longer a zone, and I can click here, click and drag and bring it down. That's just given me a little bit more of a smooth curve, not defined by the zones that we had in the precinct previous version and honestly, a great way to work on your images. The interesting thing is, I can now go in here and add more points. And each one of these points is going to make sort of the deflection. And the way that the contrast has worked be a little bit more unique. I can push it really extreme in either direction by just simply adding one point in manipulating around. I personally think that images are best when you don't do this too much and you create kind of a gentle s to bring the contrast up just the right amount. If you want to delete a point, just control click delete control point control, Click Delete control point and you can see that as we delete those control points. The image is readjusting that tone curve appropriately. Now, that's not the only way you can use this. You see the channels down here? We're really going to take it up a notch, right? So here we can look at just say the reds. And if I want to bring the Reds down in the shadows and up in the highlights, I just did it What's important to understand here is we're not talking about making the Reds brighter or darker. Were actually talking about adding and removing read from our image. Right? So what I mean is, if I push this way up, the Reds aren't darker. I'm adding red to the highlights and to the whites there. I don't want to do that in this case, and maybe what I would like to do is take a look at, say, the blues also and make it bluer in the shadows and less blue in the highlights. Now that's a look. I don't like it necessarily for this picture, but it is a look, so I can delete thes control points. If I want Teoh go back into the Red Channel rights, you can undo all this. It's all completely nondestructive afterward about ruining your image, and that's how you can bring it back right there so that we have applied all of the adjustments to our red green blue channels here. Still, but those individual color channels aren't there anymore. It's an interesting way you can look at, say, adding a little bit of coolness to your shadows are a little bit of warmth to the brighter images of your image. In this case, I really don't need it for this particular image. But let's go ahead and take a look at the next image, which is over here, Brick and would you can see it's already got some kind of funky colors going on. And in this case, let's just go right into the Reds. Let's bring the Reds up in the highlights. Let's bring him down in the shadows little bit. And then we go into, say, the blues and let's add blues to the shadows and take him out of the highlights. So here's your before and here's your after and you could see that we've just made this a little bit more of a stylized image, which is pretty nice. Of course, we can go in and make all the same sort of standard adjustments if we want to. To push down in the darker is an up in the light areas, and now we're starting to really get a stylized image before and after. And so what you can see is this is kind of harsh and extreme, but it gives you real creative control over how you work your images. Now the other thing that can give you great creative control and be really interesting issue saturation and luminous it to sell, which is what we're gonna look at next. So stay with me as we get started on that super important module of Adobe Light Room.
14. HSL: have you ever wanted to selectively adjust the sky to say, make it a little bluer or darker? Maybe the grass was a little bit too dark and you wanted to brighten it up and make it maybe a little punch here. Well, that's exactly what the age of cell Panelist designed to make. Easy for you to do in light room. We're gonna go over everything you need to know about the H S L panel not Let's get started . So you can see here that if I scroll down from basic and tone curve, I get the h of cell panel, which allows me, in a nutshell, to adjust a huge saturation and luminous of my image based on the color that's there to start with. So as an example, let's go and start with luminess, right? We can do it one of two ways. We can go down to the Blue Channel here, say, if I want to make my skies darker, I can click and drag to the left and you'll notice before and after that. My skies that simply and quickly are now darker. Let's go ahead and reset that and I'll show you a different way. Maybe even a better way to do it. If I click on the adjust luminous by dragging in the photo Little bull's eye here, I then get this cross hair and bullseye. I can go up to the blues that I'm interested in click, drag and pull down. And sure enough, you'll see that the aqua and the blue were adjusted to give me an even more refined approach to adjusting the luminess in that image. Now let's say in this particular image that the grand were too dark, not uncommon for the blues to be too bright and the grants to be too dark. So we can just go in here and click and drag on one of the leaves of the tree and bring it up. Um, let's see how we did before and after, and you can see that certainly we have brightened up those leaves a bit, so that's how you can use the luminous function. But there's also a hue function here and in the hue function. I can say if I want to take my reds toe orange a little bit and it's not a whole lot of reds here, but you can see a subtle shift there. Or maybe I want to make my blue sky a little bit more green, not saying I would want to in this particular bridge or a little bit more blue, which maybe is what I'd like to dio. And let's say that the greens wanted to be a bit on the greener side. Right here is the yellow were signed. And here by clicking and dragging, we could go to the Green Side. And, of course, if we use our bull's eye here, we can go in and make those same adjustments by clicking and dragging so before and after a non adjusted thank you as well. But it doesn't end there. And honestly, I'm not the biggest fan of messing with the hue unless it's for a very specific purpose, which probably won't happen very often. More often than not, you'll be better off using the saturation slider. So in this case, I'm just gonna go ahead and click on the Bulls eye, make sure it's still active, which it is there, and I'm gonna click and drag on the sky and increase. You can see the slider adjusting to the right of the screen there, the saturation that's in the sky. And if I look before and after, look what a huge difference that's made. It's just the sky is now more saturated. But let's say I want to do the green of the trees again. I can click and drag that up a bit. And before and after, I've got almost completely different looking and feeling image here, where I've been able to adjust the skies, luminant, hue and saturation all with a few simple clicks of a button. Let's go ahead and take a look how we might use this in a portrait next So I'll go ahead and select this portrait image. And again we've got this H S l functions, you saturation and limits. And this is actually really nice image. But maybe I want to go into a loom in its on, and I want to just selected this image, the sky, and bring it down even more. Or maybe I want to select this guy and bring it up so that it's all blown out on white or down. So it's very dark blue. The next thing I can do is maybe take a look at the saturation of the sky and bump that up touches well. Now here's where in a portrait. So that's still kind of landscape. E short of stuff, which a lot of times, Dr Portrait is indeed a combination of a landscape and a portrait kind of put together their cause. You've got nature and people all in one. But let's say that, um, for example, this shirt, maybe this shirt isn't quite what you wanted it to be. So I can click here that I can pull down or up to adjust that to more of a green, right? So before and after what you can see is that blue is now a bit green, but maybe I want to do that, even over here with this purple shirt, for whatever reasons, like click there and drag down. Or maybe that's even better and drag up. So look in the purple shirt before and after has changed a bit. Now, of course, we've cast a bit of a color cast across the lit tiles here, which is a bit of problematic because that's probably not what you would want to do. So hue saturation eliminates might not be the best tool when you're trying to make adjustments for one particular part of an image, and you've got a very big image with a lot of color gamut within it, right? So if you got a lot of colors in the image, it's gonna make that adjustment over all of them, which is why I tend to stay. If I use a chair, sell it all. I tend to use it for the luminous function and first say that the blues the sky because typically there's not a lot of blues and the skin tones. And unless you're subjects were wearing blue, you can get away with something like that fairly easily. So there's one more Tampere will talk about, and it's simply the all tab. And what you can say seeing the all tab is that it just gives you all the functions at once and again. You can just go and click here next to the bull's eye that you want to adjust right. That way, you can get to any particular adjustment without having to go through and click on the huge saturation and luminant. Here. You can use this in landscapes in order to get bluer skies greener grasses or adjust the saturation. And you'll probably be pretty good to do that because, you know, those blues and greens are probably pretty universally in the skies and in the grass, which is prime my recommendation on how to use this tool, not for portrait. So you have to be careful because, as we saw here, yes, I can adjust, say, the color and the hue of these shirts. But it does adjust other things in the image that are still important. May like the tiles in the foreground, and probably it bled over a little bit to the skin tones I would imagine. So that's DHS cell function within Adobe Light Room. And that's how you can use it to adjust hue, saturation and luminess in any picture quickly and easily. Next up, we're gonna be going over in the next tab down here, split toning. You're not gonna want to miss it, so let's get started with that right now.
15. Split Tone: one of the most creative adjustments you can make your image quickly and easily is adjusting the highlights in the shadows independently. The best way to do that is using the split toning future in Adobe Light Room. In this lesson, we're gonna go over everything you need to know about split toning, so we have our image open here and you can see are Split Tony panel. It allows us a few really helpful features. First, I want to point out that it's broken by highlights and shadows top and bottom here, and they offer you the same functions. So if you understand one, you'll understand the other. The only difference is that highlights will apply the adjustment in the highlights only and shadows will applied in the shadows only. And that's why they call it split. Toning is they're splitting the adjustments based on the tone. If you have any questions about tone, be sure to go back and check out the tone and tone curve lesson we did previously. Okay, so let's say in this particular image, I want to make the hue in the highlights warmer, more yellow. I can just click and drag Q over the yellow that I can click and drag saturation over to the point that I wanted to be at. Now. If that's not the best way for you to do it, perhaps what you can do is hold down the option or all key, and then you can slide it over till it looks very, very warm and then release it. Now you still have to bring your saturation up to whatever you think is appropriate. But by clicking option or Ault and dragging the hue slider, it'll give you a preview at 100% saturation. So that say, if I want to make some subtle adjustments now, I can click and I can drag and I can see exactly where the right spot is. And when I release, it applies at just the level that I've asked you to do it at. The final thing I want to point out here is that this little dialog box, which shows a swatch of color, can simply be clicked. And now you've got the ability to have presets here. Say I want to warm up, warm up even more by one click of a button just by clicking the eyedropper over this watch of colors they've given me. Or I can go down into this panel, which shows me all the colors available, and I can simply click, hold and rotate around here, search for the color that I want. No, actually, I kind of like that color. And what happens is when you move left to right, you'll change the hue, right? And you notice the saturation is not changing much when I do that. And if I move up to down, I'm not changing Hue. I'm changing the saturation. So that's another way that you can get a really great adjustment. And I like it right there. Which actually might be the best way to do it in general is to simply use this dialog box here because it gives you so many adjustments all at the same time. Now I'll do the same thing with shadows by clicking on that swatch spring up this dialog box and then I want to really focus in on the shadows down here underneath the boat and maybe just suddenly make them a bit Ballou are maybe take a look at the before after and that looks fine to me. Maybe I want a warm it up a little bit more in the highlights here. So let's go back in. Now that I've made that first adjustment there, that looks nice. Close it down before and after. That looks great. Now, one of the other things I want to point out before we move to our next image is the balance slider right here. If I click and drag to the left, it will favor the shadow correction. And if I click and drag to the right, it will favor the highlight correction. And you can tell that because as I drag to the right becomes much warmer dragged, the left becomes cooler, right? So you're telling it which one to kind of let bleed over into the other with this balance slider. Now I hope that that helps you understand how to do it for landscapes that's took it. Take a look at a different kind of picture entirely here of this wonderful red tomato. So this red tomato let's reset everything here yet we're good and let's say for the highlights here we wanted Teoh give this kind of a stylized look to it and make the whole image a bit red, right? We just go right up there, select we want. And again, by going down, we decrease the hue and by clicking and dragging I'm sorry. The saturation. And by clicking and dragging and moving up, we increase the saturation. And we want to really push this image. So we're gonna leave it right there and then we'll take a look at the shadows and we'll see if we don't want to. Maybe green the shadows of just a little bit. Okay, great. So we have a red green image, but now we need to balance it out. If I wanted it to favor the shadow adjustment, I click and drag the left and you can see it's starting to really bleed over that green. And if I click and drag to the right, it's gonna bleed over those reds. I kind of wanted to be a very red image. Maybe not white that much. So we'll go plus 24 there. Now you can see before and after the highlights definitely have a red tint, and there's a bit of green down here. You can see in the shadowy areas of the picture before and after So that's how we can quickly make those adjustments using the split toning panel, both landscapes and also images that have a subject like a tomato. Of course, you can do this with people also, in which case you'd probably want to warm up the highlights and cool down the shadows, which is the most common way you're probably gonna wind up using this tool. Now I hope that helps you. And I hope you stick around for the next lesson because it's detail and we're gonna talk over some of the most important part of getting the details of your image that you really want, so I can't wait to see you there.
16. Details Panel - Sharpening: a sharp images, something the love. And so in this video, we're gonna talk about how to get great sharpening in your images using Adobe Light Room. Let's go ahead and get started. Okay, so on the right panel here, you'll go down to detail and open it up, and I first want Explain how you can navigate this panel bust because it can be just a little confusing. Maybe so. Let's go over it. The first thing I want to point out is this handy dandy bullseye with the rectangle in the middle of it. It's as a just detail zoom area by clicking and photo. So let's go ahead and we'll click on that. And what you notice is that now we have this cross hair that shows up in our image and as removed the cross hair. The box on the right corresponds to where it's pointing so you can see I'm pointing at the right at the right eye, and I'm seeing the right eye in the loop, which is the 1 to 1 view of that area now. That's important because when we're working with sharpening, we're talking about working with the fine details, which are really best viewed Wonder one. So I'd recommend that going to transition to left eye here that it goes to that in the details panel over there showing it to me at 11 And so what you'll notice is that everywhere I scroll the flower here, it's following along with me in 1 to 1 there so I can check where the details gonna be. Now here's how you want to use this is you want to zoom into the spot of the image that you want to be the really of the sharpest invest and you want it. Just click there. And so let's say it's this this right I as I'm looking at the image, her left eye, I can click there, and now you notice that I can scroll around and do whatever I like here. And I can even go ahead and move the image Iran here by clicking and dragging. And it doesn't change over here to the right where that right eye her left eye is still showing All right. The other thing, you can dio if you want to adjust it furthers. You can click and drag over here in the 1 to 1 preview window, and you can move that around a pretty cool feature. So that's the way you can save yourself a lot of time when you're doing sharpening just by navigating better, let's get into the actual functions of the now of the sharpening functions here, the tool it is. So we're going to sharpening and you'll see that we've got again these familiar sliders. At this point, they give us amount, radius detail and masking. Now what I want to do is show you how to use these in both portrait's and in sort of landscape slash architectural work, which will look in next cause. You can use them differently in both settings and explain how all right, so the first thing is amount, which is pretty straightforward. Drag it higher that is further to the right. You get more sharpening, drag it to the left. You get less sharpening my scroll down here so you can see that 1 to 1 dragged right. More sharpening drinks, the less left less sharpening. Now you can see that it's pretty unappealing and ill advised many cases to drag it all the way up to 150 decks. Look at the image is really getting messed up now. This isn't the highest resolution image, but generally speaking, you don't want to overdo sharpening. If you can notice at the 1 to 1 level that you're doing sharpening, you kind of want to get. It's like just to that point and not a whole lot further. It's not the kind of thing you want to do to an image that's gonna be displayed very small , and you can still notice that it's been done. It should be a subtle adjustment or else it'll look unnatural, which is the best way to kill an image, in my opinion. So that's a mountain. I want to point out one thing that if you all to click, of course, it gives you the reset sharpening their. But if I click and drag now, what your notice is that it shows me a black and white overlay I release. It goes back to color, and this will hold true that you can click that Ault Key or Option key there on the Mac, and you can click and drag and it will show you a preview. The same goes for radius detail and masking, click and drag where you're holding down that option button and it's gonna give you that black and white overlay. And all that's doing is simply allowing you to focus on what's actually happening. This sharpening your actually doing so can be a really helpful tool to make better choices . Okay, let's go ahead and reset all of this and we're just gonna apply, I say, for the purposes of this lecture will go up a bit. Heist. You can see what's happening. Got a 45 now. You might not be able to see it so much here. But you see it 1 to 1. We're getting a good view of what's happening now. Let's first talk about Radius Radius after we even applied an amount. Now we're gonna find Tune how that amount is applied within the image, and I'm sorry if that's confusing, but I hope to make it clear right now. Radius talks about where the sharpening is happening. So on the pixels, if I slide out here to the right, the location that that sharpening is happening is way out towards the end, those pixels. So I'm getting a really punchy hard edge which can be nice when you're talking about buildings or structures that have punchy hard edges but not great. And portrait's normally in portrait. You're gonna want to keep it very low to the left, which means the sharp innings happening kind of in the center to give a softer appearance. And you don't want sharp lines on faces because of things like you know, wrinkles and of other imperfections and blemishes that you might see generally soft, smooth pork stir, which want to go after. So don't overdo radius and portrait, please. And so you usually want to keep the radio small, meaning the sharpening his happened toward the center. And I'll just maybe demonstrate here in the image in the larger view on the left here that just look at the hat now at a small radius versus at a larger radius. Maybe I need to zoom in a bit more few to see it here, just by clicking their large radius. Three small radius, right? So I've not changed the amount of sharpening. I'm changing where the sharpening is happening here, where it slid to the right again. It's happening at the edges, giving punchy, hard edges which is why the hat looks more detailed to the left happening in the center, which gives it a softer appearance, though the amount of sharpening hasn't changed now again, the reason that's important here is because of the way it would look in a portrait. You don't wanna have the Scharping way at the ends here, sliding to the right because it looks unnatural. You want more toe left with softer yet still adding a bit of sharpness. And you can see that if I click the option key again and I do that same maneuver if I slide to the right, look at how punching those lines are in the hat. If I slide to the left, look how much more subtle that is when I make that adjustment. And that's the way that you want to use that option. Click and drag to make better choices for Scharping. Okay, I can release that and go to details now No. One, a click option and slide the detail slider so you can see both with 1 to 1 and at the whole image level. What's happening and what you'll notice is that it's bringing out some of the subtle textures, textures and what you can think of the detail. Slider is as a bit of a fine tuning of the radius. It's like a good spouse or partner. They'll take what you've done and maybe just help you make it a little bit better, right? Think of detail as that kind of gentle helper. So you confined to in the larger adjustments you've done with Radius, an amount the last thing will be masking and masking is where we get to sort of the selective or creative choices of the image. Right? So option Click, and I'll use masking here to show you what's happening when I slide it to the last. Nothing is being mask, and it's gonna be applied throughout the entire images sharpening. But as I slide to the right, you notice that I can just start to selectively apply that sharpening to just those certain parts of the image. Now, actually, that looks kind of cool to me, sort of like an abstract negative painting drawing thing, maybe something that my five year old would do, but she's maybe not quite that good, but I'll give her credit for it just today. All right, so I can release it here and I can do it before and after, and you'll see that it's hard to see looking at the full image, but we conceive it better at 1 to 1. The corrections I've made here in this portrait and let me just go over one more time how I've done that. I've applied the amount I've set the radius to the left because it's a portrait and I wanted to be a bit smoother. I've fine tuned it with the detail, and I've used masking to really just sort of apply that sharpening here because you don't want to apply a whole bunch of shopping to a blurry background in a portrait, because then you start to get this weird, blurry background that's dull but sharp all at the same time, right? It's like toe left, and it's subtle. But you know, you can tell that it's making a bit of a difference. So you want to be masking that out and really just focusing on the areas of your portrait where you want it, and masking is a great way to do that. Okay, enough of that. Let's talk about a little bit of architectural work. Perhaps. And let me zoom out here so that we can see the full image, Thank you very much. And here we've got a different style of sharpening entirely right. The last picture portrait sharpening. We wanted it to be kind of a soft and towards the center of the pixels sharpening. But here we're going to go for a hard, punchy lines sharpening right. And so we can again apply the amount of sharpening were doing. And maybe we should select a different area. Perhaps we want to look at really the brick here in the wall. Eso we'll go ahead and click there, which will lock it in over here at 1 to 1, which is very helpful. Now we're gonna work, and we've already applied. So let's reapply the amounts. We can see it there on the brick wall, so we'll go ahead and apply up to say, like, 47. Well, again, apply maybe a little bit more than is prudent, but I want to make sure you can see this for this lecture. Next up. The radius. Right. We talked before that The radius for this sort of stuff can be a bit punchier towards the edges. All slide it up and I'll do the option. Click and drag so you can see what that looks like. Right? Here's where is to the left. Here's where it is to the right and look at one toe, one the detail it makes to bring out the textures of that wall. And again. That's why you might want the radius a bit bigger when you're doing this sort of thing to bring out those textures. Next up will look at the detail slider here, and I can again find tuned to sort of get the textures just the way I want and release. Let me give you a quick before and after, before and after to see what it looks like. Next up will be masking an option. Click there, and I can see that may be right about here. I'm really applying this, sharpening to the edges and lines of the image so I can click and release, give you a before and after to appreciate it there, Zoom in again, give you another before and after, before and after. You can really see there, the textures popping out and for a shot like this. We've got walls and details. That's what we want to go after. We don't want them. It's check texture and detail in a portrait. So I hope that shows you how you can use sharpening the amount radius detail and masking functions within that to get the right kind of sharpening for both portrait's and for buildings and landscapes, that sort of thing. Right now, I want you to stick around for the next lesson because I'm gonna break up this particular panel here details and we're gonna go over. Next is noise reduction, which could be an amazingly wonderful adjustment in tool if you're working with stuff that has a lot of noise, like night or high eso images, maybe even weddings or indoor shots when it's not the brightest out. So we're gonna talk about how to do both Luminant and noise reduction next, so let's get started
17. Remove Noise from Images: all right. If you've ever done photography at night, you know how frustrating it can be when you come back with an image that was so wonderful when you're out there but shows up just all full of noise and weird little pixels everywhere that are kind of crazy colors. And in this lesson, I'm gonna tell you exactly what you need to know about noise and noise Removal is that you remove the right kind. You don't mess up your image in the process. So let's go ahead and get started. What you can see here is that within the detail panel, we previously went over sharpening, but they've got a second half of it, which is sort of the opposite of sharpening. And that's noise reduction. I say that because noise reduction comes at a bit of a cost. If you want to reduce noise, there's no free lunch in a w light room. You're gonna have to pay for it with a bit of detail. So that's why I say sharpening and noise reduction are kind of flip sides of the same coin . Now. With that said, right, noise reduction generally works by making things average out So if we average out the pixels in an area which reduces the noise, it'll also reduce a bit of the sharpness. And that's why they're kind of flip sides of the same coin. Okay, that's the bad news. The good news is, is that it can really make a big difference if you do it right. But to understand how to do it right when he didn't know the difference between the luminous and color noise reduction. So what is noise noises? As we look at this image, there's a bunch of pixels that kind of look off. This guy should be blue, but it's like blue with a bunch of grey mixed in, and we can zoom in and taken even closer. Look, right, that's not house guys, Really. Look, that's how noise and pictures looks. And so we kind of know what noise is just by looking at it, we can observe it. There's some here in the moon. There's some here in the sky. There's certainly some over here in the dark of the image, but there's two kinds of noise, right? Most of the noise that we have in our images, I believe, is luminous noise and not color noise. No luminous noise is when it's kind of all the same color, but sort of like a grayish tone is off a little bit, right? There's just kind of it's all kind of blue, blue, purple e, but it's not all the same color. The same color would be no noise, but here it's like a just a kind of a random mix of things confusing. I know color noise is when it's totally different colors. It's It's supposed to be one color, but it's not. It's like a bunch, different colors mixed in, and that usually doesn't happen. Usually it's Luminant noise, where it's all close to the same color but has some variations in the color from noise. And that's aluminum noise. So a little confusing. But I hope I can demonstrate for you here. So noise reduction panel. Lew Minutes I can click and slide up and look at what just happened to the image. Holy cow! It just got rid of the Luminant noise. Now there may be a bit of color noise here. Let's see if we can do anything about that by clicking and sliding to the right now you can see that was very subtle. Let me slide it to the left and noticed. There's a little bit of kind of a yellow tint to some of the pixels here that when I slide to the right and I started all the way to the right, those have gone away a bit now now, especially if I drag the details slider to the left in the smoothness slider till to the right, that's even more pronounced. So here's without it and here's with it. It's right in this area. And that yellow just went away because we know there's no yellow in the night sky and so does Adobe Light room, so it knows to average those out. Gone. Now let me bring luminous way back down again. That's Luminant noise, Okay? And this is color noise. Is that color that's coming and going as I move this slider. Most of the noise in this image we can see is from luminous noise, not from color noise, Which is why I'm saying if you're gonna worry about one and we already know that noise reduction comes across a cost, look at the moon here before. Look at the detail on the moon and after, Right? We're definitely losing some detail because noise reduction is sort of the flip side of sharpening its averaging those out. So you really want to work on what's most important, which I think is luminous noise reduction. So okay, lets reset these things and talk about how to use these now that we know what the to kind of noises are, and we know how we can adjust them using the noise reduction function. All right, so luminous again. We can apply the luminous noise reduction by clicking and sliding on its slider. If we slide to the left, will retain some or the details, which again means, of course, we'll have a little bit more that noise, and we can click and slide that slider to the right to retain mawr of the detail. And so this is more detailed. This is less detail, in case it just messed it up. I don't know less detail to the left, more detail to the writing, her image, which means if you have less detail, you have less noise. If you have more detail, you got more noise. Now contrast. If we go to the right. It's a subtle adjustment that will allow us to retain some of the contrast, which means less of the pixels are averaged out. Which means you have mawr detail and a bit more noise. And a bit more contrast is, well, right. So it's kind of a finer adjustment you can see is that I go all the way to the extremes here. It doesn't make that big of an adjustment, just retains a bit of the contrast in the image. But if I go to details and I slide that to the left, you can see it's it's a much more significant adjustment than contrast Waas. And of course, the amount that we're applying is very significant here as well. So what do you probably want to do is bring it up to you know, something that's reasonable, given the sharpness of your image will be a 20 here. We're gonna want to retain some detail, and we are going to be there and retain some of that contrast in the image. So here's before and after, and we'll go zoomed in here before and after to see how that adjustment is settled. Good, I think, and Then again, we can go to maybe just a bit of color and the detail slider works the same way. Slide to the right to retain details, slide it to the left to sacrifice detail. Slide the smoothness letter to the right to smooth out those color and differences into the left to have a less smooth noise reduction if you have more smooth, less detail. Okay, so again, everything comes at a cost. The more of these applaud the more of these adjustments you apply, the more you're sacrificing, sharpness, sharpening, which we just went over a moment ago. So that's in this image. Let's take a look at this one as well, just so we can see how we might work with it and where the noises click. Over here, we've got a lot of color and a lot of noise, which makes it a great example. Again, we can go ahead and click and drag on the Luminant noise reduction, and then we can maintain an adequate amount of detail. In contrast, in the image, let me give you a before and after so that I can show you that we've removed a lot of the luminant noise, but I want to give you a warning and show you why I'm warning you about the color noise reduction. Remember again, it's just looking for pixels that are nearby that have different colors, and it's gonna even them out. And look what happens when I apply the color reduction here. This red, which really wasn't noise. It was part of the spray paint just turned a bit more yellow, right? So I'm I'm at an extreme here. I've kept detail all the way down and smoothest up, so maybe I'll bring him a bit more towards the center, and you can see that it's not done that quite as much. But if I slide it to the left, here's what the image looks like with all of its color. And as I look to smooth out that color and reduced color noise, I'm actually losing color entirely here. It shouldn't have done that, but it doesn't know again. It's just averaging out, which is the night, why I'm not a real big fan of using that color noise reduction function because first of all, there's just not that much color noise in this image. And second of all you lose the rial color of the image and I'll show you on the whole image here if I slide it to the right and I keep the details down in the smoothness way up, right before and after I'm losing a lot of color. Let's zoom in here on the red, maybe for a second, See before and after and again, I'm losing a lot of the red around this light and in this area. So I'm just not the biggest fan of that color noise reduction. All right, Now, you've just seen how to use the luminant and color noise reduction features in a W fellow shop. I hope that helps you understand how and when to apply what sort of noise reduction is really important and probably not so well understood. But stick with me because the next lesson will change the way you think about distortion in your camera and your lenses, cause we're gonna talk about lens correction. Let's just started
18. Lens Corrections: Unfortunately, no camera and lens combinations perfect. And every lens can you little correction because there is a little bit of distortion and maybe vignette ing in a lot of if not every lens out there. Now I'm gonna teach you in this lesson how you can use adobe light room to make corrections to your lenses after you've taken your images right in the W light room, using the lens corrections tab so you can see we're in developed and lens correction. Let's get started Pretty simple here. We've got our profile and we've got manual adjustments now. My recommendation is to 99.9% of the time. Go ahead and stick in. This profile is a super convenient and wonderful tool in a double room. So what I want you to notice is that when I click, enable profile corrections right here. It's recognizing the lens, and it's profiling the lens, so particularly watch. Maybe I'll do it one more time around the edges of the image here as it removes a vignette , and it fixes the distortion automatically and click. And it's done. And of course, the beauty of this is that you can select a number of images and enable profile correction across them, which is really great. Um, the other thing that you can do is you can remove chromatic aberrations. So here's maybe maybe an example where we've got a little bit of chromatic aberration here . This could just be some reflection from the green around it. But you know, typically the chromatic aberration is colors that would appear in the, you know, fringes and lines in the image because of an imperfection in lens. So if we click, remove chromatic aberrations that's unclipped and click again. And yeah, sure enough, you saw it there. Removed that green from the image picked up, is a chromatic aberration and removed it. There's a great example of how you can use that tool now. It just so happens that if you're not necessarily entirely happy with the corrections that are applied based on your lens, you do have some creative control here using distortion, and I'll just move this slider around by clicking and dragging. You can see the distortion happening at the edges of the image and the same thing with vignette ing. We can add and remove. Adjust creatively. That vignette ing now here's my recommendation, though, is that you don't use distortion vignette ing here to make those corrections. First of all, if you're distortion has already been corrected for in the lens, it's not really, in my opinion, a great creative tool to apply a lot of distortion that maybe you want to do it from time to time and vineyard and can probably be done better in other modules of light room, so I wouldn't really use. This is my go to solution for vignette ing, either. All right, let's go ahead and remove these now so we can explore the manual lens correction features of adobe like room. And let me say that while they can be interesting, they're not nearly as convenient as the profile correction mode. So we'll click over here just so that you can maybe get a brief overview of, um, you can see that we can still adjust the distortion of our image. But if we adjust the distortion of the image, we can also create thes areas that are no, that don't have any image meant it all. And what we can do is simply click on constrain crop and it will automatically crop out those images where there's no image left on the canvas. So that's all done. Wonderful. The next thing you can see is that we can try to work on de fringing using the eyedropper or the sliders here. So let's go ahead and zoom into this spot again. That's got that purple, and you can see if I click on my eye dropper, it tells, May pick a fringe color. Now I've got my loop there so I can see that I am on the green. And if I click it right, it's removed that green. It's made some adjustments down here is well that I'm not necessarily gonna go into. But just to say that you can use these sliders here so that you confined to in the amount and the colors of the fringing that you want to remove. But honestly, if you've got this tool here, this eyedropper, why would you even want to mess with all that stuff, right? So that you can see that it wasn't able to pick up enough green to make the adjustment, which is possible because we've removed that green already. So if you get that error, it just means you need to pick up a green or purple from one of these fringes and two d fringer image that way to remove the chromatic aberrations. Of course, we've still got vignette ing. We can apply here in a midpoint in order to control that again. Not a great Tabin light room for doing vignette ing in like we talked about before, so I probably wouldn't recommend doing that. All right, let's go back here and apply those profile corrections. You can see that's quite nice. Now, I want to use this image to really highlight how you can use profile corrections to adjust the vignette ing and why you may or may not want to do that. So this image here is a little bit dark, So why don't we go ahead and go into the basic tab and maybe bring the exposure up just a bit? And why don't we bring I don't know. Let's say the highlights up a bit and the whites up a bit as well. Okay, so that looks very nice right there. I just wanted to do a basic adjustment so you can see what I'm talking about with vignette ng next. Now, if I click, enable profile corrections, you can see that the it'll be like room does a wonderful job of removing the vignette ing and distortion from the lens. Which dentist? That 7200 lens that I use is my go to lunch Almost everything, to be honest with you. And of course, we can remove chromatic aberrations, which we're not going to see much difference on there now. Here's the thing about it, though, is ah, I actually prefer image a little bit more like this. A lot of times, so many cases when I want the vignette ing or I want that because it's bringing, you know, my subjects as well. Let the vignette is not affecting it, and the vindicating is sort of adding a nice element to the image here. So I'm not sure you would want to go like that to remove the profile corrected image here, right to remove that vignette ing by applying this profile because sometimes vignette ing and the effects of a lend can be really nice and be a great creative touch. I just wanted to use this image to point out that not all corrections are necessarily great . And you don't always want to think that your images have to be perfectly corrected. In order to be lovely, you can have them and make creative choices to keep images like this. So enough said there. Next up, what I want to do is demonstrate that this profile correction here I've got a 35 millimeter and it actually got two of them here. All right, so here is the 70 millimeters donates 200 was shot with, and nearly the same scene is the 30 millimeter here, and you can tell that there's a bit more distortion here. So if we apply and the lens correction by enabling profile corrections there simply by clicking on the box the same as before, look at the amount of distortion that's removed from the edges of the image. This time it's it's a significantly greater amount now. It doesn't have necessarily the same kind of vignette ing right. We can see that here. I'm shooting with the Sigma the 35 f 1.4 and I can move chromatic aberrations if I like, and suddenly I've got an image that no longer has is much of the distortion So it's not just a tool that you need to use for portrait's or for landscapes or for anything else. But any time you want to really remove the effects of lens imperfections or distortions, you can go ahead and do that right there in this tab. Of course, you've got all of the controls available to you, regardless of what lend it is. But there may be a time. I'll mention quickly that your lens may not come up here and there. Sometimes when you just have to go in and select the make and a W light room will find the model in profile for you. Now it may be that you just don't have a profile for that, you know, 19 forties, one off handmade lens that you've got in your camera at the moment. And if that's the case, you can certainly come in here and try to adjust it with the manual adjustments. Or you can accept the fact that those lenses may have some imperfections you can't correct . For now, you know how to use and how to make profile corrections to remove or leave based on what you want to dio the imperfections caused by a lens both in the profile mode and in the manual mode of Adobe Light Room. Stick around because up next, we're gonna be talking about camera calibration. This tab right here, which will finally get your images toe look the same on your computer as they do on the back of your camera, which to me is amazing and totally worth light room and this simple correction. So let's get started here in just a second.
19. Camera Calibration: all excited shoots done. You're back from your trip and you plugged the camera card back into the computer. In comes your images, your building, your smart previews. And then you go and click on the first image. Something awful happens. The image goes from looking really nice to suddenly different. Something about the colors and light has changed, but you didn't do anything well. It also looks different than on the back. Your camera, which is a problem, used to just drive me bonkers when this would happen and get back and be like, Why does it look different now? The differences were subtle. It's not like it was night and day difference. But it was enough. I could tell in this lesson. You're gonna find out why that is and how to fix it. Let's get started. So we're in a W light room. We're in developed. We talked about lens correction last lesson, So we'll take that down and in the bottom here, we've got camera calibration. Now here's what's going to get a little bit camera specific and unavoidable. Camera calibration lets you apply the profiles that you've said in your camera right into your images. here in light room. Which is the reason for that difference in how your image looks in your camera versus how it looks in the light room is because it's interpreting that raw information differently. Right? And so here it's applied Adobe Standard. Now you can probably guess that Adobe standards not what cannons using to show you the information on the back. Your camera. They're probably using the profile that you've set up, whether it's portrait or let's see faithful neutral landscape right. This is all under, like the picture profiles or settings. I'm sure Nikon has the same thing. Sony certainly does as well. But this is where the problem is is that it's different between light room and your camera . And that's why your images look just a little bit off. Well, it turns out there's an easy way to fix that. If you click on profile, look at that. I've got camera, faithful camera, landscape camera, monochrome, neutral portrait and standard all of the functions and features that I would have on my canon five ds conveniently for me right here in light room. Now here you'll notice a couple on the bottom that I've created custom camera profiles, and we'll go over some of the more advanced lessons later on about how you can go beyond what can and thinks your camera is and go to what your actual camera lens combination is in creating a custom camera profile that is 100% accurate. So be sure that you stick with me all the way to that. All right back to her right now, though normally I've got a landscape here. You may set to camera landscape in your camera that's displaying your preview on the back, your camera right? And so here, If I click camera landscape, look what's happened. That's how it looked when it came out of your camera and displayed on your LCD screen on the back. Your camera. That's why it looked different before, before it had Adobe standard applied. But what we want is camera landscape. In this case. Now here's the cool thing, though, is that you can go from landscape to say monochrome or to camera neutral so you don't have to go back and reshoot the images or make some kind of ah adjustments. You'll be able to use the information that light rooms got to sort of re interpret and apply the amount of adjustments in the way that that information is displayed and handled right here in a w light room justice. If you had said it that way when you took the picture in your camera, right, so we'll go back in a landscape because that's nice. I'm not monochrome the landscape. Please. There we go. All right, Well, you can see that even with this profile, there is still a way for us to, you know, do almost a bit of split toning here where it gives us shadows and we can adjust greens and magenta is in the shadows if we want to, we can take a look at the primary, the red primary here, which would generally be used for, like skin tones, perhaps in a portrait. Or we can be used to warm up a bit or change the tint. Here we can select a hue and the saturation. You can see kind of the adjustments that that's making as I'm doing it. We can look at the greens and we can look at the blues, right? So what we're doing is taking a look at the shadows and then our primary channels red, green and blue. And we can adjust those to a custom setting right here, right? Because remember the cameras recording that red green in that blue information, and this is gonna allow us to adjust the way that it's displaying. So, for example, if we want the image to be a darker blue and to be more heavily weighted towards the blues , we can slide it over to this darker blue and then increase the saturation. And that's what it would look like before and after. By having done that now, there's a lot of green in this image as well. So perhaps you want to make the grand a bit greener and increased the saturation there as well. Before and after, you can see that's making a huge difference in the image simply by applying a camera profile here, which Cannons already said in Adobe Knows and then adjusting are green and our blue primary channels like that. Now here's where it gets really cool is that I can simply select another image, and then I can Well, it's auto sync now so I can go ahead and synchronize if I go to synchronize here by double clicking that button and I can hit synchronize. And now what I should see is this little adjustment window icon pops up. And if I click over to the second image, well, Aiken scrolled on the bottom and I can see that I've got the exact same ah profile as well as the red and green adjustments done. So I can actually just go across a bunch of images. If I wanted to say of all landscapes in the same shoot at the same time in the same area. And I can just batch apply all that quickly and easily, Which blows my mind. I love that. So I'm new now. Go in and use this image, which is Ah, hanging Japanese fishing float right. That's the netting that would have hung. This is, you know, upside down from how it be in the water. This would have been holding the net up, but anyway, this isn't a lesson on Japanese fishing floats. We're going to Adobe Standard and will say camera faithful this time landscape, right? I'm giving you a couple different displays here of how these profiles are, Um, how they make this image look and how I can switch between them. I like camera monochrome. In this case, let's see what happens if I now adjust the channels of this image. You can see that if I slide nice, you to the left here on red. And then if I go ahead and increase the saturation before the foreign after is tricky because it's all gonna be from color to black and white there. But you can see as I make that slide over that I've made some adjustments to give this a bit more punch. So that's how you can use this handy camera calibration feature in a dhobi light room to make the images on your computer match. Exactly. Finally, the images that you saw when you took it on your camera, and you can stop hating your computer and light room for changing your pictures on you. It's not actually changing them. It's just a profile. It's applying, and now you know how you can select the right profile. Fine. Tune those adjustments and apply those same adjustments over all of the images, which is an amazingly powerful future in Adobe Lie Room. Thanks for sticking through these modules that have gone over the basic functions in the develop module of a W light room. Up next, we're gonna have some amazing stuff to go even beyond that. So stick with us.
20. Local Adjustment Brush: in this section, we're going to be learning how to edit just specific portions of your photos using some tools, like the adjustment brush or radial filters in light room. So go ahead and open up the photos that you downloaded earlier. And I'm going to be editing this one right here, which is Sione three. This is me and my beautiful wife Isabel, at a castle in Sione, which is actually the town where my great grandfather was born. If we're in the developed tab and we click on this brush icon right here, we get a new drop down of options and sliders. These air similar sliders that we saw before in the normal basic tone curve hs l all of these other edits. But what these lighters effect are Onley Where we brush on this is the adjustment brush. We can change the size of our brush by going down here and turning, increasing or decreasing the size of the brush. We could feather the brush more or less, and when we're ready to paint on, we just click and brush. But right now I can't see where I'm brushing. I'm gonna undo that just by pressing command Z on my keyboard and then I'm going to click this show Selected mask overlay. We're gonna make my brush just a little bit smaller, and I'm just going to brush on right here is gonna brush on our face and our body. This is weird. I'm brushing, and this is where I want to add it. I'm gonna Then go and unchecked show selected mask overlay. And now I'm going to just adjust the exposure. So if I go in here, adjust the exposure, increased exposure increased the shadows just a bit. Maybe the blacks just a tiny bit. It really makes me and is about pop out just a little bit before. If I click this pin right here and press delete on my keyboard and then undo that we can see what it looks like. We can also see if we say done. And then we do these comparisons by clicking this button right here to see the before and after. If we want to continue brushing on this photo using the same settings, we can just make sure that we click on this pin and continue to brush around the photo. I can make this entire little pathway, a little bit brighter if we want. If we want to create another brush that has separate settings, what we do is just go up here and click new. This will create a new brush. We can turn on our select mask overlay. And now, for example, maybe we want to do something creative. We can just brush on these rocks down, below and to the left. This would be very hard to do with any other kind of mask or tool. The brush is really good at this kind of thing. Then ledges turn off the show selected mask overlay. Unless you do something funky, let's boost the saturation. Let's change the temperature and the tent, and we can get something that looks completely different than what we saw before. I had some more clarity or less clarity, and now we have these two pins, and if you hover over, you can see where the pins have been brushed on. And if you want to get rid of a pin, you can just select it and press delete on your keyboard. As long as you go back and choose new, you can continue to create new brushes and continue to edit this photo in many different ways. The main ways that I used the adjustment brush is for things like this or painting on faces to increase the exposure. I take a lot of photos, just natural light, and you do tend to get some more shadows than if you're using, you know, strobe lights or flashes or anything like that. So use the adjustment brush to paint on effects to a specific part of your photo. In the next lesson, we'll learn about the radial filter.
21. The Radial Filter: Hey, in this lesson, we're going to learn how to use the radio filter. If you just watch the last lesson on the adjustment brush, it's very similar. But instead of brushing on an area that we want to edit, we're using a circle or an ellipse to choose a portion of an image to edit. So just click on the radio filter button, and now you'll see if we just click and drag on our photo, a circle appears and it appears and grows from the area where you clicked. If you want to click and drag over a face, one of the best ways to do it is by clicking at the top left, holding the option key and then dragging down the option or the all Chiana windows will allow you to drag from wherever you click. So say we want to just brighten up these faces just a little bit from my wedding photos. So I just clicked and created that ellipse. We can add the feathering right here. We can show where the mask is selected, and what's happening now is that we're selecting everything except for this face. So say I go to exposure and I'm just gonna do this really crazy. But if I increase the exposure, it happens everywhere except for this where this radio filter is. So I'm going to invert this mask. So now it's on Lee happening right here where this mask is going to get rid of that exposure adjustment. And I'm just going to increase the shadows just a bit at the little bit of contrast. Just maybe the exposure just a little bit. So now if we delete this, we can see the before and after. We can actually copy and paste this or duplicated by right clicking insane duplicate. Then we could drag the next one over to the other face. Or you can restart just by clicking new and clicking and dragging. And this might be good for this image, specifically because the image of or Monica and Isabel's face is a little bit darker than where my face and Christian spaces. So we might not need as much of an adjustment just got to make sure that we invert this mask again. So that is the radial filter. It works similar to the adjustment brush. You still have all these other sliders you can do all kinds of things, increasing sharpness just for faces. You. That's another thing that you might want to do. If you don't want to sharpen the entire photo, you can just sharpen a specific portion of it with this type of mask. Thank you so much. And in the next lesson we'll learn how to use the graduated filter, which is kind of similar, but it comes in handy and some different instances. Thanks for watching.
22. The Graduated Filter: in this lesson. We're going to learn how to use the graduated filter. I've got this wedding photo right here. It's wedding three dot Any f. This was a raw image shot on a Nikon photo. I really like this photo that my feet are for a wedding photographer Will took. Except I don't like these blinds up here, And maybe he just couldn't have lifted them. Or maybe it was just the moment and he didn't want to miss capturing this moment by going over to the blinds and lifting them. The cool thing about this photo is just the why, White background. I haven't edited this photo yet while I've already done it in the past. But in this session, I haven't gone forward and edit it, so I'm just going to quickly just at it, a couple of things just increasing the contrast. Just a bit dropped, expose air just a bit. Maybe increased the clarity and the vibrance. Okay, quick ad. It's I want to get rid of these blinds, a cool and quick way. We can do this because this is a white background is with the graduated filter. So I just click on that graduated filter button. And now when I click and drag in my project, I get this sort of line filter. I'm gonna undo that and make sure that I have my show selected mask overlay on so you can see what's happening when I click and drag. Let go. You can see that I have made a selection. I can move this selection by clicking the middle and driving up or down. I can rotate it by clicking on the line that's in the middle and rotating it. Or I can decrease the feathering by clicking on one of the top or bottom lines because there's three. There's top bottom and middle in dragging those in. Now for this image, I want a very not so much a gradual transition because I'm going to completely white out the blinds right here with an exposure adjustment. Just by increasing the exposure you can see now, when I ever I drag any of these editing options, it affects just what's above those lines, just like so I could have cropped this out. Sure, I could have cropped it a little bit closer, but maybe I want that head room right there so Now I have a white image without those blinds. If I click done, you can see it a little bit better. But now it's a little bit awkward on the right because I see the edge of the window. So what I'm going to do is go back in here going to click new. I'm going to set my exposure pretty high again and then just click and drag in on the right and then click and drag in on the left. And now I have this cool photo that looks like maybe Isabel was standing in front of an even bigger window, completely blown out, just her. So that's one case scenario for using the graduated filter. Another is to just adjust the horizon. So I'm going to take this photo right here. This works better if you're shooting a sunset shot or something like that, where it's a clean horizon. But I'm actually just going to adjust everything below this castle. Some. This is great for adjusting just the sky as well, but also maybe just the bottom of your photo. So I'm gonna go to my graduated filter. I'm going to check show selected mask. Then I'm going to click down and drag. I see what's happening is that I'm using these settings that I use before, which I don't necessarily want. Well, I'm gonna put it right about there and then drag up. I'm going to reset my exposure. I'm going to turn off show selected mask overlay and then I'm going to go down and make this grass greener, very green. So I am going to increase the saturation quite a bit. Also going to increase the clarity to get some more of that definition and sharpness, which is nice for landscape images. And then maybe let's just play with the tent to see if dragging to the left will make it a little bit more green. Let's just see what the warmth does, maybe just a little bit warmer. So we still get that yellow, but lots of green. Let's see if the exposure needs a little bit more help. We could decrease it. If we want, I might just increase it just a little bit. So now if we compare before and after, you can see such a dramatic shift from the bottom to the top of the image and the B A before and after. So this is another case of using the graduated filter. I use it all the time when I'm just editing the sky or the top bottom left or right of an image. Thanks for watching, and we'll see you in the next lesson.
23. Spot Healing Brush and Blemish Removal: in this lesson, we're going to learn how to use thes spot removal tool. The spot removal tool is great for getting rid of any blemishes that you don't want in your photos. Thinking about pimples, scars, anything that you don't want. I will say this with one caveat. I typically don't use the spot removal tool a lot of the time because I like seeing people in their natural state. A lot of people go very heavy with the retouching, and I like to keep things a little bit more natural. But whenever I'm teaching a course, I do want to show you all the tools that you have available incidents I can. I'm gonna pick on myself. And so here's this image of me. I cropped in a little bit, and it's really hard to see, but it's a good example of what the spot removal tool can do Will do if I zoom into my knee right here. I have this scar right here that I got I don't even know how I got this scar, but if I take my spot removal tool right here and now I have this brush and I can change the size of the brush over here. But that looks just about right, and I can increase or decrease the size of the feathering. I can literally just click on the spot I want to remove. It will do a little bit of magic, and it will improve. That spy basically gets rid of that spot. What it's doing and you see this second circle pop up is it's taking this information over here and blending it with the original spot where I clicked or painted on. If I move this over to the right, you'll see that it looks a little bit more funky because it's blending my pants with my skin. If I move it up here on my arm, it still looks decent, but not as good as before when it was just of the skin close by. So you want to generally find and move just by clicking and dragging this over some skin that looks how you want it. That's very close. So thinking about the tone, the way the skin is with, you know, my hairy legs or anything like that. And then the last thing you can do to adjust this blending is play with the opacity so you can just drop down this opacity and you can see that this scar comes back. But if you only want to bend, blend it a little bit. Or if that's good enough for you, then you condone Rappe that opacity. Now I'm using the hell brush. So if I click done, you literally can't see anymore. It's amazing. This is the healing tool. There's also a clone tool. So the clone tool is literally They're just Teoh. Copy and paste something in the image. So say I go to this photo right here. I take my spot healing brush and I click on clone. I get the same kind of brush. I'm going to increase the size over here and now with the clone tool. What you're doing is literally just copying, pacing another part of image somewhere else. Unlike the hell brush, which tries to blend the two selection together, this is just copy and pasting. So say I want to get rid of these people right here. Let me just zoom in right here to see these people right here say I want to get rid of them can decrease the size a little bit, but I can just paint over them like so now it makes that selection, then the 2nd 1 just like before we want to put to. We want to move to an area where it will completely cover them. If I make the opacity 100% you can see what's happening. I'm literally copy and pasting this part right here to this part over here. That might not look good, though, especially with this bar, so you might have to line it up just a little bit better. But something like that could work, and with a good amount of feathering but without feathering, it looks awkward. If I click done, you can definitely see this, and it stands out. If I go back to my spot tool, click on here and I actually don't want to move it. I want to just add some feathering. It does work a little bit better. The healing brush works even better, in my opinion, and especially when you zoom out, you really can't see that copy and paste that we did The clone. The clone tool is good for some cases, but if you're trying to remove a blemish a pimple, a scar wrinkles. I would use the healing brush. If you have any questions, let me know otherwise Will Stephen another lesson.
24. Export Photos from Lightroom: in this tutorial will learn how to export your photos from adobe light room. So you know a lot about editing. You know how to use all the development tools the adjustment brush is. And hopefully by now, you've gone through either the photos we've given you for practice or some of your own and edited them once you do that and you have a photo that you want to export to export as single image just selected down from your film, stir below, go up to file and export. Or you can select multiple by control clicking or on a PC command clicking or selecting a sequence of votes by selecting the 1st 1 holding shift down and selecting the last one and then going to file export. The other way to do it is if you have a photo selected and you're in the library module, you can just click this export button. A big dialog box with lots of options will pop up, and I'm gonna walk you through everything right now. So starting with the top it ask you, Do you want to export to a hard drive email CD DVD We're gonna export as a file, so choose hard. Drive over on the left. You do have some presets if you want to use them, so you have full side J pegs. You can do it for email, which will shrink the size. Or you can create use user presets of your own over on the right. These air, all of our file setting options. So the first is the export location. First, we're going to choose. Do we want to export to a specific folder that will choose in a second? Or you can choose one of these popular options, like desktop movies, Folders, pictures, folder. I'm going to choose specific folder. Then I'm going to go down here where it says folder option, and I'm going to say, Choose this will open up my finder and I can choose where Say, I do wanna expert to my doctor desktop. I can choose the desktop you can choose to put in a sub folder, so maybe I'll do this. All set check. Put him sub folder light room course edits. We're gonna skip this option right here. But basically the existing files says that if there is a file with the same not name what happens? Do you skip the export? Do you overwrite that one or do you choose a new name for that? I always just leave this as asked what to do. So if that does pop up, if that is the case, it will ask me with naming your file. We have this next block right here. Typically, I like to rename my ad. It's you don't have to read name your edits. You can just name them these same file name that you took and some people like that to just rename me as the original file image that will typically, if you're just bringing it in straight from a camera B, a number of letters and numbers. But I like to rename, too. And then they have these different sequence options so you can just choose a custom name. So if we have this, maybe I would just call this light room course at it, and that's what it would be named as. But maybe I'm exporting a series of image like 10 or so. Then I would choose something like custom named Sequence, and you can see when I choose the sequence that this start number over here pops up, and now they will save like this. It's shows you an example light room course at it Dash one. The next one will be Dash 2-3-4 You can also start at a different number if you want, or you could choose a different naming option or create a custom one. Next is video, but we aren't exporting video, so we don't need to do that. The next two are similar or sound similar, but it's good to understand the difference, especially for those of you new to photography and editing file settings and image sizing file settings is the quality of the export image. Sizing is the size pixel to pixel size, so in file settings we can choose a number of formats. And you might have heard of these before. We have our J peg are PSD, which is a Photoshopped file tiff. That's a very large but high quality file. Some printing places ask for that. Same with the and G. Some people, my ass for a DMG or original. If you do, I wanted to just be saved as the raw image that we imported. You can just choose original Typically, I'm going to be exporting as a J peg. And I want my quality to be at 100 unless you want the file size. Not that file actual size of pixels, but the file size in terms of kilobytes or megabytes to be smaller, then you would want to leave this at 100. You can also limit the file size. So not the image size, but the file size, like checking this box and typing in the number of kilobytes that you want to limit your photo export to. Sometimes when you're uploading photos and I know, for example, if you're exporting a photo or uploading a photo on YouTube for a thumb now they only allow photos that are two megabytes big. So I would have to limit this to 2000 kilobytes. But if you wanted to be full quality, just uncheck that and then with color space, I typically just leave it at S RGB with image sizing. This is the size of the pixels with or height and so you can resize if you wanted to be the original size of the image, which I don't exactly know what this was, but you can just leave it unchecked or you can resize it, especially for posting online. You might not need the full size oven image. Most cameras nowadays, they take photos that are 56 7000 pixels wide or even mawr, and we don't need all those pictures. We don't need it to be that big, so we can limit it here if we want the With of the image to be a max of 2000 pixels, we can put 2000 and then we can put pixels. If you wanted to be seven inches, say you're printing of us out. You put seven inches. Make sure you do the inches first and then seven. If you convert this to pixel, then it will give you the pixels in inches. If you just choose the with, then it will only limit the with to 1500 pixels. In this case, if you also need it to be smaller than, say, 500 pixels, then it will resize it so that the max height is 500 pixels. Now that doesn't mean it's going to be stretched. It just means that it will probably be smaller. Have a smaller with than 5 2050 You can also check this don't enlarge button so that it won't become bigger than the original size of it. So say you shot the photo and it was 5000 pixels wide and you weren't sure about that. And you need to, you know, export something that's 10,000 pixels wide, but you don't want to enlarge it. If it's not that big, then you can check that. Don't enlarge button the resolution over here. This has to do with whether your output is for printing or online. For a lot of online uses, 72 pixels per inch is good, and this is literally how many pixels. How many little dots of color are there per square. Inch 72 is good for online. 1 50 is great for printing. If you want to go up to 300 that would be good if you're putting a photo even larger. So if you're blowing up a photo, go up to 300 the next is output sharpening. If you do want to print, you can add sharpening here specifically for not paper for glossy paper or for the screen a lot of places do add sharpening if you go out and print your photos with them. But I typically leave this off and I'll do my sharpening in light room beforehand with the metadata. This you can choose to include all of the metadata or some of the metadata of this image. We learned about the metadata earlier that includes things like the camera model, the tags that we added, if we want to add that we can choose all metadata. So when you send this file to someone else, or when it wherever it goes, that metadata is always locked on it. But you could also remove key personal information or location information. If you don't want that water marking, we're going to skip. But I'll show you how to do that in next lesson and post processing what's gonna happen after the export. We can show it in finer weaken. Do nothing. We can open it up in Adobe Photo Shop. We can open up in another application, typically will just show it and find her after it's done and then click export. It's going to run through our load menu right here. Now we'll open up this image, which is 750 pixels wide by 500 pixels tall. So see how we limited the height of 500. So that means that because the high can only be 500 pixels than the with has to shrink as well. Or it would be a skewed image and it would look squeezed or stretched. So that is how you export an image from Adobe Light room, and the next lessons will learn about water marking your images.
25. Adding a Watermark to Photos: exporting from adobe Light room. You can add a watermark to your photo, and this might be good if you're posting your images online and you don't want people to steal them. Or at least if they steal them, your watermark will be on there. Or maybe you're sending proofs to a client and you've shot a bunch of photos from them. Maybe it's a photo shoot, a wedding shoot, and you want them to see them. But you don't want them to have full download rights yet, and they could just kind of look through the photos. It might be good to add a watermark, so just select your photos that you want to export. Could've file export just like we did last time and then go down to water marking. If we check on this watermark and then dropped on this menu, we can say at it watermark, and this will bring up another window where we can create our watermark. So here I already have this one that says Copyright Philip Abner on a Mac to create that copyright symbol. You can press Option G, and I think it should be the same for a PC. But all G or you can just copy it from online somewhere if you just search for the symbol and copy and paste it here. So say I want to cooperate. This video school online again is type in that text. I can then change the font if I want. Maybe I'll pick my favorite font. One of my favorite fonts is Let's pick one of my favorite fonts Railway. I like that one a lot, actually. I can make it bold. If I want to make it bold. I can change the color. I could also change the size so say I want to make it bigger. Just increase the size over here by clicking and dragging on the corner of the image. So typically, if I'm putting this online, I don't want my watermark toe really be distracting from the image. But if I am sending proof to a client, I might want it bigger over the image so they can't download it and crop it and use the photo however they want. Here we have our shadow. If you want to add a drop shadow to our text and then down here we have our watermark effects, which include the capacity of our actual text, which I typically like to have it a little bit less opaque. We can change the size if we do want to just change size right here. With this lighter, we could make it fit or fill if we want to fit or fill, and then we can anchor it to a part of the image. So if we wanted to be in the middle top left bottom right, whatever, we want it weaken. Change it there. I'm just going to make the size a little bit smaller, but I'm also going to change the inset to drag it in just a little bit from the edge. If you want, you can rotate it that way. I'm just gonna leave it normal, though you can also add a graphic. So say I want to add a graphic for video school online. I have a logo. I can go to my graphics folder. I can go to my logo folder, find my logo, and it will bring in that logo on Place it in the same area that we just put it. We could increase or decrease the size if we want, and if you want to change it, you can just click this choose button right here. So say, we say, save when we want to save this preset will say VSO logo say create. And now we export it. We'll use unique names. See, that popped up to ask me what I wanted to do because I had the same naming rules. Now, when I open this, you can see that it has the video school online. Low down here. Pretty cool, huh? So that's how you create a text based or a graphic based watermark in adobe light room. Thanks for watching, and we'll see you in another Wesson.
26. Full Editing Session - Landscape: All right. Now we're gonna put it all together and regards to see how we can use Adobe like room to make a picture that looks like this. When we start looks like this, when we're done quickly and easily tying together all the skills we've learned so far, let's go ahead and get started. The first thing I'll do is I'll reset this entire image. But don't worry. We'll get it back to right where we saw just in a few minutes. The first thing I'm gonna do is go down a camera calibration. And as we learned, we can now set the camera profile here to match what it would have looked like in the camera were to do this so that we get a bit truer colors and we apply what we think the camera thinks for landscape. Of course, it'll be different for each camera, but is a good place to start next up. We're going to go to the top here and we're gonna apply one of these filters were used to graduated filter to apply our first correction because what we can see is that the sky is very bright and the trees are very dark will go like that. We're gonna double click on effect to reset that entire filter, and then we're going to bring our exposure down a bit. We're warm, the image up a little bit, right to sunrise. So we should probably have a bit of that. Now, that looks quite good. But you consume. We've got some issues with that transition into the trees. So we'll drag it down a little bit with our filter just by clicking and dragging. And you can see that we've got a good start here, but I'd like a little more clarity De Hayes and some saturation. Maybe not quite that much for saturation. It's a bit much. We'll bring d haze down maybe a little, but also make this little bit. Okay, great. So you can see we've got a decent start here for our sky, but there's issues with the way the graduated filter is applied. So what I can do is if I go over here to brush, you can click on brush. And now lucky me, I've got I'm gonna increase the size of this brush. I've got this a brush that I can now paint in right and so be sure when you're doing this, I'll just show you some real quick If I scroll down, Here's my brush. I've got my feather and my flow turned way up a swell as's, you know, adjusting my size and the density 200%. So it's really just applying this with a soft brush wherever I painted and I'm gonna paint into that transition looks a bit more natural, particularly in spots like that. And over here, of course, is well, right. So I want to make sure that that graduated Filter does its job, but also that we don't have these unnatural transitions. And that's all I'm doing by simply painting that adjustment in past where that graduated filter would normally stop. I think that's a decent start, so we're gonna click done now. The next thing that can see is that these trees are a real problem in the foreground cause they're so dark. So we know from our previous lessons that in order to adjust the darkest images of our the doctor sections of her image, we can just click here on shadows and drag up. Now, when we do that, we are in danger of maybe losing some of the darks that we had. The contrast of the image so we can do it is option. Click on black, and then we can just drag it down to make sure we have the full Toma range all the way into the blacks. There. Now, I think we've got a great image as we look at the sky and as we look at the trees here to really coming together. But, of course, is a few issues over here with these power lines. And we know that we can simply click over here on the spot removal tool. And now I'm going to adjust the size of my brush down Very nice. And I'm going to simply select and paint in over those lines those power lines there. Let's see how it does. Waiting, waiting, waiting. Not bad. Do the same thing with this power line. Well, it's controls you that that wasn't right. Okay, so we're gonna we can drag year paint up on and down rid of that power line. Nice done, sir. And then we're gonna go ahead and do that down here for this power line. Very nice. And then finally for this power line here. All right, well, we'll have to undo that, cause that did not quite apply my adjustment the way I wanted it to. No problem and do that. Okay, good. So we're gonna go ahead and take care of this bottom line. It just it applied it. Not across the whole distance. And maybe I click something on my tablet here to do that, take a look. See how we're doing. Let it apply that adjustment. Okay, Not bad. But of course, we're gonna click a little bit above this line here and fill in where it didn't quite get all of it for that. See how it does. Gives it a second to apply the adjustment. Very nice. And we'll do the same thing here. Gonna go over that spot. It could use a little help with, and we'll see how it does. Filling in very nice and down here could maybe use a little touch. Oppa's well, so it's going to paint that and see what happens. Okay. Ah, let's go ahead and click. Done. So we can see exactly what it looks like before and after. Now we could probably use a little bit more refinement may be right through here. So what we're gonna do, it's this one. Yeah, This one right here. We can click and drag where it's actually applying, and we can also click and drag up here where it's sampling from. So I think we should probably re sample from a different spot. So let's drag it around a bit and let's see if that does any better. All right, so we zoom out, we look at the overall image. I think that's done a sufficiently good job there on the right hand side. Now, of course, we've got over here on the left some issues with the power lines as well. We'll zoom in over here and we'll take a look at that. We can click and drag over to it. Power lines, power lines. Everybody loves power lines. All right, so a bit more pronounced list, you're not just a little bit all right, so those are gonna be a bit trickier, cause there longer, um, but the good news is we still have a lot to work with there. So I think we're gonna go ahead on and we crossed that part of the image out. I wonder what would happen if we did that fixing by cropping will hit our Let's go ahead and crop this down, See if we can't keep the moon in the picture. Just get rid of those power lines on the left. Yeah, so check it out. It changes the picture a bit, but I think it's still good. Yeah. So we've got the, um, got the moon. We got the trees, we got everything we wanted. Maybe we consume this out a little bit more to get a little bit more in. And now, instead of having to deal with those power lines, we simply crop him out. So another way to adjust your images? Of course. I'm shooting with a ah, nice full resolution picture here. So I've got the room to do that. Now you can see that if I go down, right? I've got some some possibilities here and split toning I want to take advantage of. If I click on that box, I can turn my highlights to Mawr of a warm and saturated And I can click and drag around with the eyedropper till I get to the right spot. That looks lovely. dismissed that. And then my shadows right, I can make cooler. So the darker parts, the image normally are cooler, the brighter parts a bit warmer. Normally, that's very nice. I'll dismiss that, and I'm, you know, generally happy with the hue and the saturation adjustments on those. But of course I could adjust them here if I wanted to. And now is where it really gets fun. I can adjust this balance so I could favour the highlights or favor the shadows. And what that does is it's going to apply a bit of this adjustment over the whole image to really make it look like it all fits because we have made some significant adjustments. So before and after their wonderful Now we can go ahead. If we wanted to, and we could is the landscapes I could get away with increasing the radius. I can add a bit of the amount and radius of sharpening. We can reduce the Luminant and the color noise, and let's go ahead and take a look and how that looks here 1 to 1 and zoom in as well, German and zooming in because the noise is really going to be in the shadows here so we can continue to maybe remove a bit more of the noise. I can bump that radius up. I want more detail and the same thing for color noise. If there is any right, I can favor more detail unless smoothness here because I don't need to smooth skin tones. Now let's see the before and after a little bit hard to see that way. So what we can do is turn it off here and then turn it on to see just the effects of that adjustment. Give it a second and what you can see is that we've done a good job. I'll turn it off. There's a lot of noise there when we go 1 to 1. And if I turn it back on, we've retained enough sharpening but also done a good job removing the noise to a point where I think that's pretty darn nice, to be honest with you. Uh, all right, so of course, weaken Dio lens correction here if we wanted to and it's gonna pick up on what I shot with and adjust for any distortion Will looks wonderful and right about now, I think we're pretty good, Right? So here is where it is cropped down. We remove the power lines over here, I assure you, the full before and after. I think that's wonderful. Of course, we could click our if we wanted to. And if you're willing to tolerate the, um if you're willing to tolerate the power lines down in the bottom left there, we could go with the full image like this, which is nice because we get some contour from the trees. But again, we're left with this difficult issue of the power lines over here on the left. So, you know, my thought is don't even bother with it. Just go ahead and crop it out by reducing the size of the image here and the crop and then adjusting it so the moon is in the right spot, can hit return, and we've got a wonderful image that we can continue to adjust to manipulate as we see fit . So I hope that helps you see how you can use all of these different techniques. We've talked about to adjust an image to be just exactly what you wanted to and to get a wonderful landscape. Stay tuned because next up, we're gonna do a portrait, and it's gonna be awesome.
27. Full Editing Session - Dark Landscape: it's time to turn this landscape into something we can be super proud of. Now let's get started. The first thing that I see is we go through this full landscape at it is that there's some real issues between the top and the bottom of the image. You see, the top of the image is really bright. The bottom of the image is dark now. It goes beyond that, though, because the top of the image is also a bit hazy. So in an image like this, where we've got top and bottom kind of neatly divided with their own problems, I think we're in good footing here to use some of my favorite tools, which, of course, the graduated filter. So we'll start with the top of the image here, and what you can see is that we can drag and pull this down and line it up with our horizon right there. The ones we've done that we can go ahead and drop the exposure, the background down, and we can go to D Haze, which is a helpful tool in these kind of cases, a little too much there. I don't like exactly what it's done we can bring the contrast up, maybe even bring the saturation of a bit. All right, let's take a look that No. And I think we can even increase this sharpness a little bit because I like what that does to the buildings. Okay, so if we click done and we look at the before and the after, you can see the background looks very nice. Now, however, the foreground is too dark. And in my opinion, when you've got four grounds or that dark, it's a little bit distracting. Why even have it with that dark, right? Well, there's another way for us to fix that. We're gonna go back here to the graduated filter, and instead of this time applying it to the top of the image print, apply it to this bottom of the image transitioning really? Right up through. Probably seer. Okay, so we know that we need to bring the exposure up, so let's go ahead and dial it up until we're happy with it. Now it looks good, but there's a problem, right? This isn't shading. This isn't son. And so there's a difference in the color temperature that I can tell this to me looks warmer. This, to me looks cold or not uncommon between direct light and shadows. But in this case, I don't think it really works with what we want to do for the picture. So I'm gonna bring the temperature up to match it and about their looks. Good. Me? Let's take a look and see if there's anything else as we go up and down with our contrast. I think that's good Right in there. We'll take a look if we want. So I'm not gonna actually going to take a little bit of clarity off because I don't want it to be to pop. I don't want it to be too bright. I don't want it to be to in focus. I don't want to be to anything because I really want this back. The image not to get dominated by the front. Someone take clarity down a little bit, and I might even take a sharpness down a little bit, too, just in order to do that. And so this Let's click done and we'll take a look here at the before and after. Okay, so my I I think maybe that we made the foreground a little bit too bright in this case. Let's go ahead and select that adjustment and maybe take it down to about there. Okay, great. So if we look at the before and the after now we're getting close. I'm gonna be a little picky. That would say that this area right in here to me looks a bit too bright still, and so is because it's just that one on a note tire track, I guess. I think we can use airbrush and make it brushed. An adjustment? Maybe just this section right through here. All right, so now that we've gotten that brushed in, I'm gonna There we go. Did you see just that subtle adjustment? But we did, and I'm gonna make it a little bit brighter and also warming up Tiny bit. Okay, that looks great. So before and after to me, that looks like a very balanced in a much more pleasing image that doesn't distract with just the road and doesn't overwhelm with just the background. I think we've got some great colors that were working with their Maybe one thing we could take a look at before we go. If I click here and we're really talking about the ocean in this case is let me let me take a look and see what would happen. Maybe if I just pushed a tiny bit into the blues. Okay, I don't like that because I want these buildings to be, um, want the buildings still to be warm, but I want the ocean to me to be a little bit bluer. So let's see if there's a way that we couldn't maybe used the HSE cell tool here, one of my favorites to do that so well, we've got We're in good shape because the blues are really all up right up in here. And so I think we could probably pick this bullseye click and drag here to bring the Luminant value down a touch, perhaps on. Then let's go to the Hughes and see if we can't bring them into a little bit. Bluer shall click, and I'll drink up a bit there. That's nice. And then maybe the same for saturation. Maybe I can bring these blue saturation up just a bit. All right, Let's see if we're there now. Before after, all right? Yeah, to me, that looks fantastic. It's not. It's not too much. Maybe I'd prefer this section here to be a little bit bluer and a little bit less purple. So, you know, maybe what I can do is I can go back in and I can take a look at the hue of just that shade . Right? And because I can hover over here, click and drag. I can adjust that, Hugh now. Ah, yeah, That's what I wanted right there. Click done. And you see how and why I'm just so in love with age of cell before and after yet now, to me, that looks much better. That was just a little too purple e before, but now it looks great. Really wonderful, actually. Now, maybe maybe I would want to add a little bit of contour contrast, tonal range, whatever. We want to call it here to make this section maybe a little bit darker in this. A little bit brighter, so it just had a little bit more interest. Flat light sometimes fall short. Someone just like my brush tool again, I'm gonna decrease the size of it even more. And all I would look for I think here is just, uh kind of highlight this area here brushed in there. And what would happen if I brought mine exposure down a little? Maybe brought my contrast up a little. I want to make sure that I don't put that. Okay, Good. That's nice. Done before after. Yeah, that's really good. That gives it. And you would expect that, right? So from here, if there was a bright spot and maybe from the direction that the sun is coming in its casting maybe a tiny bit of a shadow. Or maybe it's from this tree. Right? So it works with what we got going on. But to me, man, so much better from here to hear. What we did is we darkened this background, which is too bright. We Brighton, this foreground, which is too dark. Then we matched the color attempts again. Right? And then we used our tools here to add a little bit of tonal range by darkening this what we left this area light. I hope that shows you how you can apply the tools and tricks we've learned in a w light room to tune up a landscape image to get a look at its best. Let's keep going
28. Full Editing Session - Flash Photo: I am so excited because what we're gonna do in this session is we're gonna take this image and turn it into a beautiful, dreamy, painterly looking image. It's gonna tie together so many of the other fundamentals that we've built on in the previous lessons, and I can't wait for us to go ahead and to apply all those lessons. Right now. Let's jump in and get started. And by the time you're done, you know how to apply many of the principles and adjustments we learned earlier to make great Portrait's. The first thing that we can see about this images that's got a horizon problem. So we'll click are and we'll try the auto correct over here by just clicking Auto looks fine to me, so we'll hit return and now we've got a straight horizon. The next thing we can see is that while it's a really nice image, it could use to get that painterly look, I can click and drag clarity, and you can see now that a lot of the sky has become a bit softer and many of the details are a bit softer, which in my mind is nice. However, I would like a bit more vibrance to it, so I can just click that up. Now, the next thing I'd like to do is probably take a look at decreasing the brightness of the sky to make it darker. And I can do that without adjusting the overall image simply by creating a graduated adjustment here. Okay, I'm gonna click and drag it down. So it's just below the horizon, a double click on effect, and then I'm going to decrease the exposure. I'm going to increase the contrast. And I am gonna go into my whites all to click. It is just to click it, and I'm gonna bring the whites up a bit and the blacks down a bit. All right, So you can see that we've got a very nice adjustment. I can further decrease the clarity. Maybe d hes a little bit. I don't like that one. A reset that 20 I'm gonna bring the saturation up a touch. All right, so if I click done and before and after the skies look great, but you probably are clever enough to see the issue. This young man is right in the middle of that adjustment. it's not gonna work well, But the good news is is that I can just go and click on first any to select it here by clicking on the dot Then I can click on brush, and if I go down, it gives me this great erase functions my click on a race, and now you can see my brush that I've got. I'm gonna increase the size of that brush And now I'm simply gonna take my pen and I'm going to erase off big chunks of this filtered adjustment. Now, the thing you want to avoid here is to go outside your subjects. And if you do, you'll wind up having this sort of surreal looking glow to your images, which really is a dead giveaway that you've adjusted over. Adjusted at the good news is that he's dark on this side anyway, so I can go right ahead and sort of leave that untouched. I just want to bring this bright side of him up a bit rights. You can see I'm able to do that. And there That looks really nice. I'm quite happy with that. If I wanted to, I could, of course, go into my brush and I could undo, erase and go to brush a And then I could maybe brush a little bit of that correction back in over here. Or maybe I went too far. Decrease the brush size we brush a little in here. Okay? Thank you so much adobe for that tool. Because now, before and after you can see, I've selectively kind of brought the parts of him out of that original adjustment. Right? So what, I was able to dio excuse me? It was used to graduated filter adjustment, but then selectively remove part of it, which is awesome. I love that. But the next thing I'd like to do is take a look at this rock because it is pretty cool. Part of the image. I'm going to select the brush, and what I'm gonna do here is ah, make a brush adjustment. I'm gonna reset that 20 increase the size of my brush. And I'm just going to paint on sort of in the middle of the rock here where his feet are because it would be nice to bring this out a little bit. It's a nice feature. So I've painted the adjustment on, and now I can make it right. It's a great feature about leg room is because it's non destructive. I'm able to work with these individual parts so I can bring up the exposure and maybe bring up the contrast a bit. If I wanted to, I can push up the whites. And here's where I got to make a creative choice, right, Joe? I want more clarity to the rock or less clarity to the rock. And in my mind it looks better with just a little bit more clarity, maybe a touch more sharpness. All right, I can click done, and you can see that before and after. I'm beginning to add a little bit more interest to the image by providing more of the tonal range to it That I'm after is still a darker image, and I think that's fine. But I'm just adding a bit mawr interesting contour and shape to it. With that light. One of the things I might want to take a look at those is this area right here. The shadow cast by his right leg and perhaps a good way for me to deal with that is to go into my brush tool again and see if I can decrease the size of this adjustment down to right around the size of the shadow. And if I could not perhaps rush in an adjustment hair now that I've got it in there, what I want to do, I think I want to simply bring up the shadows, bring up the blacks who not too much with the blacks, maybe mawr up on this shadow. So by bringing up the shadows, I don't really affect the darkest parts of the of the image there. Yeah, to me, that looks really nice, right? So before and after and you can see that I've really removed that shadow and shadows are a dead giveaway if you're lighting an image like I am with this one, And so in this case, it allows me to light it without being totally dead. Give away about the whole thing. All right, well, the next thing you can see here is I'm looking at the image, and it's really coming together for May is that the beach is a bit bright. Maybe I would want a dark in that part out of it, and maybe I'd like to brighten this area up to draw our focus in towards it. So let's go ahead and make another brush adjustment by clicking on my brush. They're gonna increase the size of my layer of my brush there, and I'm going to just go ahead and paint in kind of right around the edges of this beach here. Now, once I've done that, I can make some perhaps subtle adjustments. That's too much, too much. Maybe right there by decreasing the exposure a bit. I'm really trying to draw things on my subject, so that's a subtle adjustment. But I like it, and that sort of brings everything right into the center. But I still have, uh, his sister here to worry about. So maybe I'll use the radio filter and maybe I'll click and drag it here just about to there. And it's gonna be again, a subtle adjustment that I'm really just trying to. Of course, I want to come down and I want to invert the masks that's making the adjustment to her. So that's good now. And maybe I could just bring her up a tiny bit and increase the contrast on her. I don't want this to be heavy handed, but I think if you look there before and after, before and after, that might be a little bit too much. Let's go back in by clicking on the gray circle and I'm gonna bring it from 0.7, maybe down to like point for Let's see if that's a dead giveaway. Know that looks good to me before and after I brought it up. Ah, but you can't see the edges of the circle. It's done a great job feathering it. But to me, that looks very nice, all right, So are there any other adjustments move we might want to make to this image? Well, of course, I love split toning. I think it's one of the best features here in light room. So let's go ahead and take a look at how we want to move our highlights. Perhaps, And let's see, that was nice. Good. So it's a ah, a bit in the kind of oranges. Just a slight adjustment to the oranges. There were going to the shadows now, and we're gonna blew the shadows down a bit. Okay. Very good. And now we can take a look at the balance. And I tend to like to favor the highlights, but not too much. And maybe we can tone these both down and saturation a little bit. And let's look at the before and after before and after. Okay, great. That to me looks very nice. Now, of course, one of things we haven't done yet is apply our camera profile. We're gonna go with Portrait in this case, and you can see it brings up to saturation everything and readjust it quite nicely. But in my mind, it's brought things up a bit much in the vibrance. Right? Because of that profile, someone dial it down a little bit. Now that I've done that, uh, let's bring it down even a bit more because the skin tones are quite vibrant. All right, Uh, that's really nice. That's really nice. I think we might be done with this one. So before we started with an image that was a bit flat and off center through a series of corrections, we were able to bring that into an image that had tone and contrast, light and interest in really vibrant colors that popped right off of the screen. I hope that helps you see how you can apply these corrections in a situation when you've got a background that's like a landscape and a foreground that's like a portrait and how you can work those with a flash photo. Anyway, I hope that helps stay tuned cause we're about to do another fantastic get it next.
29. Full Editing Session - Group Portrait: flash photography tends to be one of the things that jams photographers up the most. If it's not the lights in the setting in the background and your sink speed, it's the adding any of the editing of those images because sometimes that could be really challenging. You know, in flash photos, you've got one exposure for your flash and one for your ambient light, which in this case, is the background and anything that could be tricky. So what I hope to do now show you how I approach editing a flash photo in light room so that I could do a whole bunch of them quickly and easily. The problem with flash photography is most of the time you're gonna get a bit of shine to the face. We'll show you how you can deal with that and other common problems in this lesson. So let's get started. Then, by the time we're done, you'll know how idea with and how you can deal with flash photos and leg room to get them looking their best. So what we can see from this image right off the get go is that we're going to apply camera portrait profile as we do with our other images. And immediately some of the sort of skin tone problems have gone away as we're now lining light room. And when our camera recorded and they're interpreting the same way, and to me, that looks quite nice. We're gonna go up at this point before we get there. We're gonna go ahead and apply our enable profile corrections. Just remove any distortion and Israel's brighten up the vignette ing that might happen here . I think it's fine navigating and some pictures, but in this where it's a really consistent lighting throughout the entire background, an image I would like to have it the consistent as well. And so we can, of course, do that. The next thing that we can take a look at in this case, um, you know, I think, will be the sharpening particular around the faces so I can click on the cross here and select the front. I hear which you look contact lenses. Love the five DS. You can see everything all right so we can increase the amount. And because it is a portrait member, slide to the left gives us softer, sharper next line to the right gives us a harder, edgier sharpening, and I think we can slide it to the left and I don't need that much detail. I'm happy to kind of leave it where it is. So let's take a look at the before and the after before and the after. It's a subtle sharpening, which to me is very appropriate for something like a portrait you don't want real tough and hard sharpening. Let's look in the shadows real quick and I don't see much noticed. I'm not gonna worry about this noise reduction, which makes sense, right, because we shot the desires. So 50 I love to do that in bright light. Turn it down below. So the native I so is 100. But Canada let me go down to I s 0 50 So I do because it's like free one Stop nd filter cuts half the light out anyway, not to get into filters. But, man, I do love that kind of stuff. And I s 0 50 is the bomb diggity. Thank you can and forgetting me that. All right, well, we're in a little bit of a bind here for it to sell because Normally we'd look adjusting the background by using our age of cell tools. But in this case, I think we're gonna find is that thes yellows air gonna bleed into the Reds and that's gonna be the same that we've got in the skin tone. So let's go ahead and take a look. Maybe the saturation of it. I think we're gonna find out that this is not gonna be that effective so we can click and drag there and bring it up. And to my surprise, we managed to stay in the Ellis and away from the oranges. And so I think that's gonna be okay. So before and after, I don't think we've really messed with the skin tone. So it just goes to show you Sometimes you never know. We can also take a look at the loom in its here, and we might want to bring up the loom in its of this blue channel for the dress. Perhaps we can click and drag and bring that up, and not only for her address, but for sure as well, right? Very nice. And we'll take a look at perhaps the hue to see if maybe towards the edges of these yellow knows what would happen if we made it a bit or injure. That's nice, subtle adjustments. So it just sell before and after. I like where we're going with it, and that's all good. Next up, clarity, right? Someone zoom in here for clarity because I want Teoh is your man all right? Clarity. If I bring it down, just a touch here, we'll soften portrait. And to me, that's that's what we want to do. So I don't want to do it so much that would lose any of the good details. But do you want to do it Enough where? You know, we could be gentle on our subjects here. And maybe the one of the things I'll do in order to help out with that is by selecting this brush. And maybe what I'm gonna do with this brush is really even go a little bit more and I'm gonna decrease the sharpness. My reset didn't mean toe just saturation decrease the sharpness of it on and decrease the clarity of it a bit. And I'm gonna come in with a very small brush, and I'm just gonna work here along the eyes. Perhaps. Let's see what that all looks like. And I've got yeah, I like with my brush settings there in terms of size, feather flow and density, I think it's fine. So maybe let's see what wishing could or should get away with here. I can decrease, decrease the clarity and a sharpness even a bit more, and maybe even bring this saturation down a bit. Now let's see if I do that. Here's the before and after before and after. Now that's a nice little change. I don't think we've done anything excessive there, but I do think that that's, you know, being kind to our subjects and trying to make them look at their best. Of course, we go further than that if we wanted to you. But you know, I'm always reticent to go too far. Worm, especially cloning and stamping and taking areas in the face where the skin tones and texture different from one area to another. So I really just tried to be gentle with my adjustments here. You know what happens if we bring the clarity down even more? No, let's see so quick, done before, After before after. Yeah, so that's That's a nice adjustment there. And, you know, perhaps we can work that in over here as well. Be helpful to get our navigator out for just a sec. Thank you, navigator. So that we can just bring in the other face here Great. And got a brush up dialed in so we can just go ahead. And hopefully those adjustments yet still there, increase the brush signs of touch. We can dial that in here, around the eyes. Um, burn ice, right? You're here. Tiny bed. But their bid as well. Jim, I don't and we'll take a look at before after before After for after. Okay. Yeah, that's good. So we've made some subtle adjustments there just to try to be kind of our subjects and make them look as well rested as possible. Of course, you can go on ad nauseam, uh, doing this if you like. That's a technique where you can use a brush to make some selective adjustments, which is a technique that we haven't used before. So I wanted to bring it out and really highlighted here. Now let's see if there's anything else. Let's say, for example, that perhaps you want these lips to be a bit redder. Young lady. We can zoom in zoom and more. Here we go and we can go ahead and brighten it up a bit. So we'll take our brush and will brush over the lips. And now that we've done that, let's just go ahead and make sure we haven't applied any of the skin softening adjustments . Let's take those off that we did from the last one. And maybe we'll just go ahead and shift the tent up a bit towards Magenta. And let's just see what happens if we bring up our saturation a touch right there before and after before after. So it looks reasonable to me. Maybe we can make quick adjustment here to remove a blemish, decrease the size of our brush. Down, down, down. All right, let's see how this goes. Select right there. Uh, decrease the feather a bit. There we're done. E think that might need a little bit of refining. Perhaps. Let's go ahead and move the area. It's gonna get applying to down a little bit. Click done. Still not doing it for me. So why don't we go ahead and click on that adjustment and then take a look at. If we can't pick a better area to do it in, it's not gonna work. Maybe, Right, you're here. Mm. Trying to find a spot as I'm moving around here, that's gonna look natural and still give me the right kind of blend. That looks good. And maybe I want to do is bring the opacity down a touch. Let's see, I think I'm gonna bring the opacity down, even just a bit more to see if I can get that to blend in while still being enough, right? I want to kind of get it right in the sweet spot here. If I can at me, I need to bring your past it down even more. It's having a hard time finding a good spot for me. So let's go ahead and click there. Bring our rapacity down even a bit more and yeah, I mean, that looks that looks much better than we had for the before. I guess we'll zoom in again and take a look before and the after before and after. And, you know, I think we can do better than that, though. And so we're gonna take a different approach this time. So the first time we tried to really just get it to pull that transition on the lip and bring it down. But I think just because of the location that that blemishes located in, maybe what we can do is just go right above the lip here, this time right through there. Let's see if we can pull it in and increased capacity here, we can decrease the feathering to see if that'll do it. I beg you to bring it down a little bit here. I'm willing to make some adjustments. Okay, lets quick done and see what we got before after before and after. So we're already here. Let's just go ahead and take care of one more blemish were in and around the mouth. All right, let's take a look. No, I don't think it did too much there. Let's go ahead and bring the opacity up and maybe even increased the size of that adjustment. It's try. While we've got selected water wasn't making that adjustment, let's increase the size, all right, That didn't work. So let's go ahead and start over it. You can see my leg room is starting to fall apart on me. Here. There we go. It caught up now. So let's go for a larger size here. Let's see how it does. Pulling it into hell. That spot, Father it a little more and click done. Ah, there we go. Very good before and after. Okay, the lips. A hard spot. Chin. Not so much. All right, Assume all the way out. And let's take a look before and after, before and after. To me, the colors look better. There's less blemishes. They look a bit more well rested. And everything really just kind of comes together for me a bit nicer. I hope that shows you how you can apply some of these adjustments to a flash photo. Now, one of the things I want to highlight, perhaps, is if we take a look at the before and after a bit of this shiny nous. Right? So maybe what we can do to take a look at that shyness is take a look at the highlights. And maybe if we put the highlights down a little, maybe even bring the whites down a touch, let's see before and after before and after Yet and so to me, right? If you're looking at sort of shiny nous in and around this spot here and maybe right down through the top of the cheekbone there, we've brought a bit of that and I'm not going to say it's perfect, but, you know, through the forehead here and maybe through some of the highlighted areas, the face because of that flash to me, we've cut that down to an acceptable level, right? So am I going to say that's perfect? No. But am I going to say any pictures? Perfect. You know? Probably not. But I'd be very happy to apply this correction and light room across, say, 20 or 30 images as I got a full screen. There we go. I'd be happy to apply this correction to, say 20 or 30 images across a Siri's here, so that could quickly apply him all through without having to be too specific. And I think they would really come out very well. And, you know, if you want to go in and dial and a few more, even further, by doing a whole bunch of small in minor corrections, of course, that's that's very possible, but I think this gives us a great way to look at it. Now, as I look here, I'm trying to wrap up. But there is this spot that is a bit dark, with shadows cast. Now, I think we can brush in an adjustment there before we leave. Just because I like to be finicky with these sort of things, I'm gonna select my brush appropriately. I'm gonna brush it in right where that dark shadow is. And I want to see what happens if I bring my blacks and my shadows up through that region. All right, that's too much in the blacks. I've killed the contrast Where doesn't look natural, So let me bring it back down a bit. But what I'm trying to do is find that right sort of combination that retaining somewhat of a natural contrast but doesn't make it quite as dark. So if you like that before, in the after, I can now see the details in the shirt. It's not as noticeable. I'm decreasing the contrast there in the shadow, so I don't lose the information in the shirt. And to me, that looks better. All right, I promise. I'm done now. Thanks for sticking in there and stay with me because next up, we've got some great stuff that I think is gonna be really helpful as well.
30. Full Editing Session - Portrait: don't you hate it when you've lined up your image, Everything looks great. You've set up your subjects, you've got a fun scene. You take it but you find out later. It just doesn't have the life you thought it did when you looked at it in camera. Maybe even in the back. Your camera. Well, we want to take a look at that now. And in this lesson, I'm gonna show you how you can turn this image into this image. Which to me, he's got a lot more life and pop. It's got some stylistic choices and I'll show you exactly how we did them. By the time you're done, you know how to make stylistic choices using the tools in adobe like room that we've already gone over. Let's get started. So what we can see as we start with this image is that the eyes are too dark, simple fix. We already know by bringing in the shadows and by bringing up the blacks right there. We've already opened up the eyes and we've got a great start to it. The next thing we want to take a look at is the whites, so I'll go ahead and all to click, and I'll push this up until I just start to press some of those whites out. So now I know I've got a good tonal range of but concede in the history grammars. I extend all the way from the blacks all the way to the whites and really without any but a few blown highlights and shadows, which in my mind, that's a white shirt. So that's fine. And maybe just a little top here in the legs anyway, I'm willing to accept all that to get that tonal range across the entire image. So moving on, we can also go down, enable profile correction here because we'd certainly like to bring the edges those image up a little bit and you can see it did that exactly. We can also apply our portrait profile here, and once we've done that, we can go up. And you know what I'd like to do for this? One of some split toning, I think. And so for this split toning, Let's go down, down, down, and we'll take a look at the highlights. And of course I think we want to brighten those highlights up and Let's get just the right amount. I don't want to be green. I wanted to be more yellowy. Yeah, very nice there. So I'm happy with that. And then in the shadows, we're gonna go with a little bit of green to be in the shadows to kind of blend in with what's happening, all right? And of course, you can see we've got some image because those shadows, of course, extend into her face, which is problematic for us. But we can favor the highlights. And what you can see now is that if we go before with the split, toning and after, we've been able to introduce a really nice warm tones while avoiding put putting too many greens right here. But maybe what we can do is go and shift the entire image. Now, away from green towards Magenta. Not too much. Yeah. All right. So to me, that's nice. A matter of fact, maybe even nicer than the image we had last time. The one I showed you started this lesson because to me, this one actually preserves the skin tones a bit better while keeping the image nice and warm. One of the things I I might take a look at is this sky, though To me it looks starting now a little off. So let's see if maybe the radio filter can help us out here and we'll just see. I mean, who knows what's the worst that can happen? We'll delete the radio filter. All right, so let's put that in here. We've got a chunk of the sky and we want to make sure that we're are invert that mask. So we're making just the adjustment to that area and maybe what we'll do this will just pull the saturation down. Maybe just a little bit. And after we pulled the saturation done, maybe will shift it a little in the Not too much, not too much into the blues. Just enough. Let's see about that. All right, Well, it's subtle adjustment, but I like it, and I think it's reasonable to me that makes it a little less purple. Lee, I guess when we started in a little bit bluer and so in my mind, this is some great stylistic choices. I wanted something that was really light and bright, airy and fun, and yet had a lot of tonal range to it. And that really brought out the eyes in the face of that beautiful woman there who is the subject of the entire photo. So there those are the stylistic choices. That's how I implemented them. And that's how we got this beautiful image. I hope that shows you how you can use the tools that you've learned to make some stylistic choices to get your images exactly where you want him. Now, stay tuned, because next up we're gonna have another full run through of Hajto Editor images using a W light room, and I can't wait to see you there.
31. Full Editing Session - Corporate Image: biography and images are really a way of branding. It's a marketing tool that can be really used effectively by you on four clients. So in this lesson, I'm gonna show you how you can use light room to take a portrait that maybe for a business and fit it with the existing branding. And we'll do that by matching colors. I think it's a pretty cool trick, and by the time we're done, you'll know how you can really match colors precisely in light room to assist. When you're dealing with folks who say having existing website remember, you just want to change one part of it of the image that is So This is an image that I took today while I was doing a shoot for a dear friend of mine, and we're gonna match it to her website. So if you go to her website, which you could have a great time if you did cause it's blue Hawaii Photo tours fordo tours here in Oahu and if you're coming this way, give her a ring. She's great people, but we want to match this to kind of the blue of her website, cause the shirt doesn't quite match. So what we'll do is we'll select the grab because I'm on a Mac. But there's other ways to do this. If you're on a PC capture selection and then I'm just gonna grab a section of her website here that's got that range of blues in it. I can go ahead and file save, and I'll go ahead and save it to the desktop. Is Blue Hawaii photo tourists done? Now I can go to my desktop Blue Hawaii Photo Tours. It's right there. I can then click and drag it down into and just drop it on the light room icon. Now it's a cool tricks that you can import it. And if you remember the way that catalogs work, the image can be anywhere, and I'm just gonna bring it into my catalogs to the original image gets worked on by the this editing process. And if you've any questions about that, just go back and look at the catalogues lesson because it's a great would understand that better. But anyway, I digress. We're here with this image, and I'm gonna go ahead and import it, and once I've done that, it'll come in right here, and what I'm gonna do is just click nine, because that's setting it to a blue label. That's just away So I can align these images when I'm done, because here's what to do next is I need to get this image right next to my previous image . So click all photos and then I'll turn my filter on to blue by clicking on the blue box right there. And what you'll see is, Presto, I've got the two blue images right next to each other. And so what I can do now is I can go ahead and you know there's a great image, but maybe I want to cool it down just a tiny bit. Mm. There. Uh, let's take a look at the whites. Make sure we've got and we'll go ahead and click the option key and click on the whites to see where we want to bring him up. Teoh. And then the blacks will option click and bring him down. So we're really getting the full tonal range there. I think it looks wonderful. I think we can bring the clarity down just a smidge and maybe the vibrance up a tiny bid. Okay. I think that's a decent starting point. Maybe the hairs. Little dark. She'll bring the shadows up. There we go. That's it. Okay, so I think that's good. And what we really want to do with this image that was matched the blues in this little section down here. So here's what we're to do. We're gonna go down to the H s. L of course hs sell it. Just sell. There we go. Missed it. Click on the bulls eye and then I'm gonna click and drag here on this shirt until I get what I think is a matching blue. And I think that's pretty close right there. So I'm gonna click in the library tab. Now, I'm gonna click over here on this arrow on the left so I get more screen space and then in the thumbnail slider down here when I click and drag to the right and I'm gonna make him bigger. Perfect. Now, I can't even click over on this triangle to dismiss that, And I've got plenty of space to look at my thumbnails. Now I'm gonna make him just even a bit bigger on what I'm looking is to see if I have matched the blues here with the blues in the shirt, and I think it's pretty darn close. I could maybe go in and maybe make it a touch bluer. So go in and I'll do that. Maybe this part here, I wanna a just a bit to get a little bluer by just clicking and dragging their. That's great, and I think the saturation is fine, But maybe I want to bring the Luminant down just a little bit that now let's go back in the library where it should come right back up in that view and take a look. I think that blue is darn close to that blue matter fact. I think this letter blue is now almost the same there. And so if we go into develop module, we can see the before and after in the blues so that we were able to bring all of the colors that were in this image. Tiny as it may be, we concede the dark blue light blue there are not perfectly matching this dark blue light blue shirt, so I hope that gives you an example of how you can use light room to custom match in different ways the images or parts of the image that you can use them in branding to match different parts off a website. So if we go back here and now this color on her website, if she were use it for her profile picture would perfectly match the shirt that she's using in this picture. Now I hope that helps. If you have any questions, let me know. But I think there's a great technique. I just want to pass on to a different application that you can use light room for for branding so that you can help your clients and friends. If they've got existing products that you want to try to match without having to go to photo shop. Awesome, let's keep going.
32. Intro to Lightroom Mobile: to boldly go where Adobe hasn't gone before. What I'm talking about is a w light room mobile. Turns out that doubles gone mobile just like everybody else and smart that they have. That's really the direction that photography is going in many ways, and there's a huge market, So I understand why they've done it in this lesson. We're going to go over what Adobe Light Room Mobile is and why you should care. And by the end of it, you have a basic understanding of what it offers you. And if it's a good fit for you or not, subsequent lessons will go over all these functions in greater detail. Let's get started. So what you can know and see hear from adobes promotional material is that Adobe Light Room Mobile allows you to get to your photos anywhere and also organize them, which is really kind of the heart of what they're offering is a better experience and more seamlessly transferring between your computer and your mobile device. When you look at your images, the other thing that they offer is the ability to powerfully edit any of the images that you have on your desktop or on your mobile if it's inked up to the cloud from any of your devices, so it becomes kind of, ah, platform agnostic tool. You can get to it and do that anywhere that you want, whether it's your mobile or your desktop, right? The last thing that it gives you an economy was an ad on it. Turns out, is that Adobe? After they started developing light room mobile, we got some feedback from some of their, you know, own staff as well as others that they wanted a camera built in. And it turns out that they built a fantastic camera. A matter of fact, I think it's worth it to get a light room mobile just for the camera. If you have already subscribed to the light room account for your desktop, because the camera gives you some functions that are really wonderful and surpassed what I've seen another camera applications and certainly what comes stock in your camera so that , in a nutshell, is going to go over what Adobe Light Room Mobile is. And before we go too far that I'll just show you some more. Their promotional material here and some of the future is that it offers its got a D hazing future here you can share online, and you can also, you know, apply the same sort of creative controls down here. You can see the slider left and right that they're offering and last up. We'll take a look at it, actually, on the phones. I'm gonna turn my head down to look my phone here, and what you can see is that it gives you the ability to organize. These are images that already in my phone, the ability to organize these images and I can create new collections, move them around between these collections, and then sink these collections back up to my computer. If I click on the phone I or the camera icon there, you can see I come up with a great picture of my keyboard, know of my phone, which allows me some really wonderful functions and features that we're gonna go over in detail next, certainly back out of there. And that is what adobe light room Mobile is that it's hard is it probably started off is their idea of how to sync and edit images. And it wound up becoming ah, great camera application, a seamless user experience. So what we're to do next is dive more into how that sinking feature works in adobe light room. So please stick with me for that. I think it's gonna be well worth our time.
33. Syncing Lightroom Mobile: All right, let's go ahead and get started in list lesson. We're gonna go and sink our desktop to our mobile and were to do it in both directions so that we can share from the desktop to Mobile and from the noble to the desktop. By the time we're done with this lesson, you'll know exactly how to set it up so you can do the same thing with the controls that you need to make sure you're not getting a whole bunch of junk onto your phone or on your desktop. Let's go ahead and get started. So what we need to do is under the name plate here. We're in a sink with light room mobile. I pause it before, so we're gonna have to restart light room to enable sink for this catalogue. So I'm going to Ah, stop this recording as we restart like room here and will pick up after we've restarted. All right, you can see that we've reopened like room, and now we're in business. You can see on the camera that I've now got my mobile catalogue sync to the cloud, and then I'm able to push pictures from my computer up to the cloud and down to my phone, and you can see that those images have transferred over to the phone. So the way that we do that, make sure that happens. Sync with Light Room Mobile, right? I'm getting a status indicator, letting me know that that's happening. Sinking is on light, real sync photos and your sync collections with any other light room mobile clients, which means it can go from my phone to the computer and back seamlessly now. So let's take a look at that. So the first thing we'll do is you know, we've got this light room mobile share, but we'll set up another one will create a new collection, and we'll call it sunsets and sink with light room. Mobile is on, which is great, and then we will just click, create sunsets, and what we can do is we can just go up here into the quick collections, which is just nice collection of pictures that we've got available and we can go ahead. And I think we've actually already got that one in there cause we created it while it was there. Sure, we've got some other sunset shots in here, though. Uh, let's see. Sunset Santa. Alright. Sunset. There was another one on. And see if you can pull one more Sunday. Okay, Good. There. We've got three images shoes that we just pulled from this local catalogue where the photos were stored on my external hard drive into this collections folder that is set to sink because of the way we created it. You can also see the icon here that it's sinking over Mobile, right? We can go up and click on the I D. Played up here and see that it's sinking two photos. So let's go to the phone and take a look. You can see if I click on the phone there that these two images air now showing up on my phone. All right, so we know that I can push at this point from my desktop to Mind Mobile. But let's see about going from the mobile to the desktop with that same process. So I'll take my phone and I go into my camera roll and with my camera roll will select. I do like that when we're gonna pick that one, too. On this one. Were you click the check mark and it's added to our light room photos. And now what we're gonna do is we're gonna go into light room mobile sharing when at a photo here from our light room photos, which we've just added these here. So I'm gonna click that one and that one. Add these two photos and here's what we should see is we should have added him to this light room we'll share and then they are from our phone right to the computer. Now, the interesting thing is that these images are actually still in the phone, that not on the desktop, but they're being pushed and shared that the data resigns on the phone, and but yet they're viewable. And here's the crazy part is I can go into my develop module now. All right, here's where it gets a little bit crazy. It takes a second to sync up the adjustment, But again, because of the way catalogues work, I can go ahead and make some adjustments. And remember, I took this image on my phone and the image remains on my phone. I can push up the exposure, bump up contrast, bring down clarity, bring up vibrance a little bit. Maybe I want to bring my blacks down a touch still. And May it looks I could warm this picture up and maybe shift to Magenta to balance out some of that green cast. All right, so I've made the adjustments right there on my desktop. Let's go ahead, and it's telling me that it's sinking that photo. And so what it's doing now is taking the adjustment I made to the desktop. It's pushing those adjustments through and applying them, as I look at it on both desktop and mobile. So it's synchronizing all of the changes. The crazy thing is that, well, first of all, that you could do this at all. It does take a few seconds for it to show on the mobile. As you can see, it's still sinking, but you can also go the other way. You could do the same thing from your mobile. Any adjustments you make there is gonna get pushed back to the desktop. So you've really created a situation where it doesn't matter where you make the changes from their shown everywhere, which means that you can take the image on your mobile, do the edits right here in light room on your desktop, and it will automatically push out everywhere. So you're literally opening up all the creative tools of Adobe Light room for your desktop , accessible from your phone. And there it is. It just happened. Now it's pretty that it works the other way as well. Let's go back to another image and we'll say, Take a look at this beautiful long exposure sunset that we did and we're just gonna make an adjustment here. And just for the sake of convenience will do a black and white and we'll do a 50% contrast there, and that looks really nice. I like that. So we've made that adjustment, and there it is. So you can see that no matter where you make the adjustments there displayed everywhere, we've created a collection and pushed it from the desktop to the mobile. So now let's go ahead and create a collection on the mobile and push it to the desktop. So what we can do is we'll go in here and we're going Teoh in our phone back out, back out, create a collection, will call it phone. Okay, then we go in and add a photo from our camera rule and who doesn't love a wonderful still life of squash. Okay, what you can see here is if we go into this new collection from Light Room Mobile, we're showing this image which came from the phone. Let's go ahead and add another one. So we'll go into the phone here, we'll click into the phone. Collection will add another photo from the camera roll. Who doesn't love pencils? Let's go ahead and add some pencils. And what I think we're going to see here in just a second is that another photo is gonna pop up being pushed from the phone to the desktop version of light rooms. Let's give it a second to see what happens. Okay, Sure enough. There it is. We've got pencils showed up from the phone so you can see that we're able to push photos from the phone to the computer and from the computer, the phone right through that amazing sink that happens through that shared catalogue. All right, I hope that helps you understand how you can build, share, sink and edit photos anywhere and having split across all your platforms up next, we're gonna talk about how to do that editing in your mobile device. So let's get started
34. Editing Photos in Lightroom Mobile: taking an editing images. Using all the power of a W light room right on your mobile is so the nature and future of editing. I think, whether it's better ipads and tablets or if it's just taking, sharing and creating better photos right from your mobile, it's such a huge potential on big upside for the future. Here, it's so important to go over by the end of this lesson, you know how to use your phone better your mobile to take better pictures. Using adobe light comes camera, and you also know how to edit those images right in the adobe light room mobile suite. And I'll say that it's not gonna be totally in depth because it's just such a huge array of tools. We're going to go over and over you to get you started so that you really can understand some of the creative choices you can make, as well as the basics of how to use those tools. So let's jump right in. We got my phone, and the first thing we'll do you can see here is I'm in my organized window. I'll just click on the camera and sure enough up comes a camera over a brief array of the features here. If I click on the lightning bolt, I get the auto on and off. We gotta like going here for this recording someone to use that to take this picture some relief it off. Next up. I've got this handy wrench. And, um, actually, this is one of the best features of the whole thing is, this is a white balance future, right? So you can see the banana that I've got in front of me, which is going to be the subject of our picture here. But what I've also got is my color checker passport here. That's got this great neutral slab to it here, right, This great card that I can shoot. So if I click on the wrench, it tells me to fill the area with a neutral surface, which I'm doing right now. Hit the check mark there, and all of a sudden I've got a custom white balance exactly to my image, which in my mind, is a complete pro feature. You've got ways to do it in video, on mobile devices, using things like filmic pro a great paid at. But you've also that's re usually reserved for higher end cameras and for pro level photography. Actually, most people even shoot in auto, white balance. Even India Solares, Um, which is fine. We've gone over in previous lessons. How you can really dalit any perfect white balance using some other techniques as well Some other products. But anyway, I digress. We've got it set perfectly here in our phone. The next thing that you've got, which is fantastic, right? So if you click hold and scroll down and up on your mobile, you should be able to adjust the exposure. But here, what adobes given us is two stops under three stops under right 01 stopover. I normally don't get that kind of plus one minus one minus two plus two indicators like I would on my DSLR when I'm exposure compensating. But they give us a really great exposure compensation tool here. So, you know, I think I want this bad boy because there's so much black in it to be. Yeah, maybe in minus one for exposure, Which is good if I click on the grid here. Of course, I've got no grid, which is what I've got selected now I've got the rule of thirds grid and I've got the square grid. And finally, I've got this, you know, kind of interesting Elektronik level that here's off for my horizon, and then you can see it's those lines matchup. It shows me that I'm on time to go ahead and go back to none. And if I wanted to do ah delayed time, I've got 25 and 10 seconds there. If I want to put on a tripod and set the timer or if it's, you know, a slower exposure, that might require more time. Anyway, that's off. Of course, we've got these presets here, which we can look through his while high contrast, flat, warm shadows and actually kind of like the warm shadows. So I think I'll stick with that, okay. And so I think we've got everything set up for this image. So what we're gonna do, It's just a banana on some plexi glass. And I've got this great black cardboard behind it here. I moved out of the way and the shadows kind of cutting through it nicely here. Nice reflection for my lead above It Looks good. Good. There. You never thought you'd pay so much attention to a mobile banana picture, right? But, anyhoo, we've got a picture now, and we should see it in light room pictures with We sure do. Right there, we can click on it. And now that we're here and because we've got the paid version running here, we've got access to a whole bunch. Great tools. And we'll just go through him briefly, right? We can flag and rate this if we wanted to, by clicking on it. And you know, we'll call the five star Banana. Just for this, we can crop it, which I don't want to do because well, all right, well, we'll take it in just a little bit to demonstrate the features. It's got all the same features as the adobe light room cropping, which you can, of course, take a look at that lesson to see how you would use these in detail. If you want. It's the same. You're just doing it by touch your presets. Here. We've got some creative presets where we could sepia tone it if we wanted to write. And of course, that undue arrow at the top does this good there because I don't like that. I just want to keep it the way it is. We have already picked the contrast that we want. But if we wanted to go back and adjusted, of course we could there because this is all non destructive. We've got a number different black and whites we could choose from. We can bring the details up. We can also apply some vignette ing and actually gonna I am on apply a little bit of genetics and light vignette ing. Yeah, which I think looks nice. As we scroll to the right, we can keep going and see that there is also high contrast flat, etcetera, etcetera. We can go back and we can reset the image if we were to tap those last two as well. Of course, if we tap into the edit menu here, we've got some really powerful tools in terms of the basic adjustments which are displayed now, we've also got a tone curve where I could push my shadows down in my highlights up and adjust my mid tones upper down just the same tools that we've got in light room so powerful right there, available for us on mobile. Here's that d heydays. And of course I don't have any hates because it's a banana picture right in front of me. But if I wanted Teoh, I showed you that in the previews. I want to show to you now. Course you've got split toning vignette, England's correction. All those things we'll click on lens correction. Right profile correction on. Clearly it knows what kind of camera I'm using here to do that. Anyway, we could go back in here to click out of that and it and your we're back into basic. We can adjust the white balance, but we don't need to like we know tent and auto toning. And then here we're going to some of the manual toning where we can adjust the exposure up and down down a tiny bit, maybe, and bring the contrast up a little bit. Here we go. Highlights. We can push those highlights. New can not there. So you can see that just by clicking and dragging across the bottom. Aiken, select these different parameters and by clicking and dragging across the top here, what I mean by that is clicking on the bottom and whites and they clicking and dragging across the top lets me adjust that. So you can just go ahead and move through the whole menu doing that clarity. Let's make this a dream. Your banana and maybe a little tiny, bit more saturated. I could. Then, of course, you get your previous and reset local adjustments. This is interesting. So right here I can click on the left and Aiken dio a linear selection or a radio selection . So I do linear just to show it to you even though I'm not gonna like it, I don't think. And if I wanted to, I could just go ahead and bring my exposure down on the top of the banana. Uh, I don't actually like that. So we're gonna go ahead and click on that and quick, the trash can delete and it's gone. We also back arrow back arrow, and it's gone that way as well. Uh, local adjustment. The other local adjustment that we could pull up here is the radio selection where if we wanted to start it, maybe the center of the banner work our way out and then bring the exposure. I wish there was a way, and I'm sure there is here. Let's take a look. Invert. Okay, so this allows us to invert their goes looking for that? This allows us to bring the surrounding areas down around that radio filter. Yeah, cool. So you can see I apply it either inside or outside the circle, depending on how I talk about switch and you can go again across this whole bottom area In all those adjustments are again available to you. I can click back here, and sure enough, look at my amazing banana mobile shot that I edited right on my camera. And, you know, here's the crazy part is now, let's say that I want to go in here and I want to go to my phone and I want to add a photo from my light room photos the banana. I'm gonna add it. Let's see what happens on the computer now, shall we? So when I look here, I should be sinking this up, and I bet that we're gonna find in a moment it pops in right here. Sure enough. Check it out. There is my banana. I got the r key selected, so let me just escape out of that. And there's my banana from my phone right to my desktop. That is how you can use your mobile to take an edit, Amazing pictures or right from your phone. Stay with me. Because what we're gonna do next is talk about how to organize all these pictures on your phone. It's gonna be quick, but it's gonna be good, So let's get started.
35. Using Lightroom Mobile to Organize Photos: Have you ever looked at your seven billion pictures on your phone and wondered how am I ever gonna find this again? Organize it for sure, with the other people in a way that they'll actually want to see? Well, we'll talk about how to do all that here. In this lesson, it's gonna be quick and easy, but I think it might be really helpful. By the time we're done, you'll know how to organize your images and even how you can share him. So let's get started. We're gonna be working mostly off the mobile on this one. Selling pulled the phone. All right. The first thing that we can see is that we've got three collections here, as well as the light from photos, light room photos like we talked about before. You can pull in all the images you want from your collection here on the computer. And, you know, let's say that we want to pull in this picture. We just tap it and click the check mark in the upper right. And sure enough, it's there now. Right here. All right. Great. Back out of that and back out of that. We already talked about how, if we wanted to, we could go into a collection. We've made an ad, a photo from our light room photos, maybe the one we just added a second ago from our Mobil's own photo libraries. Let's go ahead and click. Add so you can see that I can add to light room photos. And then I can add from light room photos to collections very simply and quickly. Just by doing that, stop back here and you know, we've got one of these. It just is a collection that's this phone which isn't doing a whole lot for me. So if I click those three dots to the right of it, you see an option to rename. Now, let's go ahead and click the X to get rid of that. And let's rename this something better may be still life. The interesting thing here is that when we click okay, I'm gonna watch my desktop, and I think we're gonna find that that phone from like through mobile phone collection there is gonna actually switch names in just a second to say Still life, which it just did. You see, it's synchronized between the mobile and desktop which is amazing. I can't believe Adobe can do this. All right. Well, let's say that we're really done with this light room mobile share. That's again, one that we made in the desktop and we pushed to the mobile. Let's say that we're done with. We don't want it here displaying anymore. We can click those three dots to the right of it and just click. Remove and remove collection. That's only removes. The collection of photos will remain untouched again because the photos are being held separately from these catalogs. I can manipulate the catalogs and collections without endangering the images, which is again part of why adobe is such a colossal guerilla. When it comes to this stuff, they're so good. Remove. Don't tell him I just called him a gorilla. By the way, I mean that in the nicest possible way. DoubIe love you guys. All right, so So you conceive. Now let maybe we want to create Miss Tap a new collection so we'll call this one. Ah, Adobe Fan Club Fan Club. I think that's one word. Not two words. Fan love. All your grammarians out there can correct me on that. If I'm wrong. All right. W fan club. We can go in. We can add a photo right from the camera. Roll this time. And you know what? We're gonna go with this. I love that picture. Added to that, and sure enough, 16 photo successfully added. Oh, hey, check that out. It just added onto my desktop is, well, both the collection as well as this image. I think in a second we're going to see the image pomp and I don't know. 321 go. Oh, my gosh. I can't believe I just time that. All right, So this is the way that we can organize collections using our light room photos, and from those collections, we can push him over into our desktop. Now, one more thing I want to share with you because we did talk about sharing our pictures online, and that is pretty cool stuff. So let's say that we love still life. So we tap on the three arrows, and then we want to share the collection and we tap share here on we will tap share link. We can now use all of our standards sharing tools to share links that people can see those or what we could do is go through that same process and we could click, Uh, let's see here, share collection again and view on Web View on Web. So it's going to create a Web gallery for this for me, which is pretty amazing. Loading, loading, loading. And there it is. There's my Web gallery. Let's go back to still life. Let's go back to share collection. Let's go toe unsure, Just in case I don't want people looking at all my pumpkin pictures, All right, that's how you can share those images that you've so neatly and meticulously organized. Now, in this lesson, I think you've learned how you can organize your pictures, how you can share him great collections, pushing between devices. I really be more effective at doing the things you love, which is taking and sharing great pictures. I hope that's helped. I can't wait to see yours
36. What are Lightroom Presets? Making a Custom Preset: in this section, we're going to be learning about using presets in adobe Light room presets are a great way to boost your efficiency as a light room editor when you're in your developed module. Over on the left hand side is this drop down menu with presets. There are actually a lot of presets already installed with adobe light room, and you can find them online that people have created to purchase. Or there are a lot for free, and we'll learn how to do that in the next lesson. But first I want to show you how presets work. So over here we have our presets that I've already installed, and some of these are the ones that light room comes with. So say we choose this light room effects preset, and I go over this. What I can do is hover my mouse over and up here in the navigator. I can see what's happening. I want to make this a little bit bigger, Aiken drag and make this a little bit bigger and could close this menu down right here. Close this menu down right here, so everything's just a little bit bigger. And now I can see what's going on. So if I want a quick being yet preset at it, I can just click been yet. If I want to go back to one of these other ones that I've downloaded, or maybe from light room of black and white, we can add a black and white filter just like so. If I goto one of these ones that I've downloaded now and go to another preset that's not black and white, you'll see that actually overrides the previous settings that I've used. So maybe I want something fun, funky colors like this. It will override as you click on other presets, but some of them don't just override. So now if I go back to vignette, this will actually, Adam. And yet to this previous precept that I added. So depending on if it already adjusted the settings or not, it will either override it or just add to that preset. If you want to completely have a fresh start and be safe about it, just click this reset button down right here, and it will reset the photo to scratch. It can start again with all of these presets weaken, go in here and at a preset. It changes our settings over on the right side, and we can go in and dial it in a little bit more. Maybe we do want a little bit more vibrance. We can add vibrance. Maybe the exposure just a little bit too hot. Weaken. Decrease the exposure. Even though I think that was actually really perfect. Weaken Dalit in over on the right. This is just kind of a starting point. Sometimes it works perfectly, but a lot of times you might have to do some adjustments over here. So that's how you use presets. One quick way to create presets. Say we did something without a preset. We did a lot of stuff over here. We played with split, toning and played with detail. We played with lens corrections. We added our vignette and everything, and we wanted to create our own preset. What we can do right here is click this plus button over by the presets window. We can name it so we'll say, fills wedding preset. So maybe this is when I'm editing all my wedding photos. I want to quickly use the same preset for all those photos because a lot of them will be shot in the same situation with same lighting, same camera, same lens, everything. And then I could choose which effects and which settings. I want it copy or using this preset. So for this, maybe I want to just choose them all and I can say create. And now, under user presets fills Wedding is right there. So now if I go down to my filmstrip, I open up another image. This is actually at a different location with different lighting. But if it has the same style, I can go down to Phil's wedding and will add to it so you can see that you know, it's a little bit too bright. I need dropped exposure down just a little bit, but it still has that been yet the same color settings, everything from the other photo. And now these will look good together when they're in a photo album. If I print them out in a photo book or just post them online, So that's what presets are in the next lesson, I'm going to show you how to actually download free presets, how to find them first off and then install them into light room
37. Calibrate Your Monitor for Perfect Color: Hey, have you ever noticed that sometimes you're monitor doesn't give you perfect colors between what you saw on your monitor and your prints or other screens. That's because you haven't profiled your monitor were to show you how to do that. Now, using this handy dandy device, the color monkey display. It's just the one I picked when I started. Of course, there's other versions and other products like the data colors got spider. You can see the before and after is they're showing you, and kind of what it does is just to get your colors right. You can see the price is about the same, depending on which model of the spider or the X rays you're gonna buy. But I'm gonna show you using the extracts. That's the one I have already. We're gonna go to the technical specifications and you can see system requirements on the Mac 10.7 and above. On windows. You can you use Windows seven or above, which is great, works on either platform and can switch between the two. But here's where it gets really interesting is you can also do this on your IOS devices and on your Google Android devices so that your colors across everything look the same. So click profile my display to get started. Easy Photo is great. We'll just click next, and then we'll take an ambient light measurement by clicking the measure button. And now we're gonna know that we've got 401 is that 69 Alumindo Light will click next. And here we're gonna flip open the diffusion panels that we displayed a lens, and then we're gonna put the lens on that little spot where it says place, color monkey here. Now the waiting back holds it on and the lenses going to measure the colors that are being projected by the monitor. And in a nutshell, what's happening here is that the software that comes with the device knows exactly what colors these are, and the lens sees exactly what's being projected. So there's the weight that holds the lens unit on in front. And here's that lens unit as the colors are being projected, and so it's looking at the difference between what the colors should be and what the colors are. It's going to create a profile for your computer so that those two are much, much closer together Now. I'll say the first time you do this, you'll see a huge difference. And then you can do it about every four weeks like I'm doing here for more minor adjustments, right? But look, it's it's projecting all of those in creating that profile. So now we're gonna save that profile it's created and that profiles adjust the colors of your monitors that they're true. And now we can set a reminder that we know every 234 weeks, and I just use four weeks because I'm get plenty. We'll go ahead and do this again, and you can see a subtle before and after shift in the colors to make it more accurate again. The first time you do, it's gonna be a huge difference. And now here's another bonuses that we can use this to monitor the ambient light, that device by flipping the diffusion panel over the cover the lens. And now it's gonna look at the light around where we're editing and make adjustments as appropriate so that our lighting, as well as their color, is always consistent. And I think you can see now why I'm such a huge fan of this device is because it's so very practical and especially if you're gonna doing prints or you're sending these pictures to people with other devices. It's so important that look the same across all the devices because the worst is when you work your heart out on an image and you send it to a client or two off to a print and it comes back looking all wrong. So I hope that helps you understand how you can profile your monitor to get perfect colors and then to continue monitoring it. Over time. Let's keep going because next up we're gonna take a look at exactly how we can profile your camera in adobe like room so we can go beyond just the generic profiles, and we can look at your specific camera show useful. I can't wait to get started, so let's get going
38. Downloading and Installing Presets: let's find some free light room presets and install them. So if you go to Google and you type in free life from presets, you'll get a number of results. And a lot of them are very high quality preset that people have created, some of them people sell some of them. You have to give them your email address, which gets you on their newsletter or something like that to get your pack or presets. So there's very 1st 1 that pops up free, lighter and pretty sets to the starter pack. This is a good one to start out with, so you can typically see what the presets look like. They'll give some options. So see this one even has a before and after kind of look of what it looks like before and after. So this is a very cool website that shows what your presets will look like. A lot of times they'll have some images below that show. What they look like This one. It looks like they have some for sale, but say we just want to download this one. The starter pack for free. We can click the download button and you want to make sure that your only downloading presets from legitimate websites that you trust and for this one you gotta plug in your email address. So I'm going to go ahead and plug in the my email address, download the pack, save it to my computer, and then we'll go from there. So I encourage you to do the same and will fall along together. So I've downloaded those files and you can see them right here in my finder. This kit actually came with a lot of cool stuff that came with some brushes. It came even with some practice photos, which is awesome. But the ones that we want to pay attention to are these presets and you can see that they're preset files because the extension is dot L, our template light room template. So how do we actually import these? So we're gonna go back in the light room, and the first thing I would do is create a folder for these presets that we're going to import. So just right click over here on the left side of the presets window. Choose new folder. I'm going to call this sleek lens, so I know who they're from that. I'm gonna open this up, right? Click this folder and say Import. Then I'm going to select all of these templates right here. Se import. It's going to import those presets. So now let me just open up another image. Say this one of this little moth or butterfly. Now we have all of these presets right here for us to use. Have fun with in Adobe Light Room. And there's literally probably millions of them out there. These presets can really make you a more efficient editor. As you can imagine, just by you find one or two that you like And that's what I've done. I've played around with a lot of downloaded a lot delete a lot. I found the ones that I like. I stick with them and for a lot of my projects, I just slap on a preset, make some minor adjustments, and it's good to go. So that's how you download and install presets in light room. Let me know if you have any questions. Otherwise we'll see you in another tutorial.
39. Advanced Correction: Calibrate Your Camera: and what I'd like to do now in this lesson, to show you how you can use this little device, which we've seen a few other times to do a pro correction. They'll take your color and white bounds to places that are so accurate. Few pros even get there. Let's go ahead and get started by the time we're done, you'll know how to get perfect color and white balance when you shoot raws beyond what you've been able to do before. So the first thing is to know that this is the product that will be using. And of course, there's others like it. But I love the guys at X ray. I have no affiliation with them, but they're fantastic people. They make a great product. It was recommended to me by a pro with over 30 years in the industry, so that's what I went with, and I haven't looked back ever since I started. So here's the product. You can see that it's Ah, plastic card here that's got a foldable back so you can prop it up like I've done in this demonstration here in a second. And all you do just like we've seen here and his images that you're going to take a picture with the color checker passport in it. And then we're gonna create custom profiles from that we screwed scroll down here for a second. So color checker passports. A powerful, captured adit color solution for any photographer looking for more accurate, consistent color and creative flexibility. That's so true. We've already talked about how to profile our monitors, so the monitors perfect, but that does he a little good if you're still guessing on the color of the actual picture . But once you've partnered getting your monitor perfect with getting your colors in your picture, perfect, then you're working at a controlled color space, and you've moved up to really the next level of photography and light roommates so easy. You can see here that if we go to the by tam, they don't sell it directly from here. But it's about 100 bucks. At the time of the making of this video, there's a bunch of different companies who offer it online, maybe some even near you that offered in person. I can't recommend this strongly enough. Matter of fact, I would rather leave behind my flash, then leave behind my color checker passport. When I go on a shoot, it's that important to me. The other thing I want to point out real quick is that if you go to DaVinci resolve, right, So this is black magics video editing software, black magic, very powerful cameras for video solutions. This software which is free if you're not using it for commercial purposes and for some other caveats thrown in there. But anyway, black magic design DaVinci resolve actually can let you use this product to get perfect colors in your videos. We're not gonna go over that. But I just wanted to mention it in case you're in the video to. All right, let's go ahead and get started and show you exactly how to use it. If we go toe light room here, we can see that we've got an image that's gonna develop where we've set up the color checker passport next to this book. Now I know because I've done this so many times, Cannons Blue Channel needs a bit of correcting compared to the other channels. And so I've purposely picked out a book that's got different shades and choose a blue. The one thing I'll point out is that this color checker passport is facing me pretty squarely. You don't wanna have the front further back than back right. It's all got to be in focus, and it's all got to be properly lit. What you'll do then is you'll go into file export with preset in light room and then you'll go down to color. Check her passport. That's all possible with the plug in and the software that's provided with the color. Check the passport. Now we'll create a name that will be able to recognize these conditions again in the future . We'll call it window light warning. Then we'll click Save. We've already created this profile just a moment ago test to make sure this would work. So we're gonna go ahead and overwrite that. Of course, if it was for another purpose, we might think about not overriding it anyway. At this point, it's creating the new profile, and what's happening is it's looking at all the colors in the color checker passport, and it's comparing them to the colors that are actually printed right, so it's extremely precisely printed. It's good for about two years and then it's gonna fix the difference. So that, say, the skin tones here, the primary colors down here are perfect when it's done. The other thing is that this patch here with notch in it well, that's for white balance. So after you've created the profile, you can then white balance right here. Now I'll say a few more things, and this is actually one of the kind of sneaky things that I love about this product. Do you see up here this range of black toe white or down here, this point range of blacked away as a photographer? When I'm setting my flash, I tend to do it manually because I shoot outside with a policy buff in the Cyber Commander , which I love. But I can tell without having to use my light meter anymore that my images properly exposed , I'll tell you, why is this is all the way black and this is all the way white. If I click over here, I can tell that I don't have any highlights clipped or any shadows, except maybe a little down here. What's just super black and I'm fine with that, but I can tell that my images properly exposed. Good enough for what I need it for. Certainly in this case. And if I set highlight clipping on my camera, I can tell just by taking an image of my color checker passport that my flash and Andean is just right. No matter where, Matt, without a light meter, which is an amazing feature because it frees me up from having to go and fiddle with my light meter. It also gives me creative control over maybe exposing to the right and overexposing a little bit or pushing to the left of Taiwan new for creative purposes. I can tell exactly where I'm gonna be clipping my blacks in my whites by simply looking at the back of the camera. Okay, Color checker passport. The profile has been generated successfully. Light room must be restarted. To activate the profile, we can click OK, at this point, will have to close down light room and started back up against the profiles available. So I'll spare you the boredom of having to watch that whole process. All right. You can thank me for sparing me the boredom of having to watch this thing shut down and restart But we did would quit light room and we've restarted it now. And so we're ready to go so you can see that the images look the exact same as we left him . But here's the cool part. Well, first, let me start up here. It says White balance as shot, which is right now we can go down and it's gonna be in the adobe standard profile mode and again, go back and check out camera calibration and profiles, the less we did there for you. Any questions? But now we can click and check it out Window late morning, which is what we created last time for a profile based on this exact lighting in this exact camera lens and everything right, go ahead and click that and holy cow, let me show you before and after. Look at the difference in the blues before and after. So this is what the camera and light room thought the blue should look like. And I picked it again because I know the blues have some problems with Canada and need to be calibrated properly. And here's what it looks like after we've made that adjustment. And again you can also see over here in the skin tones, right? The browns here, let's take a look at those before and after, so the blues and even the skin tones get exactly what they want. And here's where it gets really cool is I can now go in and click W for white balance, and I can click on that patch there and now it's not just perfect color's perfect white balance of these skin tones. If it was a person in the portrait, which is what I primarily uses for now, Perfect. Don't have to sweat it anymore. And you can see that if we go back to the top 10 and the temperature are both corrected this custom because of the way the color Checker passport did that. All right, well, that's all fine and good, but it gets even better if we go ahead and select all the images and then sink. Here's what we start to really save some time because I haven't changed the lighting or the subjects here. It all I can do one of these shots and applied across a number of different images. You can see that I've got all of it selected here and you can select what you want, how much or how little. But certainly you want to make sure that that white balance as well as the calibration, are both selected when you do this so that it applies those corrections. But there's really no reason not to apply all this and really make those adjustments across all your images and then fine tune from there. So synchronize next and you can see some magic happening. Check it out. I go to the next image here I can go before and after and looking. It's applied all of those corrections and now the all the problems with the white balance and the color that were here originally with the click of a button I get after. And that's exactly how it looked when I took the picture. Right so I can hit X here to reject that picture. And then, of course, I can click off of it, and I could turn my filters on so that I have no rejects here if I go down to know rejects , so I don't have to look at that any more. Fantastic. Now I can say crop this image down. If I wanted to readjust it. Any questions on cropping? Go back and check out those earlier lessons. Hit Return. Okay, so we're pretty close here. But what the heck? Why don't we just go a little bit further and pop up the exposure and maybe the contrast a little bit? And why not make it a little bit more vibrant now? You can see that's a beautiful image we've got. Now I can select those, right? And so I made these adjustments here and not with the color checker passport. Really fine. Tune this particular image. Now, if I had sink, it's going to carry forward all of the color checker passport adjustments, but also the ones that I just dialed in with that last picture. So now I can simply scroll through all these images here, right? And lo and behold, all of those adjustments across all these images have been properly applied. So I've just saved so much time, right by shooting in the window light here and by shooting the color checker passport and then making those adjustments to really one image and then applying it across all of them. Now they're all perfect. Perfect color. Perfect white bounds, no question about it. That is how you go from really kind of guessing you're getting close to really that professional level of color fidelity, that is, that is beyond question. It's really fantastic. So I hope this helps you understand exactly how you can dial in your profiles to get perfect color and white balance and stick with me, because the next lesson that's gonna be justice helpful.
40. Introducing Photo Editing Tablets: have you ever wanted an easier, more intuitive way to work in light room photo shop and another creative applications. Well, what we're gonna do in this lesson is give you a brief overview of some of the great tools that are out there in the form of tablets to do just exactly that. By the time we're done, I hope you have a basic understanding of how to use and set up a tablet. So for this lesson, what we're gonna be talking about is this particular brand of tablets right here. Only because it's the one I've gotten one Aiken display dio and help you set up. Also, I think it's probably most popular, So good bet that you're gonna probably wind up in one of these sort of products if you do wind up getting them. And as you can see here, there's a different line of products in the into his family here, and it's on. Ah W A c o m dot com, which is the company's website. You can see there and they've got the draw. The art, The photo on the comic. Most of this revolves around the software that comes with it as well as some of the futures like the touch future that my particular brand has. And I think I've got the art here. But honestly doesn't matter too much, because at the end of the day, I'm using it with light room and photo shop, So I'm not too worried about their bundled software packages. The difference, however, when you look at these different brands are options that you've got within this branded products is really the size. So here we're looking at this small, which is quite small. When I looked at the store, action went to Best Buy To pick one of these up for 100 bucks, you're gonna get a fairly small tablet, and my recommendation is get something larger, the largest you can afford, because the more real estate, the better mediums. When I want up getting and take a look here, it's double the price. But boy, is that extra real estate worth it when you're working on images. So with that said, if you do wind up getting one of these tablets, you'll have to configure it, and so we can go here and switch to the desktop configuration, and then we can just click on touch settings, for example, and that will take us up to We've got our tablet over here selected and we can pull up. The applications were going to use it. In this case. We've already got it loaded up into photo shop in light room, which is great. But let's say that you didn't have that is loaded up. Make sure you have to do that. Hit the plus key, and it'll let you pick applications that are open, which is great. Or you can browse. In which case, if you browse right, we could go right here. And if we wanted to add light room again, we could just scroll down to light room. Double click there, Click, click OK, and then light room would be added. I don't need to do that because we've already added it, but that's how you can select all the different applications you own. Working next up, we'll go over the basic tablet Express keys here, which could be very helpful. So the way it's set up at the moment is not the way I want it over here. I want to set it up is a keystroke, so by hand keystroke. It will pay attention to what I hit on the keys. Next. I want the brush to get larger. So I'll hit the right bracket key here and then, Okay. And then for this button, which is on the lower button on the top, right? I'm going to brush to get smaller. So had the left bracket. And then Okay. And then in the upper left here, I want in Undue. Which is command Z on the Mac. Okay. And then for the lower one, I want a forward do, which would be command shift. See? Okay. And now my tablet is set up to brush bigger brush, smaller undo and redo. Let's see what happens if I do this. Well, it turns out I've already generally got those dialed in for federal shop. And I've already got those exact settings here in light room. Almost exactly can fix this real quick. So if you want to go in and fix it and actually just wasn't displaying it properly there you can't back space. You have to hit clear. And then I'll command shift Z for undue and click, OK? And what you can see is properly configured there. So now I've got the right. Well, OK, let's go for one more second. Here. You can adjust how the tip feels. I like it right in the middle there. And then you can just the top of the bottom right, these buttons here on the pen, which I always wind up paying by accident, which is a little bit of a pain in the butt. But anyway, you can right click and click is the way I've got it configured, but you can go in here and adjust it. However you like a swell. Then there's gesture options where you can tell it, and I don't use this. I find it to be a bit distracting. I just prefer to get a keyboard. When I'm doing it right, you might as well go over all of them. So mapping tells me that if I want to flip my tablet one way or the other, I can configure it properly. I just leave it in the standard configuration. When I do it for touch settings, I find the standards to be fine. But just like any mouse, you can adjust the speed and the acceleration at which registers your signals. We've already gone over the standard gestures, which I recommend you probably not mess with at first until you're more familiar with the keypad or with the tablet more comfortable and then the on screen commands, which again, I don't find to be particularly helpful at this point in my journey with my tablet. But this is where you can go in a sign keystrokes and shortcuts two on screen command, strident use. So that's how you can configure it and go ahead and cancel out of there. And now that we've got it configured, we can cancel out of there as well. We've got it all set up and so we could go in the light room and take a look at exactly how this works. So we've got our original image here, and I'm going to zoom in a touch so we can see what's happening. And now what I'm gonna dio is gonna pick up my pen. There we go. And now that I've got my pen, you can see that I'm not touching the tablet yet. But by hovering about an inch over it, I can just manipulate around. So let's say I want to come over here. Use my pen. I can click the paintbrush and, um, you know, we'll increase the exposure a bit. Well, let's undo that. Because I didn't do it with the paintbrush I can undo using that shortcut. Click on the paintbrush. There we go. And now I can increase the exposure by painting this on. And I can adjust very precisely the size of the brush right on the tablet here. All right. And then I can go ahead and paint that in decrease the size to brush a little, decrease it a little bit more. So you see that I'm able to make nice adjustments here very quickly, right to the image. And there we go painting that and maybe a little right through there just painting the face just to demonstrate the capabilities so you can see how quickly and precisely I was able to paint that particular adjustment in. Now let's say that we wanted to, you know, maybe not go with the exposure. So we bring that back down. Maybe we just want to adjust the tent of just that part of it, right, so we can bring the tent up a bit Of course, all your standard controls are still available right there in the tablet. And what it really allows you to do is make those precise adjustments. Of course, because I've got my key strokes set up and undo by clicking that top left button I can redo by clicking the bottom left button on the tablet there. So if I maybe go back for a few of them here, you can see I've just working my way back, working my way forward. And the cool thing is, if I just put that down, I am right back onto my keypad. Now I can still use all the keys on my keyboard, and so it's a great way for you to, in a very intuitive way, work on your images in light room. Now, some of the best ways to do this, or if you're drawing, of course, or if you're working a particular areas like skin or delicate or sensitive mass that require a lot of attention to detail and precision. It's a fantastic way to get through that much quicker, and what I think it find is that if you start using a tablet, you'll be willing to make adjustments that you wouldn't have without it, because it's so much faster and easier that you'll be more willing to invest the time to make those corrections because it's just not as tedious. Well, I hope that shows you how you can use a tablet to make the adjustments you need in light room faster and a more intuitive and in a lot of ways, more entertaining and sort of fun and rewarding experience. It's a great investment if you want to get into editing some more, or if you're doing a lot of photography jobs and you want to save a bit of time when you really touch up a few images to make them spectacular. I hope that's help you understand your options with tablets. I can't wait to get started with the next lesson right now.
41. Pro Organization: Catalogues: I'm warning you right now, this is the most esoteric theory based lecture, probably the entire course, but also one that will unlock the mysteries of how adobe light room works and how it's non destructive and why that's magical. By the time you don't this lesson, you are gonna understand how Adobe like room actually is non destructively, editing images from all over the place without actually touching them and consolidating them all into one spot. Which catalogs. Let's go ahead and jump right in and get started. So what you'll see in light room is that if you go to file, there's this two options. New catalogue and open catalogue. Now, let me give you the one and only probably practical part of this entire lesson. Use only one catalogue, keep it in a safe spot. I use my external hard drive because I can take it from computer to computer. And if my heart in front computer crashes, the hard drive still is good to go back everything up on the cloud to just because I don't want to lose any images. But there you go, the practical part of lessons over. So if I got open catalogue, you'll see that it's going to open the folder where my catalogue is stored. Now here, you see light Room five catalogue that L R C A T, which is the catalogue folder. Now you'll notice that that's not my images. My images aren't saved in that catalogue, if you will. My images actually will cancel out of here are in a completely different spot. So if I go to my finder, I'm on a Mac. I'll show you where my images are. We can go to my external hard drive again and it's stored under photography. And there's there they are those all my images air right in here. It's loading, loading there. So what you can see is that my images and my catalogue are in separate spots. So how is light room working? What is that catalogue doing? Well, that's no complicated. So I'm gonna adopt a popular way of describing some of these complicated ideas, and I'm actually going to use photo shop to do it, strangely enough, So what we know is that we've got our photos over here, which we just saw are in one spot on the computer, right? So you've got your photos and then we just saw that in another spot. So a different folder in the hard drive is our catalogue, which would was called Cat here, right? All right, so So what's up with that? We've got a cataloging and we've got photos, right? And so what you'll see is that it's actually not like two separate things because what's happening here is we'll pick a different color will go green. We've got light room that's displaying something that's doing something. We can see it, right? It's what we're editing light room. And it would be a mistake. Toe ask the question. You know, for example, is light room pulling the catalog? Is that what we're working on in light room or is light room pulling a photo? Sorry, it should go like this. Let's just go ahead and redo that then is light room pulling the photos directly and letting me see then? Well, the truth is that neither of those two things is happening, and this is where it gets kind of really interesting because Adobe was really clever with the way they did this. What's actually happening is that you've got your photos, which in my case are bunch of raw images that are saved in my folder. My folder here and what happens is then they pass through right. This kind of catalogue on the catalogue is so we'll call this the raw data raw data, which is a photo. It's all the ones and zeros that your camera collected when it shot that raw image J. Peg or whatever. And then the catalog is your adjustments. Adjustments, okay? And so what's happening is is that light room is actually pulling from both of those different spots, and they act almost like nodes in a system. Right? So you've got your raw data of your photos. That's then Light Room has a preview of those, so we'll say preview in here. We'll just go preview pre. You develops a preview of those photos that you see, and then you make adjustments to those previews, which are then what's displayed in light room. Now here's why. That's so incredibly brilliant. And such a great call in the doubles part is that here is, let's say my one hard drive, right? Let's say that ive got photos in a second hard drive photo to and this is hard drive number two Bunch of raw data safe from a bunch. Different photos here. Well, what winds up happening is you can then import those into this catalog. And light room is now displaying the previews for the photo one set, which is maybe hard Drive one and then photo to. And then here's the crazy part, right? We could go hard. Drive three for photos. Three down here, photo three. And then what happens is you got three hard drives all plugged into your computer or raid whatever it is at the same time. And light room can go ahead and work with all three of these hard drives, essentially at the same time by importing all those voters into the catalogue and then these adjustments, This is the nondestructive part. So these adjustments, all the lessons that we've gone to, where we've adjusted tone, right, we've adjusted. Um, let's see. Profile profile on etcetera, etcetera. E T c. Sorry about that. Right. So here's all the adjustments, and those adjustments are right here in this catalogue layer. Right? So what happens is light room is bringing in all these photos from all these different spots and putting a minute in a preview into this catalog and then storing your adjustments . And then here's the Here's the really, like Blow my mind away part right is that when light room goes in and you're done with your picture and you export it, so this is the export process. Guess what's happening. It's taking all of this information, all of these adjustments, and it's permanently writing him to your image. So what you get in that final image out of light room, that last J peg that you sent to a client or whatever is actually gonna be your photo, plus your catalog adjustments? Not guess I'll do that in red here, the the adjustments that are stored in that catalogue cataloguing my run of space. All right, so and those air add together, it's seamless to you don't see the raw data, but here's the crazy part so I can go back into, like, this original hard drive over here hard drive where the photos were stored, or wherever they're at on the cloud. What not? And they're all the original images. I haven't touched one single bit of that raw data. All I've done is created previews brought him into this catalog and adjusted these different, you know, whatever it is different adjustments at light room made, and that's what's visible in light room and export. All of that, in a way, were there completely reversible, cause all that's happening in this catalogue, not in the original data. Now that just boom blows my mind when I think about it, right? But that's the magic of light room, and that's how that works. And let me show you that in action real quick. So if I right click and I want to edit in one of these additional third party plug ins that say, color effects pro for one of the Google and I K plug ins that we're gonna cover here in a bit, it should pop up with the dialog box. That gives me one of two different options I should say. There we go edit a copy with light room adjustments or edit a copy or edit the original. Now, here's what's happening. If I edit a copy with light room adjustments, it's gonna take the original data, plus the adjustments I made in light room through the catalogue where they're stored and it's gonna slap him together and then give me that final image to work on. If I edit the original, I'm just gonna get the data. And everything I've done in light room is going to be left behind. That, to me is amazing. When we go back here that says that not only is it nondestructive, but when I go out to 1/3 party plug in, it gives me the chance to bypass these adjustments in the catalogue and go right back to the original raw data right in adobe light room. Man, that is just crazy. Adobe light room making photos and catalogues come together seamlessly to export and to work on with incredible flexibility right there. All right, so now you know that you can take hard drives from his many different spots as you want, and you can import them in the leg room. So let's talk about that for a second were in the library, and we're the import tab here. So we just click on import under library and it comes up with this dialog box. Now, I guess I said earlier that there's only one practical application to this lesson, but maybe This is the 2nd 1 So we can go to the desktop, perhaps an under the desktop. You see this image? We can click on it, and now we can import it. Which means it's gonna take that raw data that's gonna build a preview in the catalogue that we can make adjustments to. So it maintains the raw data in one spot, and we can work on it in light room in another spot and do whatever we want with it. It gives you an option here to make a second copy. Don't do this. My recommendation is don't do this. I prefer to leave on Lee. One copy of that image in one spot and then one catalogue. Bring it together. But this allows you now to take those images. This is the process whereby you select an image data somewhere here that you're importing and you're putting it into your catalog and you're putting that information of the catalogue into, you know, one of these different spots right here that we have organized. So I'm gonna cancel out of here. That is the magic of a dhobi light room and how they're able to do such amazing stuff like keep raw data and work on it in one spot and bring information from all over the place together. I hope that helps you understand. And I hope that blows your mind just half assed, much as it does mine. Let's get started right now in the next lesson.
42. How to Whiten Teeth: in this tutorial, we're going to make eyes brighter and teeth whiter. Something my dentist always says. Do you want some of this bleach treatment for your teeth? Sounds scary to me. So I never do it because I could just white in my teeth in light room if I need to. So here's this t thought J Peg, if you want to open that up, I'm going to be using the adjustment brush to make his teeth whiter. So we're gonna get nice and close here, go to your develop tab. Zoom in here. We're just going to make this a little bit smaller so we can get more of her teeth. Like so they were just going to take our adjustment brush. We're gonna turn off exposure. Said that zero. We're going to make sure that our show selected mask overlays on. Then we're just gonna make this a little bit smaller. We just want to brush on the teeth, not on the gums or the tongue or anything like that. So let's just make this a little bit smaller. So then just go ahead and paint on her teeth. Just gonna do this paint on paint on paint on. You know, white teeth are great. It's hard to keep white teeth, especially when you drink coffee. I try not to drink too much coffee. Actually, only have coffee once every couple days. I know that sounds crazy for a lot of you. So you can see that light room is trained to make selections based off of what I'm painting . And we can always go back and edit this if we want get rid of some spots if we grab too much. Okay, that's pretty good enough for me. So I'm gonna turn off show selected mask overlay. One thing we want to do to make teeth whiter is not just brighten it up, but de saturate. So we're just going to de saturate. We don't want to go too far cause it looks really weird when teeth or any part of a natural images completely black and white. But we're just gonna de saturate just a little bit and then bring up the shadows just a little bit. Even the highlights weaken bring up overall no one. I go over bored with exposure, get glowing teeth, and it's probably a good idea to zoom out from those two so we can see. So if we go back to our adjustment brush and we click this when you turn it on or off, you can see what a dramatic difference this is. So we're going to do the same thing for the eyes that we're going to zoom into the eyes right here. We're gonna get our brush. We will show our selected mask overlay and just paint onto the whites of the eye. Just like so. Just like so you can go over here. I'm just pressing space bar to get my hand tools so I can move over here. No, I don't want that. Gonna zoom in just a little bit. Just that little part of the whites and all that white zoom out just pressing Z on the keyboard. That is scary. Now, if we turn off the Moscow overlay, we do the same thing. We kind of dropped that saturation bit increase the highlights, the shadows in the overall exposure. For this, you can see Alex a little bit funky. Think I went a little bit overboard, so I'm gonna drop that exposure again. I don't want exposure to go to high and can get little funky, especially when you're comparing it before and after. But something like this when we're comparing before and after. Like that yellow teeth eyes. Not that don't pop eyes that pop white teeth really cool, really cool stuff that you can do in adobe light room. So that's how you, Brian and eyes and white and teeth. Let me know if you have any questions.
43. Remove Wrinkles: that we're going to learn how to remove wrinkles from a photo in adobe light room using the healing brush. So I have this profile pic image if you want to open that up and we can zoom in here if we want, let's move it to where we want. We're just gonna get rid of some of these wrinkles right here. We're gonna take our healing brush, so make sure that you're on the healing brush. Change the size relatively small, a little bit more fathering for this. And then what you do is literally just paint over the wrinkle. That might just be a little bit too big. I'm gonna undo that. Make it a little bit smaller. Paint over these individual wrinkles like this. See how it takes from another part of the image. So you have to find a spot that doesn't have wrinkles. So something like that on his cheek is probably good. Can get rid of this one right here. Take from down here is that's pretty good. Just over here. Just kind of keep going. So we want to make maybe get even smaller brush for some of these parts, like right here And the more you go, the more it will help. Because you'll have more space to grab from. We want to move over here, maybe get rid of some of these wrinkles on his nose like that might work in this big one right here. Let's see what we can do with this right here. This whole area right here, this one, we might have to go a couple out of time, so let me just undo that. Make the brush smaller, just go with. Just go with these ones over here. First, take some skin from down here. You know, this is hard with, um a guy like this has so many wrinkles, but if you only have a few wrinkles and I'll show you with some crow's feet that what they're called crow's feet, the ones that are on the side of your eye, I'll show you how that looks. I'm gonna take some skin over here, maybe down just a little bit. Okay, So now if we zoom out, this guy has lost quite a few years. If we do a comparison quick way to do that just by doing reset than undoing reset and doing you can see that this guy has lost quite a bit of years from this little edit. Let's go in here. We can add it. These crows nests right here. Crow's nest, crows, legs, crow's feet. What are these called? I don't know. Someone tell me in the comments. So take your healing brush again. We're gonna make it a little bit bigger for this one. So and then we'll just start with this one right here. Move this down. Here, make another selection right here. Take move it down here again on brush. This one on right here. Grab again from her cheek. Her cheek is a good spot to grab from. It's a little bit right here. And maybe one bigger one for the, you know, underneath her eyes, right here. Getting a little bit. I don't want to select from there, so we're gonna drag it down somewhere pretty close like that. Then we could just go in and get rid of some of these pimples just by clicking on them. Let's brush a little bit bigger. It there. You know these pimples Pretty easy to get rid of in Dobie Light Room. And now, after we've got In some of those pimples, we can just click done, and we could do a before and after before after before, after before, After I did a really quick job, so you might be able to tell if you really look closely. It's a little bit blurry. In some parts, it looks a little bit funky, but you can go in there and find to not just by using a smaller brush, maybe using a little bit less oven opacity in some areas that you don't want to look so funky. But, yeah, that's the healing brush tool. That's how you get rid of wrinkles and blemishes in a practical way in light room.
44. Create a Panorama: within light room, you can stitch together photos taken at one location to create a panoramic image. So this is if you're in a location and you take one photo 234 However many you could even do a 3 60 panorama. The best way that this works is if the photos overlap a little bit so that light room can stitch them together. The way to do that is select the photos that you want to stitch together. I have these three there, called it Pano. One panel to pay No. Three. Then go up to photo photo, merge Panorama. Click that, and it will stitch together your photo and give you a preview of what you're Panorama will look like. I can increase the size of this window, and now we have some different options for how it is edited together. So we have spherical, cylindrical and perspective. Let's start with perspective. What happens with perspective is that uses the center image, and then it stitches the outer images to that centre image image but basically creates this boat high effect, and it stretches and skews the other outside images based off of where the center image lands. Now one typically doesn't work too well with spherical and cylindrical. These do a similar thing. And if you go between the two, it looks very similar. But I would use cylindrical when you are actually editing a 3 60 degree photo. You can auto crop these images by clicking this auto crop, and it will get rid of any of that boundary that you saw right there. Or you can actually warp the image to match that boundary by dragging up this boundary warp and that actually stretches. Excuse the image rather than crops in. I'm just going to do auto crop and then click merge. And now, in the background light room is going to merge those photos together and create a panorama that I can go ahead and edit right within light room with all of our development tools and other options. Once it's done, you see that it has this new image so I could pop that open and develop. I can then crop it. You can see because I'm using a raw image and it's a stitch. Together I can crop it out. You can see the where it crop before with the edges It's a little hard to see but say I just wanted to crop in just a little bit more. I can do that right within Adobe Light room. Then I could go in, play with the colors, play with the clarity, vibrant everything toe, edit this photo and save it just like I would any other image. So this is very cool. And another thing you can do to is you don't have to do a horizontal panorama you can do vertical panorama is to it works the same again. Stitch together multiple photos, any direction that you take them in. If you have any questions about this or anything else in life room, let us. No one will be sure to get back to you as soon as possible. Thanks.
45. Remove Red-Eye: in this tutorial, I'm going to get rid of red Eye in Adobe Light Room and show you how. It's very simple. So we have this red I am engine. This is one of the images that you downloaded before. If you wanted to open it up, just click on this red eye, but it right here click thes center of your eyeball if you need to. You can click and drag and drag it over the eyeball like so in light Room's gonna work some magic and get rid of that red eye and then go over to next. I you can literally just click. Now it's going to get rid of that red eye. It's like magic light Room is amazing. That's how you get rid of red eye. Let me know if you have any questions. See in another tutorial,
46. Soften Skin: Here's a quick tip to soften skin, and also I'm going to show you an even quicker way too bright and teeth than what we learned before. Softening skin is actually a good technique. When you're shooting portrait's, it gets rid of some of the details that you might not want. So all the pores and maybe even some blemishes that you might see in a normal photo you can actually quickly get rid of that by just softening up the skin in light room. They have some great presets that we can use if we go over to our adjustment brush. You see this little effect right here. If we drop this down, we have some other effects that we can use in our brush. So if we choose this softened skin, it automatically sets are settings to soften the skin so it drops the clarity. That's the main thing that is doing, and then we can just take our brush, make sure it's the right size, gonna show selected mask, overlay and paint on our skin, and I'll show you the before and after just gets rid of some of the little blemishes, makes our skin looked a little bit softer, which is it is probably nicer. So I just do a rough past like that and I turn off select overlays. And then if I delete whoops and then if I delete this pin and then undo, you can see that's before this is after before after nice stuff. The other thing we can do is white and teeth. So we have teeth. Whiting right here. Well, who don't want to change that pin two teeth whitening. So we're gonna choose new teeth whitening, and then we're gonna press Z on the keyboard pressing the space bar. I can move this photo around, make sure my brushes bit smaller and then just bright on. And it has the perfect settings for brightening up our teeth just a little bit. So let's zoom out. And now it's a done. If we go reset and undo, or we do a before and after you can see that the details are gone. Makes us look a little bit pretty. Her and our teeth are whiter and brighter, so that's a cool effect in the cool thing to note about when you do bring up your adjustment brush or really any of these mass great Grady, it filters or radial filters. You have these effects already preset that you can add to your photos. It's just adjusting these settings for you already, but it's just preset adjustments, so that's quicker and faster. Thanks so much for watching and will soon another lesson.
47. Reduce Noise: in this lesson, We're going to learn how to reduce noise in your photos. Sometimes when you're out shooting and you have to boost your I s O to a very high level, when you're out and it's night or its dark or you're inside, you end up getting a very noisy, grainy photo. In the old days, when you shot with actual film, it was actually crystals or grain that helped bring up the exposure of your film. But now we have this digital processing that increases exposure. But add some noise to your photos in lighter, and we can get rid of some of that noise. Here I have a photo that I shot just that my wife's birthday party. You can see it's inside. The lighting wasn't that great is pretty dark. I don't know if I used a flash here. I don't think it kind of looks like it used a flash, but it was still pretty dark. And if you zoom in here, you see that there's a lot of noise going on all these little grainy parts of the image. Very noisy. If we go to our basic adjustments and we go down to detail. You can see the sharpening and noise reduction sliders, and you actually have a zoomed in part of it. If you want to move this around, you can to get to a specific part just to see where that noise is. So there's two tip from types of noise reduction that we have to know about luminous and color. With luminant, you're reducing the noise of the darker parts of the image. While with color you're reducing the color noise that comes up so luminous you can see all these dark range right here. If I drag up the slider for noise reduction for Luminant, you can see those particles go away. So all the way from 0 to 100 you can see that disappears. But in the end you get this sort of soft, blurry photo. And that's one thing. If you're reducing noise, you're getting rid of that detail. And so when you zoom out, it's not too bad. But if you're zoomed in, it can get a little blurry, and you might not want that, so you might only want to go up a certain amount. The detail slider, which is the next slider, actually reverses the luminous reduction that you're kind of doing. It brings back some of the details, so if I slide all the way to the right, you get a little bit more grain. It's not as much, if luminous was at zero, but you get a little bit more grain to bring back some of that detail in the edges of your objects. If you go all the way to the left, it gets a lot more blurry. So I typically will leave that at 50 which is the normal unless after I've added some luminant. So I have to bring back some that detail. The contrast brings back some. The contrast you losing your photo. If I go all the way to 100 20 you see that there's a little bit more contrast and you get a little bit more detail back in the image. So it's standard set at zero, but you might want to bring that up a little bit just to get back some of that detail. The next is color. Now let me take out the luminous noise reduction so we can see what colors doing. We're automatically set at 25 which gets rid of some of the color speckles that you get. If I go down to zero, see how much of that color noise you have. You got greens, blues, purples, red little artifacts. And just by going to the standard 25 you lose some of that. Actually, let me bring backs in bloom in its reduction, and then I go down to color. You can still see that the color has some grain in there, so this will get rid of more of that color. But again, at the at, in the end, you get a little bit more blurry with detail. It's the same thing. Bringing up the detail brings back some of the detail from the photo. Going to the left loses more of that detail to get uneven, softer, less noisy photo and same with smoothness. How it works, with contrast above smoothness will make them the image more smooth or a less smooth, giving you more or less detail. I typically leave these at the standards of 50 50 then with the color 25 is typically good , but sometimes I might bump it up to 30 35 or so, So the key thing to note or to be careful about is you don't want to go too far with the luminous, especially if you're printing out your photos if you're blowing them up or if you are posting them online as high reds photos. You don't want your photo to get soft and blurry out the in the end from losing a lot of noise sometimes. Okay to have a little bit of noise. I'm obviously we'd rather not have noise, but it's that balance. You have to decide for yourself. How much noise can you live with and how blurry of a photo can you live with? But this luminous slider is a very powerful tool, especially when we're shooting with cameras and lenses that can't see at night. And we have to boost the is. So to get a well exposed image. Thanks for watching. If you have any more questions about this, let me know otherwise we'll see you in another lesson
48. Google NIK: There's certain things plug ins for light room that can greatly expand your creative possibilities and make life a little bit easier and sometimes even a bit more fun. In this lesson, we're going to go over one of the most popular, the Google and I K or Nick Siri's. It's free, and it's pretty powerful. By the end of this lesson, you'll have a basic overview of how to use it and an understanding of what it can do to make your photography maybe a little bit more better, maybe a little bit more creative, maybe a little bit faster. Or maybe just break up the routine to give you something new to try. Let's go ahead and get started. So, like I mentioned Google and I can hear the Nick collection is available from google dot com , Ford Slash and I K Collection Ford Slash. Once you get there, you'll see that it's now free. I paid about 150 bucks for my copy when I got it. You can download it right here Now, once you've downloaded it, you'll have access to all of these different modules atop the agency across the top of the screen and briefly. What each one does is analog effect. Pro gives you vintage looks in click button easy ways for your images in light room color effects. Pro allows you to build recipes and apply really wonderful filters, and this is the best one. In my opinion, the visa allows you to make selective adjustments to different parts of atonality. Oven image sharpener pro, as you can guess, allows to sharpen. This is the best way, in my opinion, to make black and white photos through this silver effects pro yet HDR effects to do better HDR imagery without over doing it or pushing it too hard and define takes the noise out. So let's assume that you've downloaded it by clicking on the download button. Your next step will be installation. Let me just tell you what it says. And in a nutshell, it says, Download it, double click on it, install it, and then it will be available. But a few key points make sure you've closed Photoshopped Light room or aperture, regardless of whatever platform you're gonna be using to host it, then downloaded by double clicking on that icon you saw a moment ago and opening up the installer. The installer will automatically pick the location and install it for you. And once it's done, you'll be able to use the Knicks software with whatever platform you're using. Next up, we're gonna go over Google's suggested workflow. Here's the Nick Collection help desk from Google, and it's got some fantastic ideas and tutorials as well. Asan tips for you, and what they've done here is they've put together an illustrative work scenario so that if you went through all of these processes, you'd have a very firm understanding of the basics of the N. I K collection. Now I'll just make a quick disclaimer. I normally don't do this. That is to sharpen D noise. Selective tonal adjustments color black and white and then sharpen out. They've done this, and I don't think they expect anybody be doing all that, either. But it's a way for you to understand all of the different functions that are available to you. I usually, honestly, just there going to be wondering up using the silver effects pro or the color effect pro, for those are my two kind of favorite and go twos. But if I've got some real issues with noise. You know, I might find myself and defined. Two were visit to for some selective adjustments to atonality. What I'm gonna do is walk you through with an image. All of these adjustments. Because if Google thinks it's good enough for you to figure out how to use Nick by doing that, then it's good enough for me to. So let's get started. We're gonna go into light room. We've got our image selected, and if we right click on that image, we're going to edit in and then we'll edit in. They recommended the Sharpener pro first, so we'll go ahead and you can see that this is a J peg that I've exported. So I get all of the different options. I can export the original image original with light room adjustments or edit a copy. I'm just gonna go ahead and use the one with light from adjustments here at it. And in a second it should open me up with the pre sharpener. Fantastic. It's done a great job of that. You can see I've reduced the file size. The five DS image that originally had is just too big to work with so unruly. So in order to speed this up, we're gonna go ahead and work on this image here. First thing views. The single rectangle allows you this view that gives you a preview of your changes or you cannon click it so that there are no changes that gives you a quick before and after. By doing that, next up will be this slider with the red line down the middle. That would give you a before and after that, you can see and adjust. By sliding that line on the final, we'll let you see the before, and the after side by side over here gives you some other helpful tools. This is the select tool, the magnify tool, the pan tool and the change background tool. This is used for selecting multiple points. The select tool this is used for resuming that you can also command plus and minus, which is the way I like to do it in the pan tool allows you to click and drag around the image. The last thing I'll point out is that Luke Tool has the thumbtack that you can use to thumbtack in, and that way, wherever your mouse goes, you still got the before and after. I tend to use it almost exclusively in this year because my computer screens a little smaller, and that way I can see the before and after, if I want Teoh or just used a loop to see my before and after a swell. Now what I've done here is I've applied medium adaptive sharpness, and I've done right in the middle between sharpened edges and sharpen areas we can remember from previous tutorials that sharpen areas is for things like portrait's, where you want a more softer towards the middle of the area. Sharpening and sharpened edges is great for buildings and punch your images where you want some more gritty, punchy detail. So with that said, we're gonna go ahead and go right in the middle here and you can see from our loop that that gives us some really nice sharpening. Here's the next thing I can do is I can select plus and at a control point. And once I've done that, now it's only applying that sharpening, right. So if I click and drag on the top, you can see I can adjust how far it's applying it to and I can adjust the opacity to ply more or less of that. And now, if I Let's see option click here I can click and drag and simply copy that across my foreground. Now, I've got a nice pre sharpening done to the grass. I can click OK, at this point, and I've made my first selective adjustment. You can see here that we've got our let's zoom in right before after before and after and you can see that we're much sharper here. But we've got both these images, so it will continue to go that way. It will sort of feel like we're building as we move on. The next suggestion they had was to edit in and to find to, and we'll open edit light room adjustments. Copy here, and we'll go on to the next phase of Google. Suggested editing workflow, toe help you master Google in an a K. Now you can see that it's already measured and already apply to profile so that if we were to look here, we can see that whatever noise there may have been, which it probably wasn't a lot, but maybe we'll take a look in the shadows say, down here where there might have been some noise if there was some noise it's taken care of . But these areas here shows where it's sampled to get that noise from. So maybe we'll go ahead and take a look up in the clouds here by clicking on it, thumbtack and selecting up here. And it's so doing all right. It's pretty subtle. This is a daylight picture, so you wouldn't expect much noise. But of course, if you wanted to reduce it by selectively applying it over different control points, you could do that. I recommend you stick with just this automatic process because it's quick and easy. Now I can click, Save and I go back in and you can see this is the original. This is the sharpened image. This is the noise reduced image there. Next suggestion was for us to try out the vase a, too. So we'll click and go into a visa to and we'll go ahead and head of the copy with the light room adjustments. And once we've done that will come up with a men. Another copy of this image. Okay, here we've got the image open in the vase, a two and a visa to allows us to really start making selective adjustments, using control points so you can see I clicked out of control point, and then I just dropped it where I wanted. Now, if I click command and I slide this slider here, the white part is the adjustment where it'll be applied now. The other thing, I'll point out, is that I can command, click and move it around, and as I move it, it's making a different adjustment based on the location and the color of where I'm dropping that control point. Let's say I want to make the first control point over here and that control I want to dark in that area and maybe raised the contrast a bit. And let's say that I want to do another control point say, in the middle here, where I want to decrease the size, increase the brightness, maybe bring up the contrast and thestreet uck chur, which you can think of in terms of like clarity, mid tone contrast, more structure, more detail and maybe I want to make it a touch warmer right in the middle, not too much and then I can adjust, making it redder, greener, bluer if I wanted, or shifting the hue for any one of these individual points. And maybe this is a bit too much over here so we can go in now and bring it back up. It's nondestructive. They're good. Maybe I want to do a little adjustment over here to give the image more tonal range in the grass by decreasing the size, decreasing the brightness there as well. Now the thing is, you can't see any transitions matter. Fact. It's hard to see I've made any adjustments at all. So if we go and click on the preview button, we can see the before and the after. It's significant. There's more detail. There's more contrast in tone to it now. The next thing I can do is add another control point up in the clouds. One of my favorite things to Dio that can bump up the contrast. I can bump up the structure might as well apply that same adjustment to the next cloud so I can option click and drag an applied over here. Now you can see the before and the after, and we're starting to see some real pop out of the image. It's really coming together nicely, but maybe I want to work a little bit on the ocean. And perhaps because I've selected the ocean and let me just show you one thing real quick, I'll command click and I'll adjust this. Look at how good a job it's done. It just getting the ocean, the blues in the ocean. That's what I mean when I say selective adjustments and maybe I just want to bump up the blue a little bit and maybe bump up the saturation of touch. All right, so that looks nice. We've got our before and our after, and I'm really happy with that. The other thing we could do is we could take this view and show the after before after by using the slider. I tend not to do that, though. To me, this image looks right about where I'd want it. So I'm happy to hit save, and at that point I have made my selective adjustments using the visa to, But I'm not done if you remember, the next thing Google suggested is that we edit it in color Effect Pro four now in my opinion, The visa too, and color effect Pro for the one we're opening now are the two prime, most powerful and useful for my work flows. Here's where it gets really interesting because we've got all of these filters over here on the left and what the's filters let us do so. This is a dynamic skin softener, one we don't need that I connects out of there is they let us stack filters on this image. We can click on landscape and Weaken Say, go to detail extractor a wonderful ah wonderful adjustment that we can make here. And we can zoom in a bit, perhaps to give you a closer look at what we're doing. You can see that as we slide the detail extractor the right, we really pull out of Tana details to the left, softens it up. So we're gonna go ahead and add those details. We're gonna zoom out the before and the after boom tons of punch way more than you use in a portrait, but great for landscapes. Now, if we click, add filter, we can add another filter and stack it right on top of that. So maybe we want to do a graduated neutral density now. Okay, so here what we can do is we can adjust atonality on top and then we can adjust atonality on bottom. We can now vertically shift that graduated neutral density filter. You can see it's fantastic. We could if we wanted to rotate it, but I don't necessarily think that's gonna help us at all. So what, you can see here before and after with just those two filters? Pretty amazing, isn't it? So let's say that we really love this. Well, OK, we'll climb one more skylight reflector. Don't forget to click, add filter or else you'll delete the last one you applied. And I've done that a bunch of times. Skylight filter. 1.1 thing out. If I click on this, multiple boxes overlay together actually have different versions of this that I can apply. So here's a subtle version of this filter. What's afflicted Final view here. A subtle version, a medium version and a strong version. I think the medium version is fun. If I click back, you can see it takes me back to those list of filters, and all of them have different levels of application. So if we go ahead and take a look now at the before and the after, I think that's fantastic. I'm very happy with that. It's stylized, it's punching and you can tell us a lot been them to it. But in my book, it's pretty catchy. So I like it. Click save and it's gonna bring us right back into light room, stacking this image right next to the others we've already worked on, so you can see Miss Growth Room quickly. Here's what we started with. Then we applied some sharpener than we had Dean Oise did, and then we applied for a visa, too. And then we used a color effect pro for pretty amazing. The next thing that Google wanted us to do, just to make sure we get the hang of it, is to edit it with the black and white features that are found in Silver Effect Pro, too. So we'll go ahead and open it up. And you could, of course, if you wanted to go black and white could have just opened it right up in Silver Effect Pro two to start with, in which case we wouldn't have gone through all those other steps. And what you can see here on the left, which is fantastic, is you get all these wonderful presets and a preview of them. And so if I wanted to go high key, which I don't, it would look like that. Loki, right? And it's just making these adjustments for me. Of course, you can still use a control point if I say wanted to increase the brightness right in that region there. Same idea with the control points and selective adjustments. I don't particularly want to do that, though, So if I click here to reveal the control point, I can click on it and trash it to get rid of it. Now, I don't necessarily like those looks, but if I wanted something neutral on not quite there for May, usually you can get pretty close. Let's check this out. High contrast, Smooth. Don't like it. You can see that. I'm just kind of previewing. This looks nice, though. High structure smooth. But if I were going to go black and white, that's the one I'd pick. Of course, you can always go down here and apply some additional things like atoning where I could maybe make it. Ah, split tone. That's nice. A split tune. And then if I wanted to do something on the borders, I could do that. I traditionally don't do that. And I don't really like those looks. I'm not gonna do it here, but it is an option. It is available. Been getting, of course, a little bit more my style. So I'll put a lens fall off one by simply clicking. Save. I'm right back in the light room. Now we've gone through almost all of the functions of Google's and I k sweet, and there's one they wanted us to do to finish it up, if I remember right, which was to finally do an output sharpener right there. So we'll edit this image now in the output sharpener. And again, I could have gone in and applied any one of these filters individually and for the output sharpener. Let's say I'm gonna use an ink jet, and the viewing distance is going to be, you know, people are gonna be viewing it from a body's length away or more, and I won't be used. The paper type will be a canvas print, and I'm selecting my print resolution there, and I'm gonna leave the creative sharpening as is cause I'm happy with it. Selective sharpening is not gonna be done either. This is processes and things we've already done along the way. Now you can see the before and the after. It's really optimizing it for that viewing distance and printing. And if I click save, you can see that is the final adjustments. So that is your tour de force introduction to the Knicks. Sweet. We've gone through everything Google suggested so that you get a good understanding of how to use the different filters and functions. Now, of course, there's tons of ways to doom and really creative ways to apply. Stack and mix these together. So I hope this has helped us an introductory lesson. Understand what Google nick is, where you can find it and how you can use it with all your images. All of these images will be available in the additional resource is section as well, So check them out if you want to see how they progressed one by one. I hope that helps on. Let's get right going for the next lesson
49. The Full Lightroom Editing Session: for a photo shoot. I'll open light room and go to import under library. From this point, all of my previews will open up. And I'm gonna create a sub folder with the date and the client's name after a paid shoot and you'll see there that I'm gonna rename it with the date and the final name to make sure don't get any duplicates under the standard file naming conventions of the camera. Next up, I'm gonna un select all the images and go to the first image of this shoot that I'm importing. Ah, click there and then I'll scroll to the end and click the last image and then click Import . It's now going into that sub folder that I made with the date and the client's name. From here. The images are going to first be brought into light room, and I haven't set to copy to an external hard dive. So doesn't mess up my internal hard drive for the computer. Next up, it'll create the previews, which is done, and then I'll use a no rejects filter, which basically says anything that I reject by hitting X will no longer be displayed. Now I do this so that the images aren't actually deleted in case there's one I wanted. Or maybe the clients want to see all of them after I'm done, which are usually don't do. But it's just a little bit of help for based. I'll go through the images now and hit X next to the ones that I don't want to deliver to the client and this alarm and go through the whole set and remove the images that I don't want to have to deal with any more without actually deleting any of them, because I can just turn that no rejects filter off, and then I can see them all again. So I'll just continue to go through all the images and reject the ones I don't want. Now what I'll do is I'll go back to the image, and I'll first take a look at some of the presets, so I'll just see if the presets look good for that particular scene that I was shooting. A tend to keep my scenes the same and rotate people in and out to keep things consistent for a big part of most photo shoots. So as you can see under the navigation panel, I get a preview of what those presets would look like just to see if there's one that's gonna get me maybe real close, just to start with. So I'm rotating through a couple of the custom presets that I've made there. But I don't find one that I necessarily loves. I'm gonna close those down and we wanna look at doing this manually. So I've started with the preset, which is kind of gonna get me close. But I wanna keep the contrast a little bit more in the middle. And I don't need to bring clarity quite that far or the vibrance that far up the saturation , right? So I'm just kind of fine tuning it for this particular image. Now you can see that if I turn the filter off, all the images are available, and I've shot a color card. Here. It's colored checker passport made by a company called X ray, which allows me to go ahead and load a profile created right for my camera based on that color card. And then I could have the w key for white balance, and I can select that patch there, which is meant for white balance in my image. Now I know that I've got perfect colors and what I can do is go across this entire scene, if you will, or all the photos that I took in this particular spot. And, you know, maybe I'm gonna make some adjustments here now and see if I can't beat that preset in the adjustments I made earlier. Some of you want to be my shadows up just a bit that I can check my blacks and my whites to make sure I'm getting the full tonal range there by clicking the option and Dragon Ki like we talked about before. I can adjust my highlights and then, you know, we can go down here and take a look at it. Aluminum. It's maybe I want to bring those blues down so I'll click that bull's eye click and drag to make the water but bluer. And we're in good shape here because skin tones don't have blue in them, so I can have a little bit of liberties. I can bring the saturation of that up a bit, right, because we want that water to be nice and blue before and after just so you get a sense of what we've done so far to the image. And honestly, I think I like this better than what we do with the presets on might keep this and apply to all the images. So I'm gonna move my clarity down a bit here to take some of the edge off of these portrait . It's I don't like edgy Portrait's for this sort of work vibrance up a bit and I can see before and after. It's looking pretty good. And what I can do is just go to the last image in this location because I tend to move locations during this year. And then I can just click sink here and will bring up this dialog box which will let me sink all the adjustments. I just made that last image across all of them. I could go ahead and turn back my no rejects filter on So my rejected footers air now hidden and I can preview what all these pictures are gonna look like. And what I'm gonna do is go through my entire shoot and scene by scene, do this same process that I can make really customized and dialed in corrections across a number of pictures all at the same time. Now, when I'm done, I'm going to go toe export right there. And this brings up my export dialog box. And I'm gonna choose my external hard drive under client images and create a sub folder with the year, month date and name and then click Choose. I'm not going to rename my pictures and almost ready, but I like to hear at all metadata because it's going to make it easier for me to sort by date letter if I want sharpened for screen, because I think that does a fine job and then I'll click export. Now light room will do the heavy lifting of exporting all these images toe unorganized folder within my external hard drive that has everything organized by date, and it will automatically pop open, which is great because then I can go to my Amazon drive up loader, select all the images, and I can upload them to my Amazon prime photo bucket. This gives me access to these images which are now here. I've spent this up obviously, and I'm gonna rename another folder and now this folder will be named appropriately, so I can remember it later, and my client can view it after I shared with them. Once I've created that album, I can now go in and select the images which are sorted by date because I included the metadata when I exported from Light, Remember? So I'll take the first in the last image. That shift add two album. Now it's created the album with all the pictures from the shoot, and I can get a share a bowl link and save it. The other thing I can do is usually transfer, which is this service. Here. We transfer dot com. It's free. Amazon Dr. Photos is, I think I got it for five bucks for the first year, which was great, but we transfer lets you just add all the files, the email address and a short message and will send your images off. The problem there is that it expires in like, I don't know, 30 year 60 90. Whatever is has an expiration date you don't download of in time. You're losing, which is problematic if folks want to go back and get him, which is why I really prefer that Amazon drive because they'll be there as long as I have my account. I hope that helps show you how you can use light room If you're going to do sessions, portrait photography and sessions were gonna be sending off a session to clients, so let's keep going.
50. Conclusion: Hey, and thank you so much for enrolling and taking this adobe light room class. I just wanted to make a quick video to say Really, we appreciate it. John and I were so excited to put together this course I met John Online. He's in Hawaii. I'm in L. A. And being able to work together online to create this chorus and then provided to students like you is so exciting for us. We have students from all over the world taking our courses, and it's just exciting that you're one of them. If you made it this far, I truly hope that you enjoyed the course. If there are things that we can do to make it even better, please let us know. Send John or myself a message, and we'll be happy to take your feedback to improve this course and to improve any future courses that we do create. If you have any ideas for future courses, let us know we're always ready and willing to create new courses. And if you're interested in taking other courses of John or my go to John's profile, or you can visit video school online dot com to check out all of my courses. I also post weekly law articles and YouTube videos that you can check out for free again. Thank you so much for taking this class, and hopefully we'll see you in another one by
51. Bonus: Free Lightroom Presets: Welcome to this new section
on Lightroom presets. This is a bonus
section that we've added to the course
since the launch of it. Because we love giving
things to our students and making these courses and
your photography better, more fun, easier,
and more affordable. So what better way than to give you some amazing
Lightroom presets? If you've never used
presets before, perfect, We have a lesson coming up on how to install and use them. And then I'll walk through
the different packs that we add to the
course over time and share ideas for when and why you would use those
certain types of presets. Will be adding one new
pack of presets to the course every month until
we have 12 full packs, ranging from black
and white style to bold colors and
contrast, HDR nature, soft pastels, vintage
vibe, street grunge, all kinds of fun packs that you'll be able to use
for your own photos. I just wanted to explain
what this section is. It might not be
applicable to you if you don't use Lightroom or if you
don't want to use presets. But regardless, we hope
that these bonuses are a nice gift for you and a special thank you for
taking our courses. Thanks so much.
52. How to Install Lightroom Presets: In this tutorial, I'll
show you how to install Lightroom presets into the
Lightroom Desktop app, both classic and the
regular CC version, as well as the
Lightroom mobile app. If you don't have a
desktop computer, just skip ahead to the
timestamps which I've included below to the app you're
looking to install. Thanks a lot. Enjoy. From
the library page or module, go to the develop module. On the left you'll see
your presets panel. You might have to drop it
down to see if you have any presets installed
already or if there are the ones that are already installed when you
load Lightroom, click the drop-down and
click Import Presets. Then if you're downloading any
of ours from Video School, click the desktop folder. It will have all
of the XMP files. Select all of those
files and click Import. They will import into a folder, which we will see here. And now we have all
of these presets. To use them, you just
open up a photo in the developed module
and then hover over to get a preview
of what it looks like. And then when you find
one that you like, click on it and
you will see that the preset has automatically
applied different settings. Sometimes depending
on the photo, you'll need to make
some adjustments like exposure or contrast
adjustments, things like that to make it
look good for your photo. And the beauty of
these presets is that it's a non-destructive
way to edit. So you could always go
back, reset things. You can adjust any
specific setting. You'll notice that some of
these presets in this pack are italicized and that's
when there's an option. Usually it's a color profile
that we might have selected when creating the preset that
will work for a RAW photo, but it's not a setting
that works for a JPEG compressed photo. That's totally fine though these presets will still
work and they will still look fairly similar to what it would look
like on a raw photo. But that's why some of
these are italicized. And for any other presets
that you download, you can rename these groups or renamed the individual
presets if you want, just by right-clicking the group or the preset itself
and choosing Rename. All right, That's how
you download, install, and use presets in
Lightroom classic. Cheers. Here's how to install and use
presets in Adobe Lightroom. This is the Cloud-based
apps on my desktop. From here you go to the
Edit tab, click on Presets, click on the drop-down
menu right here, the three dots and
choose Import Presets. Now if you've downloaded one of our video school preset packs, you should unzip that pack. You'll see two folders in it, one for desktop and
one for mobile. Still use the desktop option if you're using Adobe Lightroom, select all of the files. These are XMP files
and click Import. Once they've imported, you
will now have this new pack. You can click this drop-down
to see all of them. Then you can hover over the presets to see
what they look like. Click on one of them and you can see that they've adjusted some of the settings as
we've created these presets. Now, depending on your photo, you might need to make
some adjustments. Typically things like exposure. Your overall exposure
might be the one that you want to adjust. But we've tried to
make these work for fairly any photo that
is well exposed. That being said, this is a non-destructive
way of editing, which is great because
you can always undo this. You can always adjust individual settings until you get your light it
to your liking. You can also right-click the group or any of
the presets to rename them in case there's
ones that you really like and you want to
give a special name too, or things like that. The other cool thing about importing presets via
the Lightroom app on your desktop is if you use the mobile version and it's tied to your same Adobe account, these presets are
automatically going to load in your Adobe Lightroom app on your mobile device
once it sinks. This is the quickest and
easiest way to do that. We'll have another
video if you don't use the Adobe Lightroom
Desktop app and you want to download and
install presets on your phone. But it is quite a bit
more work than just this. Here's how you install presets on the Lightroom mobile app. Here I have a photo open on the Lightroom mobile
app under presets, I have this video
school flatMap pack automatically applied. So I can just click on any of these presets and it will
automatically apply. Okay, so now let's go
ahead and I'm going to actually delete this pack
from Lightroom Mobile. And then I'm going
to show you how to manually create presets. If you don't use
the desktop app. Now you can see I've
deleted the folder. The way it works in Lightroom. The mobile app is a
little bit different. You can't just this time
install XML files as presets. The process is actually creating a preset
from another photo. What we've done is
created photos that have all the settings
applied that will copy them from and
create the presets. The first thing you'll need
to do is download the folder. You can do this on your phone. If you have a desktop, you can download the folder, unzip it, and then send
the files to your phone. However you do it, You need this mobile folder
of files on your phone. If you download the zip file, typically it's just clicking that zip file and your phone
will be able to unzip it. You'll see these two folders. And then just know that you'll
be using the mobile photo. Back in Lightroom. The best way to do this
is to stay organized. The first thing
we're going to do is actually create a new album. Create new album. We'll call this. For now. We'll just call
it VS flat matte. Click. Okay. Now click on that folder. We're going to add
photos to it now. So click this bottom button in the bottom right to add photos. We're going to
choose from files. And then on your
files you're going to find that mobile folder. Open that up, and to
select all of these files, click the three dots in the top. Click the Select button, and then go ahead and
select all of the files. Each of our packs contains
about ten presets. Then click Open. These will populate into your
album that we just created. And you can see a preview
of what these photos are. Presets will look like. Now one thing I noticed is that the order of these photos is not always correct in terms of the order that we've
named our presets. To view them in order, it's very helpful to click the top three buttons
in the top right. Click sort by filename. And then the view options. If you don't have photo info on already and show overlays, click Show overlays
and make sure the photo info is highlighted. Now they are in the
order of the filename. The way that we've created them, which we try to order them in a more logical sense like all the black and white
presets for this pack, for example, are at the end. So the next step is
to go individually. Open the photo, select the
first photo, for example. What we're going to do
is basically create a preset from this photo. Click the three buttons
in the top again. Click Create preset. Under User Presets, we're going to create
a new preset group. Click, Create New Preset group. We'll call this VS flat matte or whatever you want to call it. Click the check mark. That's going to be, we're
going to put these under a group now and then just
create a name for it. You can name it
whatever you want. You can follow our
naming conventions, flatMap one, and then
click the check mark. Alright, so now let's
go back and find a different photo from our
library to practice this on. You would have to
repeat this for all of the photos in that folder. But now let's just
open up another photo. Here's a photo of my kids. We can go to the presets
button down here. And now we have this
VS flatMap album or folder of presets
that we've created. Click on that, and
we have flatMap one. Here's an example of
where we would have to adjust the exposure
of this preset. So click the check mark. Now because this is
non-destructive editing, we can go in here and we can edit any of these
other settings. That's how you install and use presets using the
Lightroom mobile app. Like I said in the beginning, it's much easier
to do this using the Lightroom app on a desktop. But at least there is an option. So just a reminder, you'd have to go through
each photo again. Go back to our albums. We're gonna go to VS flat mat, open up the second one, and from there, do
the same thing. Three dots. Choose
Create Preset. And then from there you'll
see under Preset group, now we have the BS flatMap group that we could add this under. Alright, that's it. I hope you enjoyed this tutorial and I hope you enjoyed the presets that
we share with you. Cheers.
53. Preset Pack 1: Flat Matte Style: In this video, I'll show
you the flat matte pack of presets and I'll
walk through how I would use these on
a number of photos. So if you haven't gone
through and install them yet, go ahead and do that all the editing in Adobe
Lightroom Classic. But the same techniques apply if you're using the cloud
or mobile versions. Here you can see that I have this package installed
and I can go through and hover over
each individual preset. In this pack there are 11, there's four black and white
and seven color versions. And what is flatMap? What were we trying to do
in creating these presets? That flat matte
look is where you bring up the
shadows, the blacks. And so you don't
really have a ton of contrast in the photo. It is exactly what we call a
flat profile of flat look. But all of these presets
are very different. So let me just highlight, hover over and you
can see this is a big bold bright photo. This was from wide key, key from several years
ago when I was there. You can see that as
I hover through, it, adds that little
flat matte look. But the colors change. And not all of these presets are going to look great on
all of your photos. I find when I'm using presets that when I download
a pack from someone, I might find one or two
that I really like. And that's the beauty of using presets so
that you can kind of come up with your own style or while take a style
from someone else. But that being said, you can always edit
all of the settings. So for example, this first FlatMap does not look good for this
particular photo, and we'll try to find a
photo where it looks better. But I'm really digging
some of these other ones, like 2345, that gives us
kind of like a vintage vibe. Now when I apply this,
if I click on it, you'll see that all of our settings over
here have changed. We've gone through
and changed a lot of different things for all of
these different presets. Not just your basic exposure and white balance and
that kind of stuff, but down into our color, especially in our HSL panel, you'll see that we've adjusted
things like hue saturation and luminance of
different colors for all of these
different presets. And depending on the preset, some of these other settings as well, including color grading. It might be something that we chew use for creating
that preset. So you can always go
in here and change it. For example, if we like
the basic look of this, but maybe we want to warm it
back up just a little bit. Go ahead, change the
temperature slider. This photo is relatively
exposed well for the situation, but there are times when
you slap on a preset, for example, this
one which I don't think looks great for
this photo at all. It's desaturating
a lot of colors except for this bright
pink floating right there. But that being said,
it's just dark. That's the problem
with this preset for this particular photo. Maybe increasing the
overall exposure makes it look a
little bit better. That's actually a
pretty cool look right there, I would say, when you're going through
using these presets, make sure that you know, you can make adjustments. Of course, that's going to
change the look of the preset. So if you're trying to come
up with one specific style, you want to stick relatively to the colors and the saturation
and the HSL adjustments. But basic exposure
and things like that, those are sliders that
you might need to adjust. All right, so let's
go to another photo. Let's just go to a
completely random photo. Here's a photo. This
is not a photo I took, this is just a free
photo I found online. So here's an example
of where flatMap one actually looks pretty good
for this particular photo. As a lot of drama, I might brighten it
up still just a bit. But it looks pretty good. Now if I hover over
these other ones, you can see again just the
style that this is going for. I'm betting that
some of these flat matte black and white presets Looks pretty
cool for this photo. So if I click on this one, notice how our exposure was the same as our previous edit. Just in case that doesn't
look good for you. You might want to just
go through and reset your edit down here before
you add another preset. Depending on how
they're created, sometimes they are layered
on top of each other. And if there's not a setting
that's been adjusted for the new preset that
you're trying to apply, your previous adjustments
might still stay here. I like these black and
white ones for this lion. Let's go to another photo. Let's go to this one. This is my lovely newborn
LWCF when she was born. Flatmap. Here's a great example of flat mat one looking
really cool. I love the style of
this for this photo. Some of these other ones,
maybe like four or 56, the one that looked better
for that Hawaii photo. Not so great. Here's just a typical standard
photo downtown San Diego where I live. And it's got sort of a
quaint little downtown. This photo itself, not
terribly great photo, but it kind of shows what
the downtown looks like. But I think these flatMap styles might look pretty
good for this photo. Some of them have a vintage
sort of film type film vibe, especially with the colors. And this might be example where some of these are
just a little bit bright. So we might need to
bring it back down our overall exposure to get
it to a decent exposure. That's pretty much
what this pack is. I hope you enjoy it. You can download it
in the lessons are on the course page here and install it if you
haven't done so already. And make sure you
refer to the video on installing it so
that you know which files too use
because we have both the mobile and the
desktop version files. Thanks so much. I hope you enjoy
this flatmap pack. And if you use these
presets in any of your photos and you post them
anywhere like on Instagram. Please tag us in your photos. I'm at Phil Webinar and find us at video school online as well. Thanks so much and I can't wait to see what
you do with them. Cheers.
54. Preset Pack 2: Street Grunge Style: Hey there, this is a new video school preset pack for Lightroom called
Street grunge style. Let me just walk through a
couple of these presets, talk a little bit about them, applying them to
some sample photos. And you can of course, find all the files
in the downloads of the course to
play along with. Here you can see we
just made some fun grungy style photos
playing a lot with color. Gardeners, dot presets,
that is playing a lot with colors to make your street
style photography pop. Now of course, with
all of these packs, you can mix and
match some of them. We call it street grunge, but maybe it's
gonna look good for a portrait that
you're looking for. This one is a kind of cool, vintage retro vibe going on. And as you can see with
all of our presets, there might be some
that worked for our particular photo
and some that don't. For example, some of
these street grunge ten is a crazy Edit. Click it to apply and you
can see that the colors completely desaturated except
for some of those yellows, a little bit of the greens that might work for some photos, but it doesn't really
work for this one. Now, maybe for this one we
bring up some of the shadows, we bring up some of the whites. So it's not completely
crazy with that backdrop. There's some other edits
that we can make as well to make this look
potentially better. But that being said, play around with them. Here's a cool shot that
I'm playing around with. Another example might be, let's go find another
street photo. So basic street photo. Apply one of these presets
and it gives it a nice five. This one brightens things up, highlights the
reds, lots of sort of desaturated tones
and then some reds. This one a little bit of
a greenish tint to it. This one was that retro vibe brings back some of
that, those blues. Another one that's sort
of a bit contrast year, but again brings out those reds. This one brings out
some blues as well. And here's that crazy one,
this one, total crazy style. Maybe what you're looking for. I think for this one, when we're not looking at the skies, it looks a little bit better. Sort of looks like a POC
delivery, apocalyptic scene. Perhaps. That's one more example. And then let's just look
at one last example. Let's just apply
this to a portrait. So here's the standard
portrait, basic edit. Even the street grunge
portrait presets can have some nice looks like
for this one I love five, I love three, warms it up. Some of them D saturate the skin tones a little bit too
much for my liking. But it might be
something you, yeah, ten does not work for portrait, but it's something that you
could play around with. I hope you enjoy the street
grunge Style presets. And as always, if
you're using them or any of our presets
tag us on Instagram, let us know and we would
love to share your work. Thanks so much.
55. Preset Pack 3: Bold Contrasty Colors: Here is the bold contrast
and colors preset pack. I'm so excited about this one. We've got ten presets that are going to make your colors pop, make that contrast,
contrast ear. And really make a
lot of your photos just pop with a
little bit of extra. Here. I'm just going through
some of these presets on this great photo of
Yosemite Valley. And you can see the
different styles we play around with the colors. So some bringing out
more of the green, some bringing out
more than read, some bringing out the blues, some giving the different colors a little bit of a
tint or a change of hue to play around with it and give it a
little bit of style. I love just the number one. This is sort of the go-to. If you're just have a great
nature wildlife shot, just want to make it pop. These are also going to work for other types of photos as well. So say we have this standard
portrait right here. I think the flat matte look, looks pretty cool and we have that preset pack
for the flat mat. But some bold contrast
is also a cool look. And sometimes if you think, okay, this looks pretty cool. It's sort of a grungy, looks sort of too contrasty, but maybe we want to dial
it down a little bit. And of course, some of
these aren't going to work for certain portraits. Skin tones are very
difficult to work with, and you don't want
to play around with the colors too much. So that's where you can dial
back and adjust the sliders. This is a great starting point, but it's a little
bit too bright. The highlights are too bright. Maybe we're going
to just bring down the saturation just overall, you can play with all
the individuals sliders. It's a starting point. It's not a one-click fixed
for every single photo. I would say these
pack definitely is more for the nature shots. Here is a sunset
shot, raw, unedited. I shot this down in insipidus, California, Carlsbad, actually. You can see that it just
makes the sunset pop. That one gives it a
little bit of a pink hue. So very cool preset pack. And again, a starting
point, say here, a little bit like the colors, maybe it's still a
little bit too dark. So let's just bring
everything up. Let's bring up our shadows. Maybe bring up our black point so we can see a little
bit more information. Still, if you're using this
preset and you're trying to get a cohesive vibe
across multiple photos, use that preset as
a starting point. If you're making just manual
adjustments to the exposure, your photos are still going
to have a very similar vibe. And that's looking
pretty darn good. So this is the bold contrast
colors preset pack. If you're in the class, you can download it from the resources of the
class or of this lesson wherever you find
those resources on where you're
taking this class, enjoy if you're using
them and you like them. Let us know togas on Instagram, we'd love to check out your
photos and share your work. Thank you so much and we will
see you in another video.
56. Preset Pack 4: Light & Airy: Here is another video School
Lightroom preset pack. This is called light and airy. And I'm just going to
sort of shuffle through some examples of what
these presets look like. Give you some advice on how to apply them to
different photos. Light and airy. This is meant to
make your photos bright, bright and light. Have that area vibe. Sort of like a bohemian
style that you see a lot starting out with
a photo similar to this one that I shot up in
carpentry area, california. It's already a bright photo and you can see there's
just a variety of different ways that we
created warmth, coolness. Some of them we brought
up the highlights, some of them we made it
a little bit flatter, brought up the blacks
and the darks. Here's another example. So here's a photo of, let's see, here's another photo of me and my daughter with her
little tiger hoodie. This one already
died, bright light. And it just sort of
adds to that vibe. Newborn photography, some food photography,
maybe like baking. This is a great example of where this type of style might help. With that. Let's go to the newborn shot
that I have as an example. Here you can see it. A lot of those sort of
like oranges, red tones. Really great for skin tones, softening some of
those skin tones with some of these give them a little bit of a
warmer tone, but some warm. A little bit of greenish, a little bit of magenta
ish, some yellow. Lots of different
styles for you. Here's another example. Let's take this
portrait right here, this family portrait, already a bright photo and it's
just going to enhancer it, enhance it and saturate
some colors desaturated, others sometimes for portraits depending on the skin
tone, it's not gonna work. Air set every seven. This looks great
for this sort of gray enhances that yellow
warmth of the sun. It's just going to depend. Now for darker photos, let's take just one of these
darker photos, for example. Let's go with one like
Here's a landscape photo. Let's see how it applies. It's not going to necessarily
make it that bright, airy, Bohemian style, but it might work for you for these photos. I don't think that
this is the best pack for nature and landscape Though. I think it's better
for portraits, newborn interior, perhaps
like real estate. But I'll leave it up to you
to play around with it. So this is the light
and airy pack. You'll see it in the
resources of the lesson or the course wherever you
download those resources. And I hope you enjoy it. If you do, please use them, please tag me at
Phil Webinar and our video school profile on Instagram or wherever you're sharing these photos so
we can check it out. Share your work as well. Thank you so much and enjoy.
57. Preset Pack 5: Vintage Vibes: Welcome to another free
Lightroom preset pack that we're giving out
with this course. I'm so excited to announce
the vintage vibes pack. The vintage vibes pack is
one that sort of emulates different old film stocks
and gives that sort of retro feel for portraits
and for pictures of people. It's a super fun and exciting pack that
I'm excited to share. As you can see, I'm
just running through some different examples
of what this looks like. It has ten presets. You can use it with any
version of Lightroom. Of course, all of
the information for how to install them
has been given previously in the course and
you can download them in the lesson resources or
in the course resources. Wherever you download
resources for this class. It's a great pack
if you're doing like sort of classic
vintage stuff. If you find a cool
street shot like this, of this old train depot that we have in our hometown
of Sandy, Ms. California. It gives a very cool
vintage vibe and all of these presets are
completely customizable. So you liked the
colors in this one, but maybe those highlights
are a little bit too bright. Let's bring down the
overall saturation a bit. And you bring down those whites, bring up those shadows. Everything completely
customizable after the fact, that's what makes these
presets so awesome. Here's a cool picture
of this clock tower and little clock,
not related towers. Big clock. As you can see, some look a little
bit teal and orange. Some have a little bit
more magenta, some, some deep blues, all
kinds of styles here. This is a fun one. I hope
you enjoy this pack. If you do, let us know. Let us know if you're
using these presets for your photos wherever
you're posting them. And if you haven't done so, take a chance to leave
a review for the class. No matter what the
rating is, good, bad. We love hearing from you. And we just enjoy making
these presets for you, giving out more bonuses to try to make this
course even better. Much love and joy the pack. And we'll see you
in another one. Cheers.
58. Preset Pack 6: Desaturated Colors: Phil here with Video School. Thank you so much for watching this lesson of the
class where we are announcing in launching the desaturated
colors preset pack. This is a pact that might
not be for everyone, but I think it's a
pretty cool style. So desaturated colors. What are we doing with each
of these different presets? We're basically
dropping the saturation sometimes a little
bit in just one area. Like for example,
this one desaturated for it D saturates the blues. Then in some were just
going crazy with it. Like some of these 78910
are pretty intense. Nine d saturates
everything but the blues. And so it's not
always going to look good for all of your photos. You just got to play
around with it and find the one that's
right for you. If you are in the class, you can download these
from the resources of the lesson or of the course
wherever you find those, those downloads, let
me find another one. So here's an example. Even with people, it's
kind of a cool style. Drops the saturation. Some are more
contrast than others. Some have a little
bit of warmth, some are a little bit cooler. Lots of Brown's
desaturation going on. And so for this example, desaturated ten works in that
other of the Eiffel Tower. It didn't work so much. For this photo, for example, this is a bright neon, lots of colors here. And you might be like Phil, why would I want
to desaturate it? Well, maybe you want a D
saturate some of the colors. Maybe it's just a style
you're going for. For number four, this one looks
pretty good for this one. I like that one a lot. Let's see what
some of these more intense ones look like for this pack gives completely
different hues. You can see, look
at that blue sign. Maybe you don't
want to see that. Maybe you're going
for this style. So this is a very fun pack, not going to be for everyone. I completely understand
night photography. This is a pact that might
work really well for night photography
because there's not a lot of colors that
you're seeing perhaps. And so it's really just playing with the
tones and things. The overall exposure to the
different parts of exposure that is going to give your
photo a good or bad style, whatever you think
about this pack. So if you have downloaded this, if you are using it, let us know what you think. Tag us on Instagram at fill
up near App Video School. And also if you haven't done so, hit that Review
button on the course. We love hearing reviews from our students no
matter what you think, good, bad, beautiful, ugly, whatever it is,
We appreciate it. Thank you so much and
enjoy this preset pack.
59. Preset Pack 7: HDR Nature Pop: Phil here with another
Lightroom preset pack, HDR, nature pop. I'm going to run through
some examples of what this might
look like for you. But basically, it is just
making those colors bold. It's making the
overall exposure of your photos just
relatively not flat, but just make everything
exposed pretty well. And so this is a good example of a photo where you can slap on this HDR nature preset pack
and get some nice, cool. Looks like number ten
is to an extreme. Maybe that's why
you're going for, if that's too much Dalit back with one of
these previous ones, eight is sort of a softer
version of number ten. And they have different
hues and tones. Some of them D
saturate, some colors, some of them do you say
out traits, others, some are a little bit cooler, some are a little bit warmer. This is going to work great for those nature shots for
wildlife where you're really just trying to take a photo that doesn't have
a ton of color in it. Maybe it's a raw
photo like this, the sunset and ban
at a little bit of life to it with this pack. Obviously, not all of
these are going to work. This magenta sunset
doesn't look great to me, but maybe that's
going to work for another photo of yours. This number ten, go crazy with it if you want to be
just psychedelic, That's where you're at. Number ten. Let's find
one more example. While I talk to you, here's a good example, not a nature shot neccessarily
nature architecture, but this is a pack or a preset pack that might actually look
pretty good for this. Photo. Sharpens things, makes
things super contrasty. And I kinda dig it. That's
a pretty good 110 or nine. That is, I'm actually
really dig in it. That's almost better than
the edit that I did of this photo that took me like
several, several hours. Let's look at this peacock
bringing out those colors. Hdr, look the cool blue one. That's gonna be one. If you use number
four, let me know. You'll get a prize. Hit me up on his crime
and let me know when you when you use HDR in nature, preset number four, that
one's pretty unique. Eight's pretty good,
brings out those greens, those blues, lots of cool stuff so you can download it
if you're in the class. Obviously you're
watching this video. You can download it from
the lesson or resources of wherever you're
downloading on the course. And all I asked for an
exchange is good vibes. And if you have time, leave a review and a
rating for the class, good, bad, whatever
doesn't matter to me. I just like hearing
your thoughts. Tag is on Instagram if
you're using these, Alright, Enjoy this pack. Make your nature photos. Wow. And we'll see you
in another video. Cheers.
60. Preset Pack 8: Black & White Presets: Phil here with another
Lightroom preset pack. I'm really stoked
about this one because I love black and
white photography. And here you can
see some examples of what this pack might look like using my sister's cute pup, maple for this example. So you can see a
variety of styles. Some like 67 are super
flat, super flat look. Others are more contrast. Makes your brights
brighter, darks darker, but just a completely
different range of looks, all in black and white. So if you'd like black
and white photography, this is a great pack
for you as always, you can download this
pack from the course, from the lesson or from
the course wherever you do downloads and enjoy it. If you use this pack
and you like it, make sure if you're posting
on Instagram to tag us. We'd love to get
those tags so I can share your work with the world. That's part of learning and growing as a
photographer nowadays at Phil Webinar and at the
video school page as well. We'd love to share your work. And if you haven't done so,
leave a review for the class. Those help us encourage us to make more freebies like
this to add to the class. Now it doesn't matter if you
do a good or bad review. I take all of them,
so thank you so much. I hope you enjoy
this pack and we will see you in
another video. Bye.
61. Preset Pack 8: Tropical Teals & Oranges: Hey, there, here is
another preset pack, the tropical vibe,
Orange and Teal pack. This is all for that
specific sort of orange and teal vibe or
style that you see a lot of, not only in photography, but also in filmmaking, where you're making
your greens a little bit more teal or your blues
a little bit more teal. And then also pushing those yellows and
reds into the orange. And so here, as I run through, you can see some examples
of what this looks like. This number three looks
really cool for this photo. Lots of greens are
golds and tails. They're going on some a little bit more contrasty than others. You can find these presets in the downloads of this course, and so check those out. You get it for free as
a member of our course. And we're just so excited to
be able to provide presets like this that might help you
speed up your photography, give you some inspiration. I know Preset, we are always fans of presets
because I don't think it's a great way to say that
you're a good photographer by slapping a preset
on your photos. But I do know that there's a
time and place for presets, and that's why we're going
through creating presets for you to give
you those options. If you're using these presets, let me find the photo. This one, it's really, I think better for
the nature scapes. It doesn't look great on
portraits of people because I think it just makes skin tones a little
bit funky sometimes, but like this one, it's
generally a good shot. This is in Y key, key, but the colors don't give off that tropical vibe
that you might want. So slopping on one
of these presets, it makes that sky and the ocean a little bit
more of that blue or that teal that you
might be going for him. So I think that's
where this works best. You can see this example of
the photo of me and my wife and our twins way back
several years ago. It's crazy when we
went to Hawaii. It looks a little
bit of funky. Now. Some of them might look a
little bit better than others, but I think in general that the colors for skin tones
doesn't look great. But for ocean shots
where like this, where you're just trying
to give it more of that tropical flair might
be the perfect option. Alright, thank you so much
for watching this video. If you're using these presets, make sure you tag
us on Instagram and also leave a
review for the class. We'd love to see what you
think about the class, even if it's a bad review, whatever, we just like
hearing your thoughts. Cheers, thanks so much and we'll see you
in another video.
 Phil Ebiner, Video | Photo | Design