Transcripts
1. Class Introduction: Hey, guys. And welcome to my lesson on how to edit your audio in Adobe Audition. In this lesson, you're going to learning how to correctly edit audio. I'm going to also be showing some common audio editing myths. Stakes a swell as giving tips on a smoother production process when you're recording audio on the final segment of this lesson would be how to tie it all together for that sport. Super excited Teoh walk guys through the steps that I take on without further ado. Let's get started, Thanks.
2. Common Audio Mistakes: So in this lesson, I want to go over some of the common audio editing mistakes that people tend to make when editing audio. I've been guilty of some of these myself. So I'm telling you this replace of understanding and experience and from a place of I don't want you guys so waste time like I've done and waste so much time on certain projects because I wasn't really sure how to apply the best techniques to get the best results in the dopey audition. So I'm gonna be going over my notes, and the 1st 1 is Ah, lot of people tend to think that the normalized effect in any audio editing program is like , you know, the bread and butter, and you can just do that and apply that your audio will be fine. Normalising tends to work best for radio applications, as normalising tends to take the higher frequencies in the lower frequencies, and it does its best to match them. And even though it does a pretty decent job matching them, it doesn't always preserve a lot of the quality, and you end up losing a lot of quality when you choose his option again. It's best for compressing your audio and getting it down to a smaller, manageable size on, of course, bringing the levels up and equal. But you're severely sacrificing audio quality to be able to do that. So I would recommend if you're going to do something like that in a minute. So mainly radio use. And if you have to do for your productions, just know that you're going to be using some audio quality in the process. The next audio editing mistake that I want to point out is not having compressing being the final thing that you do in your production. Compression should be the final step, because with compression similar to normalizing, you're basically compressing everything together and getting into a point in which that's going to be the final output that you want with your audio. So for compression, you really don't want to compress and then do something like equalizing because you're going to be further affecting the frequencies of your audio, and it's going to result in a more like the loss of quality and, like a more you know, not not as a good audio quality and more 10 year sound in the audio is not gonna sound as good and rich and cohesive, because with compression you're already compressing the file. So it makes sense that if you apply any other applications after that, you're going to further be diminishing on the frequencies and quality of that audio. So definitely compressed asked. And of course, even if you're going to normalize, normalize first and then compress last, you always want compression to be the last thing that you do in your audio productions. Another audio editing technique that I want to point out pertain specifically to Adobe. Audition On that is using the noise reduction toe as the BR and all tool for noise reduction. The noise reduction to It's a super awesome to buy Adobe Audition, a super intuitive, and it gets the job done in most situations. But I've personally worked on projects that it did not do the best job on. I had to seek other means of getting my audio cleaned up, such as the reverb tools or the dynamic CQ tools because of the noise reduction process, no matter how many times I thin angles and played around with it did not bring me the results. I wanted. And that's because with the noise reduction tool you are, you are sacrificing. Um, you're basically sacrificing the dynamic frequencies off your audio. So even though you may be successful in removing certain background noises and sounds, you're sacrificing quality, specifically dynamic frequencies in the process. So I definitely recommend it is a great tool to you. Three. It's turning out, but don't think that that's gonna pi toe all situations. They're going to be certain situations, no matter how good of audio that recorded that, you're gonna need to apply certain other tools and tools like the River Tool, where the dynamic e que tools, um, look far better in certain situations in reducing ah, background noise and audio. The next lesson. We're going to go ahead and continue on with cleaning up our audio
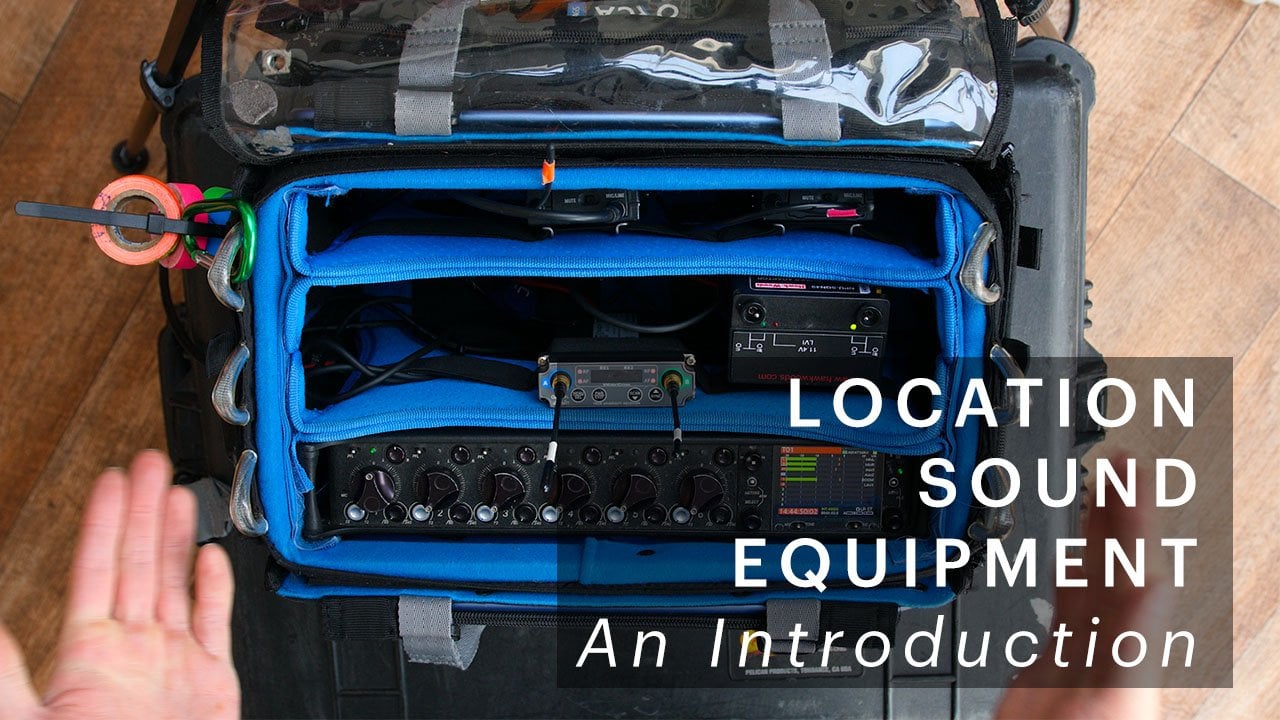
3. Recording Tips: Hey, guys, I'm not going to go ahead and just give you some tips on a smoother production process. This will help you, you know, just save so much time and posts because you don't want to be like doings in an intense amount of work and post. You want to keep posts as minimal and as least time consuming. It's possible because post editing is already a time consuming process, so you want to make it easiest possible. The first tip, our suggests, is toe. Stay silent for the first fire to seven seconds before and after you recall the audio. You want to do this because if you're if you don't have any sort of like silence, which is a K a room tone. In this situation, you won't have anything to be able to sample to remove any distracting background noises, clicks, beeps, noises. You won't have any sample to go about to apply that editing, and that's why it's so important to be able to At least I'm not talk for the 1st 5 to 7 seconds before and after you're you start speaking ideally or the speaker in your oppressions. You also want to make sure that you drink lots of water and he also have water for your talent. The person that you're either interviewing, um, collaborating on a podcast with or, you know, for your own productions, you want to make sure you have some water handy on you because it's something that you don't think about when we do a lot of talking or voice tends to with our lips, you know, especially tend to dry up, and you want to make sure you yes, they have hydrated as possible because the more high video you are from, the better the better, the better your voice is going to sound. It's not gonna sound dry. Second sound crackles. Gonna have that rich voice, and you're gonna not cringe when you hear yourself in post that. Their tip, I would actually suggest is to do some deep breathing before you start recording. And no, this is not a meditation video, but it's super important to do some deep breathing before you start your audio. Because when you when you're breathing fully, especially when you inhale and exhale, even being deeply, you're giving your voice that power to be ableto have presence and residents when you're not really breathing and you know either holding your breath because you're nervous or you're just breathing out a lot and you know, you just get in the air up. But it doesn't really sound too good. We do this even unconsciously, especially when we're in front of the camera, especially when we're being recorded. We tend to tense up, and your voice is not going to sound its best. And no amount of audio editing is going to make a sound more richer and more resident. Then simple, deep breathing. Before you start recording, make sure that your laughed Mike and this is a laugh. Mike. Right here. Make sure that your life, your laugh Mike is as close to your mouth. It's possible or is close to the speaker's Marcus possible, and you want to make sure that it's not intrusive. So I put this under my shirt. I It's not like just Dan going around. I put it under my shirt off. Of course, the perfect interviewing or yourself. You just want to make sure that they're comfortable, so if they want to put it on themselves, they can go ahead and do that. But you want to make sure it's, um, not intrusive if it's a video, if it's in Justin audio podcasts and feel free cause, nobody's going to see it. But if it's a video, you want to make sure it's as close to the mouth as possible for both podcasts and videos and for video. Specifically, you want to make sure not in the way afraid. I used the focus right audio recorder and an audio recorder basically acts as a sound card fear computer. So, for example, when you finish all your audio recording, you go to be standing those files to your computer right well before you send those styles for your computer, whether you store them on an SD card whether you shot them on your phone, you want to make sure if you want professional quality audio that you want to make sure they using some sort of sound card because that's going to give you the best quality for your audio. And when finished recording, this is super important. Always export the files as Dot way files never export the files of anything other than that , because that's going to be the original foul that you're going to need for your audio. That's basically the source file the most the file in its most natural state. You don't want to alter that, always exported as a dot way foul. And then when you're finished editing, you could converted to MP three, but not before Okay, guys, let's move on to the next lesson.
4. DeNoise and DeReverb Tools: Okay, So now I went ahead and opened up a project that I'm going to be walking you through the steps on house who properly clean up the audio. So this is a video that ah, friend of mine did. She just went ahead and started a new vlog on her YouTube channel. And she really needed help with editing the footage as well. That's the audio together now, for the remainder were basically for the for the majority of the project. The audio was fine. The order level sound pretty good. But this last section right here, you can hear some rumbling. You could hear some stuff in the background. Just gonna go ahead and play that for you guys so you can see what I'm talking about. And they obviously from the on medication, because they so I don't know if you can hear that, but there was some rumbling because occasion because And throughout the video, you hear more examples of that. But we're just gonna be focusing on this part for now. And so the first thing I'm going to do is I'm going to, um, click on the audio. The audio file. I'm going to right Click on that. I'm gonna click, Edit Clip and Adobe Audition. So already have it opened up in Dobie auditions. So we're just gonna go over here and this is gonna be the clip right here. We're gonna go ahead and play that again. Just take these effects off, because but the volume a little higher and you can hear that rumble a little bit more clearer. It's like, really in the way of like, getting the message that she's trying to say because the rumble is so loud way basically want to reduce that. And there are a few ways to this first and foremost, if you don't have the play had automatically New Ping, that's the easy way to fix that. I wouldn't write down here on. I went ahead and just clicked. Lupe blue playback by the fault is going to be like this. And if you just go ahead and press play, which I'm pressing the space bar for play, then as you can see right here, the play head is just going to keep going on and on. But what I did was I went ahead and pressed new playback and that enables of the selection that I selected to be continuously played back and forth, like so medication. Because medication, Because medication. Because so you basically you can have it new back and forth. And you don't have to keep re selecting it, which is pretty, which basically comes in handy. So the first thing we want to do is we want to get rid of that. That that rumble that we heard an audio. So a lot of resources will tell you to just go to the safe, for example. Go to the beginning. Go to the beginning of the of the audio, select a silent portion. It's pretty quiet when I'm really here. Too much goto favorites. Sorry effects. Um captured voiceprint press. OK, we're gonna de select Go back to that selection a lot more sense in they are be select the selection again. Make sure its own loop so we don't have to keep selecting it. And they obviously for me on medication go to effects, noise production, the production process. And here you can obviously pay around with the noise reduction. And usually what is suggested is you go down here and you you play around with the Spectra decay rate. You play around with the precision factor. You can play around with a few different things. So let's just go ahead and see what that sounds like. Yes, and they obviously for me on medication, because just go ahead and make this 100. This is the noise reduction, by the way, and they obviously for me on medication, because sounds about the same. Let's play around with reduced by, which is right here. And they obviously for me on medication, because in they obviously medication was about the same. You can still hear that rumble. You also have the advance sentence down here to our spectral decay rate, and they obviously Camille medication 100 when you put it low because this advice you put it low and they obviously from me on medication because and they obviously for me on medication, because it's a little better, but you can still hear it. You can go ahead and change the smoothing if you want, and they obviously for meal medication because and they obviously for meal medication. So you can basically still hear the rumble, not the noise production to Is this like a really fantastic tool. It's really good. I personally used it myself a dozen times, A calmness times on different projects, and it's a really good tool that Adobe Audition offers. The only problem I find with it is that is not a be all solution. Like a lot of things you have to keep playing around. I you have to really see what works, because what may work for one project or one audiophile may not necessarily work for all of them. So I find in situations like these like this, I find the A noise reduction process tools to not be the most efficient. It's worlds in the past for me in different situations. If I just wanna overall just kind of remove any, like, lingering background noises in the audio, then it works fine. You know, it works like a charm, but with certain situations, like fists, I can still hear like a rumble. And that's why I don't want to just use the noise reduction process for everything. Just gonna go ahead and we're going to undo that. Sure, yeah, So we're just gonna go ahead and go back next thing on this pretty popular and I've tried before and it depends on the situation again is actually looking at this of thing in the bottom here. So when you open up auditions, sometimes you just going to see the green, the green way form. But if you select this well, you our changes right here you left click, and then you just drag it up. You're gonna start to see this like infrared red, sort of like wave form of you. Now, this is just another version of the view. And if you just go ahead and play it score having to make that selection ago me on medication because and because zoom in making bigger this is a very good tool for really zeroing in on what's going on in the background of your audio. And a lot of times, if you want us like specifically target something, then you're gonna go ahead and, you know, open up this infrared view and you're gonna make the changes. So, for example, I can also click this right here, which is the marquee selection tool. Or better yet, I could also click the spot healing brush tool look like anywhere. That's the select click where we hear the rumble the most, which is about right here. And we could make a selection, left Clegg and then just kind of like painted in. And hopefully that removes some of the background noise. Let's pay that back. Okay, so you see, that sounds really scary. Her voice sounds distorted. It doesn't sound natural. So let's command see that. Let's undo that. And we can also select the square, the more key selection right here, and try to even targeted further as the one more And uh, maybe this right here. Let's just go ahead and just like this top portion and then that's hit. Delete. Now let's take a plate again because that sounds even worse because you can sound. You can hear the rumble more and her voice sounds super distorted. So let's just undo that, because you can see these applications work for certain situations. Personally, they have held me in turn situations in which it has been a beep and the clique that has been isolated. So let's say, for example, somebody's talking and you hear that B. But you don't hear that beep rather talking. This has been a super good tour because it has allowed me to isolate. But in this situation, as you can hear, she's talking and the rumbling is happening because so that's gonna make it a little harder because we can't necessarily target the the rumble itself because she's also talking. And if we affect the audio that we're going to be affecting her vocal, which will really affect the recording. So what we want to do is we want to make sure that we get, um we want to make sure that we can limit the rumbling without affecting her voice. We want to keep her voice as clear and as present as possible without affecting her voice. So a really good tool to do that would be the de noise effects was gonna go ahead and click de noise so really good to through. That would be the de noise and the deeper the D reverb effects. These tools work reading well, and they were creedy good in conjunction because they're going to allow you to keep the vocals, but to minimize any background noise. So to get to the effect you can, you can either go appear about the noise reduction and ah, select the noise are the noise and the Reberg or if you're in the multi track. I'm sorry. If you're wanting to do nondestructive editing and you don't want to make any permanent permanent changes, they could just go ahead right here to the effects rack. Click the arrow. No introduction and go to Indy noise. Okay, so now this is gonna be the D noise right here. You want to make sure that it's step to custom, We're just gonna go ahead and play. Let's go back for a selection because this is awesome. So this is our selection. We have a selection selected, and we're gonna go ahead and talk will be effect on. You can already hear that. Meet a ton of difference. It sounds better. You don't hear the rumbling a strong and you could definitely play around with the week inside it up higher than 50 because because because because should be that doesn't sound too bad. We could even make its 100 no notice. When we get to 100 her voice gets super distorted. We don't want that. We want to keep her vocal sounding as natural as possible. So that's just scaled back. I think around 75 sounded pretty good before. You could still hear her natural dynamic range and voice and the room. But it's not a strong, and this is going to be all your levels right here. You can just go ahead and leave, as is custom is pretty good. And you have these options down here. You have the focus on all frequencies, focus on lower frequencies, focus on mid range frequencies, focus on lower and higher frequencies and focus on just high frequencies. I find focused on all frequencies to be the best applications was gonna go ahead and extend out. Take a listen, everybody here that sounds so much better. But let's go ahead and add a DVD purpose while to look that's going on affect the audio even further. So go ahead and we opened up. The reverb is going to look like this. This is going to be the window that comes up. Let's go ahead and press play. Yeah, yeah, yeah, yeah, that's was okay. Let's see if we can make some changes. Slide this spider up now She started to sound a little robotic, and that's something that we don't want to. Let's just bring this back down a little bit. Let's see below 50. That sounds over a bottle to let's try it in the sixties range because, Jim, because Jim because Jim because Jim, because let's go ahead and actually choose the default preset instead. And the default presets bringing us that 40 it actually sounds pretty natural. So the default works better in this situation. For the rebirth you have the outer gain onside right here. You can go ahead and uncheck that if you want and Mandy change the game. I'm gonna leave it at auto gain as is because I'm comfortable with the way it sounds and same thing, like the D noise you want. You just want to go ahead and leave it on. Focus on all frequencies. So let's go ahead and take a listen. Let's see what that sounded like before, so you can hear that difference is talking about back on again. Found so much better. And of course, if you want to do any more changes to the voice, you can go ahead and equalize it a little bit more, and that will allow you to make some small changes and in order to get to the equalizer. You just from the effects rack. You go ahead and you select filter any cube. You can go with a graphic equaliser. 10 bands keep it really simple. You can just play around with Jim because because because because Because because Because Because Because Because okay, so as you can see, removing audio is not a one size fits all process. What may work in some some situations may not necessarily work in other ones. That's why it's important to play around and see what works from what situation.
5. Export: So now we're at the export process of the lesson and this is a pretty straightforward process. It should be pretty fast. So we're just gonna go ahead and just play the audio again Asian Asian, Because I'm going to compare it to how it sounded before occasion because Asian, because Asian. But you can see we made huge improvements. You definitely don't hear us much rumble. The rumble has been significantly reduced, significantly reduced. So now we're gonna go ahead and just press apply. Make sure the effects right here get applied to the audio file and then we're just gonna go ahead and press command s on the keyboard. That's gonna automatic. Be safe. So since we originally linked this from Premier Pro, we don't even have to worry about saving this as a separate file. Once we saved it, we can go ahead and go back to Premier pro, and the far gets updated automatically. So that's pretty cool. So that'll be if we just linked from Premier Proto Adobe audition. But what if we actually didn't do that? And we just had the file as is? As I said earlier, you want to make sure that you exported five at the dot. Way far, that's the best way to go. So just go ahead and go to file export. You have some options right here. You're gonna support the file where we're actually gonna We can actually click this select command A which selects everything. Go back to foul export and we can either export the file individually, name it and then we can select a format right here, which is MP three or whatever the format we desire. But remember, this is what we choose after we edit it, you know? So MP three condenses the file makes it a smaller size. But the wave was the original file format that we wanted and preferred because that's the original source file. So anyways, you have that option. You could also go to file export, multi track mix down. We're in the way from view right now, so we don't have to worry about the mostly track. But if we were in the mostly tracked will goto file export multi track mitt down, multi attack. Sorry. Multi track mixed down and will have the option of I'm sorry. And we'll have the option of either exporting the entire session, which should be everything that we selected selected clips or a time selection. The time selection would be like what we just had. We had that little part of my friend just saying that little loop like this, that would be a time selection. The whole entire selection will be the command. A. This would be the whole entire selection, so that's just basically the difference. The difference is in those you want to make sure that they're exported correctly and again . After you have edited your audio, you can choose to condense it toe MP three format or any other file formats you choose. But again, remember when you get the fall into the program. Ideally, you wanted to be that way foul as that's the original, as that is, the original source.
6. Closing Thoughts: so thank you for taking this lesson on how to clean up their audio inability audition. I hope that these tips and tools help you create a tenner Fantastic presentation for your next audio production. Let me know if you have any questions in the view, and please feel free to review the class and let me know what you thought about it. And if you have any questions, feel free to leave your questions in reviews, and I'll be more than happy to answer any questions you have on. Also, if you wanna go ahead and just upload on 15 to 45 seconds up recorded audio you edited, you can upload a before and after so I can see exactly what you've done to improve your audio on that. That, in return, helps are the whole community. It was just post up and we know from each other. So thanks again for taking this lesson and enjoy the rest of your day.
 Yahir S., Digital Media Specialist