Transcripts
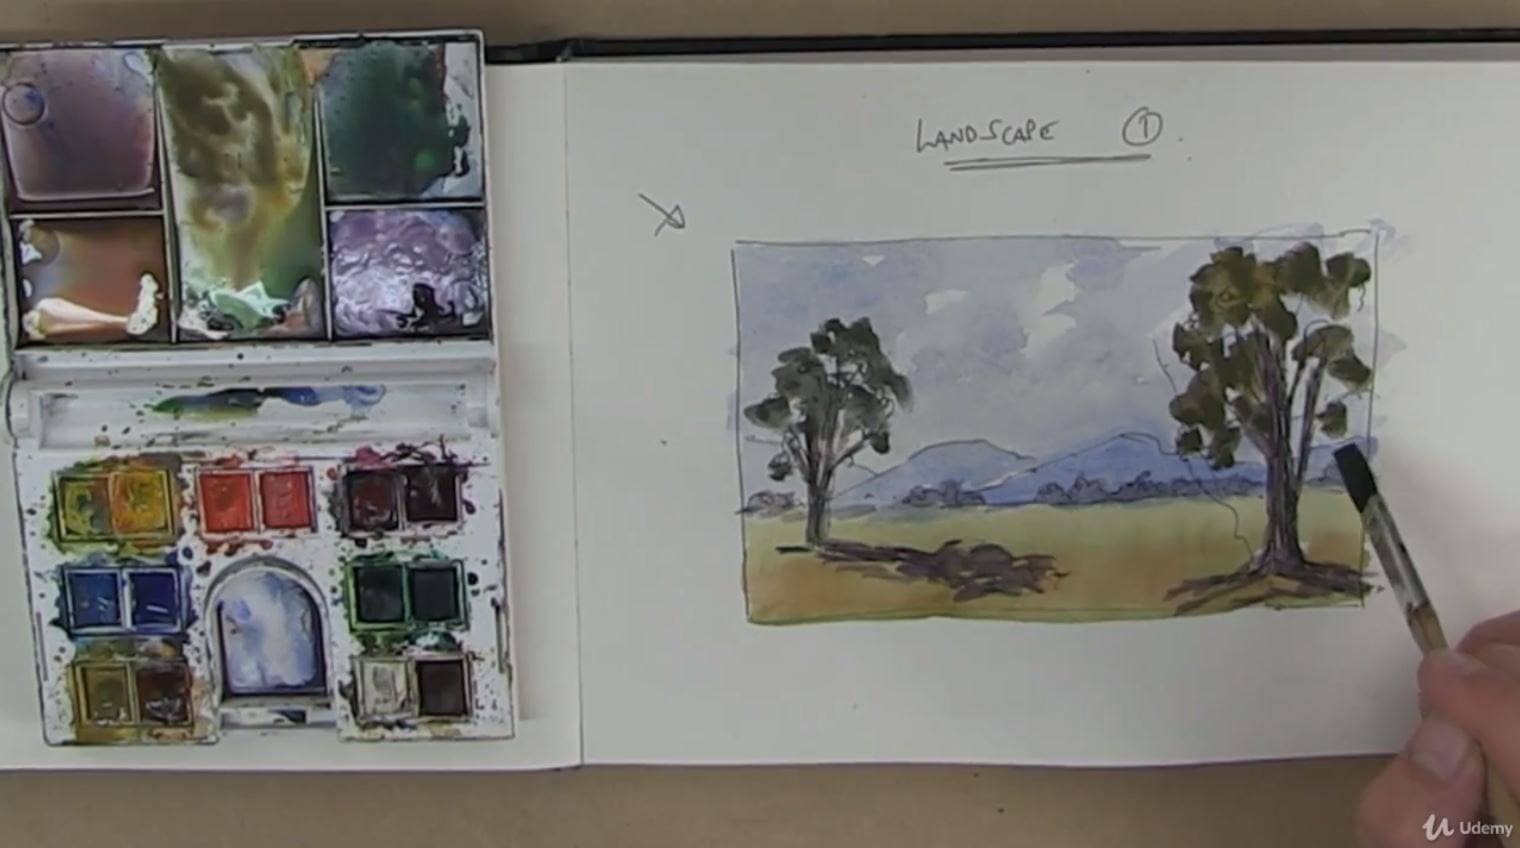
1. Welcome: get a folks. Welcome to acrylic painting techniques. The landscape. My name's Roquemore from or out school really excited that you're here in this course. What we're gonna do is break down the landscape and look at each of the different elements in a landscape and show you had a phantom on that way. By putting all the different elements together, you'll end up finding great looking landscapes by the end of this course. So we got a look at things like skies and clouds had a pint. Great looking skies we gotta look at have pipe mountains in the distance and rolling hills in the full graham. We'll look at the different tops of trees and get to understand the process of credit, realistic looking tree. And then we look at things like houses and bonds, manmade objects that you might find in a landscape. And then lastly, we'll look at all those little details that you might find also the landscape, things like fences and pubs, reflections in water, that type of thing, that really just those little details that really add up together toe finish off a great looking landscape planning. So it's gonna be a terrific course, we're gonna do it in acrylics. However, the same principles will apply in oils, and you could just as easily do this course in oils. On. This course is aimed at beginner to intermediate students who are really they're just starting out on their journey of learning to paint. Or you maybe you don't get a painting, but you're now looking to take your pain to another level by getting to know and understand the different elements in Alaska. I'm really excited to bring you this course, and I look forward to seeing your pilings as a result of guy through. There's acrylic painting techniques, the landscape cools, Let's get into it.
2. Paints & Colour Palette: First of all, let's talk about the pants of going to use. I'm gonna do this course in acrylics, and the branded I'm going to use is a brand called Apt Ilya Interactive Acrylic Pack. Now there's air professional grad paint, and I use them because they have a unique ability to be able to be rehydrated s. So that means you can work back into the pipe even after it's dried, using an unlocking former a little bit of water to unite characteristic. Because if you've done the work with the crooks before, you know, they do drive fast on once they start to dry, very difficult to do blends and things like that. So if you can't get your hands on the art Ilya Interactive acrylics, they're not highly recommended. Alternatively, I would get any good quality professional grand acrylic paint if you can afford it. And if not, then I student quality pine. But go for the best quality one that you can get in your budget. So in this course, we're gonna use a handful of callous on. We keep it really simple. We're gonna use ultramarine blue. We'll use a lizard crimson as that cool red who used yellow worker and Kevin M. Yellow. So we use basically four colors. Kevin Millar uses of boots too callous. I Primarily I use the ultra marine blue lizard, crimson and yellow. Iker is my three primary colors, my blue, my reading, my yellow. So you'll need those differently. But a cadmium yellow as a boost to colorful when we do our grains a bit lighter along the course and finally will use titanium white as a what so very simple palette keeps it affordable. And we didn't budget for most of us and me to go and get those colors. I'll put a list on if these videos are all the resources they will need for this course. So damn mind there's a pdf. You can gather the art supplies store and make sure you get the right parts, of course.
3. Brushes: Okay, let's talk about the brushes. We're gonna use it again. I like to keep things simple. I'm going to use just a handful of brushes. The 1st 1 is this one inch Jeffs I brush. Now this is a bristle. Hairbrush on gets a really good brush for blocking in big areas. We've looked to punch, but it's also great for doing trees and bushes because you can use the edges. Rough up the edges and it gives you really know suffix of bits of falling and leaves and grasses and things like that. So this is a great brush for landscape painting, right? So if you're doing a lot of landscape painting, which is what this course is about, then definitely recommend this little one into. Just brush there a couple of dollars from the out supply store so you can use them, throw them out and get another one, and not break the bank with them. So they're very affordable. But very, very versatile brushes well, and it's what we do A lot of panic within this course. Then we'll also use some flat brushes, so I've got a medium sized flat brush, and, as he considered a well worn or brush. Now get a good amount of use that on my brushes and I've got one. That slut gets smaller, so use the smaller one for maybe a bit more architectural. When we do buildings, houses, things like that, I use a small one on. I'll use the bigger one for bigger areas, like putting in grass. And so and then I have a little script liner brush in. This is a watercolor brush, and it's a nylon hair so the others are bristle here. This is nylon synthetic, and this is what we use. That little detail work. Little dashes, little lines, their branches on trees and fence posts. Things like that. So you want a little lawn of Russian. As I said, this is a a water kala brush made by neath, and there's different varieties of these. But this is a good little brush very handy and use this one very often, but we may use it, this course, and that's a little flat little fan brush. So this is a medium sized fan brush get bigger ones, but I only used every years of medium. I hardly use it in my general panting. But we will use a little bit in this course just to shave some different effects with truth and soul so that you got just a handful of brushes. So you want to get those get the pants in the medium's we're going to use, and then we'll get stuck into the next section. Which Israel about patents. Guys, I'll see you there.
4. Mediums: Let's talk about the acrylic painting mediums that we're going to use this course now, typically, when I punch. If you have seen me in my home or at school courses or my learned a packed club projects, then you'll know that typically, I don't use a lot of mediums when I'm painting. How about what we'll do in this course is I'll show you different mediums that you might want to use. And there's a particularly designed for the art Ilya Interactive brand. That depends on what brand of acrylic you're using. They will have their own mediums, but the ones that I use, the unlocking formula and a squirt bottle little water bottle. But what I do if I put three or four drops of the unlocking formula into the bottle filled up with water, and then I can squirt that onto the canvas when I want to rehydrate on blues from the pint up sucking blend back into whatever I go already got down the canvas so there would be a really important powerful game. Do the everything is with acrylic paint because it does dry fast. I'll even a sort of sub tropical environment, very hot and humid side. My pant will dry really quickly. And so one of the things you can use a medium is a retired. So what this does is if you mix this in with your Callum mixes as you as we mix them up, this will slow down the drawing time off your acrylic pints of very handy. I wouldn't use it everywhere, but perhaps in big areas like skies or water, things like that. This could be very handed to make sure that it stays wet long enough to work into it and get the result that you're looking for. And then finally, we have liquefying medium. This is, ah, Gretel medium to use. I only use it when I'm doing a little fine details at the end because what it does, you mix it in with the paint, and if the pints trying to draw off just a little bit, it can be difficult to work to get very fine details. And the liquefying medium. If you mix that in, will just help keep your paint nice and fluid so that you could do that. Little details with these little lines of trees and things like that become a lot easier with liquefying medium, so they're mediums that will probably end up using at some point in this course. However, as I said generally when I paint, I don't use a lot of medium. I tend to use the acrylics a little bit like oil pan, so I use a lot of pain because I use a lot of pain. It kids the pack weather for longer, and I could work into it more effectively than a lot of beginnings that I see they use just a small amount of pain. And I have trouble getting it to apply under the canvas and solemn, and it dries instantly, right? So don't do that. Use a lot of pain charm and you'll find that you get much better results. But also, you might want to consider getting those mediums on that will help you as well. In the next video showed what brushes gonna use
5. Simple Clouds: Okay, let's come and have a quick look now doing some very basic labs, and we've done that. Stole the right cloud. We've done a few little sort of streaky clouds in a sunset, but what about those big cumulus clouds that you might find on a nice summer's day? Now there's big, fluffy white clouds so that those I use just a little flat brush like this one. And we just dio, you know, really simple version open, but you'll be able to see how you make up the shape of a cloud. Had a to it later on. Toys important away, your light source coming from outside the lies coming from over here. Which means that side of the club's gonna be light up on this side. The cloud is going to be more in shadows that import with anything that you understand where the lot sources. So I'll try some pure white, and I want put it separate. I'll put it just that blew that we're using for this guy. So we have some integration, Keller. Just mix it around a little bit on what I want to do, because this is pretty much dry. I don't want too much paint in the brush Initial. If you have too much of the brush, you end up usually the global point up on the campus on very uses. Brush in a swirling mush and see how holding it at the bottom here, put the brush up there and I'm just gonna swell around to credit the average off the cloud . That's what you always want to think about. Is that at a ridge? So I just pulled a little bit of pine down. I'll cop here and see how swirling it round, like so and again. Too much point when we're doing this. And that gives that nice. By swilling around like that, it gives that nice sort of fluffy feel to the clouds. Okay, now, just be careful. You don't make them too random, like the advice of the same shock but the mind. So what I'll do is I'll just push this one up on a little bit more. I want to be too brought on the left hand side because the chef, that's all I want to be broader on lots sought over here. So that's where I just He's just a touch more point like site care and that creates a pretty simple little cloudlike affected were getting automatically getting some of that blew off the authority there in the sky just coming through and credit a bit of a shutout of sort of the off these clouds on down the bottom or just get slightly blow a mix, and we just work value in on the bottom and flattened at the bottom of it. Now that the established are coming to work, my lot side edges, too much point there brush and on the doctor s office take some of the doctor blue and reduced works from about into the shut on side. You couldn't accept different Doc, if you want. That seems to be working quite well. And so, by adding that the middle value docking a lot, we get three dimensional form starting to type shut a little one over here they got a really simple and easy way to correct cloud top of fix in sunny sky like that just would really little brushing your swelling at ransom. Give that a guy do some practice ones of that and you'll be surprised. Have grinded Clancy can crack after this. A little bit of practice
6. Sky 1: Okay, So welcome. When they're gonna look at Sky's on get an understanding, have paint skies that we create a realistic looking sky, and we're going to do so by during four little studies of skies and clouds. So I've got a six day by 20 campus here and all I've done I just put some masking tape in the middle of just a section off into four sections. So you might want to do something similar. Or just you force smaller campuses for this one for each of studying. So we're gonna start off. We're just doing a very basic, simple Grady and of a sky which is going from dark to light. So they go outside and say, David Anderson's blue, it's at the top and it gets closer. The horizon lightens right off. So if if you can learn how to a basic Grady it from Dr Lot do a nice smooth so blend in that gratitude, then that's the first step to be out of panic. Good skies. So on the campus here I've got ultramarine blue and titanium. What we're all getting Just just take my little squirt bottle and we'll just squirt the canvas just to get a bit of moisture on that, just help it flow better now. Don't always do that, Danny, when I've got big areas that I want to get paint nice and smooth and blended onto what I use water or medium in the mix. So we're going to come down to about 2/3 of the way down. So we have a low horizon in this little study that we're going to do. So I'll start off with my wanted Jesse Brush and take a chunk of the ultra Marine blue puppet here. And then we'll take a chunk of the touch. Any Watson actually put out plenty of point when you start off and I'll put that to the side and then just gradually introduce those two together. Always keep in mind that acrylic paint is going to dry. Just that little bit dark out after you after it had a chance to dry off so that whatever county mix up there, it's gonna just be a little bit doctor upon the canvas. So we'll take that and then one of the largest planet in bangs across the top of the cameras, like so so 0.1 bag and then I'll add more water to it. We're not add more watch. I'm not gonna put it right in the middle here, rep. Right to the edge. Makes it to the edge. The reason why I do that, then I could pull back up into the mind mixed there, if I may to. But the reason why I do that is so I can compare. Have I got a lot of than that first mix which I have Southern all bring that damn along through that cat that said sick and picks Now, Admiral, watch I've already running. Talk Tell me what My shape with plenty of piney, Uh, does the thing about you want to use acrylics, Lock their oil pine and you gotta use a lot of time is the thing off them? So put out some more. What, then take some or what? And again, I'll just fix it on the edge here again. That will help me know that I've got a lot enough. Or do I need to get a little bit doctors? I just get a little bit doctor there and again, we'll come down and just paint that in a band So see, after starting these horizontal beds and we'll come back and we'll blend that in just one moment. Well, what? Mixing on the age? Somehow it considers that you can see the transitional, the gravy in of color on your palate. And if you can't sit on your palate, then you're probably haven't got Robin campus even. Okay, point calling up the brush. This type that and you can see it's getting water and water as we come down and one farm, a little step will take some more of that titanium. What makes it on the edge on this is really gonna be almost what we just a tim to the blood . Okay, so you can see that there if I just run that along the bottom. Okay, I've come down a bit further than the 2/3 mark, but when I got put my land in or mountains and so on, I could always work back up over it. Always better to come a little bit lower than what you think you need. So then, with that down, what I'll do is I'll just give that Russia climb. Now, if you do this with a reasonable pipes then the pipe will still be wet. So what I can do is come up to today's joins, who claim brush and just work over so that there's no hard band can work down. Don't work back up. Don't take that lot back up into the higher sections of the canvas. We wanna keep that lot. Working down just blended out north and soft brush on board the well he's going to do. The artist took a bit too much of that dark down a lot, so I can just come back up to where that previous mixed waas pick up some of that point. Just work that back in just a little bit of Dhaka pine just through there. Stand back and have a look. And that's pretty good for a nice radiant that goes from Doc down to lock down the bottom there. And when that draws and settles down and stuff putting some mountains and foreground interest, that scar will look quite good. Well, don't come back to this guy in a little bit on will use that to put a couple of clouds. And just to demonstrate, how did you do class as well
7. Sky 2: Okay. Now, next Scott study. What we do is the effective of sun rising up in the morning, and we'll do it in this corner and will create the effect of sunlight spilling out into our sky. So you use the same basic principle is gonna go from doc, toe like, top to bottom using the blue. But they were going to introduce a sick and lots source or a second doctor lot, which is gonna be a sunrise. He sort of breaking through and spreading golden sort of sun lot through the bottom part of Scott. This could be really effective if you didn't. God put a lot of mountains or a headline on Seascape and have this golden sunlight breaking out from behind. So why that we achieve that? You've We'll do the sign process. We use out blue here, and we use that. What can make studies to give up on Don't just give a quick little squirt water. Okay, It's all mixed Those two together a little bit document we have previous inside wanted that , and I'll start with the sign process pining bands just a little bit quicker this time. More What? That's what I get from this broad had sought I'm going to just now claim the brush. But I want to mix the yellow with the blue authority in the brush because that'll just a greens give fresh a little bit. Pull through the pipe, tell And now take our yellow Oka, would you really great caliph for its earthy yellows? Gold Keller, block the sunlight. We'll get plenty of water with it. Well, just mixed us two together. Gonna be a knots a lot, though you don't like to dock. Okay, something Look that time there And then I'll start to introduce that into the bottom part of the sky. Probably a bit too much out there. So it up, anyone, and I'm leaving a really gentle touch. That's the case. Really gentle touch. When I got towards that blue press too hard, it'll just merged true together. And that's not quite or after. We don't want to get agree. Keller. You lied the brush and there's a bit of blood coming through and there's big yellow. So we've got that nice, effective some law. Now again, when I put like a head, little something here will look like there's this beautiful glowing yellow breaking through in the background there could get a little bit darker just down the bottom. Here, introduce that. Now Just give the brush a bit of a climb again. And then where I got these bands up here, or just with a Dr plane brush, just gently just work out those edges just to soften it in. So I don't have any hard bands there. Just put a little bit that blue here in that. Very good. So, as you say, really easy to create that sunlight effective. That sort of rising up in the morning. The sun would be over. He in this example. And again, if we put a nice, dark sort of foreground interest, there will credit fantastic looking effects. That pretty if you want to do have you got that one all sitting next year?
8. Sky 3: Okay, So we're gonna do now is a nice dusk sky so lightened today just before the sun completely goes down So nice hazy horizon line and a bit of a some sitting glow and in the light of part of sky above that So we'll start off with the Given. Come down to a 1/3 Ryan. She's a 2/3 Scott, and we'll start by mixing up this time a murdered. So I will take some a loser Crimson, this time with the ultra Marine blue will mix thighs to together with some titanium white. We want this to be a loss, a lot of value. It's gonna be slot on the blue side, fix it around till you get not movie time, something like So that's right about the time that we're looking for. Okay, so I'll type that focus again. Squid Mine scripts this time will stop at the bottom years. We'll stop this 1/3 mark and we'll just the horizon lock So and a lot it off Just a little . Get a little bit blew up production in red. Well, let's put some of the ready. It's great that you has use it and then I'll get the lot blue in above that. That's just using your Children blue in the Titanic. What their and then work that in the top we get that a lot up look, so I'll just blend the two to give up north with their I've got a few strikes in there, which could imply in the brush. That's like, I will not carry that Something reports some of a lot of time back there. That's stricter. Gun might some bit of interest in the sky. Okay, so, you know, I splendid sort of Iraq no horizon, but a nice blended transition between the dark move to the big pink AEA and into the lot of blue in the upper section there. So what I'll do is one credit hospital sunset or some sitting effect will try to piss Piper , tell of a figure here and no brought at the bottom. But right about here, it starts getting pinky pull out some some of that pull that employees. But just sitting that pineapple little bit through this and that I will be to take my small brush. I'm getting mixed up an orange. So the Elizabeth Crimson and the yellow, AKA and somewhat slide that back a little. It's a nossa of orangey killed like that and where I just think that that Pinal just strike strict that and done blended in too much, working too hard. Just put some strikes of it in there. Just a little bit up into higher up. However, I'll probably put some trees and he's Don't you love the doctor? Don't lose all his dock on the pain that we put in there, so I don't make it too heavy handed. Guess is the key, and then I'll take some of this red public that I would get some water into it now. So that's a lot in that off of a peaky time there. I'll just run some of that in here as well. I didn't take some of this notice, doc and that a little bit there more red or blue. But this doctor version off the point and ultra stand in a little streaks here. In there. Let's grab some clad if it now type the plane out of the brush and then all just soften that evening. Pretty much dry claim brush what was coming and or just suffer on the name like a big red And like so now it looks like that son sitting parties sort of sitting up too high in the sky. But we're not putting just some some not so tree lines on the bottom there, it will start to make sense of it all. Day also was just a little bit wet. Still just been a pipe talented wife back. And I'll just popping Cem silhouettes, Trey lines and he just to show it. So we use a doctor that okay, he's the ultramarine blues, and Neil is on crimson explore. I'm just gonna put in silhouette of treason here for you. Obviously, they will be distant truth. - So as you can see, I'm just roughed eating a little bit of a true line there and a bit of foreground just to show you how that sky now would sit back into the in the last campaign. And I could broaden things up a little bit here. But it is a dust saying, which is why I've kept Callens fairly muted. This is an effective little sunsetting sky for landscape. And you got these nacelle so their shadowy clouds in the horizon a nice, different lot of fix. He get us the sun just before it disappears on the horizon. Side portals scarred use Haven't got that one I'll see in the next video.
9. Sky 4: Okay, So what we gonna do now is a bit of a stormy grey cloud blowing in the sky and some rain falling down. So we're gonna use for that just to mix up a gray going to use our ultra marine blue will use this mix were using before. So mix that in with some listen crimson mixed eyes to together. It's talking a little bit on the blue side. Was it the Knauss Dr Neil? Just long enough. Just sloppy, but a waterman. Okay, we want to ask, Doctor, What I'll do is we'll have that club sort of coming in around about that. So it's a big band of sort of great club blowing in what we wanna do. Watch that, then I wanna have a light on the neath so they could put the effect of the rain falling down. So in order that got a lot around the knife, we will take a chunk of the what or mixed one side there, and I'll get just a big blue with I'm picking up some of that Dr Keller, but I've also adding in extra blue just too cruel back of it. This wants to be a fairly lot time because this is down low, uh, towards the horizon. You know, you wanted to get a bit of a nice soft edge as we've talked about all. Just give this a little bit of squid on the ball just on the top so I can work. It is a lot of turn upon the natives cloud. General Kharazi looks quite a lot of love arising on that some of that point. And now taik just low just the tip of his brush. Just deployment through that Dr Time. Let me show you that on the camera. Just got, like, a little B to the pinal on the edge day. And I'm just going to come over here and just very, very lightly just drag down looking forward. Run! You will come back to this, doc. Just 20 up that bottle, man. Text one. There's a lot of time to the at the very top of tech from this blue that we've been using before. Just run that blow right into the top of the class. Okay, that's looking a little bit angry and too much there, man. Or just soften some of them. - I'm just trying to reduce the admiral impact of that class a little bit too starting off. So lose some of the falling. Ran for the second for the moment, come back and put that back in. Just trying something effectively. Just get a softer effective. That cloud was just a little bit too heavy for my walking. Okay, that's looking back. That's time, Morlock. Big round. Just sitting in the sky blue. Now I can come back and just get that pint just on the edge of the shot before on just very gently. Crathie effect of some of this fooling around looks where I just stood. That top orders come back in with some slightly, have you? Okay, so I just painted in a bit about a little hillside. They're just part of the world Proportion and show that rain falling down onto the top of the hill Top. There's just a real quick little sketch there. But the overall effect of doing our stormy sky in a last gap I think he was quite dramatic . Just keep reminding it to have a nice a lot of the horizon, a big shadow dock area, and then above that you can get a little bit longer again just to get some contrast happening. But that's a good little Scott doing for a bit of drama in your in your landscape paintings .
10. Skies Wrap Up: Okay, well, that brings us to the end of Alpine ing out Simple skies Pretty used to do pretty basic sort of approach. But the end result, I think, is pretty powerful as well. So it could have a nice little by six coaches a graded from Dr Lot number. Gonna have sort of fluffy cumulus clouds in the sky, which and I've always good stifle of any landscape painting that you might want to do that We've got out rising sun in the morning, that glow glowing sunlight if it as it rises up about the horizon and sends that golden rays on what I've done, Just joining a little Seascape seem to go with that. I put in some ocean and little Hedlund there with palm trees, and you could see the effect of that glowed with that somewhat against a little Hedlund there, but obviously still wet. But because of the silhouette effect of the Hedlund Really, Max, that sunrise really glowing more than we do now. Sunset with the sort of shadow effects arising up in the sky and the dusk sort of same. And of course, our big heavy rain cloud dropping round down to the the mountain range. So it's free. Sorry for pretty simple skies. Get these right, Have a practice of these. It'll give you a pretty good sort of grounding and had a start off a landscape because that's the time of landscapes. Of course, with sky applies a pretty important part of it. So you get your skies right and it sent Seems toe, make sure that everything else stays on track is your pants. I haven't got these. Have a few guys. If you need to try some different variations on, then I'll see you in the next section, which we're gonna talk about mountains of different types of mountain rangers that we might have been ask landscapes, so I'll see that.
11. Mountains Introduction: get five. Welcome to this section here on had a pint mountains and rolling hills into your landscape . We had a look at four different sort of styles of mountains. So Anderson Bicycle Mountains on the key with those that don't understand. How do we get aerial perspective? In other words, how we create depth in the lives of Mountainside? Just stand up on a look at across a valley in his little mountains in the distance how we position them and point them in a whywe we've got. That's a natural progression depth. So look at that. Then we look at everyone's fiber. The bub Russ Stall mountains around Barbara spill Alexander with fans during these help on pates. How do you do them in a critical point? Then we'll look at your sort of rolling hills and had a crack like a full Grant Hill and again, using aerial perspective. How do we adapted to the pain? But credit not sort of foreground. We've always different rolling hills in the background, So look at that and then finally will look at one of my favorite subject, which is a ah he'll face with a rocky escarpment a lot of seems that I blocked a pint but have that sort of approach. So I had to get that sort of rocky looking effect in a month. The college, but still keeping a really simple sort of beginner style of approach. So we're looking that's is gonna be a panic, A little module. Mountains are obviously important part off any landscape painting that we do. So to put that we get a handle on how to replant dies in the basics of the concept behind them. So let's get to the first video. I want to get planning mountains.
12. Mountains 1: Okay, Welcome back. Now that we've talked about skies and we've looked at a few different approaches on how you Panis guy, we're not gonna talk about mountains, some mountains, obviously a pretty important part of the landscape painting. So we don't look at a couple of different styles and approaches to mountains and rolling hills, so they will start off with just getting an understanding of the basic concepts of mountains. Now, thinking they'd understand with mountains is the further or they get away in the distance, the lighter in value they become, and also the cooler in temperature. They tend to get blower of blew up as they get off in the distance of you have been at the country driving and you've seen a mountain range off in the distance. You noticed certain light conditions. They got quite blue. So we'll start off with just doing a little simple range of mountains in the distance and just increase the strength and the temperature of them as they come forward close to us. So what? I got up on the board here. Got ultramarine blue and titanium watch lizard, crimson and yellow, I guess pretty much of signed Keller's we've been using and I'm just gonna take my little flat brush. Now prepare my canvas here by paying in four different skies, and I just got masking tape typing them off, and we'll build up out mountains on in today's for little skies Before you actually start doing this exercise, it would be worthwhile getting four small panels or campuses or one big one and masking type. It all flock off down there. So at first, when we got to do is just a little simple range off mountains. So as matters get further away, the blue and the rid or not just mountains but anything in Alaska, the blue and the red starts to disappear out of the callous spectrum. So by 10 to sort of yellow on, the rid disappears so they tend to go blue. So it was a mix up a lot blue something along those lines, and if I come down here, I'll put the one in the distance. That's almost the same. Very was my sky Keller. So I just need to make that just a little bit darker so that we can Okay, that's better. That's pretty pile time there against the Scott's honest A little mountain range right down the bottle, man. And we just keep this simple when the already here is just understand the bites of concepts of what we're doing now, as you get the doctor, part of the mountain is gonna be the tip. And if you get down into the valley down below here is gonna get just that little bit. A lot of salt. Just a lot, that pine off a little bit just down in the valleys there. Okay, so that's the first little mountain, and what we'll do now, I'll just add more blue to that will strengthen that up. So you get a doctor book so you can see they are. That was my original turn. Then on off makes the doctor there so I can compare just to make sure that I got that little bit doctor. So they will start off another mountain range to be bigger and put that one man so you can see that that one or Mackley pushes the 1st 1 further back into the distance. Just make some interesting go shuts there and then again, as like it lower down. I just want to have a little bit more. What? In the mix. Just lighten it off. Low house off that man. Okay, so this one automatically is now sitting well behind the one off. Just government. Now again, as we come more forward again, which gonna get Doc up. So a two stage around using the blue of the water. But what will happen is the class A, There's mountains. Get to us. I will stop toe the reds and then eventually yellows will start to come into play. So what I'll do now is all type a little bit of red. Not too much on a bit more blood. We're just docking it up. But we're also warming it up. Okay? Lets just test that off a little mountain range that runs in through there. What that want to push into the front? Okay. And you can see there automatically have a first mountain is sort of disappearing in the background there, and the second one's also sitting further back. So that's how we crack aerial perspective in our paintings by just changing the value, which is the strip from darkness, toe lightness, widest mapping out from the background. Then on then as become closer to us. We make them a little bit doctors. We've got this one here and then closer again. We might with start to warm them up So that this you know, there's a bit of reading this one now, and it's definitely coming more forward than the other truth so we can take that one step further order store a little map, a small mountain. But we'll just put that class of Tulis before I run another mountain range up through here . But I want to take it over. The others could just be a small little range. All right, You put that at that side and getting a sign theory with just a lot it often to the lower parts of the mountains. And then you get So now we've got, like, four different liars. They got this foreground. So the map ranch here, the one sitting behind it in the blue one and then the light blue off in the distance. And that's a pretty simple approach to creating a lot of depth in the pine. It's and getting your mountains in the right order and sequence so that they do look realistic. So I haven't got that one, and then we'll have a look a different top of mountain range in the next video.
13. Mountains 2: OK, in this video we're gonna talk about, had a credit, those bob rough stall mountains, those Alpine mountain ranges with deny snowy picks. And how do you do that in acrylics? Because obviously, Bob Ross, Bill Alexander, they were doing that in oils. And there's particular technique. So good news is they're pretty easy to do in acrylics and the site in total basic approach of what that we're using. So let's start off with a dock. So take out blue and red here. It just means that up. Now. We don't want to dockside something like touch blew up. Okay, so we'll have a mind pick maybe there now that used the Taliban off, obviously. And you could do that if you want. However, I'm going to use a brush. Really much difference of the purpose of this demonstration and I wept with many picks and things is what might be the mark of used. It's simple for the moment. Just get a little bit a lot of that in the last video down towards the bulb. If anything improper, just touch. Die with this time for, um, what we're doing here. So you probably packed that a little bit light up, but not to worry. We'll work with what we've got there. So that's the first step is to paint in the shadow side off your mountain range if you want . Do they sort of Alpine snack piece. The next step is and where is the, like, going to come from? So that line is coming from a peer. That means that this side is going to be capturing with lodge. Okay, so what I'll do is I'll put this brush away and I'll pick up my small brush school flat brush, and we will get a lot tell us that we're gonna use mostly What? Put that I was going to take just a peek ahead off the yellow. I can, you know, just a tonic. A little bit of yellow. I can mix that in. The reason why I'm doing that is just a warm that up a little bit. Not too much. Just a little bit. Now, the key to these things going to pay. Hardly any point in the brush. So with acrylic. When when you're doing highlights, you don't wanna have you brush loaded up like that. Okay. You want to make sure your brushes claims. So why's Piper tell handy? And then we just want the time has a little bit of time just on the tip of their brash. And you couldn't even see that there but times a little bit on the team. So they come up to where I want to have mine. Sunlight. Keller find that spot. And then with the lightest of pressure, just getting to just apply that in such a way that its brightest breaks up a little bit. You want let the canvas the father of campus pool, pine office. That is a very lot pressure on. Let the under pine Keller Sean through what would have been good with pain to let the the sheriff side dry off first. But you can do that if you want. When you have got this. Okay, so we just build up bit by bit. The key is not to do it around a little rich through there. I don't quite like down there, So I'm going to just get mix up my doctor again on don't just pined that section. Great thing about acrylics can very easily might changes. Just a touch Dr. On that side of it. Fix that. You want to keep this hard. Like Caliban. Awesome claim side pipe I'm pregnant with it will get a bit dirty, but that's happening Then maybe White told you're under paint dries off now. Should I thought what Bob Brooks and Bill Alexander those guys used to do is I would put a chef turned in there as well, by using the why, so that there's still what they're indicating that the fact that there is no but snow and shut up. So that's when you got a crew version like some warm version number. Cool version. I want to too much of these up. I have a do it, but I just hope some power brush. So you would say that effect too much point there just in a few spots, like so, probably do a little bit of home this year. Allowed is wet. - It probably notice. I just went back and added, A few extra bits will highlight there. Just strengthen the color up. That's one thing with acrylics is it does as it dries. It can draw a little bit fine, you know Dwight colors. So I just got back in and just put in some stronger time, just in a few K spots. I, for instance, am nine pick here. We wanna make sure that that of the North Strom Cats now on there like that really glow that, and that's pretty much it. I think that you know a nacelle approach. And if you put some paan trees in the foreground, like or something into this little sing, then that's a great little long mountain range sing. So having got that one, we'll see the next video.
14. Mountains 3: Okay. Welcome back. So what we gonna do now is gonna just paid a couple distant mountains here similar to what we've done in this example? We do now show you how I do rolling hills. So do a rolling hill through there and one that cuts through for the four gram. Just to show you, that sort of foreground rolling here have realized to the background. So we've got out wide a mountain here we're gonna have next Doctor one here. We need to go. One step doc out for next little rolling He'll hit, Take more blue and I'll take some of the red on this time. I want to use any watching that mix. Okay, so what I'm gonna do this is the under pining, and then we'll come back and will highlight this. So looks like we're gonna have a rolling here. What runs for? Maybe we might get a bit more that way. Runs through that. So practice on the way. I approach my landscapes. If you say my acrylic pining introduction the projects and that is always pining underpinning first the shed. I thought so, usually blocking with my doctor tells looking doing that And you can see that just by using those doctor pushes everything else back into the distance in the pilot, this little about understanding aerial perspective and so one of the key if their perspective is the cool colors go back into the distance. Warm colors come forward. So my foreground area, what I would do just finished painting. This is all warm up my shadow turn in the foreground area. So I'm ashamed that a little touch one to the bus here. I'm not down to there. Okay, so now I got my four grams. I'll take red on your Michael earthy time like that. So I basically just using it was a crimson and yellow ECA picks up a Knauss every time because that's a warm and then I'll run. This is gonna be my foreground hill here. So I got my rolling hills. But this is the four gram where I'm gonna put my bra chest times of my grasses like side. So you can say again, this is definitely popping forward on the others are receiving back into the distance there . So, in terms of then highlighting that I wouldn't highlight these two distant mountains, But this one here, I would put some muted Grimm's on. And then we put our brightest, warmer screens on the foreground hill here. So what we do is let that drive our pop back assumes that's dry. And we'll what? We'll do that. Okay, so let that drop off a little bit. For me to do now is just mix up some greens. Teoh hot the distant mountain here and then have four Grand Mountain. So that seems to be the blue on a bit of the yellow mix up green because it in the distance we need Teoh just a little bit of red just to grind that time back. If you've done my kala mix and course, then you'll understand why very important. And we need a lot better off of a bit of what parent as well. Now the thieves to oil tests on my that makes up Is that the right mix? But we don't really know until we come in here and test. So I just come up here and just run my brush along the top there, and that's not a bad time, really. Just a gentle sort of brush strike that way, don't ever do the harlots on these rolling hills? We want to let some of that, um, on the turn, Sean through and this is the first passed, so you could always come back in and awesome. I'm brought up. Highlights on this. Consider this to be like a middle bedtime grasses. I kind of like leaving from chef dies down in the belly there. Okay, a little bit of a while here. We're talking just locked in that back even further. Some more. What? I'm a bit more blue in that mix. Is that doing sign? That was what we've just done. It's a subtle difference, but there's definitely a difference there. Okay? And as I probably wouldn't do the eyes to the back, um depends on the landscape of what you're paying. So that brings us to this four grams one here and what I'll do for that years. So cadmium yellow, medium a boost to Keller. So I think I explained that I have my three primary colors that I used the idea of my pain . But whenever I want to boost things up a little, adding my kevin and yellow medium, my sleep of grains is the area where he was at my side. If we type that mix here now, that more yellow on Kevin. Yeah, sure. I'm gonna end up with by much broader, warmer time. Look, set. So if I'm a running that down along this, that's probably too broad. It would just put that file on time. Crisis Knauss. Lovely rolling hills with plenty of depth and recession. Apache in the foreground looks like so you can say by using that warmer, great in the foreground. Makes that come forward. Sends everything else back with his nice, earthy, warm time popping through the green so that already read works really well, growing times, which is why I use it for the foreground and good. I always order automatic liars of depth, pining just by shifting values a lot. Mr. Darkness and Temperature cool toe warm. So I play around with that, doing little purpose six sides like this and get a feel for how that works. And then I'll say in the next video
15. Mountains 4: Okay, welcome back. So in this video we're gonna do is a rocky of Scott manana. Dark Matter range, painted in a mountain range. Gets hapless guy a little bit of full of foreground grasses and things. And what we'll do is do some knots. Rookie of Scotland. So this mountain ranch here, it's a sign why we painted. These ones here are just mixed up. Blew it. Ready? Go on our stock and just block that in rocks. I got some interesting shapes in here, and it's one of the subjects. All of the pine is rookie of scat minutes. Then I could put little cottage cheese with some trees and things like that. So that's what we're going to do. He so the what I would do. The Rockets captain is really earthy red color. So the same as what were you before the yellow on the grid. Mix those up. Okay, stop with that. As I have a vice time and usually rookie a Scotsman's on sort of a cliff or mountain. The best way is delighted to brush up and then just drag the brush down just like the little dragging marks. So you find a spot here and just run the brush down. Now this is again the under time that we're doing here. And the key, of course, is not too. I do it Easier said than done. So something like that, even that John looks good. We could put some highlights and trees and things around that time. But what I'll do is I'll just clean the brush off move. Just applaud another little liar of heart, which is Bisley the side time. What we do is a lot. Let's just say they want a loss. Orangey. If your energy time remember that acrylics will dry a little bit. DACA Okay, so that's getting there. Take a big more water into that meets. Okay, that's that. More like what? I'm looking for a little touch of blue in there. So we want something along those lines. You can see that quite a bit light off. And what? I will do that brush for the much I got in my small brush. This was quite a regular little brush, which is actually good because my heads sort of splay out. It will stop us from trying to pack this perfect which can kill off the effect. So I just lied the brush by just pulling the tip through as we showed you before. Can tie a little bit of point lots coming from Maybe he said no. All this rock is going Teoh be catching a lot. So we just wanted think about whether Is that a lot going to really Kinect with these rocks ? So just a few little marks like that. It's really a lot names. Just a few little highlights like that show where the sun is catching on the rockets, Captain. And then we come back in and we can put in some highlights here. So I'll go in here with some nice a lot graze, You know, I come back in now, Touch of the blue now, Busta, Kevin Miller like that. So I got that not some mixed up and were just happy in some. A little bit too broad, I think was chick. We're just tapping some grass is not grasses and tops us in trees here and run that along the top. They're still a little bit too brought from locking Just where the tree tops are going to you catch you a lot. So you see, they have got the sunlight catching on those treetops. I just need to strengthen, get back in and strengthen up what we've done on the Rookie of Scotland's there are feel. So just get back to our red and yellow, that that sort of orangey mix that we had okay, brought in all that up a little bit. I think because the folate highlight that I was using, I think was starting was starting to lose this document back a little bit stopped. We're starting to lose the rookie of scalp, which is our mind that puts it back you. But I think I need to get a little bit more shadowing here in there as well. Just a little bit of shit backing it up. And that's not looking too bad if I come in and put a big tree that rises up there. And so, um, then I think that could work quite nicely. - Oh , c'mon. Put a little bit of sunlight catching you grasses here. I think you guys, that's I do a little rocky ESCAP start off with the shadow town of the actual mountain in the shadow time of the rock face that some highlights the highlight of trees around it, just really just clipping along the tops of the trees there, which is what we've done. So that's how you do that pretty simple approach. And that's what we like to do is keep it simple. Keep it. It's a beginner level and still get a good effect. So have a gallon does and let me know how you go and I'll see you in the next section. We're gonna look at the different tops of trees that you can find a landscape.
16. Trees Introduction : Okay. Welcome to this module. Had a pine trees. Great that you're back with us now. So we're gonna look at planning different styles of truth. However, the important thing that I want you to really get from this module isn't so much. Have a pint each individual tree. It's the approach that I used to be a pint, any tree. So what we're gonna do is do a couple of different tops of trees, but we use exactly the same approach for agents were doing Australians. Little Lucas, you killing trees were doing Alpine Cyprus top trays, a poplar tree which is probably more Australian English, everyone's favorite, the palm trees eso willow tree on a river embankment and some silver birches in a SNI. Sandra So I'm gonna just play around with different trades and I'll show you different techniques with the brushes and following. And so however, the really important take away from this module isn't so much at a pint each individual tree, but the actual approach that I use for all of the truth. If you get the approach right, then you can pretty much started paining topic tree that you want and for that matter, anything that you say the landscape. So let's have some fun. Let's find some truth
17. Trees Gum Tree Part 1: the first thing we do. Let's start off with a Australian eucalyptus or gallantry, which is something I pine a lot off strange landscapes, pipe against know so much about the individual tree that we're looking for here. It's really about being able to understand the process of planning a tree when you get the concept of Dr Returns lots. And so then you pretty much any type of tree that you're looking for. What I'm going to do is use some of my liquefying medium just to get a bit of better flow. So I'm just gonna put that into a lid of a job. This is my evil here, and I'll dip into that just to just to improve the my ability to be able to get the point of fly. Okay, so there we go now. First of all, it was established ground the treatment, said Alonso, pining ground there, shut out of time and then I'll start off track of trainer straying countries. They come in all sorts of different shapes. There's lots and lots of different types of countries and straight, actually, so we'll just do a basic form of shape here, and perhaps this one has got bit of a mind branch. They were separated that So what was this stuff Establishing my trunk and then my main branches, like so come back in and do small branches with a rigger brush. Get in the mind branches using just this little flat brush here and always good with gum trees to do a little cluster of So let's do another one sitting a bit further away. Yeah, and we'll run that while I got there. Don't try piping to date tracing in nature. I can't be alive the place a little bit Things happening behind there. So that's the first step of what I would do, Whatever a pine tree. And if you've seen my acrylic acrylic introduction course, you know we do gum trees like this in in some of the projects that we do that extend out that, Should I turn a little bit there? Okay, so you're backstage work for So the next step that I would do then if I would switch to a lot of brush that was doing the bigger I would use my little just so brushes wanted just so brush and I'd get those hairs out In fact, let's do that shape is normally get smaller. I reject side of my brush, but let's use this one. So I just want to use dyes hairs on the edge there. Okay, so what I can do is just come through, just pick up a bit more pine. And again, I'm just keeping us a dark time for the under pain here. But what I'm doing is just pushing the hairs of the brush up through the pain. And I'm gonna just going to use this to scrub in our falling, so just scrub it around a kid. We don't have too much, um, pint on the brush when you do this, because it will clump together. Okay? Followers there I lost sight That gives us, um, possible Mexican cities. Look, a little pathology, leafy things happening in that, and we'll let that just dry off, and then we'll come back on. We will do our highlights of mid times, I without it, you'll see that that will come to get quite nicely
18. Trees Gum Tree Part 2: Okay, so I've looked. It's draw off a little bit. Now we're going to do our mid time zone highlights. So we're gonna do a couple of passes here, So studying without strain, you collect What we'll do is now moved to a green here. So with blue better this yellow, I can get a little bit clumpy. Mix that up, You said, Not sort of grand time. It's a little bit too blue, just a p ahead of red. Whenever you mixing grains, we think automatically. It's blue and red, but sorry, Blue and yellow. If we just a pease head of red in there, then what I'll do is just not the saturation level. Back off your pain and make it look just that little bit. Mawr natural, I guess. Okay, so there's a nossa of all of the green of mixed up. See, I've got a little kind up there in the brush. I don't want too much this. I'll just scrap it off. Which is why I got the back bone here, Max. It easy for media is to pull some pineapple. And now if we assume the line is coming from the left hand side and all these truth with that point there. What? I could do magic start to just scramble that over the top of that. Wanna lose? I don't want a livable the, uh you know, the shutter that we added in there of that college so important point is not to overdo it, because we need the doc to really sell a lot. Okay, I need a doctor. So a lot. Okay. Like that. Pretty simple. And then what I can do for my highlight that Whitmore is I use my cadmium yellow. Now, I'm gonna use this sparingly. I don't want this to have a much cover as my mid time does. So just where with Lot be having the most impact. You okay? But pretty much where we want to just drop that, okay? And fallen. Just clumps of polish now starting to get some modeling and some shape and affected to them the next step. That is the traps or the truth here. So we need a meat time. First of all, so we're gonna do is just get a bit of an orange time happening here. So the yellow and the red and then we'll get plenty of what? So just pinch a little bit of that, doc a little bit of blue in there. More wine. I'm trying to get a gray time on. Of course, whatever we makes, anything you do is to come in and testify, right? Okay, that's probably no bad time. I can start to work that down sort of my tree here, but I want to keep that shed. Are as well. I want to completely lose the docks. Solid, averted. Panitan on the tree. I have to do it, but you have a little bit there. What I can do is come back to my dark. So mix up the blue and the red again, huh? Medium in there? No, I just want it off. Just a little bit. Of what? That a little bit of blue. Never get that's terminals thinking. I've been just around that down Pops here. Well, so it's not my doctor stock. It's just timing that trade back a little bit. That trunk road probably got a little bit too much with the a lot of turn there, plus some of that to the middle section of a here. And what? Adding that highlight turn get in touch lot. I'm not here just with a lot. It's gonna be catching. Do you want to get to live in that vary? Because don't stop looking a bit pasty from the what? Okay, so just think. Where would that lot catching? And if you get further reference of trees in pot Watt pop part? Sure. Then that could be a great health. Okay, Did the vice of it tree would put up more of an orange time just for a bit of back and put up use of spots in there as well? And then just to dress it up a little bit, type a little flat brush here, we'll get some of this yellow touch of the water. It's always important how we sit these trees in Alaska. So just put in a little bit of grasses things around the vice there, just roughly you take more time if you actually doing a landscape. Of course, that just makes it so sit there in, uh, in the right place. Looks like. So they got Gretel strained countries that pretty easy to do. I put more details and things in there, but for the sake of the exercise. I think you pretty well hit the i d. Here of what we need to do. And have you got that? Well, one thing I probably would've had back in here. It's a sense of that lot that we talked about. So the shed are just makes up a shot time here. Blumenauer Red. And so we took the lots coming from over here. So we're gonna have shut right from Let's get some casting a shadow like site.
19. Trees Cypres & Poplar Trees Part 1: Okay, Next up we want to do some Cyprus style trees is a top trades, he would say the Bob Russ stop painting. And there's different ways of doing names and I'll show you cypress trees and also what I call poplar trees, which are more of a strange sort of version of So basically again, ice would start off with Doc. Get that shadow time. Now, if I use my little one inch brush here, I want to get the pack to pull hairs together in this cut. Before we were doing the follow job, one of the heads. But now I wanna pull. Just pull a chip of the brush too much blue there, pull the tip of the brush so that just classes up those heads a little bit. So I gotta be more of a chisel. Edge on. This is important whenever you pining different elements, knowing the different brush techniques to use, I think it's really important. So again, let's just start off a ground some way for a trace to sit. Paulson piped through, and first thing you want to establish is just so the spinal, the trunk of a tree that Okay, let's just do a couple here, something like that. And again, I'm gonna get some of these fly medium mixed in that the why bother us would do it would be with a fan brush so he'd use a fan brush. Right. So let me just demonstrate that chicken t he would then just do a little start to build the trap lock side with fam brush, which is a good technique that can work, just farms. Well, problem is, they don't end up with a two nation orderly. I think it's gonna be mindful of that. And as you get towards the bottom man, it's natural. Of course, that is going to just push out towards the bottom. That's like your affective looking an effective looking little soccer. True that stripping out some of the bites there just right at the top. Just be mindful of not getting too thick up there. So a shooting we had painted a sky behind that, of course in the sky would become through through that area. I'll just put that one little bit class soldiers getting there just that in some form days , just attacking the brush from son saw you. Okay, little buddy there now. So that's what approach and then the other approaches the Australian sort of cypress. Sorry, the Australian public tree might be a little bit Rhetta Poplar tree is mawr like this? Let's just get they're on the branches of ago, more up looks. They tend to be more orangey and go in. It's a different shut. So where he's got here? Mawr Alpine type truth The Australian ones arm or closed in. And they're they're a bit more golden colossal at that in when we come. Teoh kinds of highlights there if you weigh more there. Okay, so they're out. So the Cyprus Al Parn populist stall tree
20. Trees Cypres & Poplar Trees Part 2: that it's looking at Alpine, Cyprus and puppetry. Just gonna use a sign project we've used for the Australian nuclear. True. Just with this one here. So now we first need to do is get that meeting Great. Probably something along. Nice lines open. More yellow in there. A little piece of the red, Uh, plus some of that punch touch of the water in there. And we just use the same approach you before. We just don't lose a lot of that. Shut up. We're pretty there. And we want must to this meeting. Time to end up on the lot side lots coming from the left hand side here. So it's gonna be mawr shadow on the right hand side of this tree from the left. We just tap it in. Look, So trip a little bit into this one. Good partners, A little bit more shelter around by stay, But I'll just block. We will kill up map from a of what we do is just brought up by adding in some yellow What? It's exactly the same process we did before. And don't lose the docks in the mid times. We wanna make sure that we preserve does not gonna be a much file out. Of course, from the left hand side, this one's gonna be blocked by the first line. But we just pop a little bit injured for a bit of definition, and they got a hospital's sort of ponds of soccer's trip. The one thing you could probably add to that would be just the sense of I have a trunk. Take that same time and don't put this everywhere. But let's just put if you, my store it here and there. So probably put a doc in there as well, just to strengthen. Okay, so it's really just a little hint if we want Teoh just adding a little bit of a little bit grass. So the back there fruits without public for you striving for public tree, What we'll do is we'll guy for more of an orange time here, Britain Yellow. I basically it's just what that in just getting that midtown in first, the last 30 orange there looks on, and then, for at that point I'll go last pure yellow here, I think in autumn I had this beautiful yellow look to them Show me it's catching lots of Sunday give you something locked that it needs to be against the rock backdrop, obviously, so you wouldn't paint trees like I've done. You would have a backdrop of a sky, mountains and things like that. You pain is over that sort of backdrop, but that's pretty much the approach that we were attacked with does.
21. Trees Palm Trees Part 1: Okay, let's look at a couple of other tough trees. We'll look at some some palm trees, and some will live trees as well. So just get some of these red here just makes up, Doc, and I'm using a little fan brush for this. Que makes that'll around so again, just starting off with a dock time got too much pine of the brush because I'm using the brush to mix. It does tend to clog up side, then pull out some of that pipe. Just kidding, Clip. We'll dip into my flowing medium. Okay, Makes that. And so again, we're just printing ground here. Palm trees. I'm just going to use this fan brush. I'm gonna you to draw in the branch or trunk and that they were simple. Lean in towards the sunlight. So let's do that with this. Will just room that one down, too. They look fun and maybe we'll do another smaller one man, perhaps a small. Their tracks were all living in that they always seem to have a lend. Although there are some very straight up and down, but they look more effective if you have a leaning into the painting. So have beach, saying he having these late into the pain is always a good idea. What is with your punctures? If you want to start off, find the center points. That's who sent a point there and then you want to just draw out the from so they sort of full lies this tree. He is not going to have many a lot like something at all doing just using the natural. Here's the brush in place to get at that center point just dragging it down and then at the end, just give you a little, very lot tug, which is what happens up those heads there and credits that effect. Okay, gonna be blocked by this one. So just there look sexy. A little cluster of pop trains you want. Put a couple of her off in the distance here as well. I don't have to do what they It's just a matter. I'm standing the different shapes that die full when you get a handle on that, you know, collecting five references always handy to know what shops to paint Tracy. But it's a very simple little sort, even if you're doing like a if I put a nice orange glowing sunset there. Having just the silhouette of a palm tree like that can be really quite effective as well. Just be careful. You think Trump's too thick, get the knots and granted on the basis said that what you're I should just in him.
22. Trees Willow Tree Part 1: Let's have a look at some willow trees, so we will trade on. I think these were good to paint because if you got rid of banks and things like that will trade for what's good in a landscape. And so a lot of mine eyes war little phrases always have relied trees. So him on the indictments, they're so good things. So you will trade. You need to get the shape off. But I have a role correct. That sort of just hanging down like so look that in. They will highlight detail that up. But even the fan brush up or could use a flat brush as well would have worked fun. And then we put the digital river there. Okay, group some that just sort of wispy hanging off the edge. And when ah ha like that, that will stop, look, blocked An ocelot. Well, true that So we'll come back to that as well
23. Trees Palm Trees & Willow Trees Part 2: Okay, so let's not do the same for palm trees. And I will treat would start off again with this sort of meat grain time. Here, just give a good solo mix, pull a pint, and let's just what is it that just because you don't get the pine true Copy? Okay, I've got plenty of that shadow coming through. So we do that or come back into the trunks in one second. Let's just same for this guy here. Run that brush down. But I'm getting some not strict into it there. So it's plenty of that on the pipe coming through. Be more of a shadow on that side. Okay, then come back in with this yellow. Just warm up that mix there and you can just click ing some pot lots again. Not everywhere, but just in the spots where it makes sense. Six more. This yellow a lot with sons got between on the tree. Trade has not set a streaky feel to it. Okay? Yeah. Let us just get in the trucks for the palm trees. This time. Here is probably pretty good time for that. Remember, we want to keep the dockside of those trades. Just pining a lot. Sort of like so pop. A bit of sanding yellow. I heard from your what So imaginative sand on the beach here. Well, that during the show fiction so that you have your eye should never ever in here blue just to show Have you run through that? Well, I trade he march where you might not depending, you might say some trunk, but generally not with the truth. But what you will say is not so streaky branches of things. Now I've done that quite large. If he did that as a smaller trade against the riverbank there, it's kind of a quite effective.
24. Trees Birch Trees Part 1: And lastly, let's look at some birch trees. So I guess I'm just gonna keep on with this fan brush because I can't get a nice aged here . But we've you birch trees. Then they're just pretty much you get a nice stretch sort of line. Just a couple of us. Just establish a gram for the guys and with these Usually I don't have much follow John, but I do have nacelle Twiki branches coming off. I'm going to switch to my rigger brush and dip it into that medium just to get a pint of flood. Let's get a little bit of point that okay, and let's just running from different branches here and again, I come back and highlight these in the next section, so it's a pretty basic sort of shuts that really easy to do. You're what stuff would be dots then I promise you it'll work better better when you get towards the finish. So that's how I start all my trees, right? So that bicycle format, the differences just bicycle technique with Brock shoes, and it really is that what brush my using. So I use the fan brush for a few of these on his script brush for there's a twigs, thicket, trees. I've used a thick Abrash. It's pretty simple. What I will do is just I was stripped from out there. No wrong, just a couple of additional sort of branches in here. A couple of French is standing up okay, so we'll let that dry and then we'll come back and we'll do our highlights and mid times and highlights over the top of that.
25. Trees Birch Trees Part 2: Now, finally, we come to our birch trees here. These are pretty simple. I wouldn't do too much with days. We'll just take a lot time could be more water that these are silver birches or white birches. And, you know, while parents may, it's obviously winch up. So a couple different wives do. You could just go high, locked down the side of the tree like this one approach Sam's well done ball, the others and a whole lot of feudal twigs and things. So you do want that the other way that you probably Saint Barbara school, has ended that sort of guys do it. Detective fan brush or your Pelton off Just a little bit of pirate Just I didn't side, like so so back to give you a similar effect that one probably bit soft working. So just take the point here and stripping up in pots. - You guys are just stripping up a doctor. Little bill. Not Doc Sod. Put a little bit about sort of snow. We feel the eggs to crack that winter sort of atmosphere
26. Trees Conclusion: Okay, so that's how we got paying out trees. So you see, you have the Australian you click tree. We've got these of Alpine Cyprus type tree and Australian puppetry. Good out. Everyone's favorite, right? Palm trees on a tropical beach will treat pretty basic sort of a pressure of luxury. And a silver birch in knife went up top sitting. The important thing to remember in this is that the approach that I use for all of them is exactly the same, isn't it? Started out with a doctor I'm gonna have by six shape of that tree trunks and at collagen using a dock off. Let that drop because we've acrylics better after a draw first. Then I've come back and I'll applaud the meat time and the highlight on many little details that we need now because I'm trying to keep this a sort of begin a level we haven't detailed up. There's trees too much so that they pretty simple anyone gonna have got them. So have a play around with these. Get yourself a couple of canvases, player and we different trees like this using that basic approach right on what I suggest is tight what? To fight over trees, print them out, and then just use practice canvas like this and just try getting the shapes rot and use that sort of three step a pressure we've just used. And I'm sure you were pining great trays in night, Tom, It'll
27. Buildings 1: Okay, Welcome back. Now, this module, we're gonna talk about man made objects in the last game, like houses and bonds and song. So we'll start off with a very simple little approach to doing a farmhouse in a country setting. Then we'll expand that after have a bit mawr three dimensional sort of form to it. And then we'll do 1/3 example, which will be just that little bit more complicated and show you a bit more detail in and had a really credit, ineffective looking household farmhouse in a landscape, saying so to start off, I'm gonna just use my ultramarine blue lizard, crimson and titanium. What, And just a small flat brush for drawing. Now, if you're just starting out of beginning, you want to keep your Laska reasonably simple when you're just starting out. So if you feeling you do painting, then the first approach it will do is one that will make sense for you when you're just starting out. So what I'm doing here, I'm just mixing Doc Tech, Baltimore and Blue and models are cruising and just a touch of water because initially gotta do a drawing here, so I don't want my point to be too thick for the drawing purpose. Okay, and that's why I'm just using a small, flat brush. So in terms of creating a simple little cottage in the last couple, put in a bit of ground to heaven on. So there's a few things that you want to avoid when you're pining landscapes, farmhouses in particular when we're younger Children here. When we learned the drawers, little ones, we tend Teoh draw truth of around circling, sticking Alcalay pump and we tend draw houses. A little book for a triangle of top never took a starting point, but I think as we start to learn to paint that we want to just add a few more elements to it, to have a bit more realism in effect. So bicycle at Long Bay obviously is going to be walls and a roof. So put one ball there, going to initially they fights on house so we'll try and avoid going to there, which would be the square approach. Let's just bring it out just that little bit further, okay? And then we run the roof three lakh son and with the roof. Instead of just doing try Michael. Just a touch more interesting. Do it like site. Now, when you draw in life, I've done that. The first thing you do is just chick and ask yourself, Is it all in proportion? Doesn't look, you know, reasonably likely to in proportion there. And I guess probably my initial response is that the AIDS here of the building is sticking out to fire that point there and then probably just a little bit too far. So what I can do is just bring those walls out a bit more and run those age. Just hanging. Not so much so rather through about there. Okay, now let's talk then about the different elements that we might have. So we potentially will have chimney that papa one side by side. So just put that in and that will run down the side of the building here on the outside. Okay, so we popped eyes elements. E. If you want opportunity on the other side as well, that's perfectly fine on and naturally there's going to be a doors and windows. Temptation will be to put the door right in the middle of a window on every side and keep it really symmetrical on. You know, that may work, but what I find is that if we just mix things up a little bit, like rather bright rather than doing what people would naturally, I expect we just break it up a little bit, making a bit more interesting. So use that line. There is my door from around the door in there. So it's not as predictable, okay, and just ripping up that Graham, so that's starting to look reasonably good. What I'll do is, uh, we're just building this out. But before we go any further with that, just listen that kind of a little bit more, we have to think about pointing out buildings of farmhouses. So we've been a sitting. You don't want to just point, um, sitting on their arm lock up, done there. So we need to think about when we put some trees and, uh, other elements. That sort of Mike, this five have sort of sitting to the landscape. Okay, good practices. Always in the corners. Here is if you can introduce some college in the corner like so then that will anchor the little cottage into the landscape and make it look like it belongs. There is pot off the landscape. So what I'm doing here Just getting in the drawing of where I want my mine shuts to boot once we got a drawing. And next step, then is to block in the Calderone here. So too, do the blocking off. Just shift to a slightly larger brush and we'll take the sun Doc that would be using Let's just run that end through here. Look around the door and the window and they flat brushes of great for this type of working doing objects like this. Just doctor about that for him there. All right, so they were a little bit more to painting college and found house. And so but really, the price is quite simple. We defend to build it up, step by step. Why would do the mountains and the trees? It's just a matter of getting out, buses drawing and then get you. Some doctor will come back in with some high locks and progressively build it up. Now do this roof as I a tin roof, but with a little bit of rest to make it look a little bit sort of rustic old farmhouse sitting in the in the sort of bush there or on the land thought out. There's all types, um, titanium white, and I just introduced. Just try a little bit of the blue in there. That's not pure. What? So what is what we're teaching blue killing something like that, that cause I'm gonna do, uh, you know, tin Roof, it's gonna be big shapes of teams are gonna use this brush is gonna drag it down in the shape off the, uh, Tyne shapes like So you seem just changing the angle, depending on where I'm up to. There, they don't where it's not perfectly, Nate, because I'm doing a rustic you sort of farm half here. It's going to have little bits that are going to be perfect. Okay, But I can always come back and touch that any bits. My other little brush Here, get some of these dock and we're going over there. I just point that out for these background trees. I'll just a little bit docket in the roof, but not too dark. We're just doing a misty sitting here. What? I want too much detail in these trays because that's not the purpose of the demonstration here, but just to give it a bit of context. But the good thing about doing trees and sky around the trees is it gives us an opportunity . They cut back these lines along the very top. So So that gives me a chance to get those longs correct, sort of work up to which is give us a hospital backdrop there and come up to the edge. I will just take more care. - Okay ? I'll come down, These two here. We'll just got a little bit rhetoric that that this one's like arrives Bush. So just look, sir, on this one over here, I'll do this a little bit more blue. Saad, We were just talking about that blue and the yellow hall out of that club. Bush is around the bottom of the box of a house there that gives a nacelle sitting here and then, you know, we have the sky was popular sky just to give it a bit of context. That power is doing this at the moment is because I'm waiting for the blocking pint there just to draw a little bit. So what Blocked in their around the hats This is just giving it a Tom to draw Falae. Fasten from a lot of other elements, and I'm really pretty made Barbara elements just to give it a bit of context to my little hassle part pot, all of us sitting here, a little bit of sky in the background there. Okay, so now what I want to do is on the roof here. I want to get just a little bit of rusty sort of effect. So the lettering Kurzem is ideal for that. Not as strong as that. So talk a little bit of what, Pop that it's a little bit to Pete. Just take a little bit dark, just dirty it up a little bit just to stop a big tree brought peak so it neutralizes it a little bit. So it's no struggle time, so they don't just like the tip of the brush. But just by pulling the tip back and forth through the pack and then blocked in the under pine here and you can see that it's not pure. What? That's, um, not too blue and everything coming through. What I would do is just drag the brush very lightly. We're not too much packed just time. Little touch there. And you were still we haven't lost the tin roof, so we haven't lost the timber of color. But we've got this North sort of rusty roof effect now coming into play, which I think is important. So next we want to get a little bit a lot happening into this side. So imagine the light was coming from here, then maybe half of this little building is going to be getting a lot. And the rest of it's gonna be blocked by the roof and soul, so we'll just put a little bit of life opening through that. Okay, so just use this white here. Want got pure, just get a little bit of blue. So now I'm doing This is a very simple version off how you would pan if I house just to give you the i D. But we do want to create a sense of lots of what We'll Jews will run that lot so that it comes across this window here. Let's that runs through there. Okay. So you could see there were credit up on effect, where half of the courage is getting a lot to it on half of its no. So I imagine a lot was coming from over here. That's why it's catching on the lot there and changed a little window in the door. The window is gonna have a lot of other than what the door is going to have. So just get a slightly full version. Delivered McCabe in the pellet quad. You know, simple in terms of the cowboy using. If I point that in, I'll put a little window legend song around it. We just get back for a dock here, the doc run that down to the door. That's what God slow a different time in the shredder so that we could distinguish the two just like my little small brush. And we'll just get a little bit of red, broader red here on the small brush and just writing that down the lot, sort of Judy, just to pick that up a little and then using my little script brush if one here, get that into some liquefying medium and the first thing we want to do is just bit of a dock. It's fine for you. It's been like that. Just talk underneath the eaves he might. Sure. That's awesome, Doc. Were shut up and use that for the window. Sure. So this is a little window parents the night shift. You're not using that killer around the door because we're not gonna see it. So I just shift the killer too slightly. What? We're blue tint. And technically, that problem wouldn't be as broad as that. That's all in shadow. However, I think it happens just to bring the door at a little bit, Michael pop a little bit. So you see, we gotta start to type shut there. One final sort of little details that I would then I didn't. Okay. What? This is all a just about thinking it's fruit and just working. Step busted should get all the details. So what I would do along the riff he is just run a little. That may be a few little details along there. I'm probably going to be heavy up in heat. So look, everything could be corrected. Do it. Just tap out a few spots with some bloom. What murky bloom there. But if I just break that law enough a little so strong that we got such a fact that sit back in the distance way a little bit more holiday Cial around his bush. Remember the source? The lot where it's coming from. Put it a little bit of smart coming out of the chimney. So smoking's Ugo Bluey What? You know, Blue Grey, But on the lot sucks are very much out there, the way out of smokers. I usually just use a little scribble on a brush and just say, I've got this doctor tree behind It sort of makes it work really quite well. Just squiggle up from Smarck into the a lot. Son, now in terms of demonstration, look too happy that we have done the sky half tree half. So we'll just taught that up a little bit like that. Look a little bit more realistic or just slightly different time. And, um, put another tree through here again. Give me an opportunity to shape the edges, talking about a little bit here in there, so they got a little simple little cottage. Just would take a little bit more care a little bit more detail. We can move beyond the way most of us would approach, apparently cottage, which would be to do a little square triangle on top. So taking that concept just expanded a little bit of a few more details on what importantly I want to say about painting houses and bombs and things. If this is going to be the focal point, the thing that you want to be the main subject, the edges around. You want those to be hard edges, a mosque, shop, laundry. But then I have to be really shop. But you can see the I've got the quite defined lines, whereas the trees in the background there are soft edges so that the others defined where the edges and that makes those so go out of focus. And it brings the little cottage into focus. So that's one of the key things when you're pining elements like this into a live Skype, is that you hard edges on the building and then softer rages on the collagen and the rest of landscape around it to bring the subject into fighters. So keep that in mind
28. Buildings 2: Okay, so that's a simple little fight song. Cottage were looking directly at it. Let's now look at one that's a bit more three dimensional. Now, if you've done my cause, theocratic painting introduction course than this exercise will be for me or for you. But it's worth recapping, so we're gonna do the similar sort of college, but only on its side. So let's get a little bit of pint drawing and the good thing about the acrylic painting introduction courses. So do this progressively with you. So you want to check that at it would be worthwhile doing. But basically what we're going to do is draw Cube. So put that there from the through there. No, through the through this. What? We're getting a three dimensional effect of them around the roof. That wife, our hands on the roof through there, back to there. And then we'll put a little extension grounds to about there being a slut. No doubt of that. Okay, so that's the basic way I would approach doing in three dimension. The beauty of this is it allowed enables us to really create a sense of locked in the painting much more than face on. So basically started off a little cube and extended of that that way. Then I rent this roof down over that those two points on overlapped it. So they've got now the hanging roof here, run out there trying down this. That's where the sort of natural end of that Cuba baby, we'll be right about that. But I just put an extension on it with a sloping roof. Damn that would run toe around about They would suspect somewhere through there. Okay, so that gives us a little three dimensional courage. Weaken. Run some price down the little veranda on it. Now what I'll do, I'll just block that in on a ship. Me again. The lots coming from here. Which means this side here is gonna be the dockside on this. And this is going to get a lot of partially lot. So just blocked that. And I want dual the elements. I will just do a little door. I don't like site. And perhaps I wouldn't go there. Okay, Maybe this will be done back to to pull me, get the lawns right on that, but they don't do it. Starting port. I just wonder where that war might want to come to just to make it feel better. Okay, so let me block that. You know, I got a flat brush here. We'll take this color or just cool calidad by adding a bit of blue to it. Now cool it down because it's the side. That's a wife from a lot. Sorry. Not a bad idea just to make it a little bit on the cool side on and let's just block that in. Okay? - Okay . Now what? One thing I forgot was to put it a little chimney so I could just take some Piper tear because that Chinese is wet there at the moment, I could never let it dry off. Or just Texan Piper talent. Just work a section through that. Just remove some of that. We'll rush. So I still want to do it, Doc. But I'll just make that doc a little bit more on the red side because it's going to be broke. So I date I'll it up. But we just indicate that there will be off help. So we have chimney, the old style of Cheney. Okay, then, that I usually type er into the man which rule to get there. Look, son, and possibly put, we have a solid as well. Now that was edges. All would clean up when I would paint the sky tracing as we talked about the last exercise . So that's that side, um, in terms of the roof. Okay, so I'll do the roof to sign why we did. The previous exercise will take some of that blue. Put that there. Some of the truck turning what would be the blue you stood around. This talk is gonna be just that little bit easier to Pantene invigorates together on one side. - So will be that rusty turn, Teoh Subtle hints of it there and we'll try this roof. Keller, you just run that down this side here as well. Just don't be blocking it. We can. Just talking. Okay, Now the front of a little chip, we will do very similar thing to what we did earlier with this example. For one side is going to be in shallow, but not as much, uh, as we go on this side here. So I wanted to be worth using my small brush for that a little bit tricky, just working around here. It's just a slightly more complicated Syria's of shut mix up a lot of version again that for the door. Okay, so a couple things with this overhangs here probably be a little bit doctor in the sugar. Just believe the AIDS there. So Dr Up one more blue before that blue and red together just live in a shit. I look set age. Let us put a little lot, man as we did in the previous example. Soldiers, they Let's just rock down through this section. - It's been a lot catching through that and Father, just a few little detail touches there. Just a little script lot of Russia dipping into the free flow and made him just because it's drawing off a little bit. My point. Yours, Mine. Not okay. We need to get in a couple parts here, so that would be one that's going to run where I put my door. They're not a great spot because the edge of it it's sort of covered by that pie. Stock probably should have thought about that a little bit more. That that's what plans will about is living learning. It's got a little bit of shit. And there's also that little touches. You can see how it all starts to come to Los brush. For that. Just stop time back in a little bit. It gets further away. Look, sorry you could get on port side clump of bushes, just the anchor in. Some of those Cornell's have demonstrated previously just might look a little bit more authentic. - A funeral box of Riff indicated it's a little bit older, and then one good thing to do said, There's chimneys here. We got the light coming from over there. Why don't think that I always like to do is just to shift that time slightly. Just turned that into a show on the roof. Protect kids what I just did there. But just to give you the idea they have another chimney over here is insured. It's still wants a little bit of heart just to, you know, probably a little bit more work than what I've done. But you just haul out a little from that side just to help it stand out a little bit. Look, sir, lovely. That little window there time. Well, we're not saying tell him in no having some definition Teoh feels that some of the rust they could be just strengthened a little bit. - What you might want to consider it. This is a little weather board house. You might want to just right fuel indications of such. I don't have to do it there a little boxes, old names and on the dockside you could quite easily just shift that to a lot turn, but don't have to do it. So basketball world was just indicate a few little my flocks. So they get a simple little cottage so similar sort of approach to what we do with this one , and we we've got it on angle. So I'm gonna be a three dimensional feel to it with a strong sense of life happening. And, you know, when you started developing little cottages and farmhouses in your landscapes with a bit more detail like these, then they become more realistic and more effective. So far, no one will do one from a father that I've taken, which will just be a little bit more complex, a little bit more detail just to show you how to add in mawr information into your building . So we'll do that in the next video. But having out days too
29. Buildings 3 Part 1: Okay, so now we're going to do to little colleges side by side here from a father that I've taken the fire. What sells a little bit of gloomy day. So we'll just brought up a little bit and emphasized the shadows in the lots a little bit more than what's in the father. And I'll include the fatto in the reference material for this course, so you'll have a copy of that as well. So it's two colleges side by side on the street. I'll start off just by drawing. Get the drawing. So use out. Listen, cribs and ultramarine blue and just my small brush for drawing water just to finish down. And stuff here helps here. So do this start is to establish shuts reforms off there that long about the around. Still, that is a novel little roof line through that, but then that currently bushes. So just cats. True, that's a little bit tricky roof law in this one, because it's got this full nose veranda six around about the you that runs a little walk. But point right down. Now, at this point, here we go, the fence lawn through the defense. Look suck that fits that tool. Before we then hit the street here. Think of that one. It goes, last work. We want fuss too much with that. Let's go. A few section looks love what they're We're not gonna try and describe that detail. Just indicate that it's there. Then if Pro Your chili that runs through that one that runs up through here and then a little bit far down the rabbit getting slung, smaller house, it sits, you know right about here. That one has a difference of tribal shape. So just like this little bit smaller half that's about runs today. Given that this sort of veranda startle effect there go. Were that lodge Bush this has got. So it's gonna be something like that. We're just going to loosely do tell that fuss too much of this one, probably a little bit more to get the proportion for up. So that was awesome for this study. Quite freedom really can't Milan's. I'm not. I have been looking at this stage of the drawing. I don't think it's more important we get the right lines in the right place, so it's gonna be another push that on that behind you with God. Number different truth and things that run through this fence land can still be in there is gonna be Yeah, another one. So that's the rule drawing that we're gonna work towards. First things first is to blocking darkest docks work. So Dr Stock's gonna be in underneath here and, uh, the names wolf. He will be getting more lots. There won't be as stock, so it's just good. No stock going here on start a block today. I'm not gonna be a slide to my drawing when I'm blocking you. Yeah. So, roughly where everything's going to die, take a few risks with drawer. Just gets slightly blew up. So cruel. Down slightly for this second. Probably have a cheese running out. Yeah, I don't get these couple of bushes in. Why bother during a normal price? Isn't that why we plant trees? I'll just go straight ing with doctoring. Just just wait just in the capital, that's all. And then we've got a couple of big trees out back there which will just do those things. Misty's a distant trees, you know, I'm not typing time days. Obviously, I'm just I really wanted to use them as a wide pining, negative shapes of irrational subject. - Look , so that's a little section of the back there, but okay, We'll get that back. Okay, Now what? I want to just run this fencing as well. Defense. Rid. Really Orange time. My point here is not Trump. I'm accurate fence just walking this covered. - And then I just put some grass in the foreground here, so let's just quickly do that. - Okay ? So by putting in a fence in the trees and the grass, that just gives a little bit of context to work with. So what we got a painting will start to make sense as we develop these shapes. So I got a doctor. No need to get out lighter side of the two buildings here. This one here. And we need to get the roof in. So the lot of side is going to be a pretty similar time. What we used earlier um, just go. What? So I'm not gonna stick laboriously callus, and finally, it's really using this reference point with shuts mind because it was a dock, sort of gloomy. Died five. We don't really want a pine dock will be pain, I think. Blue. What? Start to walk in here. - Okay , Such That will be It will put some details. That makes more sense. And then we're going to get into riff Keller Heat. Now, we have two thoughts. The real put a little bit of yellow, and they just might get slightly orange. A little touch of blue just to dock it off just a little bit. See that? That and then that's gonna be on. Sure. Okay. So far. Run that down here. - Sign thing with this little section here that starts to take shape with you Got to reach the steps that we've been talking about. Well, that's a little bit too much. The blue in there to dock more red. - Okay , then I'm a lot side will. Just a lot better off with red with the what? Rid that on this side, Where some lost catching, like so okay for the fence who just used mostly what? In the blood for the gaps here, man. Okay, that 20 up a couple of messages. Okay, so we've got that walked in on next step, abated to come and put some of the little details on which will do in just one month.
30. Buildings 3 Part 2: Okay, so now we're gonna have blocking down. We're gonna stop to just do a few little data files just to bring this toe loss. Might get a little bit more interesting. A bit more appealing. We will start off, but he's a little rigger brush. We'll get some docks happening, you hear? Sort of mix up that doctor, get some of this flora medium. We'll just start to stripping out some docks here and there. Not everywhere, but just hearing there. - Okay . What a very fun point. Just running some indications lock. So there is little eventual something about there. Put the doc same down here. And as we have this little do Charles, it'll just start, bring everything. Toe lof way on the main house is well, I trust you. It's why I never were your dock there. No, just to cut the fence here a little bit. Then I'll just makes up a docket. Red. Here. Use that. Just for a few Indications on first offense doesn't have to be really just few mocks Kinder's Doc, and you should a little bit of paff killer, which is just an orange. So the yellow and red bit of what? Just a lot of back and then we can establish a little bit of a puff. It's a very crude elementary doing a passport. I think you get the point. A little pop that for me. For the hearing in the shadow areas. We guy made some windows rolled over them. Just take my flat brush to do those. And I think I wonder if you really use laws. That Doc is a vice for this. Get time. Something like that. I suspected maybe a touch. Doctor, I'm going to have a duel. Why around out there that would this just indicate that you don't have to put it in every detail with this? Just a couple of remarks like that. Remember? This isn't Shut up. So you're not gonna settle holly accurately here to a lot of stalking that back up? Yeah, just remember, he indication there to away no. Now, just get a few changes in the time. So on this riff, so get a few. A lot of accents here in there. Well, I'm just having it. One sold doc to shift things around a little bit like so and probably a little bit read on cheating here. That's okay. Now, let me just sick too lot up some of the fall into a lot, too. Just more just to give you the feel of where the lots coming from. Do that. - Okay . There is, um, or night Let us work around the veranda of this house. I'm not gonna get to detail with that. I think the purpose is off. Just understand. Had a construct building pineapples. We don't need to master less work. So just run. Run through what? Through the it runs up there different traditions that stops to port. Border. This one doesn't have as much night work around the veranda with a a symbol of the Kachin block said and probably amuse I just slightly blue a version that came down around the doors here a couple of occasions like that come back to our dock. I feel as a few opportunities there that we could just proof. Three things Not long a touch of smoke. Chimney. - Sega . There's a simple approach to painting some quite nice looking houses. There are worry Stolar has. It's not exactly the same as my father used. The father was a starting point, you know, to get the basic shapes of how long this has the book, and I think it's worked quite well. We've got, you know, very little work, the start of some really good little lob buildings that you could quite easily print or landscape. So having out days and I'll say the next module.
31. Module 6 Introduction: Okay, Welcome back down this section. What we're going to do is look at the details highlighting finishing touches that you might find in a landscape. So, behind me on the board here, what I've done is I've blocked in a very basic little landscape using all the principles that we've already talked about so far. So got a graduate blue sky, profuse tricks of nature's to give it a movement. Lost Got a couple of different mountain ranges here. So a lot of blue on the back and then a stronger blue one that comes forward from there Then in the distance I've walked in the shadow side off. Ah, lot of truth here that I've got these trees here leaning in. I've got my tall trees on the outside off the pan here, and I've got them a little bit lower there for the I can work its way through into the mountain ranges that I've blocked in just a little cordage, which I'll put a little bit of data all but not too much because we looked at that in the last video. And then I just blocked in on in the ground just an earthy time So it's just a red and yellow on block. That is, that's gonna be the base color off out. So I've sort of just blocked in a landscape Yiddish. So we can now start to work on that and look at the details, the highlighting little finishing touches, little elements that you might find in a landscape. So the car's gonna use this section. Similar everything with you throughout the course. Good ultramarine blue lizard, crimson yellow. I got al boosted column, which is kept me alive and try Tiny. And what site? In the next video we'll start off with highlighting these trades, and then we'll continue to develop this little pining in sections so that you can see you know how you would go back doing nice finishing touches.
32. Module 6 Distant Tree Highlights: Okay, So in this first video, what want to do is just get in. The highlights on these trees got the shadow color in there. And as you can see, the chef, Keller is not a strong values. What I've blocked in the house move. So we need to create that little sense of separation. And what I have a lot coming from either he down into the pine in here, which means I get a highlight this side of the trees that would the light will be catching . Okay, so the first thing we want to do is really find that shadow tone again. On the way I cried that show time was with the ultramarine blue on a loser and crimson and a bit of titanium white into that mix. If I mixed that around, Okay, so that's probably a little bit on the red side. If I probably don't touch it out there, it's a bit warmer than what's the shed off pilot up there, so I just put a little bit more blew into it. We don't want to be too warm because it is often the distance. Have a point that in still a touch red, but just a lot back. Is it really? Our first step is to find that color again. That's pretty close to the shed. I turn still little touch warm, but I don't mind that because what we gonna do now is we're going to warm that Colorado will get a lot. So whenever you doing hearts on things like treats, you find you should have color and then you lot with more. What? And you warm it up with the Allies and reds, Okay? And they give you a nice father turns. If I take some more of that one, we mix that in there. Say it's fairly purple. They're all move. So what I'll do is now take some of the yellow ICA and symbolism. Cruz. Just a warm that up. Okay, that's going So the golden color probably just a little bit more wide in that something along those lines. And then the thing to do is to test soldiers pull some of the pine off the brush on a muted by one inch brush. Here, I'm really defined. Load that corner of the brush, so come down here to find a spot and we'll just run that brush around. Just a test here, and that's not a bad time. I would like to be touched green. That's I'll pop a bit more blue in there, a little bit more yellow, green it up a little bit. We'll try that. So again, the lots coming from every here. So I'm just going to Holland. These edges, that would be catching a lot. Now this is in the background. So I want to kick this fairly subtle, not come forward too much. So it's not a battle time there, so we'll just keep working with that man. I'm not brought, not brought up in a few spots as we progress this pine. And that was just rolling the brush after I'm not applied too much. If it to the Russian wedding, brush myself to the work that will continue keeping plenty of that show our killer in there as well. I don't want to lose that. Shut up. Okay. Is that correct? In hospital, sort of effective some trees in the background there. Now, what we can do is just puts of others in the bites around here just to mix it up. But I just have one liar trees in there. So what I can do is just credit of a shift. I'll go for the blue and I'll get for slightly warmer yellow, a little bit more yellow. We just cried it out a little bit more vibrant. Time that on. And if you pop that in a few spots as well, that might be some clumps of different tops of bushes around plus here and then puts a vindication of of it in there. And that just breaks it up from being just a little one. Um, you know, Big sold mass off the Simon Keller. That variety is important, but again, kidney throughout, principle of lots coming from either he into the pine. So that's a pretty simple step. That's how we hardline trees. If I wanted to, I could brought up just in a few places. So just back that turn out a bit more that kept me and yellow into and not everywhere. But just hearing that probably in the fire pops the trees is going to get that little bit of extra brought us from the sun block. Okay, that's an awful variety into it as well. Notice I was painting knives. I have a little mushroom. Me showed sex just because of the you know, the light coming on that angle. It's gotta be clipping one side off the clump of college. Such pretty easy. So then the other thing, we could do that type rigger brush, which we've been using this one here and just get some of the Tony and what he and I want to be pure. What? That So I'll just take a little touch that shed. I call, and I'll just keep that. Why, Okay, it's pure while just jump forward too much and the rebel armies in that shed I time because that's the time I'm pretty much already got in. He anyway. Now let's just test this. We don't want to do this, but a few well place sort of branches and trunks and things. My, my good, you there document just one little touch extra. So even with adding that shell, I turn that still what brought them so I can just come back and knock that back. If I feel that it's jumping out too much of it, literally. - The key is done. I do it, which are starting to do now a little touch Karelia. Futile marks like that credit nozzle backdrop here off some follow jewel, some trees in the distance and then, as we come forward, that will sit further, further back into the distance. That's how do the high log distant trees in the next video? We'll do the grasses in here so you can see how we might go back doing nights. I'll see the next video.
33. Module 6 Grasses & Fields: Okay, so now we're gonna do some grasses in this full grand area, the grand area and we're gonna do some different stalls and approaches to doing the grass is just to show you some different wives and do it. I'm going to use the flat brush predominately, and much of the structure gonna do is going to be just lying the brush up, dragging the brush across and allowing the truth of the campus to pull Pinal food. Every much pressure with this just a nice, gentle sort of strike is all we need. So let's start off with during quantum Australians, sort of looking landscape here. But just use yellow, Aker and titanium. What makes lives to give up. So the summer month, you can get a bit dry here. So it often Brown's off in the fields, goes in sort of a nice gold coach, this sort of gold color, But we've got there is always who can put in a landscape it towards the back because they don't draw the eye in to that sort of a golden time. So what I'll do is I'll just find a spot here now. I don't want to go into the shadow area at this stage. I just want to keep it along the line of where I've got this time. So find a spot and then just drag the brush along. And, as you can see, because I have use hotly pressure here, the truth of the campus has pulled the paint off. But it's also broken up, which is what we want, what that under 0.2 shines for. If I put a little bit more pressure, then I could get a more Ford line like side. Okay, sort of work that up here. What do you like? Dive bits of pipe through like that's all. Wouldn't get back impact that I think they was leaving his happy little accidents so that where I got the snow shadow trying in the back. What I'll do is just take the brush and we just talk a little bit of pine or even using the pine majority there could just flick up the corners. Blocks just correct him impression of this grasses and things that are growing a bit told there that's worth at this stage, just popping in some, but the grass don't have to do it just a few little subtle touches. Volt names. Okay, now there will be punches where I'll leave. I get, like there, for instance on. But I'm not just pick it up. He and they will be trying also still just doing it horizontally. I'm coming and add some vertical boxes. Well, just to break up the pattern mark a little bit, doctor in the back there flick ups and grasses and bushes and things. Okay, so, you see, it's starting to build up now. Okay? Touched, Doc. You know, just like his opinion of rid. We're just getting working here. Just burying that struck around. So it's a little bit like a patchwork quilt of this study, but it will come together with me progressive. Well, give without too much. What? Okay, so I get to that stage. Roma do now shift the time, and I'll stop adding some greens. I'm just using my ultramarine blue and yellow. I could Yes, I'm just using my ultramarine blue and yellow. I could They're letting brush up again, just with the same principle of what we've been. We're going hear Arkan, just add some of that into the pots that I've already done. and continue to build up of here. Tackle that. Just clipping some little bushes and things. A little patch of grass. Que document a few places if you want to, except somewhere that it's a little dark. So just locking it up with some Kevin Mila dance of strikes in here as well. - Okay , in the bottom corners here. What I'll do is I'll just stocking up with some blue and red. It was good to have the bottom corners just a little bit. Doctor, pull the yarn into the pointing that way, like some of these red under pint here. Whoa! Okay, so, as you say at the moment, it looks would be patching a bit sort of disjointed thought we do now. We'll just come in and we'll start to just connect up something's level. Texas in a lot of colorable. Just putting some lot of patches here. And then Andi will Texas his grain Just wear that a lot of time for Milly Just introduced some of it here in there, so it doesn't look what there's a disconnect. Okay, so at this stage, that's what I do with this grassy area and relieved that until the very end will come back and just tweak it after we got some of the other elements in play. But the important thing here is mixing up having a variety of different callosum time. So it's not just one big area will sound Keller and using a variety of brushstrokes to Christ interesting flicking up graphs. We've got a horizontal and vertical strikes in there with the brush, so that's important that we do. We do that next step is I'll put in a nice path in here, so I'll see in the next year.
34. Module 6 Path & Driveways: Okay, so now we want to put in a path. So the way I was pressured poppies to use and oranges and vice red and yellow, like so many attacks in Italian. What makes? I've given what I want to be, too. Brock. That's a little bit on the red side there, So that's a more yellow. I couldn't do that. Just time back a bit. That's no bad time if we have out. So with the pop, you want to have, like, an s shape. Don't just Europe a strike part coming down. So obviously made a path to help people get to the the little village. He'll not village cottage. So you wanna have a coming Sullivan s shut? Something like, Now we'll have it waiting for the under point draw. Here. Publish it of. I want to be a bad idea for you to do so. But I'm just going started on top of that. What? Which? My old man? I'll call some issues, depending. Okay, so I got this time he had blocked that in. You can see it's gonna be interest, but the poor thing is wide up down here. It s fate where we're standing is the view up, and it just sort of narrow and smaller up as it gets closer up to the House that the FBI just adds that little bit of interest in in terms of the Shut left, a couple slightly Dhaka trying there blew into it different in a couple of shadow areas in the foreground. If you look at that grin graphs because it's going to happen, it's a track. That's what we're going for here. It's going to be well worn cottage in the Bush country, getting flying a lot of turn. Just give a couple of indications. But a lot of times, well, now I'm going to need taught up around. He s so I'll get back to that green that we were using. And let's just run that up to the edge of the coffee now Grasses to help deform the shape of it a little bit better and direct the edges of the I don't have it is a high Lorne. In fact, one of the things that I would recommend is that we mix up a dock green here. Let's just pop that on the edge regarding the doctor from the edge of that path. They just clumps of college just to break along by slaves. There isn't one doing that. Okay, so it backs that path. Now, start to sit into that landscape better when you just with those injuries there. Just, um, make sure there's no hard edges, not sort of variety times and textures in here and just out of interest there. But one thing I think we need to do this mix up a dark, profuse shut out of times in this check out ultramarine blue that there was in crimson experts together. It's getting a little bit of the water man from mortal Help it. Okay, And let's just running should you're in there, that's a bit for the heavy. I've just done there as you can probably tell. So what I'm gonna do, check in dry claim brush. Little rush just softened. Should a little you have to stop in the mean not so harsh. Should I sort of effect is there? I'm just knocking out the harshness so that we get a simple of 50 little way to do a path leading up to the house. And as you can see that, you know, it's all starting to come to get a nice of it. What might do in the next video is maybe little Clive's along with Mom's hanging out the washing. So do that animal look of some fences and things like that. Just pull it all together, so I'll say the next video.
35. Module 6 Clothes Line: Okay, so I just put a little bit of detail work not too much into the house age of seven. Understand? That will be more so. Now one of the things I'll have to put into landscapes is a clothes line, which is really a job risk is a flat brush and text on this titanium. Why not be helping 20? What? And let's side with Kloesel on either he which, you know, manage Mrs B where it would be like. But it's always good to do it against the shadows there. So what I do is just run down. Bet she What? So this market first up to the house and so on. But at least you'll see how I got back that maybe take some red and put it, I jumper split up. Yeah, okay. You put many different clubs and there's you want because I yellow pair of has probably not . But I've got the ball hanging there on the clubs on on. Then come back to our rigger brush. No way I would take a dock and then put a hot water. So just you that ultramarine blue and lizard crimson get a doc. So I'm sorry. Orders run up a couple of puss. One way should our do you prop revision and then it means some pure What? So just drag the tip of the brush through that trial attorney wants. I've just got the tip. They allowed it. Let's just then connect up the lawn, runs through. And then maybe you've got the old affection supporting lines like so following side. And that gives you a little clubs. One which, you know, if I put that aside, he would have been not to have it in the back here. But that's the general idea. How would paint that nice little touch that just makes it feel homely? But there's someone living in this landscape. So that's something I always trying at me. Whenever I'm doing this sort of Corning Jenna landscape top of since I haven't got that one
36. Module 6 Fences & Gates: Okay, So what are the other elements? That I think is pretty important in Alaska is Fences Gheit's and things like that. So I thought we'd do is just a little fence. He might be a guy in this section here just to demonstrate how to do that again. Although I start off with docks will get out tomorrow and blue here and it was a criminal. Just makes a big Paula doctor. Now, you might want to wait until everything else is dry before you start to do this sort of final touches on top to you. So this pool brush on some using this review brush again, just lighting it up with plenty of pint on that. And I think what we need is I fence pipes that runs around about that one hit one strike there, which means we're gonna have one. Here is Whoa, never set off just with that. See how this one I've left the party that's going out of the top of that bush and that's what creates a sense of depth in a panic. He's crediting lions like that. Okay? Their propaganda bay from shed I from these I crossed the path it. It's a little shit out. Like that. Really Old site. Make it sort of capital life. Now, as we get further up the path, these going to get a little bit small. So we would have, um, in proportion, Lotso. Okay. Keep your shit. I was running on. We're after the same sort of handle that. Okay. And then we'll do two more up here. Um, from one. We're okay. I mean, along the back line here, I always looked pretty rough. Fences. Just little box, because you gotta keep the, uh, goats and shaping. It also keeps Bush. So put little live fences in the back there. And I wouldn't bother pretty shadows for those. Maybe while too specially have anywhere. Got this broad? Some lot area. Okay, Don't do it. That because you can see it's certainly a little bit too much detail happening in the back there where we don't want a lot of time, but false. I do couple across here so popping fits, place to run about. Maybe just that huge of one man. Second post there Sigh mango. Do you want here? I just one that make the whole perfect with striking up right, Found in the bush, Some of them before you ever on what we do here is we're just around. Get the thing. I would detail that you can get the idea to put more detail on If you want, we'll have So that's all blocking you now. Little details. Um everything you bought having country here is you might have some kill gripes around. That was a couple of shadows into that. So now get with titanium War here just touches blue so as not to throw and come back. And just off the main ones were just wrong. A little down the ages. Kim fuel back there. Just a few. My lord again, I wouldn't dual them on here. And they're not everywhere. Like the water with tip of the brush. Let's just running catching up, Waas Like so Okay, so tell I would do some fences and guide some pipes and things like that. Just little details like that make a big difference and really start to bring it old life, you know, make it look like a real scene in the country there. So, having our doing that India landscape
37. Module 6 Conclusion: Okay, well, that brings us to the end of this section. I've just added in a little gum tree. You've seen how to do that in the previous section on trees, but I thought it needed something just in this sort of four grand area and also pushes everything else. Backs are correct. A little bit more. Dip just out very quickly. Take time and put a bit of effort and thought into it. I've just sort of threatened in a couple of minutes. Just Teoh demonstrate Teoh the importance off these different elements and where they sit within a pain, distant truth and before ground troops and have a to it to relate importantly, that night that's where it starts. But where the following Jews up in the sky here, that's a relocated doing foreground trays. Lock that as well. So hopefully you've learned some ideas on different techniques and painting the different elements into the landscape. Practice them because everything requires practice. And I haven't got these little things like the club's line highlighting trees and things like that until you start to get good at them and you can pull them all together into the one landscape
 Rod Moore, Artist & Art Teacher