Transcripts
1. Welcome to class: Welcome to the beginner's guide to Animal character design. My name is Nina Rycroft. I'm a children's picture
book illustrator, and I absolutely love drawing and illustrating animal characters
for picture books. And I want to show you just how easy and how much fun it can be. Whether you're an aspiring
picture book illustrator or you just love
animal characters. In this class, I'm
going to show you some real fundamentals
that are going to help you draw any animal character for any project that you
do in the future. In this class,
there are going to be four different lessons. In lesson one, I'm
going to show you how to draw four very
different animal characters. We're going to draw a crocodile, a hippo, and a flamingo. In lesson two, we're going to transition from observation
to illustration. And as a picture book
illustrator or anyone interested in adding human personality
to animal characters, this is a really important step. In lesson three, I'm going
to show you how to break any animal character down
into six key elements. And finally, in lesson four, we're going to bring this cast of animal characters
into a single scene. And we're going to build a simple illustration
just to show you how we can start interpreting
animal characters and making them more into a
picture book illustration. All you're going to
need for this class is a pencil and printer paper. If you like, tracing
paper will really help. And if you want to, you follow the same
process and use your iPad. So grab your paper and pencils, your iPad, and let's dive in.
2. Draw animals with basic shapes: Welcome to the beginner's guide to animal character design. In this lesson, I'm going
to show you how you can draw any kind of
animal character, and there's an approach to this, which I'm going to
walk you through. Lesson two, I'm going
to show you how you can transition from observation
to imagination. In lesson three, you're
going to be discovering the six key elements to
animate any animal character. And in lesson four,
we're going to bring your cast of animal characters
to life in a scene. So now that I have my four animal characters,
let's get started. When designing human characters, you can start by following the basic body
proportions based on age, such as the head
and body ratios. And even if you exaggerate the limbs or features
of the character, it will still be
recognizably human. In contrast, designing
animal characters offers infinite possibilities
with so many shapes and sizes and structures, whether you're
sketching a flamingo, a hippo, a zebra, or a crocodile, the challenge
is deciding where to begin. In this lesson, I'll guide
you on where to start and demonstrate how to construct
four very different animals, each with their unique
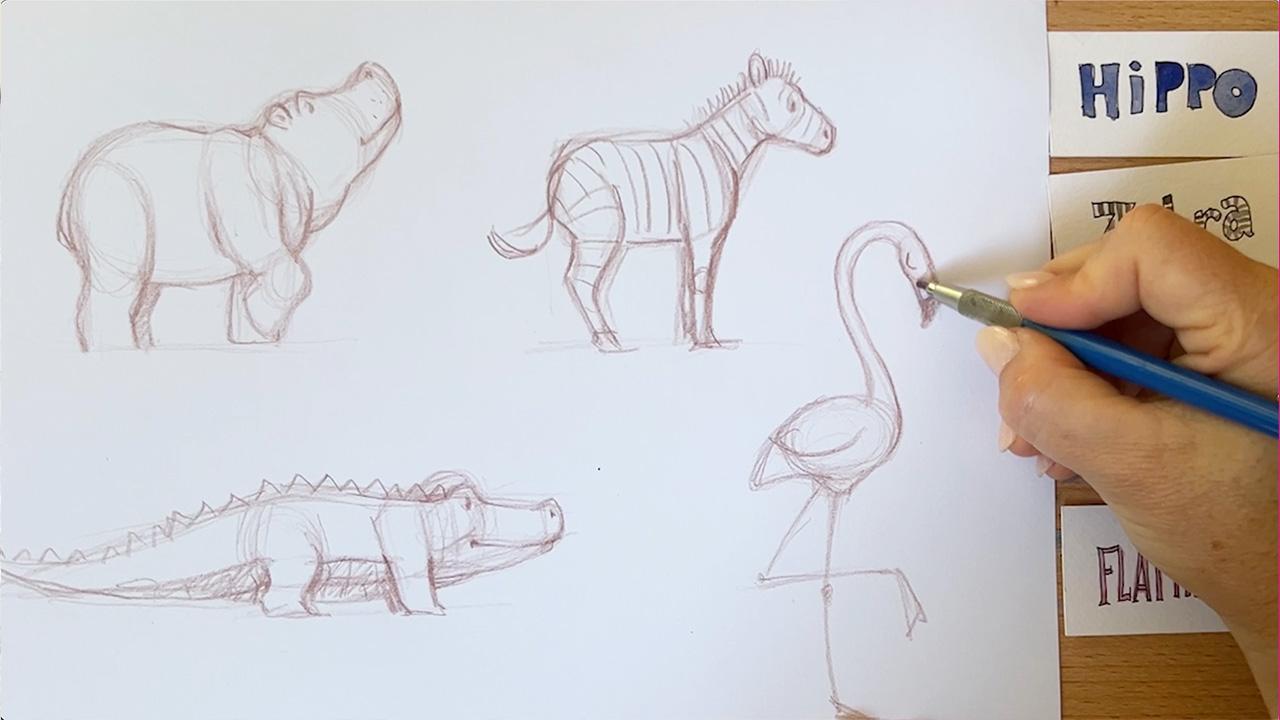
features and personality. So I'm going to start
off drawing the hippo. And to me, a hippo is quite short and stout
and quite chunky. And so I'm going to be drawing an oval for the body and
just starting with that. So you can see I'm drawing
sort of rough circles or rough sort of
ovals and circles, and here I'm drawing
the head of the body, and I'm drawing rectangles or just simple shapes to
start with just so I have a basic structure
to work with. So here I'm drawing the
front leg, the back leg, and I'm now going to draw
the snout of my hippo. You can see I'm using
a brown pencil, and you could use a
brown colored pencil. And then later on, once I have established sort of the general shape of
my animal character, I would then draw with a
more permanent pencil, whether it's a graphite
pencil or pen. But for now, I'm just
getting familiar with sort of the idea of
drawing a hippo character. So at the moment, I'm
drawing a side view, and you can see that I'm drawing where the eye would
go with the eye socket. I'm also drawing a
very small ear for the hippo and I'm not looking at any
reference at this point. I'm just trying to remember in my mind what a
hippo looks like. So now you can see I've
drawn the head of the hippo, the body of the
hippo, and now I'm working on the front
legs, and shoulder. And as you can see, I'm
drawing this as a unit. So here I'm drawing
the knee of the hippo, and I might kick this leg back. So this front leg is going
to be up in the air. And I'm just trying to
get an understanding of how my hippo is standing. So now I'm just
coming in and making the neck almost like a fold of volume, I guess
you could call it, and just sort of figuring
out sort of what the snout, the nose, the mouth
may look like, and then coming back, and I'm drawing that second front leg, and I'm really pressing
it into the ground. So now I'm ready to
start on the rear leg, and I'm kicking back the knee, so I'm just going to work out where that knee is going to be. With the hippo, it's quite
a large round section, and you probably
wouldn't see too much of it because of the
weight of the animal. There's a lot of meat
around a hipo's leg. I'm going to work my way
around the back of the hippo, adding in the tail,
little snub at the tail, and just bending and moving. Can you see the
shoulders have sort of a lump on the top there? So you can see how I'm
using the shoulders and front legs and the hip area. They all sort are sections
of these animals. So I'm just coming in, outlining what I need to, and I think I'm pretty much
there as far as my sort of initial thoughts and ideas for what a
hippo may look like. So now that I've finished
drawing a hippo, let's move on to
drawing a zebra. So I'm going to start
off with quite more of a rectangle shape for
the body of the zebra, and my rectangle is obviously
going to have softer edges. But this is going to be the
starting point of my zebra. Once I've established
the body, the mass, the large mass of the zebra, I'm going to start
thinking about the legs, and you can see how
I'm kicking back the legs just like
with the hippo, except the legs of
zebra are thinner, more slender, and
they taper down. So I'm not going to
focus on the hooves, the feet, the details. At this point, I'm
just going to be drawing just my initial
thoughts of the shapes, proportions, and sizes of zebra. So now that I've got
the hind leg done, I'm going to move to the to the front legs and the shoulder, and you can see, again, I'm drawing a straight
line up and down, sort of recognizing where the knees are going
to be placed. And I'm just getting
a feel for where, you know, how the Zebra's
legs are going to be placed. And you can see
that the front leg and shoulders are being
drawn as a unit as well. And so I'm going to
be coming in with just a slight shadow
for the legs behind, just darkening them
ever so slightly. And now it's time
to draw sort of the neck area of the zebra, and you can see that the neck will come out from the body, and I'm going to draw a circle to represent
the head of the zebra. So just like I did with the
hippo, I'm drawing a circle, and then I'm going
to draw the snout of the zebra as well. So I'm lowering the snout, like you can see the
hippo snouts facing up. This zebra snout is facing down. Within that skull
area, the circle area, I'm drawing the
eye of the zebra, and then I'm drawing
the ears of the zebra, which are sort of
a cross between the size of a horse
ear and a donkey ear. They're a little bit longer
than a horse ear, I think. Again, I'm not looking
at reference with this. I'm trying to remember and recall what I remember
as being zebra. So I think this is
also a great technique to use when it comes to
designing animal characters. You know, if we were
to look at reference, you might get caught
up in the reference to the point where
you're just coping. And when it comes to having to recall your memory of what
that animal looks like. It can actually make, you know, your
character more unique. So as I work my way down the body of the
zebra, you can see, I'm going to be adding
a bit of a tail, which will swing back. Tails are an extension
of the spine, so we don't just stick
the tails on the back. They are going to
have the same kind of movement and look like they're attached to
the spine, as well. Then, of course,
zebras needs stripes. And again, this is just a
very quick sketch of a zebra. When it comes to doing the
more finished artwork, we then spend more time, possibly look at reference and
spend a bit more time with the details like the stripes on the body and the
legs of the zebra. But for now, I'm quite happy
with the general shape. So let's move on to the
next animal character, which will be a crocodile. Again, I want to show you how each one of these animals are completely different
in proportions. So with the crocodile,
it's going to be longer and more horizontal
than the hippo or the zebra. So I'm drawing sort of longer
rectangle to start with, and I'm going to be
drawing shorter legs. So I'm still going to
draw the rear legs and hips and the front
legs and shoulders, but I'm going to draw them
much closer to the ground. So the knees are
going to kick back, similar to the hippo. And I'm going to really plant
those legs into the ground. So here I'm looking at the
shoulder and the legs and the feet and sort of always
drawing those as a unit. So here I have sort
of my basic idea of how I want the legs to go, and now it's time to draw the head and the snout
of my crocodile. So just drawing a
circle to start with. And I'm going to then
from that circle, draw a longer snout. So I'm just trying to work
out how this will work. And I don't want
to draw the head of my crocodile upright. I've chosen to draw the
crocodile more elongated. So I'm just drawing literally
triangles, rectangles, circles for, you know, the different sections
of my crocodile. I also want to have
a two toned area, so the underbelly of the
crocodile is going to be lighter than the top area. So yeah, I'm quite happy
with this general shape. So what I'm doing now is just
going to I'm going to add in sort of where the eye
of the crocodile would go. So lifting up that eye
socket and drawing in the eye and then coming around and just adding
a bit more detail. So you can see similar similar to what I
did with the hippo, just a pointier snout. And again, I'm not
looking at reference. I'm really just trying to recall what I think crocodile
would look like. So moving around, and I'm
going to put a bit more of a chin or a gullet on the crocodile and,
again, the underbelly. I really want to have
that as two toned. So I want to keep these as animal characters suitable
for picture books. So I want even my crocodile
to look slightly friendly. So, you know, my animals tend
to smile and look adorable, even though they're they
could be quite deadly. So that's just the
way it is with me. And once you have
the general size, shape, and proportions of
your animal character, you can then go back and look at reference and get
more, you know, ideas for how you want
to render, you know, the underbelly or the spine or any other detail
with the character. So I'm happy with this. So let's move on with the flamingo. And instead of a large
chunky oval or rectangle, I'm going to start off
with a circle shape, very simple circle shape. And again, my
flamingo is a bird. It's not a four legged animal, so I'll just be
drawing two legs. But the same idea,
I'm going to be drawing a body, the neck, legs, and tail, just like all the other
animals on this page. So here, I'm going to
be drawing very long, elongated legs with simple
triangles as the feet, and I'm going to kick back this back leg and have it
bend at the knee as well. So I'm going to
bring that forward, and I'm going to draw that
second foot down here. And for now, I'm just drawing
triangles for the feet. So I'm drawing the
neck of my flamingo, and I'm not exactly sure. Again, I'd have to
look at reference to make sure that I'm
on the right track. But I'm just going to be
drawing a long bending neck, a very snake like looking neck. Um, a circle for the head, and I'm going to draw the
beak of the flamingo, which is quite large. So I'm just working my
way around the neck, and I want to
continue that line as far as the beak is concerned. And I think the beaks
sort of are this shape, and they are black at
the tips from memory. And yeah, I'm quite
happy with the flamingo. I feel like the legs
could be longer. Or the head and neck could be the head might
need to be smaller. But in general terms, it reads as flamingo,
so I'm happy with that. So as you can see, I have drawn four very different
looking animals using the same kind of format, starting with drawing
the largest body mass, followed by the legs, whether it's the two
legs of a bird or the front legs and the rear
legs of a four legged animal. And then we draw the tail, and we have four completely
different looking animals, but we've drawn them in
a very systematic way. So I hope you've
enjoyed this lesson, drawing a zebra, a crocodile, a hippo, and a flamingo. And I will see you
in lesson two, where I'll show you
how we can transition from observation to imagination.
3. Give animals human qualities: Welcome back. In this lesson, I'm going to show
you how to move from observation
through to imagination. Before I do that, I want to run you through the
difference between sketching from life versus
sketching from reference. When sketching from life, you need to be able to capture the animals in their
natural habitat quickly, and you get to see
them interacting with each other and
their environment. Sketching from life is probably the best way to learn how to
draw animal characters well. But not many of us
get the opportunity to be able to draw a rhino
in its natural habitat. So the next best thing is to
head down to your local zoo. You can take notes,
you can sketchbook, you can take photos, video, footage, and use that to form an idea of
your rhino character. And if you're unable to do that, the next best thing is to
do that Google search. So once you've established
the basics of what that character looks like and their characteristics
and personality, you can then start sprinkling in your imagination and bring
that character to life. When it comes to designing animal characters
for picture books, you want to find that sweet
spot between sketching from life and bringing
in your imagination. So, grab your pencils
and let's get started. I'm going to show you
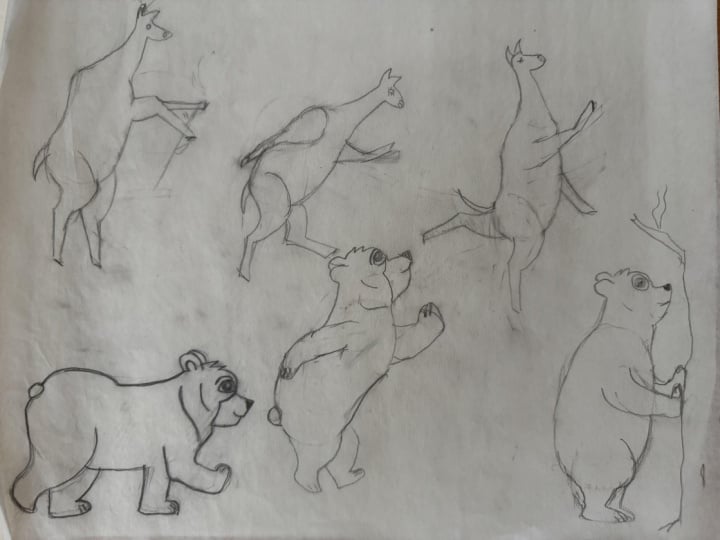
how you can bring human qualities to any
four legged animal. We're going to
bring them up onto their hind legs and just add a little bit of a
human touch to them. So what I'm going to do
first is move my zebra from standing on all fours to
standing on his hind legs. Now, you can choose to
use your iPad or you can follow along with me and use a sheet
of tracing paper. So we're going to start
drawing the torso, but instead of drawing
it horizontal, we're going to tilt the torso of the zebra so that
it's almost vertical. So you can see the shape here is almost like a
jelly bean shape. And really, this shape does a lot as far as movement
with your characters. Because I'm tilting my zebra, I just want to show
you I'm going to then have the legs here. The tail would stay,
obviously, in the same spot. And the arms. Well,
the shoulders, I should say, 'cause we are moving the arms and
shoulders together. You can see that I have up
until the the bend in the arm, and then I'd bend the
arm up, possibly. And then I might even the
wrist I might bend that down. So there's the arms. Looks like my zebra is
going to be falling, so I'm gonna put a second leg in behind, you know, in
the background there. So you can see my zebras
coming together and you can see that I can just
pop in the neck. So it really is just taking the side view and
tilting the torso. And I might even do a second
arm in the background. My zebra could be, I don't know, holding something like a flower. You add in the details,
you add in the stripes, and then you have your zebra, character looking
a lot more human. So let's have a go at drawing this same zebra,
but with more energy. So I just want to bring a little bit more
life to this zebra. So the way to do that
is to bend the torso. So I'm going to start
off with the torso, the same length, the
same width. Here we are. And imagine the torso having an oval there,
an oval there. But I'm actually going to curve this torso out here like this. I'm going to have one leg
down just like we did before. So you can imagine
quite easily how this leg would come
in from back here. I've got the knee joint, and then we have
the tail can flick up a little bit more,
maybe. Alright. But what I'm going to
do now is rather than having the leg standing, I'm going to kick
one of the legs up. And I'll kick the
leg up forward. So this is the leg that's
sitting in the background, so it still sits
within the hip joint, but you can see that
I'm kicking the leg up. There we go. So all of a sudden, there's a lot more
movement to this zebra. I'm then going to keep the neck where it is,
the head where it is. You can see all these
pieces coming together. But I might just
lift the head up. And my zebra is going
to be looking up. And of course, you can add
expression on the face. The moment it's
looking quite worried. I don't know why. Big sad eyes. And you can see, what do I
want to do with the arms? So this is something you
can play around with. Let's try and move one
of the arms backwards. So we've got the shoulder. So you do want to be aware
of where the shoulder is. And I'm just going to add the hoof of my zebra.
That's one arm. And I'm going to add the
other arm I'm just looking. Can you see how you
can just sort of play around with where you
want that second arm? Do I want that second arm up? Do I want it forward?
Where do I want it to go? So I think we're going to go
we're going to go forward. So again, I've got the arm and the shoulder, got
the joint here, and I'm just going to so really, the tracing is just to keep keep tabs on the
length of the limbs. And just to keep that
consistency going. You can see already I've got
the nose almost too thick. So I'm just gonna come
in, narrow the nose down. I'm also going to add
some of these Ooh Sorry, I got lost in the trace. We can come in and we can
just add the stripes to our zebra to make
it more zebra like. But you can see how you can go from your drawing
of your zebra on all fours to drawing your zebra standing upright to making the movement
and the position. Oops, sorry. I'm
just coming in here. I just want to fix this
part. Much more dynamic. So you can see how just by
simply moving the limbs, understanding the shoulders, and you don't need to
draw all the shoulders. When it comes to
your final piece, you'd just be
drawing this much of the arm you try and create
that roundness of the zebra. And you can just play around with moving your animal
characters arms. You don't want to, like,
distort them too much when it comes to positioning
your animal characters, or it won't be believable. I'll just do one
more. But instead of curving the spine this way, so I'm going to draw the
front and the side position. I'm actually going to Really stretch the zebra's
body the other way. So you can see here
the jelly bean shape or kidney bean
shape was this way, and now it's the opposite way.
Let's see what that does. Again, I'm going to put this
leg down on the ground. And what I want to do is
I want to just try, yeah. Go. Moving the leg a little
bit forward because I want to kick one of the legs back rather than
forward the whole time. So we have one leg on
the ground. Here we go. And then I'm going to come in, and I'm actually going to I want to have the belly and the
leg sort of continue out. Let's see if we can create this. So I'm looking where
the hip joint would be, the legs, the arms. So this is the back leg. So I'm just going to just
shade that in a little bit, and then we'd have
the tail as well. Alright, so all of a sudden, my zebra looks
completely different. So I just want to turn this around and you can
see the shoulder. And I want to lift this arm up. Again, I'm just looking
at it from height, and I'm going to so I
really do have this Of of the zebra, doing this. Alright. Already,
I quite like this. So I've got that arm up. I'm going to have this arm down. And again, I've
got the shoulder. But what I want to
do is I want to bend the arm at the elbow, much like I did with this one, and just soften it a little bit. So what do I do with
the head of my zebra? I'm going to have
the neck continue. So here I've got the spine, and that's another thing. Really think about the
spine and the tail. Now, I had my tail tucked in, but I'm actually
thinking I might kick the tail up here
because I think it has a nice line across here. So look for the pose, Alright, so that's what
my zebras looking like. I'm just gonna rub this
part of the tail out, just so I don't get
confused. There we go. But I like how this is going. But now it's all about where
the head is going to go. So do I want my head up? And I think I do. I
think I want my head up. So, again, I'm
lifting the head up. And I'm drawing the
snout of my zebra, and my zebra might have
their eyes, clothes. Go. Just coming around here now. And I think, here we go. I have my zebra, really dancing, moving,
looking very regal. And then, again,
you can come in and do facial expressions
and that sort of thing. But this is how you get your
animal characters moving. So we've gone from zebra on all fours to zebra in a
sort of placid position. To a zebra, moving forward. And we've also changed
just by moving the arms, the legs, the torso, twisting the torso
from forward to back. We've really opened
up the idea of being able to move our characters in any which direction
that we need them to be. And it's just so much fun
bringing animals to life like this and being able
to move them as you wish. And I hope this has helped with bringing more
human qualities to your animal characters. Make sure to join me
in the next lesson, where I'll be showing
you how to use the six key elements to
animate any animal character. I'd love to see
what you're up to, so please share, and I will
see you in the next lesson.
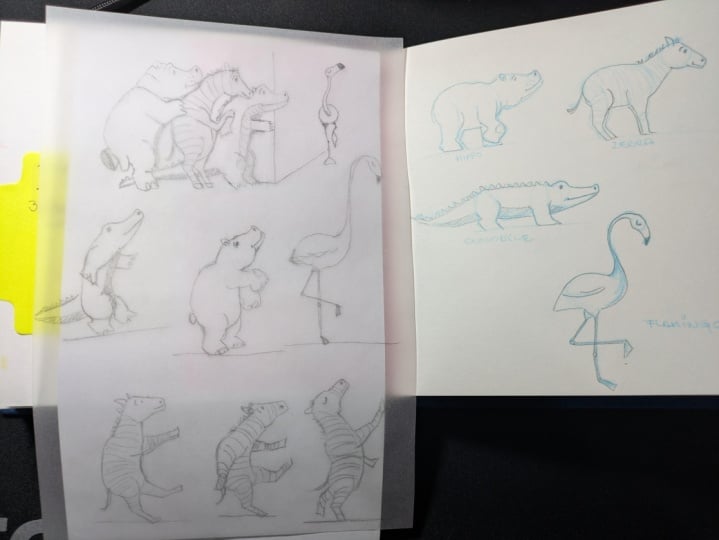
4. Six key parts to move animals: Welcome back. In this lesson, I'm going to show you how to use the six key elements to
animate any animal character. We're then going to apply
the six key elements to a crocodile character, a hippo, and finally
a flamingo character. At the end of this lesson, we should have four
characters a zebra, a hippo, a crocodile, and a
flamingo ready for our next lesson where we
place them into a scene. Let's go back to our
original sketches of the hippo, the zebra, the crocodile, and the flamingo, for animals that are completely
different in appearance. The hippo is bulky and round. The zebra, side by side with the hippo is quite chunky
as far as its body goes, but it has much thinner, longer limbs, a
much longer neck. And a horse like snout. We then have the crocodile, which is similar in size
as far as the body goes, but much shorter limbs, much longer snout and
longer, larger tail. And then we have our
flamingo, two legged, not four legged, so slightly
breaking the rules here, but we have a small round body, and then we have the long
elegant neck and legs. So despite their
striking differences, these animals are all constructed from the
same six key elements. They each have a head, a neck, front legs
and shoulders, the body being the largest mass on each of these
animal characters, the rear legs and hips, and finally, the tail. I mean, look how different
these tails are. With the crocodile, you've
got this enormous large, long tail that juts
out from the body. Compare this to the tiny
little flick tail that the zebra has and the stub of
a tail that the hippo has. Knowing how to break
your animal characters down into these six
different parts will help you be able to illustrate and animate any kind
of animal character. Using this method, you'll be
able to make your hippo sit, your zebra stand, or have your crocodile
walk across the page. So now let's start drawing and animating our
animal characters, like we did in the last
lesson with the zebra, I'm laying a sheet of tracing paper over my original sketch. But with every animal
character that we do, we always start with
the largest mass, and that would be the body. You can see here I've tilted my crocodile's body into
a more vertical position, and I'm about to
work on the limbs. And the quickest and
easiest way to do that is to tilt the page underneath, and you can see that I'm
making room for the hip joint, and I'm just literally
tracing the knee, the leg, and the foot
of the crocodile. So here I'm drawing an ellipse
underneath the crocodile. And I want to draw that
left foot of the crocodile. So I want to place that backfoot within
that ellipse shape. And the ellipse is kind of allowing me to sort of think of the crocodile in more of a three dimensional
kind of shape. So I'm just tracing
in the back foot, darkening it up, and I'm
really happy with that result. So now it's time
to draw the tail, and you can see that the tail is an extension of the body, and I'm just adding the spines and connecting
everything together. So far, we have the body, the hind legs, and the tail. So next, let's work on the head. So with this, I have a circle
and then from that circle, I'll draw the eyes,
the eye socket, and I'll draw the long snout, just tracing from the
drawing from underneath. I'm then going to attach this to the body and just make sure that I have everything
in the right place. Once I've done that,
I add the spines across the body and
head to finish it off. And now I've got to think
about where I want the arms. And you can see I'm rotating
the sketch underneath. I want to have a
bit of a wall here, so I want the crocodile to
be peering around the wall. I have that back arm really
stretched out straight with the fingertips just
bending around the corner. And once I finish this, I
start on the second arm, the one that's closest to us, and I start with the shoulder. And I'm just using the image behind to get the correct
length and width of the arms, helps keep everything
in proportion. Also helps keep the
character consistent. So if I was to draw
this character over and over again
for, let's say, a picture book,
I'll be able to use that original illustration to keep everything in proportion. So now that I've completed
my crocodile character, I'm going to move on
to my hippopotamus. Like we did with our crocodile, I'm going to start with the
body of the hippopotamus. Want to change the shape of the body and arch the
back and arch the belly. So I'm just sort
of bringing it in. So it's more like a
jelly bean shape, as you can see here. So now I'm ready to do the legs. I'm going to focus on
where the hip would be, and I'm just drawing
an oval to mark that. I want to know where the
knee is and also the placement of the ankle
and the base of the foot. So here I have the first leg. And now I've got to
try and figure out what I want to do
with this second leg. So I'm just having
a little play. And with that first leg
planted into the ground, what I'm thinking
of doing is kicking that back leg up and back. And I think that'll be quite a dynamic pose for this hippo. So I'm just having
a bit of a bit of a play around with how I
want to animate this hippo. So you can see I've got
the back leg kicking up and that front leg planted really nicely
into the ground. So far, I have my body my
hind legs and the tail, and now I need the fore arms and the shoulders.
And that's the thing. When you're animating
animal characters, you want to be able
to see the arms and the shoulders as one unit. They're not just stuck
on like an afterthought. And also, when it comes to anthropomorphosizing your
four legged animals, you want to make
the arms as thick and as long and as
wide as the legs. So make sure to refer back
to your original sketch of your animal character and keep those proportions the same. Now I just got to work out where I'm going to put that back arm. And when I'm thinking
about the back arm, I got to think
about the shoulders and the length of
the arm as well. So here I have my hippo complete with one leg down
and one leg kicking back. He's fully animated,
but his size and proportions are still the
same as the original. Now you can see side by side, my hippo and my crocodile are completely different in
shape, size, and proportion. But we've managed to
break down both of their bodies into six
different parts, the head, the neck, the front
legs, and shoulders, the body, the rear legs, and hips, and finally, the tail. So now let's move on to the last character,
which is the flamingo. So I want to redraw the
side view of my flamingo. I like the one
that I did before, but I want to have
much longer legs. So I'm doing a smaller
shape for the body, drawing a side view,
and then a front view. So now I have my egg shape. I'm going to draw the tail
and bring that around. And then I'm going to
start thinking about the length and the size
and the shape of the neck. I'm bringing it
up from the body, and you can see I'm
using a soft curve, almost like an S shape. And I'm just going to bring
the neck up and around, and I'm creating a circle
for where I want the head. And from the head, I
then draw the shape of the beak, really simple eye. And now I'm going to draw
those really long legs. The legs are about
the same length as the neck and
the big combined. I've got an ankle and
then the large sort of paddle foot and make sure to
draw the knee in, as well. So I'm happy with
this basic structure. Here I'm just doing
the bent leg, and I'm just going to
drag that across and do a very simple triangle for
the foot of my flamingo, a few extra feathers, and we've done our side view. Now we're going to move on to the front view of our flamingo. And what I'm doing
here is dragging across the basic size and proportions of where
those main things are like the bottom of the
foot, top of the head, the body, and you can see how I'm drawing a circle to mark the space where the
body is going to sit and also where
the neck starts. Now, you won't see the curve of the neck with the front view. You might see a slight curve. The head is going to be in the same spot as the side view. And I'm just, again, drawing the length of the neck. Uh, down into the body, and then I'm going to
draw the front view of the flamingos head and the
heads facing upwards as well. So just working on where the eye would be and
a side view of the eye, you wouldn't see
very much of it. I'm just going to
work my way down. And now it's time
to draw the legs. So the legs come from these
little triangle areas. I'm going to mark
where the knees are. And rather than drawing legs
going straight up and down, place them on an angle and kick that knee in and then bring
it out again for the ankle. You can see I've
got the knee there. I've got the area where the
leg extends from the body, and I'm going to ground that
flamingo into the ground, so it looks like it's balancing. So I'm ready to start
on the second leg, and I'm just tilting
the body up a little I'm then going to draw
the top part of the leg. So let's do the knee first. And then I'm drawing
the legs going back, so there's going to be a little
bit of perspective here, and then I'm going to draw
the ankle and the foot. Here we go. There's the ankle, connect to the shin, and then I'm going
to draw that foot to the same length as we have on that side view. And
here we have it. We have a side view and a front view of our
flamingo bird character. So now that we have animated our four animal characters,
despite their differences, these animals are
all constructed from the same six key
elements, the head, neck, front legs, and shoulders, the body, back legs, and hips, and the tail. As an illustrator, knowing these six key elements is really going to give you the
freedom to animate and pose your characters
in any way you like. So looking forward to having you join me in the next lesson, where we're going to
place our hippo, zebra, crocodile, and flamingo
into a scene. Oh
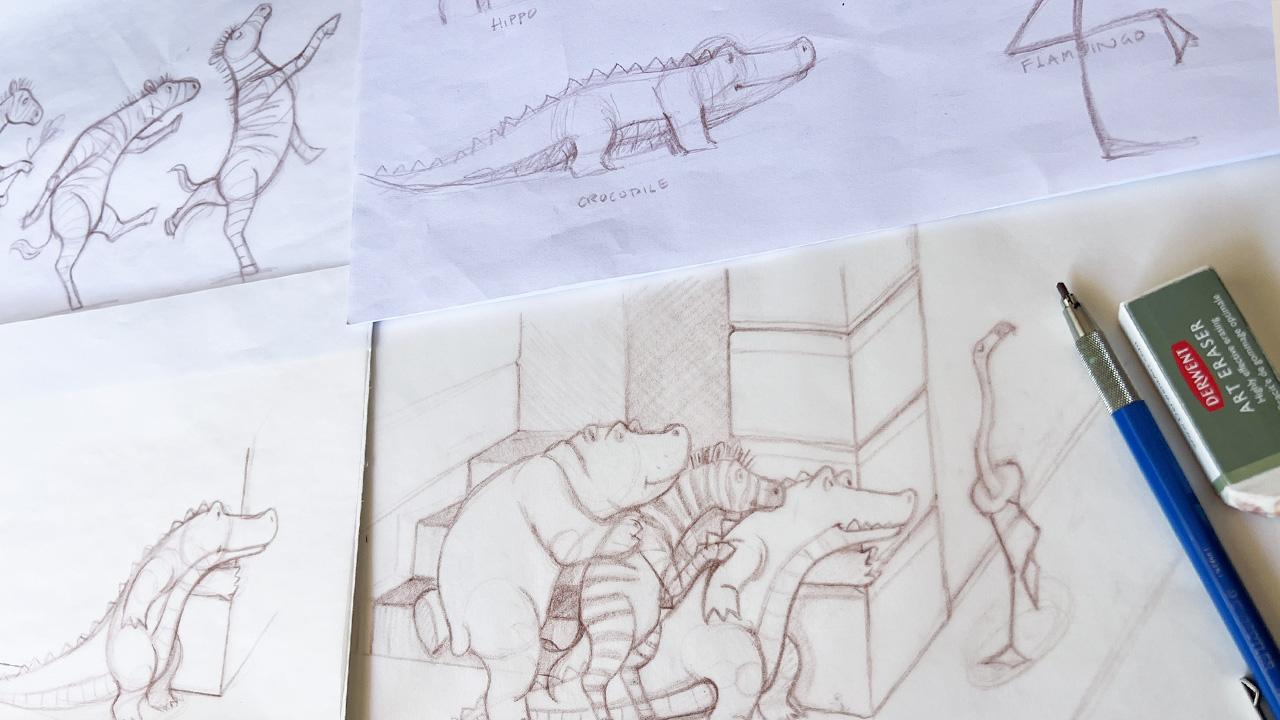
5. Draw a scene with your animals: In this lesson,
we're going to build a scene using our hippo, zebra, crocodile and
flamingo characters. In Lesson one, I randomly
picked four animal characters, and we drew them
using simple shapes. In lesson two, we moved from
observation to imagination, adding human
qualities and making our zebra character stand, walk, and dance across the page. In lesson three, I showed
the easiest way to animate any animal character by breaking down the subject into
six key elements. We then use this technique
to animate our hippo, our crocodile and our
flamingo characters. Uh, so what we're
going to do now is we're going to take all the sketches
that we did earlier. And here we drew the flamingo
side view and front view. We drew different variations
of our character, and we're going to start with
this idea of the crocodile. So now that we have the basic
structure of our animals, we're going to start thinking about how we can create a scene, and you might even decide
to change your characters. You might want to add a
little bit more detail. So this is your opportunity to understand and refine
your characters. So we're building in story. So to keep it as
simple as possible, what I've got here is the crocodile appearing
around the corner. So I might even pop
in another eye there, so that he's really
stretching his neck, and all you see is
his arm and hand. And again, we're going
around the corner here. So again, we want to perhaps understand a little bit
more about the details. This is kind of
the opportunity to spend a little bit more time um, refining your animal characters. So I'm not going to
complete the tail of my crocodile because I want to have other
animals coming in behind. So my crocodile is in the front. And I don't know
how I'm going to position the other characters
around my crocodile. And you can see the knee here. I can see that I want my crocodile to be the
first of the bunch. So his hand is already
around the corner. I might even put a
little thumb there. I want to make him a
little bit more human. And, again, this
is where you can start spending as
much time as you want to need to how do you want to
illustrate your crocodile? Like I said, I'm not
going to complete the tale of my crocodile until I know what
my other characters are going to be doing. And I want to start
building this story of the crocodile peering
around the corner. What's he doing?
Why is he doing it? And start thinking about this storytelling aspect
of your illustration. What I'm going to try and
do is bring in my zebra. My zebra is going to be standing right behind the crocodile. I almost want to make my zebra 20% shorter, smaller,
that sort of thing. I can move this arm
to fit the story, and I might even move
the head, as well. So let's just try and get the zebra to fit what
we'd like to do. So here I have my
front leg of my zebra. And the hoof. And again, I got this idea of the leg of my zebra might
even bring that further out. So my zebra's
standing in front of the crocodile's tail,
which makes sense. So I want to make my
zebra a little bit smaller and shorter by
shortening the torso, so I'm just gonna bring the
torso down a little bit. There we go. And we have
the zebra coming in. And then you can see that
that will be the torso there. So I've got the hind legs, the torso, and now I'm
going to work on this arm. Now, for me, this arm is
sticking out too far. It's not connecting
to the crocodile. So what I'm going to
do is draw so you want to imagine that we have a shoulder as well because, you know,
it all connects. But what I might do is
I might actually place the arm onto the
crocodile's hand, almost like he's
holding the hand. So I'm just going to erase
some of the crocodile here and draw the zebra. And there's the
elbow, the wrist. And then we have And then we have the front arm of the zebra really leaning in. So what I want to do now is
draw the neck of the zebra. And again, I like the idea of following this shape of
the crocodile, as well. So let's just do that
same thing with the neck. Here we go. And I want to bring the zebra
in front of the crocodile. So what I'm going to do is here I'm rubbing out again another
piece of the crocodile. But I want to have ze zebra almost like really leaning in. And again, my zebra's
gonna be 20% smaller. So I'm just gonna
be aware of that. There we go. And my zebra's eyes there might even lift a little
bit of the eye up here. And do I want to have the
ears forward probably? Like, everything's
on high alert. And then we have, maybe the ear in the back there. And zebras have that sort
of mohawk style down here. I'm also going to just
bring in a few stripes. My zebra is going to have
stripes all the way down here. I think the hard
part is actually the arms and how do you
connect all the stripes? And again, we'd have
stripes along the legs as well so that it reads zebra. Alright, so we now have
a crocodile and a zebra. And do I finish the tail
of my zebra? I'm not sure. I'll put something in for now, but I can always change it. Alright, so there we
go. Crocodile zebra. The zebra's connecting
with the crocodile. I might even bring
a second arm here. And the spines of the
crocodile are there, too, and I like how
they're connected. These two are up to something. All right. So now my next character is
going to be the hippo. So let's go back to this sheet. And I can see straight up
how am I going to do this? So we're looking down. There's my pavement.
And I want my hippo, so I got I've got my
crocodile sitting here, my zebra sitting here, and I think I want my hippo
to be sort of standing here a little bit in front
with that front leg. Alright, so let's
tuck him under, and let's see what we can do. So you can see they're
not exactly because we've been just
randomly drawing them. We haven't exactly drawn the
connection between the two. So what I might do do I want to have my hippo
really leaning in? He might be too heavy for that. So I might, I might
tiptoe my hippo, as well, a little bit more. Okay, let me just draw
the body of my hippo. So I'm going to draw the torso, which I really quite like
the hippos torso here. We have the arm of my hippo. And I might draw the elbow
of my hippo over here. So this arm can come down. And I might just try and connect my hippo to the zebra just here. So just leaning on the
back of the zebra. Now, you can see that
it's almost too heavy to have the weight
of the hipo's head. So I might just tilt.
There we go, like this. And I'm going to draw My hippos a baby hippo,
but still a lot, um, a lot larger than the
others. A lot heavier. And to make it look more baby, I've probably made the
snout a little shorter. And I'll worry about the eye and what that looks
like in just a minute. I'm just going to draw
the shape of the head, so the head's gonna
sit in this area here. And the hippo has
little snubby ears. There we go. And he's
got folds of skin, because he's nice and rotund. Alright, in the arm, you probably wouldn't see
all that shoulder part. You just see this section here. Alright, so now I need to
understand the leg of my hippo. And I'm thinking that my hippo is really going
to be reaching out, like leaning up
almost on tiptoes. So this seems to work.
This works well, and I think it's in line
with the zebra, as well. So before I start, I'm going to just draw
the backfoot of my hippo. There it is the hind leg. And I'm going to draw the hippo on his tippy toes.
There's his knee. And there's his, you know, we really want to
see that leaning in. And here he has his leg. And you can see now, I'm glad
I didn't finish my zebra. I think I'm going to bring the tail around here
like this for the zebra, just so it's not
overlapping the hippo. So I just want to, you know, sometimes things like the tail, you might want to just hold back and do those sorts of things
last. So I really like that. So let's say they're all
looking around the corner. They all want to get a
really good view of what, you know, what's coming
around the corner. They don't know.
There's a lot of anticipation in
this illustration. Do I want to show both eyes with my hippo or just the one eye? Maybe I'll show both. Alright, so I really like that. I really like the
leaning in. Let's just get clear about this hand. Do I want a big clunky
hand of my hip? I think I might just
soften and make the hand less heavy by just putting
a few digits in there. There we go. And
that's my hippo, maybe a few bits of hair fur. Now, while I have this,
I'm going to go back to my crocodile and the
tail of my crocodile. Now that I have all my other
animals sitting behind, where do I want the tail to go? So this is really
just piecing together all these different animals and making them
connect with story. So here we have the crocodile. I might even bring
the crocodile's tail around and behind the zebra, there's the two toones
of my crocodile. Again, I can come in and add all the
details that I need to. So my crocodils sitting behind. So I would probably
just do that. Let's see what we have here. Alright, so this
is looking good. I want to add a
few more details. We've got some shadows to do. Here we have a
shadow of the zebra. And we've got the
shadow of our hippo, as well against the wall. All right. That looks good. Now that we've got the
shadow of our zebra there. That works and the shadow
of our zebra there. And then this is all crocodile
with the zebra's hand. So it's just a matter
of moving through and seeing if you've got all
your characters in place. Do you have the
facial expressions, exactly how you want them? Let's have a look. We've
got the wall here. Do you want to show a
little bit of, you know, weeds, that sort of thing
growing on the wall? How does that wall look? And we now need to look at what's coming
around the corner. What's this story all about? How can we finish
this illustration and make it into a
really fun story? So what I'm thinking
is that we have the flamingo completely unaware of what's around the corner. But the flamingo is going
to be just walking, and we know what's coming, but the flamingo has no idea. So I'm just drawing, you know, a little bit more detail around the the hoofs of my zebra. Alright, that makes
sense. That reads well. And I think everyone's
looking great. All we now need to do is draw
our unsuspecting flamingo. So what we have here
is flamingo walking. I think my flamingos
way too big, so I'm going to draw my
flamingo, much smaller. Okay, so I'm going to draw my
flamingo in this spot here. To make it smaller, I'm going to draw the body of my
flamingo smaller. So half the size. I'm then going to just very
quickly draw the knee, the leg, draw much
more like this. That's it. That's about it. Feet planted on the ground. One knee up, leaning all his weight
into this part of the leg. Let's just really lift up
this side of the leg as well. The knee, there we go. We had the foot up and
around with the ankle here, so the ankle was a bit
higher than this ankle. Gosh, that's too
thick, isn't it? Yep. Nice and planted. And then we had the ankle coming
back a little bit, so a little bit of
foreshortening. And then we had
the leg back here. So that works. Alright. The leg goes up, and then we had the neck
sort of protrude from here. So what I want to do is I want to probably turn the
head more to the side, just so it's a little
bit more interesting. And I want to make the length of the neck the same as the legs. So I'm going to go here. I'm going to bend the neck. And just to keep up with the
shapes that we've got here, we've got, you know, the
pavement coming this way. Got the pavement there. So I might even draw
the flamingos head sort of over here like this. And I might even draw my
flamingos eyes closed. So they really aren't. They're
just walking confidently, not really taking much
interest in what's around. And here, I've got a
much longer leaner neck, head, color this part in darker. And I might just make
sure I've you know, we've got Flamingo absolutely unaware of what's
about to happen. Um, there's flamingo sort
of in this spot here. There's a little
indication of crocodile. And friends, about to pounce or at least
scare our flamingo. I'm just gonna make the claws of my
crocodile a bit smaller. We have now created
a scene where our animal characters
have come to life story. I hope you enjoyed
this drawing session, and I hope it's made drawing animal characters
a lot more simple, and I can't wait to see
your final artwork.
 Nina Rycroft, Picture Book Illustrator